How to Plumb a Kitchen Island Sink
Plumbing a kitchen island sink may seem like a daunting task, but with the right tools and knowledge, it can be a DIY project that saves you money and adds functionality to your kitchen. In this article, we will provide a step-by-step guide on how to plumb a kitchen island sink and offer some helpful tips and troubleshooting advice along the way.


How to Plumb a Kitchen Island Sink


Installing Plumbing for a Kitchen Island Sink
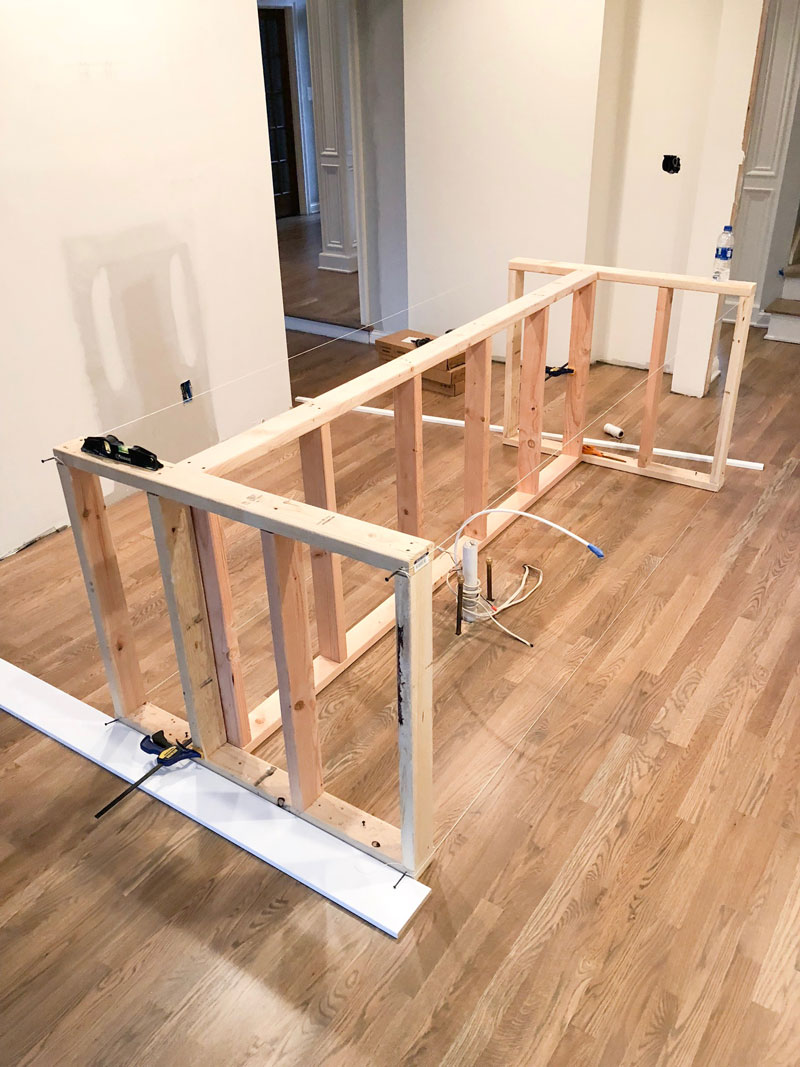
The first step in plumbing a kitchen island sink is to determine the location of your sink and the placement of your water and drainage pipes. This will depend on your kitchen layout and the location of your existing plumbing. If you are building a new kitchen, it is recommended to consult with a professional plumber to ensure proper placement and connection of your pipes.


Installing Plumbing for a Kitchen Island Sink


Plumbing a Kitchen Island Sink: Step-by-Step Guide
Step 1: Cut a hole in your kitchen island countertop for your sink, following the manufacturer's instructions. Make sure to leave enough space for the sink and any additional fixtures, such as a garbage disposal.
Step 2: Install the sink and faucet according to the manufacturer's instructions. This may include attaching mounting brackets and connecting water supply lines.
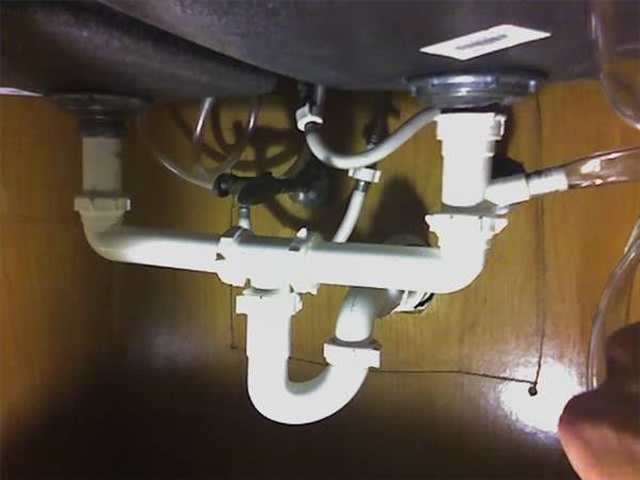
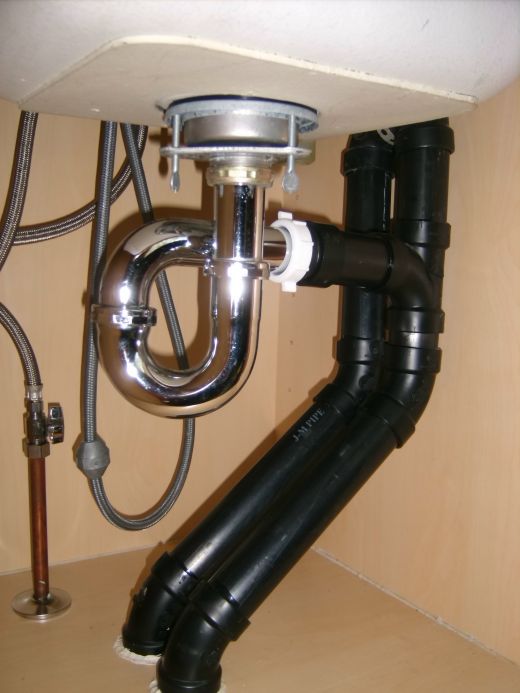
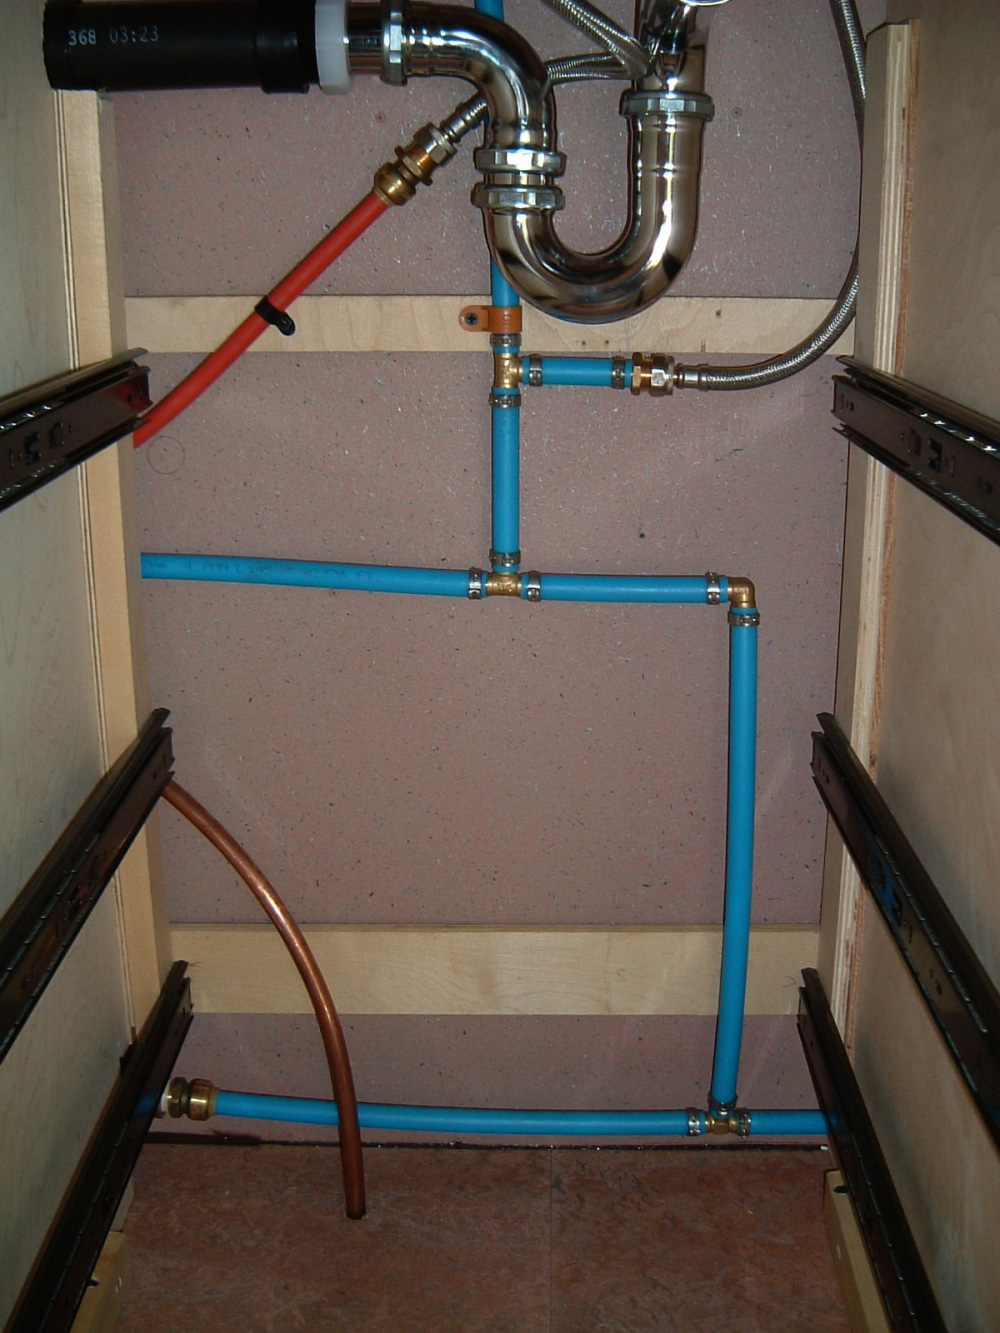
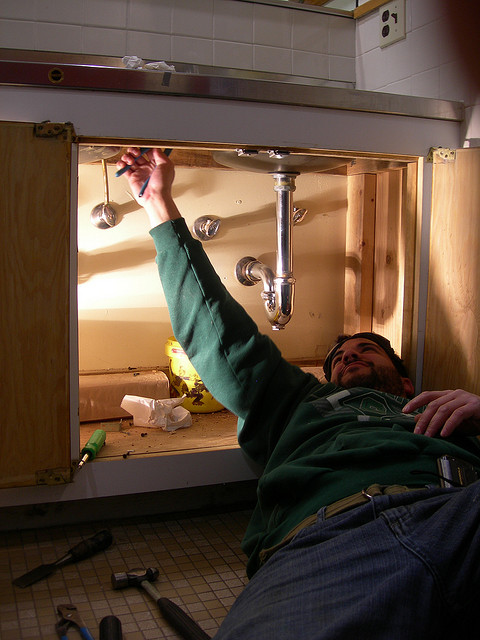
Step 3: Install the drain assembly, including the strainer, gasket, and tailpiece. This may require a specialized drain wrench to tighten the connections.
Step 4: Connect the drain assembly to the waste pipe. You may need to use a PVC pipe cutter to trim the pipe to the correct length.
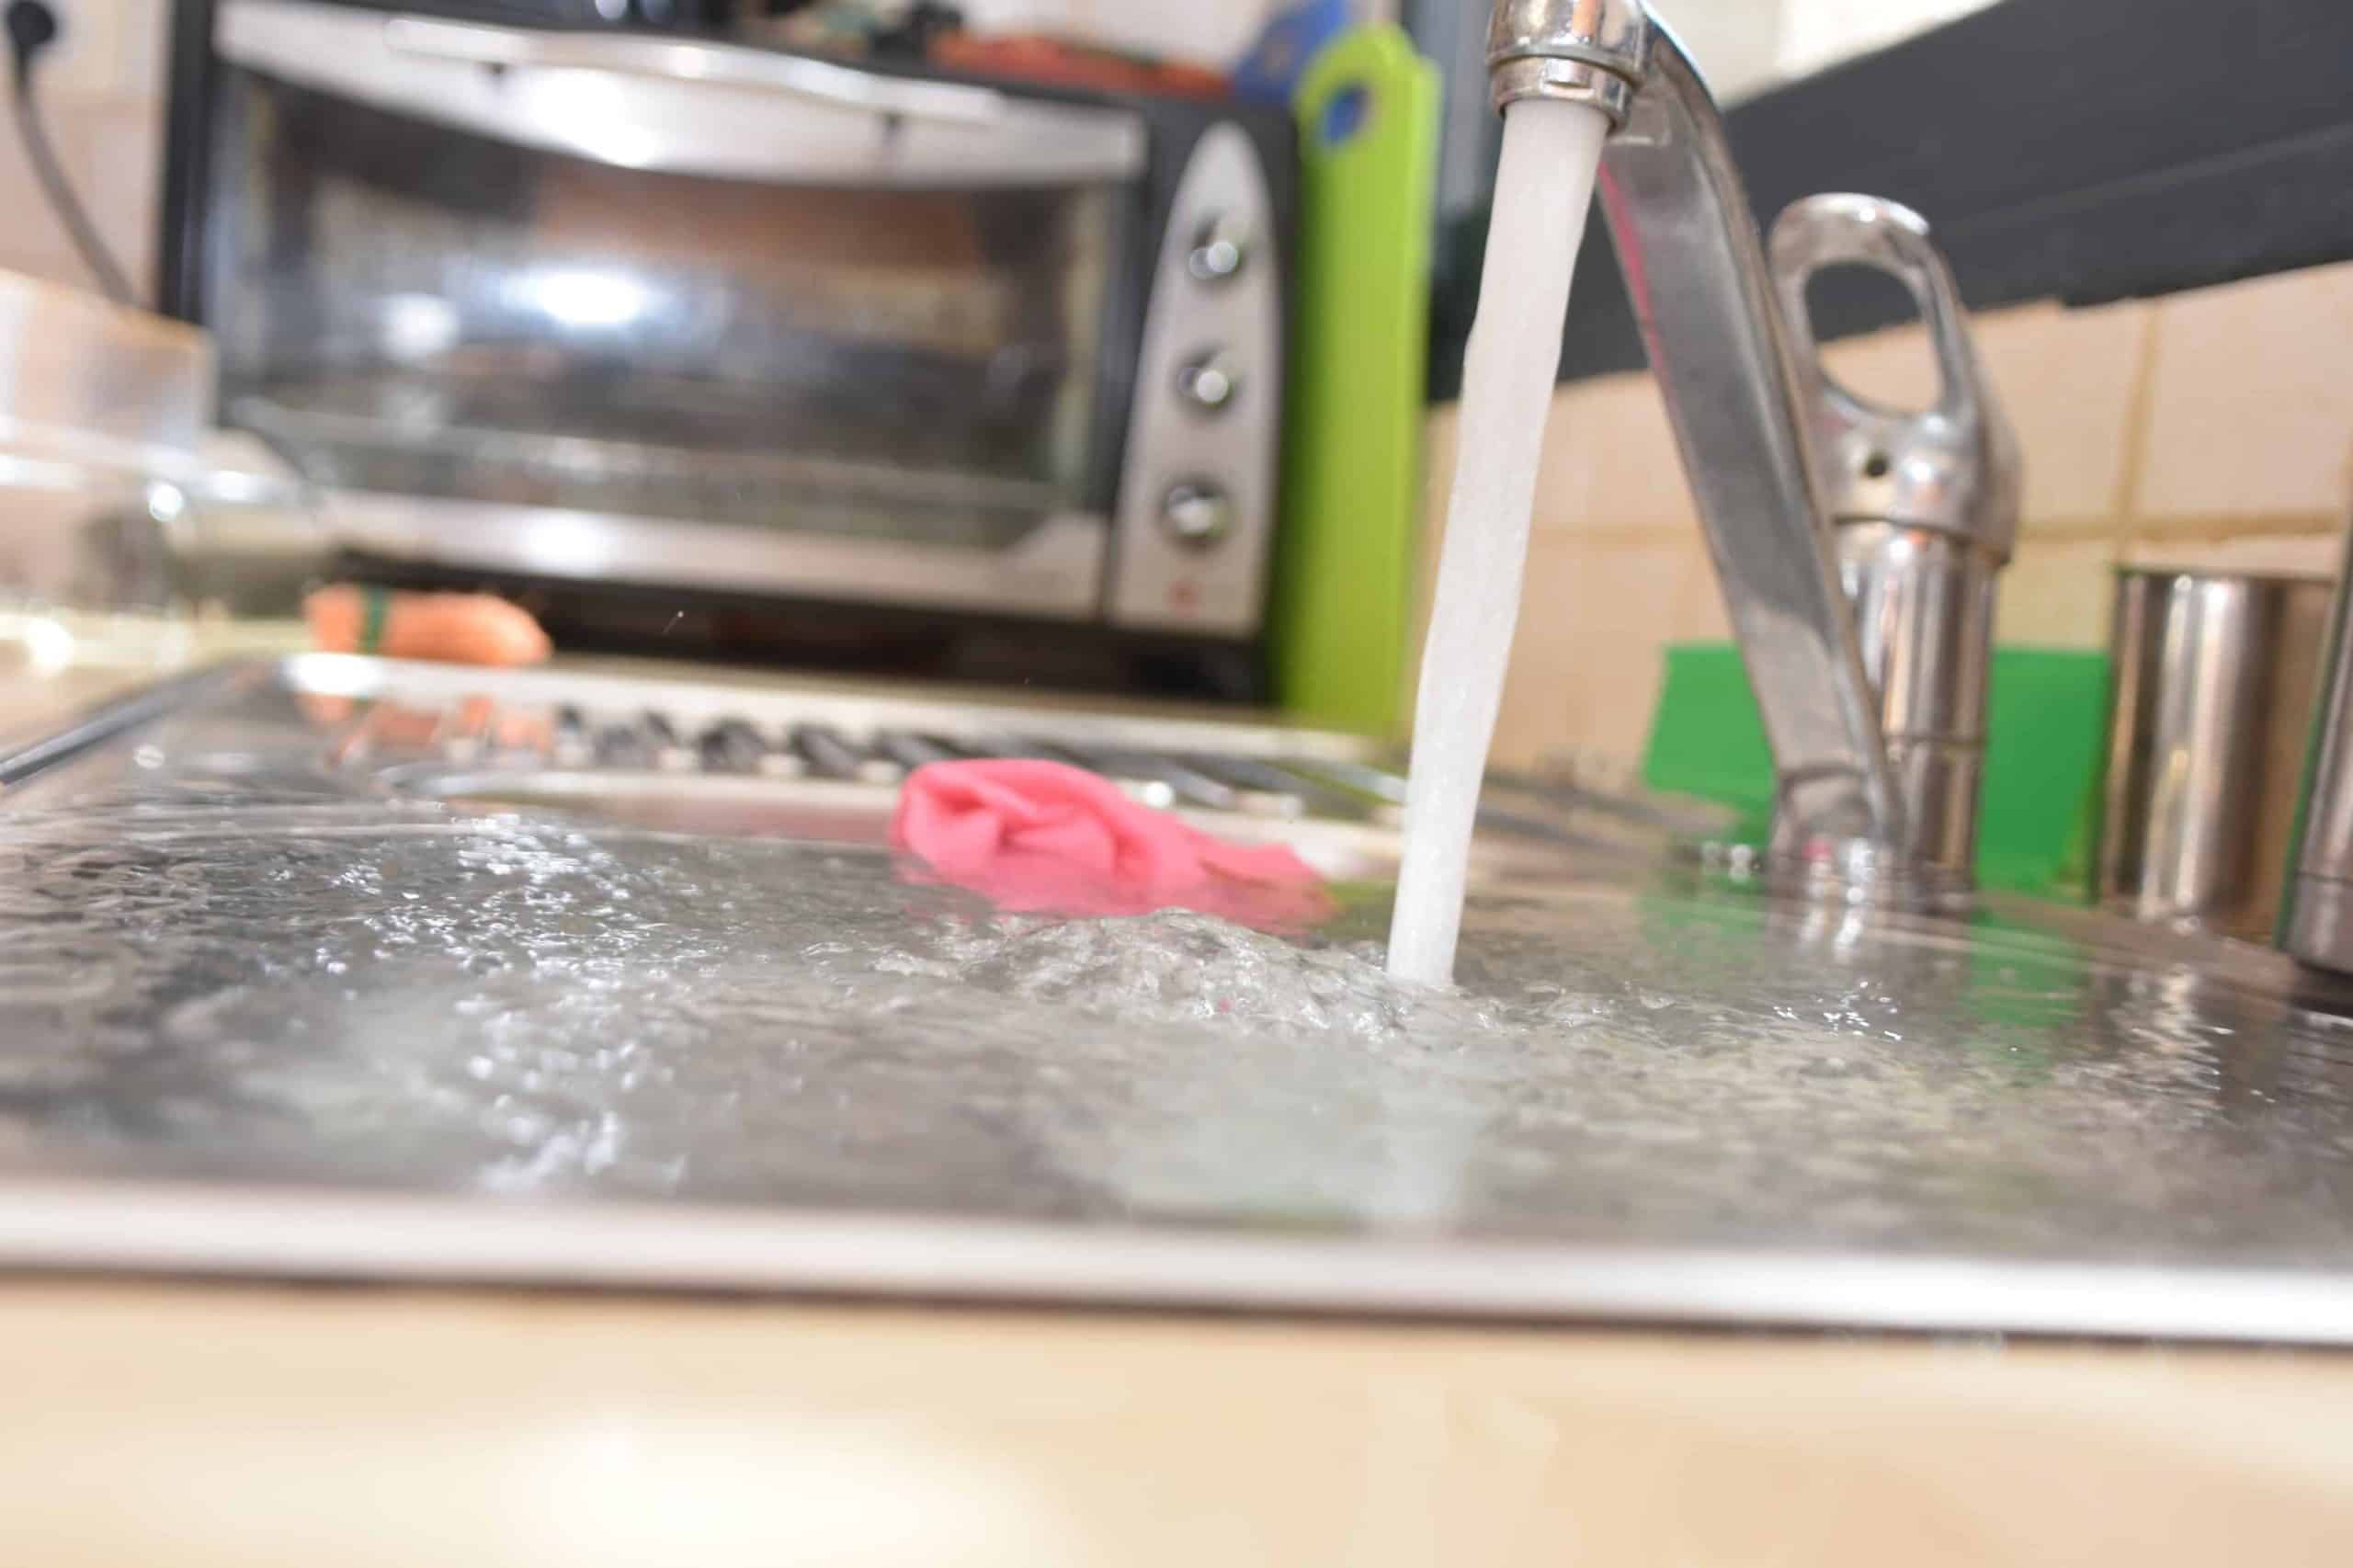
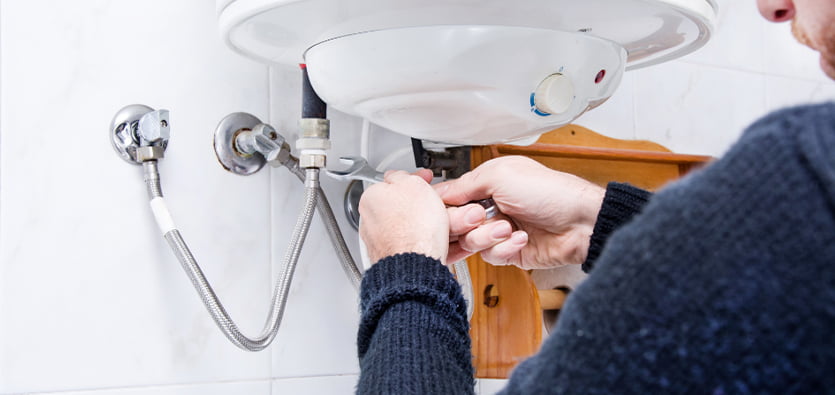
Step 5: Connect the water supply lines to the faucet and turn on the water to check for any leaks. If there are any leaks, tighten the connections or replace any faulty parts.

Plumbing a Kitchen Island Sink: Step-by-Step Guide


Tips for Plumbing a Kitchen Island Sink
Tip 1: Consider using flexible water supply lines to make installation easier and to allow for some movement in case of any shifting in the kitchen island.
Tip 2: Use plumber's putty or silicone caulk to seal the drain assembly to the sink and prevent any leaks.
Tip 3: If you are connecting to existing plumbing, make sure to turn off the water supply and drain any remaining water from the pipes before making any connections.


Tips for Plumbing a Kitchen Island Sink


Common Plumbing Mistakes to Avoid When Installing a Kitchen Island Sink
Mistake 1: Not securing the sink properly. Make sure to use the appropriate mounting brackets and sealants to ensure a secure and leak-free sink installation.
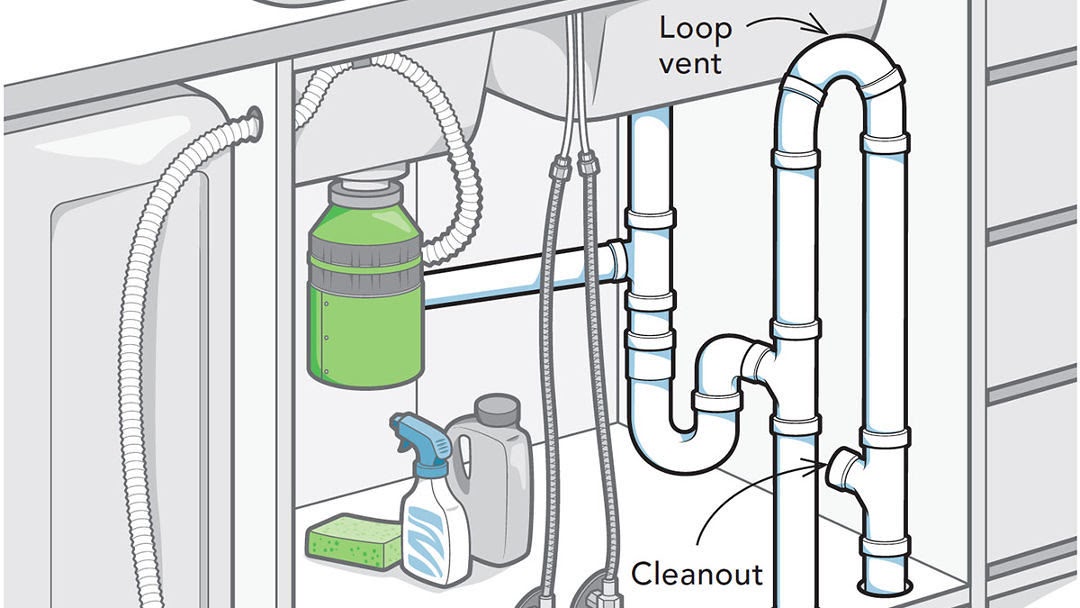
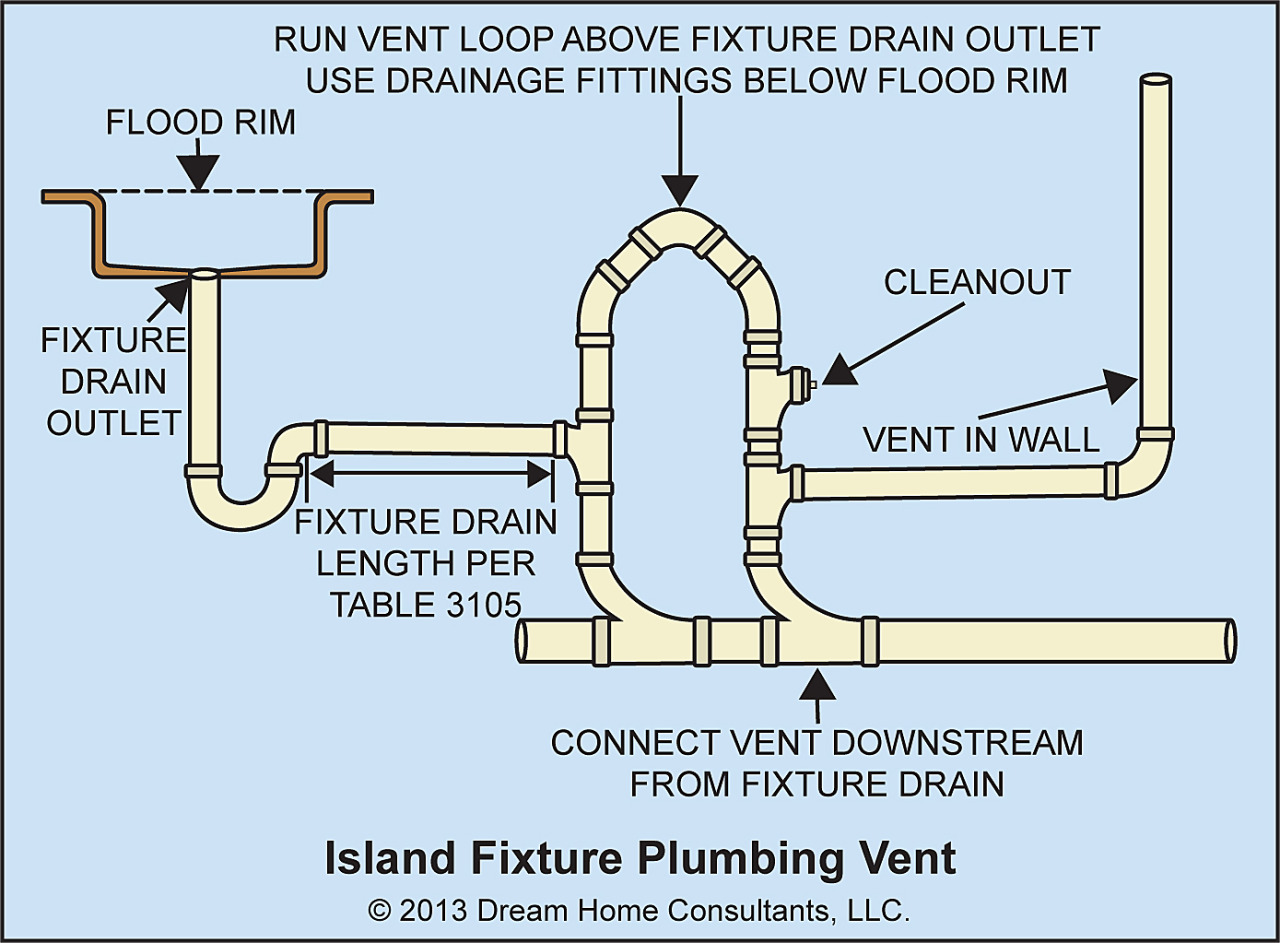
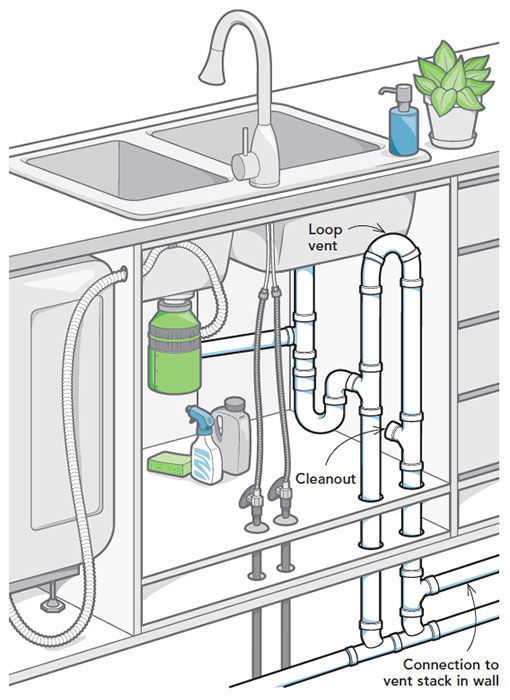
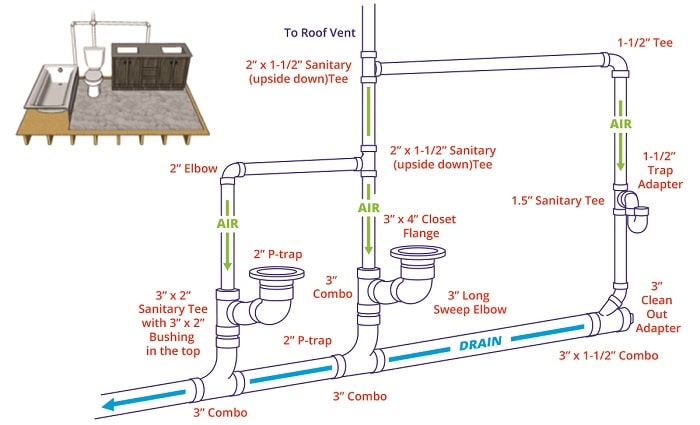
Mistake 2: Not properly venting the sink. A vent is necessary to prevent airlock and allow for proper drainage. Make sure to consult with a professional plumber if you are unsure of how to properly vent your sink.
Mistake 3: Not checking for leaks. It is important to thoroughly check all connections for any leaks before using your new kitchen island sink. This will save you from potential water damage and costly repairs in the future.


Common Plumbing Mistakes to Avoid When Installing a Kitchen Island Sink


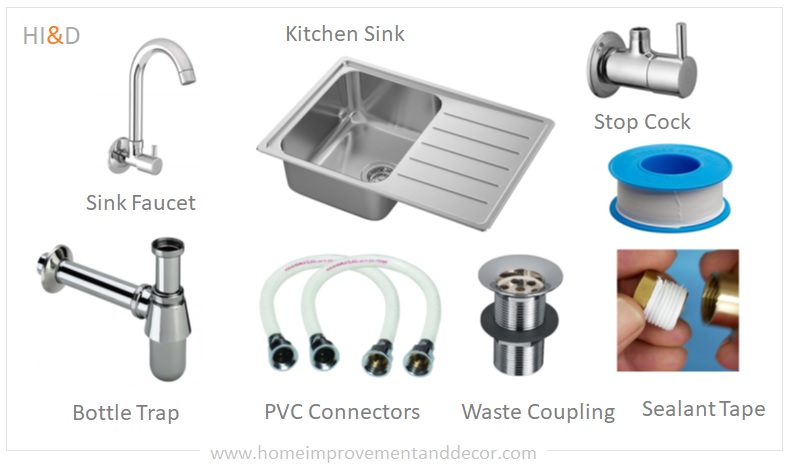
Tools and Materials Needed for Plumbing a Kitchen Island Sink
- Sink and faucet
- Drain assembly
- Flexible water supply lines
- PVC pipe cutter
- Plumber's putty or silicone caulk
- Adjustable wrench
- Drain wrench


Tools and Materials Needed for Plumbing a Kitchen Island Sink


How to Connect Plumbing for a Kitchen Island Sink
Connecting plumbing for a kitchen island sink requires attaching the drain assembly to the sink, connecting the water supply lines to the faucet, and connecting the drain assembly to the waste pipe. It is important to follow the manufacturer's instructions and use the appropriate tools to ensure a secure and leak-free connection.
How to Connect Plumbing for a Kitchen Island Sink


Plumbing a Kitchen Island Sink: DIY or Hire a Professional?
Plumbing a kitchen island sink can be a DIY project if you have the necessary tools and knowledge. However, if you are unsure of how to properly connect or vent your sink, it is recommended to hire a professional plumber to ensure a safe and functional installation.


Plumbing a Kitchen Island Sink: DIY or Hire a Professional?

Troubleshooting Common Plumbing Issues with a Kitchen Island Sink
If you encounter any leaks or problems with your kitchen island sink, it is important to address them immediately to prevent further damage. Check all connections for any loose or faulty parts and make sure to properly vent your sink if necessary.


Troubleshooting Common Plumbing Issues with a Kitchen Island Sink


How to Properly Vent a Kitchen Island Sink
Properly venting a kitchen island sink is crucial to prevent airlock and allow for proper drainage. This can be done by installing a vent pipe that connects to your existing vent system or by using an air admittance valve. It is recommended to consult with a professional plumber for proper venting techniques.

How to Properly Vent a Kitchen Island Sink


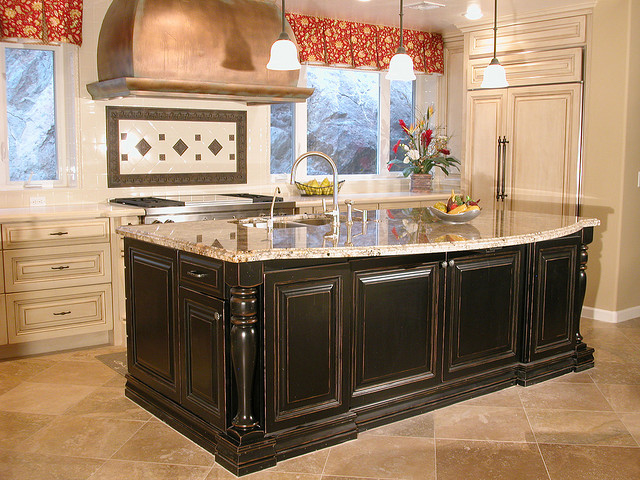
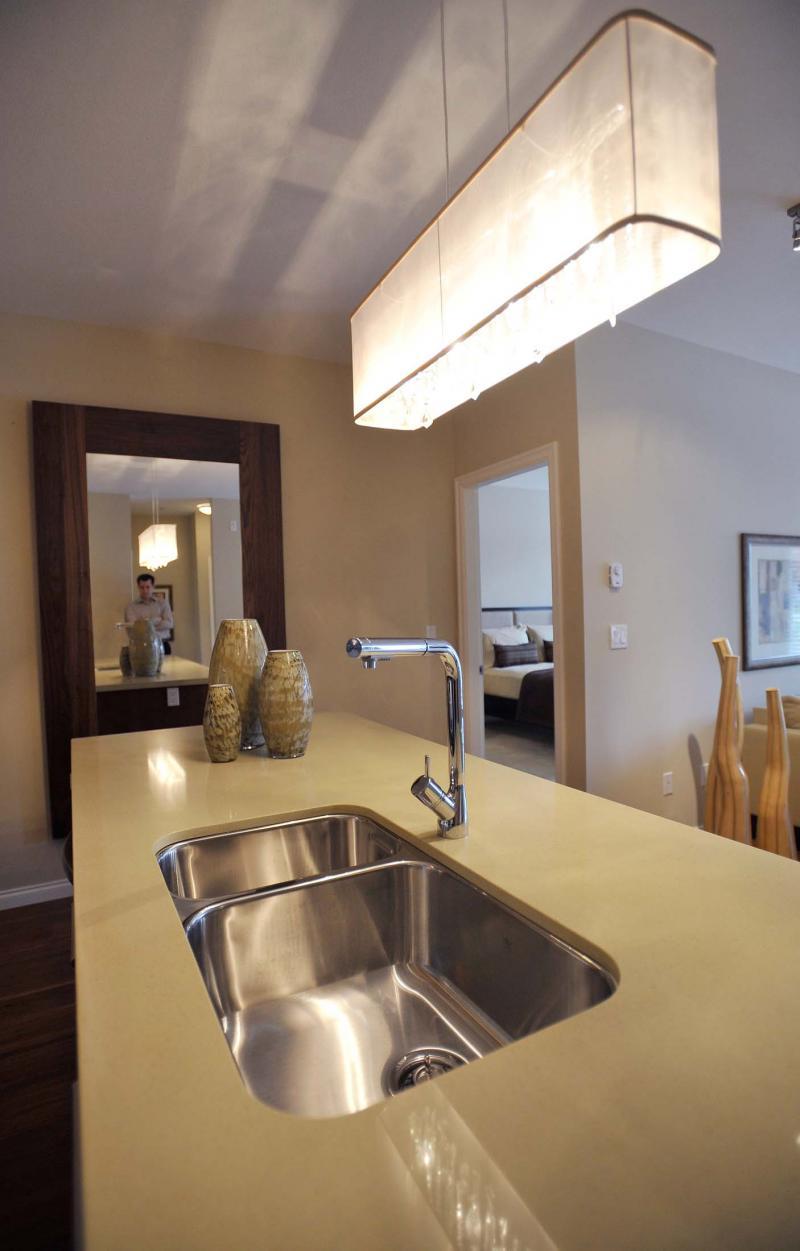
Maximizing Space and Functionality in Your Kitchen: Adding a Kitchen Island Sink

Transform Your Kitchen Design with a Kitchen Island Sink
/how-to-install-a-sink-drain-2718789-hero-24e898006ed94c9593a2a268b57989a3.jpg) When it comes to kitchen design, one of the most popular and practical additions is a kitchen island sink. Not only does it add a sleek and modern touch to your kitchen, but it also serves as a functional and versatile workspace. Whether you have a large or small kitchen, a kitchen island sink can help maximize your space and make meal prep and clean up a breeze. Let's dive into the benefits and considerations of plumbing a kitchen island sink in your home.
When it comes to kitchen design, one of the most popular and practical additions is a kitchen island sink. Not only does it add a sleek and modern touch to your kitchen, but it also serves as a functional and versatile workspace. Whether you have a large or small kitchen, a kitchen island sink can help maximize your space and make meal prep and clean up a breeze. Let's dive into the benefits and considerations of plumbing a kitchen island sink in your home.
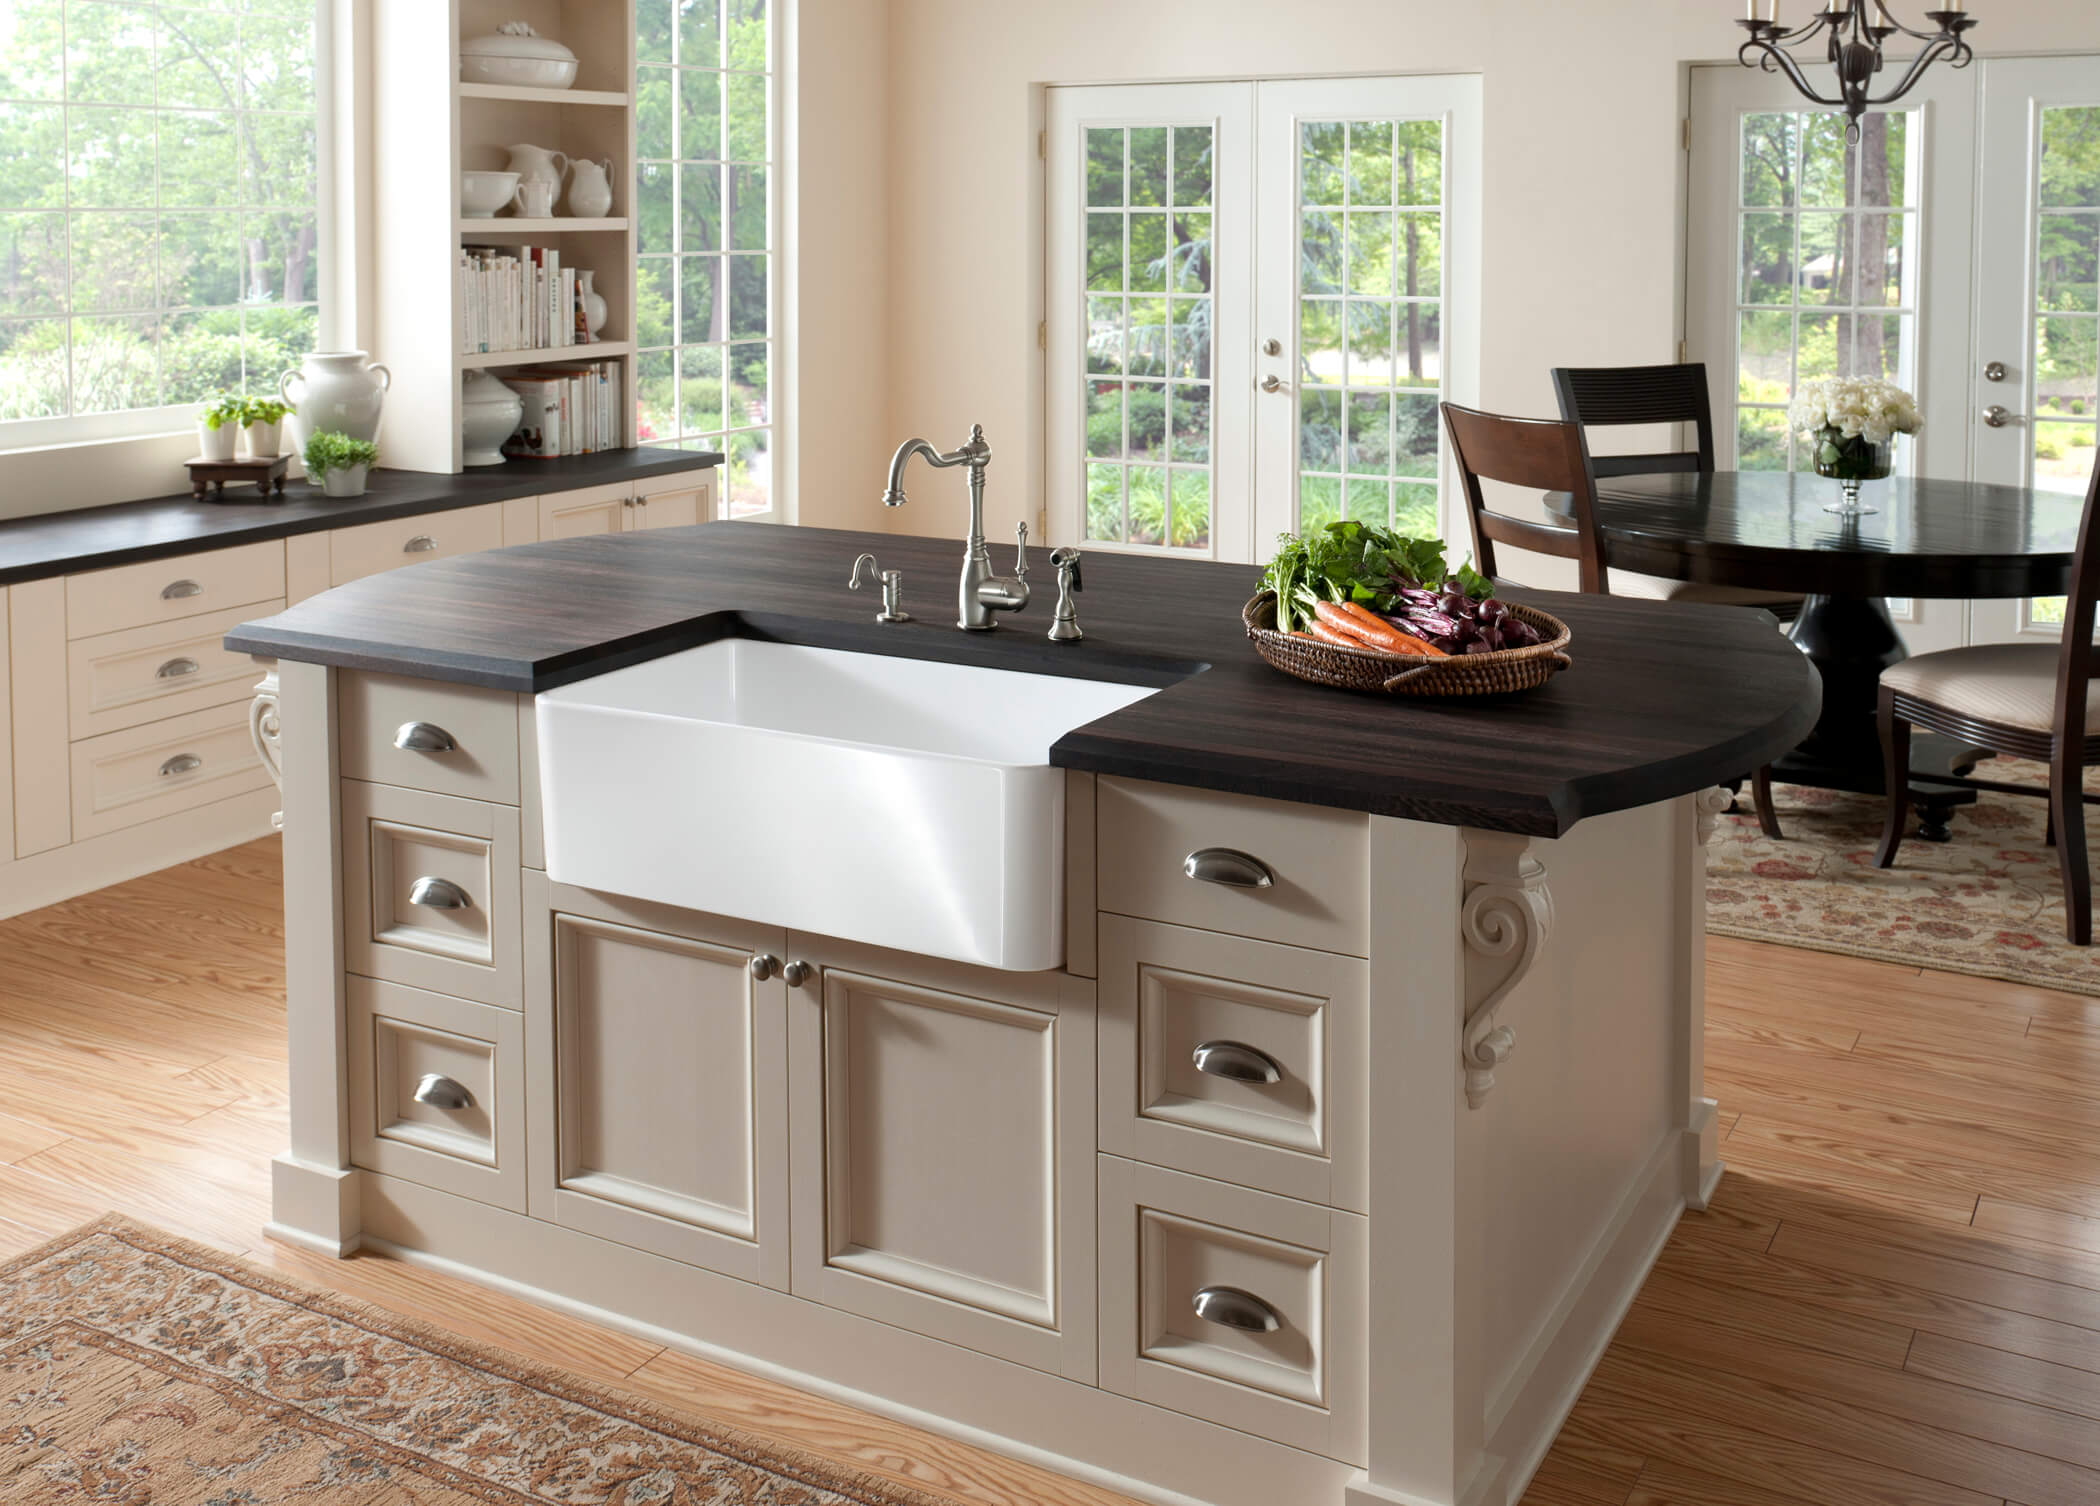
The Benefits of a Kitchen Island Sink
 The main benefit of adding a kitchen island sink is the extra workspace it provides. This is especially useful if you have a small kitchen and need more room for cooking and food preparation. With a kitchen island sink, you can have a dedicated area for washing and prepping ingredients, while still having plenty of counter space for other tasks.
Another advantage of a kitchen island sink is its versatility. It can serve as a secondary cooking station, with the addition of a stovetop or oven, making it perfect for hosting guests and preparing multiple dishes at once. It can also be used as a bar or serving area during parties or gatherings.
Moreover, a kitchen island sink adds a touch of elegance to your kitchen design. It creates a focal point and adds a modern and stylish element to the room. It also allows for more seating options, making it a great spot for casual meals or quick snacks.
The main benefit of adding a kitchen island sink is the extra workspace it provides. This is especially useful if you have a small kitchen and need more room for cooking and food preparation. With a kitchen island sink, you can have a dedicated area for washing and prepping ingredients, while still having plenty of counter space for other tasks.
Another advantage of a kitchen island sink is its versatility. It can serve as a secondary cooking station, with the addition of a stovetop or oven, making it perfect for hosting guests and preparing multiple dishes at once. It can also be used as a bar or serving area during parties or gatherings.
Moreover, a kitchen island sink adds a touch of elegance to your kitchen design. It creates a focal point and adds a modern and stylish element to the room. It also allows for more seating options, making it a great spot for casual meals or quick snacks.
Considerations for Plumbing a Kitchen Island Sink
 Before diving into the project, there are a few things to consider when it comes to plumbing a kitchen island sink. Firstly, you will need to make sure your kitchen has enough space to accommodate a kitchen island sink. It typically requires a minimum of 36 inches of clearance on all sides, including space for opening cabinets and drawers.
Additionally, you will need to consider the location of your existing plumbing and how it will connect to the new sink. This may require some rearranging or extending of pipes and drains. It is important to consult a professional plumber to ensure the proper installation of your kitchen island sink.
Before diving into the project, there are a few things to consider when it comes to plumbing a kitchen island sink. Firstly, you will need to make sure your kitchen has enough space to accommodate a kitchen island sink. It typically requires a minimum of 36 inches of clearance on all sides, including space for opening cabinets and drawers.
Additionally, you will need to consider the location of your existing plumbing and how it will connect to the new sink. This may require some rearranging or extending of pipes and drains. It is important to consult a professional plumber to ensure the proper installation of your kitchen island sink.
Conclusion
 In conclusion, adding a kitchen island sink can greatly enhance the functionality and style of your kitchen. It provides extra workspace, versatility, and adds a modern touch to your home. However, proper planning and professional installation are key to ensuring a successful and functional addition to your kitchen design. With the right considerations and expert help, you can transform your kitchen into a space that is both practical and aesthetically pleasing.