If you're experiencing a leaky or malfunctioning Moen bathroom sink faucet, it may be time to replace the cartridge. The cartridge is the part of the faucet that controls the flow and temperature of the water. Removing it may seem like a daunting task, but with the right tools and techniques, you can easily swap out the old cartridge for a new one. In this guide, we'll walk you through the steps to remove a Moen bathroom sink faucet cartridge.How to Remove a Moen Bathroom Sink Faucet Cartridge


How to Remove a Moen Bathroom Sink Faucet Cartridge


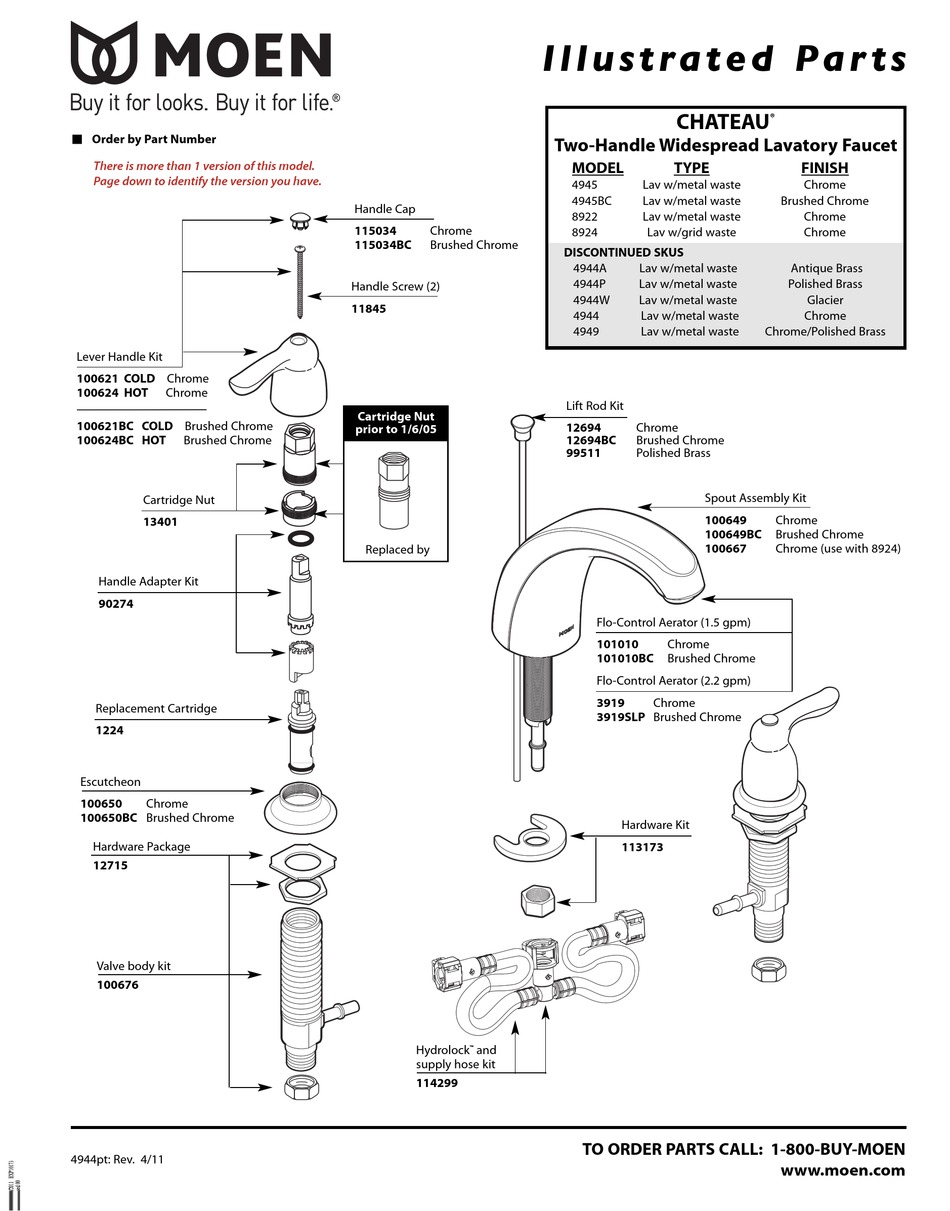
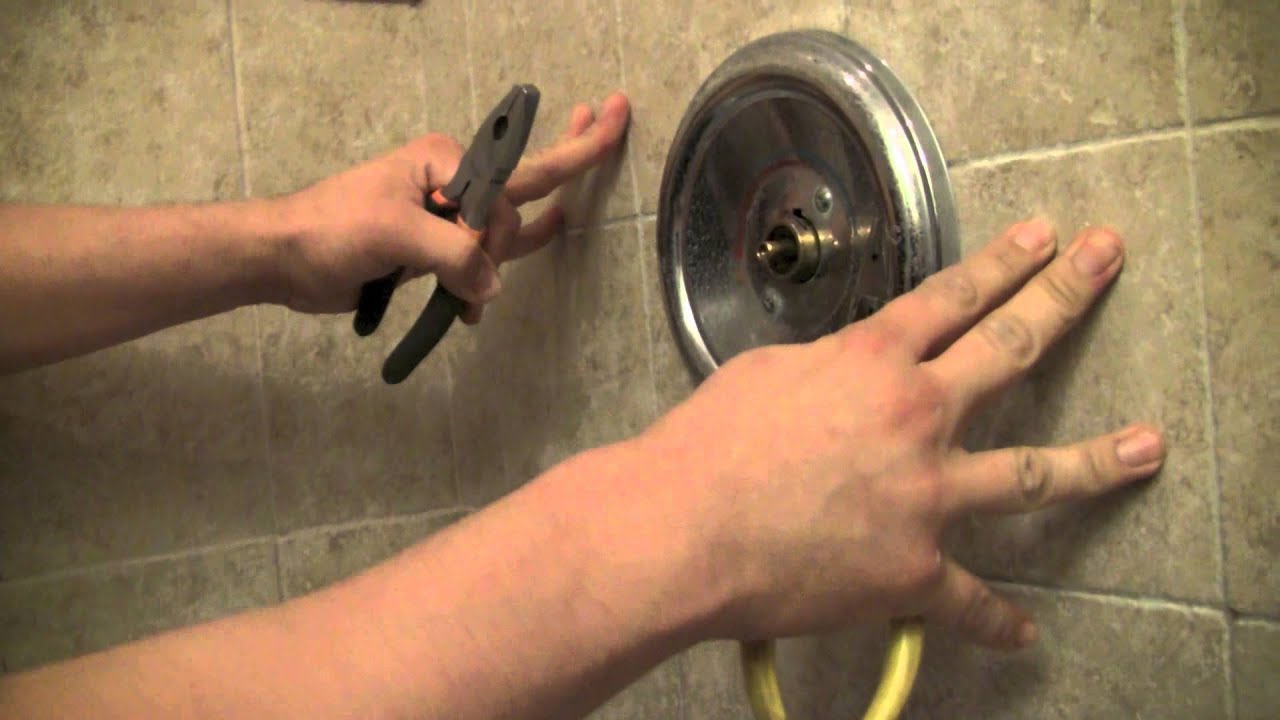
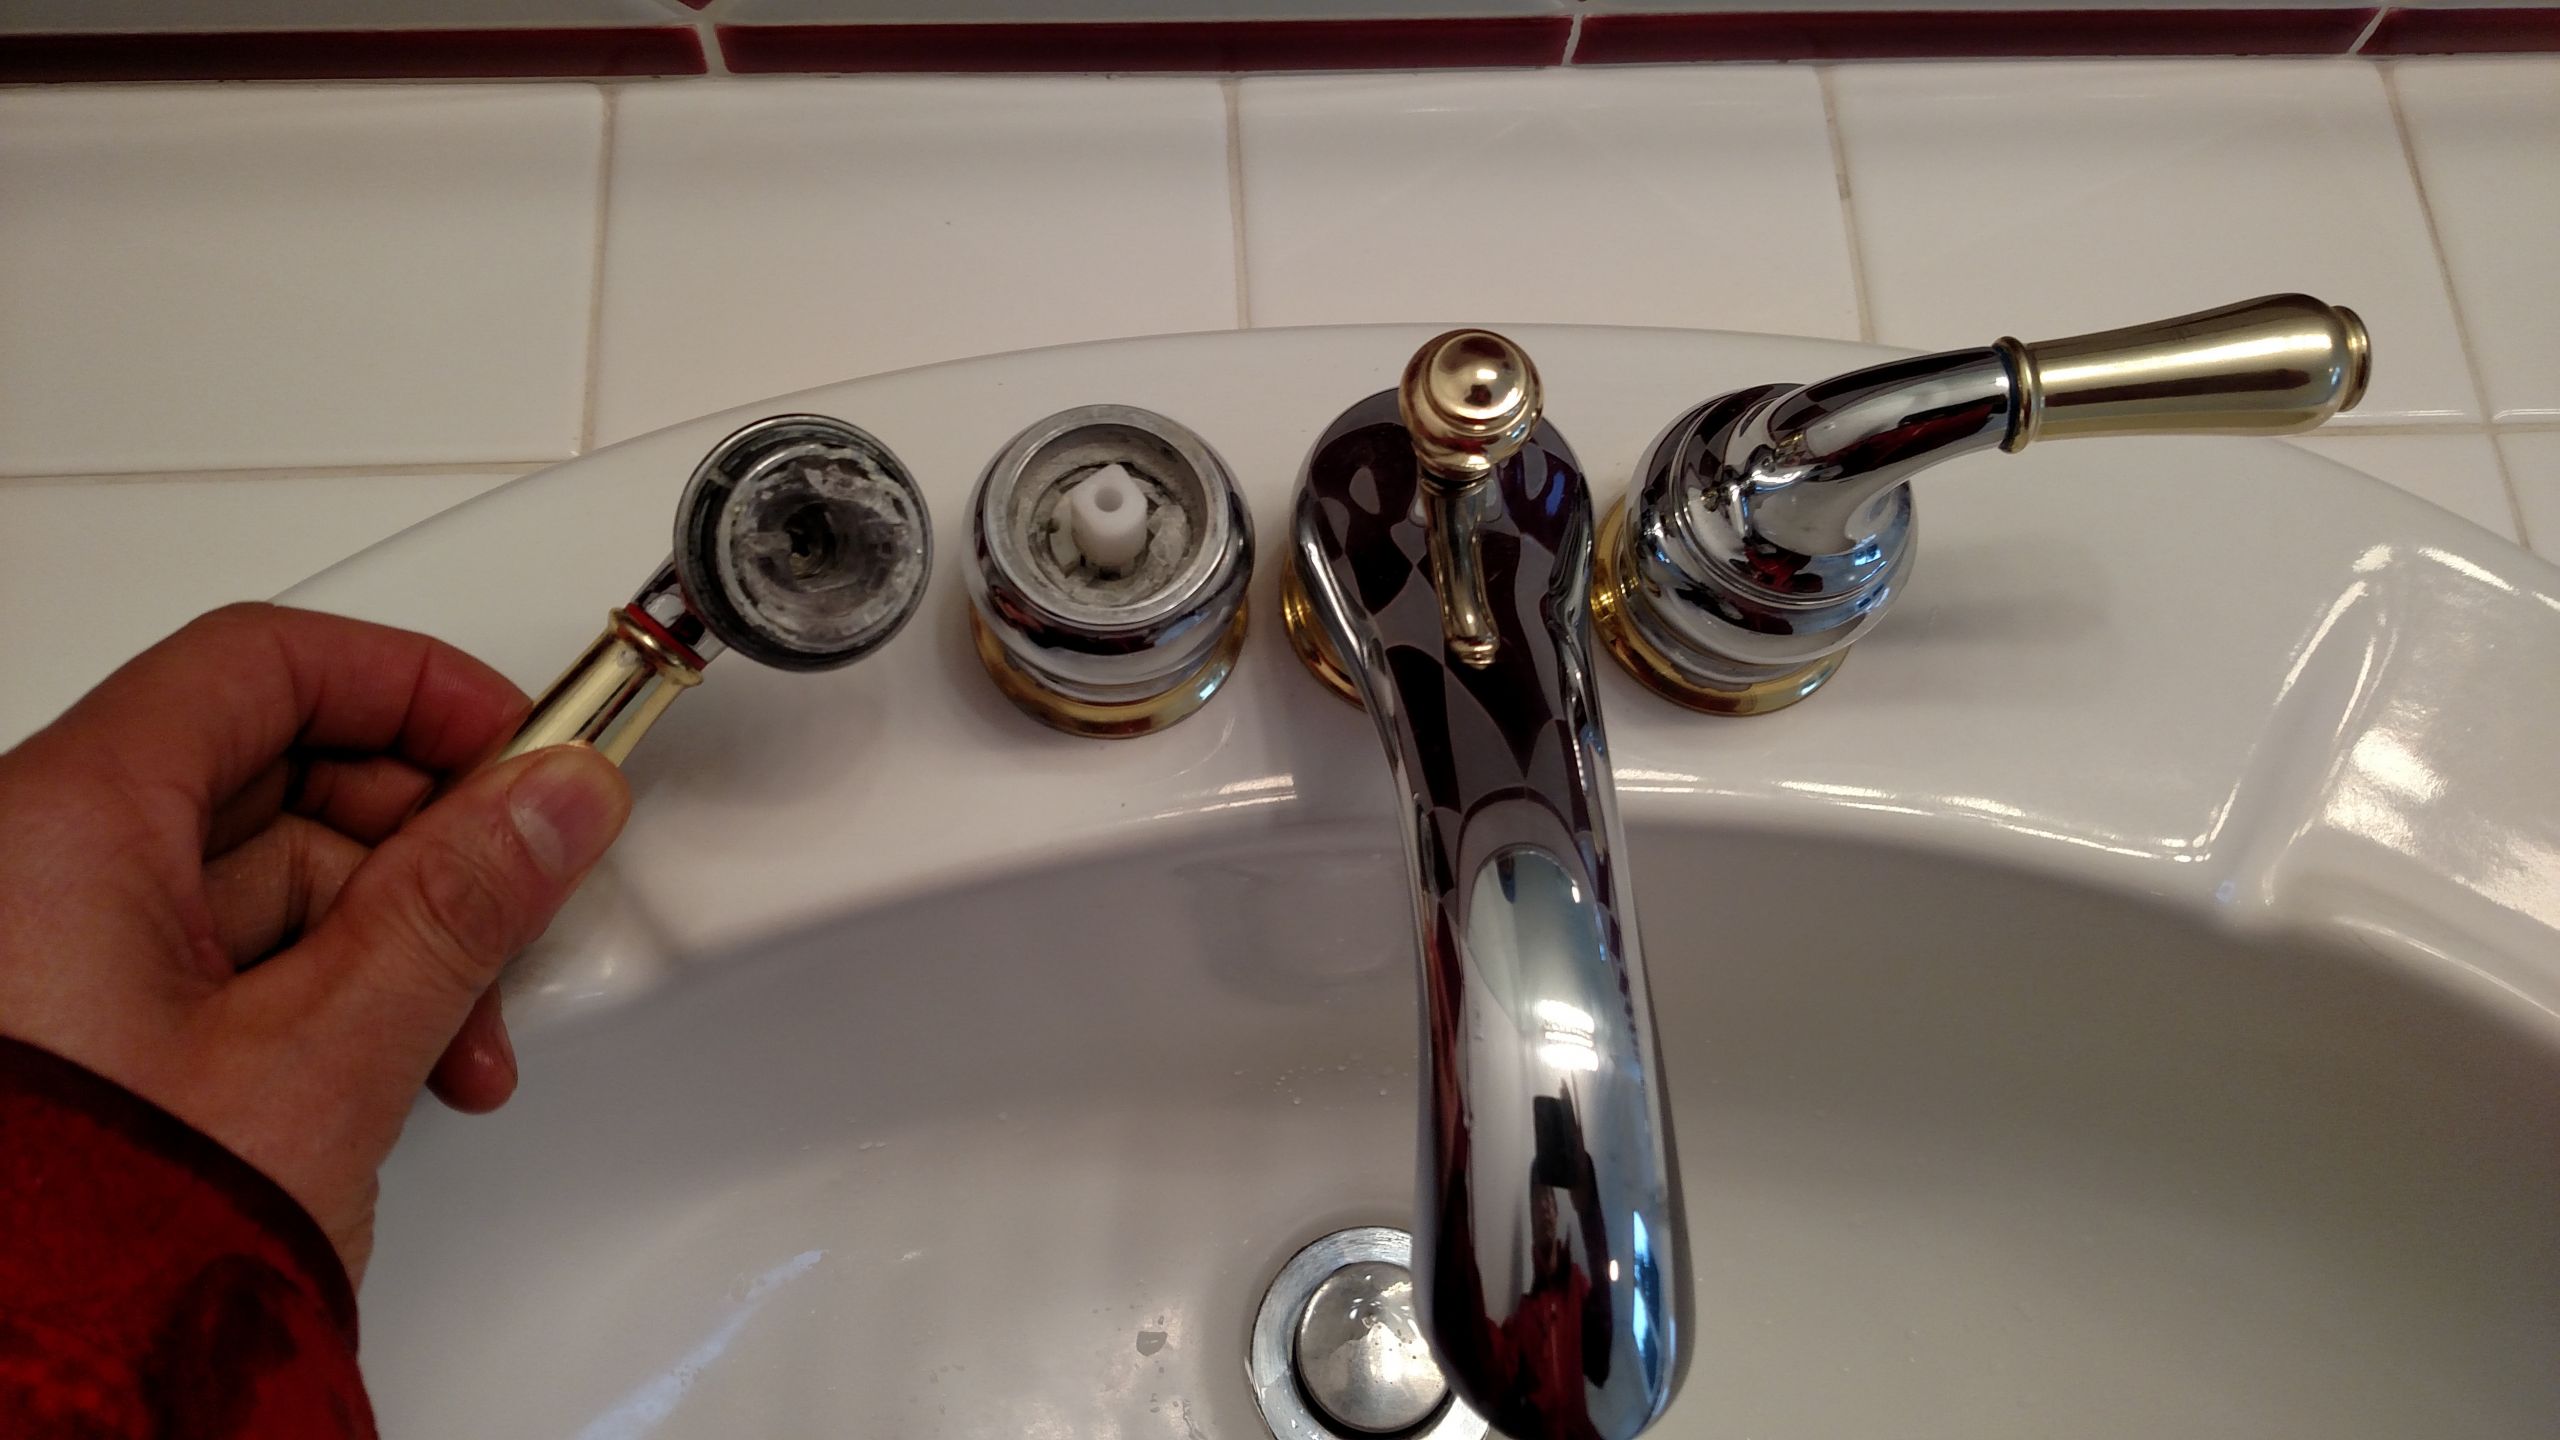
Before you begin, make sure to turn off the water supply to your sink. This can usually be done by turning the shut-off valves located under the sink. Once the water is off, you can begin the process of removing the cartridge. Step 1: Locate the handle set screw. This is a small screw located on the handle of the faucet. Use a screwdriver to loosen and remove the set screw. Step 2: Remove the handle. Once the set screw is removed, you can gently pull the handle off of the faucet. If the handle is stuck, you can use a handle puller tool to help loosen it. Step 3: Remove the retaining clip. The cartridge is held in place by a retaining clip. Use pliers to remove the clip and set it aside. Step 4: Pull out the cartridge. You can now pull the cartridge out of the faucet. If it's stuck, you can use a cartridge puller tool to help remove it.Removing a Moen Bathroom Sink Faucet Cartridge

Removing a Moen Bathroom Sink Faucet Cartridge


If you're looking for a more detailed guide on how to remove a Moen bathroom sink faucet cartridge, follow these step-by-step instructions: Step 1: Turn off the water supply to your sink by turning the shut-off valves located under the sink. Step 2: Remove the handle set screw with a screwdriver. Step 3: Gently pull off the handle. If it's stuck, use a handle puller tool to help loosen it. Step 4: Use pliers to remove the retaining clip and set it aside. Step 5: Pull out the cartridge. If it's stuck, use a cartridge puller tool to help remove it. Step 6: Clean the faucet area and inspect for any damage or build-up. If necessary, clean the cartridge with a vinegar solution to remove any mineral deposits. Step 7: Replace the old cartridge with a new one by inserting it into the faucet and securing it with the retaining clip. Step 8: Reattach the handle by placing it back onto the faucet and tightening the set screw. Step 9: Turn the water supply back on and test the faucet to ensure it's working properly.Step-by-Step Guide for Removing a Moen Bathroom Sink Faucet Cartridge
Step-by-Step Guide for Removing a Moen Bathroom Sink Faucet Cartridge


If you're a DIY enthusiast, you may want to tackle the task of removing a Moen bathroom sink faucet cartridge yourself. With the right tools and techniques, it can be a simple and cost-effective project. Step 1: Gather your tools. You will need a screwdriver, pliers, and possibly a handle or cartridge puller tool. Step 2: Turn off the water supply to your sink. Step 3: Follow the steps outlined above in the "Step-by-Step Guide for Removing a Moen Bathroom Sink Faucet Cartridge". Step 4: Clean and inspect the faucet area before installing the new cartridge. Step 5: Replace the old cartridge with a new one and reattach the handle. Step 6: Turn the water supply back on and test the faucet to ensure it's working properly.DIY: Removing a Moen Bathroom Sink Faucet Cartridge

DIY: Removing a Moen Bathroom Sink Faucet Cartridge


If you're looking for a quick and easy method for removing a Moen bathroom sink faucet cartridge, follow these steps: Step 1: Turn off the water supply to your sink. Step 2: Use a screwdriver to loosen and remove the handle set screw. Step 3: Place a cloth over the faucet to protect it from scratches. Step 4: Use pliers to grip the cartridge and gently pull it out of the faucet. Step 5: Clean and inspect the faucet area before installing the new cartridge. Step 6: Replace the old cartridge with a new one and reattach the handle. Step 7: Turn the water supply back on and test the faucet to ensure it's working properly.Quick and Easy Method for Removing a Moen Bathroom Sink Faucet Cartridge

Quick and Easy Method for Removing a Moen Bathroom Sink Faucet Cartridge


Here are some additional tips and tricks to keep in mind when removing a Moen bathroom sink faucet cartridge: - Make sure to clean and inspect the faucet area before installing the new cartridge. This will help prevent any issues in the future. - If the cartridge is stuck, try using a cartridge puller tool to help remove it. - If the handle is stuck, use a handle puller tool to help loosen it. - Use a vinegar solution to clean the cartridge and remove any mineral deposits.Removing a Moen Bathroom Sink Faucet Cartridge: Tips and Tricks


Removing a Moen Bathroom Sink Faucet Cartridge: Tips and Tricks
The best way to remove a Moen bathroom sink faucet cartridge will depend on your specific situation. If you're unsure or inexperienced, it's always best to consult a professional plumber for assistance. However, if you're comfortable with DIY projects and have the right tools, you can easily remove the cartridge yourself by following the steps outlined above.The Best Way to Remove a Moen Bathroom Sink Faucet Cartridge

The Best Way to Remove a Moen Bathroom Sink Faucet Cartridge

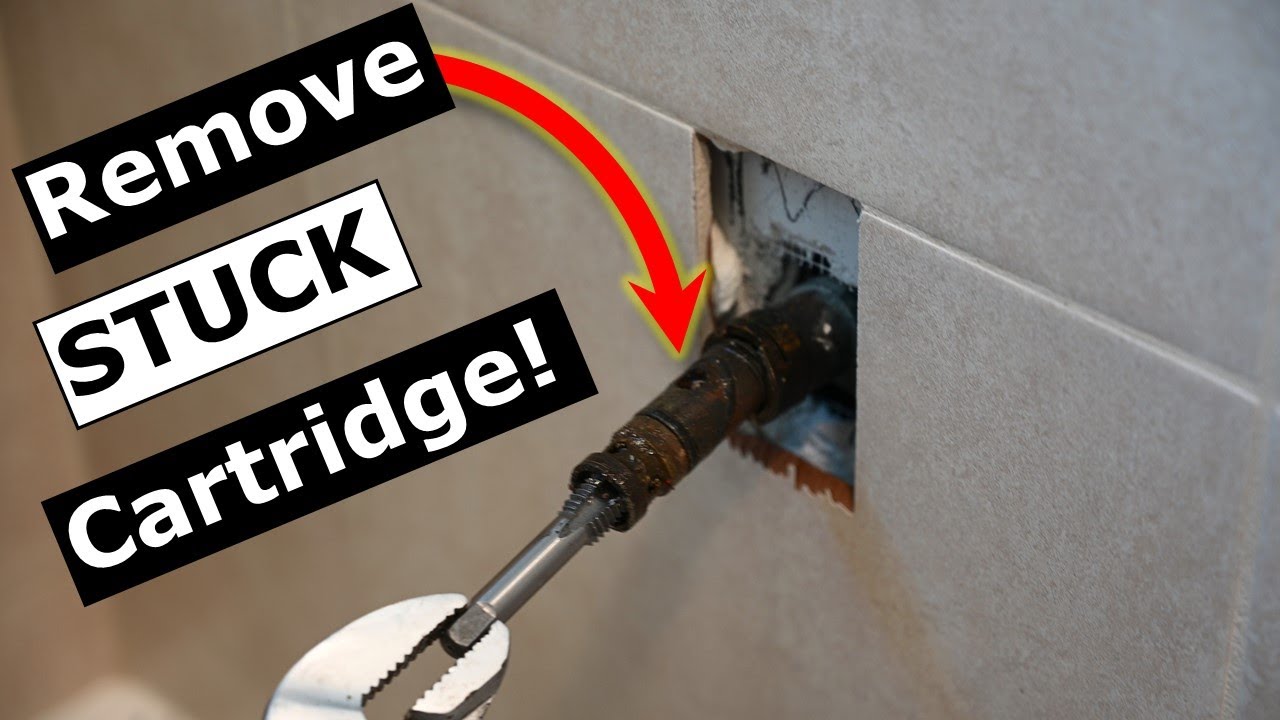
If the cartridge is stuck and you're having trouble removing it, try using a cartridge puller tool. This tool is specifically designed to help remove stuck cartridges and can save you time and frustration. If the handle is stuck, a handle puller tool can also be helpful in loosening it.Removing a Stuck Moen Bathroom Sink Faucet Cartridge


Removing a Stuck Moen Bathroom Sink Faucet Cartridge

For a detailed, step-by-step guide on how to remove a Moen bathroom sink faucet cartridge, follow the instructions outlined above in the "Step-by-Step Guide for Removing a Moen Bathroom Sink Faucet Cartridge". These instructions will walk you through the process from start to finish, making it easy for you to successfully remove the cartridge and replace it with a new one.Step-by-Step Instructions for Removing a Moen Bathroom Sink Faucet Cartridge
Step-by-Step Instructions for Removing a Moen Bathroom Sink Faucet Cartridge

When removing a Moen bathroom sink faucet cartridge, there are a few common mistakes to avoid: - Forgetting to turn off the water supply before beginning the process. - Using the wrong tools or techniques, which can potentially damage the faucet or cartridge. - Not cleaning and inspecting the faucet area before installing the new cartridge. By following the steps and advice outlined in this guide, you can easily remove a Moen bathroom sink faucet cartridge and replace it with a new one. Remember to take your time and be gentle with the process to avoid any damage. Good luck! Removing a Moen Bathroom Sink Faucet Cartridge: Common Mistakes to Avoid


Removing a Moen Bathroom Sink Faucet Cartridge: Common Mistakes to Avoid

Replacing Your Moen Bathroom Sink Faucet Cartridge
Step 4: Removing the Old Cartridge
 Now that you have gathered all the necessary tools and materials, it's time to remove the old cartridge from your Moen bathroom sink faucet. This step is crucial in ensuring the smooth installation of the new cartridge.
Remember, the key to successfully removing the cartridge is patience and precision.
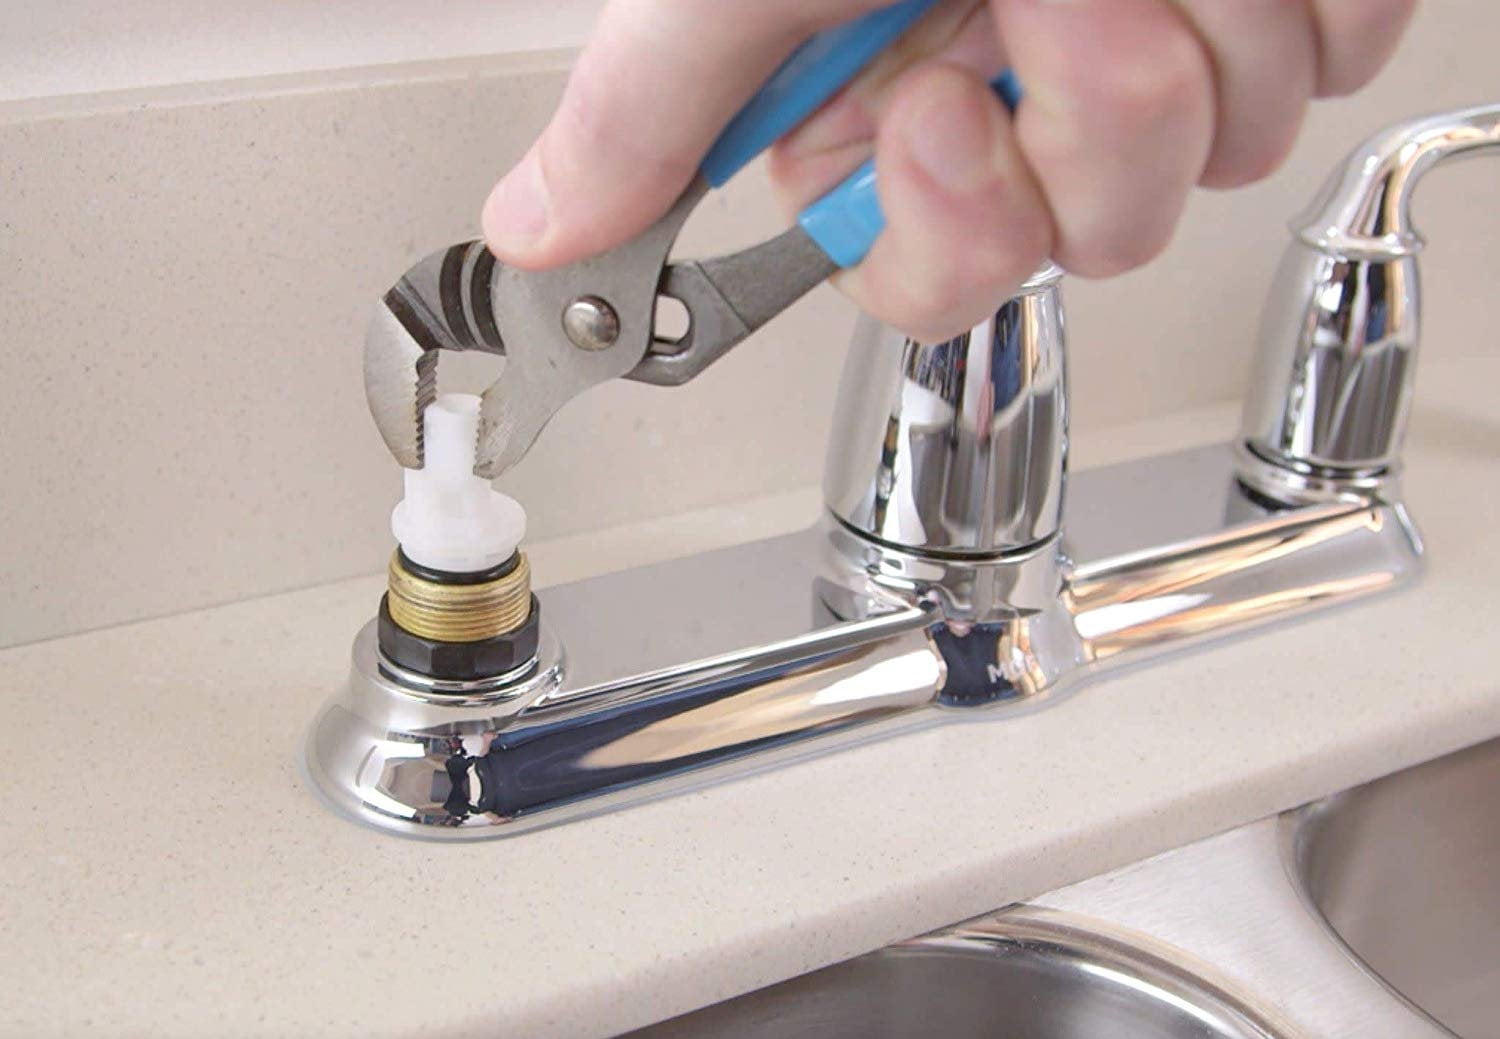
First, locate the retaining clip on the side of the cartridge. This clip holds the cartridge in place and needs to be removed before you can take out the old cartridge. Use a pair of pliers to grip the clip and gently pull it out of the cartridge.
Be careful not to lose the clip, as you will need it for the installation of the new cartridge.
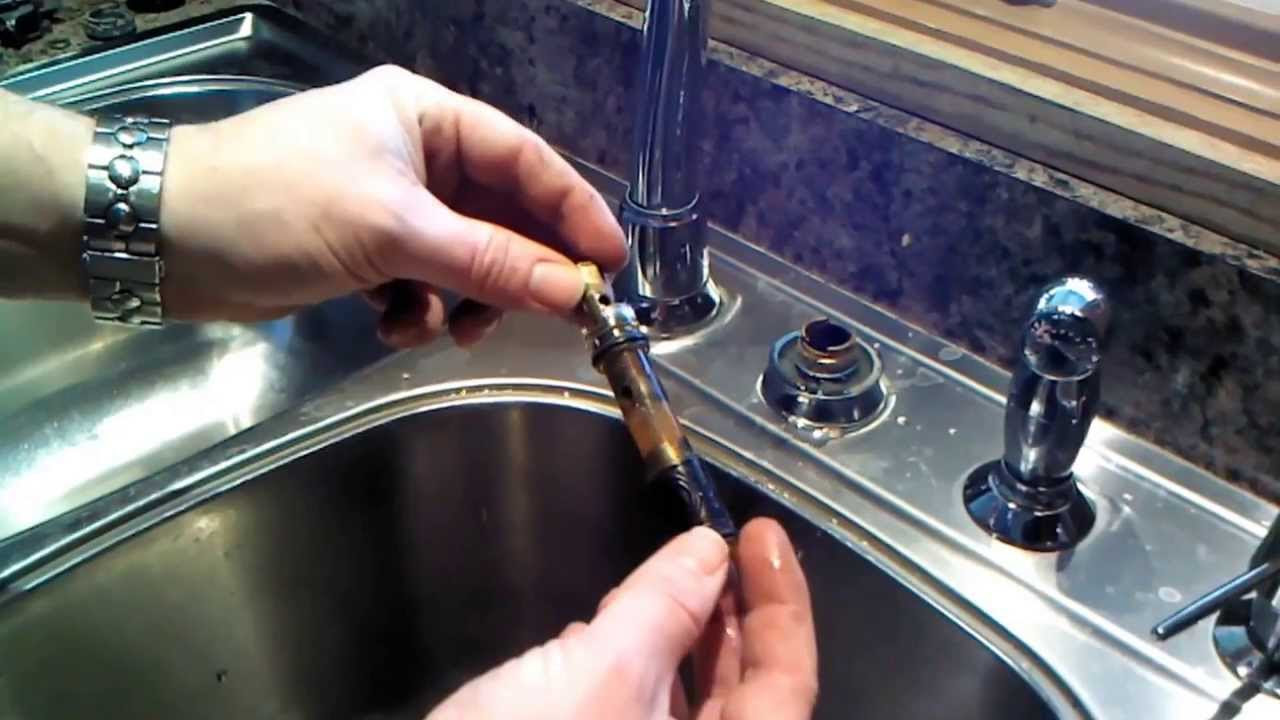
Next, you will need to use your cartridge puller tool to remove the cartridge. This tool is specifically designed for Moen cartridges and can be purchased at any home improvement store.
Insert the tool into the cartridge and twist it clockwise until the cartridge is loose enough to be pulled out.
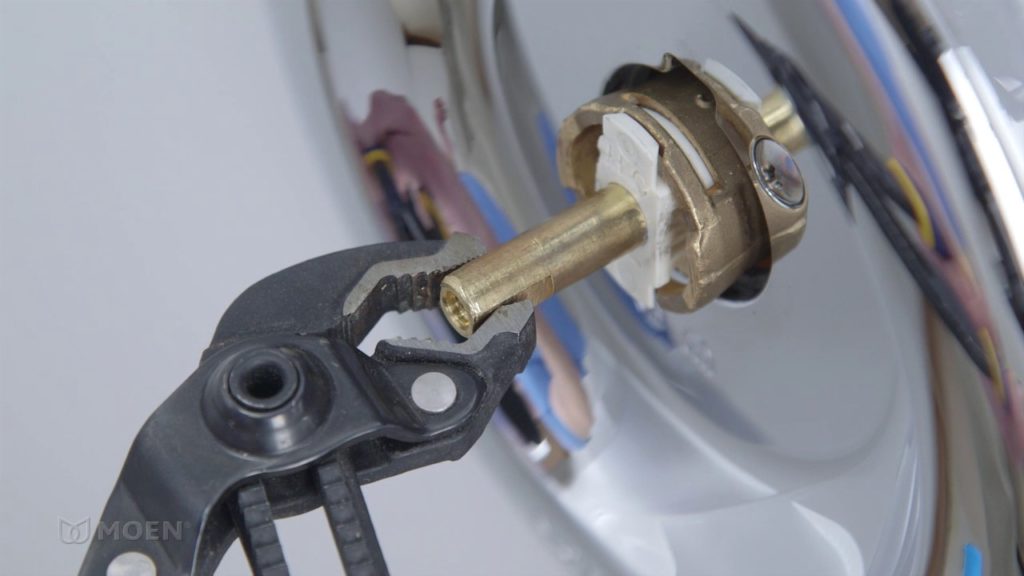
If you do not have a cartridge puller, you can also use a pair of pliers to grip the top of the cartridge and pull it out.
However, be careful not to damage the cartridge or the faucet while using this method.
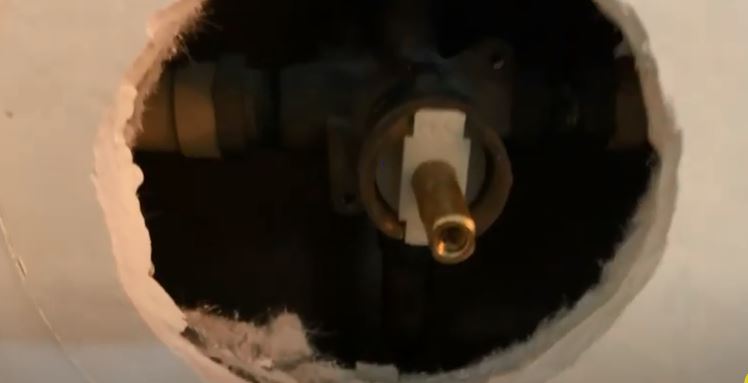
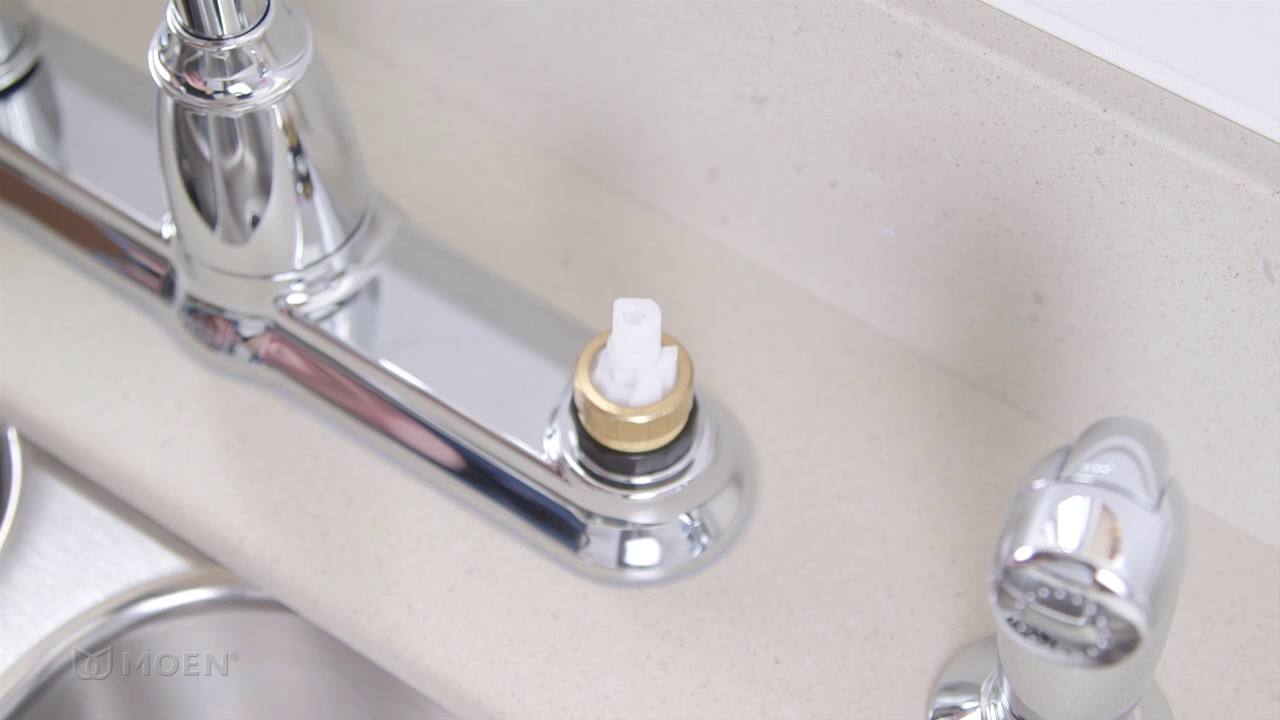
Once the cartridge is loose, pull it out of the faucet.
Inspect the cartridge for any damage or debris that may have caused it to malfunction.
If the cartridge is damaged,
it is important to replace it with a new one to avoid further issues with your faucet.
If there is any debris,
clean it off using a soft cloth or a toothbrush before proceeding with the installation of the new cartridge.
Congratulations, you have successfully removed the old cartridge from your Moen bathroom sink faucet!
Now you are ready to install the new cartridge and enjoy a fully functioning faucet once again.
Keep reading for the final step of the process – installing the new cartridge.
Now that you have gathered all the necessary tools and materials, it's time to remove the old cartridge from your Moen bathroom sink faucet. This step is crucial in ensuring the smooth installation of the new cartridge.
Remember, the key to successfully removing the cartridge is patience and precision.
First, locate the retaining clip on the side of the cartridge. This clip holds the cartridge in place and needs to be removed before you can take out the old cartridge. Use a pair of pliers to grip the clip and gently pull it out of the cartridge.
Be careful not to lose the clip, as you will need it for the installation of the new cartridge.
Next, you will need to use your cartridge puller tool to remove the cartridge. This tool is specifically designed for Moen cartridges and can be purchased at any home improvement store.
Insert the tool into the cartridge and twist it clockwise until the cartridge is loose enough to be pulled out.
If you do not have a cartridge puller, you can also use a pair of pliers to grip the top of the cartridge and pull it out.
However, be careful not to damage the cartridge or the faucet while using this method.
Once the cartridge is loose, pull it out of the faucet.
Inspect the cartridge for any damage or debris that may have caused it to malfunction.
If the cartridge is damaged,
it is important to replace it with a new one to avoid further issues with your faucet.
If there is any debris,
clean it off using a soft cloth or a toothbrush before proceeding with the installation of the new cartridge.
Congratulations, you have successfully removed the old cartridge from your Moen bathroom sink faucet!
Now you are ready to install the new cartridge and enjoy a fully functioning faucet once again.
Keep reading for the final step of the process – installing the new cartridge.
HTML code:
Replacing Your Moen Bathroom Sink Faucet Cartridge
Step 4: Removing the Old Cartridge

Now that you have gathered all the necessary tools and materials, it's time to remove the old cartridge from your Moen bathroom sink faucet. This step is crucial in ensuring the smooth installation of the new cartridge. Remember, the key to successfully removing the cartridge is patience and precision.
First, locate the retaining clip on the side of the cartridge. This clip holds the cartridge in place and needs to be removed before you can take out the old cartridge. Use a pair of pliers to grip the clip and gently pull it out of the cartridge. Be careful not to lose the clip, as you will need it for the installation of the new cartridge.
Next, you will need to use your cartridge puller tool to remove the cartridge. This tool is specifically designed for Moen cartridges and can be purchased at any home improvement store. Insert the tool into the cartridge and twist it clockwise until the cartridge is loose enough to be pulled out. If you do not have a cartridge puller, you can also use a pair of pliers to grip the top of the cartridge and pull it out. However, be careful not to damage the cartridge or the faucet while using this method.
Once the cartridge is loose, pull it out of the faucet. Inspect the cartridge for any damage or debris that may have caused it to malfunction. If the cartridge is damaged, it is important to replace it with a new one to avoid further issues with your faucet. If there is any debris, clean it off using a soft cloth or a toothbrush before proceeding with the installation of the new cartridge.
Congratulations, you have successfully removed the old cartridge from your Moen bathroom sink faucet! Now you are ready to install the new cartridge and enjoy a fully functioning faucet once again. Keep reading for the final step of the process – installing the new cartridge.