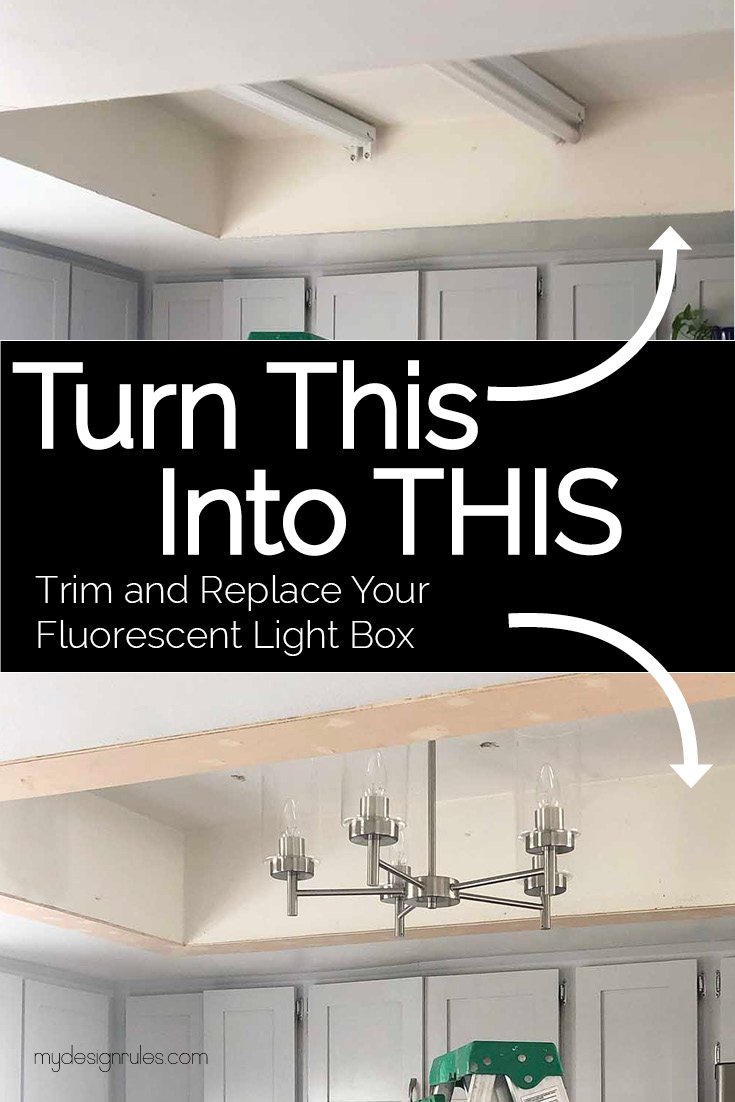
Replacing a recessed fluorescent light fixture in the kitchen may seem like a daunting task, but with the right tools and knowledge, it can be a simple DIY project. Not only will it improve the overall look and feel of your kitchen, but it will also provide better lighting for your cooking and dining areas. Follow this step-by-step guide to learn how to replace your old recessed fluorescent light fixture in the kitchen.How to Replace a Recessed Fluorescent Light Fixture in the Kitchen
Step 1: Gather your tools and materials Step 2: Remove the old fixture Step 3: Disconnect the wires Step 4: Install the new fixture Step 5: Turn the power back onStep-by-Step Guide to Replacing a Fluorescent Light Fixture in the Kitchen
Before starting any project, it's important to make sure you have all the necessary tools and materials. For this project, you will need a ladder, screwdriver, wire cutters, wire connectors, a voltage tester, and a new LED light fixture. Make sure to turn off the power to the light fixture before beginning any work.
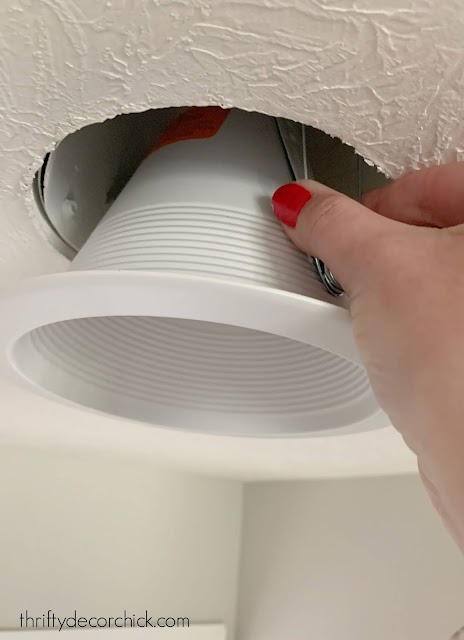
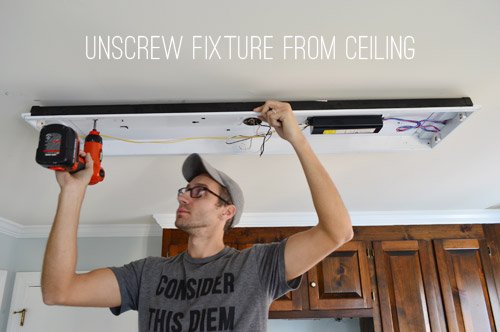
Using the ladder, carefully remove the old recessed fluorescent light fixture. Unscrew any screws or clips holding it in place and gently lower it down. Use a voltage tester to make sure the power is off before touching any wires.
Using the wire cutters, carefully disconnect the wires from the old fixture. Make sure to note which wires are connected to which color for easier installation later on.
Follow the instructions provided with your new LED light fixture to properly install it in place of the old one. Make sure to connect the wires correctly and use wire connectors to secure them in place. Use the screws or clips provided with the fixture to secure it in place.
Once the new fixture is installed, turn the power back on and test the light to make sure it is working properly. If everything is in working order, you're done!
Replacing a fluorescent light fixture in the kitchen is a great DIY project for anyone looking to upgrade their kitchen lighting. Not only is it a budget-friendly option, but it also allows for customization and personalization. With the right tools and knowledge, you can easily replace your old fluorescent light fixture with a newer, more energy-efficient LED light fixture.Replacing a Fluorescent Light Fixture in the Kitchen: A DIY Project
One of the best ways to upgrade your kitchen lighting is by replacing an old recessed fluorescent light fixture with a new LED fixture. LED lights are more energy-efficient, providing better and brighter lighting for your kitchen. They also last longer, meaning less maintenance and replacement costs in the long run.Upgrade Your Kitchen Lighting: Replacing a Recessed Fluorescent Light Fixture
Replacing an old fluorescent light fixture in the kitchen may seem like a simple task, but there are a few tips and tricks that can make the process even easier. Make sure to turn off the power before starting any work, use a voltage tester to ensure the power is off, and take note of how the wires are connected before disconnecting them. This will make the installation process smoother and prevent any potential issues.Replacing an Old Fluorescent Light Fixture in the Kitchen: Tips and Tricks
A DIY kitchen lighting upgrade is a great way to personalize and improve the overall look and feel of your kitchen. By replacing a recessed fluorescent light fixture with a new LED fixture, you can create a more modern and energy-efficient space. With the right tools and instructions, this can easily be a DIY project that anyone can do.DIY Kitchen Lighting Upgrade: Replacing a Recessed Fluorescent Light Fixture
Removing and replacing a recessed fluorescent light fixture in the kitchen may seem like a complex task, but with the right tools and instructions, it can be done easily. By following the steps outlined in this guide, you can safely and effectively remove and replace your old fixture with a new LED light fixture.How to Remove and Replace a Recessed Fluorescent Light Fixture in the Kitchen
Before replacing a fluorescent light fixture in the kitchen, it's important to know a few key things. Make sure to turn off the power, use a voltage tester to ensure the power is off, and take note of how the wires are connected before disconnecting them. It's also important to choose the right LED light fixture for your space and follow the installation instructions carefully.Replacing a Fluorescent Light Fixture in the Kitchen: What You Need to Know
Upgrading your kitchen lighting by replacing a fluorescent light fixture is a simple DIY project that can make a big difference in the look and feel of your kitchen. By following the step-by-step guide outlined in this article, you can easily replace your old fixture with a newer, more energy-efficient LED light fixture. Step-by-Step Guide to Upgrading Your Kitchen Lighting: Replacing a Fluorescent Light Fixture
If you're new to DIY projects, replacing a recessed fluorescent light fixture in the kitchen may seem intimidating. However, with the right tools and instructions, it can be a simple and rewarding project. By following the steps outlined in this guide, you can successfully replace your old fixture and upgrade your kitchen lighting in no time. Replacing a Recessed Fluorescent Light Fixture in the Kitchen: A Beginner's Guide
Why You Should Consider Replacing Your Fluorescent Light Fixtures in Your Kitchen

The Benefits of Upgrading Your Kitchen Lighting
 If you're looking to give your kitchen a fresh new look, one of the easiest ways to do so is by replacing your old, outdated fluorescent light fixtures. Not only will this improve the overall aesthetic of your kitchen, but it also has many practical benefits that you may not have considered.
Improved Energy Efficiency
Older fluorescent light fixtures can consume a lot of energy, resulting in high electricity bills. By replacing them with newer, energy-efficient models, you'll not only save money but also reduce your carbon footprint. LED light fixtures are a popular and cost-effective choice for kitchen lighting, as they use significantly less energy and last much longer than traditional fluorescent bulbs.
Enhanced Lighting Quality
Fluorescent light fixtures can often cast a harsh, unflattering light in your kitchen. This can make it challenging to see what you're doing while cooking or even just spending time in the kitchen. By upgrading to newer LED fixtures, you can choose from a variety of color temperatures and brightness levels to create the perfect lighting for your kitchen. This can make your space feel more inviting and comfortable, making it a more enjoyable place to spend time.
Increased Property Value
If you're planning to sell your house in the future, upgrading your kitchen lighting can significantly increase its value. Potential buyers are often drawn to homes with modern, energy-efficient features, and a well-lit kitchen is sure to make a good impression. This small investment of replacing your fluorescent light fixtures can pay off in the long run when it comes to selling your home.
How to Replace Your Fluorescent Light Fixtures
 Replacing your old fluorescent light fixtures with newer, more efficient models is a relatively simple process. First, turn off the power to the existing fixtures at the circuit breaker. Then, remove the old fixtures and disconnect the wiring. Next, install the new fixtures according to the manufacturer's instructions and connect the wiring. Finally, turn the power back on and enjoy your new, improved kitchen lighting.
In conclusion, upgrading your fluorescent light fixtures in your kitchen has many benefits, including improved energy efficiency, better lighting quality, and increased property value. By taking the time to replace your old, outdated fixtures, you can transform your kitchen into a more functional and attractive space. So why wait? Start researching and shopping for new kitchen light fixtures today and see the difference it can make in your home.




















:max_bytes(150000):strip_icc()/_hero_4109254-feathertop-5c7d415346e0fb0001a5f085.jpg)
