If you've noticed that your kitchen sink nozzle isn't functioning as well as it used to, it may be time for a replacement. Over time, the nozzle can become clogged with mineral deposits or damaged from wear and tear. Luckily, replacing a kitchen sink nozzle is a relatively simple DIY project that can save you time and money. In this guide, we'll walk you through the process of replacing your kitchen sink nozzle step-by-step.How to Replace a Kitchen Sink Nozzle
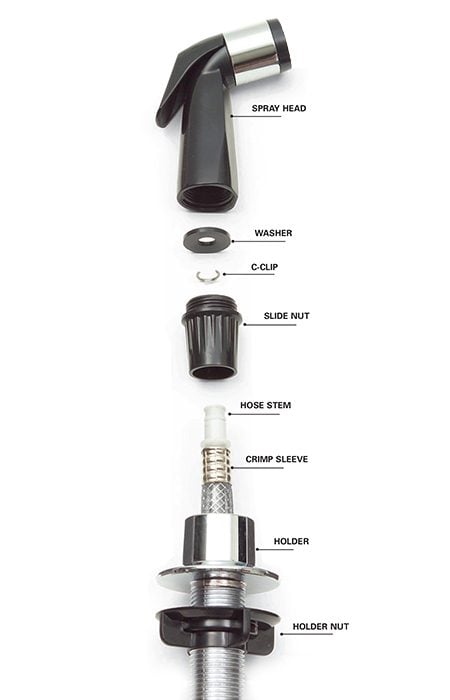
Before you begin, make sure to shut off the water supply to your sink. You can do this by turning off the main water valve in your home. Once the water is turned off, follow these steps to replace your kitchen sink nozzle: Step 1: Remove the old nozzle by twisting it counterclockwise. If the nozzle is stuck, you may need to use pliers to loosen it. Step 2: Once the old nozzle is removed, clean the area where it was attached to the sink. Use a mild cleaner and a soft cloth to remove any residue or buildup. Step 3: Take the new nozzle and wrap the threads with plumber's tape to create a tight seal when attached to the sink. Step 4: Carefully screw the new nozzle onto the sink in a clockwise direction. Use pliers if necessary, but be careful not to overtighten as this can cause damage. Step 5: Turn the water supply back on and test the new nozzle. Make sure there are no leaks and that the water flow is working properly.Replacing a Kitchen Sink Nozzle: Step-by-Step Guide
Replacing a kitchen sink nozzle is a DIY project that can save you time and money. By following the steps outlined above, you can easily replace your old nozzle with a new one. However, if you are not comfortable with DIY projects or are unsure of your plumbing skills, it may be best to hire a professional to avoid any potential issues.DIY: How to Replace a Kitchen Sink Nozzle
Here are a few tips and tricks to keep in mind when replacing your kitchen sink nozzle: Tip 1: Before purchasing a new nozzle, make sure it is compatible with your sink. Check the brand and model of your sink to ensure a proper fit. Tip 2: If your old nozzle has a lot of buildup, soak it in vinegar for a few hours before attempting to remove it. This can help loosen any stubborn mineral deposits and make it easier to remove. Tip 3: Keep a bucket or towel handy when removing the old nozzle to catch any excess water that may drip out.Replacing a Kitchen Sink Nozzle: Tips and Tricks
To recap, here is a step-by-step guide for replacing a kitchen sink nozzle: Step 1: Turn off the water supply to your sink. Step 2: Remove the old nozzle. Step 3: Clean the area where the old nozzle was attached. Step 4: Wrap the threads of the new nozzle with plumber's tape. Step 5: Screw the new nozzle onto the sink. Step 6: Turn the water supply back on and test the new nozzle.Step-by-Step Guide for Replacing a Kitchen Sink Nozzle
When replacing a kitchen sink nozzle, there are a few common mistakes to avoid: Mistake 1: Overtightening the new nozzle can cause damage and leaks. Mistake 2: Not turning off the water supply before removing the old nozzle can result in a messy and potentially damaging situation. Mistake 3: Using harsh chemicals to clean the area can damage the sink or the new nozzle.Replacing a Kitchen Sink Nozzle: Common Mistakes to Avoid
To successfully replace your kitchen sink nozzle, you'll need the following tools and materials: Tools: pliers, soft cloth or sponge Materials: new kitchen sink nozzle, plumber's tape, mild cleanerReplacing a Kitchen Sink Nozzle: Tools and Materials You'll Need
If you're new to DIY projects, replacing a kitchen sink nozzle is a great place to start. It's a relatively simple project that can be completed in just a few steps. By following our guide, you can successfully replace your kitchen sink nozzle and gain confidence in your DIY skills.How to Replace a Kitchen Sink Nozzle: A Beginner's Guide
If you encounter any issues while replacing your kitchen sink nozzle, here are a few troubleshooting tips: Issue 1: The new nozzle is leaking. Solution: Check to make sure the new nozzle is properly attached and not overtightened. If the issue persists, you may need to replace the nozzle with a different one that fits your sink better. Issue 2: The water flow is weak or inconsistent. Solution: Make sure the new nozzle is free of any debris or buildup. If the issue continues, you may need to clean the aerator or replace it entirely.Replacing a Kitchen Sink Nozzle: Troubleshooting Common Issues
While replacing a kitchen sink nozzle is a relatively simple DIY project, it may be best to hire a professional if you are not comfortable with plumbing tasks. A professional can ensure the job is done correctly and safely, and can also provide helpful tips and maintenance advice for your new nozzle.Replacing a Kitchen Sink Nozzle: Professional vs. DIY
Why You Need to Replace Your Kitchen Sink Nozzle for a More Efficient and Stylish Kitchen

Upgrade Your Kitchen with a New Sink Nozzle
 If you’re looking to give your kitchen a fresh and modern update, one of the best places to start is with your
kitchen sink nozzle
. This may seem like a small and insignificant detail, but trust us when we say that investing in a new nozzle can have a huge impact on the overall look and functionality of your kitchen.
Efficient Water Usage
One of the main reasons to replace your kitchen sink nozzle is for more efficient
water usage
. Older nozzles may have build-up or clogs that restrict the flow of water, causing you to use more water than necessary. By investing in a new nozzle, you can save on your water bill while also being environmentally friendly.
Modern Design
Another reason to upgrade your kitchen sink nozzle is for a more modern and stylish
kitchen design
. With so many different styles and finishes available, you can easily find a nozzle that complements your kitchen’s aesthetic. From sleek and minimalist designs to more ornate and decorative options, a new nozzle can add a touch of elegance to your kitchen.
Improved Functionality
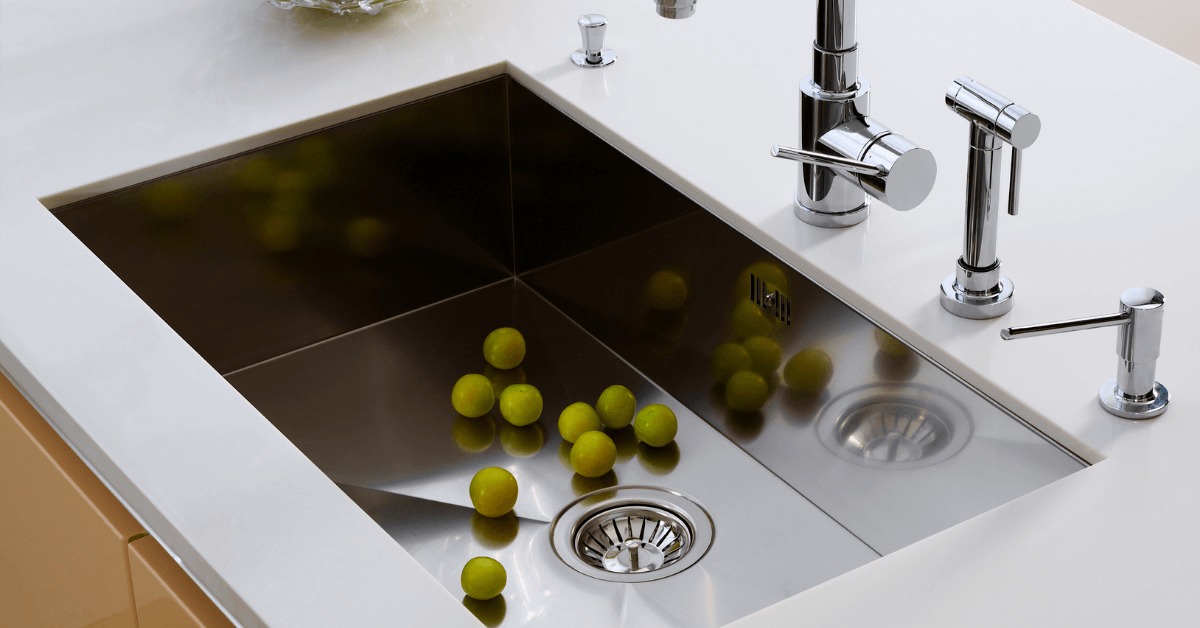
In addition to water efficiency and design, a new kitchen sink nozzle can also improve the functionality of your sink. Some nozzles come with adjustable spray settings, making it easier to clean dishes and fill pots with just the right amount of water. Others come with a pull-down feature, allowing you to easily clean hard-to-reach areas of your sink.
How to Replace Your Kitchen Sink Nozzle
Replacing your kitchen sink nozzle is a simple and straightforward process that can be done in just a few steps. First, turn off the water supply to your sink. Then, using a wrench, unscrew the old nozzle from the faucet. Next, attach the new nozzle by hand and use the wrench to tighten it. Finally, turn the water supply back on and test out your new nozzle.
In conclusion, replacing your kitchen sink nozzle is a cost-effective and easy way to upgrade your kitchen. Not only will it save you money on your water bill, but it can also add a touch of style and improve the functionality of your sink. So if you’re looking to give your kitchen a makeover, don’t forget to consider replacing your kitchen sink nozzle for a more efficient and stylish space.
