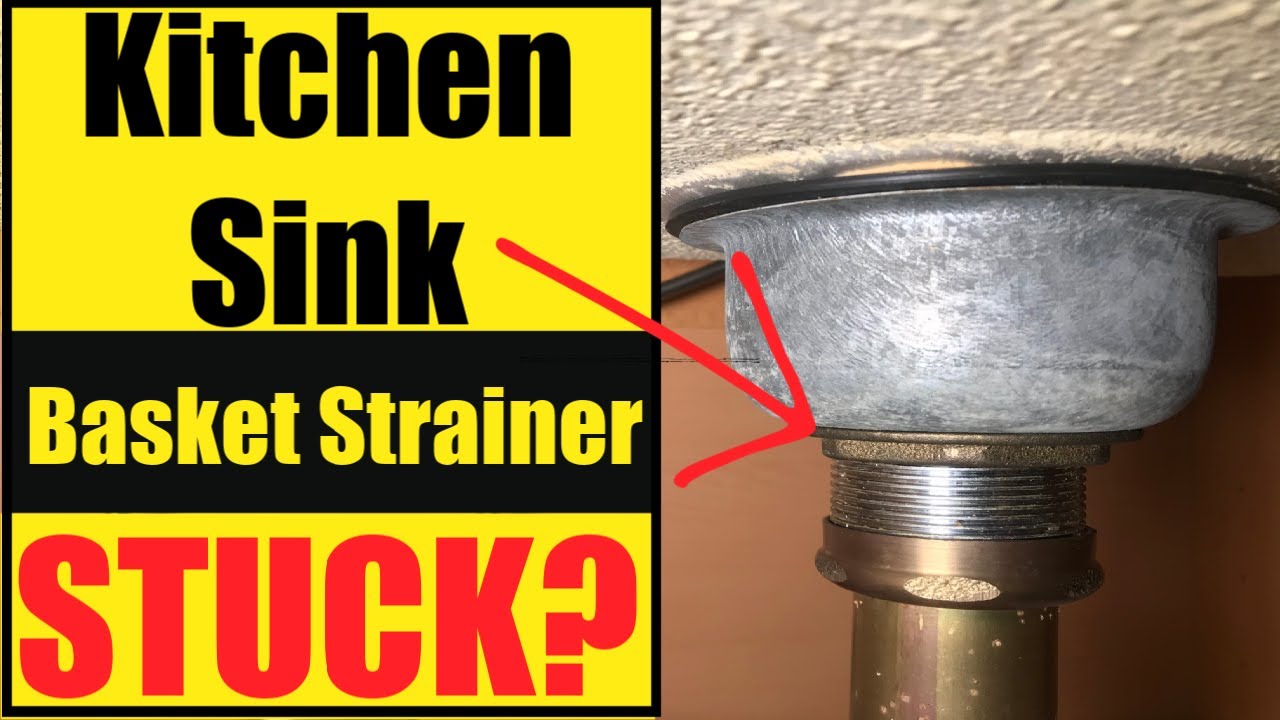
Are you tired of a clogged kitchen sink? Removing the strainer basket can help improve your sink's drainage and prevent future clogs. Here's a step-by-step guide on how to remove a strainer basket from a kitchen sink.How to Remove a Strainer Basket from a Kitchen Sink

How to Remove a Strainer Basket from a Kitchen Sink


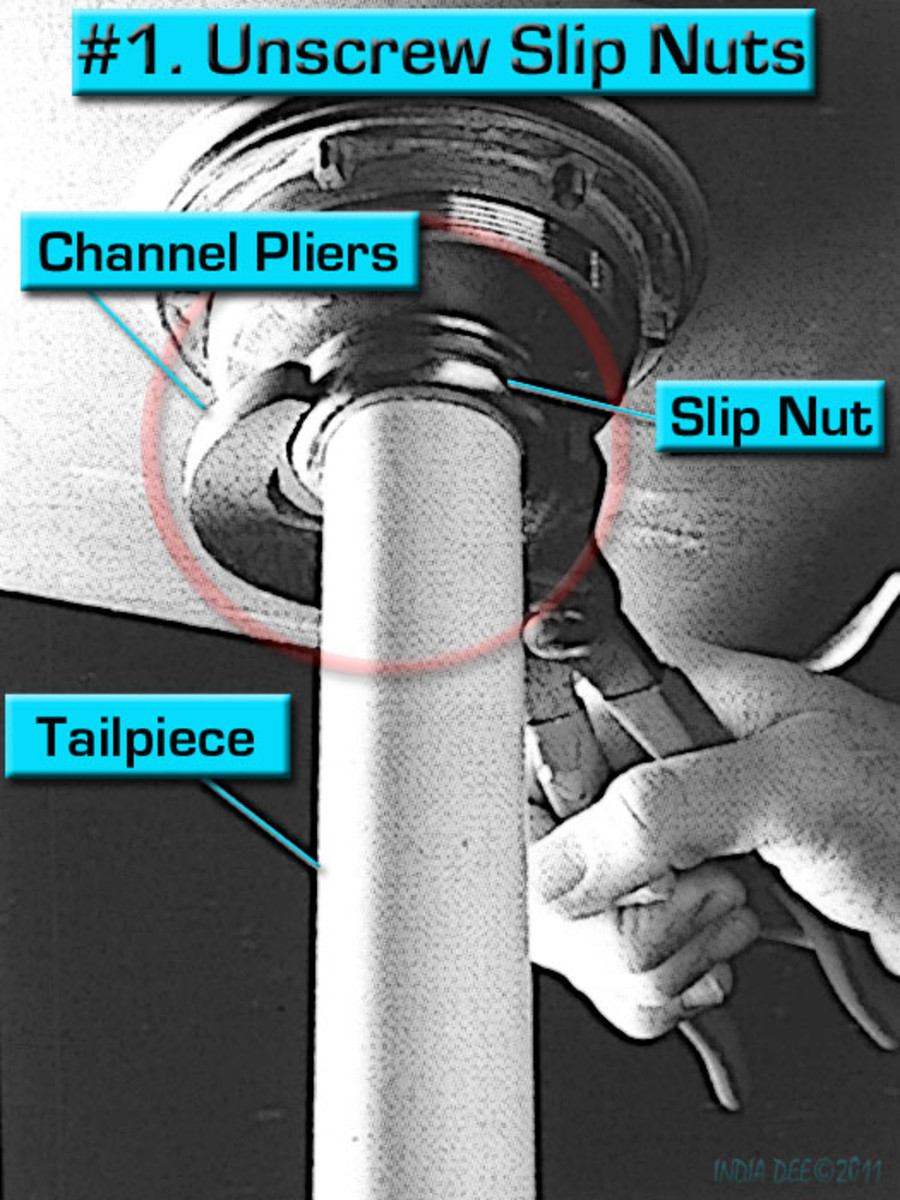
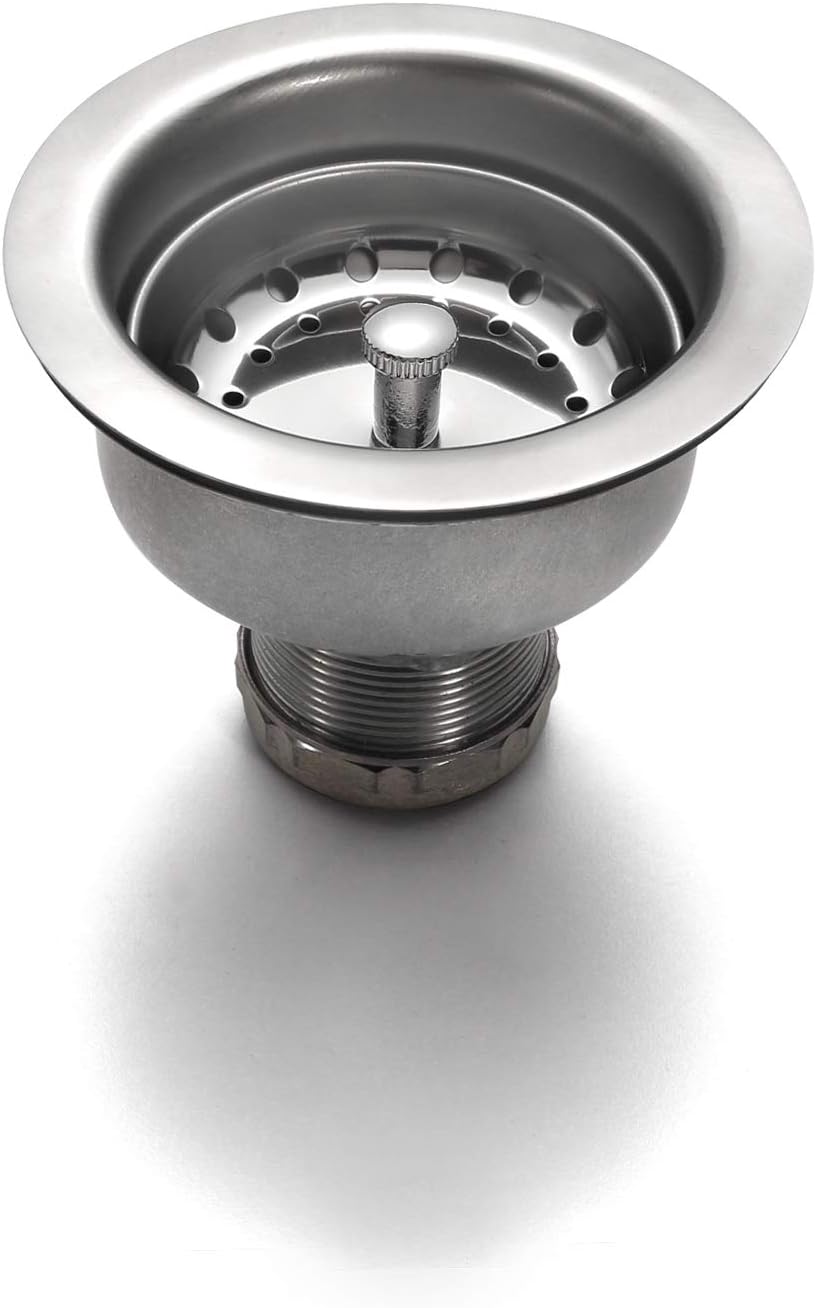
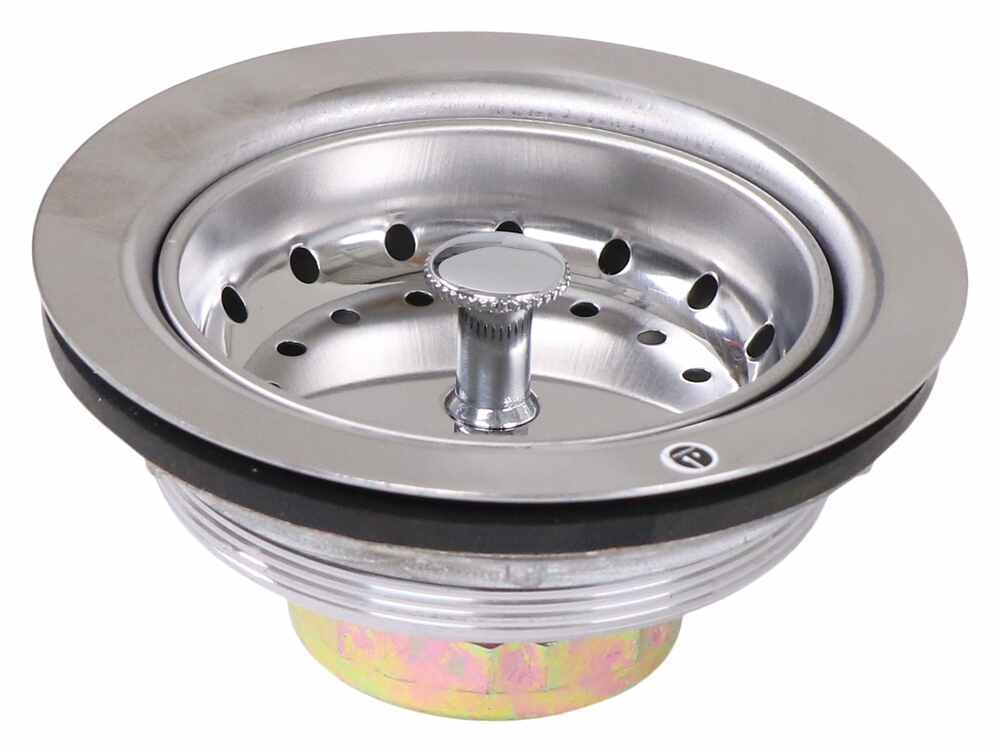
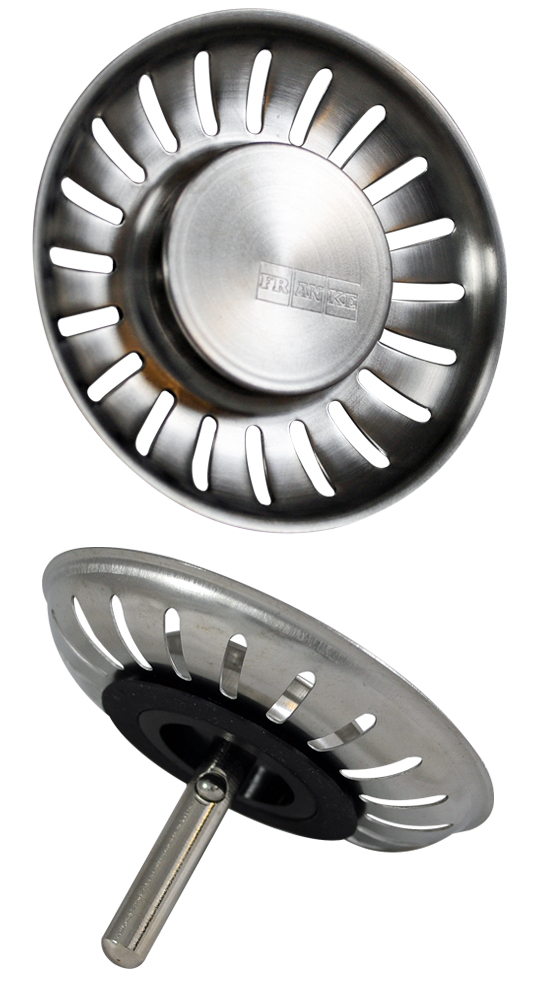
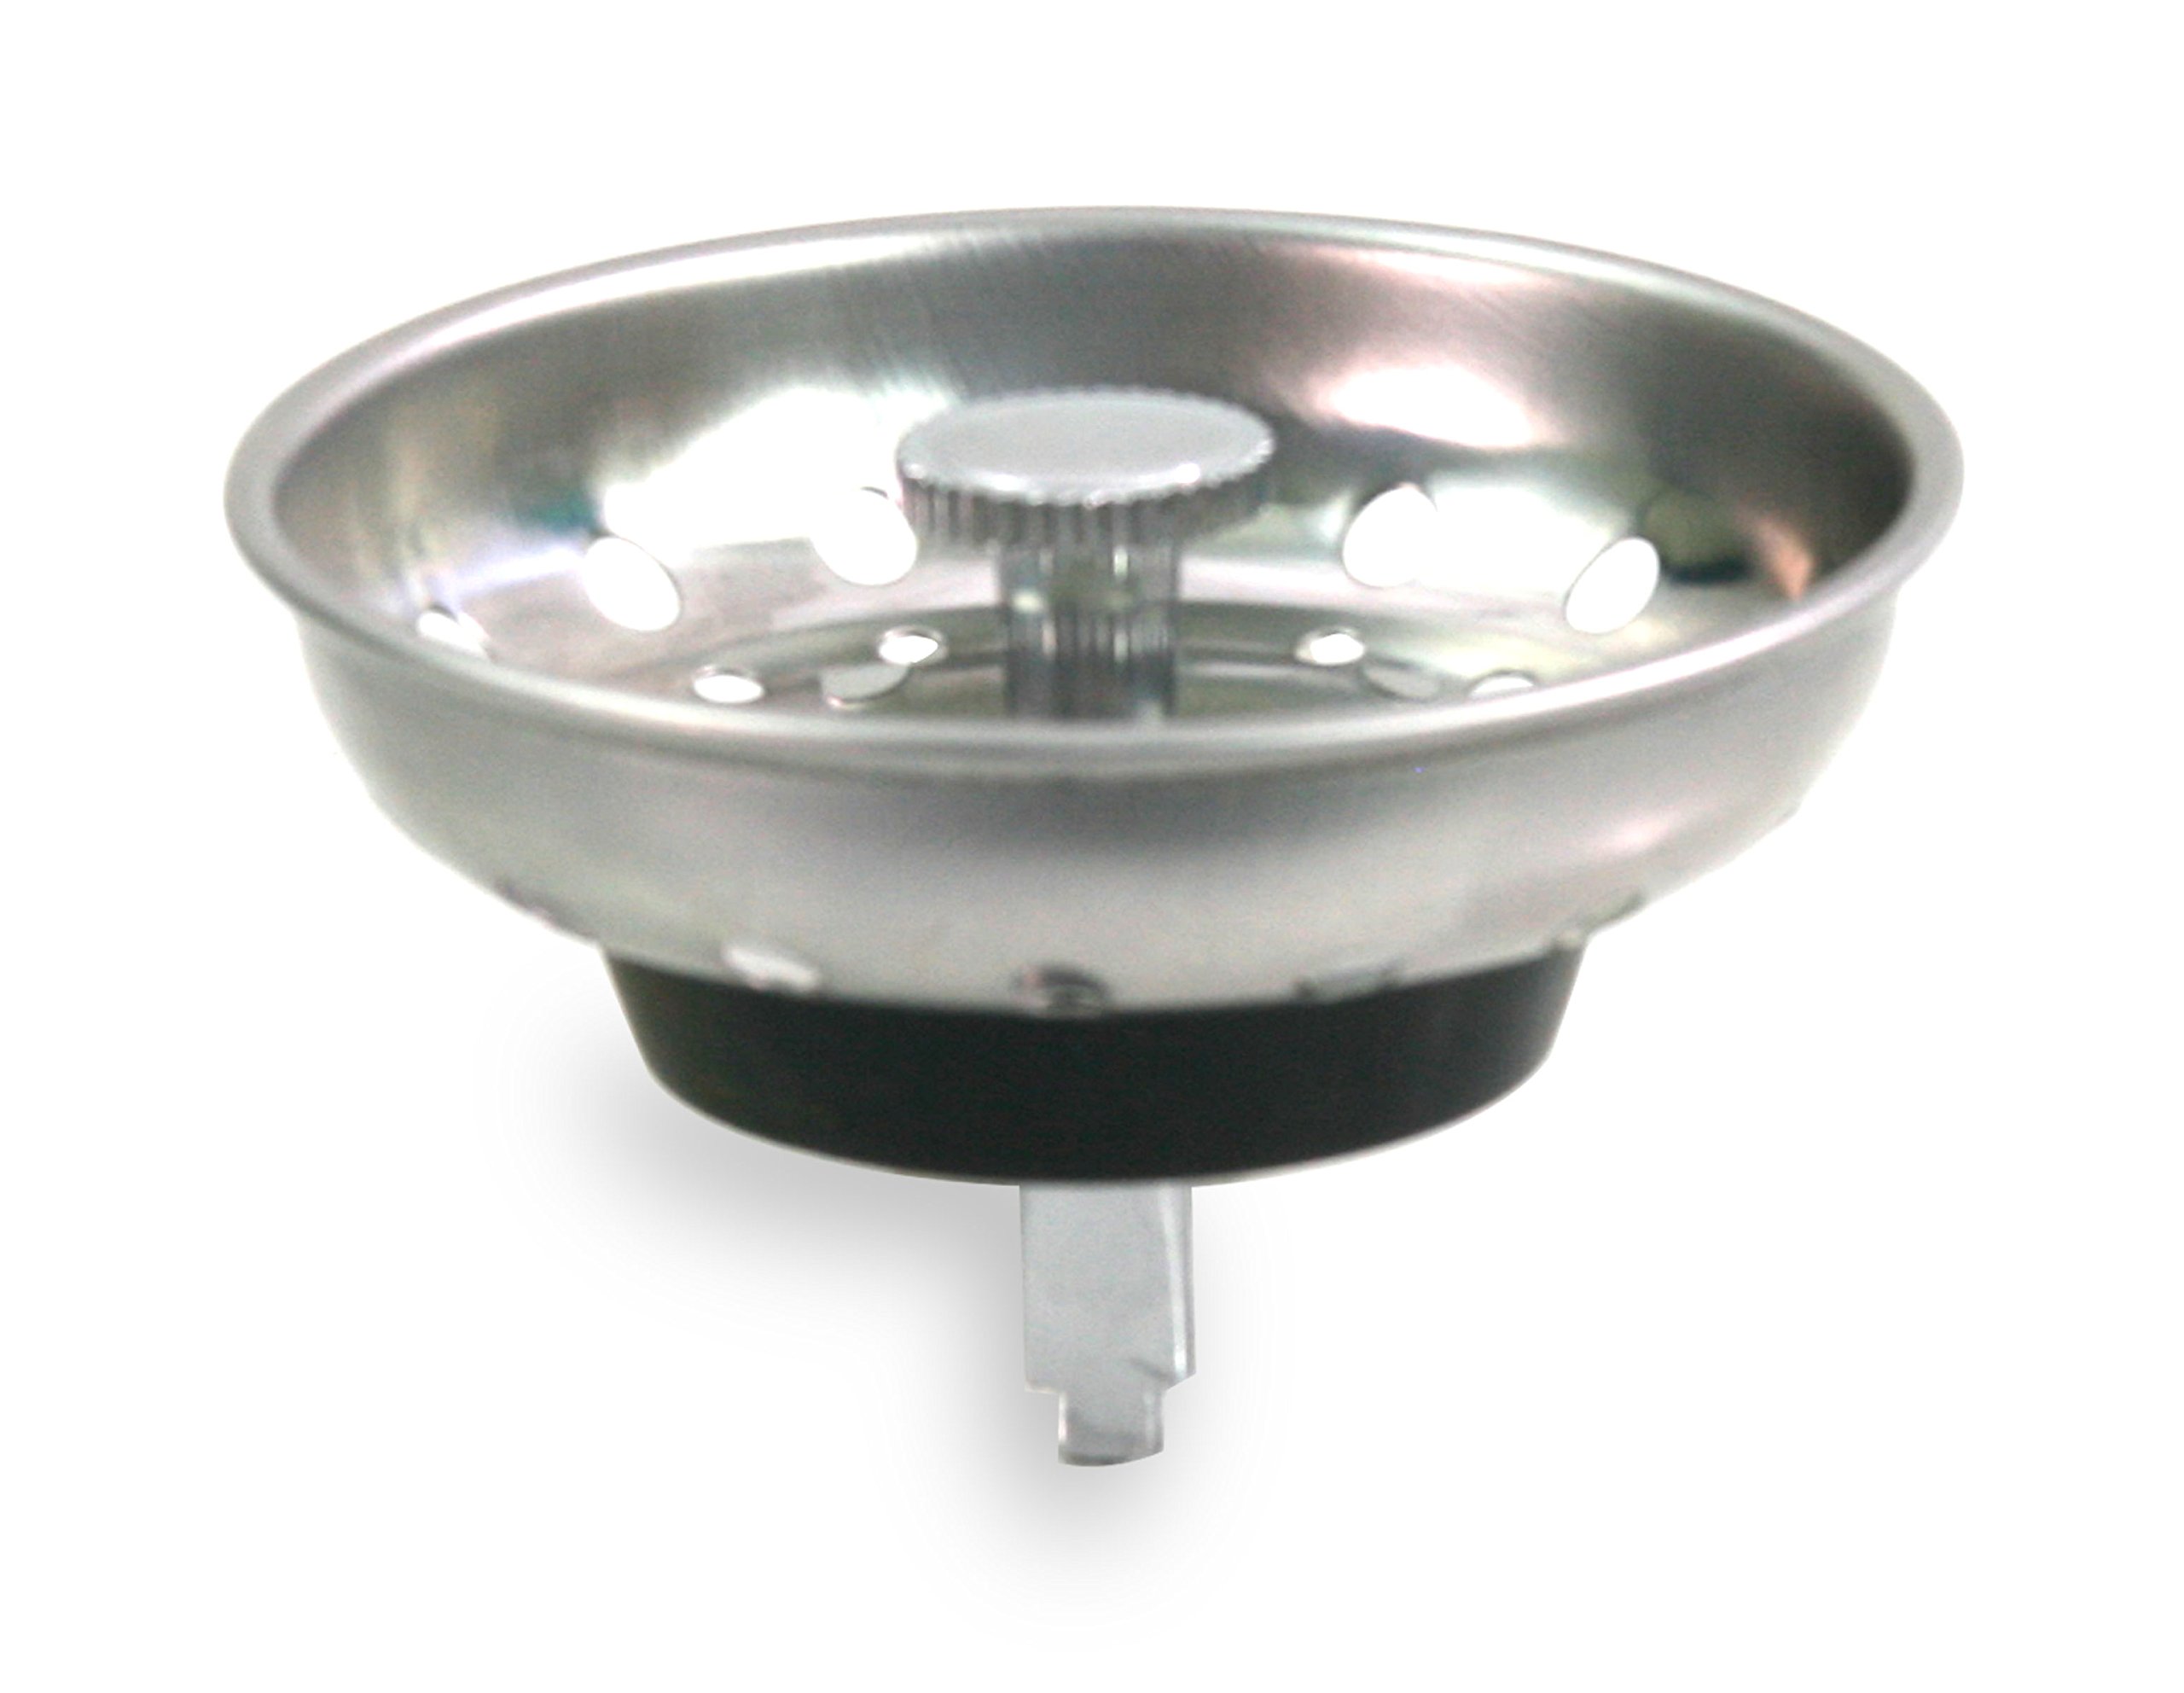
Before starting, make sure to gather all the necessary tools and materials. You will need a pair of pliers, a screwdriver, and a plumber's putty. Once you have all the tools, follow these steps: 1. Shut off the water supply to the sink. This will prevent any water from spilling out while you remove the strainer basket. 2. Remove any objects from the sink. Make sure to clear out any dishes, utensils, or debris from your sink. This will give you more space to work with. 3. Loosen the nut underneath the sink. Using a pair of pliers, loosen the nut that connects the strainer basket to the sink. Turn it counterclockwise until it is loose enough to remove by hand. 4. Remove the strainer basket from the sink. Once the nut is loose, you can easily remove the strainer basket from the sink by pulling it out gently. 5. Clean the sink and the strainer basket. Take this opportunity to clean any buildup or debris from both the sink and the strainer basket. 6. Remove the old plumber's putty. Use a screwdriver to scrape off any old plumber's putty from the sink. This will ensure a clean and secure fit for the new strainer basket. 7. Apply new plumber's putty. Roll out a small amount of plumber's putty and apply it around the underside of the sink's drain opening. This will create a watertight seal when the new strainer basket is installed. 8. Install the new strainer basket. Place the new strainer basket onto the sink's drain opening and press down firmly. Make sure it is centered and level. 9. Tighten the nut underneath the sink. Using your pliers, tighten the nut underneath the sink to secure the strainer basket in place. Make sure it is tight enough to prevent any leaks. 10. Turn on the water supply. Once the strainer basket is securely in place, turn on the water supply and check for any leaks. If there are no leaks, your strainer basket is successfully installed!Steps for Removing a Strainer Basket from a Kitchen Sink


Steps for Removing a Strainer Basket from a Kitchen Sink


If you're having trouble removing your strainer basket, here's a detailed guide to help you through the process: 1. Remove the stopper. Some sinks have a stopper attached to the strainer basket. You will need to unscrew or pull out the stopper before you can remove the strainer basket. 2. Use a penetrating oil. If the nut underneath the sink is too tight, you can apply a penetrating oil to help loosen it. Let it sit for a few minutes before attempting to remove the nut again. 3. Use a strainer wrench. If the nut is still difficult to remove, you can use a strainer wrench, which is specifically designed to remove strainer baskets. This tool will provide a better grip and make the removal process easier. 4. Apply heat. If the nut is rusted or corroded, applying heat with a hairdryer can help loosen it. Be careful not to overheat the sink, as it may cause damage. 5. Cut the nut. As a last resort, you can use a hacksaw to cut the nut and remove the strainer basket. This method should only be used if all other methods fail, as it may damage the sink.Removing a Strainer Basket from a Kitchen Sink: A Step-by-Step Guide


Removing a Strainer Basket from a Kitchen Sink: A Step-by-Step Guide


If you're looking for a quick and easy way to remove your strainer basket, here are a few tips: 1. Use vinegar and baking soda. Create a mixture of equal parts vinegar and baking soda and pour it down the drain. Let it sit for a few minutes before attempting to remove the strainer basket. The combination of vinegar and baking soda will help loosen any buildup or debris. 2. Use a plunger. If there is a clog in your sink, using a plunger may help dislodge it and make it easier to remove the strainer basket. 3. Use a drain snake. If the clog is further down in the pipes, you can use a drain snake to break it up and remove it. This will also help with the removal of the strainer basket. 4. Seek professional help. If you're still having trouble removing the strainer basket, it's best to call a professional plumber for assistance. They have the tools and expertise to safely and effectively remove the strainer basket without causing any damage to your sink.Easy Ways to Remove a Strainer Basket from a Kitchen Sink


Easy Ways to Remove a Strainer Basket from a Kitchen Sink


Here are a few tips and tricks to keep in mind when removing a strainer basket from your kitchen sink: 1. Use gloves. The nut underneath the sink can be sharp and may cause injury. Protect your hands by wearing a pair of gloves during the removal process. 2. Be patient. Removing a strainer basket may take some time, especially if it is stuck or rusted. Be patient and try different methods if necessary, but don't rush or force it to prevent any damage. 3. Clean the strainer basket regularly. To prevent future clogs, make sure to clean the strainer basket regularly. This will also make it easier to remove in the future. 4. Replace old parts. If the strainer basket or any other parts are old and worn out, it's best to replace them. This will ensure a secure and functioning sink.Removing a Strainer Basket from a Kitchen Sink: Tips and Tricks


Removing a Strainer Basket from a Kitchen Sink: Tips and Tricks


If you're a DIY enthusiast, removing a strainer basket from a kitchen sink is a simple task that you can easily do yourself. Just follow the steps mentioned above, and you'll have a clean and unclogged sink in no time!DIY: Removing a Strainer Basket from a Kitchen Sink


DIY: Removing a Strainer Basket from a Kitchen Sink


Here are some common mistakes to avoid when removing a strainer basket from a kitchen sink: 1. Forcing the basket. Trying to force or pry the strainer basket out may cause damage to your sink. Be patient and use the proper tools and techniques to avoid any damage. 2. Not turning off the water supply. Forgetting to turn off the water supply can result in a flooded kitchen. Make sure to shut off the water before starting the removal process. 3. Not cleaning the old putty. Not removing the old plumber's putty can cause the new strainer basket to not fit properly and result in leaks. Make sure to clean the old putty before installing the new strainer basket.Removing a Strainer Basket from a Kitchen Sink: Common Mistakes to Avoid

Removing a Strainer Basket from a Kitchen Sink: Common Mistakes to Avoid


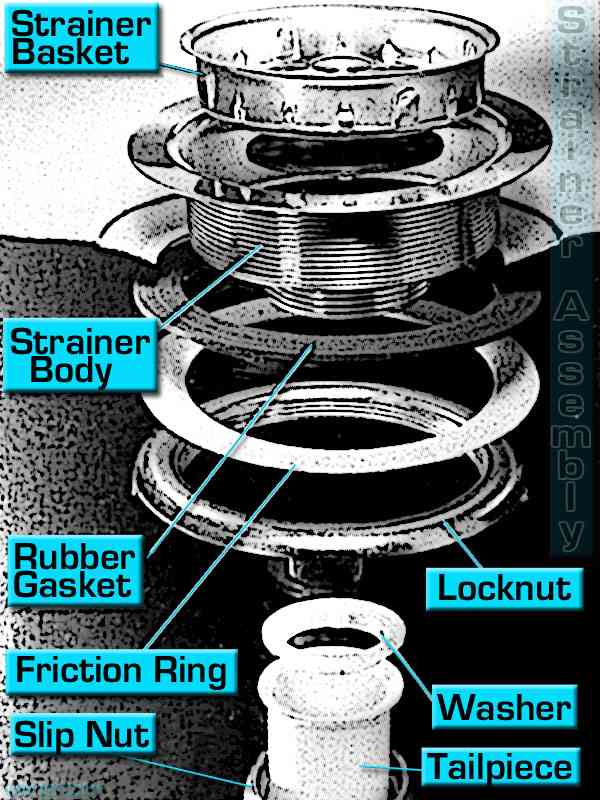
Make sure to have the following tools and materials on hand before removing the strainer basket: 1. Pliers - for loosening the nut underneath the sink 2. Screwdriver - for scraping off old putty and removing the stopper 3. Plumber's putty - for creating a watertight seal 4. Strainer wrench - for a better grip and easier removal 5. Penetrating oil - for loosening a tight nut 6. Hairdryer - for heating a rusted or corroded nut 7. Hacksaw - as a last resort for cutting a stubborn nutTools You'll Need to Remove a Strainer Basket from a Kitchen Sink


Tools You'll Need to Remove a Strainer Basket from a Kitchen Sink

If you encounter any issues while removing the strainer basket, here are some troubleshooting tips: 1. The nut won't budge. If the nut underneath the sink is too tight, try using a penetrating oil or a strainer wrench for a better grip. 2. The strainer basket won't come out. If the strainer basket is stuck, try using a plunger or a drain snake to dislodge any clogs that may be blocking it. 3. The sink is leaking. If the sink is leaking after installing the new strainer basket, make sure the nut is tight enough and that there are no gaps in the plumber's putty seal.Removing a Strainer Basket from a Kitchen Sink: Troubleshooting Common Issues
Removing a Strainer Basket from a Kitchen Sink: Troubleshooting Common Issues

When removing a strainer basket, safety should always be a top priority. Remember to wear gloves, use the proper tools and techniques, and avoid any unnecessary force to prevent any accidents or damage to your sink.How to Safely Remove a Strainer Basket from a Kitchen Sink
How to Safely Remove a Strainer Basket from a Kitchen Sink
Why It's Important to Remove a Strainer Basket from a Kitchen Sink

Prevent Clogging and Drainage Issues
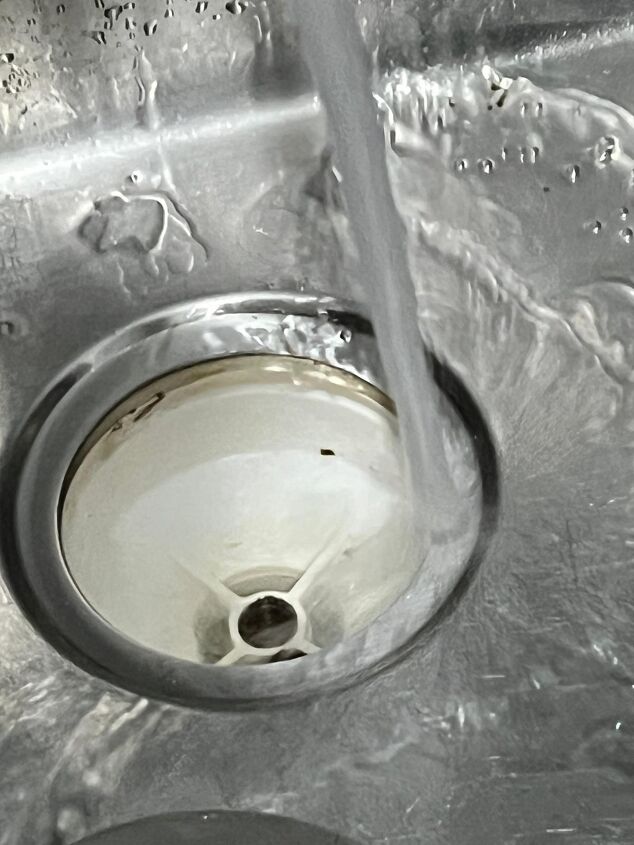
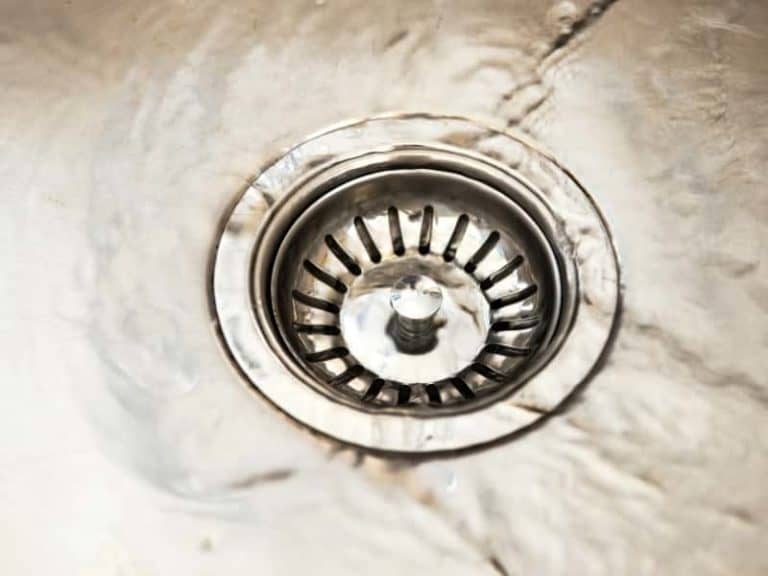
 When it comes to the functionality of your kitchen sink, the strainer basket plays a crucial role. This small but essential component sits at the bottom of your sink, catching food scraps and other debris to prevent them from clogging your pipes. However, over time, these baskets can become clogged themselves, causing drainage issues and unpleasant odors. Removing and cleaning the strainer basket is an essential step in maintaining a functional and hygienic kitchen sink.
Removing the Strainer Basket: A Step-by-Step Guide
Before attempting to remove the strainer basket from your kitchen sink, it's important to gather the necessary tools and materials. You will need a pair of pliers, a flathead screwdriver, a cleaning brush, and a mild cleaning solution. Once you have these items, follow these simple steps to remove the strainer basket:
When it comes to the functionality of your kitchen sink, the strainer basket plays a crucial role. This small but essential component sits at the bottom of your sink, catching food scraps and other debris to prevent them from clogging your pipes. However, over time, these baskets can become clogged themselves, causing drainage issues and unpleasant odors. Removing and cleaning the strainer basket is an essential step in maintaining a functional and hygienic kitchen sink.
Removing the Strainer Basket: A Step-by-Step Guide
Before attempting to remove the strainer basket from your kitchen sink, it's important to gather the necessary tools and materials. You will need a pair of pliers, a flathead screwdriver, a cleaning brush, and a mild cleaning solution. Once you have these items, follow these simple steps to remove the strainer basket:
Step 1: Turn Off the Water Supply
 Before beginning any work on your kitchen sink, it's essential to turn off the water supply. This will prevent any water from flowing out while you are trying to remove the strainer basket.
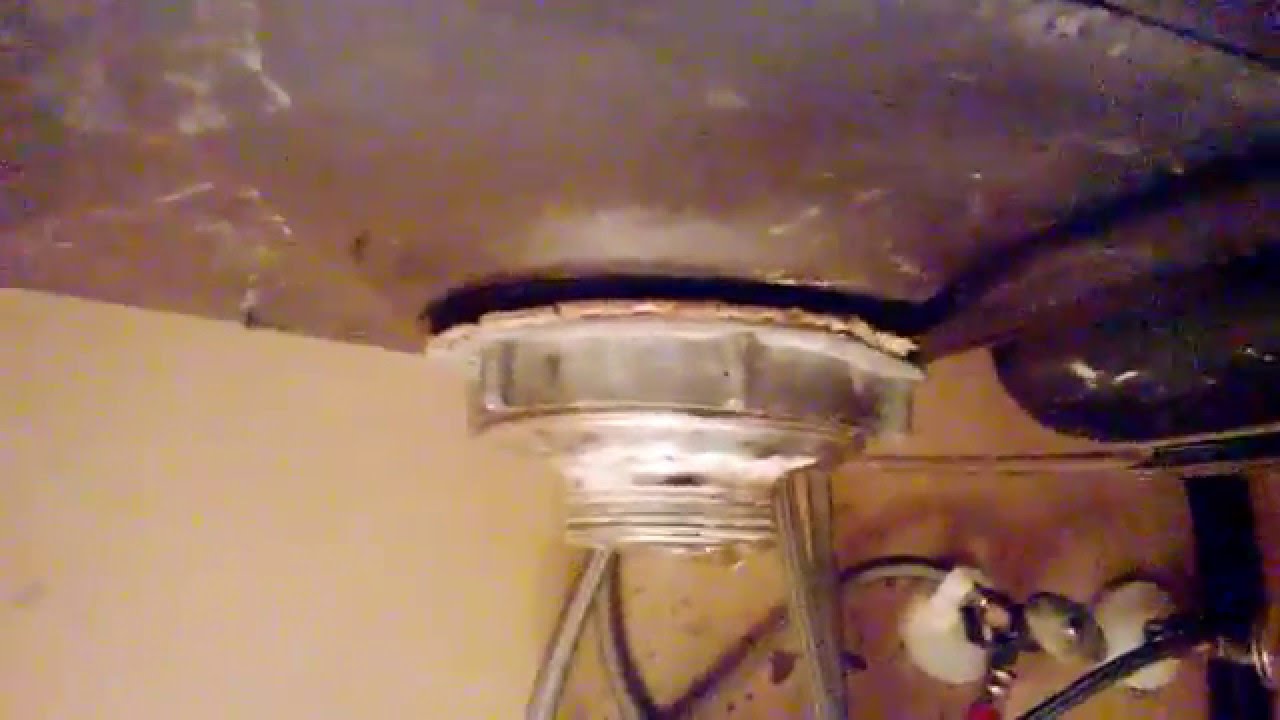
Step 2: Use Pliers to Loosen the Locknut
 Underneath your sink, you will find a locknut that secures the strainer basket in place. Use a pair of pliers to loosen this nut by turning it counterclockwise. If the locknut is stuck, you can use a flathead screwdriver to help loosen it.
Step 3: Remove the Strainer Basket
 Once the locknut is loose, you can simply lift the strainer basket out of the sink. Be sure to hold a cleaning brush underneath to catch any debris that may fall out.
Step 4: Clean the Strainer Basket
 Once the strainer basket is removed, it's important to clean it thoroughly. Use a mild cleaning solution and a brush to scrub away any food particles and grime. Rinse the basket with water and dry it before reattaching it to the sink.
Preventative Measures for Future Maintenance
To prevent your strainer basket from becoming clogged in the future, there are a few preventative measures you can take. Use a food catcher or drain cover to catch larger food particles and prevent them from going down the drain. Regularly clean your strainer basket and dispose of any trapped debris properly. These simple steps will help keep your kitchen sink functioning properly and avoid any drainage issues.
In conclusion, removing a strainer basket from a kitchen sink is an essential maintenance task that should not be overlooked. By following these simple steps and taking preventative measures, you can ensure that your kitchen sink remains functional and hygienic. Remember to always turn off the water supply before attempting any work on your sink, and use the appropriate tools to avoid damaging the strainer basket or other components.
Once the strainer basket is removed, it's important to clean it thoroughly. Use a mild cleaning solution and a brush to scrub away any food particles and grime. Rinse the basket with water and dry it before reattaching it to the sink.
Preventative Measures for Future Maintenance
To prevent your strainer basket from becoming clogged in the future, there are a few preventative measures you can take. Use a food catcher or drain cover to catch larger food particles and prevent them from going down the drain. Regularly clean your strainer basket and dispose of any trapped debris properly. These simple steps will help keep your kitchen sink functioning properly and avoid any drainage issues.
In conclusion, removing a strainer basket from a kitchen sink is an essential maintenance task that should not be overlooked. By following these simple steps and taking preventative measures, you can ensure that your kitchen sink remains functional and hygienic. Remember to always turn off the water supply before attempting any work on your sink, and use the appropriate tools to avoid damaging the strainer basket or other components.