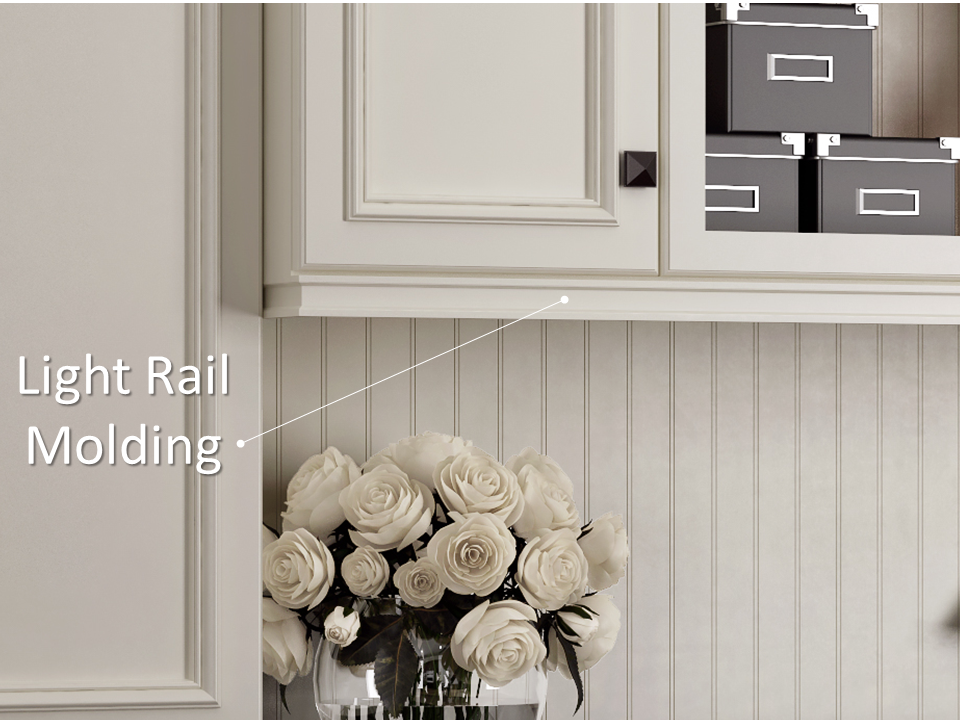
Light rail molding is a small, yet impactful addition to your kitchen cabinets that can elevate the overall look and feel of your space. Not only does it add a decorative touch, but it also helps to hide the under-cabinet lighting, giving your kitchen a sleek and seamless appearance. If you're ready to take on a DIY project and add light rail molding to your kitchen cabinets, here's a step-by-step guide to help you get started.How to Install Light Rail Molding on Kitchen Cabinets


How to Install Light Rail Molding on Kitchen Cabinets


Before you begin, make sure you have all the necessary tools and materials. You will need a measuring tape, a miter saw, a nail gun, wood glue, and light rail molding of your choice. Once you have everything you need, follow these steps:Installing Light Rail Molding: A Step-by-Step Guide

Installing Light Rail Molding: A Step-by-Step Guide


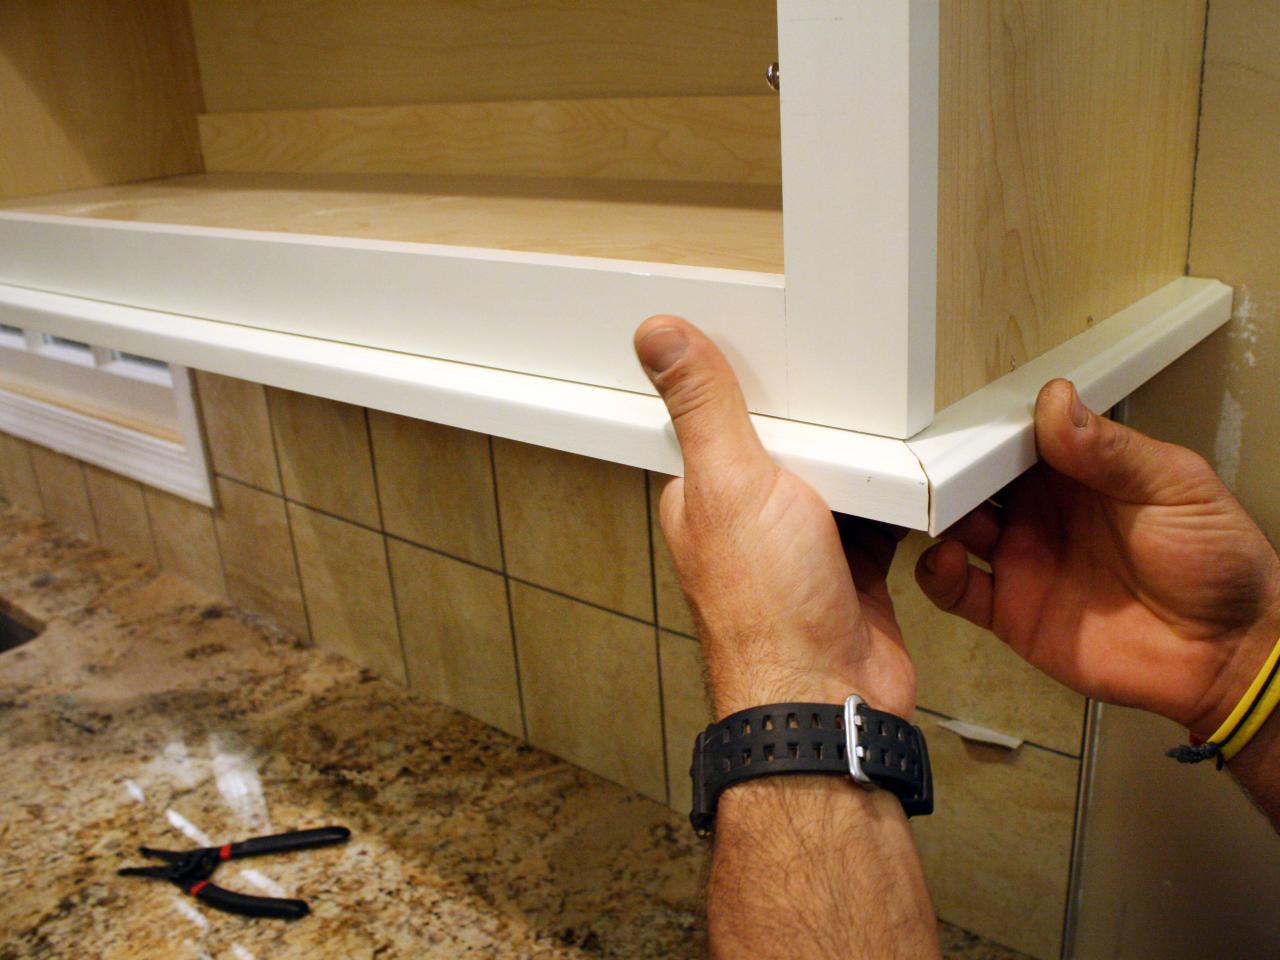
Start by measuring the length of your kitchen cabinets where you want to install the light rail molding. Use a miter saw to cut the molding to the appropriate length, making sure to cut the ends at a 45-degree angle to allow for a clean and seamless corner.Step 1: Measure and Cut the Molding
DIY Kitchen Cabinet Light Rail Molding Installation


Before attaching the molding, do a test fit to ensure that the pieces fit together properly and that the corners are aligned. This will save you time and hassle later on.Step 2: Test Fit the Molding


Easy Steps for Installing Light Rail Molding on Kitchen Cabinets


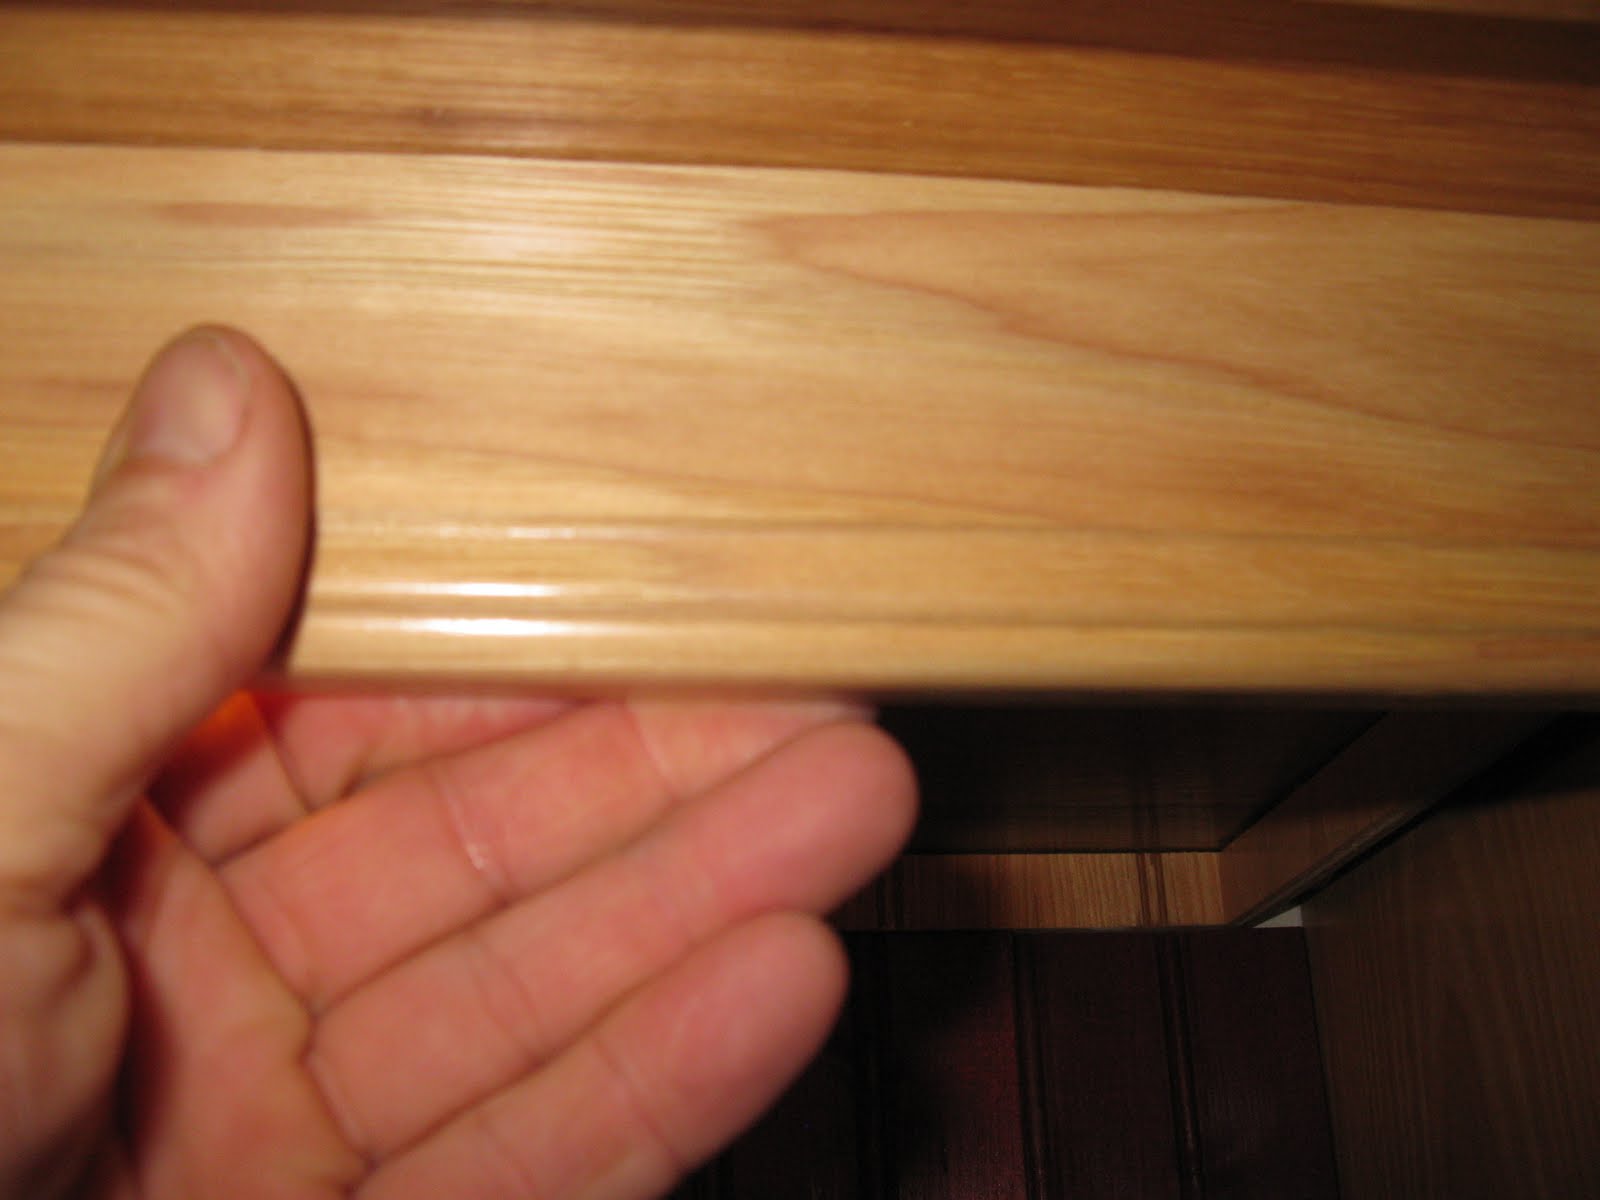
Once you are satisfied with the fit, apply wood glue to the back of the molding and press it firmly against the bottom of the cabinet. This will help to secure the molding in place before nailing it down.Step 3: Apply Wood Glue

Installing Light Rail Molding on Kitchen Cabinets: Tips and Tricks

Using a nail gun, carefully nail the molding into place, making sure to keep the corners aligned. Be careful not to nail too close to the edge, as it may cause the molding to split.Step 4: Secure with a Nail Gun

Light Rail Molding Installation: A Beginner's Guide


Repeat the process for the remaining cabinets, making sure to measure and cut each piece of molding to fit accordingly. Take your time and be patient, as this part can be a bit time-consuming.Step 5: Repeat for Remaining Cabinets
Step-by-Step Guide for Installing Light Rail Molding on Kitchen Cabinets
After all the molding is installed, allow the wood glue to dry completely before moving on to the next step. This will ensure that the molding is securely attached and will not come loose over time.Step 6: Allow the Glue to Dry


How to Add Light Rail Molding to Your Kitchen Cabinets


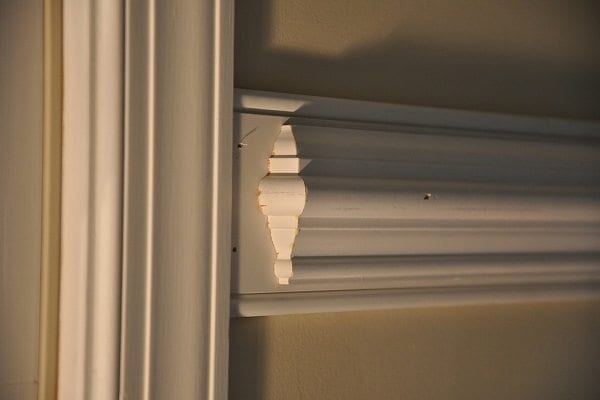
Once the glue is dry, you can paint or stain the molding to match your kitchen cabinets. This will give it a cohesive and polished look.Step 7: Paint or Stain the Molding

Installing Light Rail Molding on Kitchen Cabinets: A Comprehensive Tutorial
Here are a few tips and tricks to keep in mind as you tackle this DIY project: Use a Miter Saw: A miter saw will help you achieve clean and precise cuts, making the installation process much easier. Measure Twice, Cut Once: As the saying goes, always double-check your measurements before making any cuts to avoid costly mistakes. Choose the Right Molding: There are various types of light rail molding available, so make sure to choose one that complements your kitchen cabinets and overall aesthetic. Be Patient: Installing light rail molding can be a bit tedious, so be patient and take your time to ensure a professional-looking finish.Tips and Tricks for Installing Light Rail Molding on Kitchen Cabinets
Light Rail Molding Installation Made Easy: A Complete Guide


Choosing the Right Light Rail Molding for Your Kitchen Cabinets

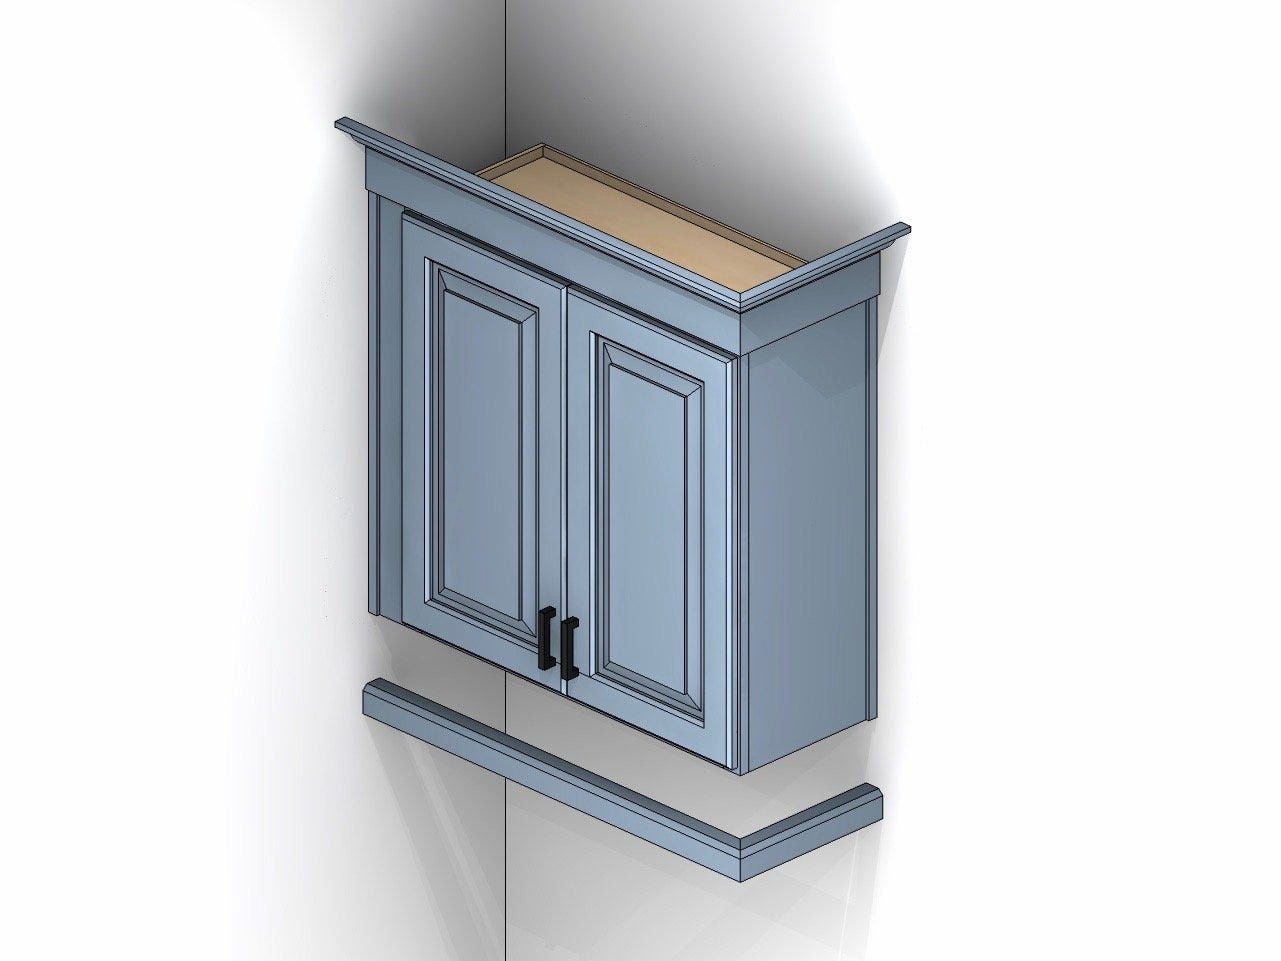
Why Light Rail Molding is Important
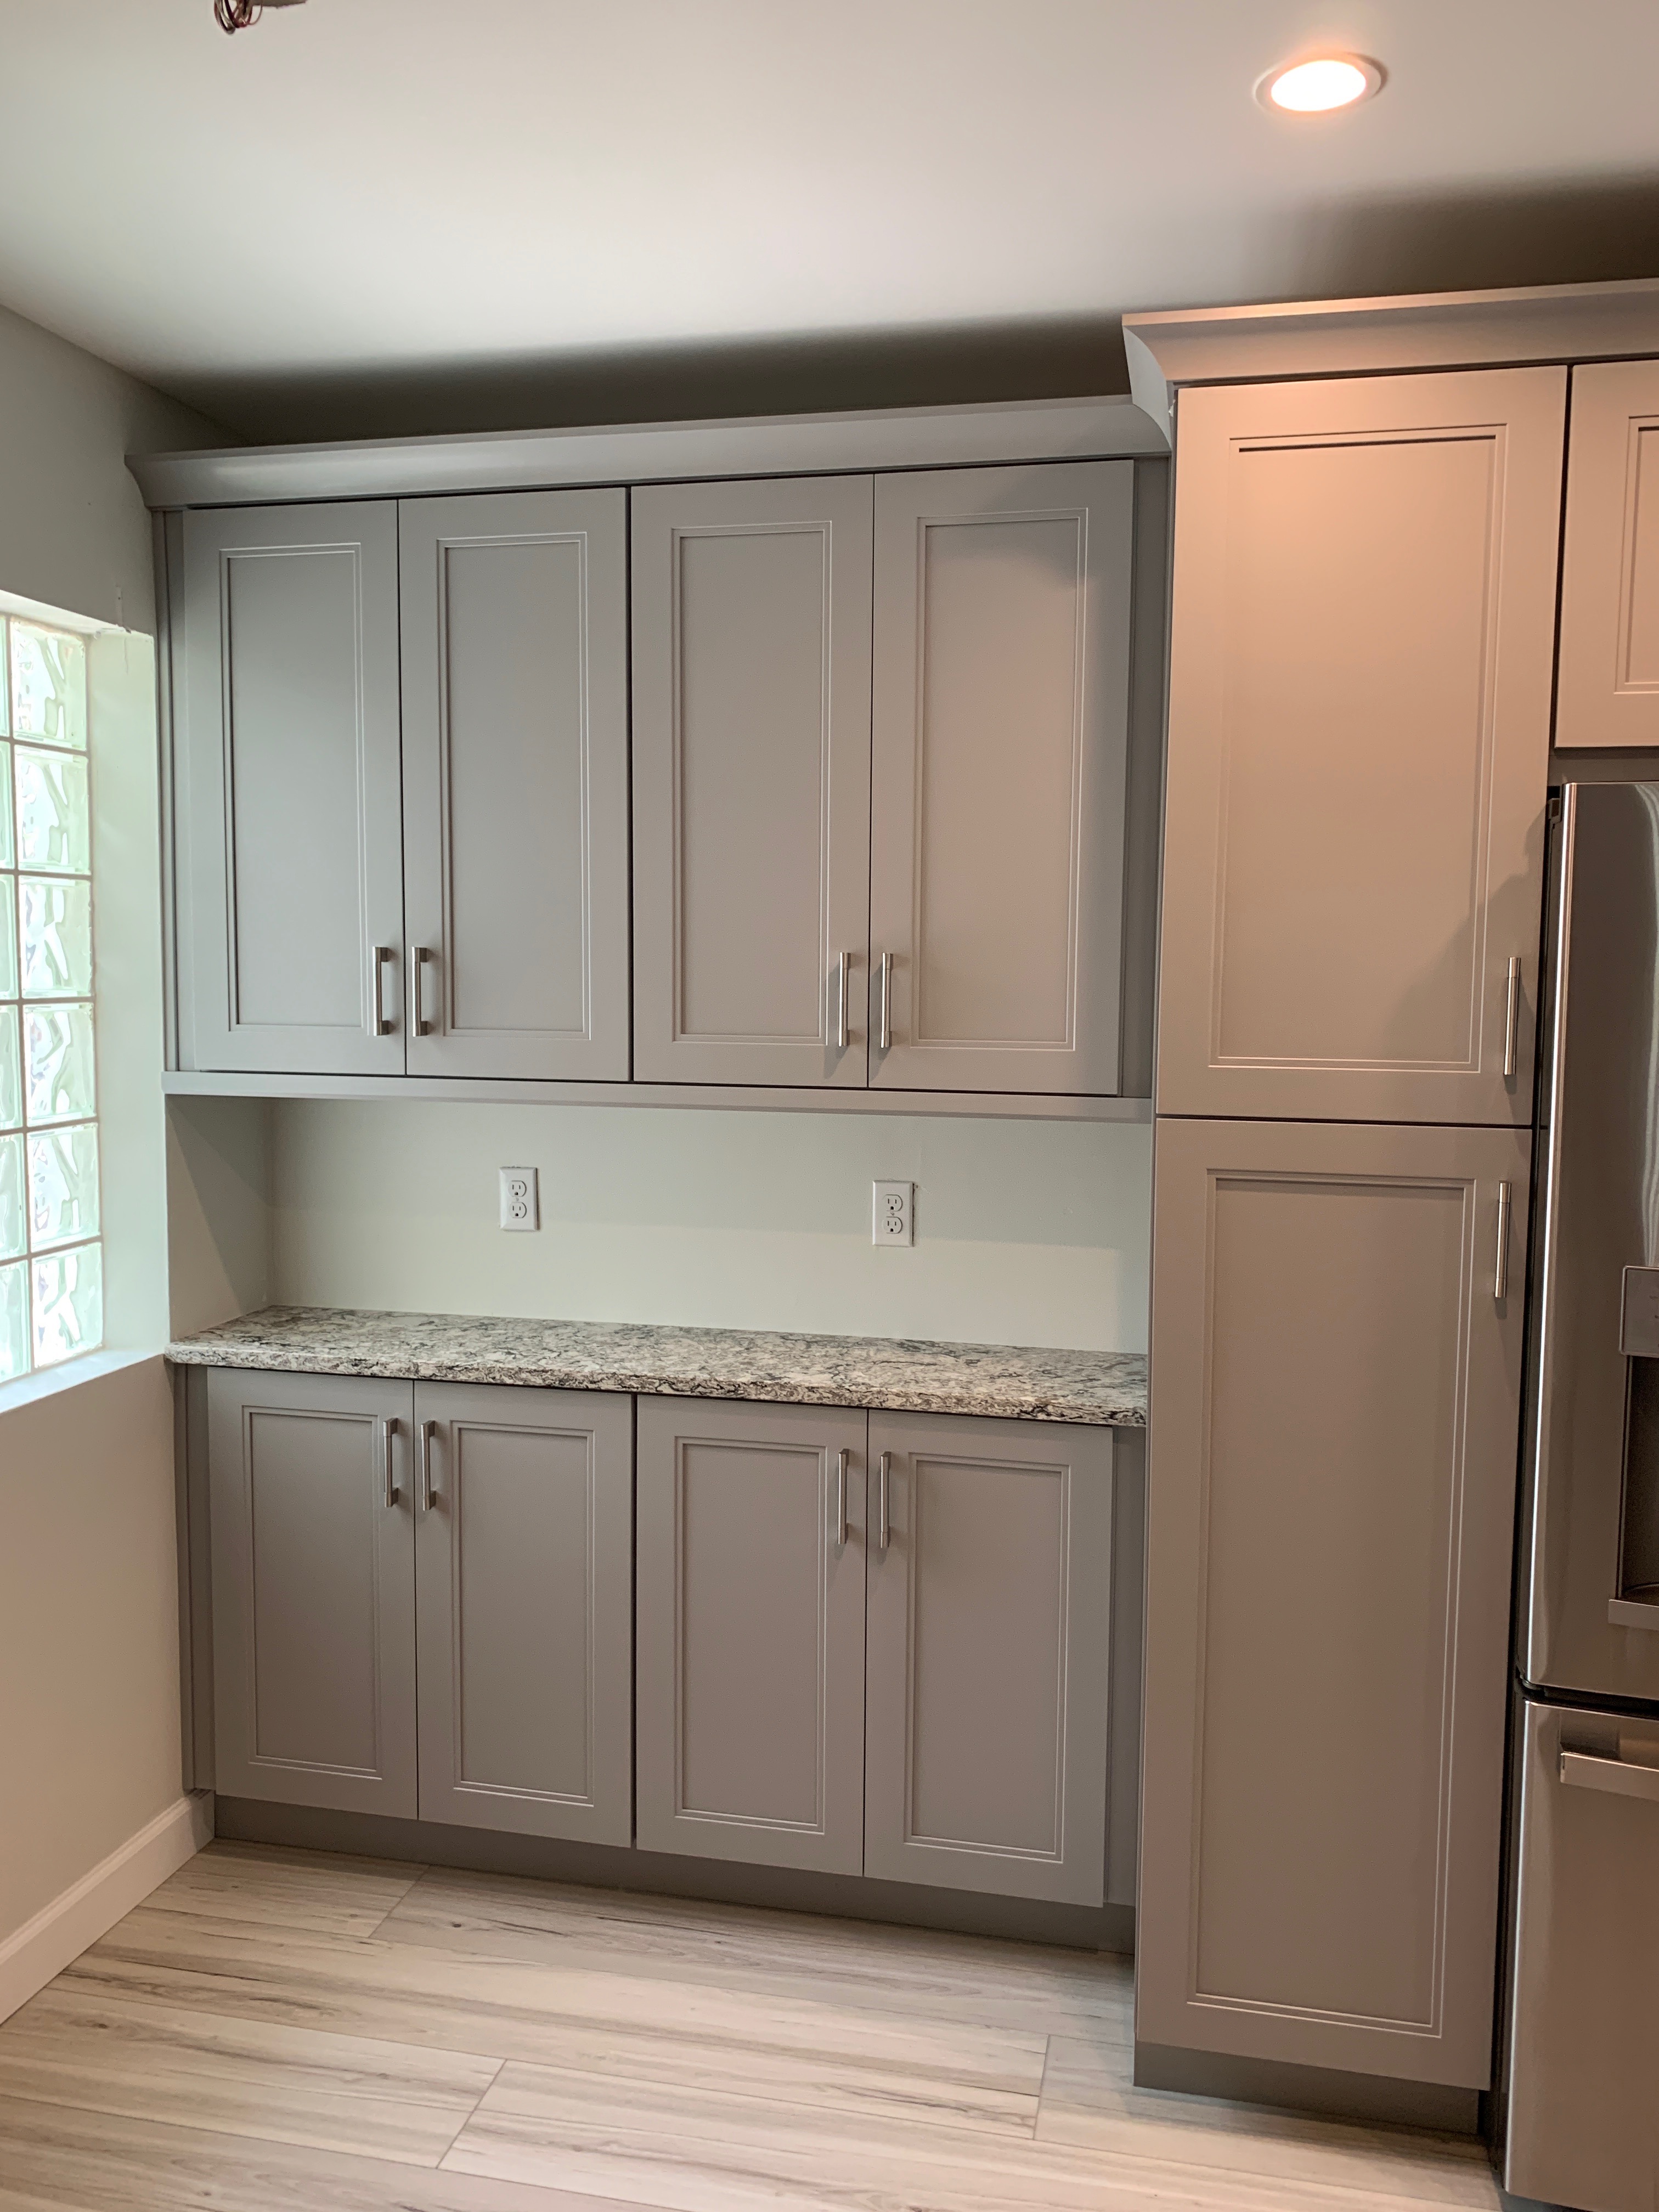
 When it comes to designing your kitchen, every detail counts. From the color of the cabinets to the type of countertop, each decision can impact the overall look and feel of the room. One often overlooked element is the light rail molding on kitchen cabinets. This small strip of molding not only adds a finishing touch to your cabinets but also has practical benefits.
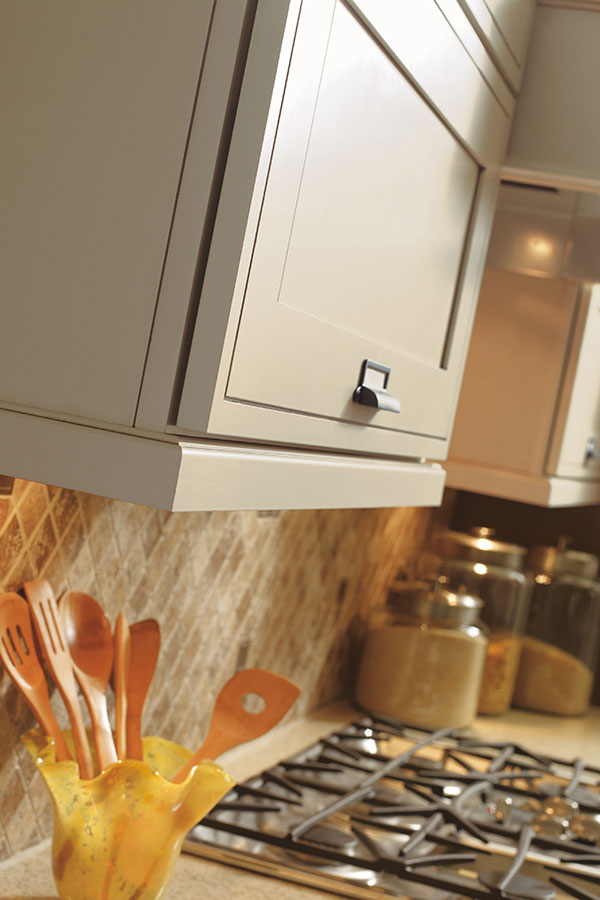
Light rail molding helps to prevent dust and debris from collecting on top of your cabinets and also creates a seamless transition between the cabinets and the wall.
When it comes to designing your kitchen, every detail counts. From the color of the cabinets to the type of countertop, each decision can impact the overall look and feel of the room. One often overlooked element is the light rail molding on kitchen cabinets. This small strip of molding not only adds a finishing touch to your cabinets but also has practical benefits.
Light rail molding helps to prevent dust and debris from collecting on top of your cabinets and also creates a seamless transition between the cabinets and the wall.
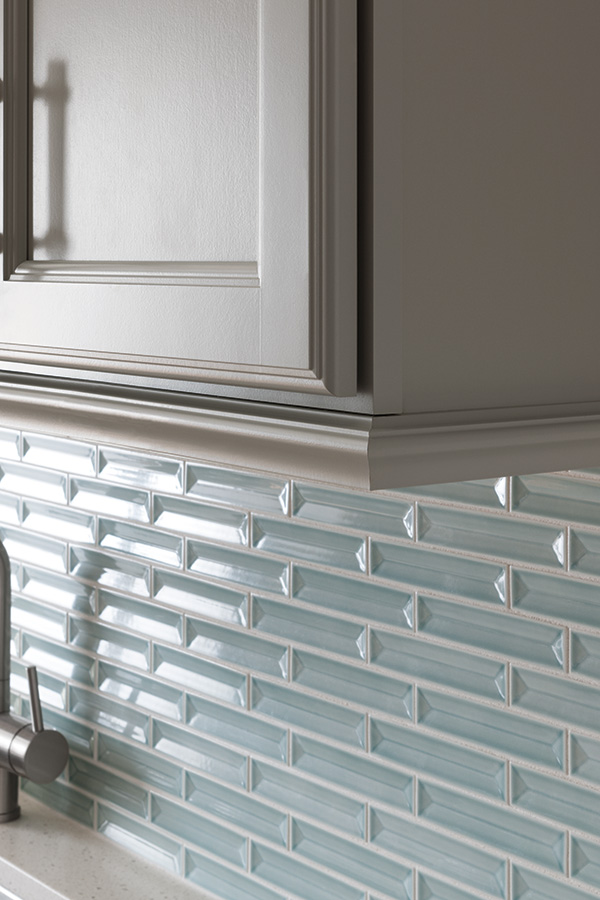
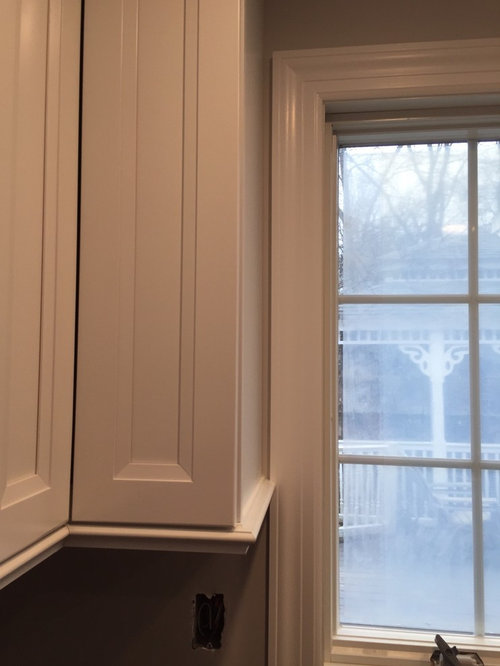
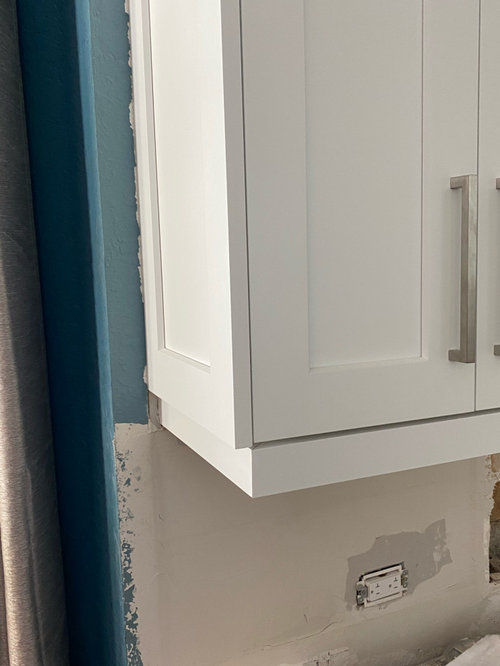
Types of Light Rail Molding
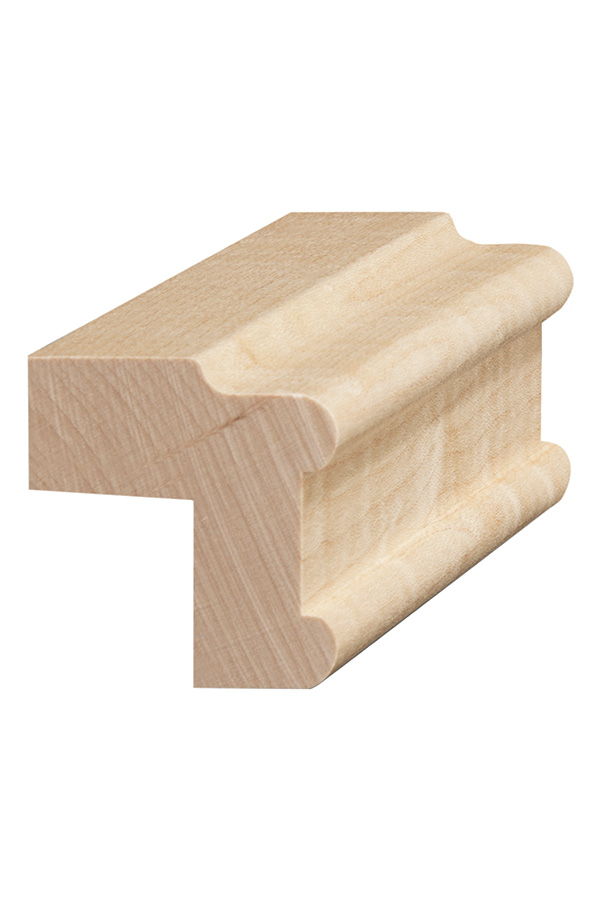
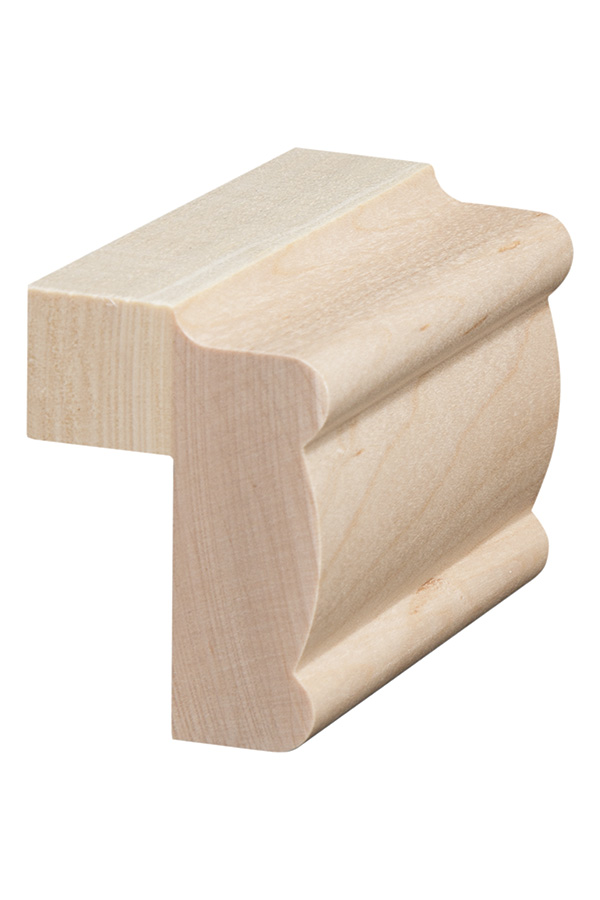
 There are several different types of light rail molding to choose from, each with its own unique style and function.
When selecting the right light rail molding for your kitchen cabinets, consider the overall design of your kitchen and the style of your cabinets.
For a modern and sleek look, consider a flat light rail molding. This type of molding sits flush against the bottom of the cabinets and creates a clean, streamlined look. For a more traditional and decorative style, opt for a curved or beaded light rail molding. These add a touch of elegance and can be a great way to incorporate a pop of color or texture into your kitchen design.
There are several different types of light rail molding to choose from, each with its own unique style and function.
When selecting the right light rail molding for your kitchen cabinets, consider the overall design of your kitchen and the style of your cabinets.
For a modern and sleek look, consider a flat light rail molding. This type of molding sits flush against the bottom of the cabinets and creates a clean, streamlined look. For a more traditional and decorative style, opt for a curved or beaded light rail molding. These add a touch of elegance and can be a great way to incorporate a pop of color or texture into your kitchen design.
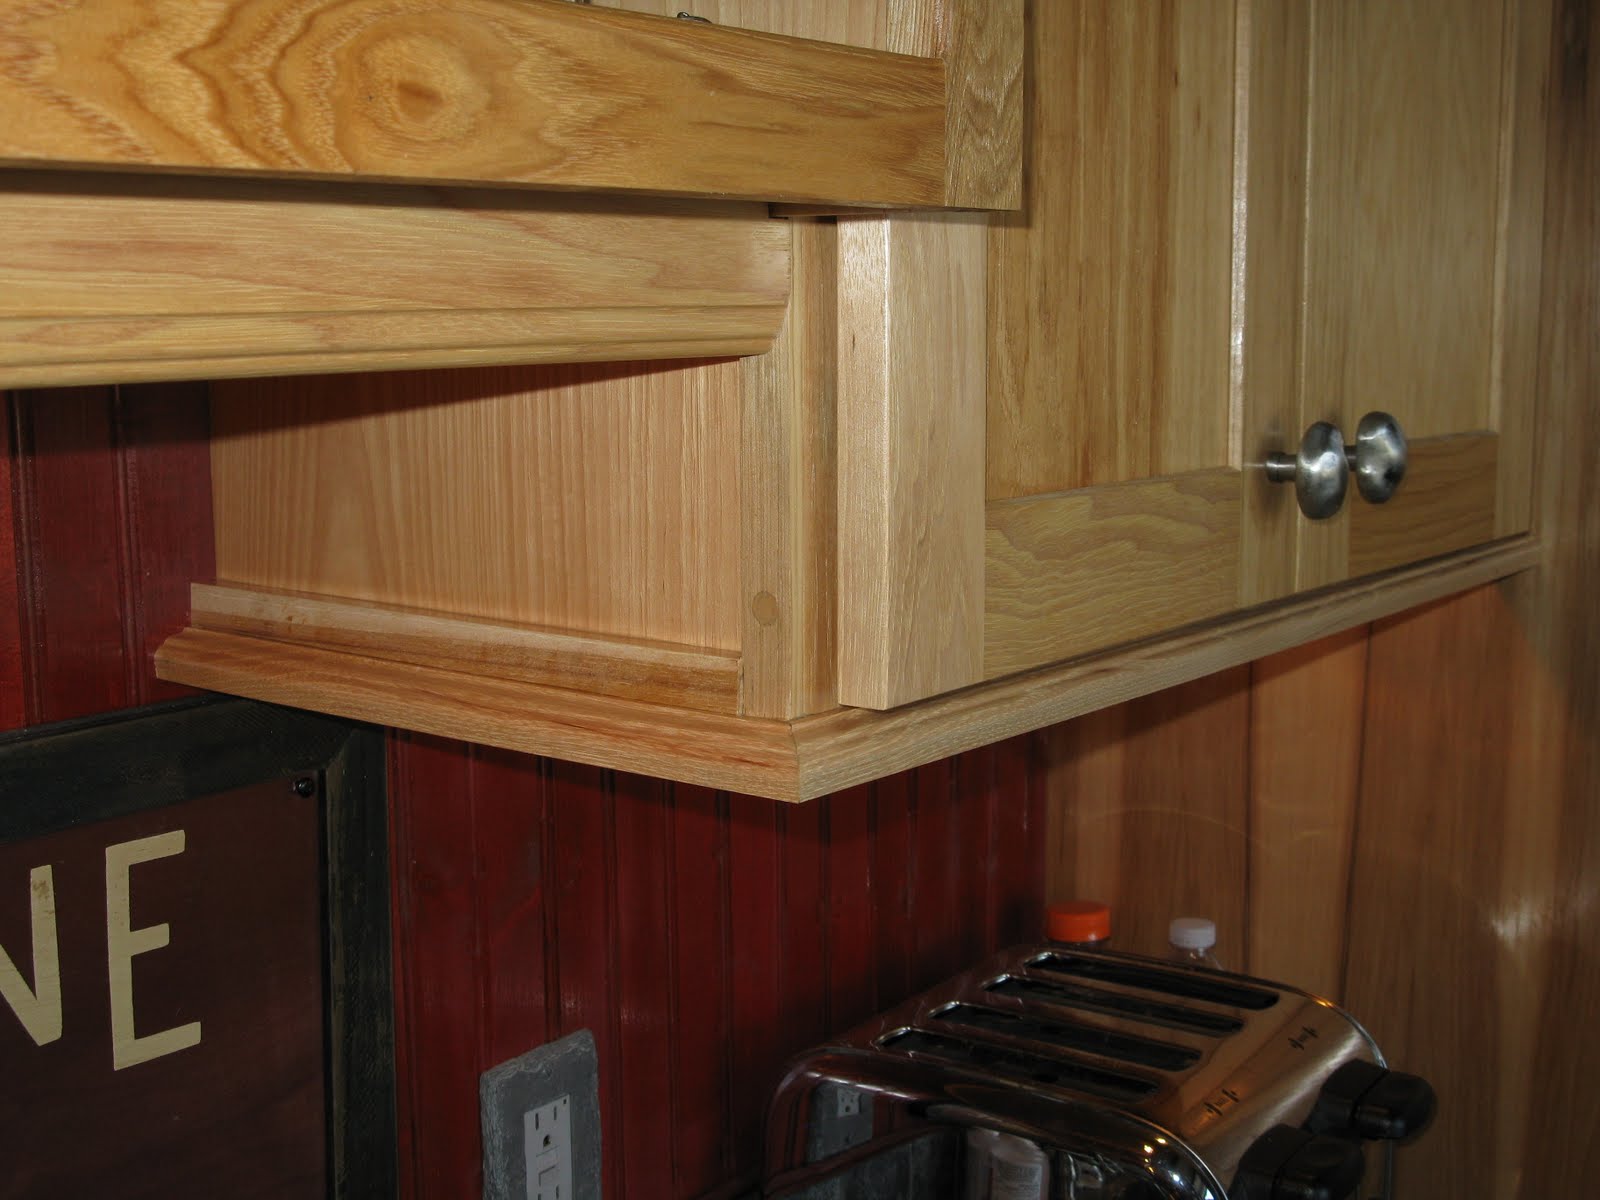
Installation Process
 Now that you have chosen the perfect light rail molding for your kitchen cabinets, it's time to install it.
Installing light rail molding may seem like a daunting task, but with the right tools and techniques, it can be a simple and straightforward process.
Start by measuring the length of your cabinets and cutting the molding to fit. Next, use a level to ensure that the molding is straight and mark where it will be attached to the cabinet. Then, using a nail gun or adhesive, attach the molding to the bottom of the cabinet.
Be sure to take your time and make adjustments as needed to ensure a perfect fit.
Now that you have chosen the perfect light rail molding for your kitchen cabinets, it's time to install it.
Installing light rail molding may seem like a daunting task, but with the right tools and techniques, it can be a simple and straightforward process.
Start by measuring the length of your cabinets and cutting the molding to fit. Next, use a level to ensure that the molding is straight and mark where it will be attached to the cabinet. Then, using a nail gun or adhesive, attach the molding to the bottom of the cabinet.
Be sure to take your time and make adjustments as needed to ensure a perfect fit.
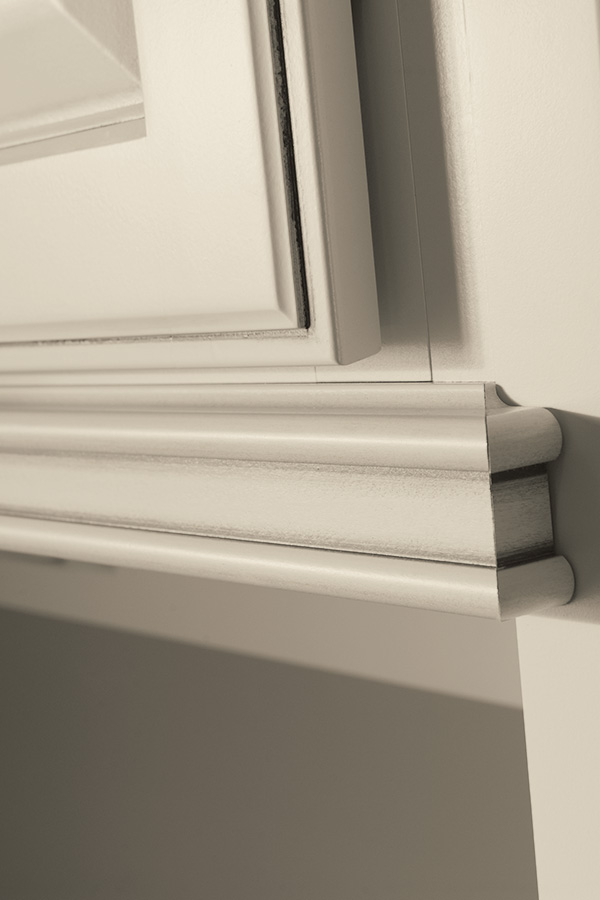
Final Touches
 Once your light rail molding is installed, it's time to add the finishing touches.
Consider painting or staining the molding to match your cabinets for a cohesive look.
You can also add decorative elements, such as rope or trim, to give your kitchen cabinets a unique and personalized touch.
Don't forget to regularly clean and dust your light rail molding to keep it looking like new and maintain its functionality.
Once your light rail molding is installed, it's time to add the finishing touches.
Consider painting or staining the molding to match your cabinets for a cohesive look.
You can also add decorative elements, such as rope or trim, to give your kitchen cabinets a unique and personalized touch.
Don't forget to regularly clean and dust your light rail molding to keep it looking like new and maintain its functionality.
In Conclusion
 Light rail molding is an important and often overlooked element in kitchen design.
With the right type of molding and proper installation, you can elevate the look of your kitchen cabinets and add practical benefits. Take the time to select the perfect light rail molding for your kitchen and follow the installation steps carefully for a seamless and professional finish. Your kitchen will thank you for it.
Light rail molding is an important and often overlooked element in kitchen design.
With the right type of molding and proper installation, you can elevate the look of your kitchen cabinets and add practical benefits. Take the time to select the perfect light rail molding for your kitchen and follow the installation steps carefully for a seamless and professional finish. Your kitchen will thank you for it.