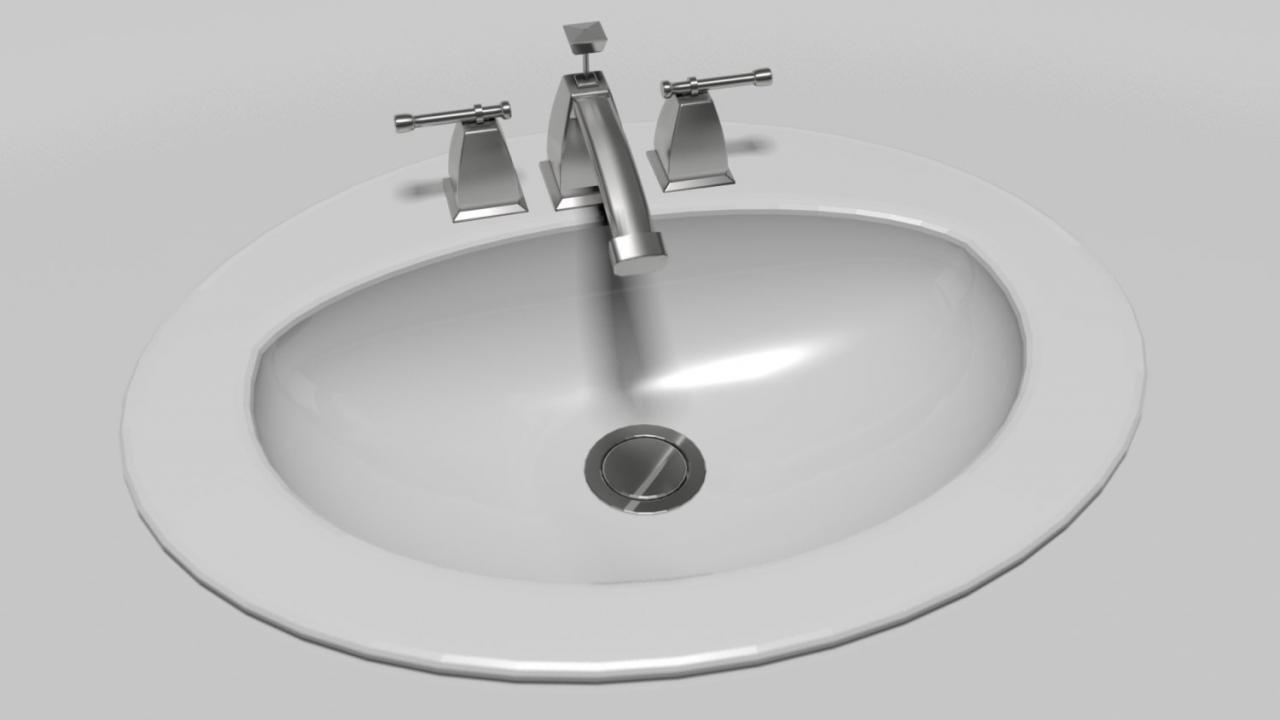
How to Install a Moen Bathroom Sink Stopper
If you're tired of dealing with a leaky or broken bathroom sink stopper, it's time to replace it with a new one. And what better brand to trust for this task than Moen, a company known for its quality and durability? Installing a Moen bathroom sink stopper may seem daunting, but with the right tools and instructions, it can be a simple and satisfying DIY project. Here's a step-by-step guide on how to install a Moen bathroom sink stopper.


How to Install a Moen Bathroom Sink Stopper


Step-by-Step Guide for Installing a Moen Bathroom Sink Stopper
Before you begin, make sure you have all the necessary tools and materials, including a Moen sink stopper kit, a screwdriver, pliers, and plumber's putty. Once you have everything ready, follow these steps:

Step-by-Step Guide for Installing a Moen Bathroom Sink Stopper


Moen Bathroom Sink Stopper Installation Instructions
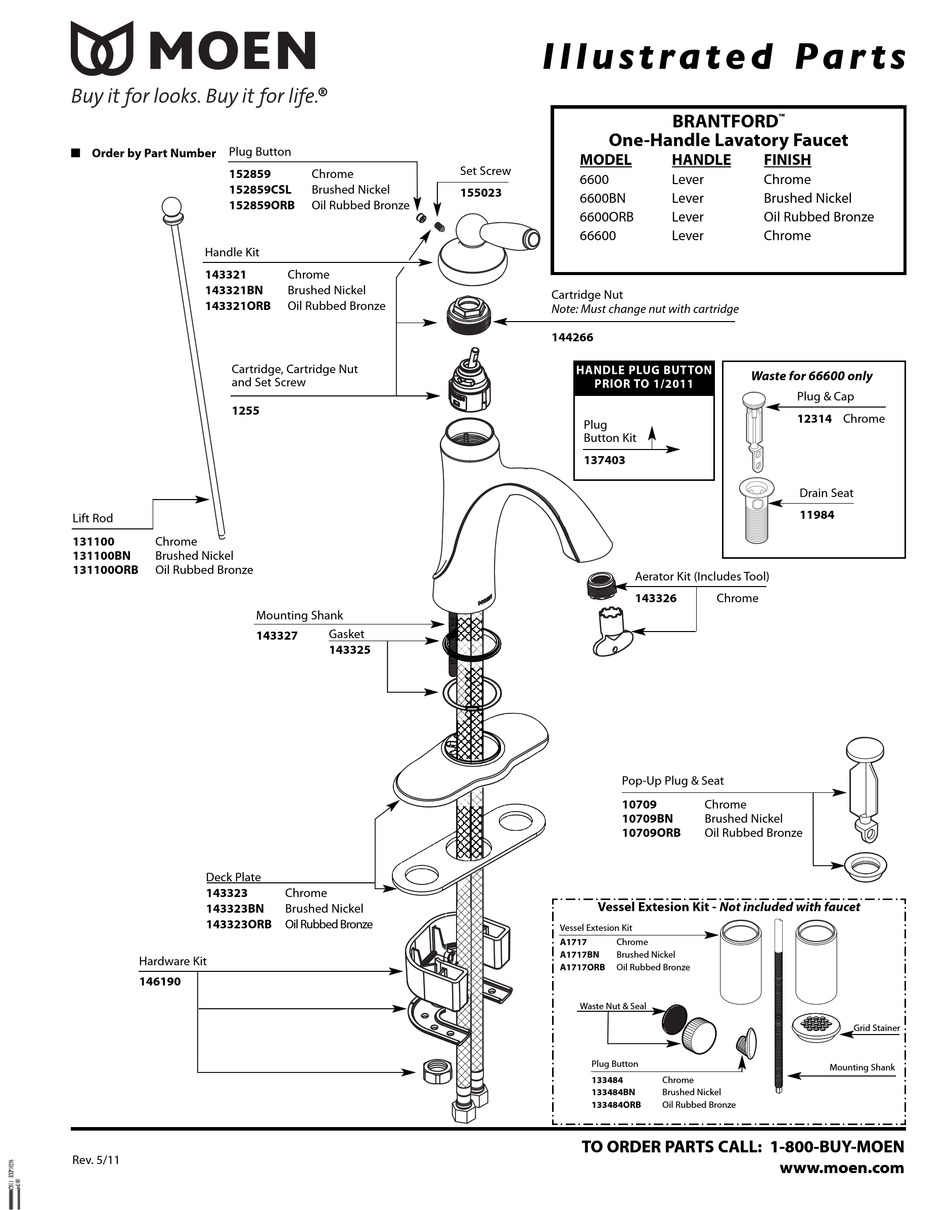
For a visual guide, you can refer to Moen's installation instructions that come with the sink stopper kit. These instructions provide detailed diagrams and steps to help you install the stopper correctly. Make sure to read and follow them carefully to avoid any mistakes.

Moen Bathroom Sink Stopper Installation Instructions


DIY: Installing a Moen Bathroom Sink Stopper
Installing a Moen bathroom sink stopper doesn't have to be a daunting task that requires professional help. With the right instructions and tools, you can easily do it yourself and save money in the process. Plus, the satisfaction of completing a DIY project is always a bonus!


DIY: Installing a Moen Bathroom Sink Stopper


Quick and Easy Guide to Installing a Moen Bathroom Sink Stopper
With Moen's user-friendly design and clear instructions, installing a bathroom sink stopper can be a quick and easy process. Just make sure to have all the necessary tools and follow the steps carefully, and you'll have a new stopper installed in no time.

Quick and Easy Guide to Installing a Moen Bathroom Sink Stopper


Installing a Moen Bathroom Sink Stopper: Tips and Tricks
Here are some tips and tricks to keep in mind while installing a Moen bathroom sink stopper:

Installing a Moen Bathroom Sink Stopper: Tips and Tricks


Moen Bathroom Sink Stopper Installation: What You Need to Know
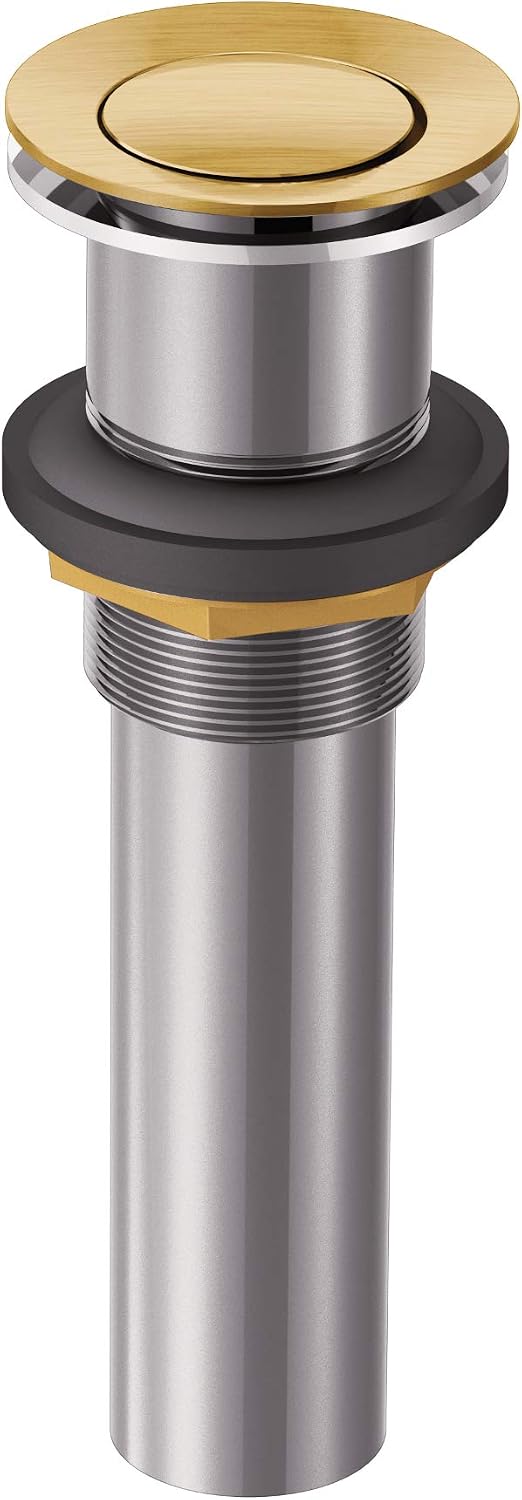
Moen bathroom sink stoppers come in different styles, such as push-button, lift-and-turn, and pop-up. Before purchasing a stopper, make sure to check your sink's style and buy the appropriate one. Also, keep in mind that Moen stoppers are compatible with Moen sinks only.

Moen Bathroom Sink Stopper Installation: What You Need to Know


Step-by-Step Tutorial for Installing a Moen Bathroom Sink Stopper
To make the installation process even easier, here's a step-by-step tutorial for installing a Moen bathroom sink stopper:


Step-by-Step Tutorial for Installing a Moen Bathroom Sink Stopper

How to Replace and Install a Moen Bathroom Sink Stopper
If you're looking to replace your old Moen bathroom sink stopper or install a new one, follow the steps mentioned above for a hassle-free process. With Moen's high-quality products, you can be sure of a long-lasting and functional bathroom sink stopper.


How to Replace and Install a Moen Bathroom Sink Stopper

:max_bytes(150000):strip_icc()/bathroom-sink-drain-installation-2718843-01-4955fe1f576b447a91abe51c126d220b.jpg?strip=all)

Moen Bathroom Sink Stopper Installation: A Comprehensive Guide
We hope this comprehensive guide has helped you understand the process of installing a Moen bathroom sink stopper. With the right tools and instructions, you can easily complete this DIY project and have a functional and stylish sink stopper in no time. Follow the tips and tricks mentioned above, and you'll have a successful installation without any hassle.

Moen Bathroom Sink Stopper Installation: A Comprehensive Guide
How to Install a Moen Bathroom Sink Stopper for a Modern and Efficient Bathroom Design
:max_bytes(150000):strip_icc()/bathroom-sink-drain-installation-2718843-07-2b728cbd5c994dc39179346f51bb6421.jpg)
Introduction
 When it comes to designing your house, the bathroom is often overlooked. However, a well-designed bathroom can greatly enhance the overall look and functionality of your home. One important element of a bathroom design is the sink stopper. Many homeowners opt for a Moen bathroom sink stopper due to its modern and efficient design. If you're looking to upgrade your bathroom with a Moen sink stopper, then you've come to the right place. In this article, we will guide you through the step-by-step process of installing a Moen bathroom sink stopper for a sleek and practical bathroom design.
Gather the Necessary Tools
 Before you begin the installation process, it's essential to gather all the necessary tools. This will save you time and frustration in the long run. The tools you will need include a flathead screwdriver, a pair of pliers, an adjustable wrench, and a tube of silicone sealant.
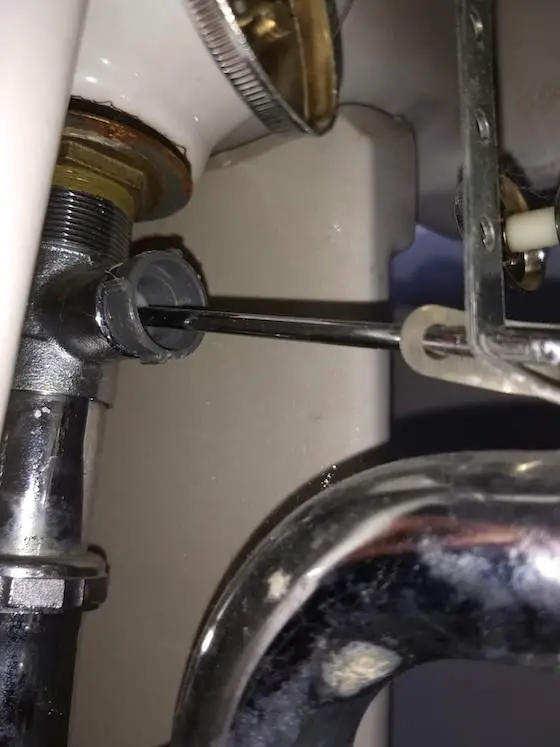
Remove the Old Stopper
 The first step in installing a Moen bathroom sink stopper is to remove the old stopper. This can be done by unscrewing the retaining nut at the back of the drain pipe with a pair of pliers. Once the nut is removed, you can pull out the old stopper and its attached linkage.
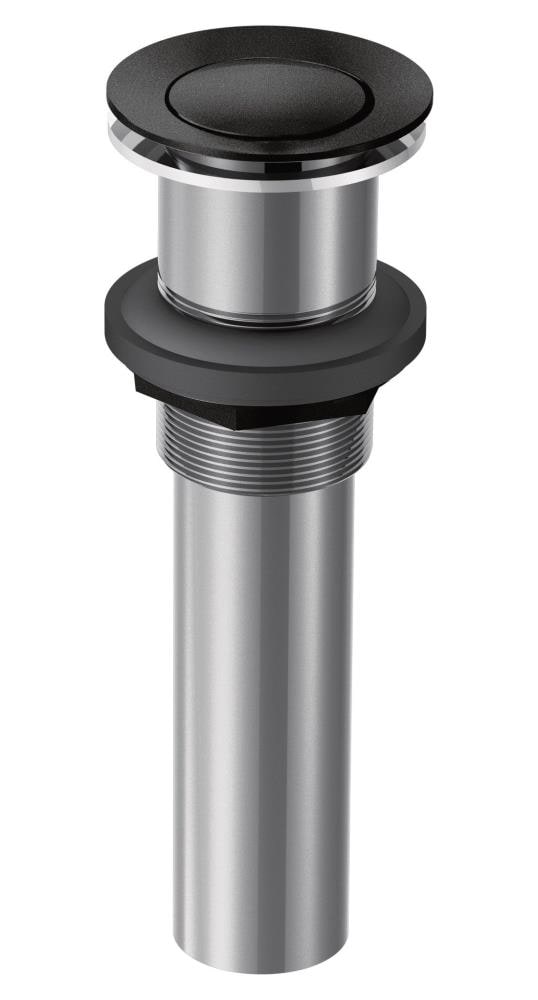
Install the New Stopper
 Now it's time to install the new Moen bathroom sink stopper. Apply a thin layer of silicone sealant around the rim of the drain hole. Next, insert the new stopper into the drain hole and push it down firmly. Then, attach the new linkage to the stopper by inserting the horizontal rod into the hole at the back of the stopper.
Adjust the Stopper Height
 To ensure proper functioning of the stopper, you may need to adjust its height. This can be done by loosening the adjustment nut on the horizontal rod and moving it up or down until the stopper sits at the desired height. Once you've achieved the desired height, tighten the adjustment nut.
Test the Stopper
 Before completing the installation process, it's important to test the stopper to make sure it's working correctly. Fill the sink with water and push the stopper down to see if it holds the water. If it doesn't, you may need to adjust the linkage or the height of the stopper.
Conclusion
 Installing a Moen bathroom sink stopper is a simple and effective way to upgrade your bathroom design. With just a few tools and easy steps, you can achieve a modern and efficient sink stopper that will enhance the overall look and functionality of your bathroom. So, why wait? Follow these steps and enjoy your newly installed Moen bathroom sink stopper today!