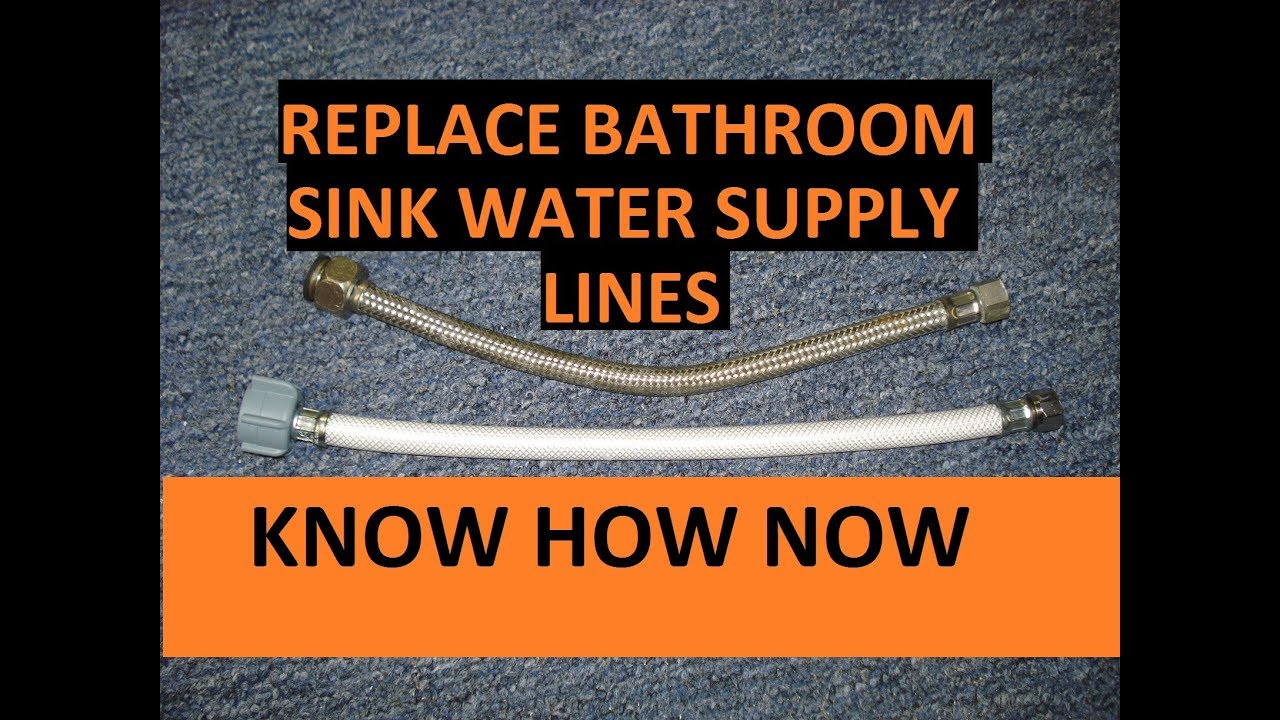
How to Replace Water Lines on Bathroom Sink
Replacing the water lines on your bathroom sink may seem like a daunting task, but with the right tools and knowledge, it can be a simple DIY project. Whether you're dealing with a leaky faucet or just want to upgrade your plumbing, replacing the water lines on your bathroom sink can improve its functionality and appearance. Here's a step-by-step guide on how to replace water lines on a bathroom sink.


How to Replace Water Lines on Bathroom Sink


:max_bytes(150000):strip_icc()/water_lines-56a73c363df78cf77293884c.jpg)


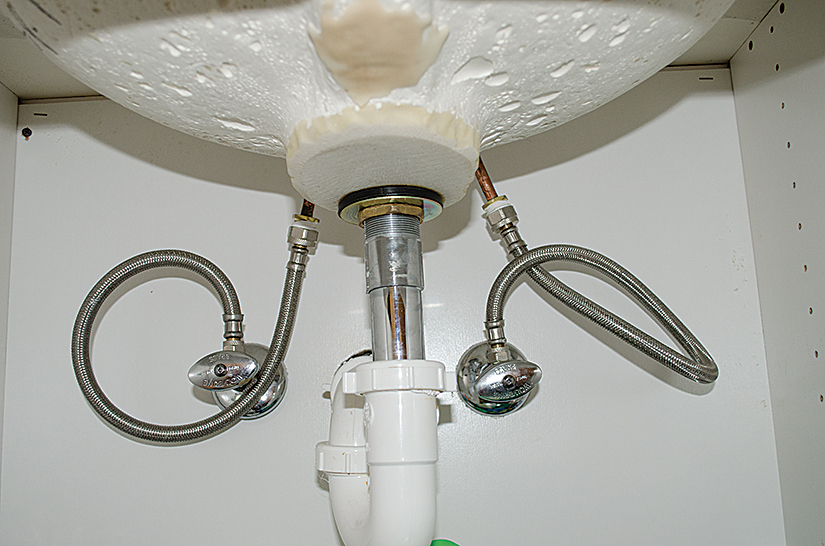
Replacing Water Lines on Bathroom Sink
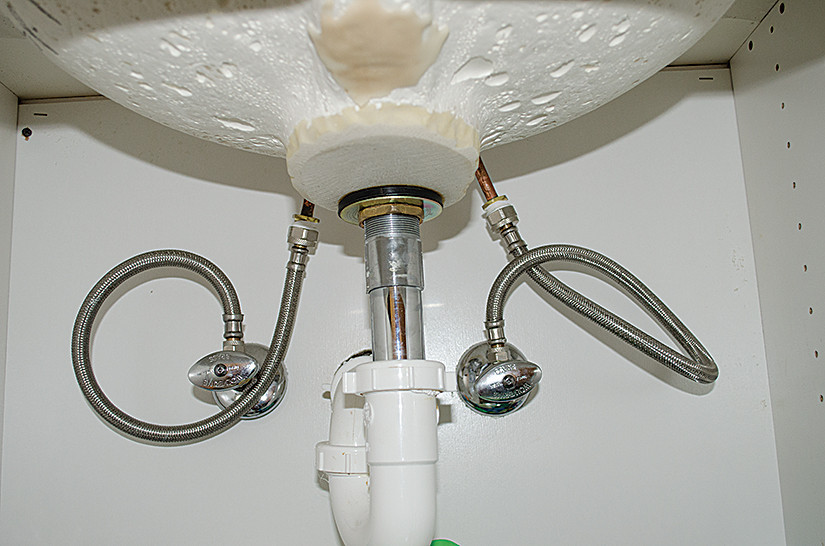
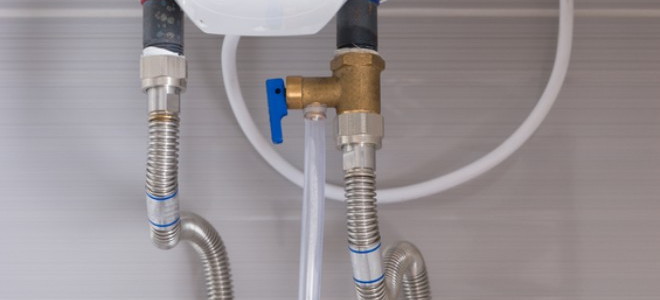
Before you begin, it's important to determine what type of water lines your sink has. Most modern sinks have flexible, braided water lines, while older sinks may have rigid copper pipes. The process for replacing these two types of water lines may differ, so it's important to identify which type you have before you start.

Replacing Water Lines on Bathroom Sink


DIY Bathroom Sink Water Line Replacement
If you're feeling confident in your DIY skills, replacing the water lines on your bathroom sink can be a simple and cost-effective project. However, be sure to have all the necessary tools and materials before starting the process. You will need an adjustable wrench, pipe cutter, Teflon tape, and new water lines. It's also important to turn off the water supply and drain the pipes before beginning.


DIY Bathroom Sink Water Line Replacement


Step-by-Step Guide for Replacing Water Lines on Bathroom Sink
Step 1: Turn off the water supply and drain the pipes.
Step 2: Remove the old water lines by unscrewing them from the valves and faucet.
Step 3: Cut the new water lines to the appropriate length using a pipe cutter.
Step 4: Wrap Teflon tape around the threads of the new water lines.
Step 5: Connect the new water lines to the valves and faucet, ensuring they are tightly secured.
Step 6: Turn the water supply back on and check for any leaks. If there are any, tighten the connections further.
Step 7: Once everything is secure and there are no leaks, turn on the faucet and check for proper water flow.


Step-by-Step Guide for Replacing Water Lines on Bathroom Sink


Tools Needed for Replacing Water Lines on Bathroom Sink
The tools needed for replacing water lines on a bathroom sink may vary depending on the type of lines you have. However, here are some essential tools that will likely be required:
- Adjustable wrench
- Pipe cutter
- Teflon tape
- New water lines

Tools Needed for Replacing Water Lines on Bathroom Sink


Tips for Replacing Water Lines on Bathroom Sink
Here are some useful tips to keep in mind when replacing water lines on your bathroom sink:
- Turn off the water supply and drain the pipes before starting.
- Take note of the length and type of water lines you need before purchasing.
- Use Teflon tape to ensure a tight seal.
- Check for leaks and test the water flow before finishing the project.


Tips for Replacing Water Lines on Bathroom Sink
Common Mistakes to Avoid When Replacing Water Lines on Bathroom Sink
While replacing water lines on a bathroom sink may seem like a simple task, there are some common mistakes that can easily be avoided:
- Forgetting to turn off the water supply and drain the pipes.
- Not measuring the length of the water lines correctly.
- Not using Teflon tape to secure the connections.
- Over-tightening the connections, which can cause cracks and leaks.


Common Mistakes to Avoid When Replacing Water Lines on Bathroom Sink


Cost of Replacing Water Lines on Bathroom Sink
The cost of replacing water lines on a bathroom sink can vary depending on the type of lines you need and the tools required. On average, the cost can range from $30 to $100 for materials and tools. However, if you decide to hire a professional plumber, the cost can be significantly higher.


Cost of Replacing Water Lines on Bathroom Sink

Professional vs DIY: Replacing Water Lines on Bathroom Sink
If you're unsure about your DIY skills or have a more complex plumbing issue, it may be best to hire a professional plumber to replace the water lines on your bathroom sink. While this may cost more, it can save you time and ensure the job is done correctly.
Professional vs DIY: Replacing Water Lines on Bathroom Sink
Preventative Maintenance for Bathroom Sink Water Lines
To avoid having to replace water lines on your bathroom sink frequently, it's essential to perform regular preventative maintenance. This includes checking for leaks, cleaning the pipes, and replacing any worn or damaged parts. By taking care of your plumbing, you can save yourself time and money in the long run.


Preventative Maintenance for Bathroom Sink Water Lines


Replacing Water Lines on Bathroom Sink: A Step-by-Step Guide

Why You Need to Replace Your Water Lines
 Replacing the water lines on your bathroom sink may seem like a daunting task, but it is an important maintenance task that can prevent costly water damage and ensure proper functioning of your plumbing system. Over time, water lines can become corroded, clogged, or damaged, leading to leaks and decreased water pressure. By replacing them, you can ensure a reliable and efficient water supply for your bathroom.
Tools and Materials You Will Need
 Before beginning the process, it is important to gather all the necessary tools and materials. This will save you time and frustration in the long run. You will need
pliers, a basin wrench, an adjustable wrench, Teflon tape, and new water lines
. It is also a good idea to have a bucket and towels on hand in case of any water spills.
Before beginning the process, it is important to gather all the necessary tools and materials. This will save you time and frustration in the long run. You will need
pliers, a basin wrench, an adjustable wrench, Teflon tape, and new water lines
. It is also a good idea to have a bucket and towels on hand in case of any water spills.
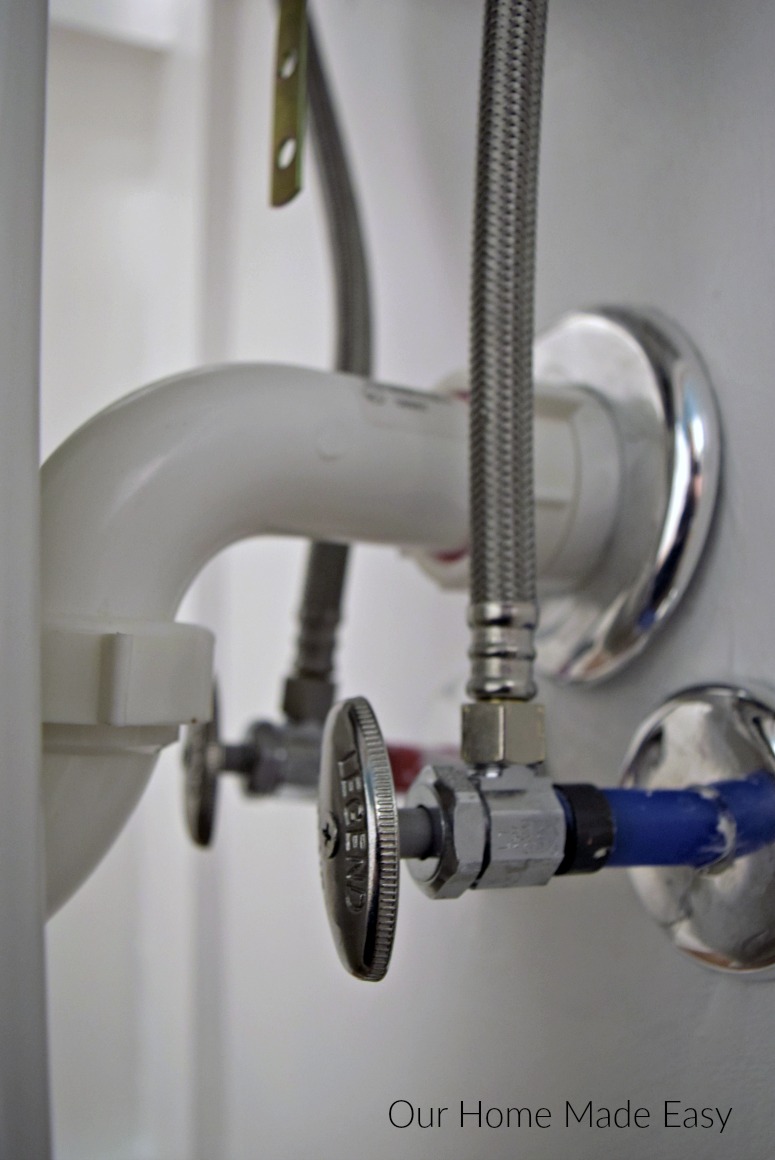
Step 1: Turn Off the Water Supply
 The first and most important step is to turn off the water supply to your bathroom. This can usually be done by turning the shut-off valves located under the sink in a clockwise direction. If your sink does not have shut-off valves, you will need to turn off the main water supply to your house.
Step 2: Remove the Old Water Lines
 Using your pliers, loosen and remove the nuts that connect the water lines to the faucet and shut-off valves. You may need to use an adjustable wrench for harder to reach areas. Once the nuts are removed, carefully pull out the old water lines and discard them.
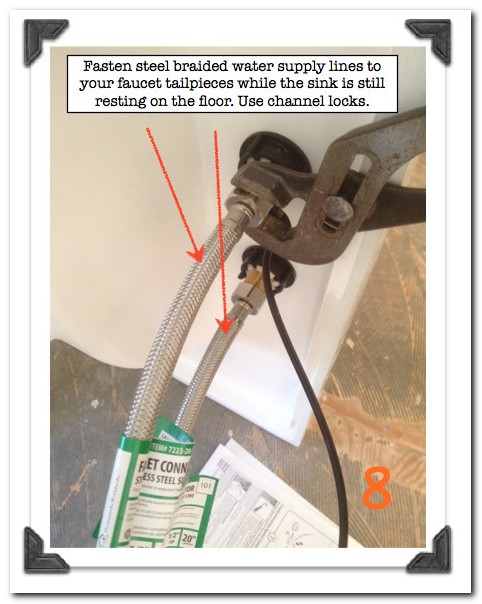
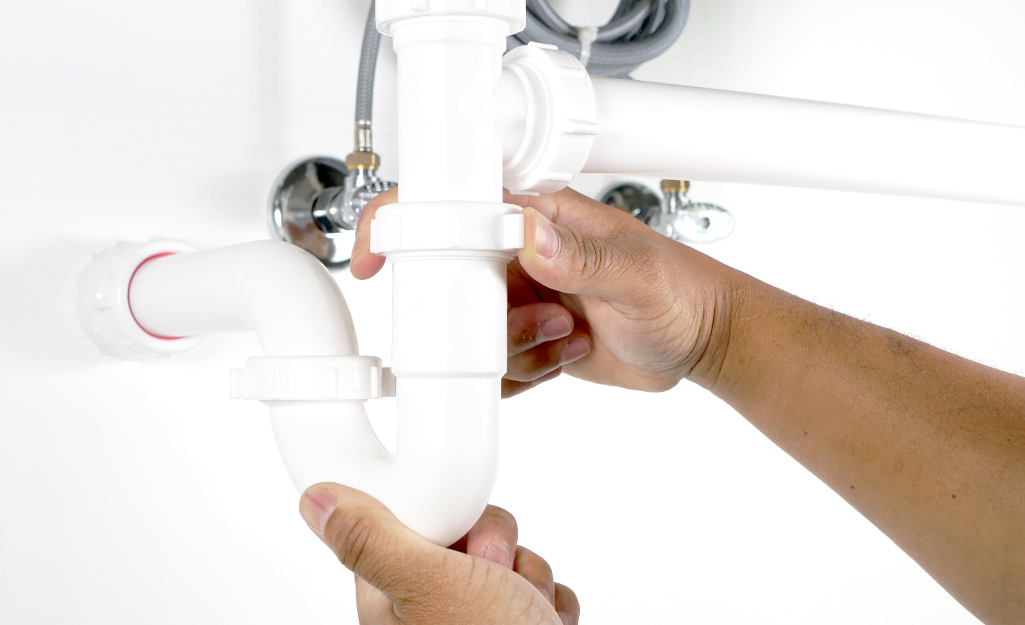
Step 3: Install the New Water Lines
 Using the Teflon tape, wrap the threads of the new water lines to ensure a tight seal. Then, attach one end of the water line to the shut-off valve and the other end to the faucet. Use your pliers and an adjustable wrench to tighten the nuts and ensure a secure connection.
Step 4: Turn On the Water Supply
Step 5: Test the Water Pressure
 With the water supply back on, turn on the faucet and check the water pressure. If it is lower than normal, you may need to clean out the aerator or replace it altogether. This is a good time to also check for any leaks around the faucet and shut-off valves.
Final Thoughts
 Replacing water lines on your bathroom sink may seem like a daunting task, but with the right tools and materials, it can be easily accomplished. By following these steps, you can ensure a reliable and efficient water supply for your bathroom. Regularly checking and replacing water lines can help prevent costly water damage and keep your plumbing system functioning properly.


