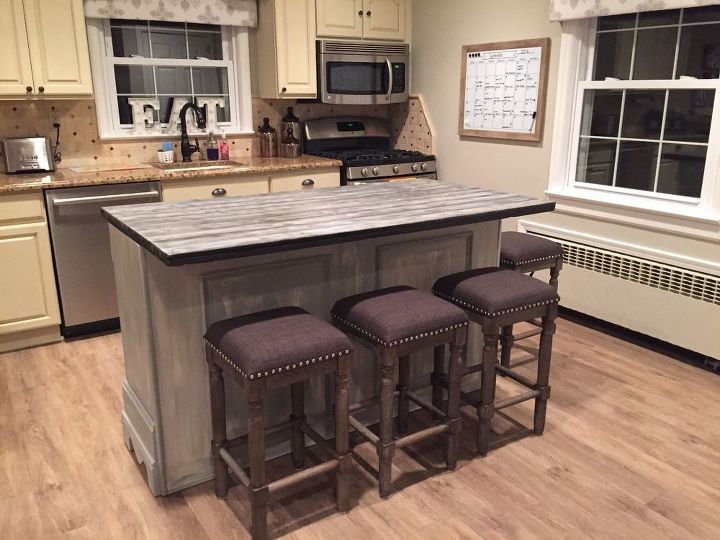
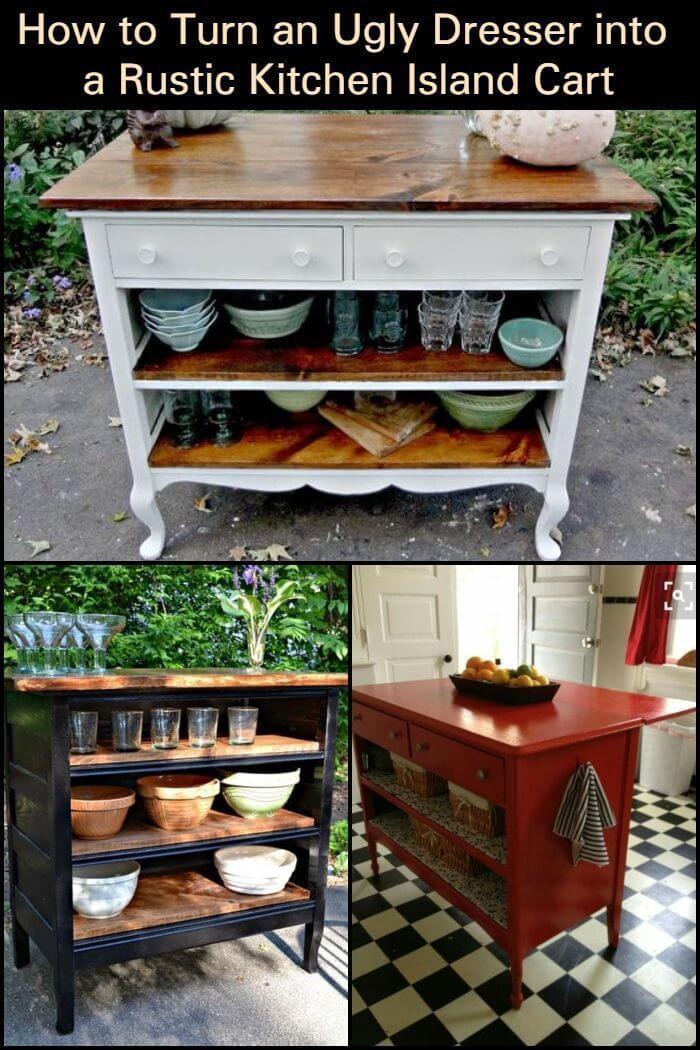
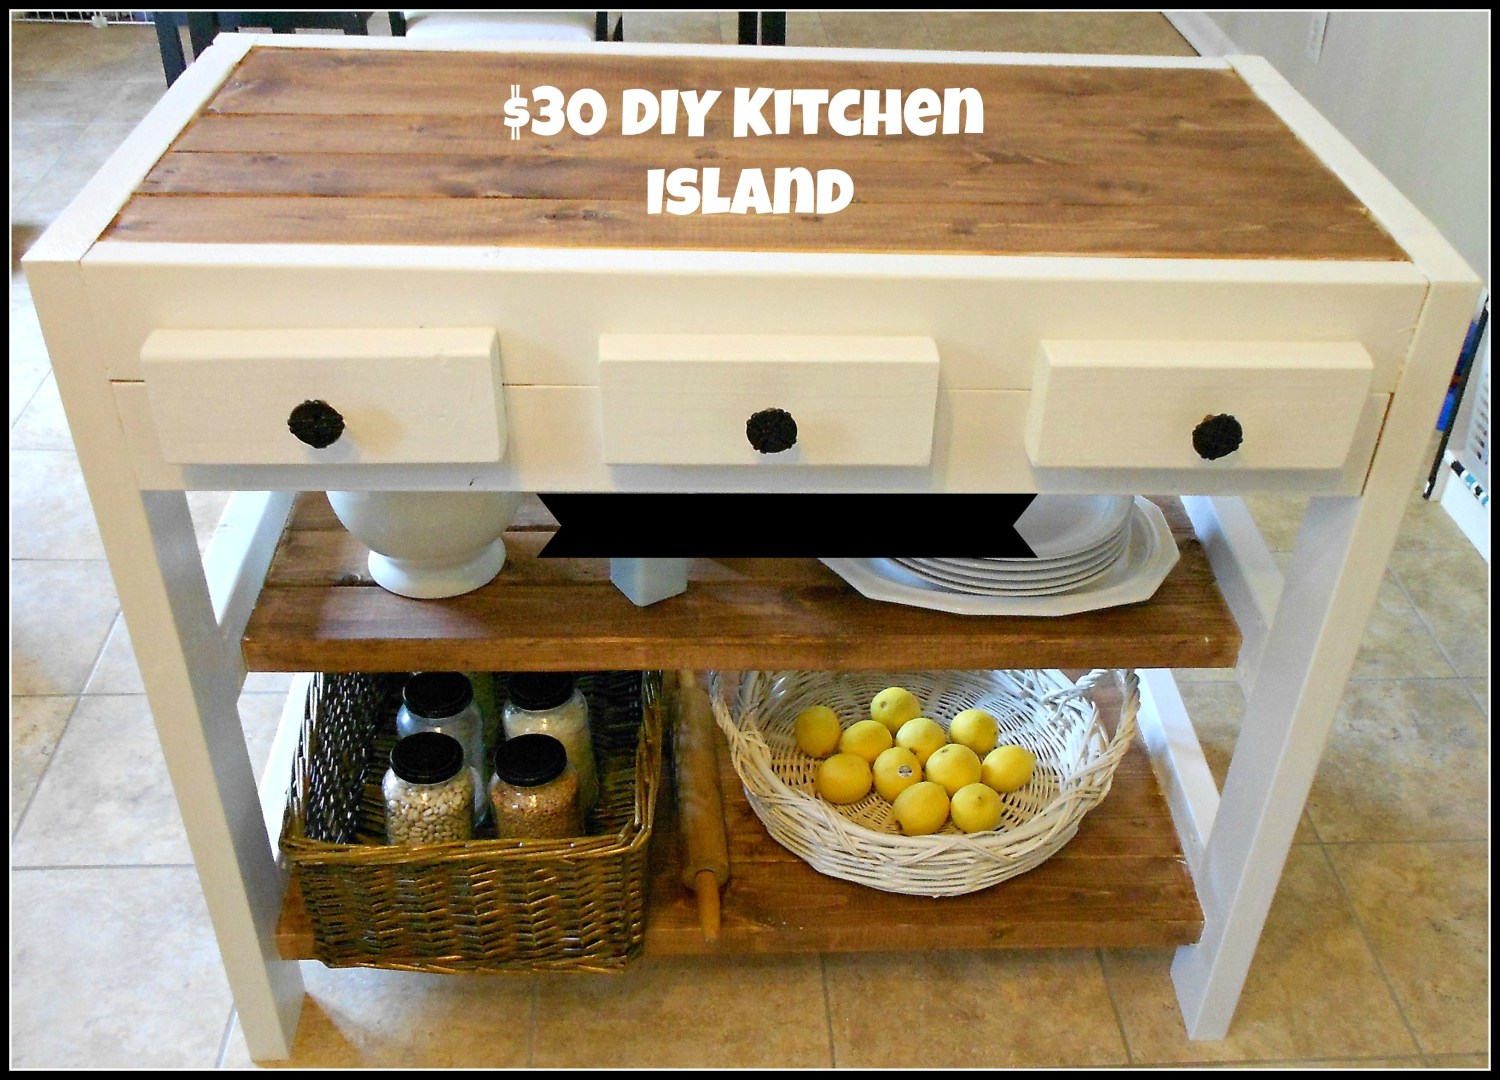
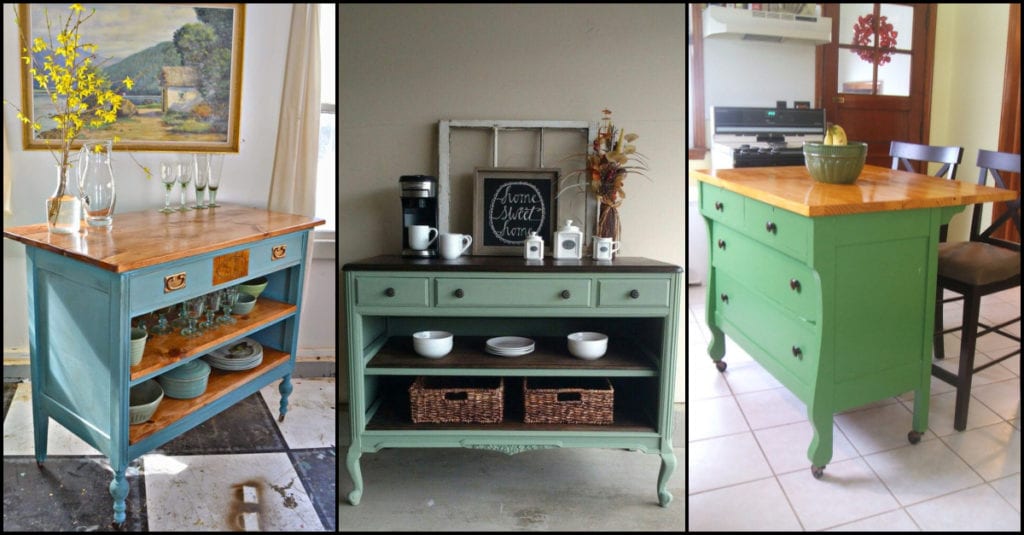
Are you looking for a unique and budget-friendly way to add more counter space and storage to your kitchen? Look no further than your old dresser! With a little DIY know-how and creativity, you can easily transform a dresser into a functional and stylish kitchen island. Here's how to do it: First, you'll want to choose a dresser that is the right size and style for your kitchen. Consider the space you have available and the overall aesthetic of your kitchen. You can use a small dresser for a compact kitchen or a larger one for more storage and counter space. Once you have your dresser, the first step is to remove the drawers and any hardware. Set these aside for later use or for another project. Next, determine the height you want your kitchen island to be and cut down the dresser legs accordingly. You can use a saw or a hand saw for this step. Now it's time to add a countertop to your dresser. You can use a butcher block, granite, or even repurpose an old door for a unique look. Cut the countertop to fit the dimensions of the dresser top and secure it in place with screws or adhesive. Next, you can add shelves or additional storage to your kitchen island by using the empty space where the drawers used to be. You can also add hooks or racks on the sides for hanging kitchen tools or towels. Finally, give your DIY kitchen island a fresh coat of paint or stain to match your kitchen decor. You can also add decorative elements, such as trim or hardware, to give it a more polished look.1. DIY Dresser to Kitchen Island | How to Turn a Dresser into a Kitchen Island


1. DIY Dresser to Kitchen Island


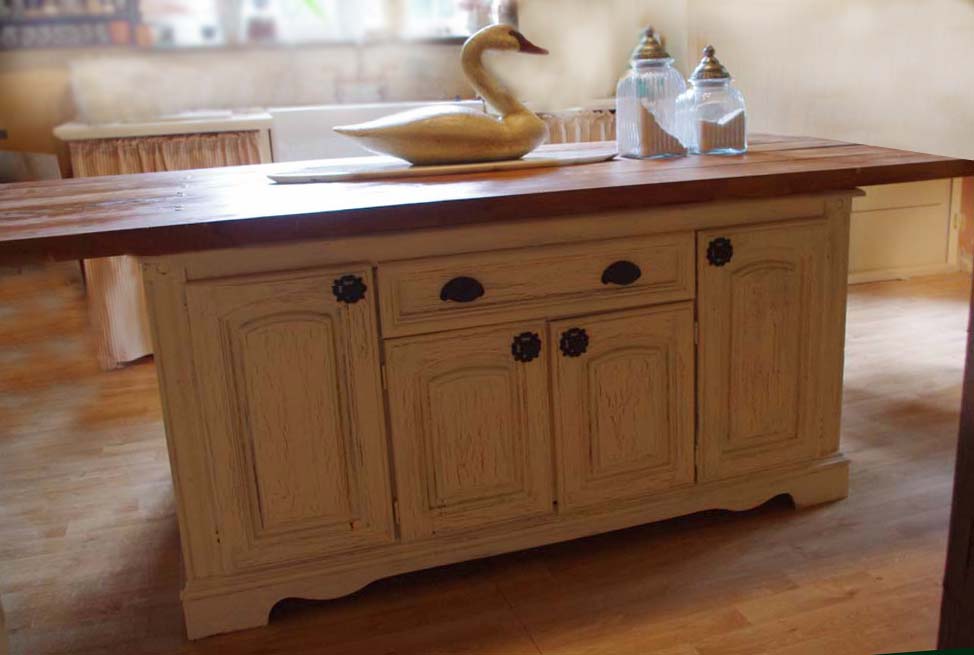
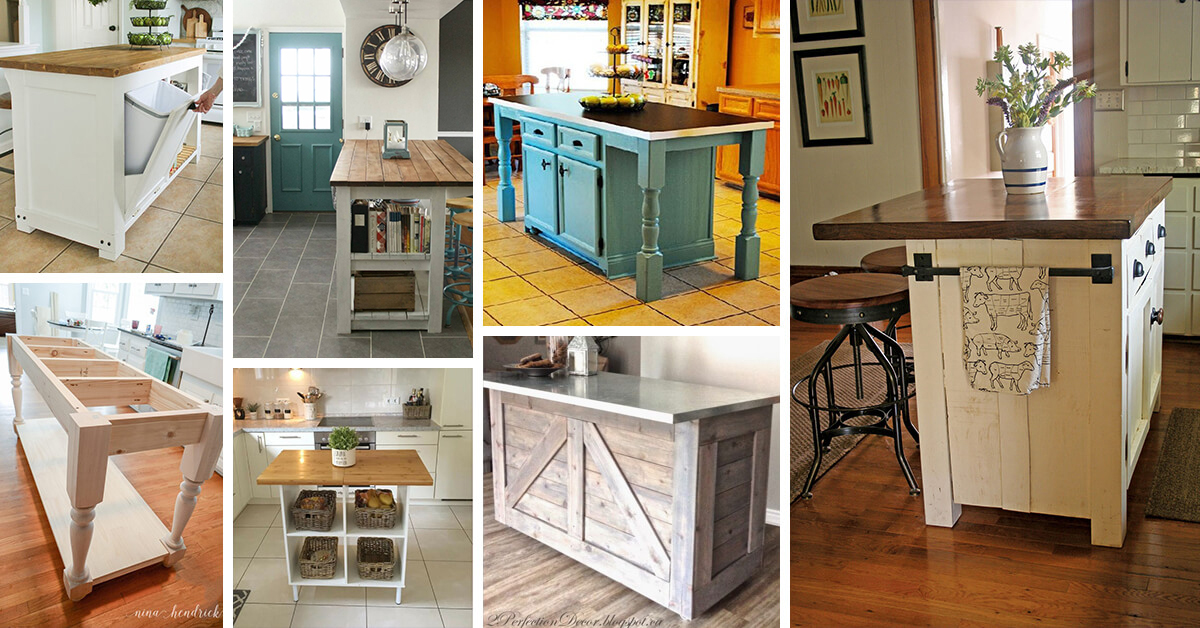
Looking for more inspiration for your dresser to kitchen island transformation? Here are some creative upcycled kitchen island ideas to get your creative juices flowing: 1. Dresser with a Drop-Leaf - If you have a smaller kitchen, consider adding a drop-leaf to your dresser to create a space-saving and versatile kitchen island. You can easily fold down the leaf when not in use to save space. 2. Dresser with Open Shelving - Instead of using the empty space where the drawers used to be for additional storage, you can leave it open and use it as a display shelf for your kitchen decor or cookbooks. 3. Dresser with a Wine Rack - If you love wine, consider repurposing a dresser into a kitchen island with a built-in wine rack. You can use the top drawers for wine glasses and the bottom drawers for extra storage. 4. Dresser with a Breakfast Bar - Add a cozy and functional breakfast bar to your kitchen by transforming a dresser into a kitchen island with a built-in bar area. You can use bar stools or add a drop-leaf for extra seating. 5. Dresser with a Farmhouse Sink - For a rustic and charming look, consider adding a farmhouse sink to your dresser kitchen island. You can also add a backsplash and decorative knobs for a farmhouse feel.2. Dresser to Kitchen Island DIY | Upcycled Kitchen Island Ideas


How to Turn a Dresser into a Kitchen Island
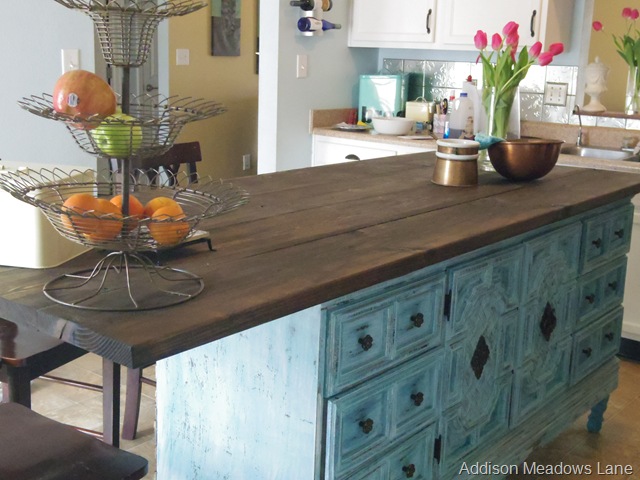

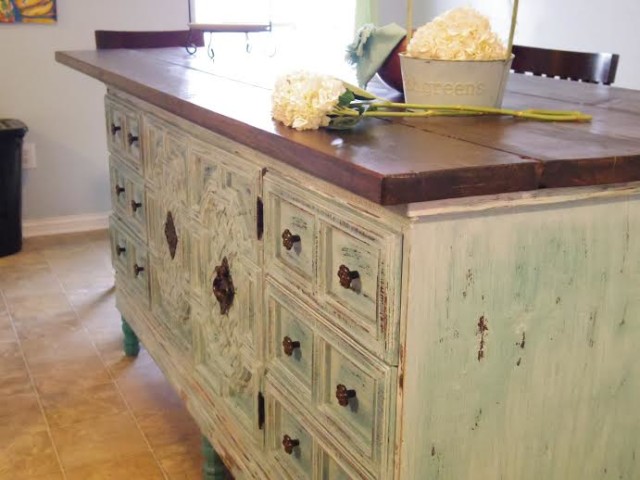
Transforming a dresser into a kitchen island not only adds functionality to your kitchen, but it also adds character and charm. Here are some more DIY kitchen island ideas to inspire your dresser makeover: 1. Dresser with a Marble Top - For a touch of elegance and luxury, consider using a slab of marble as the countertop for your dresser kitchen island. It will instantly elevate the look of your kitchen. 2. Dresser with a Built-In Trash Bin - Keep your kitchen tidy and organized by transforming a dresser into a kitchen island with a built-in trash bin. You can also add a cutting board on top for easy meal prep. 3. Dresser with a Chalkboard Surface - Turn your dresser kitchen island into a functional and fun piece by using chalkboard paint on the top surface. You can use it to jot down grocery lists, meal plans, or leave notes for family members. 4. Dresser with a Bar Cart - If you love to entertain, consider transforming a dresser into a kitchen island with a built-in bar cart. You can use the top surface for serving drinks and the bottom for storing extra glasses and bottles. 5. Dresser with a Pot Rack - Maximize the vertical space in your kitchen by transforming a dresser into a kitchen island with a built-in pot rack. You can also use the top surface for displaying your favorite pots and pans.3. How to Turn a Dresser into a Kitchen Island | DIY Kitchen Island Ideas

2. Dresser to Kitchen Island DIY


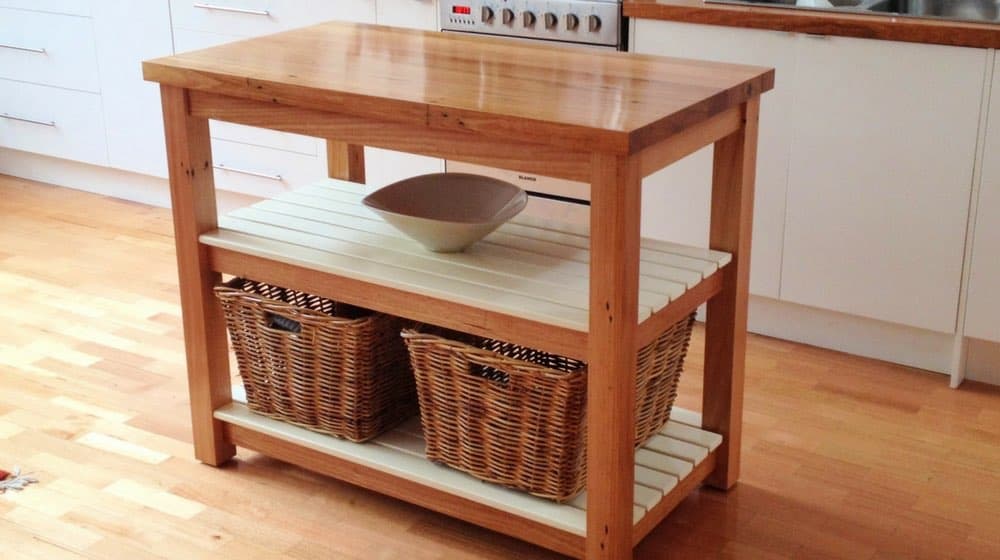
Turn your old and unused dresser into a functional and stylish kitchen bar with this easy DIY transformation. Here's how to do it: Choose a dresser with a flat top and plenty of storage space. Remove the drawers and set them aside for later use. Next, cut down the dresser legs to your desired height and add a countertop to the top surface. You can use a piece of wood or repurpose an old door for a unique look. For the storage area, add shelves or wine racks to the empty space where the drawers used to be. You can also add hooks or racks on the sides for hanging kitchen tools or towels. Finally, give your dresser kitchen bar a fresh coat of paint or stain to match your kitchen decor.4. Dresser to Kitchen Bar | DIY Kitchen Island Transformation


Upcycled Kitchen Island Ideas


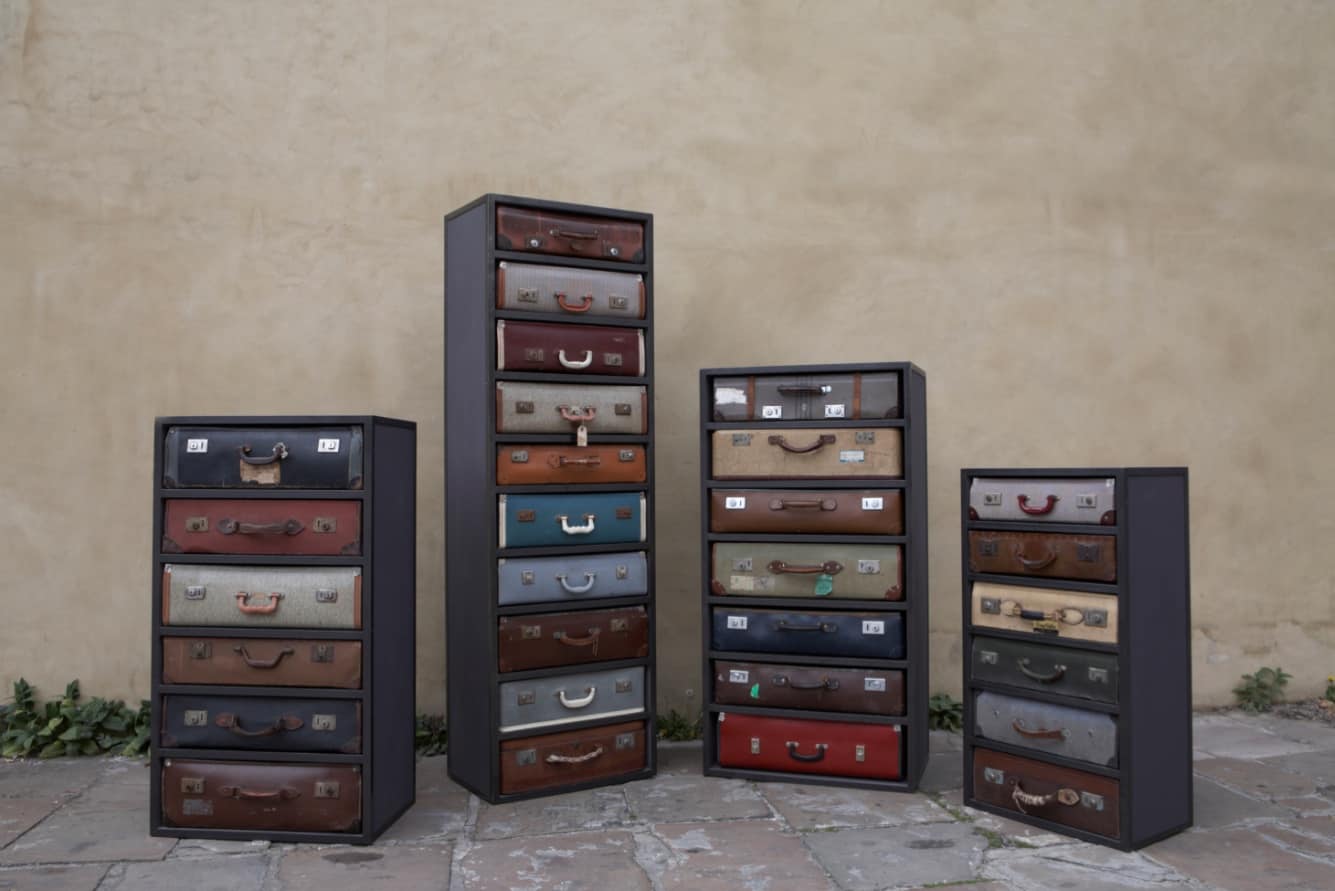
Don't limit yourself to just turning a dresser into a kitchen island - there are plenty of other furniture pieces you can upcycle into a kitchen bar. Here are some ideas to get you started: 1. Repurposed Buffet - A buffet or sideboard can easily be transformed into a kitchen bar by adding a countertop and removing any unnecessary drawers or shelves. You can also add wine racks or shelves for displaying glasses and bottles. 2. Vintage Suitcase Bar - For a unique and eclectic look, consider using a vintage suitcase as the base for your kitchen bar. You can add legs or stack it on top of a dresser or table for added height. 3. Bookcase Bar - Repurpose a bookcase into a kitchen bar by removing the shelves and adding a countertop and storage space. You can also use the shelves for displaying glasses, bottles, and decor. 4. Dresser with a Built-In Cooler - For a fun and functional twist, consider turning a dresser into a kitchen bar with a built-in cooler. You can use the top surface for serving drinks and the bottom for storing ice and beverages. 5. Bar Cart with a Folding Table - If you have a small kitchen, consider using a bar cart as your kitchen bar and adding a folding table for extra counter space when needed. You can also use the cart for storage and display.5. DIY Dresser to Kitchen Bar | Upcycled Furniture Ideas


3. How to Turn a Dresser into a Kitchen Island


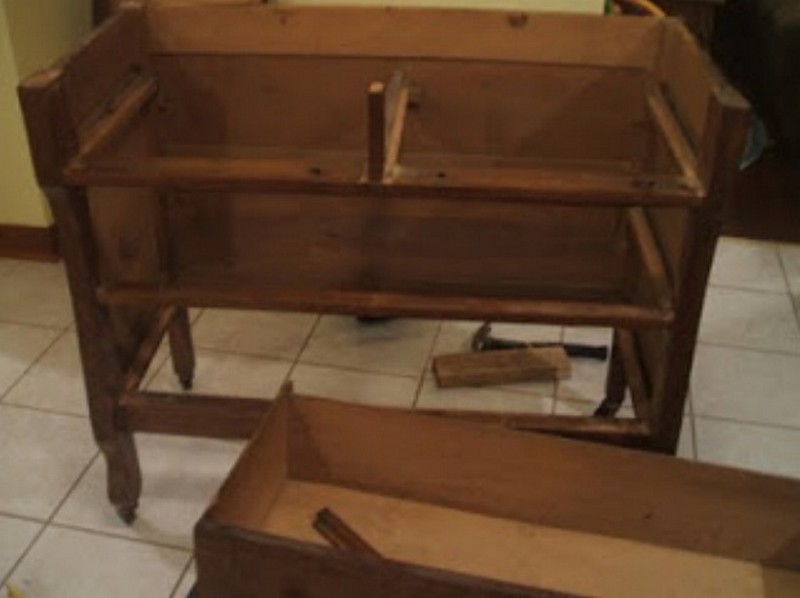
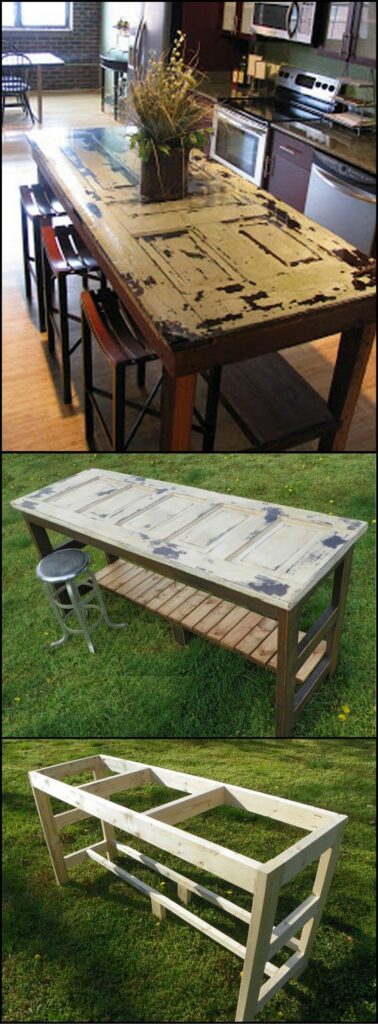
If you're new to DIY projects, turning a dresser into a kitchen island may seem daunting. But don't worry - here's a step-by-step tutorial to guide you through the process: Step 1: Gather Materials - You will need a dresser, saw, countertop material, screws or adhesive, paint or stain, and any additional hardware or decorative elements. Step 2: Prepare the Dresser - Remove the drawers and any hardware from the dresser. Cut down the legs to your desired height and sand down any rough edges. Step 3: Add the Countertop - Cut the countertop material to fit the dimensions of the dresser top and secure it in place with screws or adhesive. Step 4: Add Storage and Decorative Elements - Use the empty space where the drawers used to be for additional storage or display shelves. You can also add hooks or racks on the sides for hanging kitchen tools or towels. Paint or stain the dresser and add any decorative elements. Step 5: Enjoy Your New Kitchen Island - Once everything is secured and dried, your DIY dresser kitchen island is ready to use and enjoy!6. Dresser to Kitchen Island Conversion | DIY Kitchen Island Tutorial


DIY Kitchen Island Ideas

:max_bytes(150000):strip_icc()/ana-white-farmhouse-free-kitchen-island-plans-584ae5155f9b58a8cd4908ca.jpg)


Looking for more ways to repurpose your old dresser into a kitchen island? Here are some additional ideas to give your dresser a makeover: 1. Add a Towel Bar - Install a towel bar or rack on the side of your dresser kitchen island for easy access to kitchen towels and dishcloths. 2. Add Casters - Make your kitchen island more mobile by adding casters to the bottom of the dresser legs. This is especially useful if you have a small kitchen and need to move the island around for more space. 3. Add a Lazy Susan - For added convenience, consider adding a lazy susan to the top of your kitchen island. You can use it to store spices, cooking oils, or other frequently used items. 4. Add a Chopping Block - If you love to cook, consider adding a built-in chopping block to your dresser kitchen island. You can also use a butcher block cutting board on top for easy meal prep. 5. Add a Pop-Up Outlet - Make your kitchen island more functional by adding a pop-up outlet on the top surface. This is useful for plugging in small appliances or charging devices.7. How to Repurpose a Dresser into a Kitchen Island | DIY Kitchen Island Makeover


4. Dresser to Kitchen Bar


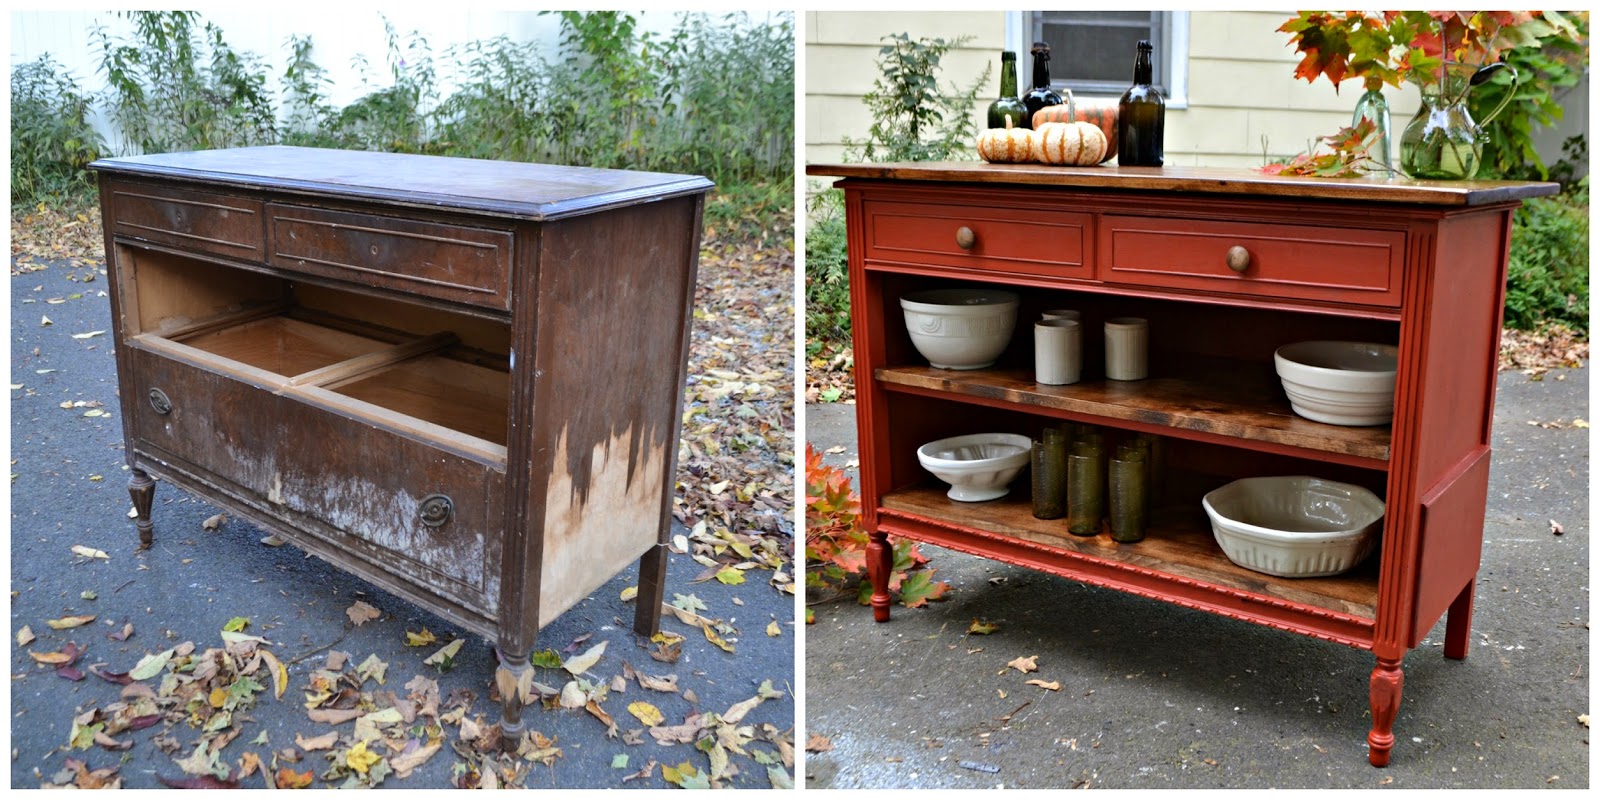
If you're still unsure about transforming your dresser into a kitchen island, take a look at some before and after photos for inspiration. You'll be amazed at the transformation and the endless possibilities for your own dresser makeover! From a plain and ordinary dresser to a stylish and functional kitchen island, the before and after photos will surely inspire you to tackle this DIY project. Get creative and make your kitchen island a unique and personalized piece for your home.8. Dresser to Kitchen Island Before and After | DIY Kitchen Island Inspiration

DIY Kitchen Island Transformation


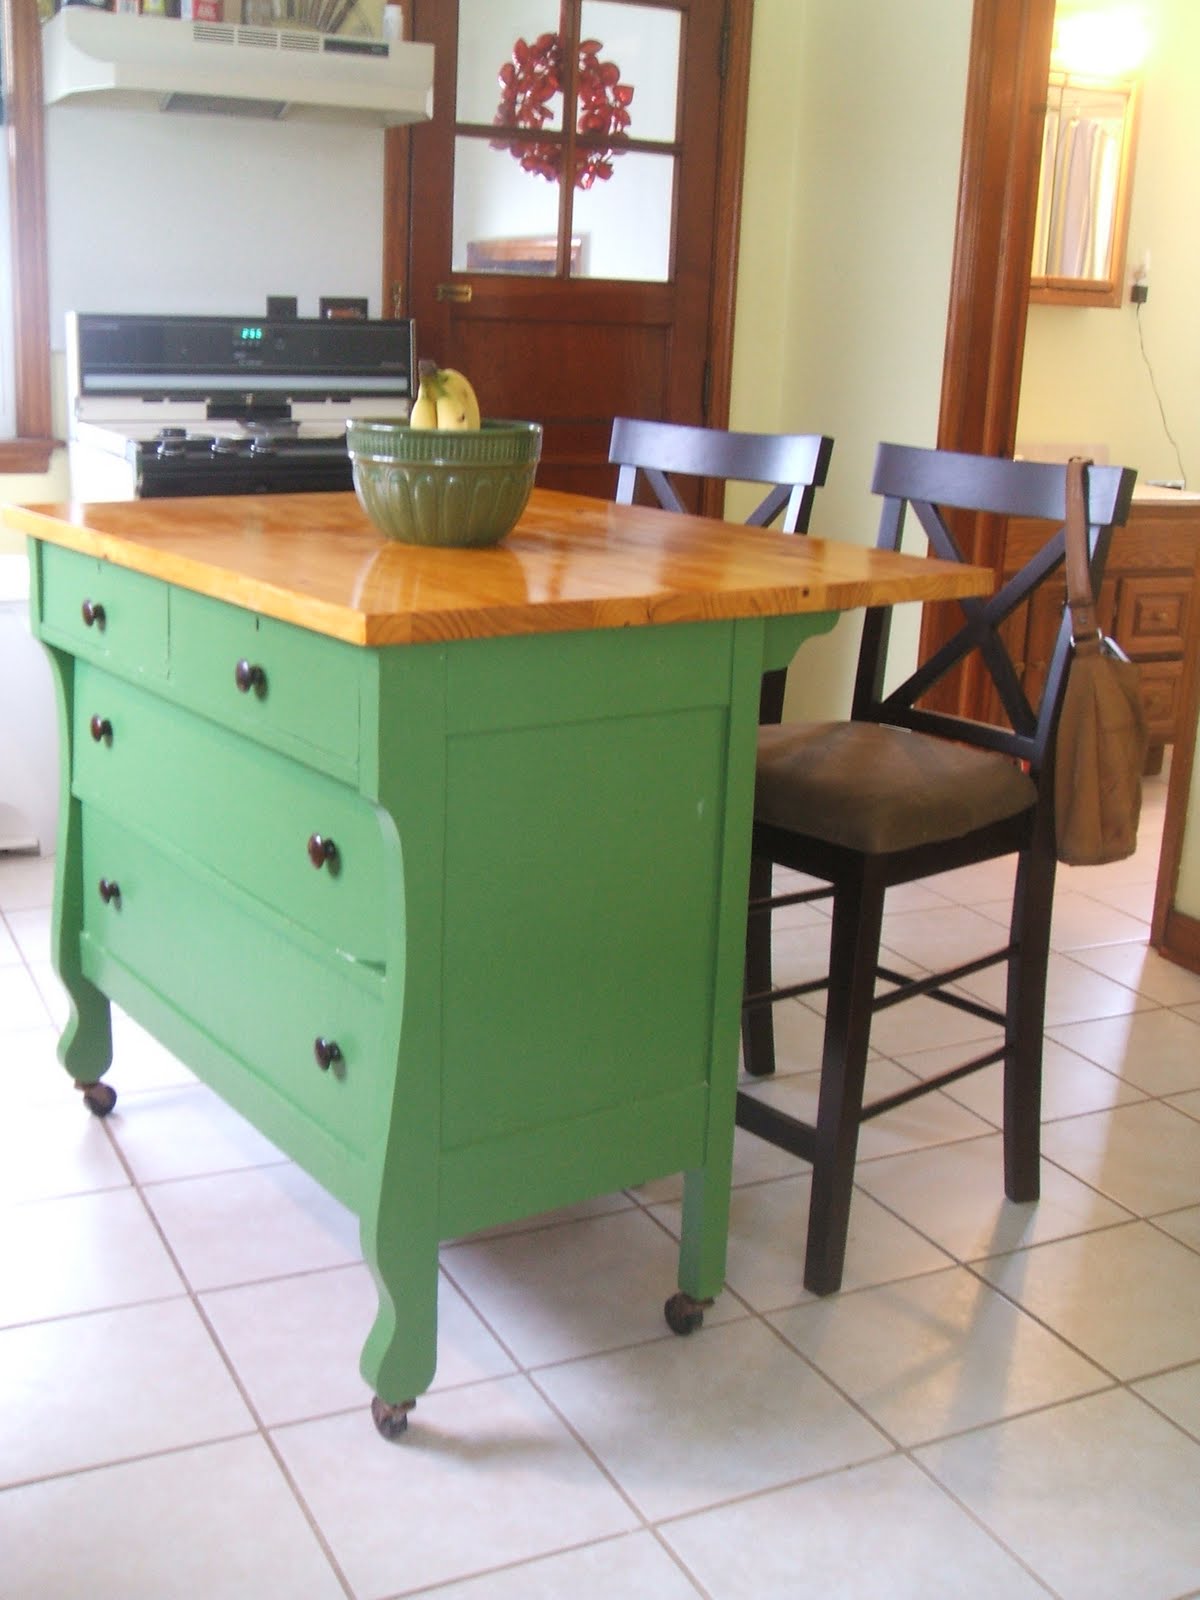
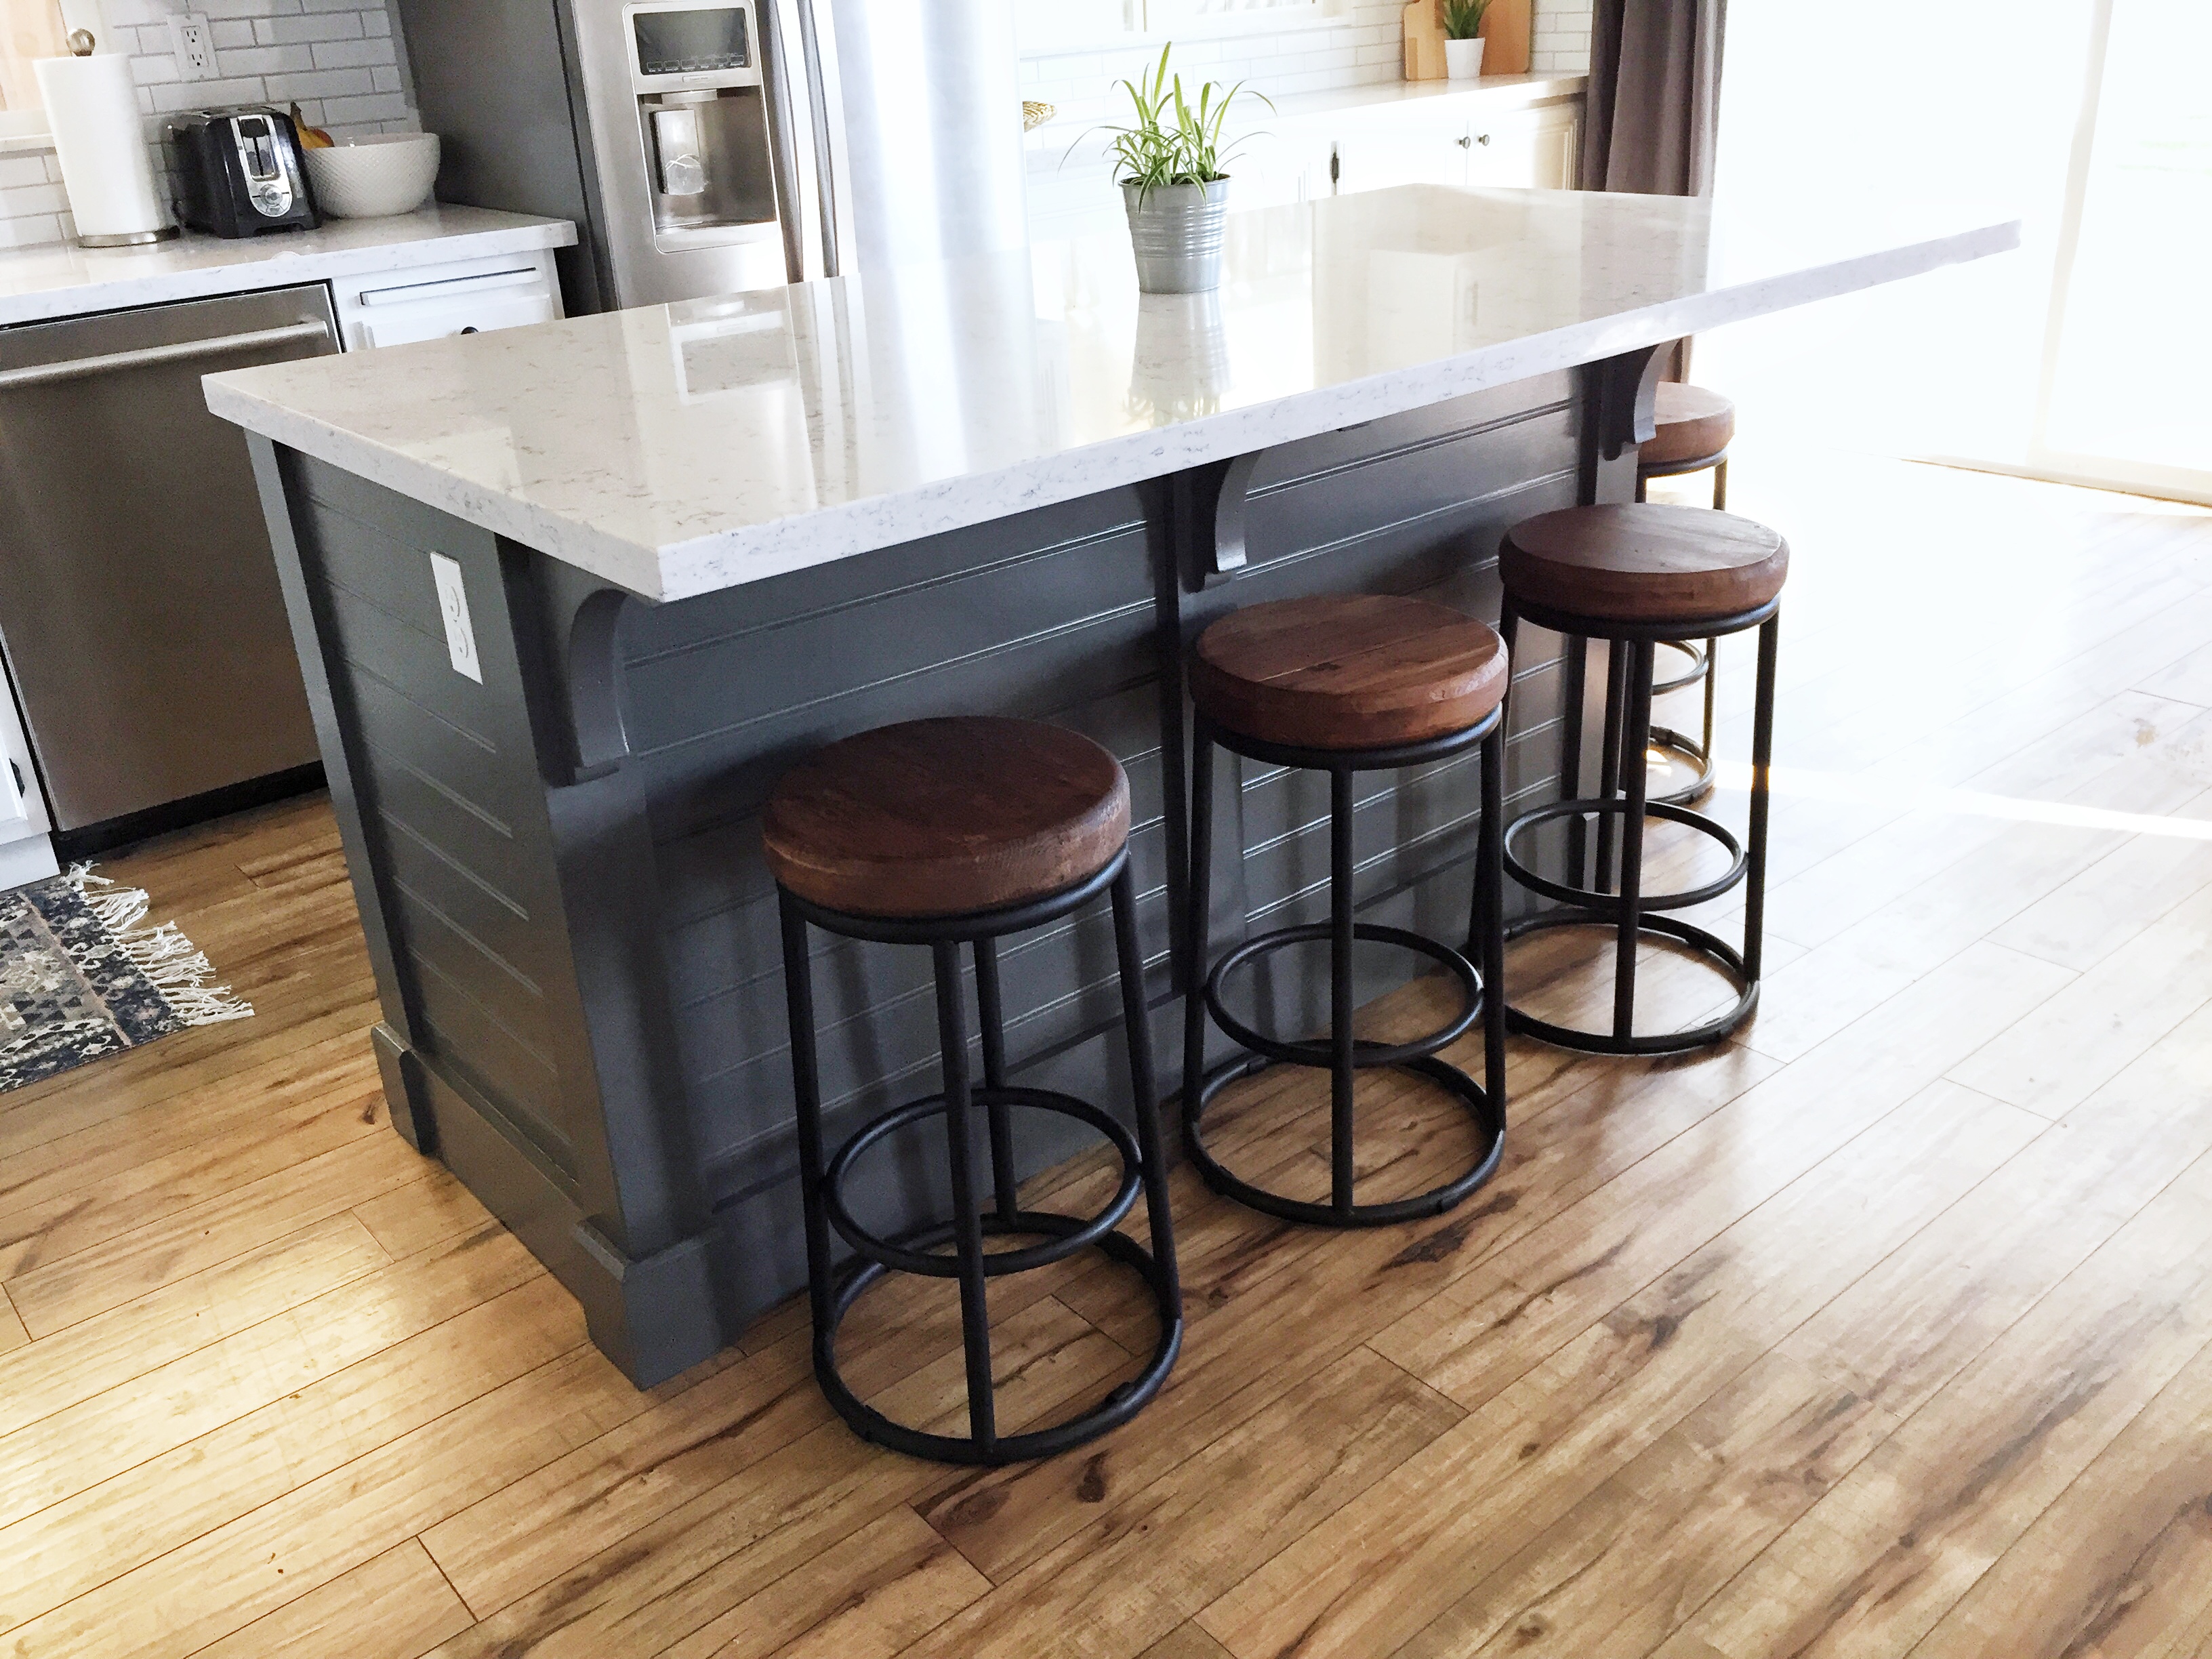
Transform your dresser kitchen island into a versatile piece by adding seating options. Here are some ideas to incorporate seating into your DIY kitchen island: 1. Bar Stools - For a traditional and simple look, add bar stools to your kitchen island. You can also use different seating options for a more eclectic feel. 2. Built-In Bench - If you have a larger dresser, consider adding a built-in bench to one side of the island. This will provide extra seating and storage space. 3. Drop-Leaf Table - Add a drop-leaf to your dresser kitchen island and use it as a table for dining or working. You can easily fold it down when not in use to save space. 4. Kitchen Island with a Breakfast Nook - Use a dresser with a built-in breakfast nook for a cozy and functional seating area. You can also add a drop-leaf for extra seating options. 5. Kitchen Island with a Bar Cart - Use a bar cart as a moveable seating option for your kitchen island. You can also use it for serving drinks or extra storage.9. DIY Dresser to Kitchen Island with Seating | Upcycled Kitchen Island Design


5. DIY Dresser to Kitchen Bar


Transforming a dresser into a kitchen bar is a great way to add a unique and personalized touch to your home. Here are some more ideas to inspire your dresser to kitchen bar transformation: 1. Add Lighting - For a cozy and inviting atmosphere, consider adding lighting to your kitchen bar. You can use pendant lights above the bar or install under-cabinet lighting. 2. Use Decorative Knobs - Add a pop of color or texture to your dresser kitchen bar by using decorative knobs or handles. You can mix and match different styles for a fun and eclectic look. 3. Add a Backsplash - Give your kitchen bar a more polished look by adding a backsplash. You can use tiles, wallpaper, or even a chalkboard surface for a functional and unique touch. 4. Add a Mirror - Make your kitchen bar feel more spacious by adding a mirror on the back wall. You can also use a mirrored backsplash for a modern and chic look. 5. Use a Different Color - Make your kitchen bar stand out by painting it a different color than your kitchen cabinets. You can also use a bold or bright color for a statement piece.10. Dresser to Kitchen Bar Transformation | DIY Kitchen Island Ideas


Upcycled Furniture Ideas


Transforming a Dresser into a Stylish and Functional Kitchen Bar
Why a DIY Kitchen Bar?
 If you're looking to add some personality and functionality to your kitchen, a DIY kitchen bar is the perfect project for you. Not only does it serve as a great space for dining and entertaining, but it also adds a unique touch to your home and saves you money compared to buying a new bar. And what better way to add some character to your kitchen than by repurposing an old dresser into a stylish and functional kitchen bar?
Choosing the Right Dresser
 The first step in this project is to find the right dresser to use for your kitchen bar. Look for a sturdy, solid wood dresser that is the right size for your space. It's important to choose a dresser that is in good condition and has enough surface area to serve as a bar top. Keep in mind that you can always refinish or paint the dresser to match your kitchen's aesthetic.
Materials and Tools
 To transform your dresser into a kitchen bar, you'll need some basic materials and tools. This includes a screwdriver, sander, paint or stain, and a protective sealant. You may also want to consider adding some additional features such as shelves, hooks, or a wine rack. Make sure to measure and plan out your design before starting the project to ensure you have all the necessary materials.
The DIY Process
 Once you have all your materials and tools, it's time to start the transformation process. Begin by removing any drawers and hardware from the dresser. Then, use the sander to smooth out any rough spots or imperfections on the dresser's surface. Next, apply your chosen paint or stain, being sure to cover all surfaces evenly. Once the paint or stain has dried, add a protective sealant to ensure the bar is durable and long-lasting.
Personalization and Finishing Touches
 The best part about a DIY kitchen bar is the opportunity to add your own personal touches. Consider adding a chalkboard or dry erase board to the back of the bar for a fun and functional feature. You could also add hooks for hanging utensils or a small shelf for additional storage. Don't forget to add bar stools or chairs to complete the look and make your kitchen bar a perfect spot for dining and socializing.
In Conclusion
 Transforming a dresser into a kitchen bar is a fun and creative way to add personality and functionality to your kitchen. By choosing the right dresser, gathering the necessary materials and tools, and adding your own personal touches, you can create a unique and stylish kitchen bar that will impress your guests and enhance your overall home design. So why wait? Start your DIY kitchen bar project today and enjoy the satisfaction of a job well done.