1. DIY Cob Oven and Kitchen Sink | MOTHER EARTH NEWS
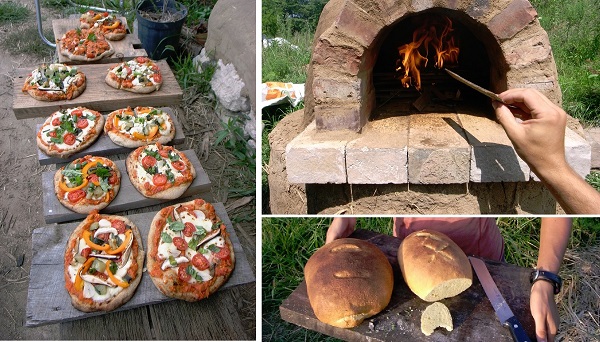
DIY cob ovens and kitchen sinks have become increasingly popular among eco-conscious individuals looking for sustainable and affordable ways to build their own homes. And with the rise of the minimalist movement, more and more people are opting for simpler and more natural living spaces. One way to achieve this is by making a kitchen sink out of cob.
Using cob, a mixture of clay, sand, and straw, you can create a sink that is not only functional but also aesthetically pleasing. Cob is a natural and non-toxic material, making it a great alternative to traditional materials like concrete or plastic. Plus, building a cob sink is a relatively easy and inexpensive project that can be completed in just a few days.


1. DIY Cob Oven and Kitchen Sink


2. How to Build a Cob Kitchen Sink | DoItYourself.com
If you're ready to take on the challenge of building your own cob sink, here's a step-by-step guide to help you get started.
Step 1: Gather Your Materials
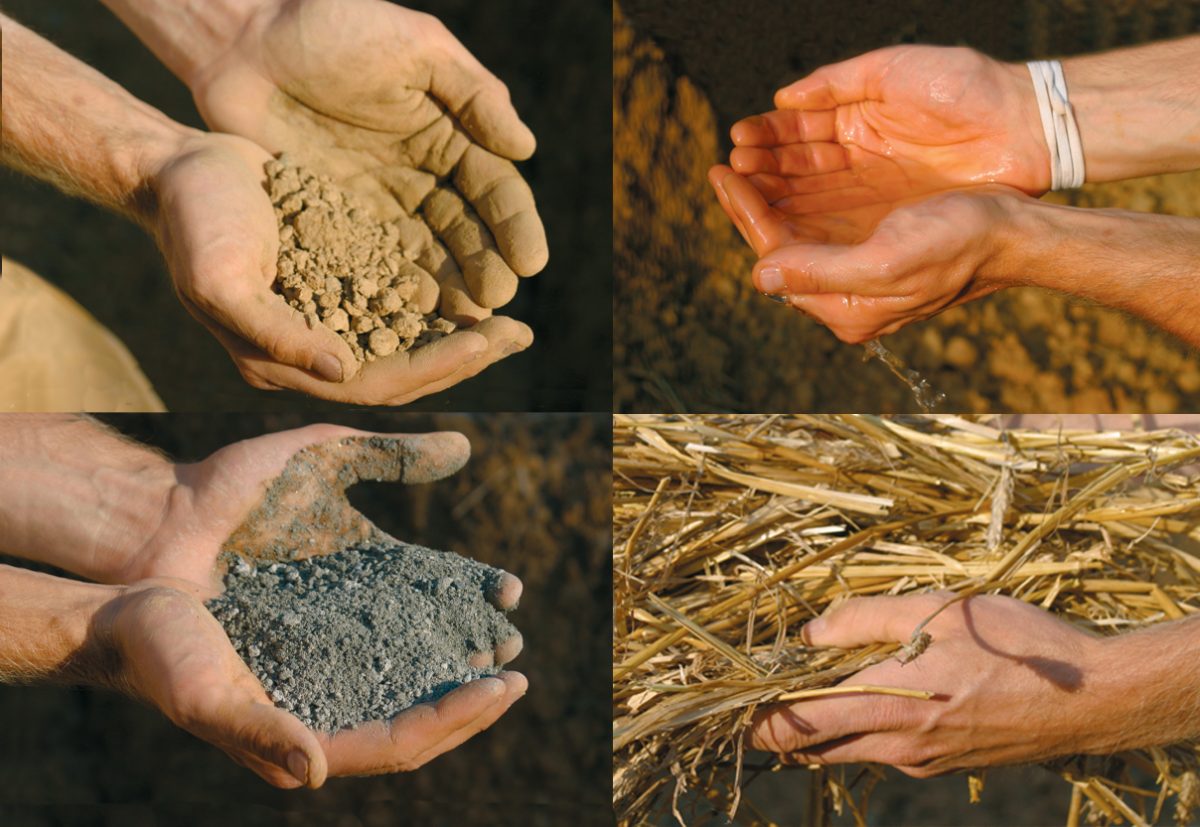
To build a cob sink, you'll need clay, sand, straw, water, and a few basic tools like a trowel and a bucket. You can also add natural pigments to the mixture to give your sink a unique color.
Step 2: Create a Base
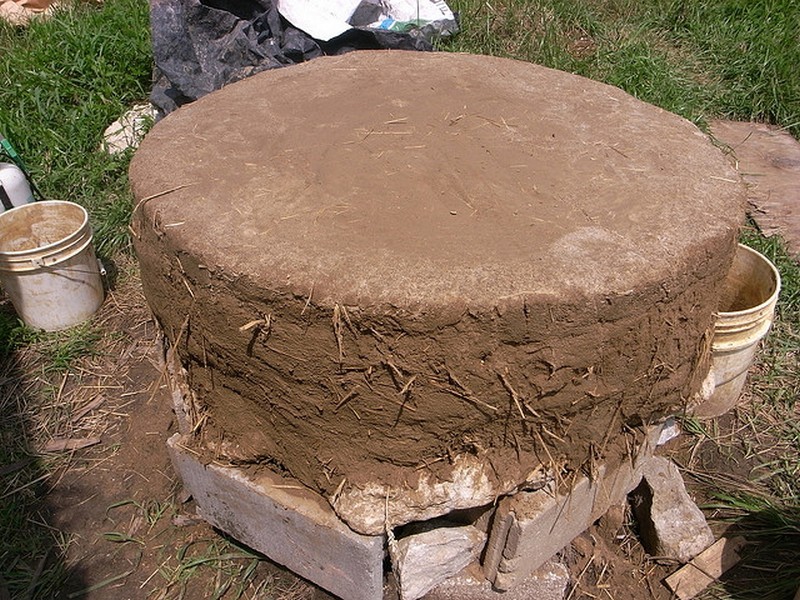
Start by creating a base for your sink using a wooden frame or a base made of bricks. This will serve as a mold for the sink's shape. Make sure the base is level and has proper drainage for the sink.
Step 3: Mix the Cob
Combine equal parts of clay and sand in a large mixing container. Add straw and water gradually, mixing with your hands until the cob mixture has a pliable consistency. Make sure to remove any large debris or rocks from the mixture.
Step 4: Shape the Sink
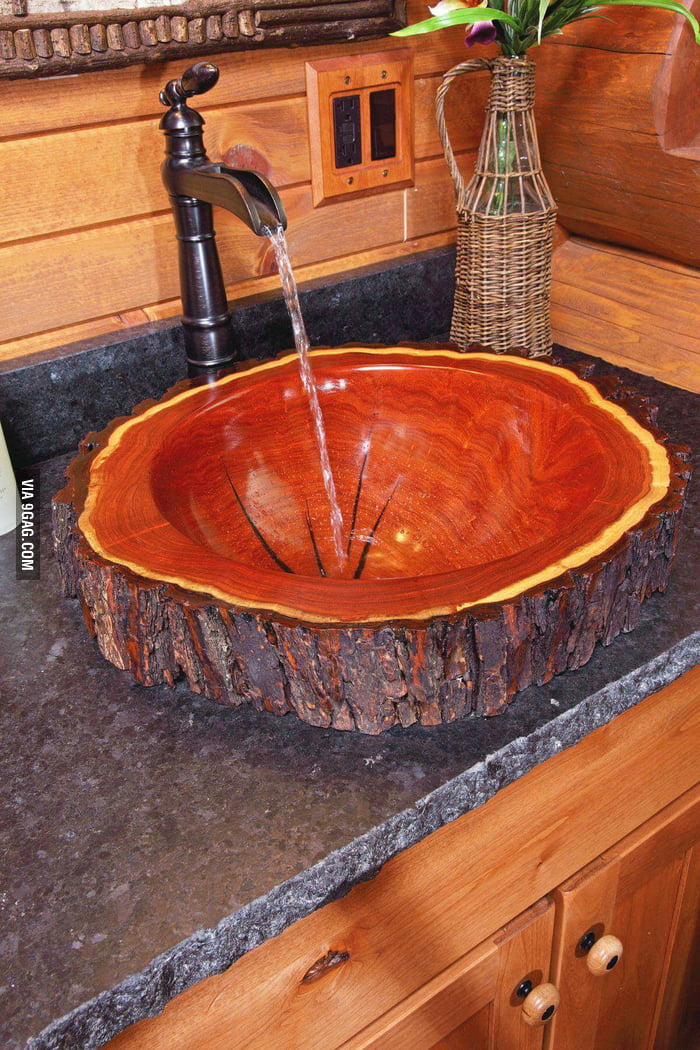
Use your hands to shape the cob mixture on top of the base, creating a bowl-like shape for the sink. Make sure to smooth out the edges and compact the mixture to avoid any cracks or gaps.
Step 5: Let it Dry
Let the cob sink dry for at least 24 hours, or until it is firm to the touch. You can also use a fan to speed up the drying process.
Step 6: Remove the Mold
Carefully remove the wooden frame or brick base from the sink. You may need to use a knife to loosen the edges. Let the sink dry for another day or two before moving on to the next step.


MOTHER EARTH NEWS


3. How to Make a Cob Sink | Home Guides | SF Gate
Once your cob sink is completely dry, it's time to finish the project and make it functional.
Step 7: Smooth Out the Surface
Use a wet sponge or a trowel to smooth out any rough spots or imperfections on the surface of the sink. You can also add decorative elements like shells or pebbles to the surface at this stage.
Step 8: Apply a Sealer
To protect your cob sink from water damage, apply a natural sealer like linseed oil or beeswax. This will also give your sink a polished finish and enhance its natural colors.
Step 9: Install the Drain
You can either purchase a pre-made drain or make your own using a metal pipe. Place the drain in the center of the sink and secure it using cob mixture. Make sure to smooth out the edges and let it dry for another day.
Step 10: Connect the Sink to Plumbing
The final step is to connect your cob sink to your plumbing system. This may require some professional help if you're not familiar with plumbing. Once the sink is connected, test it out to make sure it's working properly.


2. How to Build a Cob Kitchen Sink


4. How to Build a Cob Sink | Home Guides | SF Gate
Building a cob sink is a fun and rewarding project that can add a unique touch to your home. Not only is it affordable and eco-friendly, but it also allows for creativity and personalization. You can experiment with different shapes, sizes, and colors to make your cob sink truly one-of-a-kind.
However, it's important to note that cob is not as durable as traditional materials, so it may not be suitable for heavy use or high-traffic areas. But with proper care and maintenance, a cob sink can last for many years.
So why not give it a try and add a touch of sustainability to your kitchen with a DIY cob sink?


DoItYourself.com


5. How to Make a Cob Sink | Home Guides | SF Gate
Not only is a cob sink a practical addition to your kitchen, but it also adds a unique and rustic charm to your home. Plus, by using natural materials, you're reducing your carbon footprint and contributing to a more sustainable way of living.
And the best part? You don't have to be a professional builder to make a cob sink. With a little bit of patience and creativity, you can create your own functional and beautiful sink that will be the envy of your guests.
So go ahead and unleash your inner DIY enthusiast and give cob sink building a try!


3. How to Make a Cob Sink


6. How to Build a Cob Sink | Home Guides | SF Gate
Building a cob sink is just one way to incorporate cob into your home. You can also use cob to build ovens, fireplaces, and even entire homes! With its natural and sustainable properties, cob is an ideal building material for those looking to live a greener lifestyle.
And if you're feeling extra adventurous, you can even use cob to build outdoor furniture, like benches or tables. The possibilities are endless with this versatile material.
So why not join the growing community of cob enthusiasts and start your cob building journey with a DIY kitchen sink?


Home Guides


7. How to Make a Cob Sink | Home Guides | SF Gate
Still not convinced that a cob sink is the way to go? Here are a few more reasons to consider building one:
1. Cost-effective: Cob is an inexpensive material, making it a budget-friendly option for those on a tight budget.
2. Eco-friendly: Cob is made from natural and non-toxic materials, making it an eco-friendly choice for your home.
3. Aesthetic appeal: Cob has a unique and rustic look that can add character to any space.
4. Customizable: With cob, you have the freedom to create any shape or design you want, making it highly customizable.
So why not give cob a chance and make your own cob sink? You won't regret it!


SF Gate


8. How to Build a Cob Sink | Home Guides | SF Gate
While building a cob sink may seem daunting at first, it's actually a straightforward and fun project that anyone can tackle. And the best part is, you don't need any fancy tools or equipment to get the job done.
So gather your materials, roll up your sleeves, and get ready to create a beautiful and sustainable addition to your home!


4. How to Build a Cob Sink


9. How to Make a Cob Sink | Home Guides | SF Gate
Not only is building a cob sink a great way to add a unique touch to your home, but it's also a great way to learn a new skill and connect with nature. Working with cob allows you to get hands-on and be creative, making it a rewarding and fulfilling experience.
And who knows, this could be the start of a new hobby or even a potential business venture!


Home Guides
10. How to Build a Cob Sink | Home Guides | SF Gate
So there you have it - a step-by-step guide on how to make a kitchen sink out of cob. Not only is this a sustainable and affordable option, but it also allows for creativity and personalization.
So why not give it a try and add a touch of natural beauty to your kitchen? Who knows, this could be the start of a whole new way of living for you.


SF Gate
The Versatility of Cobb in Kitchen Design
 Cobb, a natural building material made of soil, sand, and straw, has been gaining popularity in recent years for its eco-friendliness and affordability. While it is commonly used in outdoor structures such as walls, ovens, and benches, it is now being explored for use in kitchen sinks as well. This may seem like an unconventional choice, but cobb has proven to be a versatile and durable material, making it a viable option for kitchen design.
Benefits of Using Cobb in Kitchen Sinks
 One of the main advantages of using cobb in kitchen sinks is its sustainability. Unlike other materials such as concrete and porcelain, cobb is a natural and renewable resource. This makes it an eco-friendly choice for those looking to reduce their carbon footprint. Additionally, cobb is a cost-effective option as it can be sourced locally and does not require expensive manufacturing processes.
Another benefit of cobb is its durability. When properly mixed and applied, cobb can last for decades without any need for maintenance. This is especially important in the kitchen, where sinks are constantly subjected to water, heat, and heavy use. Cobb is also resistant to stains and scratches, making it a practical choice for busy kitchens.
One of the main advantages of using cobb in kitchen sinks is its sustainability. Unlike other materials such as concrete and porcelain, cobb is a natural and renewable resource. This makes it an eco-friendly choice for those looking to reduce their carbon footprint. Additionally, cobb is a cost-effective option as it can be sourced locally and does not require expensive manufacturing processes.
Another benefit of cobb is its durability. When properly mixed and applied, cobb can last for decades without any need for maintenance. This is especially important in the kitchen, where sinks are constantly subjected to water, heat, and heavy use. Cobb is also resistant to stains and scratches, making it a practical choice for busy kitchens.
Design Possibilities with Cobb Sinks
 Cobb is a versatile material that can be molded into different shapes and sizes, allowing for unique and creative designs. This is especially beneficial for kitchen sinks, as they can be customized to fit specific needs and preferences. Whether you prefer a traditional farmhouse sink or a modern, minimalist design, cobb can be molded to suit your style.
Additionally, cobb can be mixed with various natural pigments to add color and texture to your sink. This adds a touch of personality and character to your kitchen, making it a focal point of the room. With cobb, you can create a one-of-a-kind sink that not only serves its practical purpose but also adds to the overall aesthetic of your kitchen.
Cobb is a versatile material that can be molded into different shapes and sizes, allowing for unique and creative designs. This is especially beneficial for kitchen sinks, as they can be customized to fit specific needs and preferences. Whether you prefer a traditional farmhouse sink or a modern, minimalist design, cobb can be molded to suit your style.
Additionally, cobb can be mixed with various natural pigments to add color and texture to your sink. This adds a touch of personality and character to your kitchen, making it a focal point of the room. With cobb, you can create a one-of-a-kind sink that not only serves its practical purpose but also adds to the overall aesthetic of your kitchen.
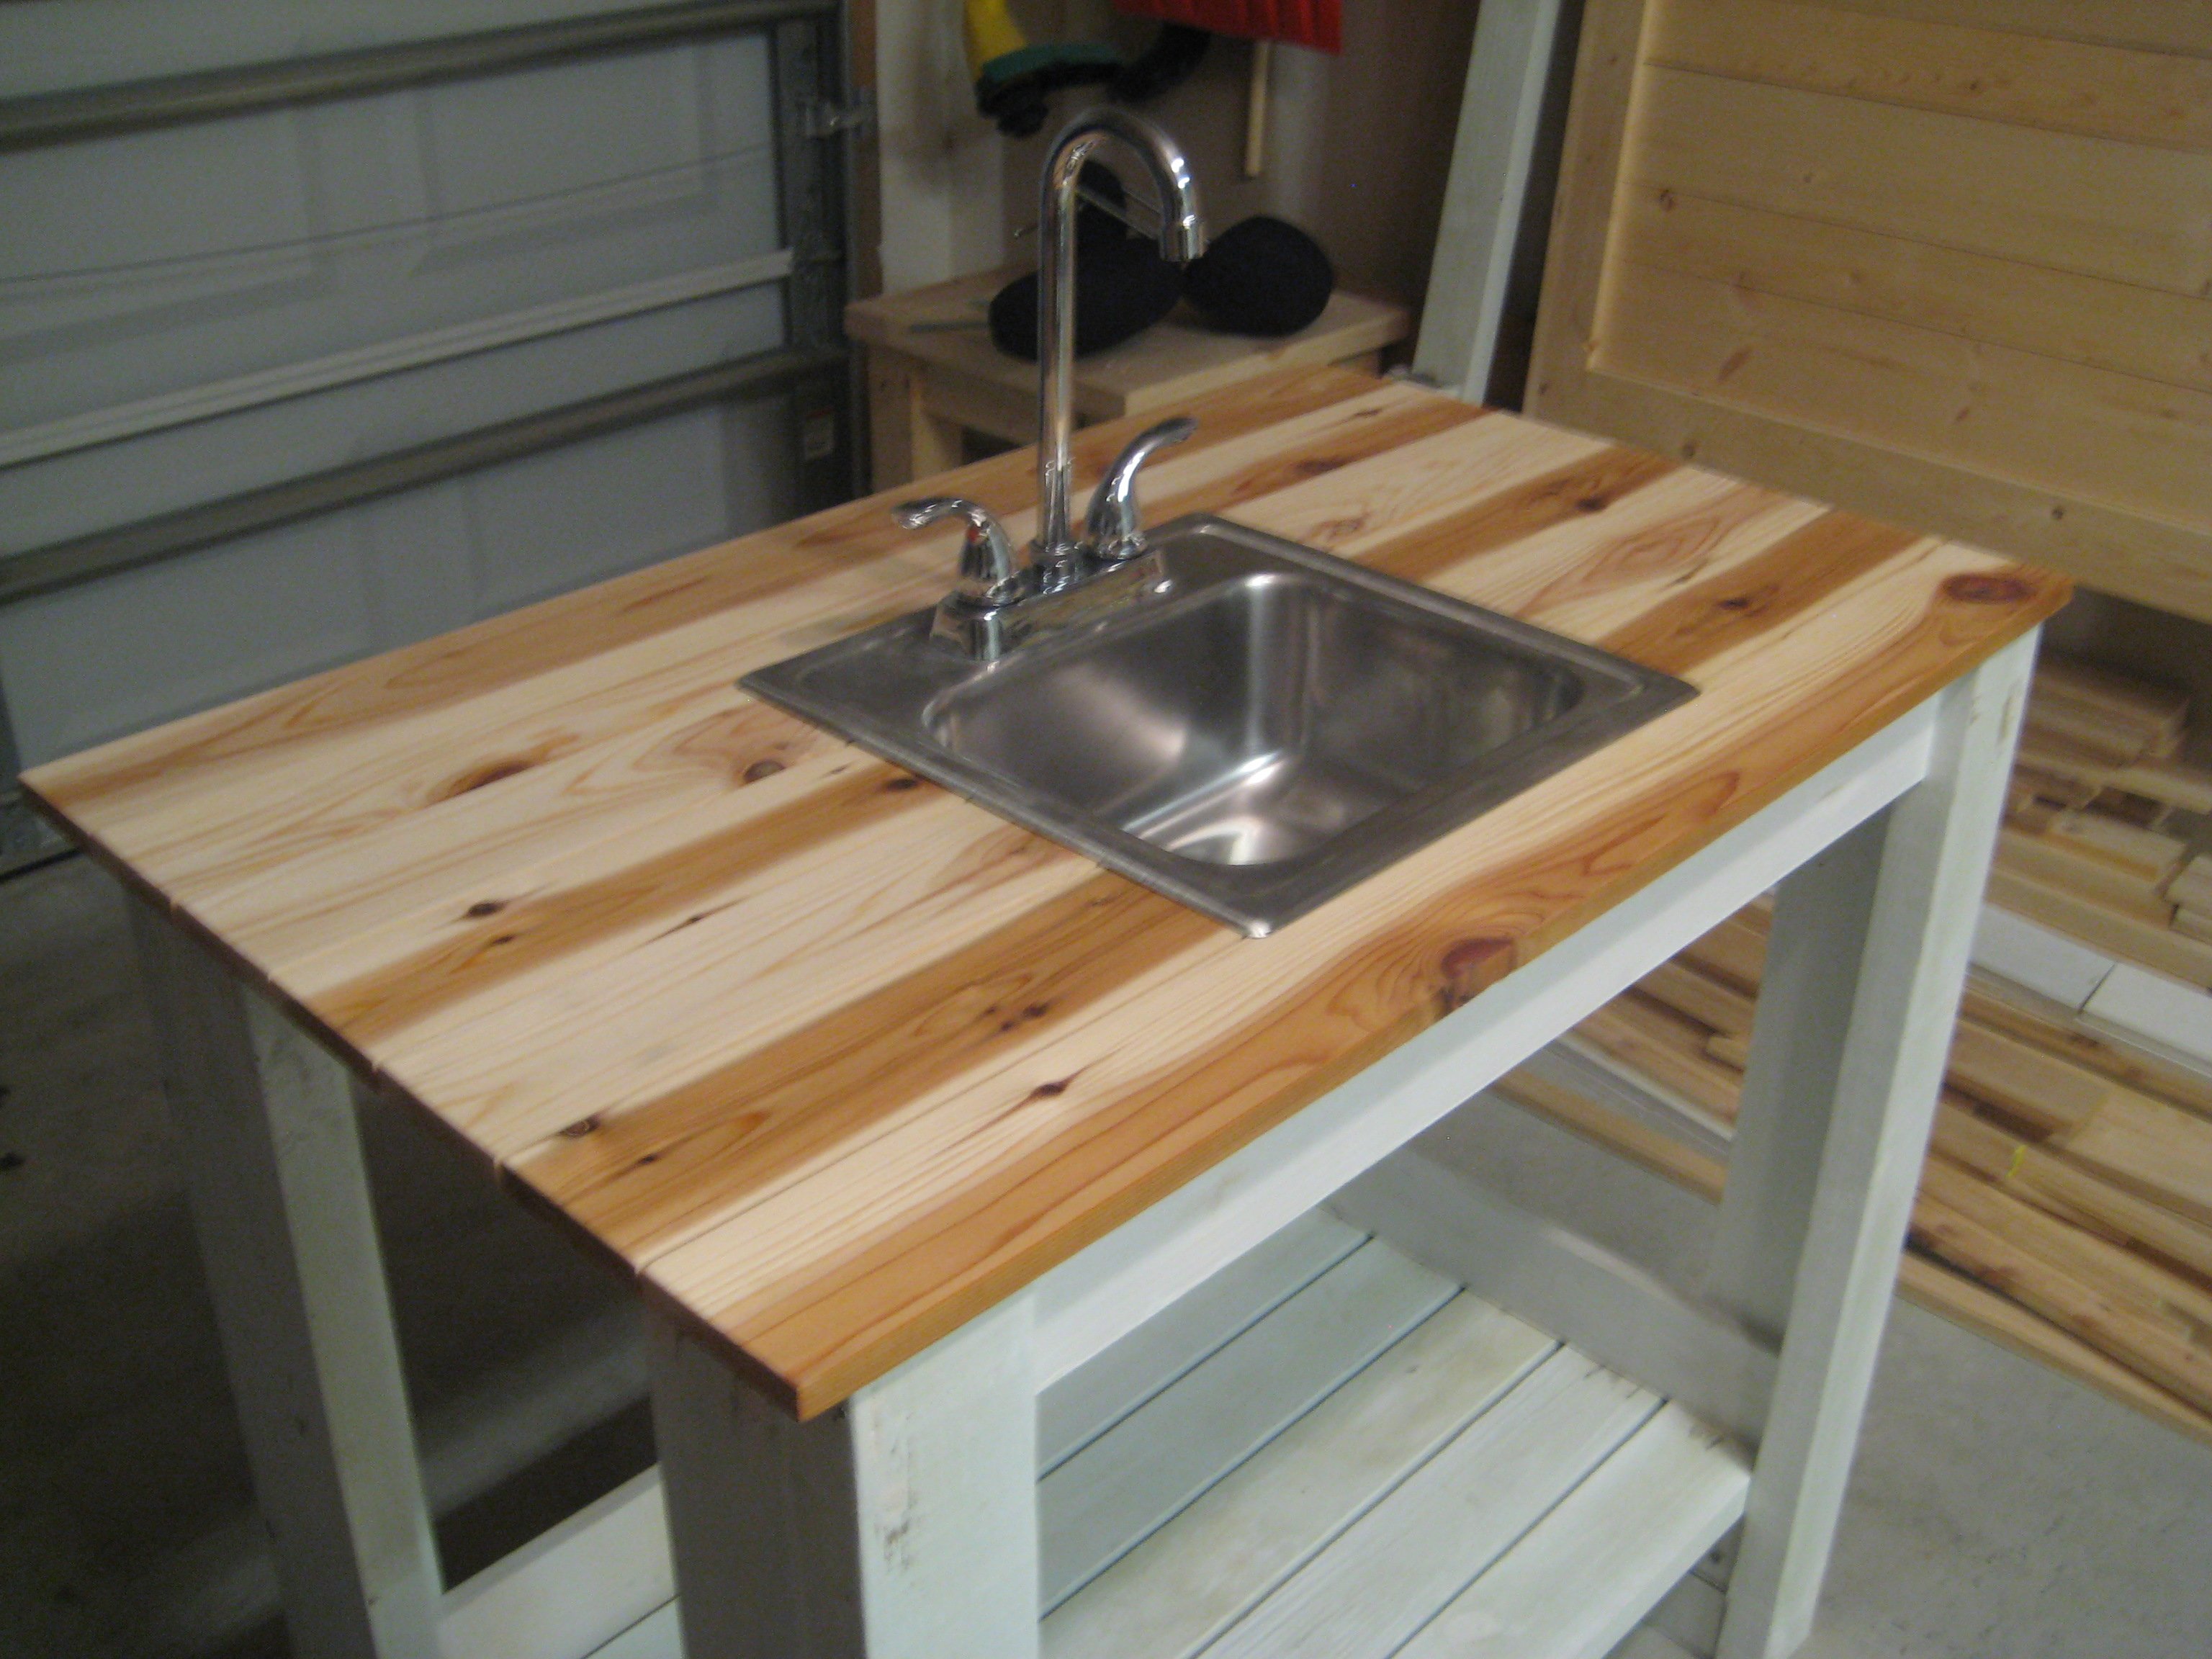
How to Make a Kitchen Sink Out of Cobb
 While it may seem daunting to make a kitchen sink out of cobb, it is actually a relatively simple process. First, the cobb mixture is made by mixing soil, sand, and straw with water until it forms a dough-like consistency. This mixture is then molded onto a form, such as a large bowl or basin, and left to dry and harden. Once dry, the sink can be smoothed and finished with a waterproof sealant to prevent any water damage.
In conclusion, cobb is a versatile and sustainable material that can be used to create unique and durable kitchen sinks. Its eco-friendliness, affordability, and design possibilities make it an attractive choice for those looking to add a touch of nature to their home. With cobb, you can have a functional and beautiful sink that reflects your personal style and values.
While it may seem daunting to make a kitchen sink out of cobb, it is actually a relatively simple process. First, the cobb mixture is made by mixing soil, sand, and straw with water until it forms a dough-like consistency. This mixture is then molded onto a form, such as a large bowl or basin, and left to dry and harden. Once dry, the sink can be smoothed and finished with a waterproof sealant to prevent any water damage.
In conclusion, cobb is a versatile and sustainable material that can be used to create unique and durable kitchen sinks. Its eco-friendliness, affordability, and design possibilities make it an attractive choice for those looking to add a touch of nature to their home. With cobb, you can have a functional and beautiful sink that reflects your personal style and values.


