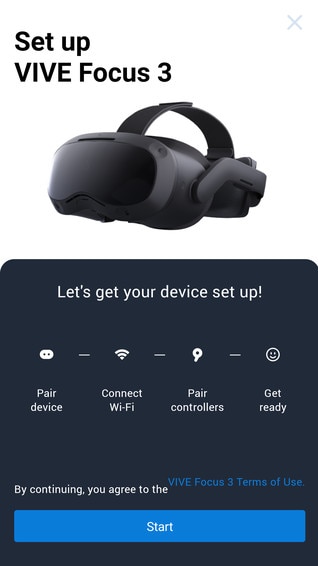
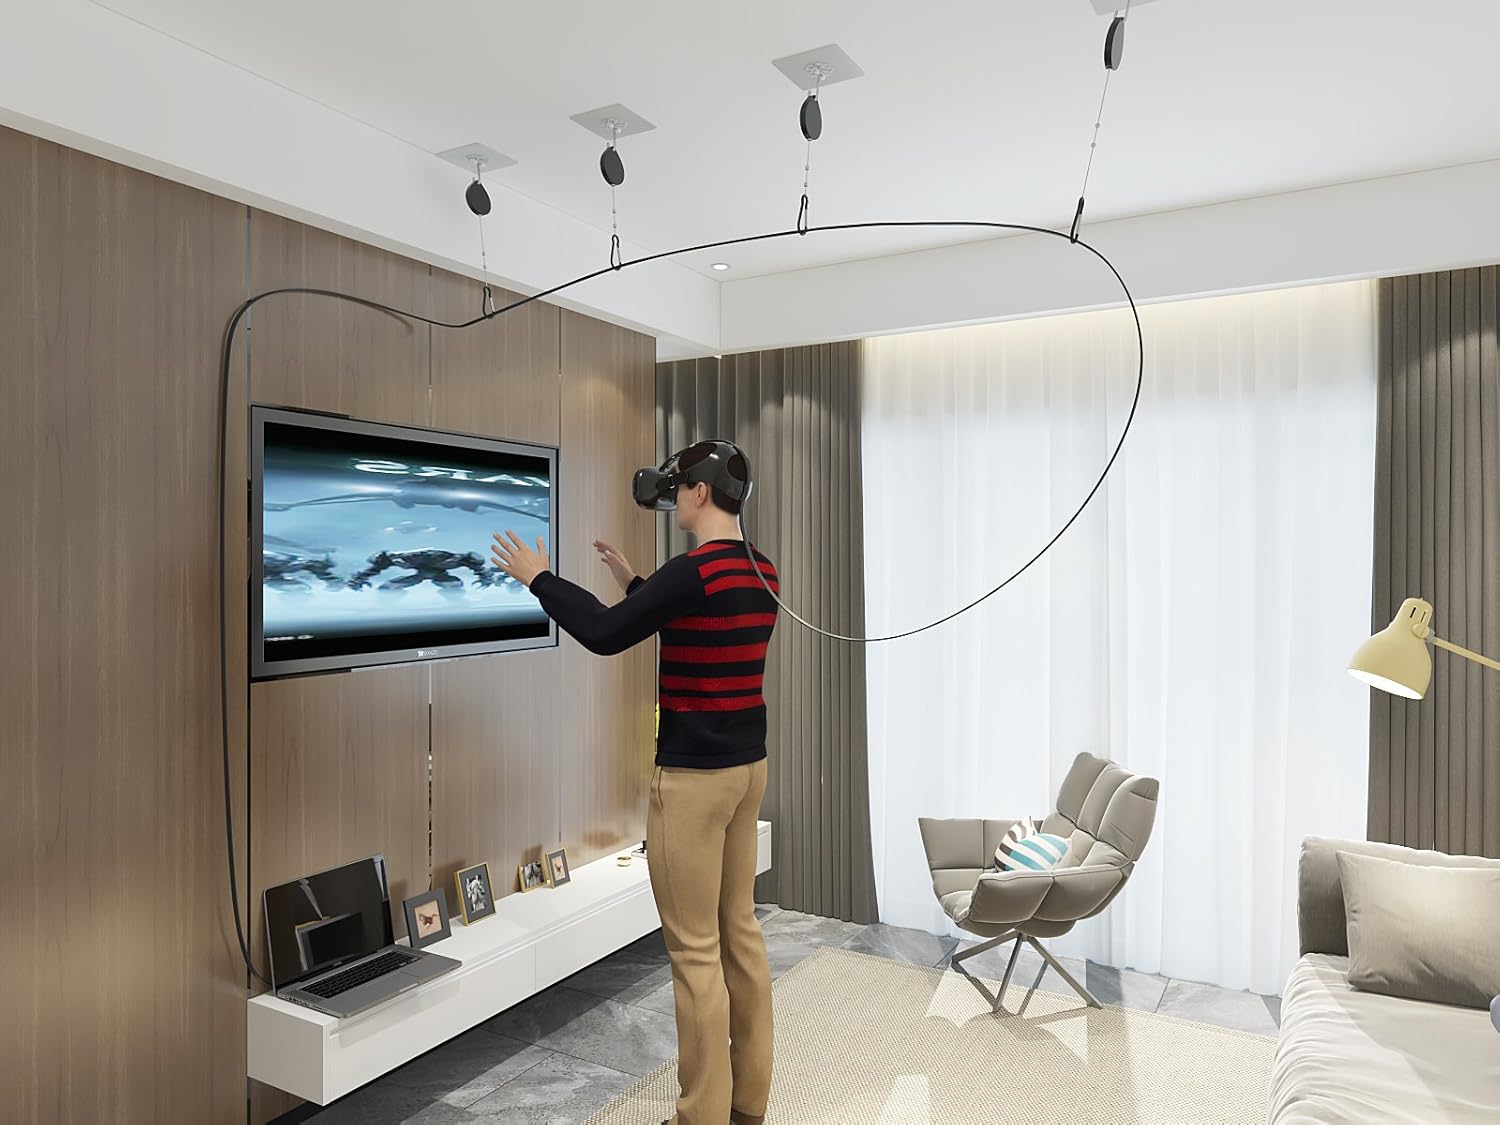
1. Vive setup in living room
Setting up your Vive in the living room can be a daunting task, but with the right steps and equipment, it can be a smooth and enjoyable process. Before you begin, make sure you have enough space in your living room to fully experience the immersive virtual reality world. Follow these steps to set up your Vive in the living room.


Vive setup in living room


2. How to set up Vive in living room
The first step is to unbox your Vive and make sure you have all the necessary components. This includes the headset, controllers, base stations, and all the cables. Once you have everything, you can start setting up your Vive in the living room.


How to set up Vive in living room

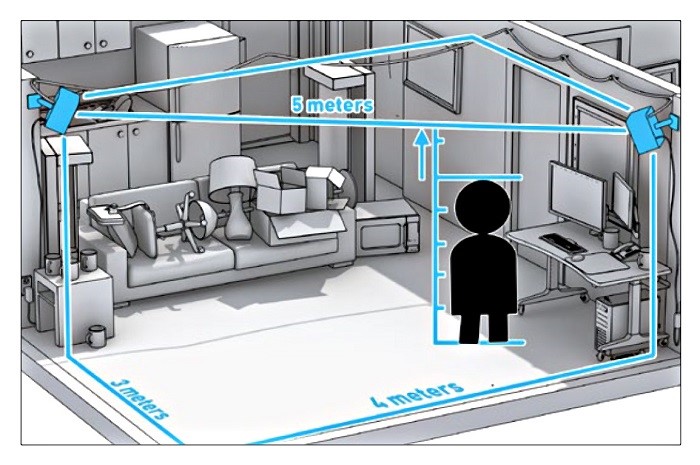


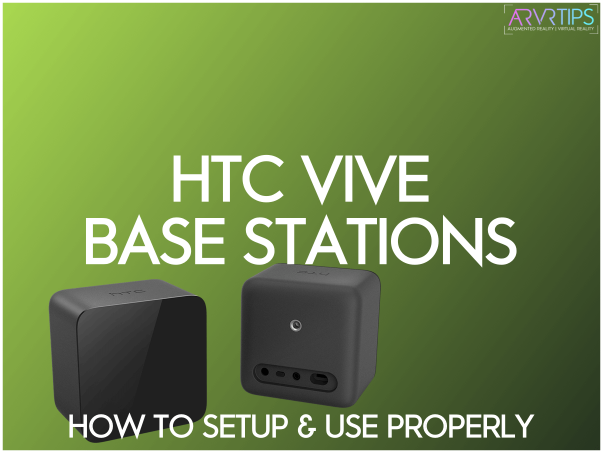
3. Vive room setup
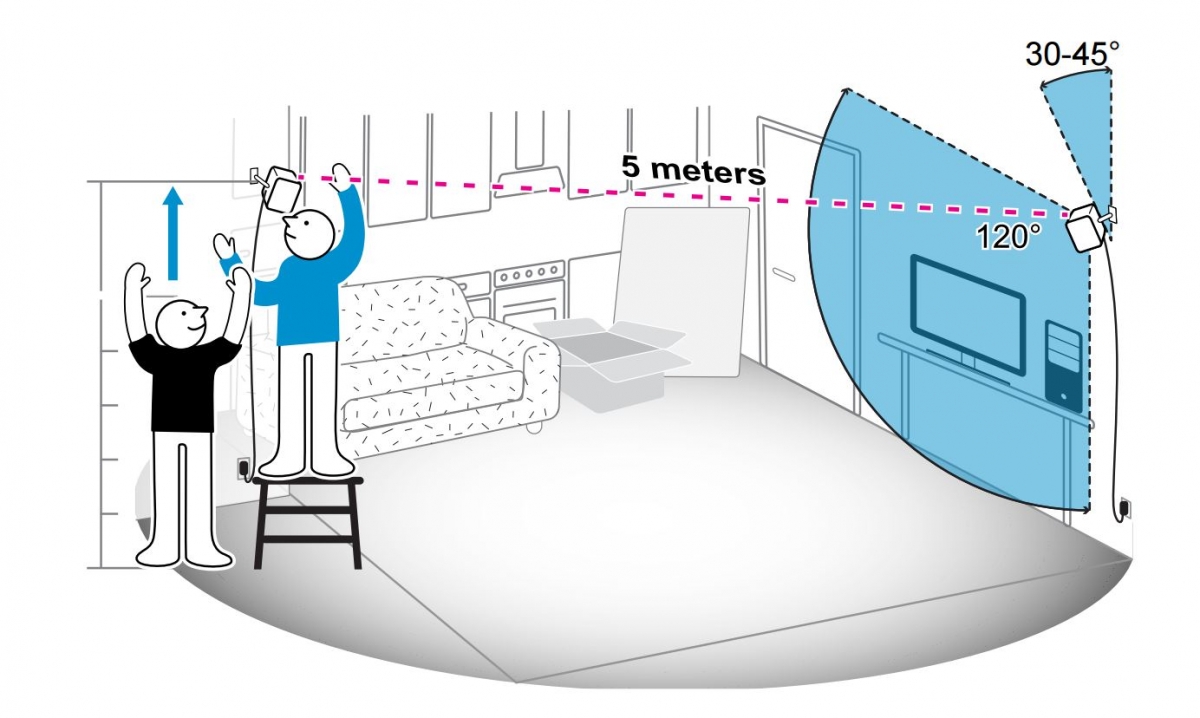
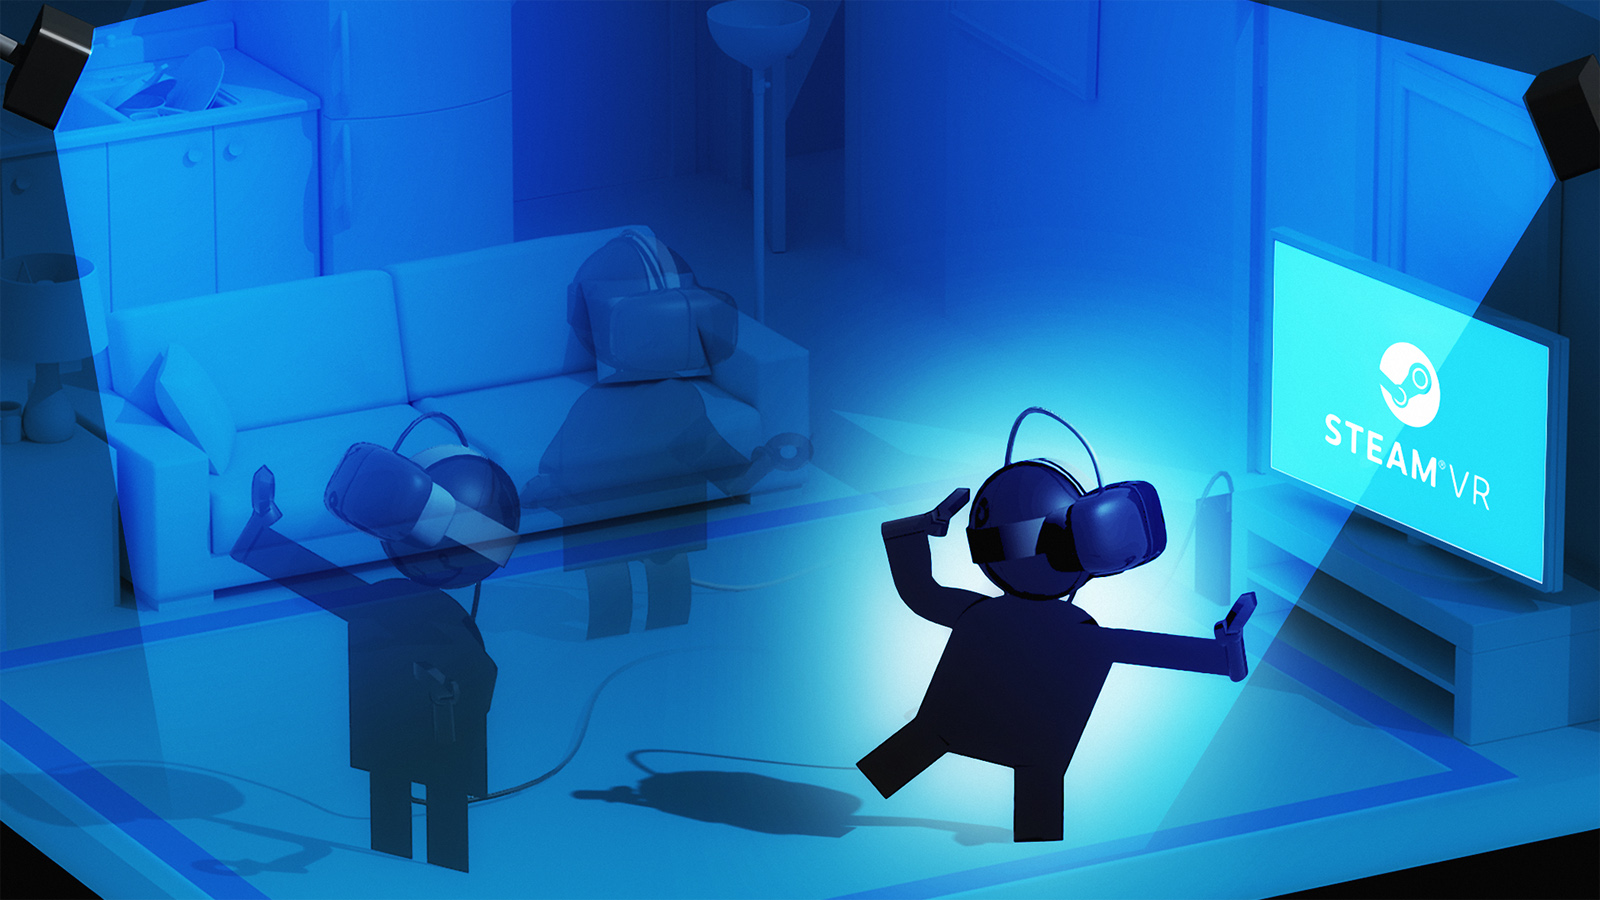
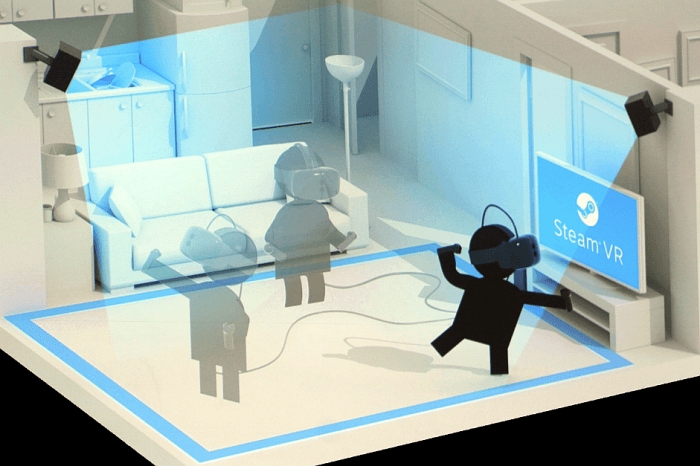
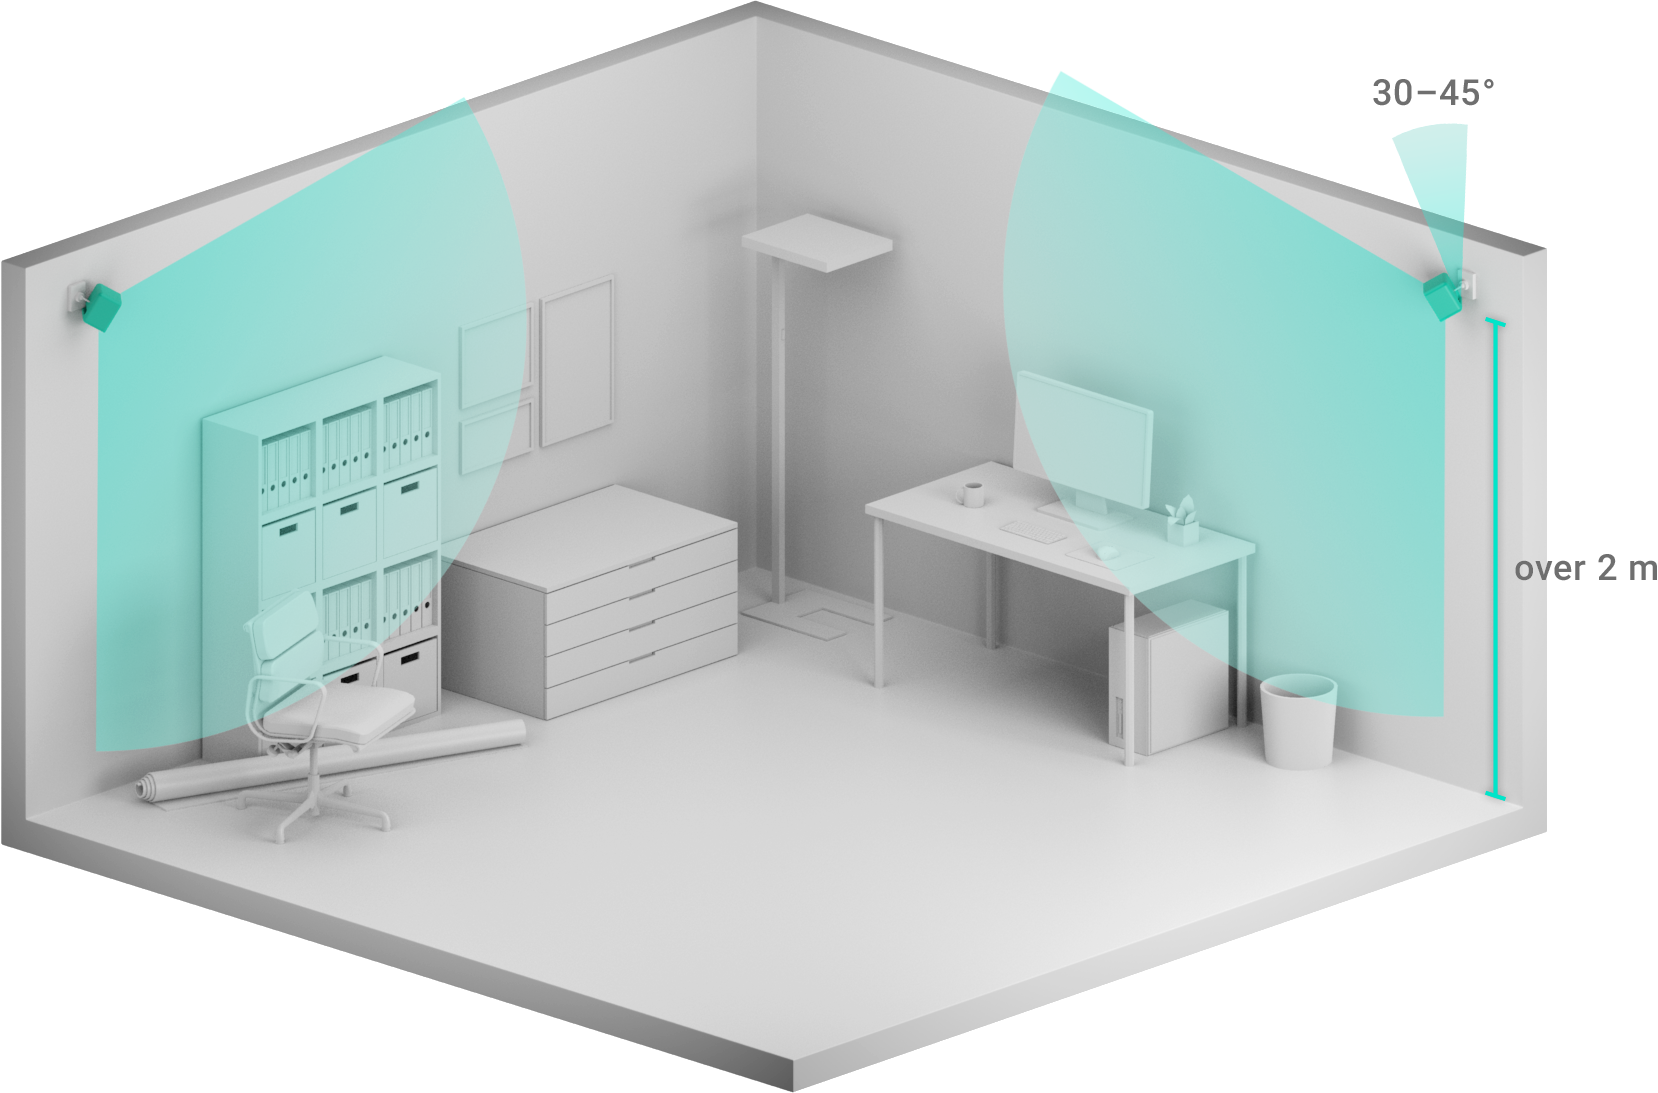
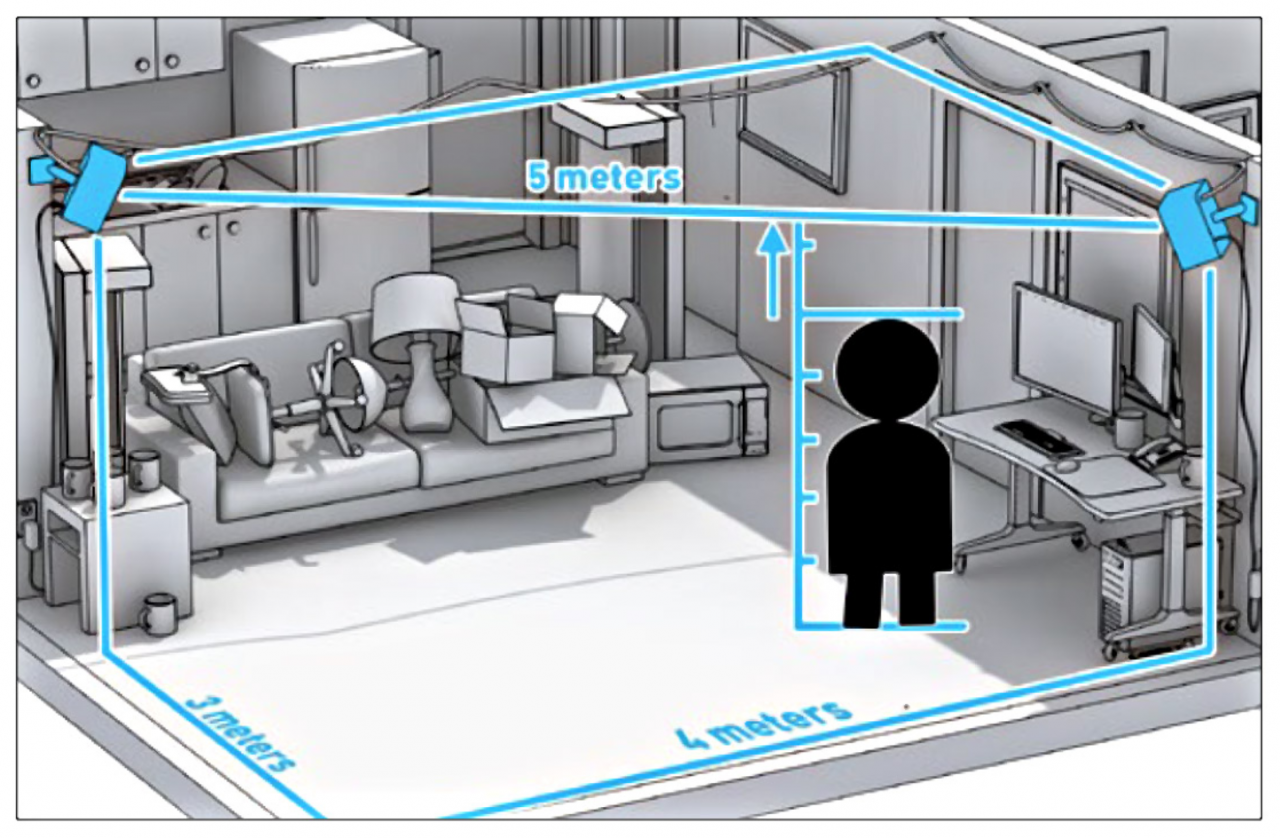
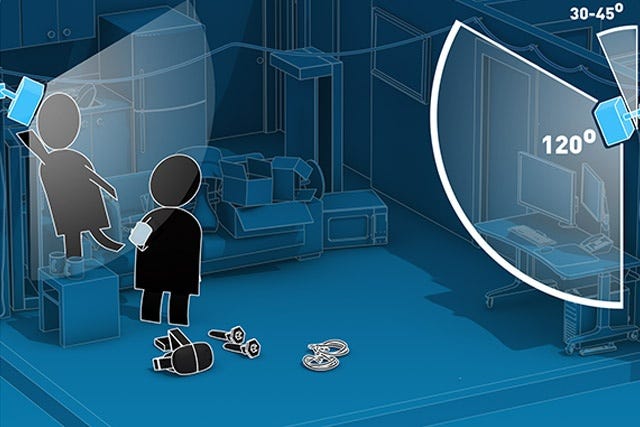
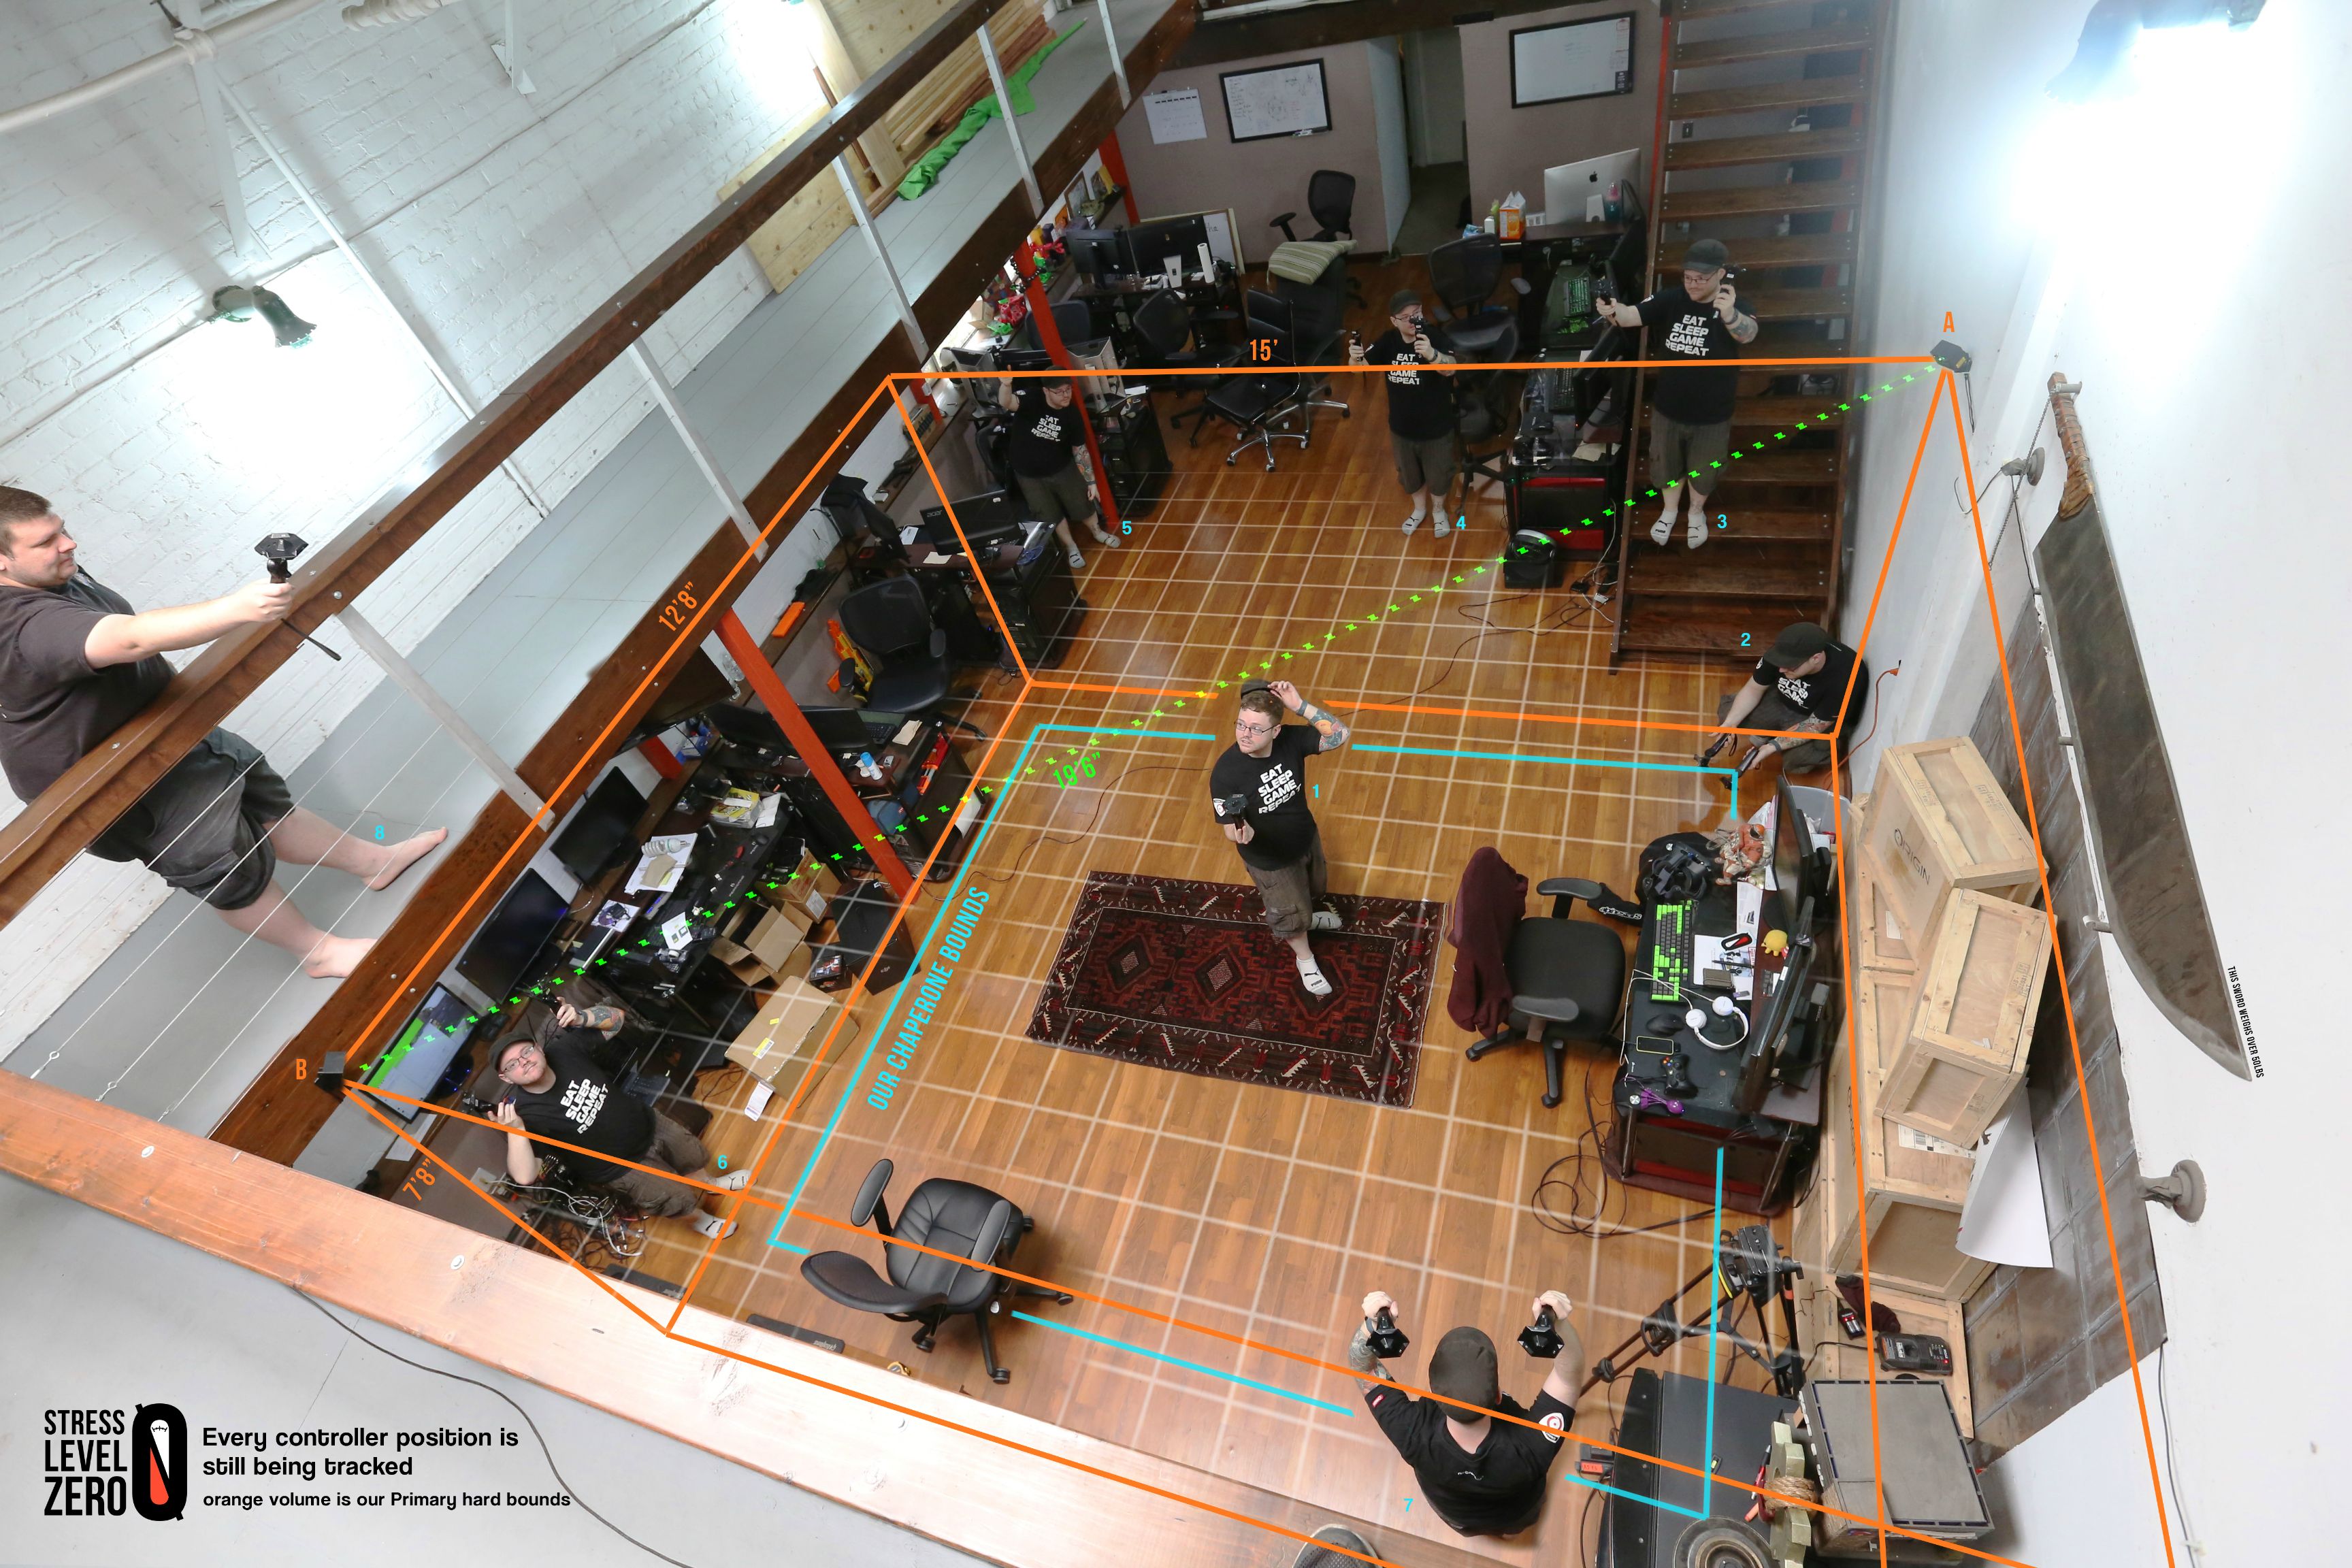
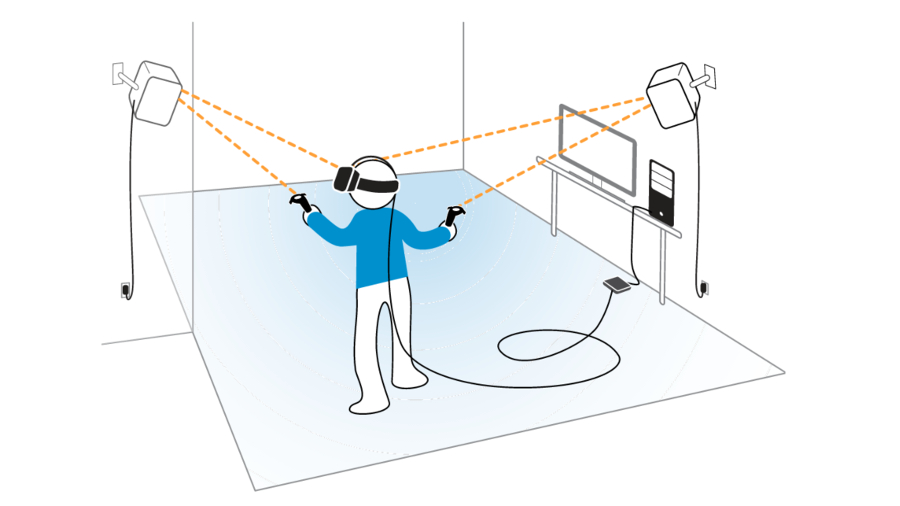
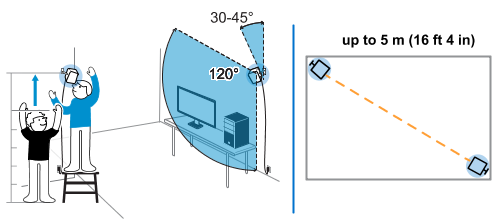
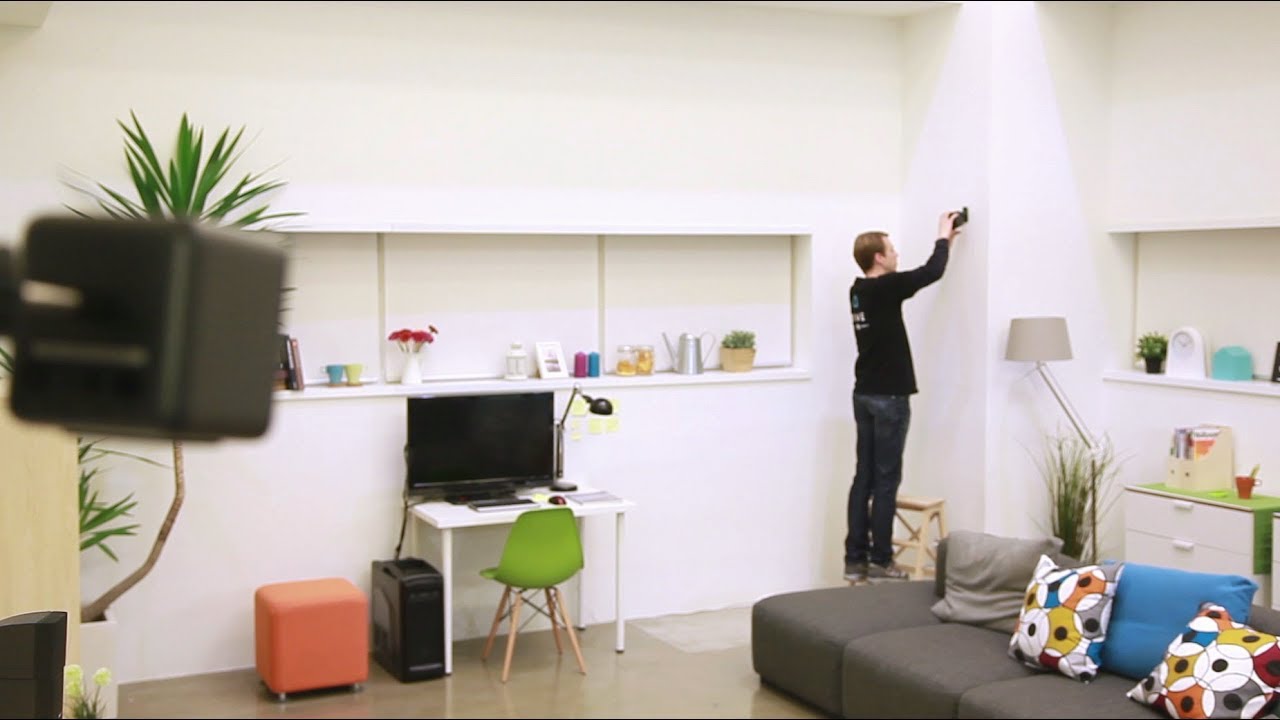
The base stations are an essential part of the Vive setup. They emit infrared light that helps track the movement of the headset and controllers. The first base station should be placed on a high shelf or mounted on the wall, facing towards the center of the play area. The second base station should be placed in the opposite corner, also facing towards the center. This will allow for full room tracking.


Vive room setup


4. Living room Vive installation
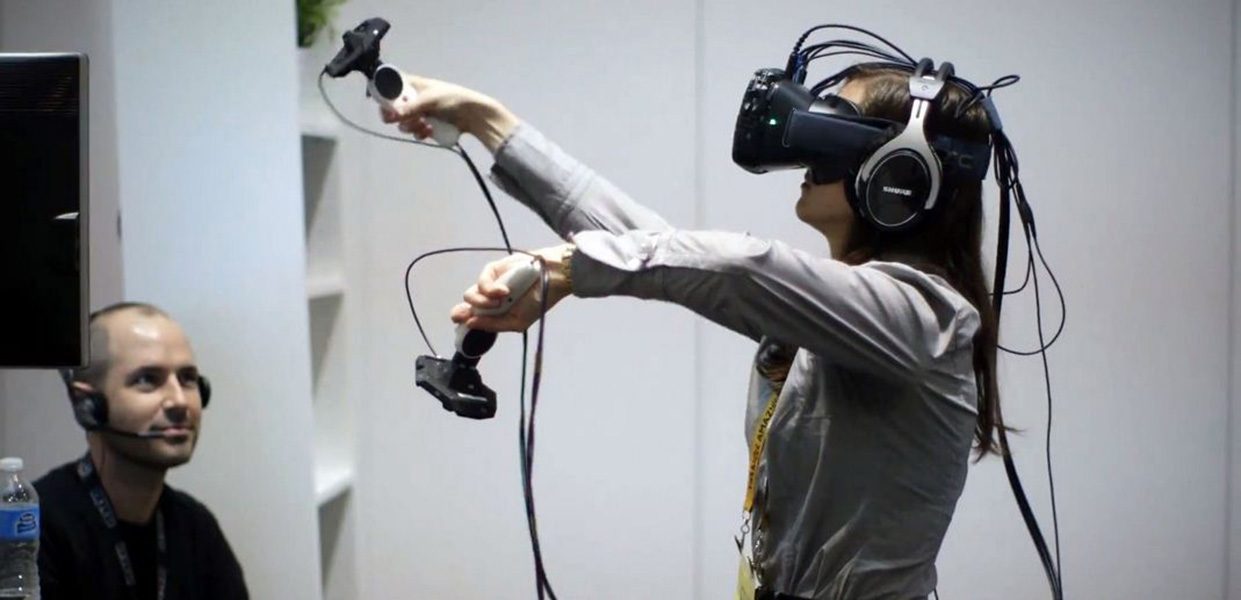
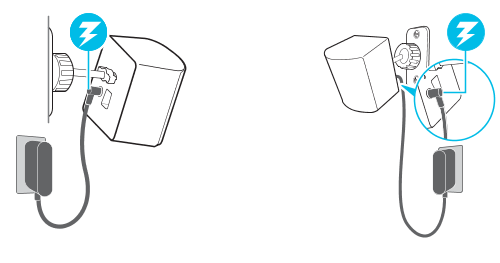
Now it's time to set up the headset and controllers. Connect the headset to your PC using the included HDMI and USB cables. Make sure it is securely connected and then put on the headset. The controllers can be charged by plugging them into your PC with the included micro USB cables. Once they are charged, turn them on and pair them with the headset.


Living room Vive installation


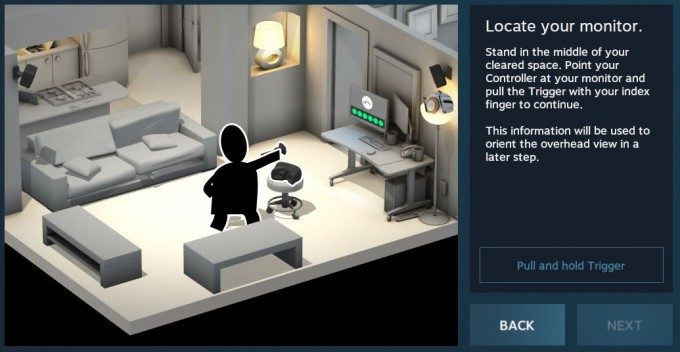
5. Vive room calibration
After the base stations and controllers are set up, you will need to calibrate the room to ensure accurate tracking. This can be done through the SteamVR software on your PC. Follow the on-screen instructions to complete the calibration process.


Vive room calibration


6. Setting up Vive base stations in living room
If you are having trouble getting a good tracking signal, try adjusting the base stations. They should be placed at least 6 feet off the ground and tilted downwards towards the center of the play area. You can also try moving furniture or objects that may be blocking the signal.


Setting up Vive base stations in living room
7. Vive room tracking setup
Once the base stations are properly set up, you can test the tracking by moving around in your play area. Make sure to stay within the range of the base stations for optimal tracking. If you experience any issues, you may need to recalibrate the room or try adjusting the base stations again.


Vive room tracking setup


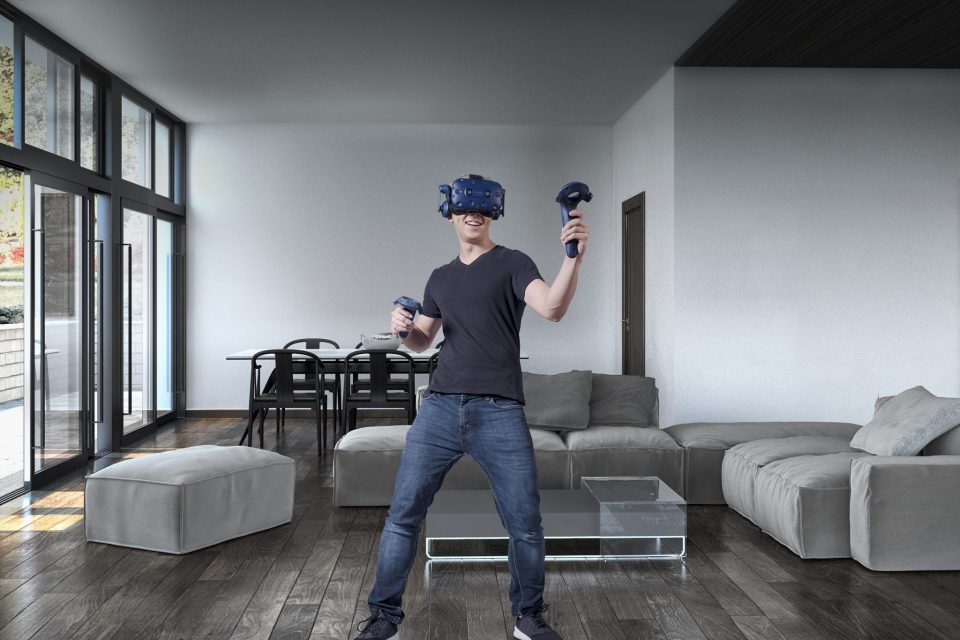
8. Living room VR setup with Vive
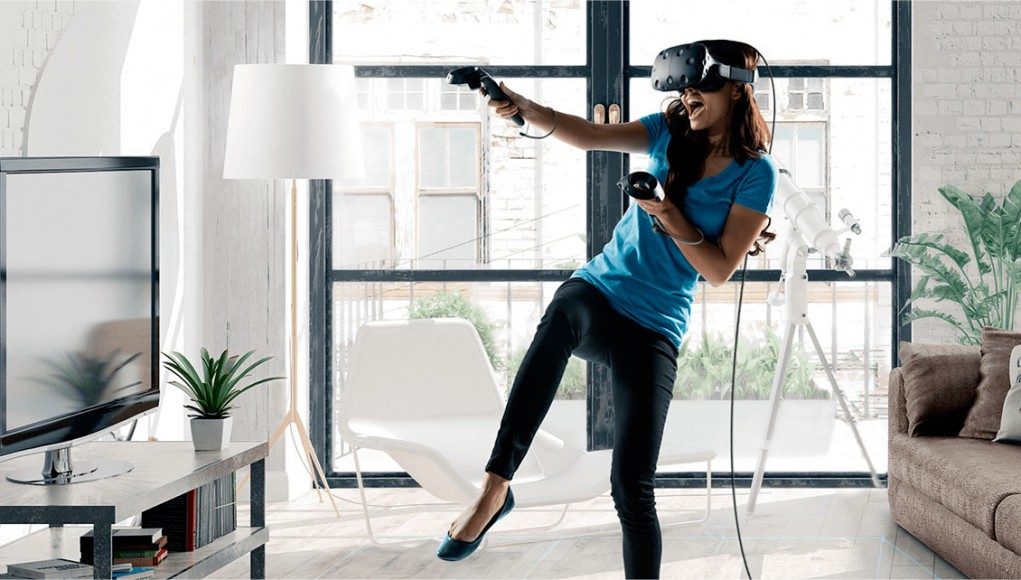
Now that your Vive is set up and calibrated, you are ready to enter the virtual reality world. Put on the headset and use the controllers to navigate through menus and start playing games. Make sure to follow all safety precautions, such as not playing for extended periods or in a cluttered space.


Living room VR setup with Vive


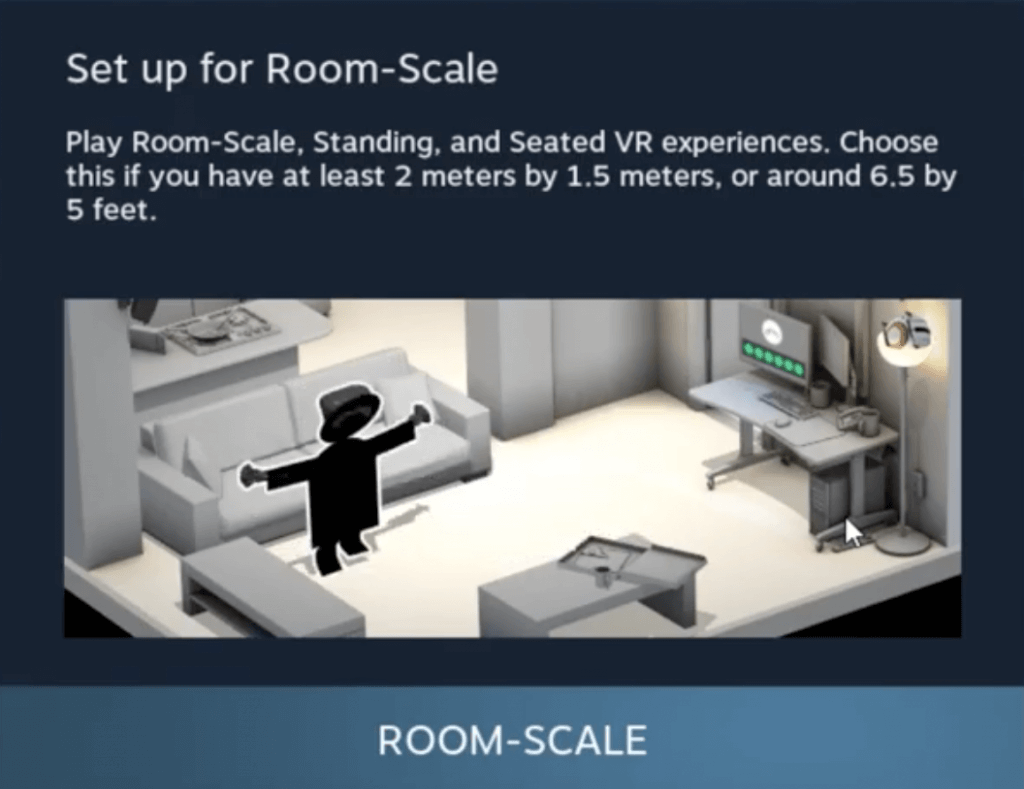
9. Vive room scale setup
The Vive allows for room-scale VR, meaning you can physically move around and interact with the virtual environment. This adds an extra level of immersion and excitement to your gaming experience. Make sure to configure the room scale settings in SteamVR to match the size of your play area.


Vive room scale setup


10. Living room setup for Vive
With your Vive now fully set up and ready to use, you can enjoy endless hours of immersive gaming and experiences in your living room. Just make sure to properly store and maintain your equipment to ensure its longevity and continued performance. Now, put on your headset and get ready to be transported to a whole new world.


Living room setup for Vive

Optimizing Your Living Room for the Vive Experience

Creating the Perfect Play Space
 Now that you have your
Vive
set up and ready to go, it’s time to transform your living room into the ultimate
VR
playground. The first step is to make sure you have enough space for room-scale
VR
experiences. Ideally, you should have at least 6.5 feet by 5 feet of clear space. This will allow you to move around freely without any fear of bumping into furniture or walls. If you have a smaller living room, don’t worry - there are ways to optimize your space for
Vive
without sacrificing gameplay.
Now that you have your
Vive
set up and ready to go, it’s time to transform your living room into the ultimate
VR
playground. The first step is to make sure you have enough space for room-scale
VR
experiences. Ideally, you should have at least 6.5 feet by 5 feet of clear space. This will allow you to move around freely without any fear of bumping into furniture or walls. If you have a smaller living room, don’t worry - there are ways to optimize your space for
Vive
without sacrificing gameplay.
Clearing the Space
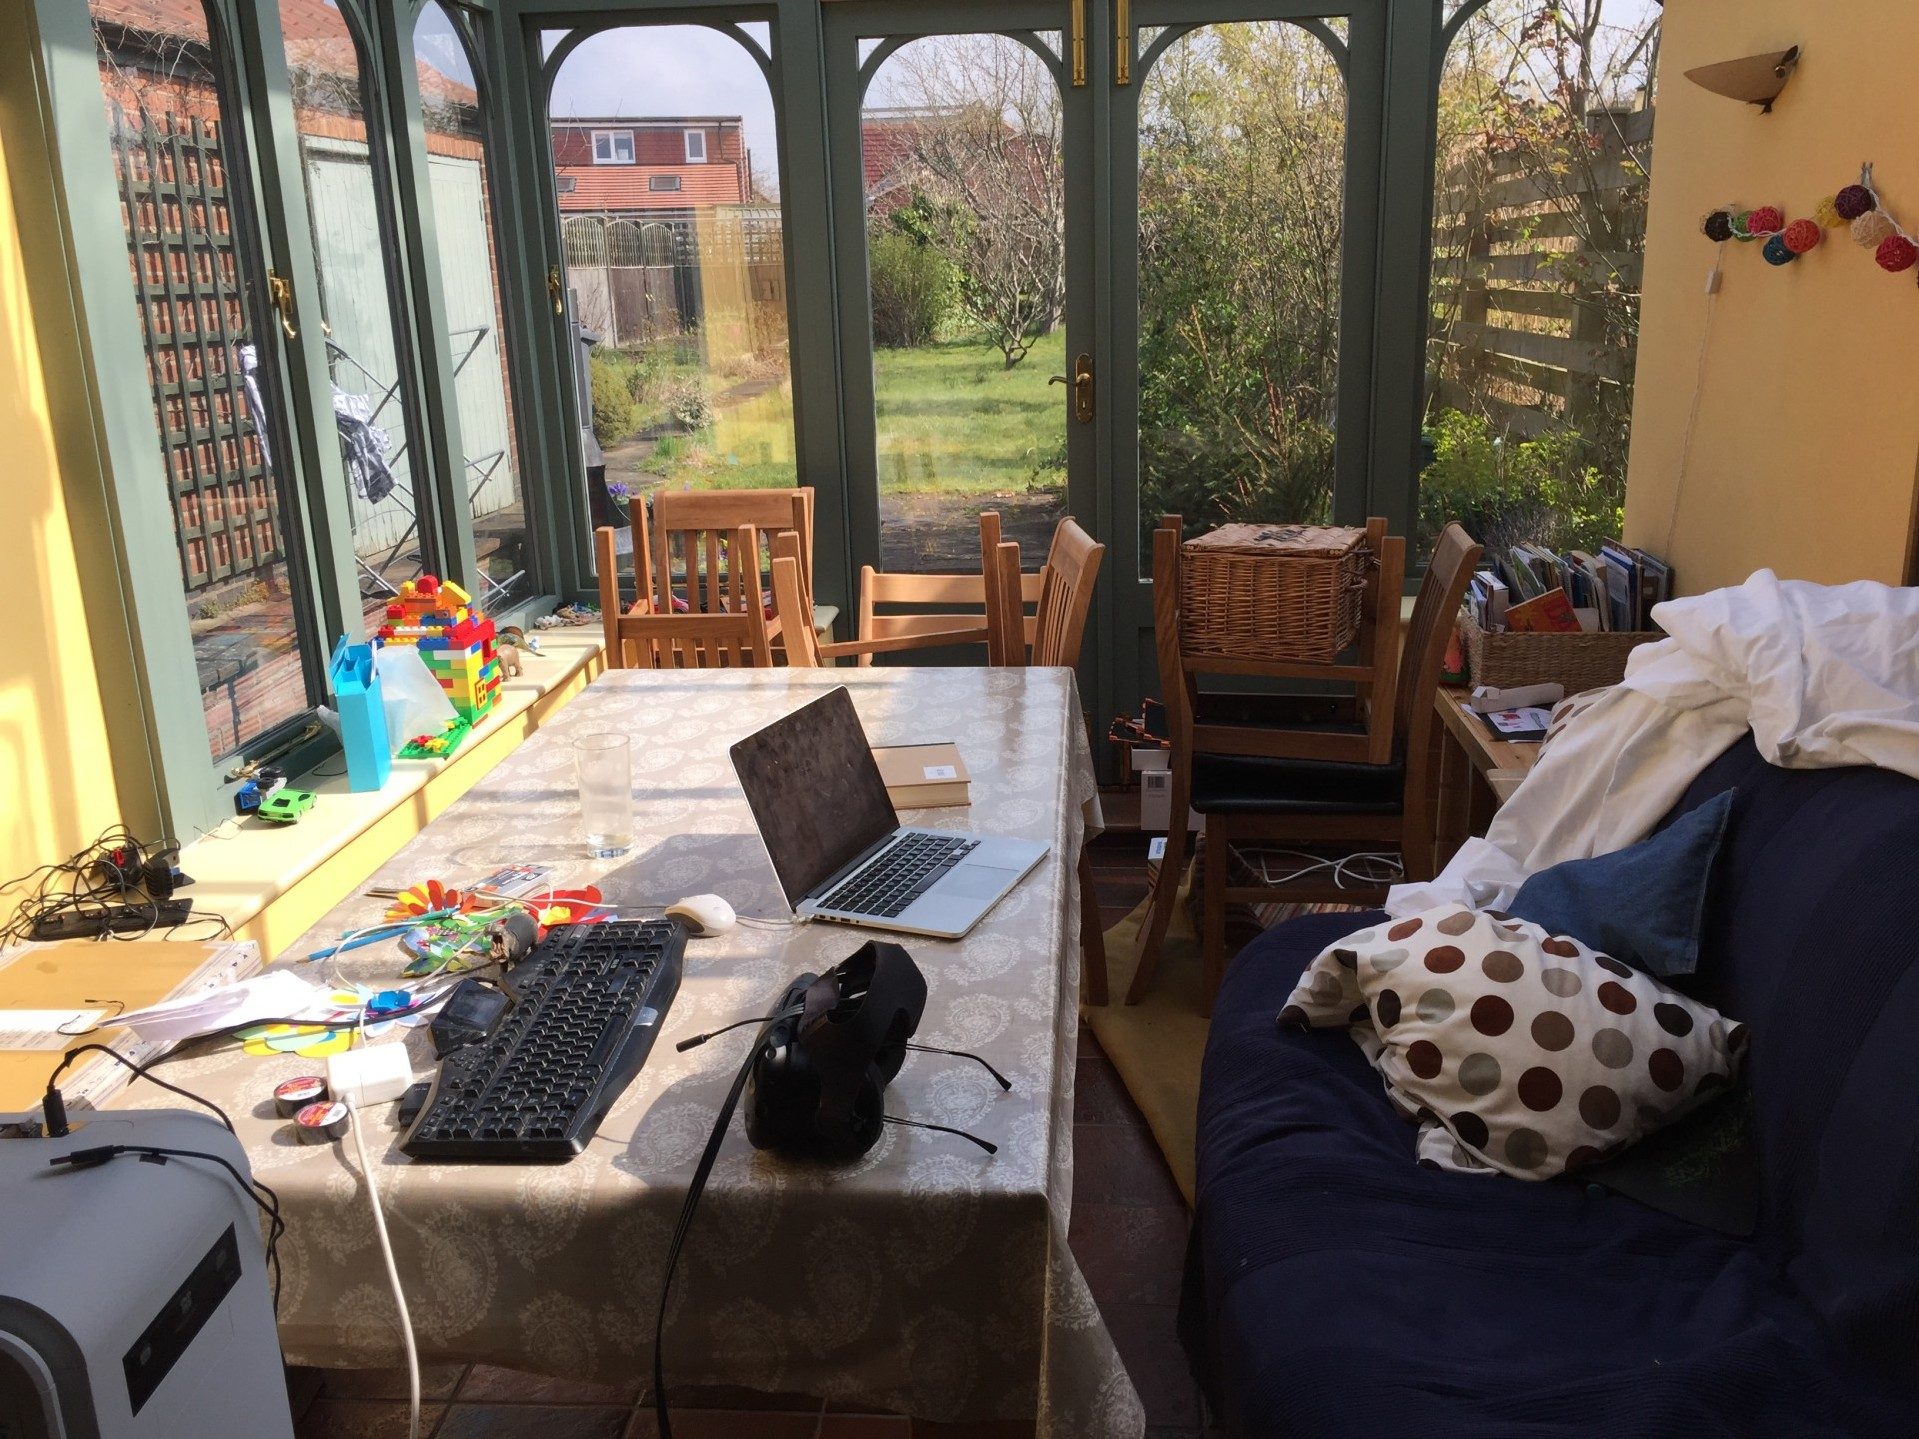
 The key to creating the perfect play space is to declutter and rearrange your living room. Start by removing any unnecessary furniture or objects that may obstruct your movements. This includes coffee tables, floor lamps, and other decorative items. You should also consider covering any fragile items or electronics with a sheet or blanket to protect them from accidental damage.
Setting Up the Base Stations
 Next, you will need to install the
Vive
base stations in your living room. These are the devices that track your movements and allow for room-scale
VR
experiences. The base stations should be placed in opposite corners of the play area, ideally mounted on the wall at a height of 6 feet. Make sure they are angled downwards towards the center of the play space for maximum coverage.
Next, you will need to install the
Vive
base stations in your living room. These are the devices that track your movements and allow for room-scale
VR
experiences. The base stations should be placed in opposite corners of the play area, ideally mounted on the wall at a height of 6 feet. Make sure they are angled downwards towards the center of the play space for maximum coverage.
Creating Boundaries
 To prevent yourself from accidentally stepping out of the play area, you can create virtual boundaries using the
Vive
software. This is especially useful if you have a smaller living room, as it will help you stay within the designated play space. You can also use physical objects, such as rugs or tape, to mark the boundaries for added safety.
To prevent yourself from accidentally stepping out of the play area, you can create virtual boundaries using the
Vive
software. This is especially useful if you have a smaller living room, as it will help you stay within the designated play space. You can also use physical objects, such as rugs or tape, to mark the boundaries for added safety.
Final Touches
 Before you start your
Vive
experience, make sure to do a quick safety check. Ensure that all cords and cables are neatly tucked away to avoid tripping hazards. You can also use cable management solutions to keep your living room looking tidy. Finally, adjust the
Vive
headset and controllers to fit comfortably and securely for the best
VR
experience.
With these tips, you can optimize your living room for
Vive
and fully immerse yourself in the world of
VR
. So go ahead, grab your headset, and prepare for the ultimate
Vive
experience right in the comfort of your own living room.
Before you start your
Vive
experience, make sure to do a quick safety check. Ensure that all cords and cables are neatly tucked away to avoid tripping hazards. You can also use cable management solutions to keep your living room looking tidy. Finally, adjust the
Vive
headset and controllers to fit comfortably and securely for the best
VR
experience.
With these tips, you can optimize your living room for
Vive
and fully immerse yourself in the world of
VR
. So go ahead, grab your headset, and prepare for the ultimate
Vive
experience right in the comfort of your own living room.