If your kitchen table is looking worn and tired, restaining it can give it a fresh new look without breaking the bank. Restaining is a great option for updating your kitchen table, as it allows you to keep the original wood and character while changing the color or finish. In this article, we will guide you through the process of restaining your kitchen table, from choosing the right products to applying the stain.How to Restain a Kitchen Table


How to Restain a Kitchen Table


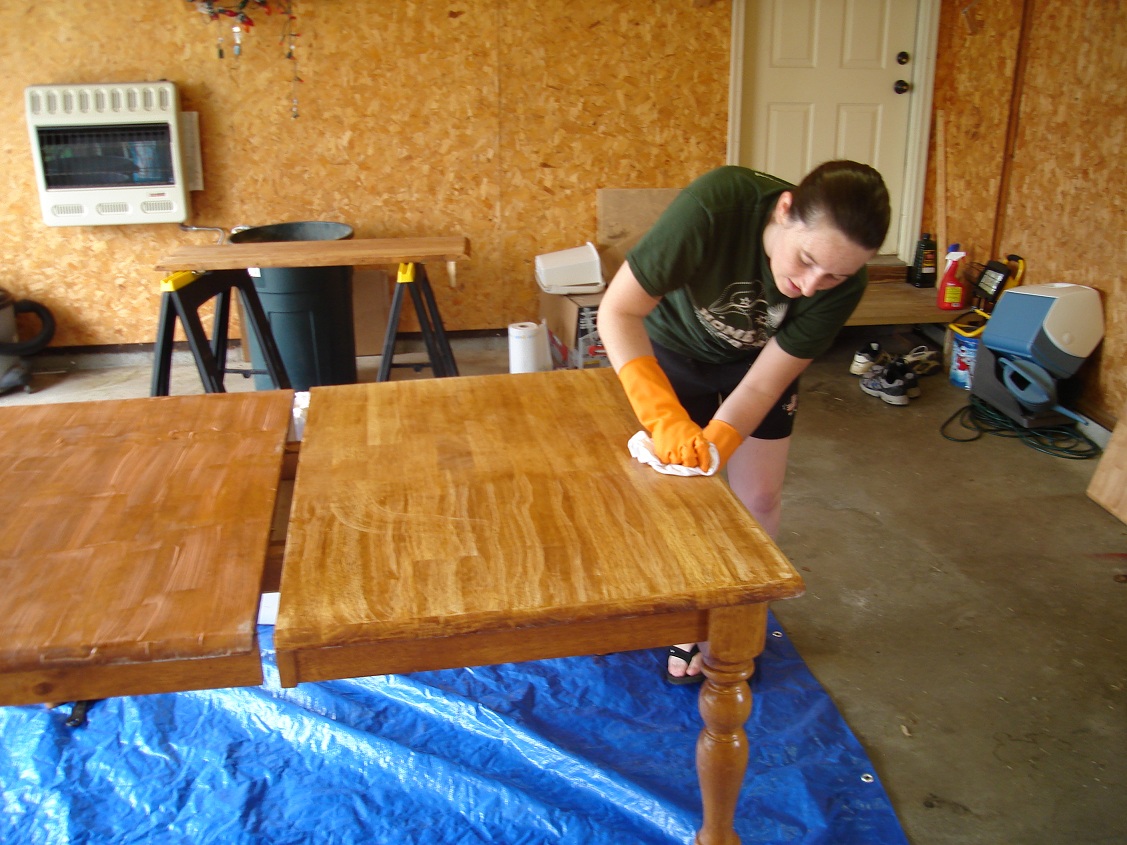


Restaining a kitchen table may seem like a daunting task, but it can be done easily with the right tools and techniques. Here is a step-by-step guide to help you achieve a professional-looking restain for your kitchen table: Step 1: Prepare your workspace by covering the floor and surrounding area with drop cloths or newspapers. This will protect your floors and furniture from any spills or drips. Step 2: Remove any existing finish from the table by sanding it down. You can use an electric sander or sandpaper, but make sure to sand in the direction of the wood grain for a smooth finish. Step 3: Clean the table thoroughly with a mixture of warm water and mild soap. This will remove any dust or debris from the sanding process and ensure a smooth surface for the stain to adhere to. Step 4: Apply a wood conditioner to the table. This will help the stain to absorb evenly and prevent any blotchiness or uneven color. Step 5: Choose your stain. There are a variety of stains available, from oil-based to water-based, so make sure to choose one that best suits your needs and preferences. Step 6: Apply the stain using a brush or cloth, following the direction of the wood grain. Start with a small section and work your way across the table, making sure to blend any overlapping areas. Step 7: Allow the stain to dry completely, following the instructions on the product. This usually takes 24 hours. Step 8: Apply a second coat of stain if desired. This will deepen the color and give a more dramatic finish. Step 9: Once the second coat is dry, apply a clear finish to protect the stain and give a smooth, durable surface. You can choose between a polyurethane, varnish, or wax finish. Step 10: Allow the finish to dry completely before using your newly restained kitchen table.Restaining a Kitchen Table: A Step-by-Step Guide


Restaining a Kitchen Table: A Step-by-Step Guide


Restaining your kitchen table can be a fun and rewarding DIY project. Not only will you save money, but you will also have the satisfaction of transforming your table with your own hands. Here are some tips to help you achieve a successful DIY restain: Tip 1: Take your time and be patient. Restaining is not a quick process and rushing can lead to mistakes and a less than perfect finish. Tip 2: Test the stain on a small, inconspicuous area of the table first to see how it looks and absorbs. This will give you an idea of the final color and allow you to make any adjustments if necessary. Tip 3: Make sure to wear protective gear, such as gloves and a mask, when working with stain and finish. These products can be harmful if inhaled or in contact with skin. Tip 4: Follow the instructions on the products carefully and don’t be afraid to ask for help or advice from a professional if needed.DIY Kitchen Table Restaining Tutorial


DIY Kitchen Table Restaining Tutorial


Choosing the right products for restaining your kitchen table is crucial for achieving a successful and long-lasting finish. Here are some highly recommended products to consider: Minwax Wood Conditioner – This product helps to prepare the wood for staining and prevents blotchiness or uneven color. Varathane Premium Gel Stain – This gel stain is easy to apply and gives a deep, rich color to your table. General Finishes Arm-R-Seal Urethane Topcoat – This topcoat provides a durable and protective finish to your restained table.Best Products for Restaining a Kitchen Table


Best Products for Restaining a Kitchen Table


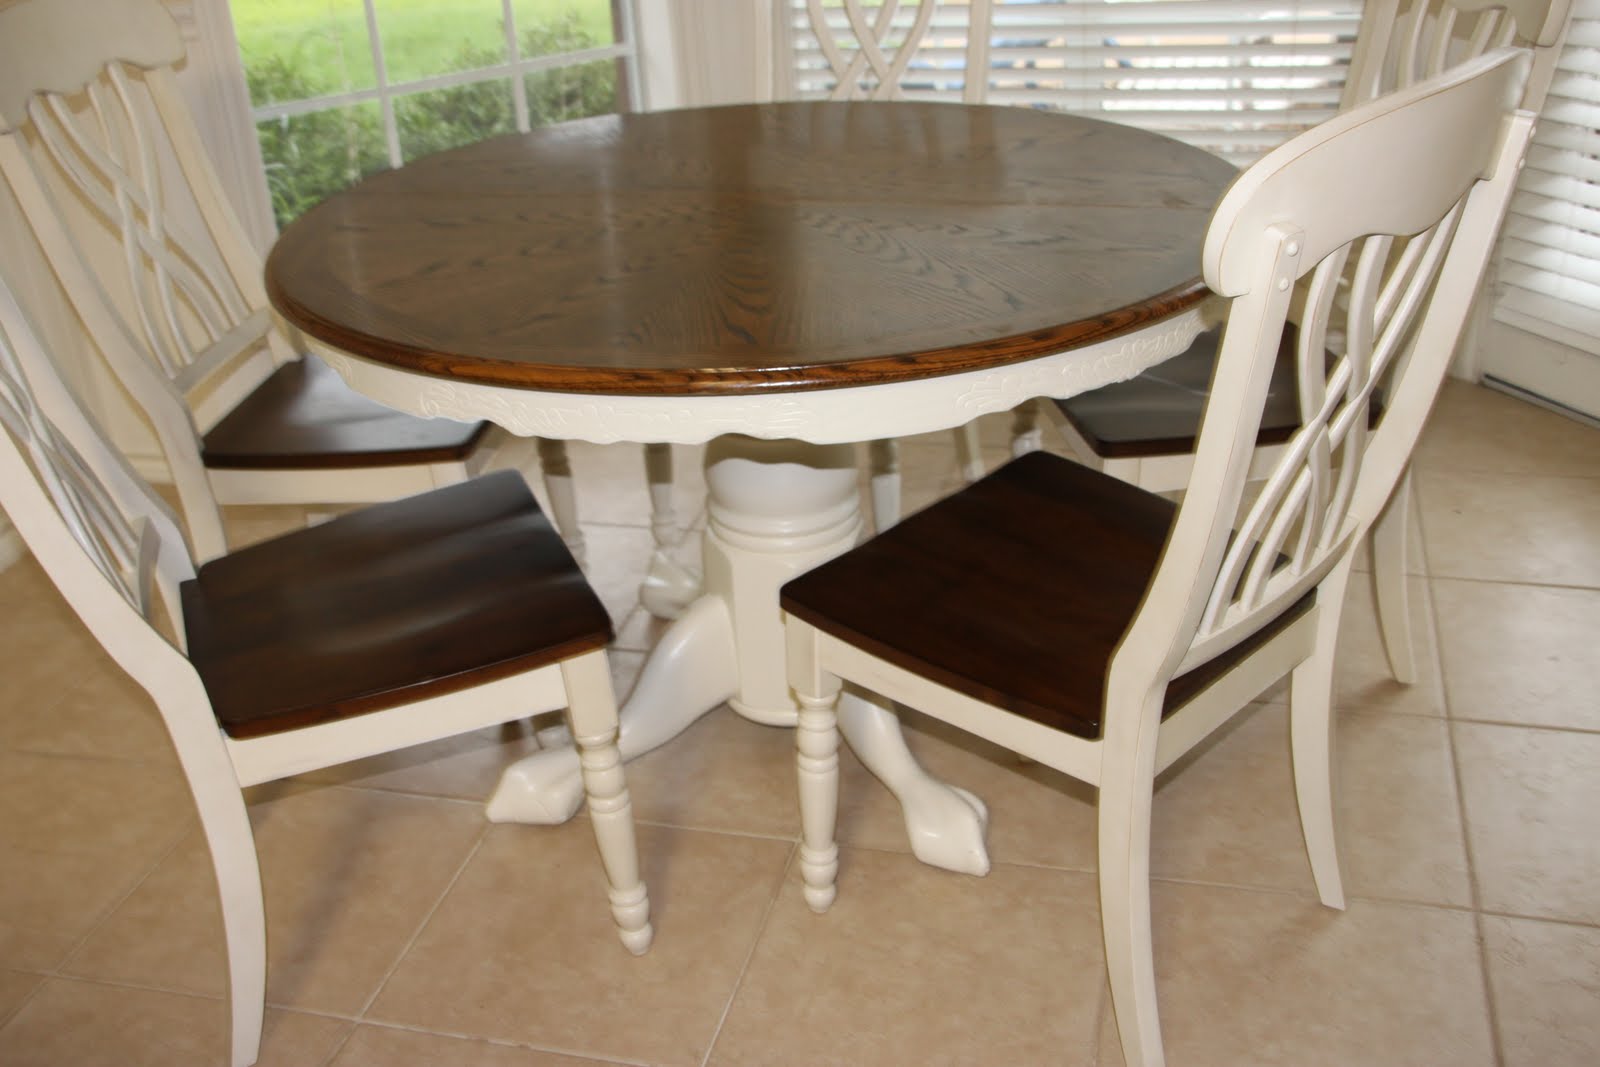
When it comes to updating your kitchen table, you may be wondering whether to restain or refinish it. While both methods can give your table a new look, there are some differences to consider: Restaining involves sanding down the existing finish and applying a new stain. This is a more budget-friendly option and allows you to keep the original wood and character of your table. Refinishing involves completely stripping the table down to its bare wood and applying a new finish. This is a more time-consuming and costly option, but can give you more control over the final color and finish of your table. Ultimately, the best option for your kitchen table will depend on your budget, time, and preferences. If your table is in good condition and you are happy with the wood, restaining may be the better option. However, if your table is damaged or you want a completely new look, refinishing may be the way to go.Restaining vs. Refinishing: Which is Better for Your Kitchen Table?


Restaining vs. Refinishing: Which is Better for Your Kitchen Table?


Choosing the right stain for your kitchen table can be overwhelming, with so many options available. Here are some tips to help you make the right choice: Consider the wood type: Different types of wood absorb stain differently, so consider the type of wood your table is made of when choosing a stain. Test the color: As mentioned before, it’s important to test the stain on a small area of the table first to see how it looks and absorbs. Consider the finish: Stains come in different finishes, such as matte, satin, and glossy. Think about the overall look you want for your table and choose a finish that complements it. Think about the room: Consider the color scheme of your kitchen and the overall style of the room when choosing a stain. You want your table to blend in and complement the space.Tips for Choosing the Right Stain for Your Kitchen Table


Tips for Choosing the Right Stain for Your Kitchen Table


Restaining a kitchen table may seem straightforward, but there are some common mistakes that can lead to a less than perfect finish. Here are some mistakes to avoid: Skipping the prep work: Preparing your table properly before restaining is crucial for achieving a smooth and even finish. Not testing the stain: As mentioned before, testing the stain on a small area of the table first can save you from any unpleasant surprises and allow you to make any adjustments if needed. Not sanding properly: Sanding the table in the direction of the wood grain is important for achieving a smooth and even surface for the stain to adhere to. Not using wood conditioner: This step is often overlooked, but using a wood conditioner can make a big difference in the final result of your restain.Common Mistakes to Avoid When Restaining a Kitchen Table


Common Mistakes to Avoid When Restaining a Kitchen Table


Properly preparing your kitchen table before restaining is crucial for achieving a successful finish. Here are some tips for prepping your table: Clean the table: Make sure to remove any dust or debris from the sanding process by cleaning the table with warm water and mild soap. Sand the table: Use an electric sander or sandpaper to remove any existing finish from the table. Sand in the direction of the wood grain for a smooth finish. Apply wood conditioner: This step will help the stain to absorb evenly and prevent any blotchiness or uneven color. Cover the surrounding area: Protect your floors and furniture by covering the surrounding area with drop cloths or newspapers.How to Prep Your Kitchen Table for Restaining


How to Prep Your Kitchen Table for Restaining


Restaining a kitchen table has both advantages and disadvantages. Here are some pros and cons to consider before deciding to restain your table: Pros:Restaining a Kitchen Table: Pros and Cons


Restaining a Kitchen Table: Pros and Cons


To achieve a professional-looking restain for your kitchen table, here are some expert tips to keep in mind: Properly prep your table: As mentioned before, properly preparing your table before restaining is crucial for a smooth and even finish. Use quality products: Using high-quality products, such as a wood conditioner and stain, will make a big difference in the final result. Follow the instructions: Make sure to read and follow the instructions on the products carefully for the best results. Be patient: Take your time and be patient, as rushing can lead to mistakes and a less than perfect finish. Restaining your kitchen table is a cost-effective and rewarding way to give your table a new look. By following these tips and techniques, you can achieve a professional-looking restain that will refresh your space and bring new life to your kitchen table.Expert Tips for a Professional-Looking Kitchen Table Restain


Expert Tips for a Professional-Looking Kitchen Table Restain


Restain Your Kitchen Table to Give Your Home a Fresh Look

Is your kitchen table looking dull and worn out? Are you tired of the same old color and want to give it a fresh new look? Restaining your kitchen table is a simple and cost-effective way to transform the overall look of your kitchen. Not only does it give your table a new lease on life, but it also adds a touch of elegance and style to your home. In this article, we will discuss the benefits of restaining your kitchen table and the step-by-step process to achieve a professional and beautiful result.
The Benefits of Restaining Your Kitchen Table

When it comes to home design, the kitchen is often referred to as the heart of the house. It's where meals are prepared, family gatherings take place, and memories are made. The kitchen table plays a central role in all of these activities, making it an essential piece of furniture in any home. Over time, the constant use and exposure to heat, spills, and scratches can take a toll on its appearance. Restaining your kitchen table can bring back its original beauty and provide the following benefits:
- Cost-effective: Instead of buying a new kitchen table, restaining is a budget-friendly option. It requires minimal supplies and can be done at home, saving you money on professional services.
- Customization: Restaining allows you to choose any color or shade that matches your kitchen's decor and personal style. You can also experiment with different finishes, such as glossy or matte, to achieve the desired look.
- Long-lasting: A properly restained kitchen table can last for years, even with regular use. It provides a protective layer that helps prevent damage from daily wear and tear.
The Step-by-Step Process of Restaining Your Kitchen Table

Now that you know the benefits of restaining your kitchen table, let's go over the step-by-step process to achieve a professional and long-lasting result.
Step 1: Prepare Your Table
Before starting, make sure to clean your table thoroughly. Use a gentle cleaner and a soft cloth to remove any dirt, grime, or residue. Sanding the table lightly with fine-grit sandpaper will help the new stain adhere better. Wipe the table down with a damp cloth and let it dry completely.
Step 2: Protect the Surrounding Area
Restaining can get messy, so it's essential to protect the surrounding area. Cover the floor with a drop cloth and use painter's tape to protect the edges of the table from getting stained.
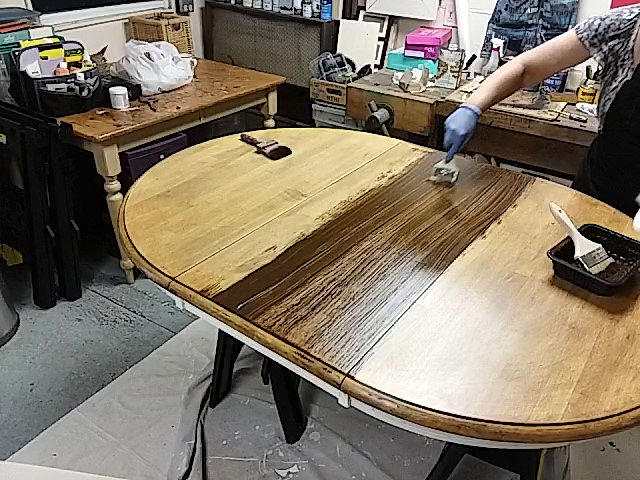
Step 3: Apply the Stain
Using a high-quality brush, apply a small amount of wood stain in the direction of the wood grain. Work in small sections, blending the stain evenly. Let it sit for a few minutes before wiping off any excess with a clean cloth. Repeat this process until you achieve the desired color and coverage.
Step 4: Add a Protective Layer
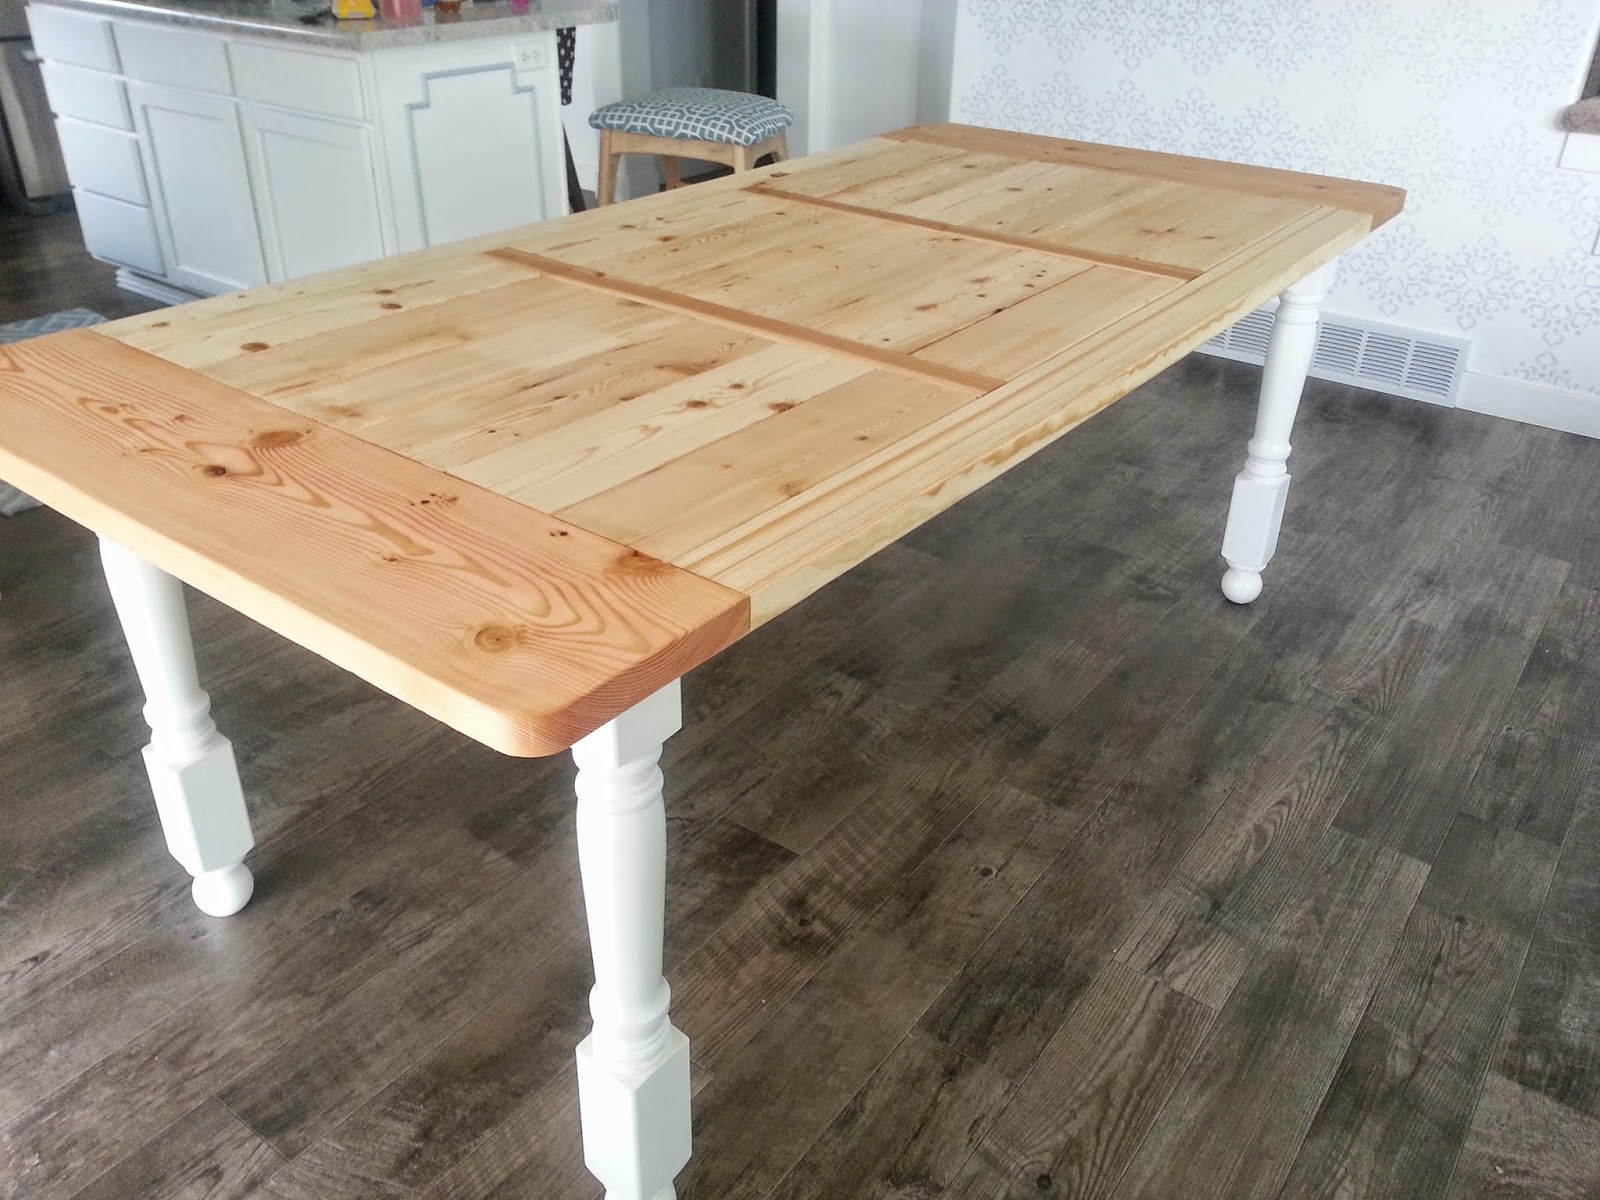
Once the stain is completely dry, apply a layer of polyurethane sealant to protect the table from scratches and moisture. Use a clean brush and apply the sealant in thin, even coats. Let it dry completely before adding another layer.
Step 5: Finishing Touches
After the sealant has dried, lightly sand the table with fine-grit sandpaper and wipe it down with a cloth to remove any dust. Apply a final coat of sealant and let it dry completely before using your newly restained kitchen table.
In conclusion, restaining your kitchen table is a simple and affordable way to give your home a fresh and updated look. By following these steps, you can achieve a professional and long-lasting result that will make your kitchen table the centerpiece of your home. So, why wait? Grab your supplies and start restaining today!