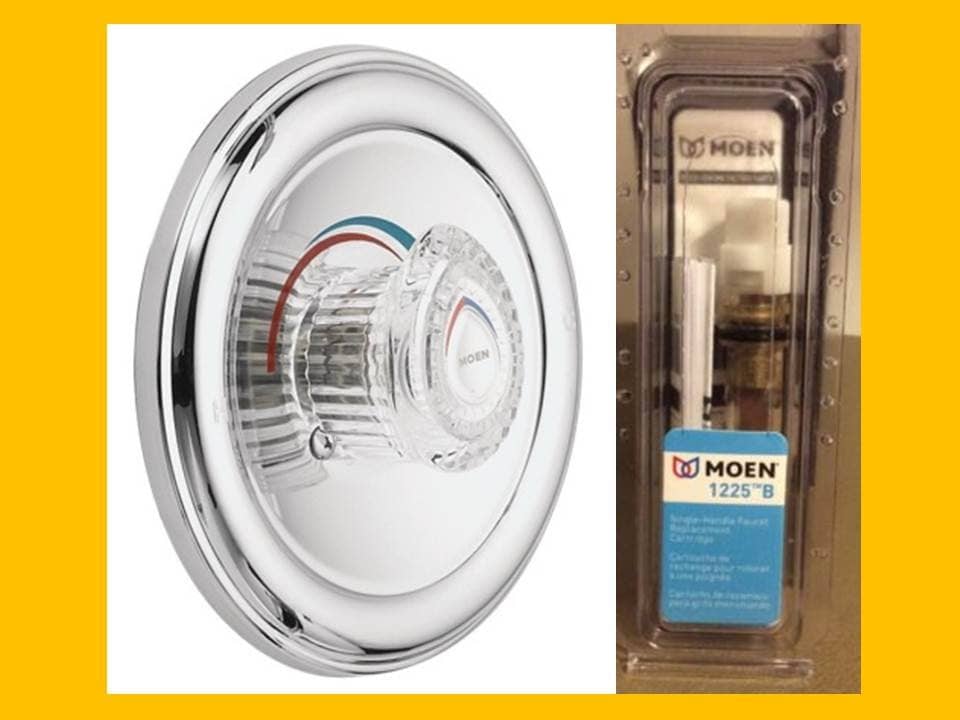
How to Replace a Moen Bathroom Sink Cartridge
If you're experiencing leaks or other issues with your Moen bathroom sink faucet, it may be time to replace the cartridge. This small but essential part controls the flow of water and can become worn out over time. Don't worry - replacing a Moen bathroom sink cartridge is a simple DIY task that can save you time and money. Follow these step-by-step instructions to get your faucet working like new again.


How to Replace a Moen Bathroom Sink Cartridge


:max_bytes(150000):strip_icc()/moen-faucet-cartridge-replacement-2718852-04-ea1736b5288b4ed8950218f6ed8e85a0.jpg?strip=all)


Moen Bathroom Sink Cartridge Replacement Guide
Before you begin, you'll need to gather a few tools and materials:

Moen Bathroom Sink Cartridge Replacement Guide


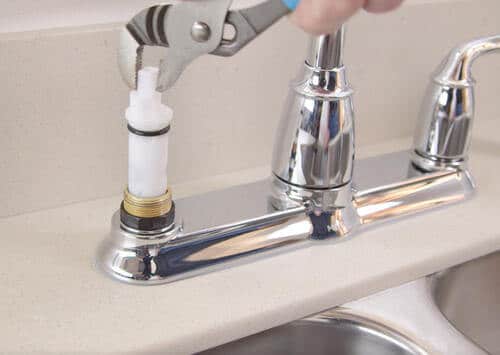
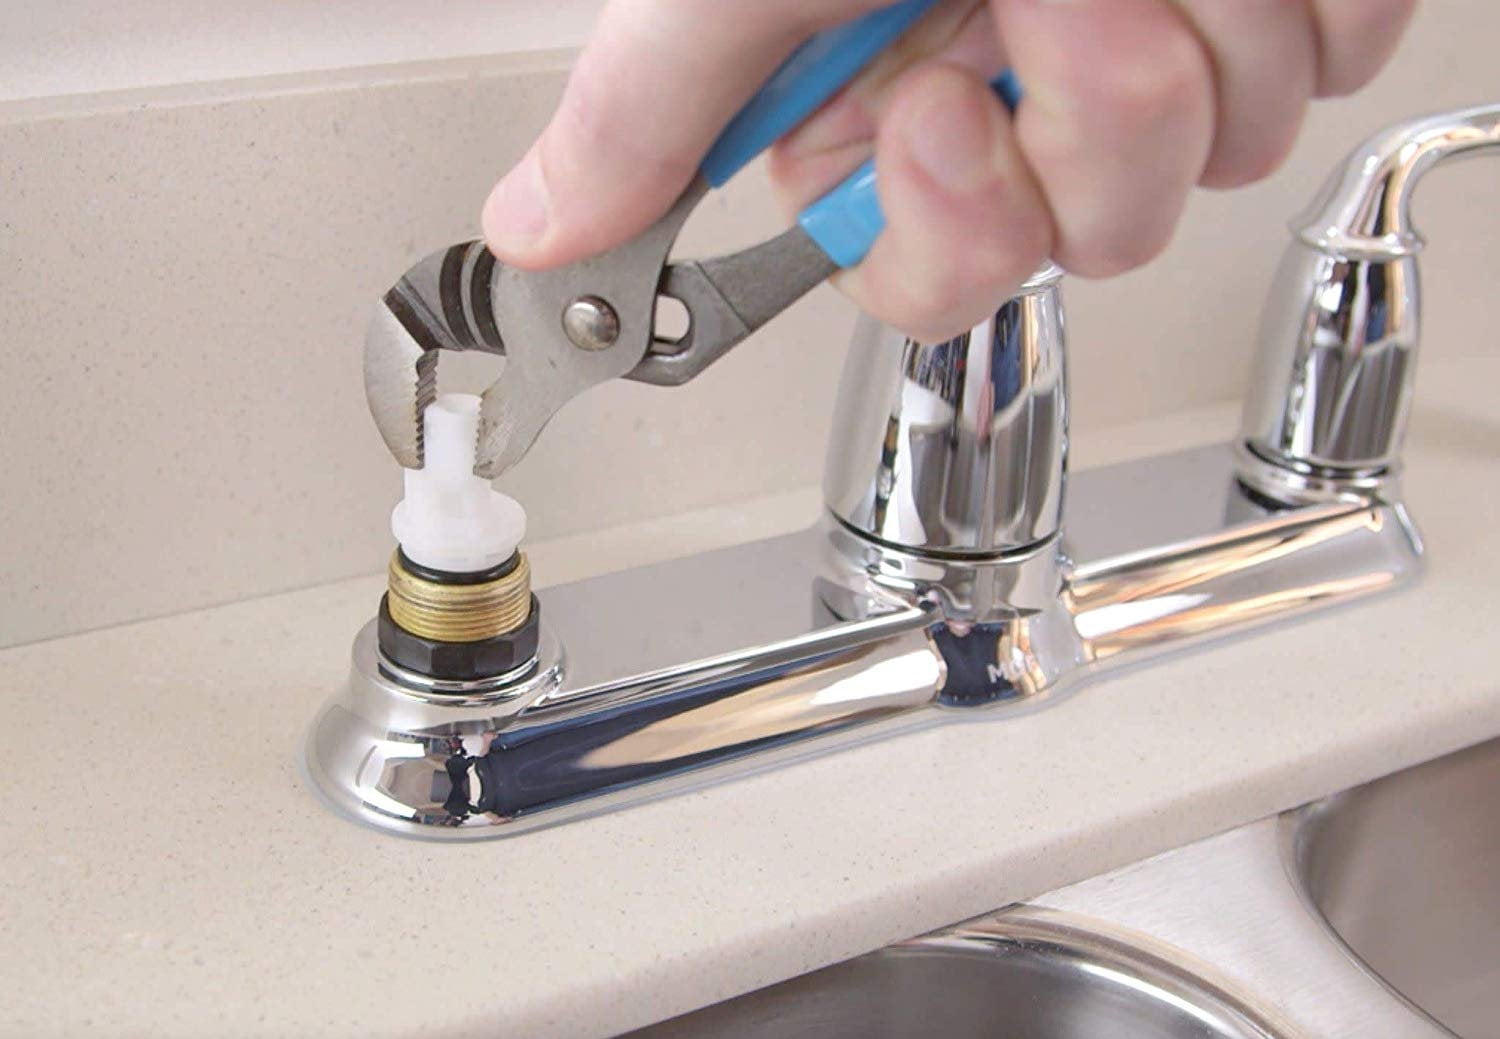
Step-by-Step Instructions for Replacing a Moen Bathroom Sink Cartridge
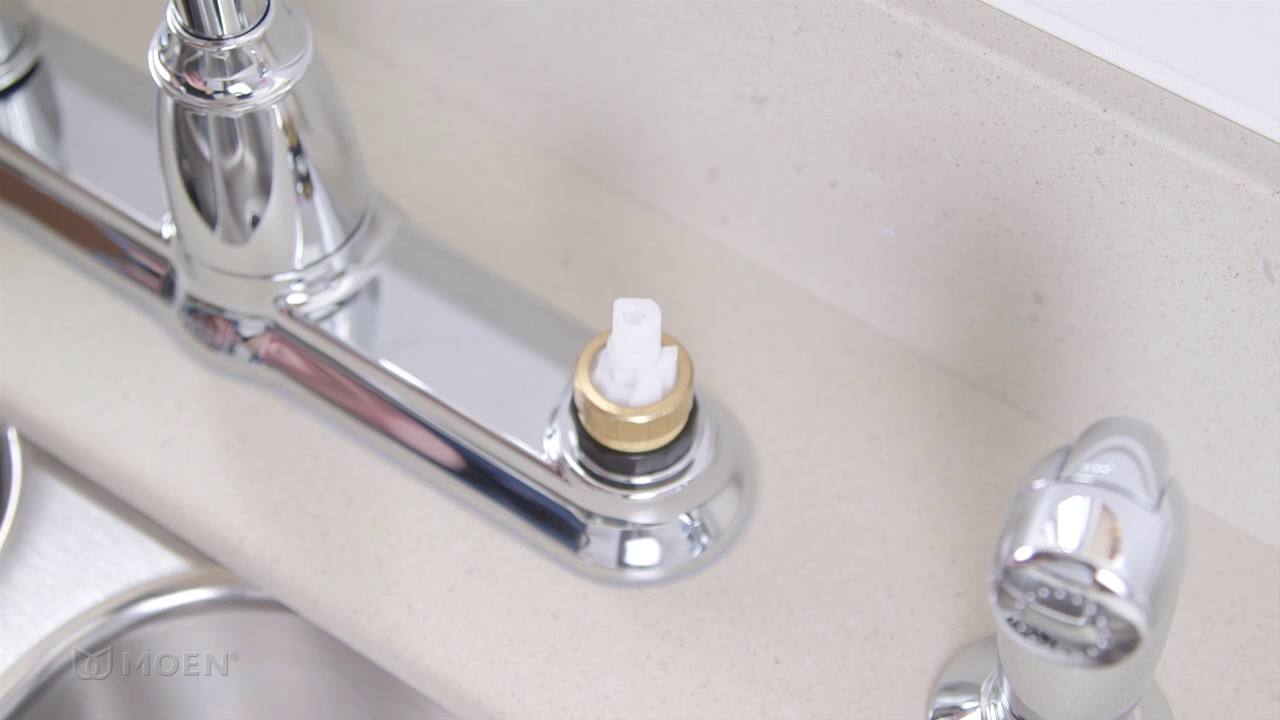
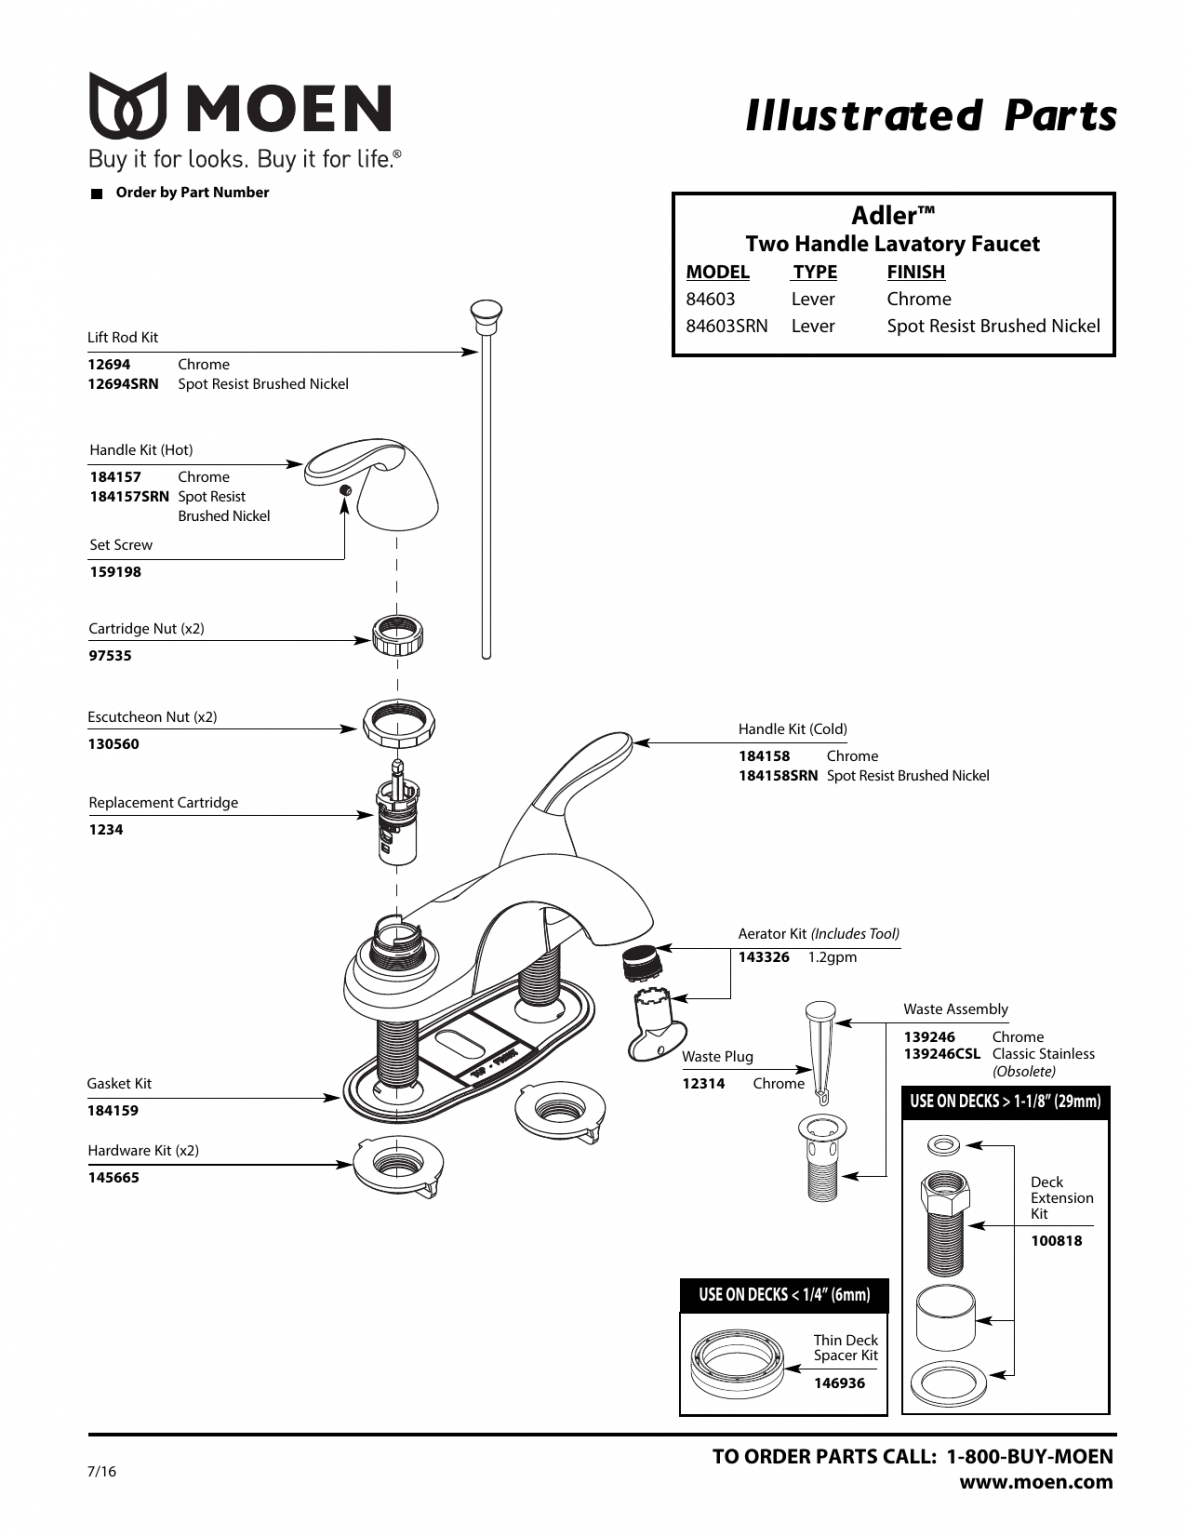
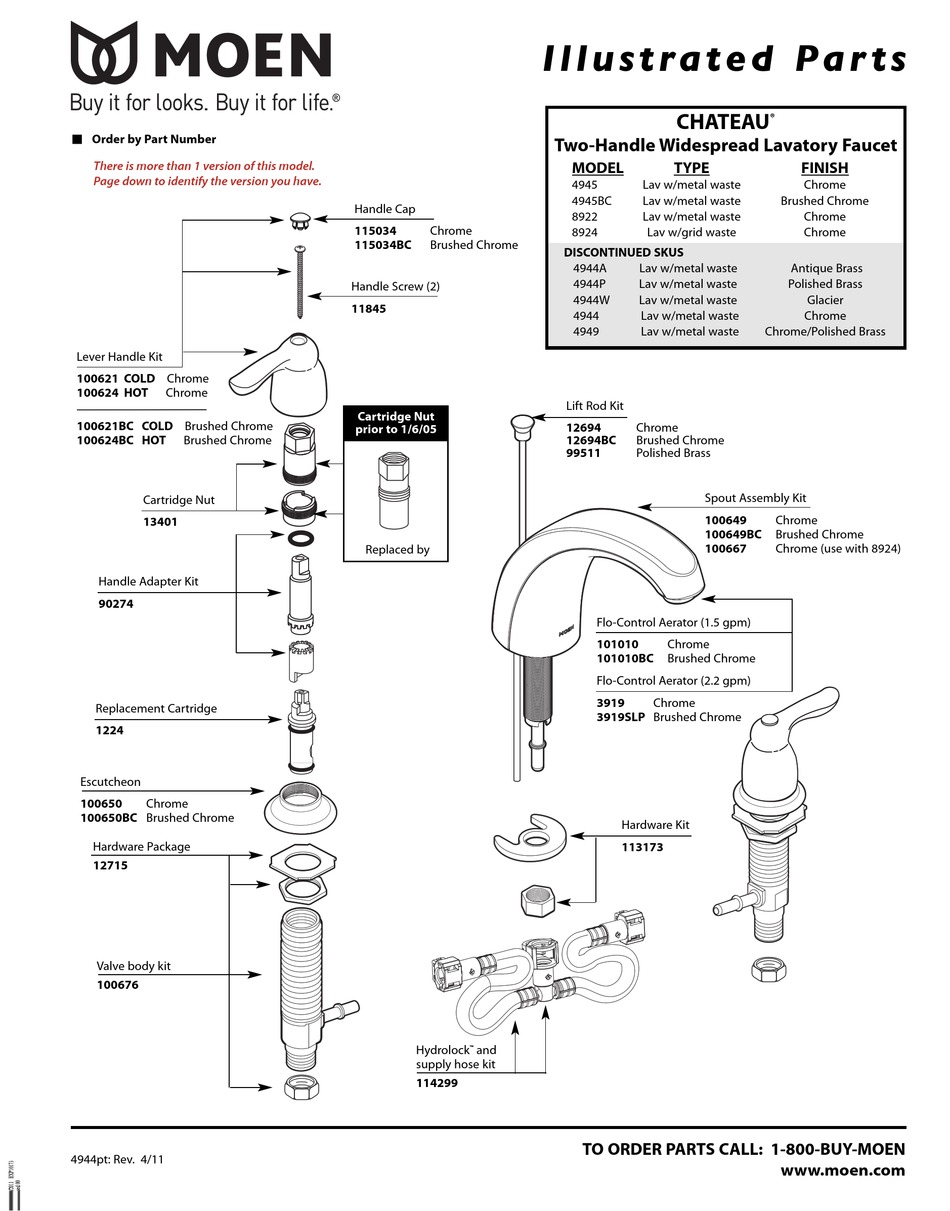
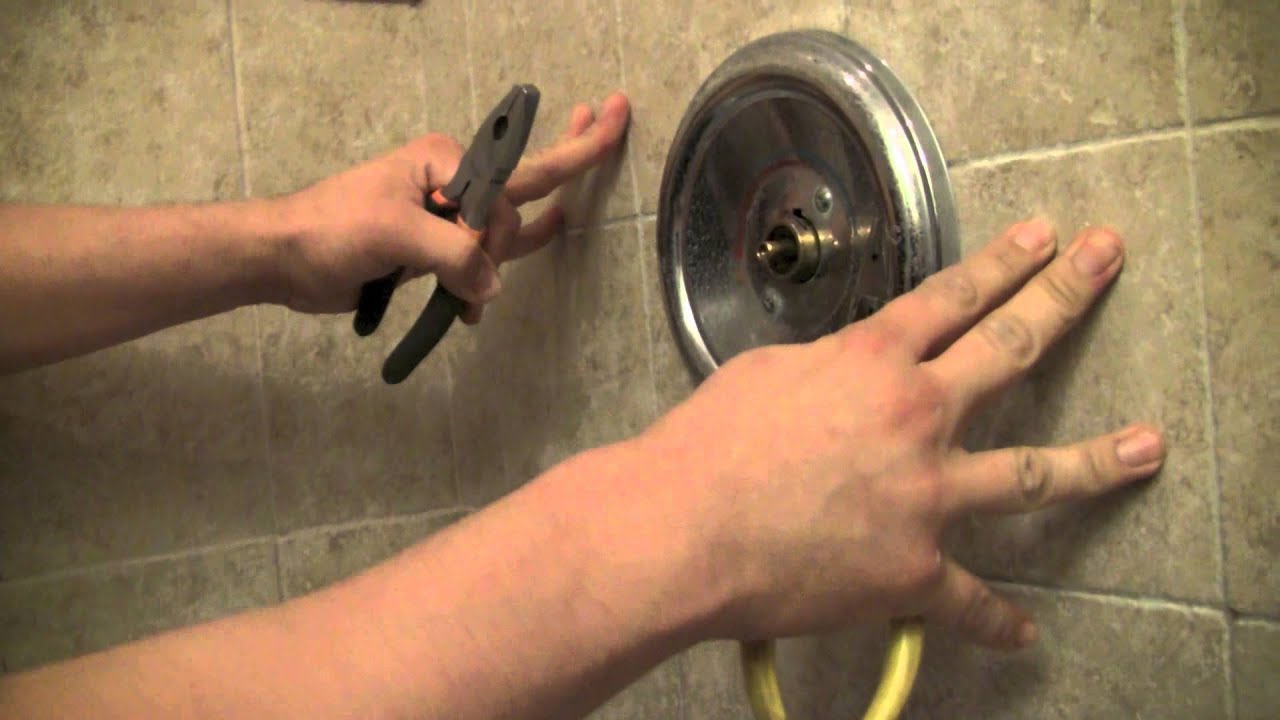
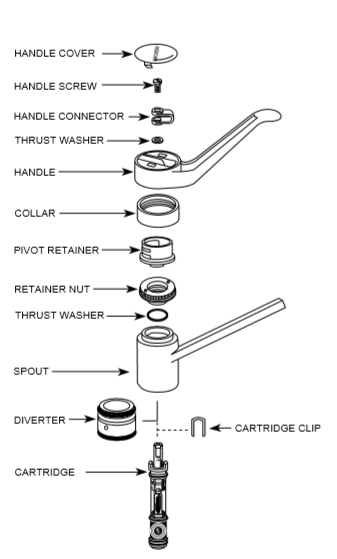
Step 1: Remove the handle. Use a flathead screwdriver to pry off the handle's decorative cap, then use a Phillips head screwdriver to remove the screw underneath. Once the screw is removed, you should be able to easily pull off the handle.
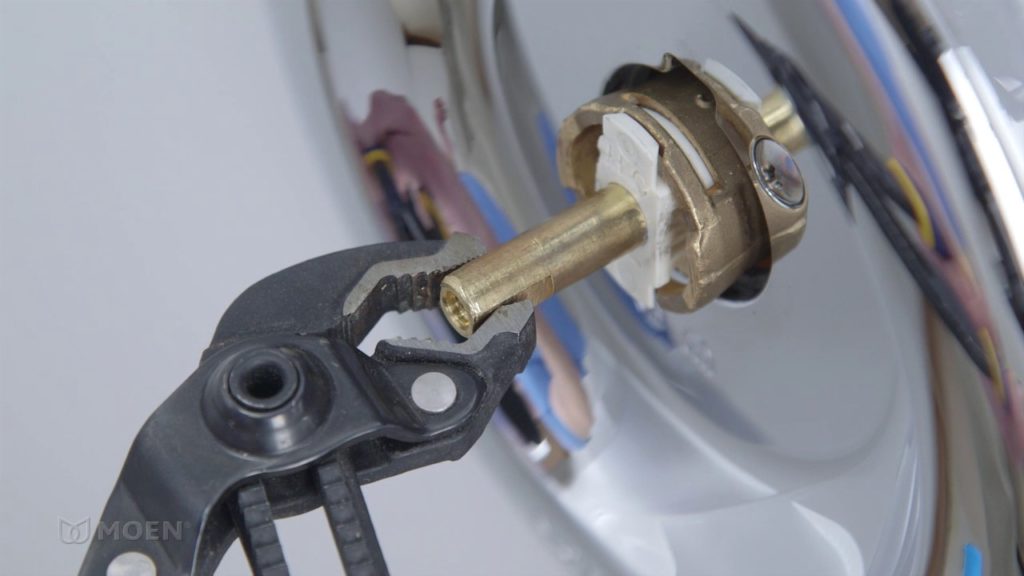
Step 2: Remove the retaining clip. Using a pair of pliers, carefully remove the retaining clip that holds the cartridge in place. Keep the clip in a safe place - you'll need it later.
Step 3: Remove the cartridge. Use an adjustable wrench to loosen and remove the cartridge nut, then gently pull out the old cartridge.
Step 4: Install the new cartridge. Apply a thin layer of plumber's grease to the new cartridge's O-rings to ensure a smooth installation. Then, slide the new cartridge into place and secure it with the nut.
Step 5: Reinstall the retaining clip. Place the retaining clip back in its original position and use the pliers to secure it in place.
Step 6: Reattach the handle. Put the handle back on and secure it with the screw and decorative cap.
Step 7: Turn the water supply back on and test the faucet. If everything is working properly, congratulations - you have successfully replaced your Moen bathroom sink cartridge!


Step-by-Step Instructions for Replacing a Moen Bathroom Sink Cartridge


DIY: Replacing a Moen Bathroom Sink Cartridge
Replacing a Moen bathroom sink cartridge is a DIY project that can save you time and money. Hiring a professional plumber can be costly, so follow these simple steps to do it yourself and get your faucet back in working order.


DIY: Replacing a Moen Bathroom Sink Cartridge


Quick and Easy Guide to Replacing a Moen Bathroom Sink Cartridge
With the right tools and a little know-how, replacing a Moen bathroom sink cartridge can be a quick and easy task. Follow these steps and you'll have your faucet working like new in no time.

Quick and Easy Guide to Replacing a Moen Bathroom Sink Cartridge


Replacing a Moen Bathroom Sink Cartridge: Tips and Tricks
Here are a few tips to keep in mind when replacing your Moen bathroom sink cartridge:


Replacing a Moen Bathroom Sink Cartridge: Tips and Tricks
The Ultimate Guide to Replacing a Moen Bathroom Sink Cartridge
This comprehensive guide has everything you need to know to successfully replace a Moen bathroom sink cartridge. From tools and materials to step-by-step instructions, this guide has got you covered.


The Ultimate Guide to Replacing a Moen Bathroom Sink Cartridge
Replacing a Moen Bathroom Sink Cartridge: Common Mistakes to Avoid
While replacing a Moen bathroom sink cartridge is a simple task, there are a few common mistakes that can be easily avoided:

Replacing a Moen Bathroom Sink Cartridge: Common Mistakes to Avoid

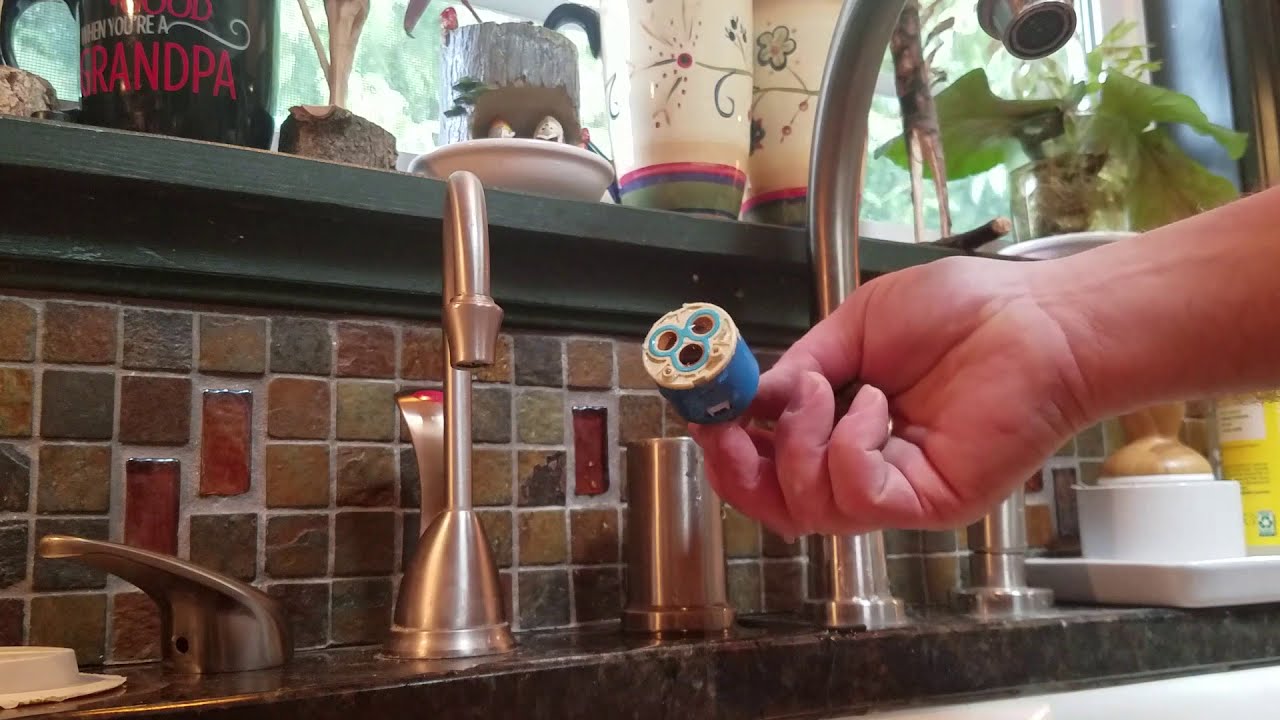
Step-by-Step Video Tutorial: Replacing a Moen Bathroom Sink Cartridge
If you're more of a visual learner, check out this helpful step-by-step video tutorial for replacing a Moen bathroom sink cartridge. With clear instructions and visuals, you'll have your faucet working like new in no time.

Step-by-Step Video Tutorial: Replacing a Moen Bathroom Sink Cartridge


Replacing a Moen Bathroom Sink Cartridge: Tools and Materials You'll Need
Before you begin, make sure you have all the necessary tools and materials on hand:

Replacing a Moen Bathroom Sink Cartridge: Tools and Materials You'll Need
Why Should You Replace Your Moen Bathroom Sink Cartridge?
Improve the Functionality and Efficiency of Your Sink
 Replacing the
Moen bathroom sink cartridge
may seem like a daunting task, but it can greatly improve the functionality and efficiency of your sink. Over time, the cartridge can become worn or damaged, resulting in leaks or reduced water flow. This not only affects the performance of your sink, but it can also lead to higher water bills. By replacing the cartridge, you can ensure that your sink is working at its best and save money in the long run.
Replacing the
Moen bathroom sink cartridge
may seem like a daunting task, but it can greatly improve the functionality and efficiency of your sink. Over time, the cartridge can become worn or damaged, resulting in leaks or reduced water flow. This not only affects the performance of your sink, but it can also lead to higher water bills. By replacing the cartridge, you can ensure that your sink is working at its best and save money in the long run.
Prevent Water Damage and Costly Repairs
 A faulty
bathroom sink cartridge
can also lead to water damage and costly repairs if left unattended. Leaks from a worn or damaged cartridge can cause water to seep into your cabinets and floors, leading to mold and mildew growth. This not only poses a health hazard, but it can also result in expensive repairs. By regularly replacing the cartridge, you can prevent these issues and maintain the integrity of your bathroom.
A faulty
bathroom sink cartridge
can also lead to water damage and costly repairs if left unattended. Leaks from a worn or damaged cartridge can cause water to seep into your cabinets and floors, leading to mold and mildew growth. This not only poses a health hazard, but it can also result in expensive repairs. By regularly replacing the cartridge, you can prevent these issues and maintain the integrity of your bathroom.
Upgrade the Look of Your Bathroom
 Replacing the
Moen bathroom sink cartridge
is also a great opportunity to upgrade the look of your bathroom. Over time, the cartridge can become discolored or worn, making your sink look outdated. By installing a new cartridge, you can instantly refresh the look of your sink and give your bathroom a more modern and polished appearance.
Replacing the
Moen bathroom sink cartridge
is also a great opportunity to upgrade the look of your bathroom. Over time, the cartridge can become discolored or worn, making your sink look outdated. By installing a new cartridge, you can instantly refresh the look of your sink and give your bathroom a more modern and polished appearance.
Ensure Proper Hygiene and Cleanliness
 A damaged or worn
bathroom sink cartridge
can also affect the cleanliness and hygiene of your sink. Leaks and reduced water flow can make it difficult to properly clean your sink, leading to a buildup of bacteria and germs. By replacing the cartridge, you can ensure that your sink is functioning properly and maintain a clean and sanitary bathroom.
A damaged or worn
bathroom sink cartridge
can also affect the cleanliness and hygiene of your sink. Leaks and reduced water flow can make it difficult to properly clean your sink, leading to a buildup of bacteria and germs. By replacing the cartridge, you can ensure that your sink is functioning properly and maintain a clean and sanitary bathroom.
Conclusion
 In conclusion, replacing the
Moen bathroom sink cartridge
is a simple and cost-effective way to improve the functionality, efficiency, and appearance of your sink. It can also prevent water damage, costly repairs, and ensure proper hygiene and cleanliness in your bathroom. So, don't wait for leaks or reduced water flow to become a problem, regularly replacing your bathroom sink cartridge is a small task that can make a big difference.
In conclusion, replacing the
Moen bathroom sink cartridge
is a simple and cost-effective way to improve the functionality, efficiency, and appearance of your sink. It can also prevent water damage, costly repairs, and ensure proper hygiene and cleanliness in your bathroom. So, don't wait for leaks or reduced water flow to become a problem, regularly replacing your bathroom sink cartridge is a small task that can make a big difference.