How to Replace a Bathroom Sink Drain Plug
Replacing a bathroom sink drain plug may seem like a daunting task, but with the right tools and knowledge, it can be a simple and quick DIY project. Whether your current drain plug is broken or you simply want to update the look of your sink, this guide will walk you through the steps to replace it. Follow these easy instructions and you'll have a new and functioning drain plug in no time.


How to Replace a Bathroom Sink Drain Plug


Replacing a Bathroom Sink Drain Plug: A Step-by-Step Guide
If you're ready to tackle the task of replacing your bathroom sink drain plug, here are the steps you'll need to follow:
Step 1: Gather Your Materials
Before you begin, you'll want to make sure you have all the necessary materials on hand. These include a new drain plug, pliers, a drain key (if needed), a screwdriver, and a putty knife. It's also a good idea to have a bucket or bowl nearby to catch any water that may come out of the drain during the process.
Step 2: Remove the Old Drain Plug
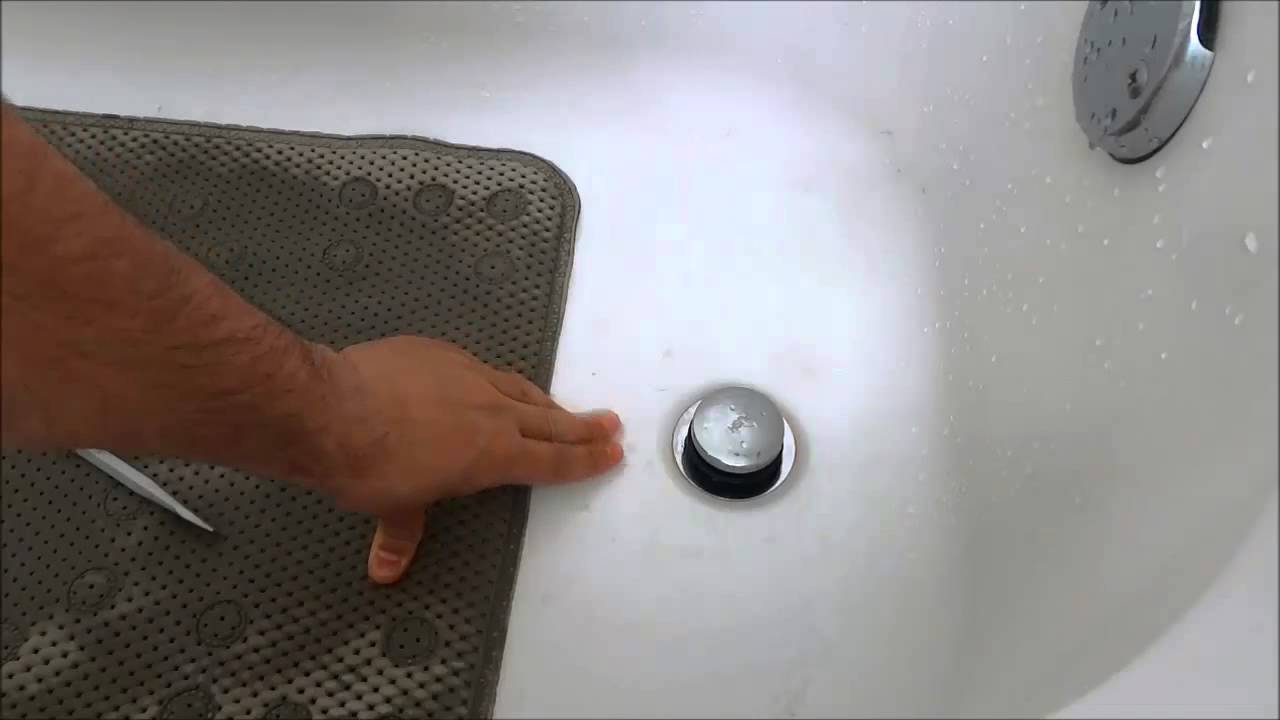
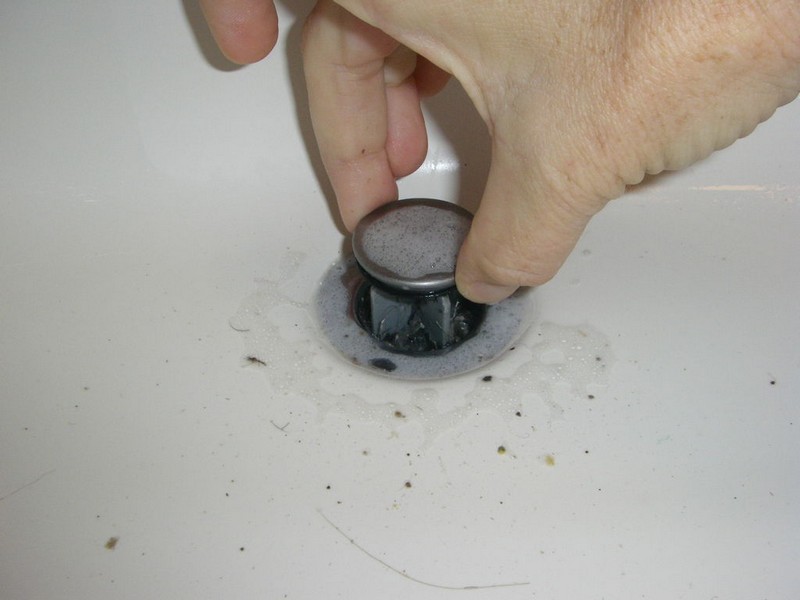
If your old drain plug is still intact, you'll need to remove it before installing the new one. Start by using pliers to unscrew the top cap of the drain plug. Once it is unscrewed, you should be able to easily pull out the entire drain plug from the sink.
Step 3: Clean the Area
Once the old drain plug is removed, use a putty knife to scrape away any old putty or debris from the sink area. This will ensure a clean surface for the new drain plug to be installed.
Step 4: Install the New Drain Plug
Take your new drain plug and apply a thin layer of plumber's putty around the underside of the top cap. Then, insert the new drain plug into the sink and firmly press it down. Make sure it is centered and level before moving on to the next step.
Step 5: Secure the Drain Plug
Using pliers, tighten the top cap of the new drain plug onto the bottom piece. This will secure the drain plug in place and prevent any leaks.
Step 6: Test for Leaks
Before you finish up, it's important to test for any leaks. Fill the sink with water and let it drain. If you see any water leaking from the drain plug, tighten it further with pliers. If the leak persists, you may need to remove the drain plug and reapply the putty before trying again.


Replacing a Bathroom Sink Drain Plug: A Step-by-Step Guide


DIY: Replacing a Bathroom Sink Drain Plug
Replacing a bathroom sink drain plug is a great DIY project that can save you time and money. By following these simple steps, you can easily replace your old drain plug and give your sink a fresh look.


DIY: Replacing a Bathroom Sink Drain Plug


Replacing a Bathroom Sink Drain Plug: Tips and Tricks
Here are a few tips and tricks to keep in mind while replacing your bathroom sink drain plug:
Tip 1: If your old drain plug is stuck and won't unscrew, you may need to use a drain key to remove it. A drain key is a tool specifically designed to remove stuck drain plugs.
Tip 2: For an extra secure fit, you can apply silicone caulk around the bottom of the drain plug before installing it. This will create a watertight seal.
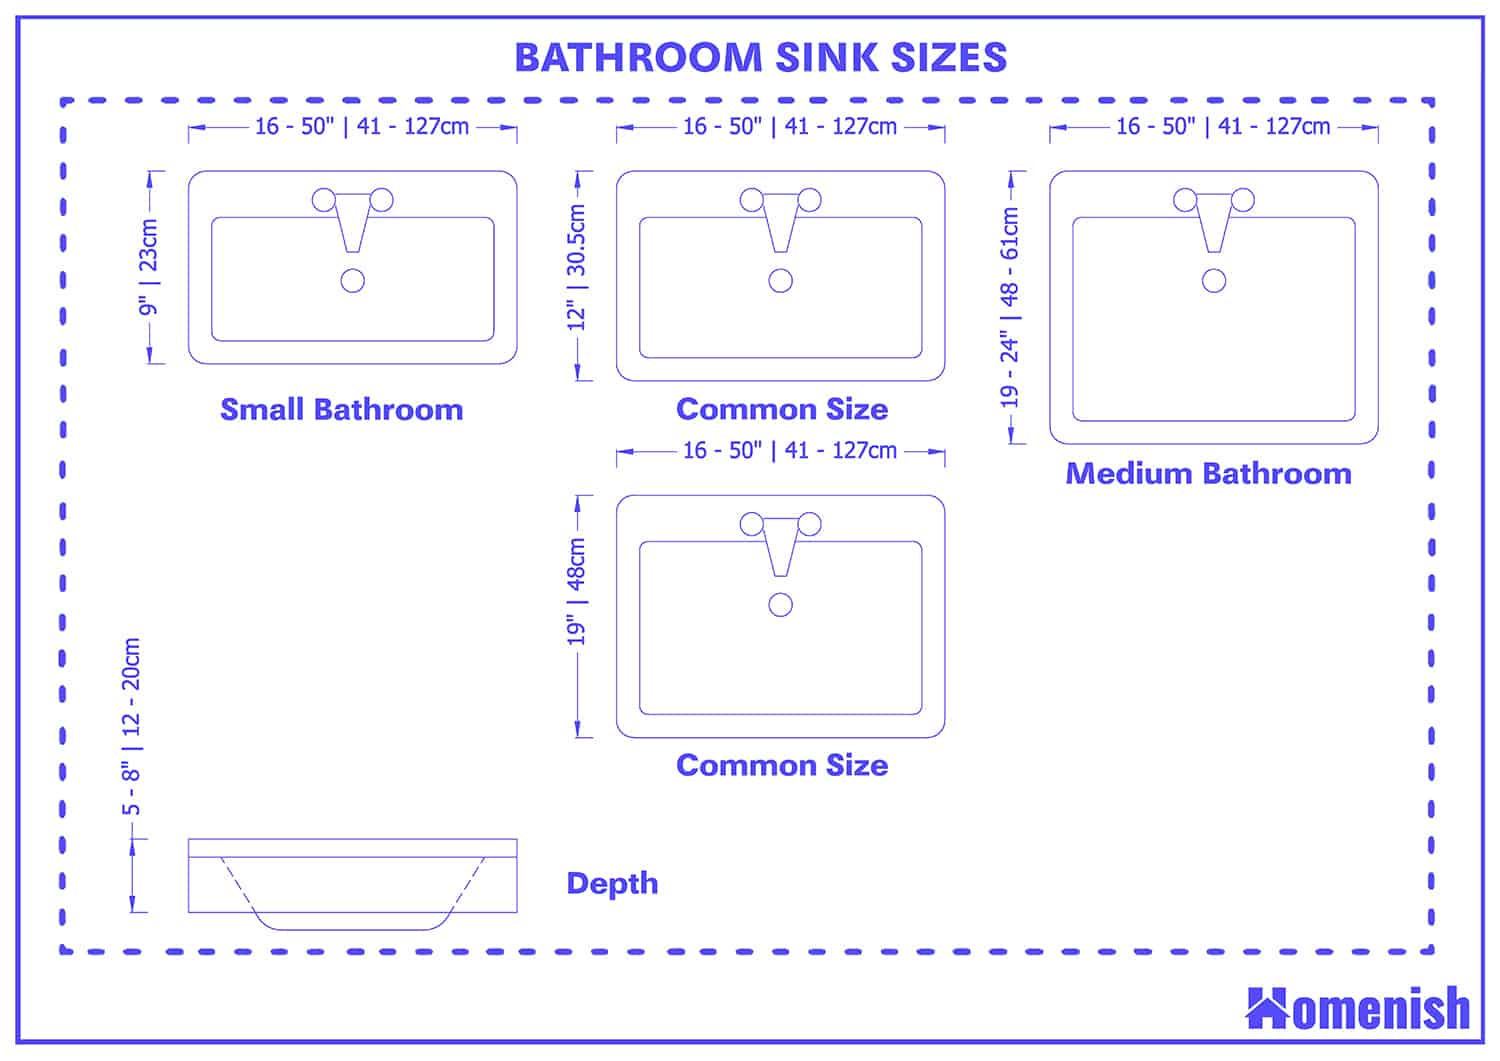
Tip 3: If you're unsure about the size of your drain plug, take the old one with you when purchasing a replacement to ensure a perfect fit.


Replacing a Bathroom Sink Drain Plug: Tips and Tricks


Quick and Easy Guide to Replacing a Bathroom Sink Drain Plug
Replacing a bathroom sink drain plug doesn't have to be a complicated process. Follow these steps for a quick and easy installation:
Step 1: Gather your materials.
Step 2: Remove the old drain plug.
Step 3: Clean the area.
Step 4: Install the new drain plug.
Step 5: Secure the drain plug.
Step 6: Test for leaks.


Quick and Easy Guide to Replacing a Bathroom Sink Drain Plug

Replacing a Bathroom Sink Drain Plug: Common Mistakes to Avoid
While replacing a bathroom sink drain plug may seem simple, there are a few common mistakes that can cause problems. Here are some mistakes to avoid:
Mistake 1: Not using enough plumber's putty. This can lead to leaks and an unstable drain plug.
Mistake 2: Using too much plumber's putty. This can create a messy and uneven seal.
Mistake 3: Not securing the drain plug tight enough. This can also lead to leaks.


Replacing a Bathroom Sink Drain Plug: Common Mistakes to Avoid
:max_bytes(150000):strip_icc()/bathroom-sink-drain-installation-2718843-02-61e5ecbee1e949be8d8f45ac4f5a6797.jpg)
Step-by-Step Tutorial for Replacing a Bathroom Sink Drain Plug
For a more detailed guide on how to replace a bathroom sink drain plug, follow these step-by-step instructions:
Step 1: Gather your materials.
Step 2: Remove the old drain plug.
Step 3: Clean the area.
Step 4: Apply plumber's putty to the underside of the new drain plug's top cap.
Step 5: Install the new drain plug into the sink and press down firmly.
Step 6: Tighten the top cap with pliers.
Step 7: Test for leaks and make any necessary adjustments.

Step-by-Step Tutorial for Replacing a Bathroom Sink Drain Plug

Replacing a Bathroom Sink Drain Plug: Tools and Materials You'll Need
To successfully replace a bathroom sink drain plug, you will need the following tools and materials:
Tools: Pliers, screwdriver, putty knife, drain key (if needed).
Materials: New drain plug, plumber's putty, silicone caulk (optional).


Replacing a Bathroom Sink Drain Plug: Tools and Materials You'll Need

Replacing a Bathroom Sink Drain Plug: Troubleshooting Common Issues
If you encounter any issues while replacing your bathroom sink drain plug, here are some troubleshooting tips:
Issue 1: The drain plug won't unscrew. Solution: Use a drain key to remove it.
Issue 2: The drain plug is leaking. Solution: Tighten the top cap with pliers or reapply plumber's putty.
Issue 3: The drain plug is loose. Solution: Apply silicone caulk around the bottom of the drain plug for a tighter seal.

Replacing a Bathroom Sink Drain Plug: Troubleshooting Common Issues
Expert Tips for Replacing a Bathroom Sink Drain Plug
For a successful bathroom sink drain plug replacement, keep these expert tips in mind:
Tip 1: Always turn off the water supply before starting the replacement process.
Tip 2: Use a drain key to remove a stuck drain plug.
Tip 3: Apply a thin layer of plumber's putty for a secure and leak-free seal.
Now that you have a step-by-step guide, tips and tricks, and expert advice, you are ready to replace your bathroom sink drain plug. Follow these instructions and you'll have a functioning and updated drain plug in no time. Happy DIY-ing!

Expert Tips for Replacing a Bathroom Sink Drain Plug
Replacing a Bathroom Sink Drain Plug

Why Replace Your Bathroom Sink Drain Plug?
 When it comes to house design, the bathroom is often overlooked. However, small changes in this space can make a big impact on the overall aesthetic and functionality of your home. One area that often gets neglected is the bathroom sink drain plug. Over time, these plugs can become worn or damaged, causing them to not seal properly and leading to leaks and potential water damage. Replacing a bathroom sink drain plug is a relatively simple and inexpensive task that can greatly improve the look and functionality of your bathroom.
Step-by-Step Guide to Replacing Your Bathroom Sink Drain Plug
 Step 1:
Gather your tools and supplies. You will need a new drain plug, pliers, and plumber's putty.
Step 2:
Turn off the water supply to your sink. This can usually be done by turning off the valves under the sink or shutting off the main water supply to your home.
Step 3:
Place a towel or bucket under the sink to catch any water that may drip out.
Step 4:
Use pliers to unscrew the old drain plug from the sink. You may need to use some force, but be careful not to damage the sink or any surrounding pipes.
Step 5:
Remove any old plumber's putty or silicone from the drain hole.
Step 6:
Apply a thin layer of plumber's putty around the edge of the new drain plug. This will create a watertight seal.
Step 7:
Place the new drain plug into the drain hole and tighten it with the pliers. Make sure it is snug and secure.
Step 8:
Turn the water supply back on and test for any leaks. If there are no leaks, you have successfully replaced your bathroom sink drain plug!
Step 1:
Gather your tools and supplies. You will need a new drain plug, pliers, and plumber's putty.
Step 2:
Turn off the water supply to your sink. This can usually be done by turning off the valves under the sink or shutting off the main water supply to your home.
Step 3:
Place a towel or bucket under the sink to catch any water that may drip out.
Step 4:
Use pliers to unscrew the old drain plug from the sink. You may need to use some force, but be careful not to damage the sink or any surrounding pipes.
Step 5:
Remove any old plumber's putty or silicone from the drain hole.
Step 6:
Apply a thin layer of plumber's putty around the edge of the new drain plug. This will create a watertight seal.
Step 7:
Place the new drain plug into the drain hole and tighten it with the pliers. Make sure it is snug and secure.
Step 8:
Turn the water supply back on and test for any leaks. If there are no leaks, you have successfully replaced your bathroom sink drain plug!
Upgrade Your Bathroom Sink Drain Plug
 Not only is replacing your bathroom sink drain plug a practical fix, but it can also be an opportunity to upgrade the look and style of your bathroom. Consider choosing a new drain plug in a different finish or with a unique design to add a touch of personality to your space. You can also opt for a push-button drain plug for added convenience.
In conclusion, replacing a bathroom sink drain plug is a quick and easy way to improve the functionality and design of your bathroom. Don't neglect this small but important component of your sink and enjoy a leak-free and stylish bathroom for years to come.
Need Help?
If you are not comfortable with DIY projects or encounter any difficulties during the process, it is always best to seek the help of a professional plumber. They have the expertise and tools to ensure a proper and long-lasting replacement.
Not only is replacing your bathroom sink drain plug a practical fix, but it can also be an opportunity to upgrade the look and style of your bathroom. Consider choosing a new drain plug in a different finish or with a unique design to add a touch of personality to your space. You can also opt for a push-button drain plug for added convenience.
In conclusion, replacing a bathroom sink drain plug is a quick and easy way to improve the functionality and design of your bathroom. Don't neglect this small but important component of your sink and enjoy a leak-free and stylish bathroom for years to come.
Need Help?
If you are not comfortable with DIY projects or encounter any difficulties during the process, it is always best to seek the help of a professional plumber. They have the expertise and tools to ensure a proper and long-lasting replacement.