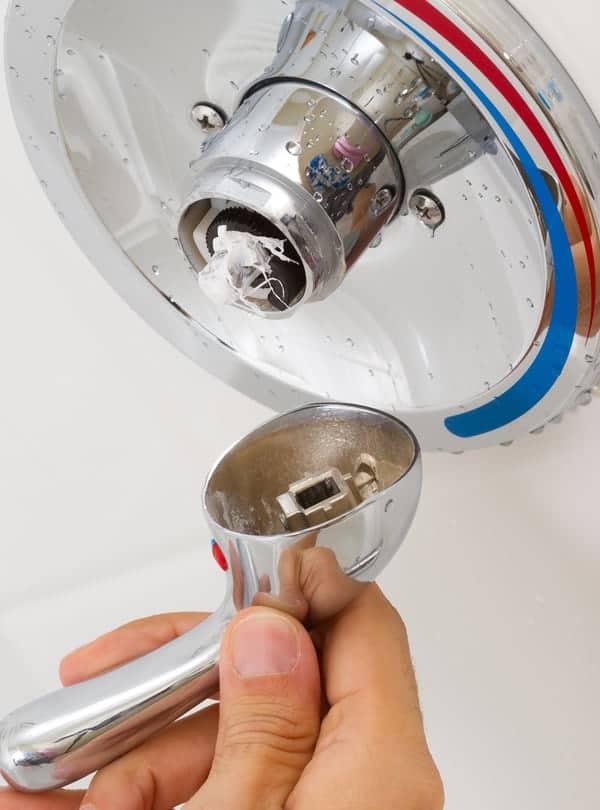
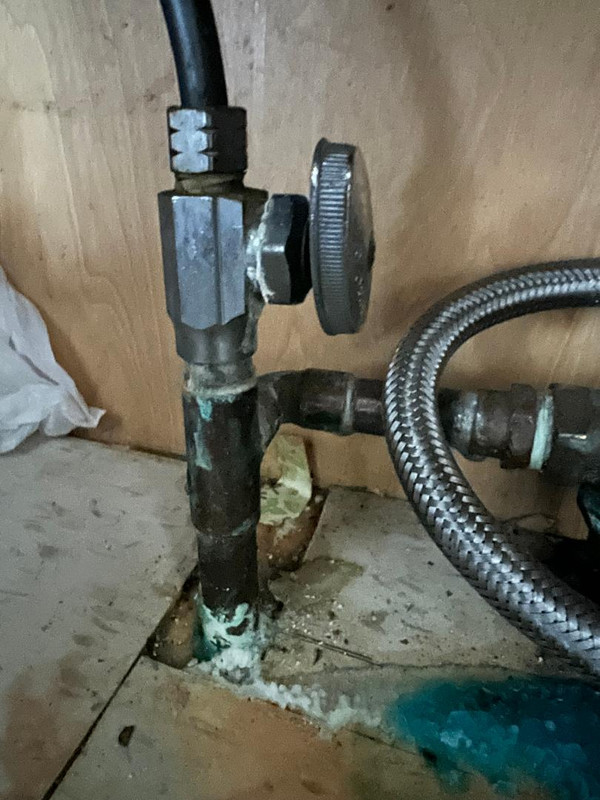
If you're experiencing a leaky or faulty water valve under your kitchen sink, it's important to replace it as soon as possible to avoid any further damage. While it may seem like a daunting task, it can easily be done with the right tools and knowledge. In this guide, we'll take you through the step-by-step process of replacing a water valve under the kitchen sink.How to Replace a Water Valve Under the Kitchen Sink


How to Replace a Water Valve Under the Kitchen Sink


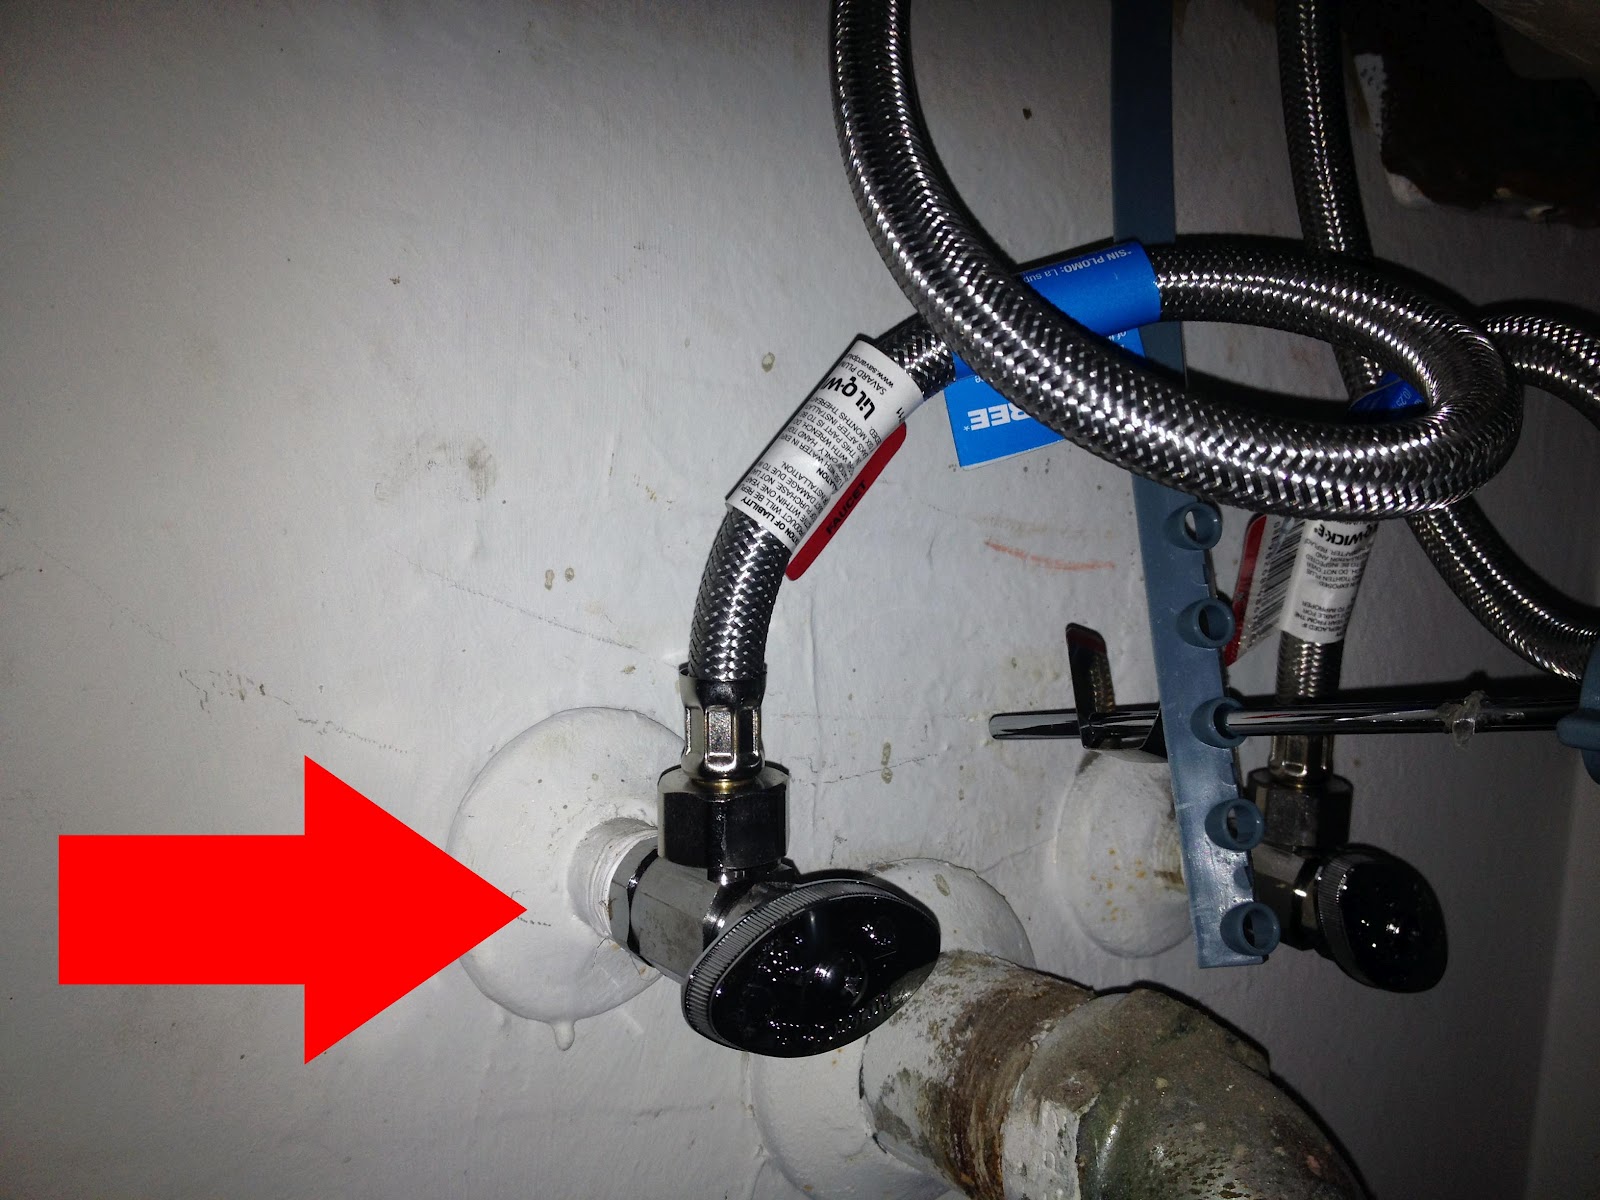
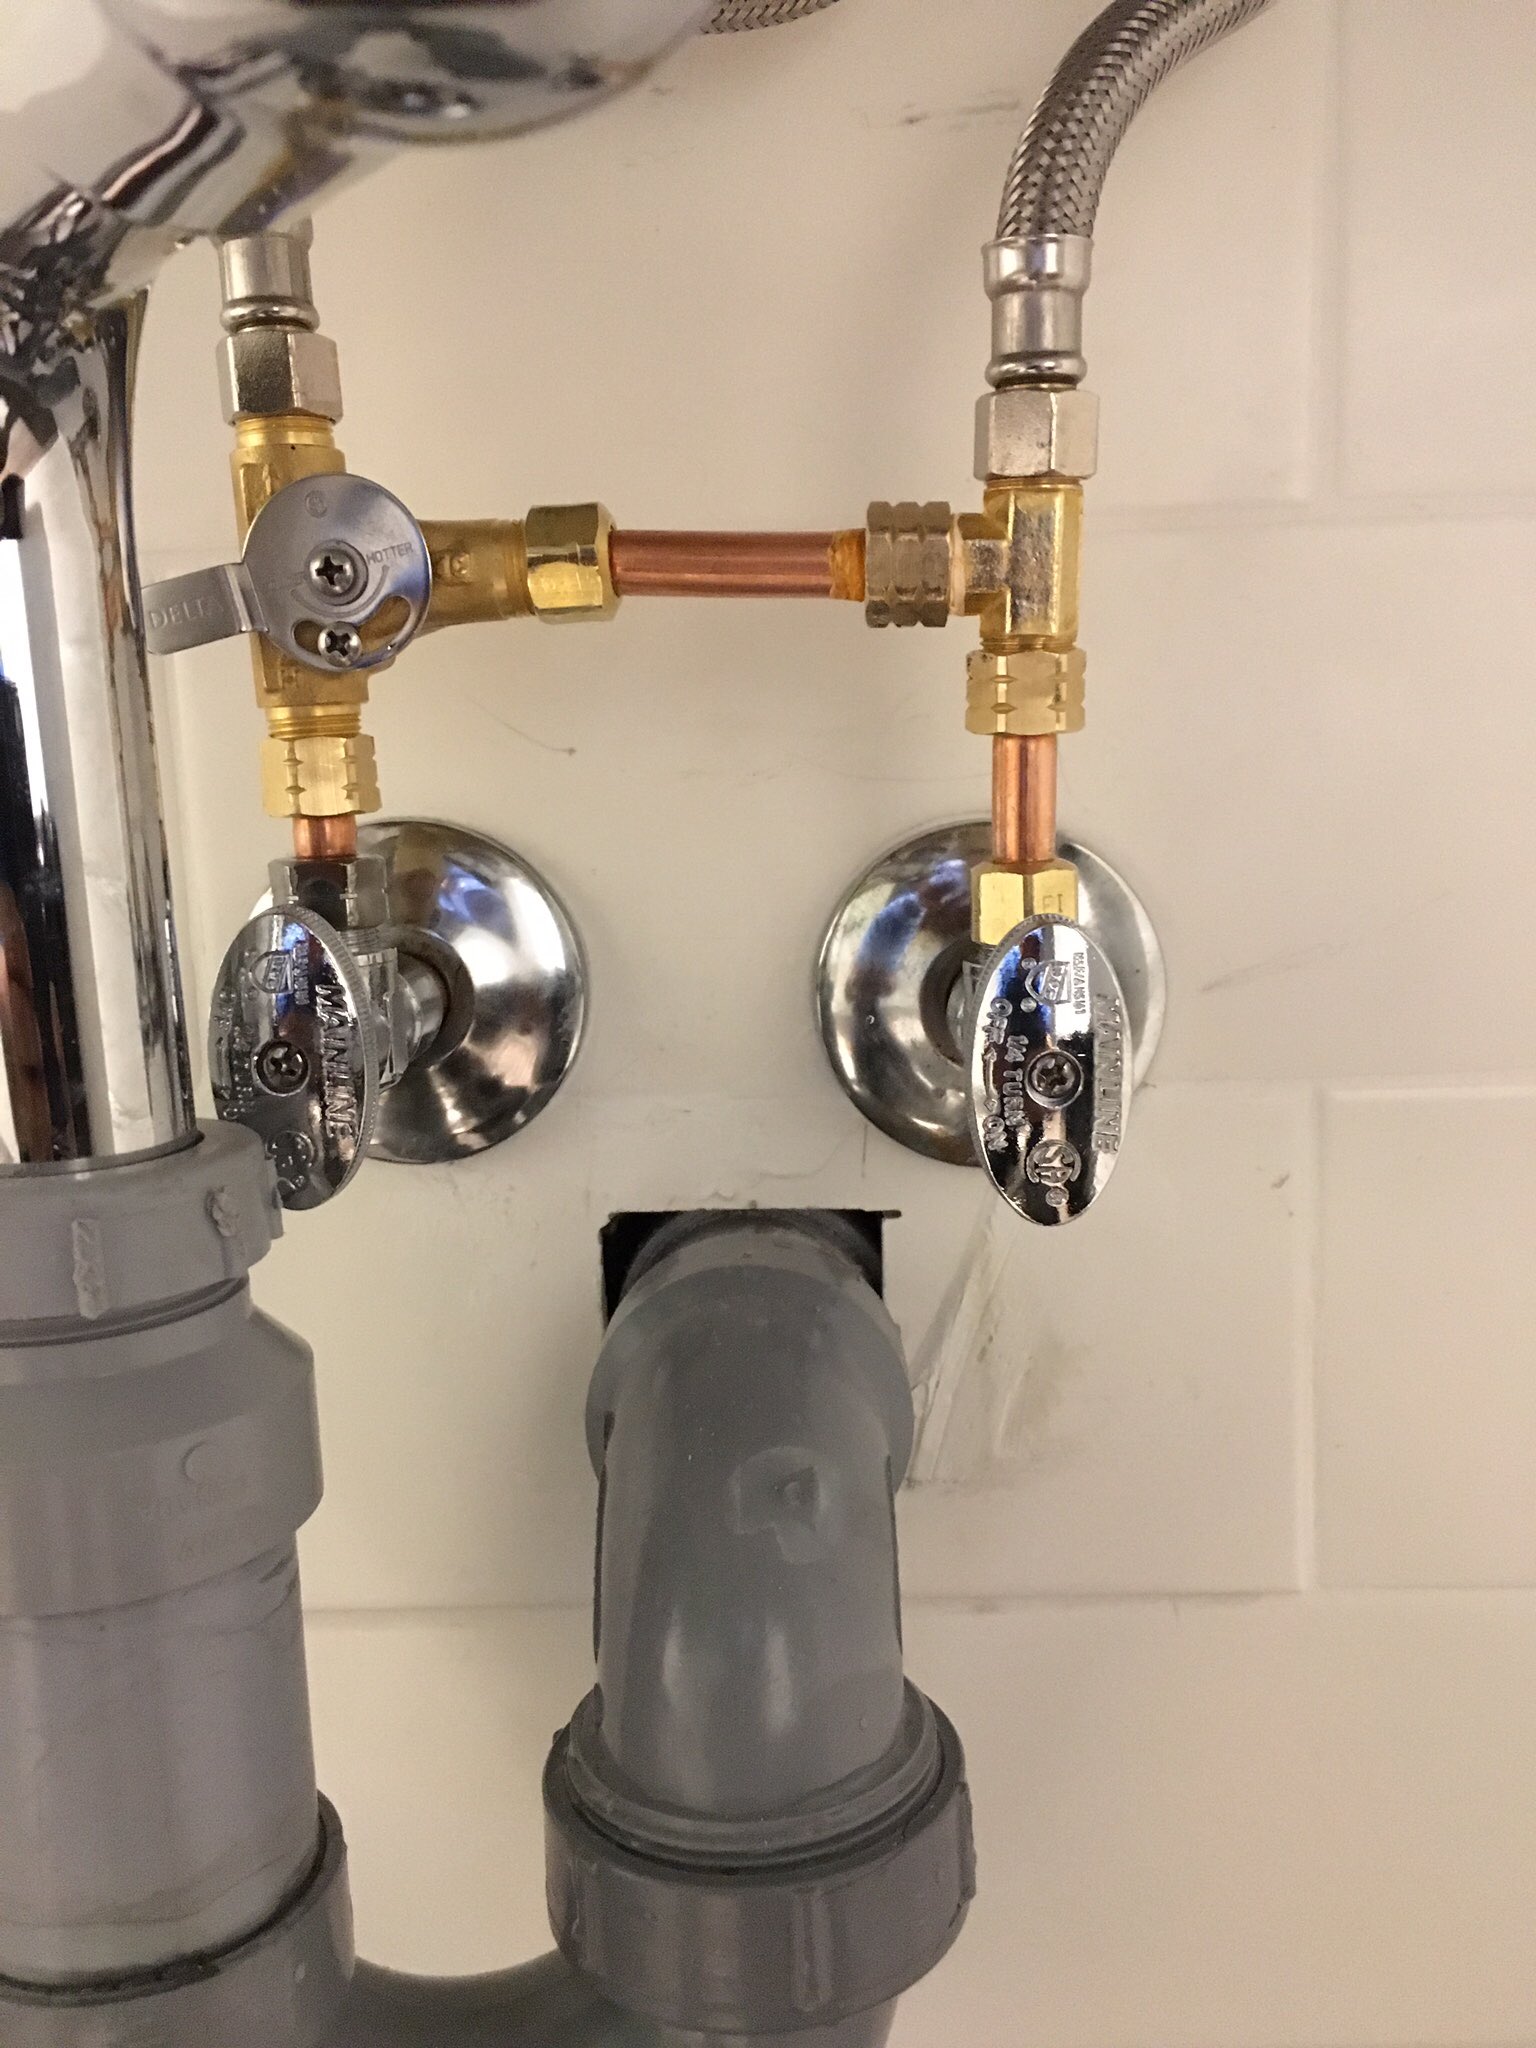
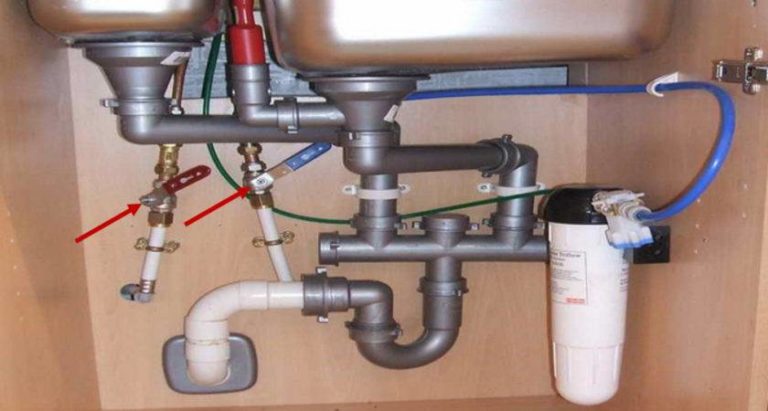
The first step in replacing a water valve under the kitchen sink is to turn off the main water supply. This can usually be found near the water meter or in the basement. Once the water is shut off, turn on the faucet to drain any remaining water. Next, using a wrench, unscrew the nuts that are securing the old water valve to the pipes. You may need to use a bucket to catch any excess water that may come out. Once the nuts are removed, you can carefully remove the old valve. Before installing the new valve, make sure to clean the pipes and remove any old plumber's tape or debris. Apply new plumber's tape to the threads of the new valve to ensure a tight seal. Using the wrench, secure the new valve to the pipes by tightening the nuts. Be careful not to over-tighten as this can cause damage. Once the valve is securely in place, turn on the main water supply and check for any leaks.Replacing a Water Valve Under the Kitchen Sink: A Step-by-Step Guide

Replacing a Water Valve Under the Kitchen Sink: A Step-by-Step Guide


/sink-pipe-under-wash-basin-119001607-75542e154b364e7bb52032249f293908.jpg)


Replacing a water valve under the kitchen sink can save you time and money by avoiding the need to call a plumber. With the right tools and some basic knowledge, it can easily be done as a DIY project. Make sure to have all the necessary tools and materials before starting the project. This may include a wrench, plumber's tape, and a bucket. It's also a good idea to have someone assist you in case you need an extra set of hands.DIY: Replacing a Water Valve Under the Kitchen Sink


DIY: Replacing a Water Valve Under the Kitchen Sink


Replacing a water valve under the kitchen sink can be a tricky task, but with these tips and tricks, you'll be able to do it with ease. Firstly, make sure to turn off the main water supply and drain any remaining water in the faucet. Additionally, using a bucket to catch excess water can help prevent any mess. It's also important to clean the pipes and apply new plumber's tape to ensure a tight seal with the new valve. And lastly, always double check for any leaks before calling the project complete.Kitchen Sink Water Valve Replacement: Tips and Tricks


Kitchen Sink Water Valve Replacement: Tips and Tricks
:max_bytes(150000):strip_icc()/sink-pipe-under-wash-basin-119001607-6f28aec4c66944efb7a9a38cb622ab8b.jpg)

Before attempting to replace a water valve under the kitchen sink, it's important to have a basic understanding of how it works. The valve controls the flow of water into the sink, and when it becomes faulty or leaks, it needs to be replaced. Knowing the location of the main water supply and having the necessary tools and materials on hand can make the process much smoother. It's also important to take safety precautions, such as turning off the power supply, to avoid any accidents.Replacing a Kitchen Sink Water Valve: What You Need to Know


Replacing a Kitchen Sink Water Valve: What You Need to Know


Replacing a water valve under the kitchen sink can be done in a few simple steps. Firstly, turn off the main water supply and drain any excess water. Then, remove the old valve using a wrench and clean the pipes. Next, apply new plumber's tape to the threads of the new valve and secure it in place with nuts. Finally, turn on the main water supply and check for any leaks.Step-by-Step Guide to Replacing a Water Valve Under the Kitchen Sink


Step-by-Step Guide to Replacing a Water Valve Under the Kitchen Sink


While replacing a water valve under the kitchen sink may seem like a straightforward task, there are some common mistakes that can easily be avoided. One of the most common mistakes is over-tightening the nuts, which can cause damage to the pipes or the valve itself. Another mistake to avoid is not properly cleaning the pipes before installing the new valve. This can result in a poor seal and lead to leaks. It's also important to make sure the main water supply is turned off to avoid any accidents.Replacing a Water Valve Under the Kitchen Sink: Common Mistakes to Avoid


Replacing a Water Valve Under the Kitchen Sink: Common Mistakes to Avoid

Before starting the project, it's important to have all the necessary tools and materials on hand. This may include a wrench, bucket, plumber's tape, and the new valve. It's also helpful to have someone assist you in case you need an extra set of hands. Having the right tools and materials can make the process much smoother and prevent any delays or extra trips to the hardware store.How to Replace a Water Valve Under the Kitchen Sink: Tools and Materials Needed
How to Replace a Water Valve Under the Kitchen Sink: Tools and Materials Needed


If you encounter any issues while replacing a water valve under the kitchen sink, don't panic. There are some troubleshooting tips that can help you overcome any challenges. If the new valve is leaking, make sure the nuts are tightened properly or try using a different type of plumber's tape. If the valve is not turning off the water completely, it may be due to a faulty valve and will need to be replaced again. And if you're unsure of how to proceed, it's always best to consult a professional plumber.Kitchen Sink Water Valve Replacement: Troubleshooting Tips
Kitchen Sink Water Valve Replacement: Troubleshooting Tips
While replacing a water valve under the kitchen sink may seem like a simple task, it's important to take some safety precautions to avoid any accidents. Always turn off the main water supply before starting the project and make sure to turn off the power supply if the valve is near any electrical outlets. It's also a good idea to wear protective gear, such as gloves and safety glasses, to prevent any injuries. And if you're unsure of how to proceed, it's best to call a professional plumber for assistance.Replacing a Water Valve Under the Kitchen Sink: Safety Precautions to Keep in Mind

Replacing a Water Valve Under the Kitchen Sink: Safety Precautions to Keep in Mind
Why You Should Replace the Water Valve under Your Kitchen Sink

Problems with Old Water Valves
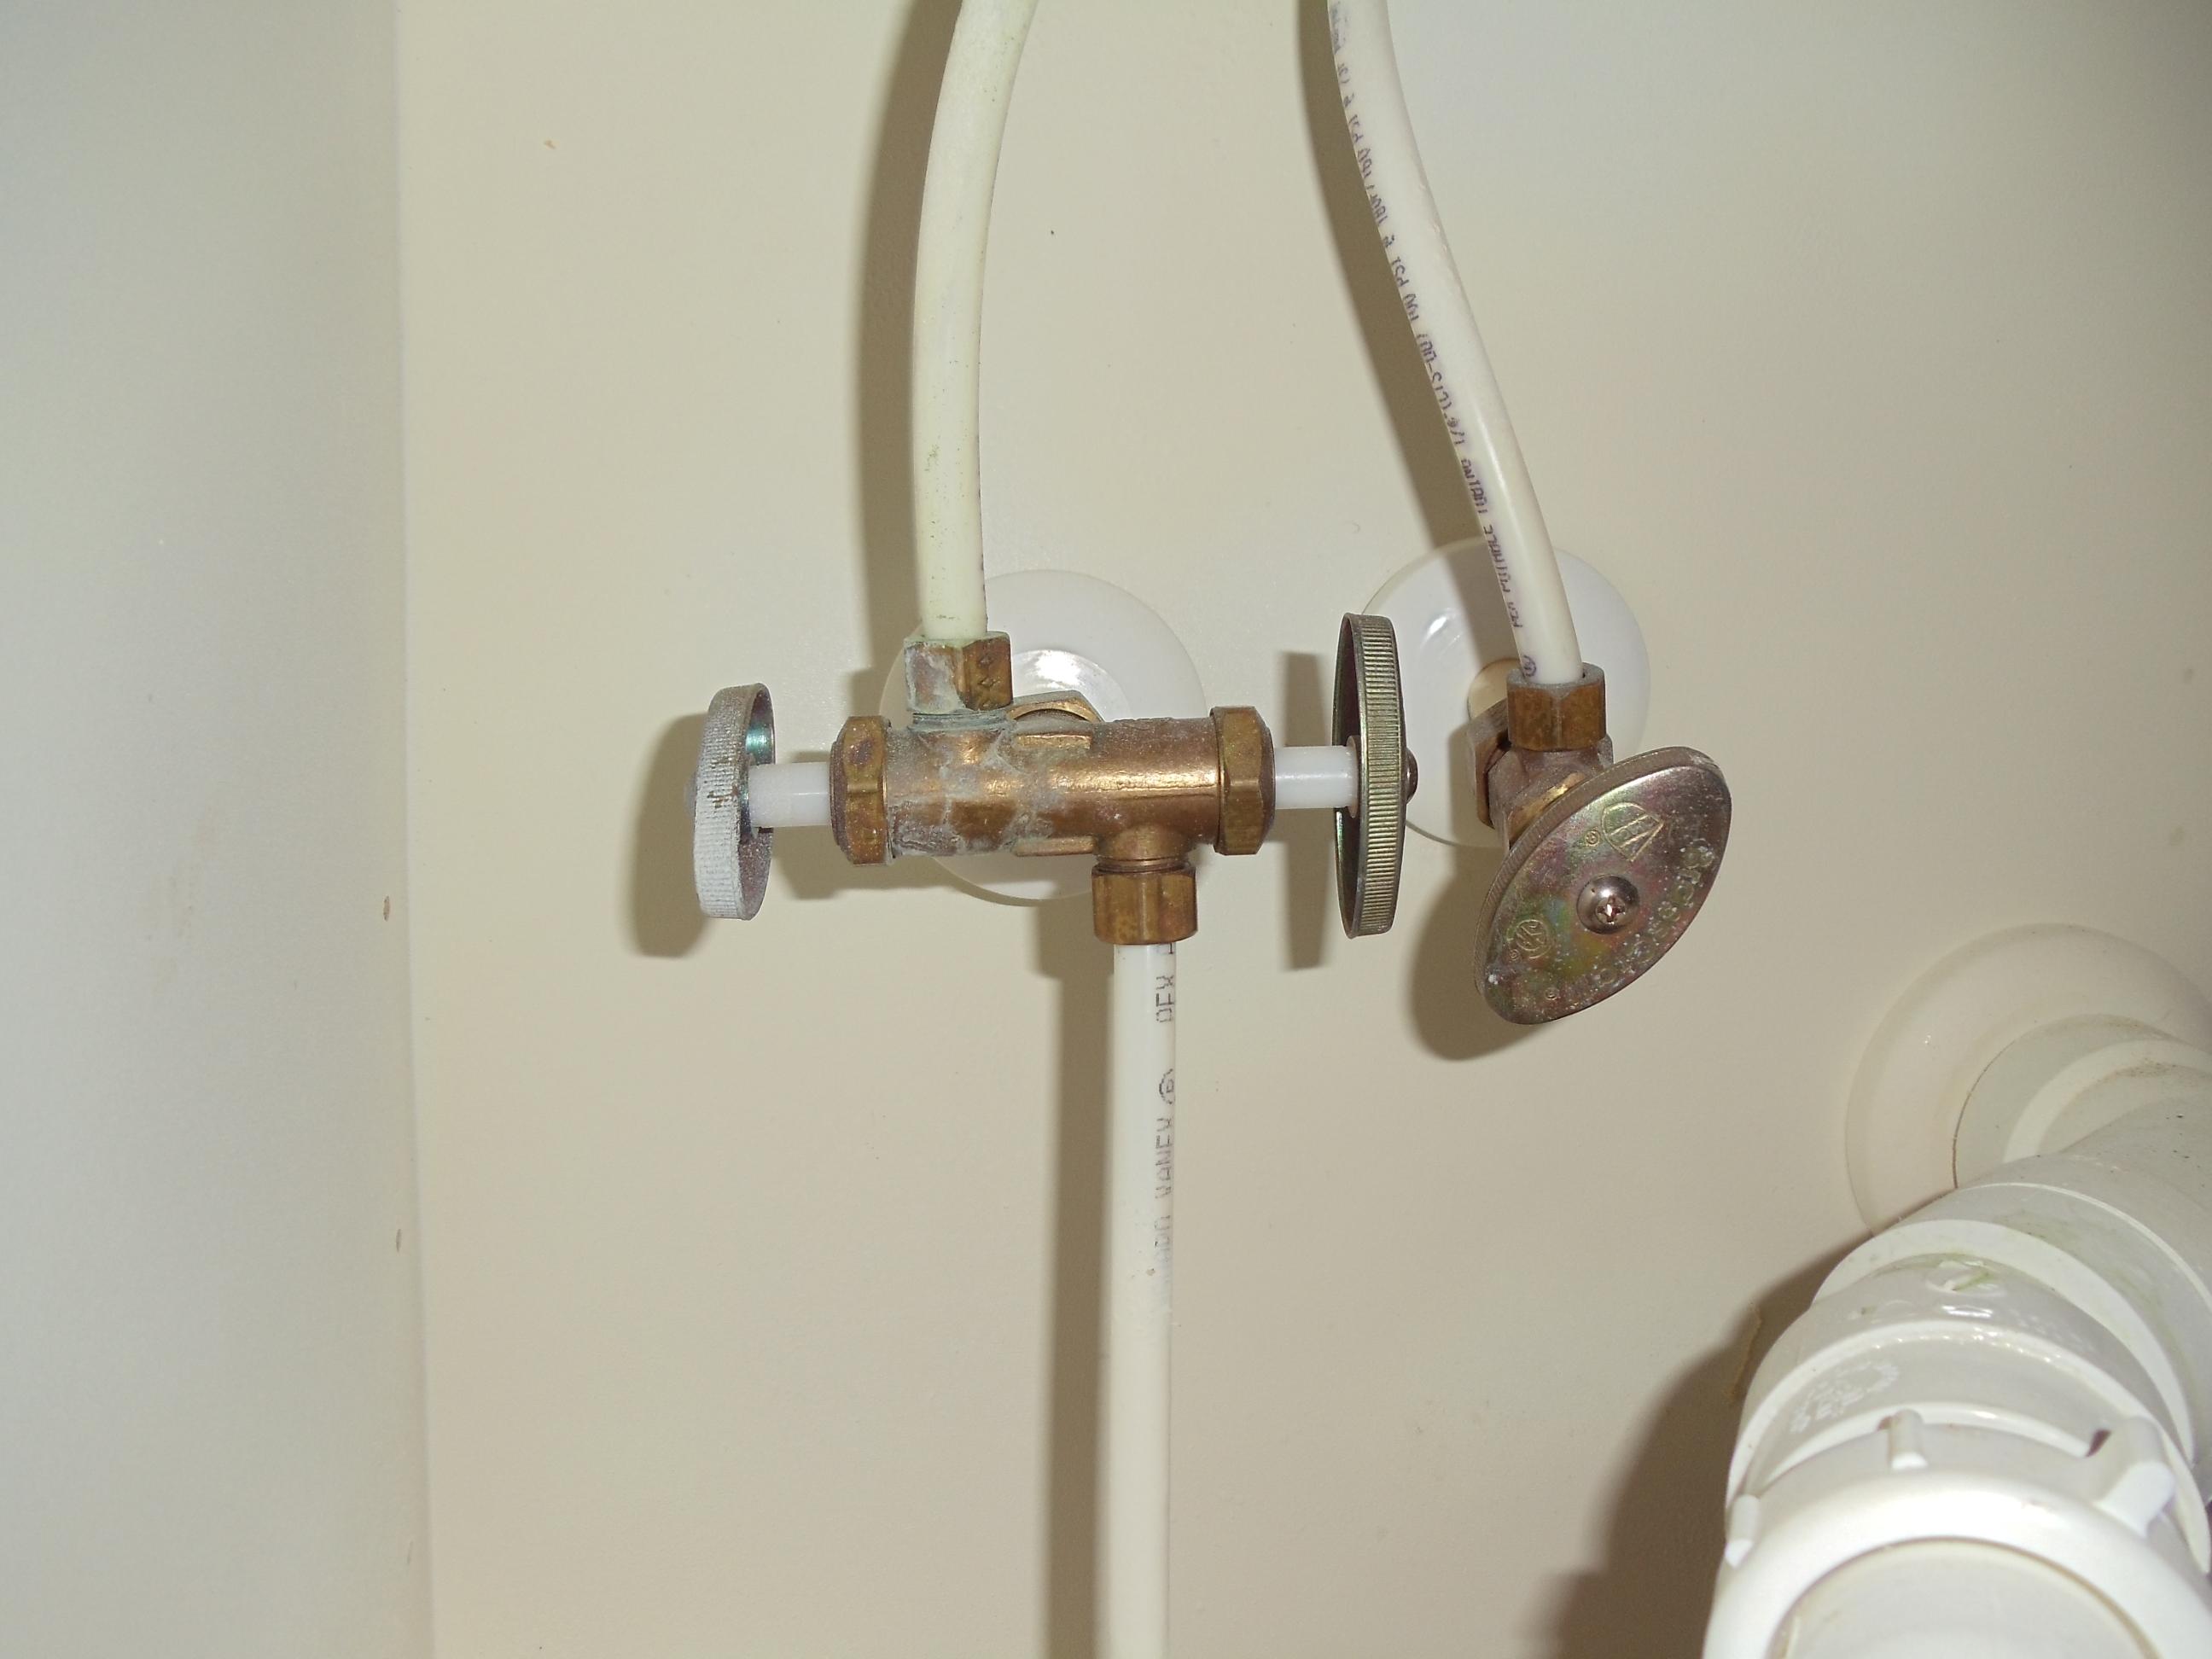
 Old water valves can cause a lot of problems in your kitchen. They can leak, get clogged, or even break, causing water damage and inconvenience. If you have an older home, chances are you have an old water valve under your kitchen sink. These valves are typically made of metal, which can corrode over time and become less effective. This can lead to issues with water flow and temperature regulation, as well as potential leaks.
The Benefits of Replacing Your Water Valve
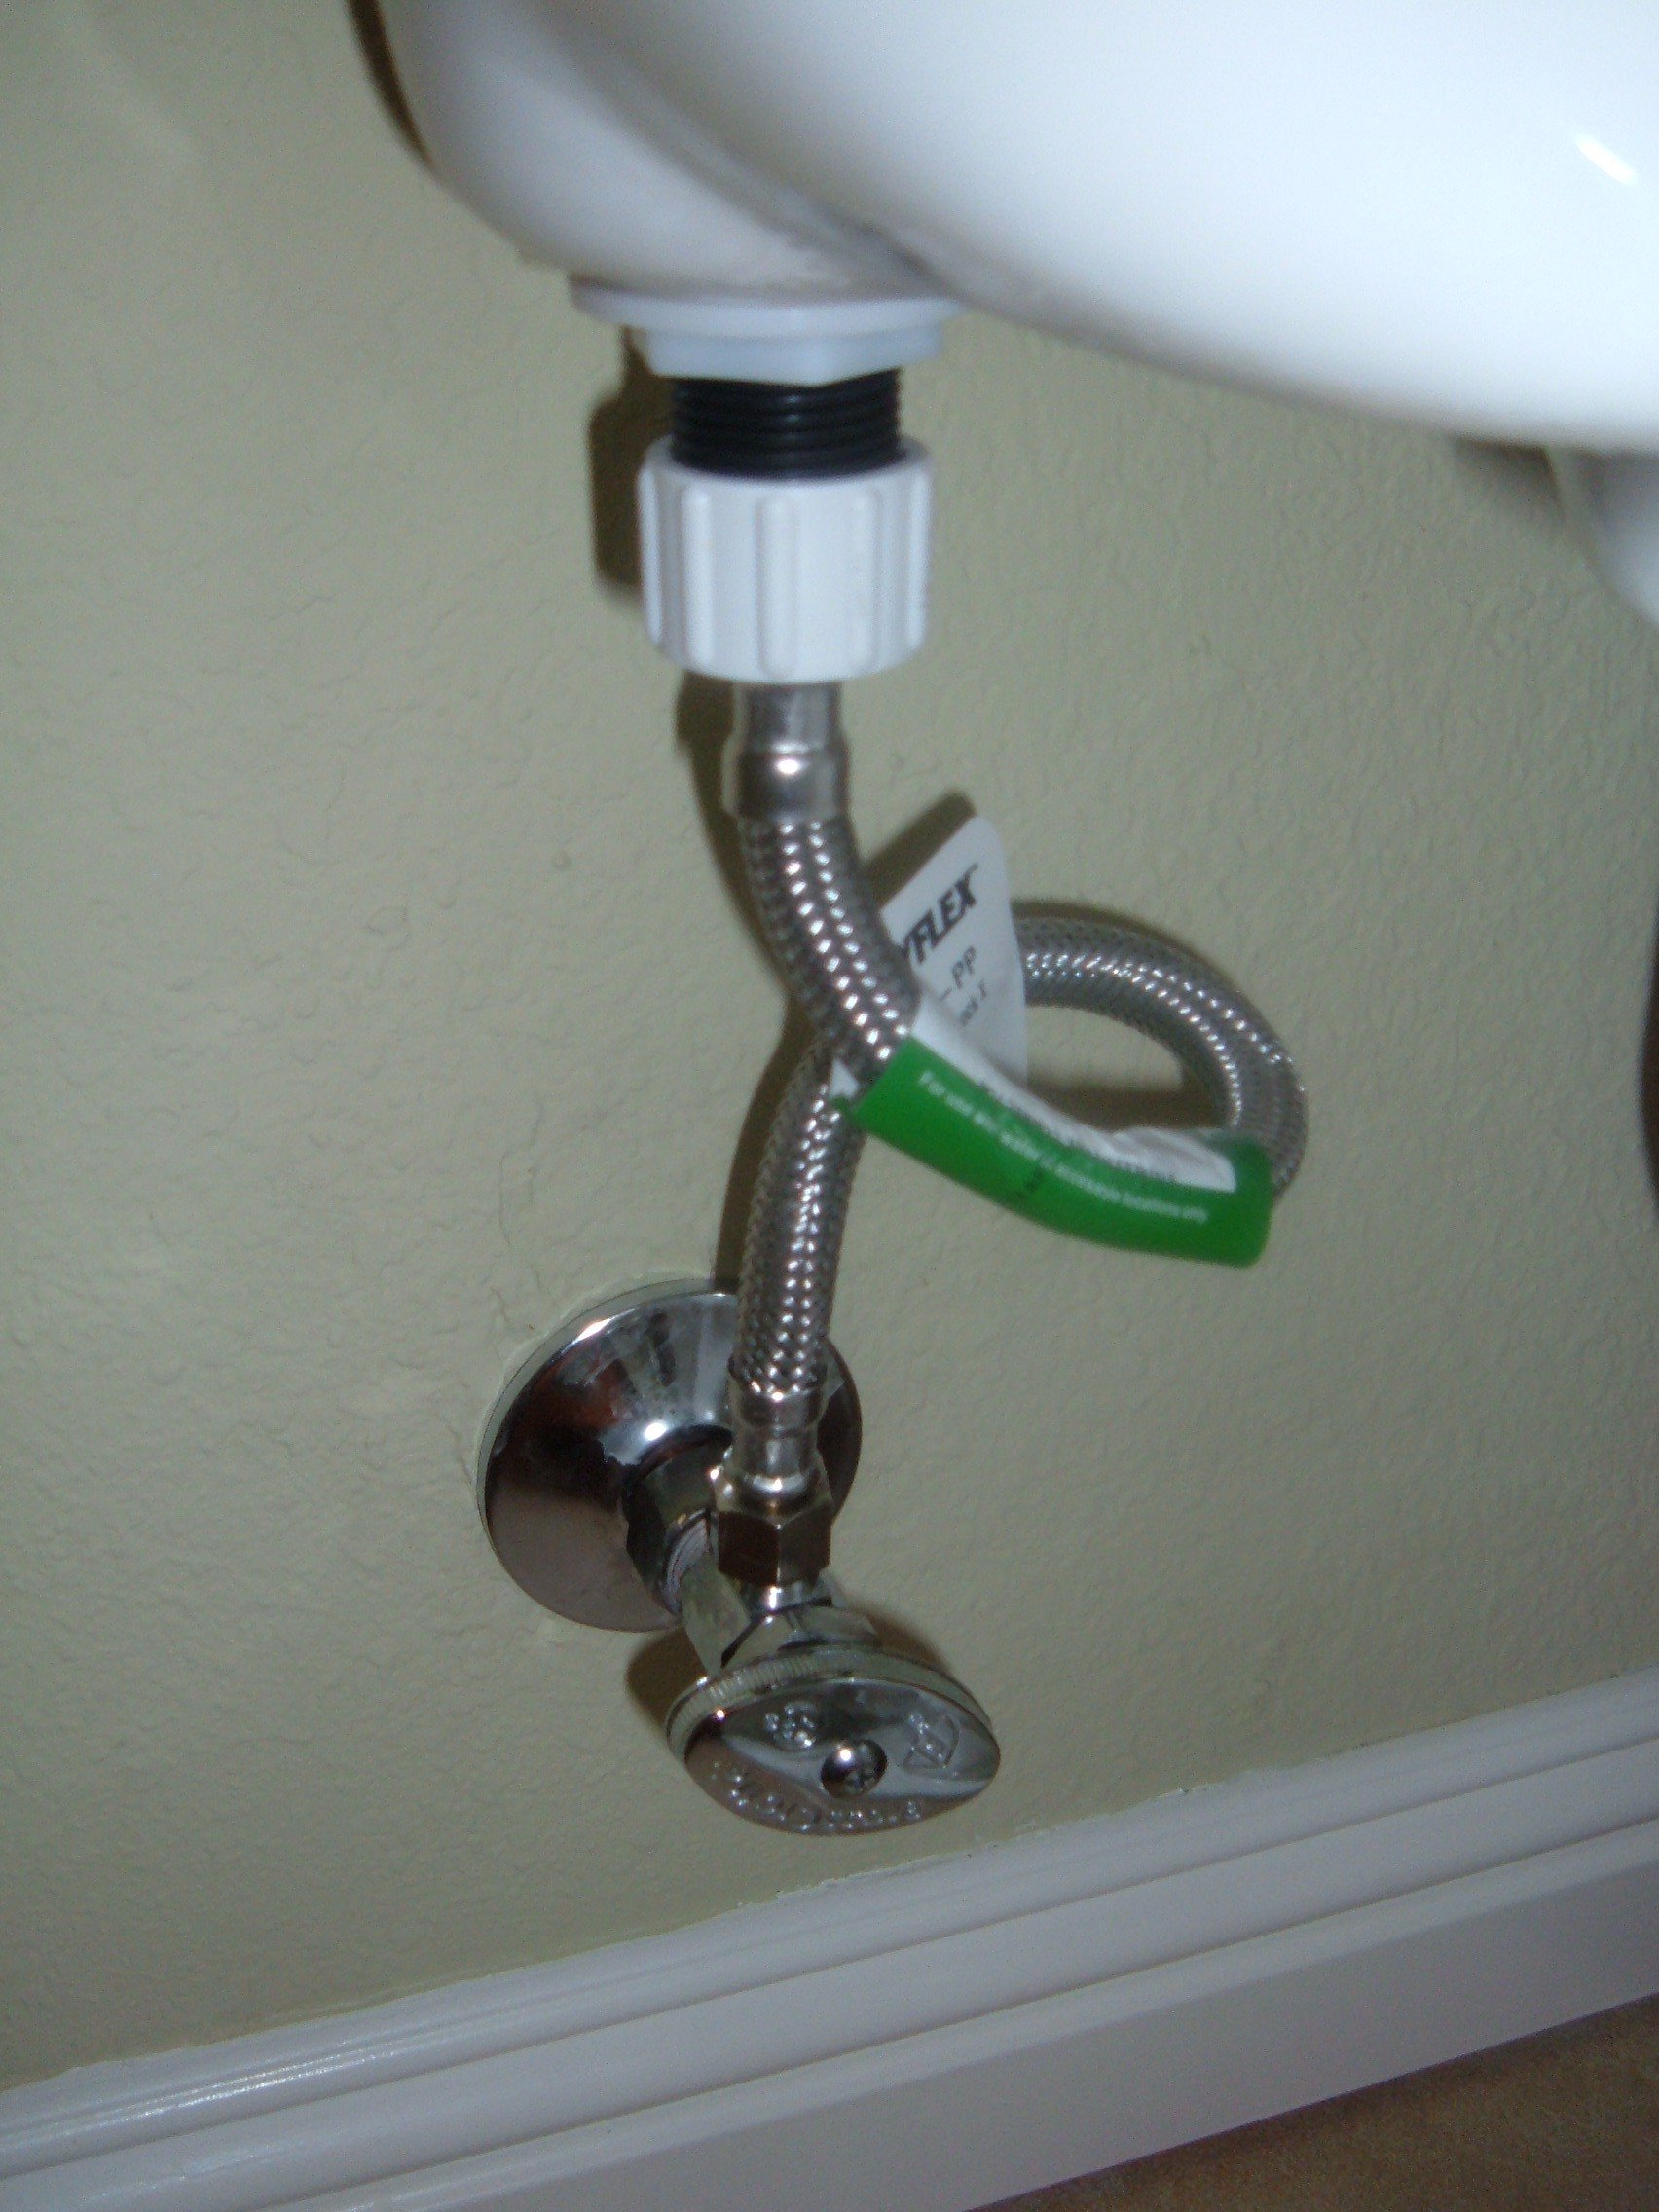
 Replacing the water valve under your kitchen sink may seem like a hassle, but the benefits far outweigh the inconvenience. By installing a new, modern valve, you can ensure better water flow and temperature control, as well as preventing potential leaks. This can save you from costly water damage repairs in the future. Additionally, newer valves are often made of more durable materials, such as brass or stainless steel, which can withstand wear and tear and last longer.
How to Replace the Water Valve
 Replacing the water valve under your kitchen sink may seem like a daunting task, but it is actually a relatively simple process. First, you will need to turn off the water supply to the sink. This can usually be done by turning a shut-off valve located under the sink or in the basement. Next, use a wrench to unscrew the old valve from the water supply line. Then, install the new valve by tightly screwing it onto the supply line. Finally, turn the water supply back on and check for any leaks.
Hiring a Professional
 While replacing a water valve under a kitchen sink can be done as a DIY project, it may be best to hire a professional plumber for the job. They have the expertise and specialized tools to ensure the valve is installed correctly and without any leaks. Plus, hiring a professional can save you time and stress, allowing you to focus on other aspects of your house design.
In conclusion
, replacing the water valve under your kitchen sink may seem like a small task, but it can have a big impact on the functionality and safety of your kitchen. Don't wait for a problem to arise, consider replacing your old valve with a new one today. It's a simple and effective way to improve your house design and prevent potential issues in the future.
While replacing a water valve under a kitchen sink can be done as a DIY project, it may be best to hire a professional plumber for the job. They have the expertise and specialized tools to ensure the valve is installed correctly and without any leaks. Plus, hiring a professional can save you time and stress, allowing you to focus on other aspects of your house design.
In conclusion
, replacing the water valve under your kitchen sink may seem like a small task, but it can have a big impact on the functionality and safety of your kitchen. Don't wait for a problem to arise, consider replacing your old valve with a new one today. It's a simple and effective way to improve your house design and prevent potential issues in the future.