Is your bathroom sink not draining properly? The culprit could be a faulty clevis. The clevis is a small piece of hardware that connects the sink drain stopper to the sink lever. Over time, it can become worn out and may need to be replaced. Read on to learn how to replace a clevis in a bathroom sink. Replace Clevis in Bathroom Sink


Replace Clevis in Bathroom Sink


Replacing a clevis in a bathroom sink may seem like a daunting task, but with the right tools and knowledge, it can be a DIY project. The first step is to identify the type of clevis your sink has. There are two main types: a threaded clevis and a clip-on clevis. Once you determine the type, follow these steps for a successful replacement. How to Replace a Clevis in a Bathroom Sink


How to Replace a Clevis in a Bathroom Sink


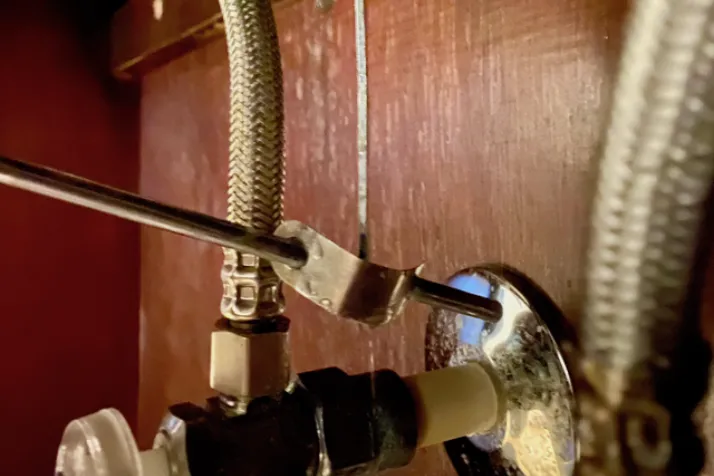
If your bathroom sink has a threaded clevis, start by unscrewing the nut that holds the clevis onto the sink lever. Use pliers to loosen the nut if it's too tight. Once the nut is removed, the clevis should easily slide off the lever. Next, remove the old clevis from the sink drain stopper and replace it with the new one. Finally, screw the nut back onto the sink lever and tighten it with pliers. If your sink has a clip-on clevis, start by pressing the clip to release it from the sink lever. Then, remove the clevis from the lever and from the drain stopper. Replace it with the new clevis and clip it onto the lever. Make sure the clip is securely attached to prevent any future issues. Bathroom Sink Clevis Replacement


Bathroom Sink Clevis Replacement


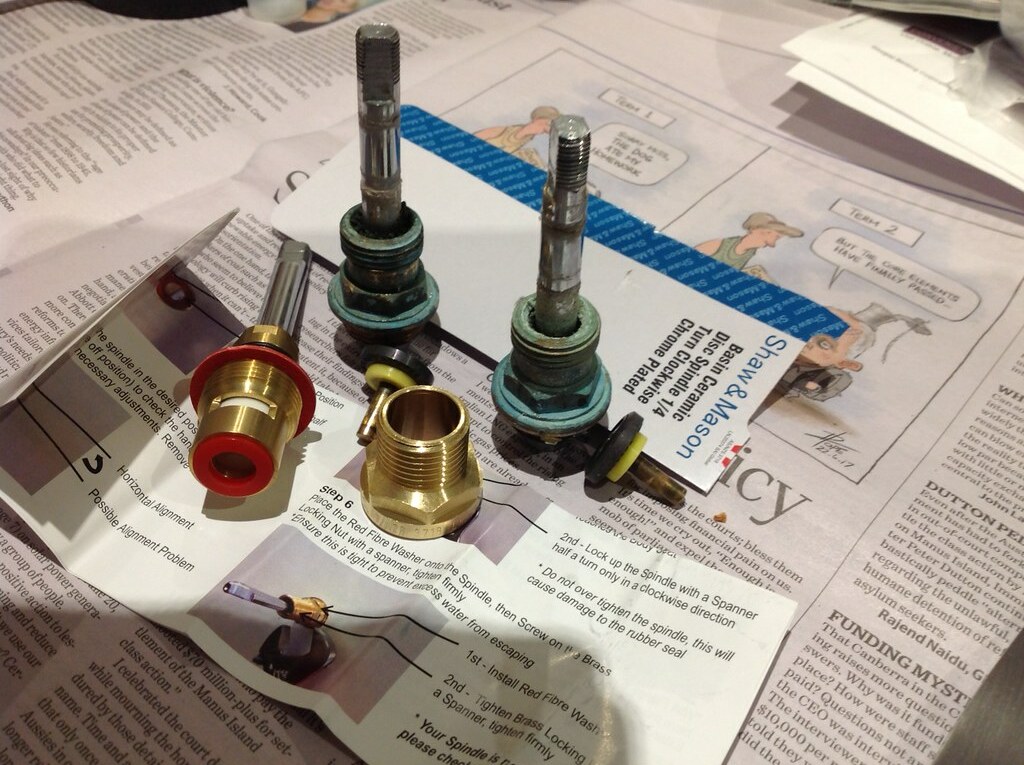

Replacing a clevis in a bathroom sink can be a DIY project, but it's important to have the right tools. You will need pliers, a screwdriver, and a replacement clevis. It's also a good idea to have some plumber's putty on hand to ensure a tight seal between the clevis and the sink drain stopper. DIY Clevis Replacement for Bathroom Sink


DIY Clevis Replacement for Bathroom Sink


Here is a step-by-step guide to help you replace the clevis in your bathroom sink: Step 1: Gather your tools and make sure you have the correct replacement clevis. Step 2: Identify the type of clevis your sink has (threaded or clip-on). Step 3: Turn off the water supply to your sink. Step 4: Remove the old clevis from the sink lever and the sink drain stopper. Step 5: Install the new clevis onto the sink drain stopper and the sink lever. Step 6: Turn the water supply back on and test the new clevis. Step 7: Make any necessary adjustments to ensure proper functioning. Step-by-Step Guide for Replacing Clevis in Bathroom Sink

Step-by-Step Guide for Replacing Clevis in Bathroom Sink


When replacing a clevis in a bathroom sink, keep these tips in mind: - Always turn off the water supply before starting the replacement. - Check the condition of the sink lever and replace it if it's worn out. - Use plumber's putty to ensure a tight seal between the clevis and the sink drain stopper. - Double-check the placement of the clevis to ensure it's securely attached. Clevis Replacement Tips for Bathroom Sink


Clevis Replacement Tips for Bathroom Sink


If you encounter any issues during the clevis replacement process, here are some common troubleshooting tips: - If the clevis is too tight or too loose on the sink lever, adjust the position of the clevis or use pliers to tighten the nut. - If the clevis is not properly connected to the sink drain stopper, make sure the clip is securely attached. - If the sink lever is not functioning properly after the replacement, check the condition of the lever and replace it if needed. Troubleshooting Clevis Replacement in Bathroom Sink


Troubleshooting Clevis Replacement in Bathroom Sink


Here are the tools you will need to replace a clevis in a bathroom sink: - Pliers - Screwdriver - Replacement clevis - Plumber's putty Tools Needed for Replacing Clevis in Bathroom Sink


Tools Needed for Replacing Clevis in Bathroom Sink


While replacing a clevis in a bathroom sink may seem like a simple task, there are some common mistakes that should be avoided: - Not turning off the water supply before starting the replacement. - Using the wrong type of clevis for your sink. - Forgetting to use plumber's putty to create a tight seal. - Not properly attaching the clip-on clevis to the sink lever. Common Mistakes to Avoid When Replacing Clevis in Bathroom Sink


Common Mistakes to Avoid When Replacing Clevis in Bathroom Sink


If you're not comfortable with DIY projects or encounter any difficulties during the clevis replacement process, it's best to seek professional help. A professional plumber can quickly and efficiently replace the clevis in your bathroom sink, ensuring it functions properly and preventing any future issues. Replacing a clevis in a bathroom sink may seem like a daunting task, but with the right tools and knowledge, it can be a DIY project. However, it's important to pay attention to details and follow the proper steps to ensure a successful replacement. If you encounter any difficulties, don't hesitate to seek professional help. With a new clevis, your bathroom sink will be draining properly in no time. Professional Clevis Replacement Services for Bathroom Sink


Professional Clevis Replacement Services for Bathroom Sink


Why Replace the Clevis in a Bathroom Sink is Important for Your House Design

The Role of a Clevis in a Bathroom Sink
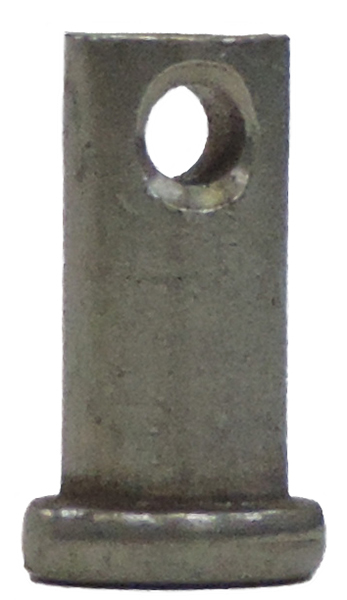
 When it comes to the functionality of a bathroom, a sink plays a vital role. It is used for daily activities such as washing hands, brushing teeth, and even cleaning your face. However, many people tend to overlook the importance of maintaining the components that make up their sink. One of these components is the clevis, which is responsible for connecting the sink stopper to the lift rod and allowing water to drain out. Without a properly functioning clevis, your sink can become a source of frustration and inconvenience. That's why it is crucial to replace the clevis in your bathroom sink when necessary.
Signs that Your Clevis Needs to be Replaced
 Over time, the clevis in your bathroom sink can become worn out and damaged. This can happen due to constant use, exposure to harsh chemicals, or simply old age. When this happens, you may start to notice certain signs that indicate it's time to replace the clevis. These signs include a sink stopper that won't stay in place, difficulty in draining water, or a loose lift rod. Ignoring these signs can lead to bigger problems in the future, such as a completely clogged sink or water leakage.
The Impact on Your House Design
 Aside from its functionality, a bathroom sink also plays a significant role in the overall design of your house. A damaged or malfunctioning clevis can not only affect the sink's functionality but also its appearance. A loose or wobbly sink stopper can be an eyesore and disrupt the aesthetic of your bathroom. Additionally, a clogged sink due to a faulty clevis can cause water damage to your countertops and cabinets, affecting the overall design of your bathroom.
Benefits of Replacing the Clevis in Your Bathroom Sink
 Replacing the clevis in your bathroom sink can bring numerous benefits to your house design. Firstly, it ensures that your sink remains functional and efficient, making your daily tasks easier and more convenient. Secondly, it helps maintain the appearance of your bathroom and contributes to its overall design. By replacing the clevis, you can also avoid potential water damage and costly repairs in the future.
In conclusion, the clevis may seem like a small and insignificant component of your bathroom sink, but it plays a crucial role in its functionality and design. If you notice any signs of wear and tear or damage, it's essential to replace the clevis as soon as possible. This will not only keep your sink functioning properly but also maintain the overall design of your house. Don't overlook the importance of this simple yet essential part of your bathroom sink.
Replacing the clevis in your bathroom sink can bring numerous benefits to your house design. Firstly, it ensures that your sink remains functional and efficient, making your daily tasks easier and more convenient. Secondly, it helps maintain the appearance of your bathroom and contributes to its overall design. By replacing the clevis, you can also avoid potential water damage and costly repairs in the future.
In conclusion, the clevis may seem like a small and insignificant component of your bathroom sink, but it plays a crucial role in its functionality and design. If you notice any signs of wear and tear or damage, it's essential to replace the clevis as soon as possible. This will not only keep your sink functioning properly but also maintain the overall design of your house. Don't overlook the importance of this simple yet essential part of your bathroom sink.