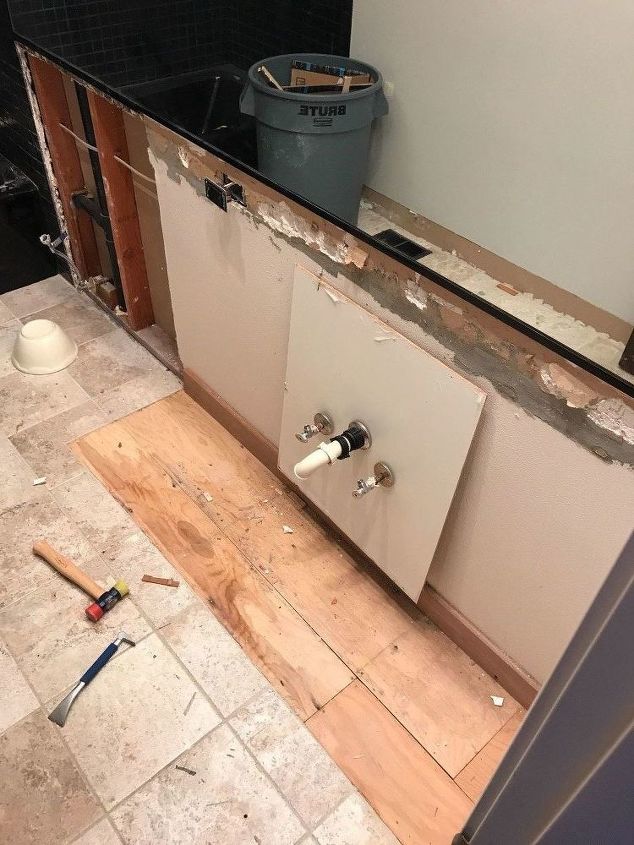
If you're planning to renovate your bathroom or simply need to replace your old porcelain bathroom sink, you'll need to know how to properly remove it. While it may seem like a daunting task, with the right tools and techniques, you can easily remove a porcelain bathroom sink without causing any damage. In this article, we'll provide you with a step-by-step guide on how to remove a porcelain bathroom sink, along with some tips and precautions to ensure a successful removal process.Removing Porcelain Bathroom Sink
Removing a porcelain bathroom sink may seem like a complicated process, but it can actually be done in just a few simple steps. Here's a quick overview of the process: Step 1: Turn off the water supply Before you begin removing your porcelain bathroom sink, make sure to turn off the water supply. This will prevent any potential flooding or water damage. Step 2: Disconnect the water supply lines Using an adjustable wrench, loosen and remove the nuts connecting the hot and cold water supply lines to the faucet. Make sure to have a bucket or towel handy to catch any water that may drip out. Step 3: Remove the drain Use a drain key or pliers to loosen and remove the drain from the sink. You may need to use some force to break the seal between the drain and the sink. Step 4: Detach the sink from the wall Using a screwdriver, remove any screws or brackets that are holding the sink in place against the wall. Once removed, gently pull the sink away from the wall. Step 5: Disconnect the sink from the countertop If your porcelain sink is attached to a countertop, you will need to disconnect it before fully removing the sink. Use a utility knife to cut through the caulk between the sink and the countertop. Once the caulk is cut, you should be able to easily lift the sink off the countertop. Step 6: Remove the sink With all the connections and attachments loosened, you should now be able to easily remove the sink from its position. Be sure to have someone help you with this step to avoid any accidents or damage.How to Remove a Porcelain Bathroom Sink
Now that you have a general understanding of the removal process, let's dive into the specifics with a detailed step-by-step guide: Step 1: Gather the necessary tools To successfully remove a porcelain bathroom sink, you'll need the following tools: - Adjustable wrench - Screwdriver - Drain key or pliers - Utility knife - Bucket or towels Step 2: Prepare the sink area Before you begin removing the sink, make sure to clear out any items from the sink and its surrounding area. This will give you more space to work and prevent any accidental damage to your belongings. Step 3: Turn off the water supply As mentioned before, be sure to turn off the water supply before starting the removal process. You can usually find the shut-off valve under the sink or in the bathroom. Step 4: Disconnect the water supply lines Using an adjustable wrench, loosen and remove the nuts connecting the hot and cold water supply lines to the faucet. Be sure to have a bucket or towels nearby to catch any water that may drip out. Step 5: Remove the drain Next, use a drain key or pliers to loosen and remove the drain from the sink. This may require some force, so be prepared to apply some strength. Step 6: Detach the sink from the wall Using a screwdriver, remove any screws or brackets that are holding the sink in place against the wall. Make sure to have someone help you with this step to avoid any accidents. Step 7: Disconnect the sink from the countertop If your sink is attached to a countertop, you will need to disconnect it before fully removing the sink. Use a utility knife to cut through the caulk between the sink and the countertop. Once the caulk is cut, you should be able to easily lift the sink off the countertop. Step 8: Remove the sink With all the connections and attachments loosened, you can now carefully lift and remove the sink from its position. Be sure to have someone assist you with this step to avoid any accidents or damage.Step-by-Step Guide for Removing a Porcelain Bathroom Sink
If you're feeling handy and want to save some money, removing a porcelain bathroom sink can be done as a DIY project. Here are some tips to ensure a successful and safe DIY removal: Tip 1: Have all the necessary tools ready Make sure to have all the tools listed earlier in this article ready before starting the removal process. This will make the process smoother and more efficient. Tip 2: Have someone assist you Removing a porcelain bathroom sink is not a one-person job. Be sure to have someone help you with the heavy lifting and to prevent any accidents. Tip 3: Be patient Removing a porcelain bathroom sink may require some force and patience. Be sure to take your time and avoid rushing, as this may lead to accidental damage. Tip 4: Use safety precautions Be sure to wear protective gear, such as gloves and safety glasses, when removing a porcelain bathroom sink. This will protect you from any potential injuries.DIY: Removing a Porcelain Bathroom Sink
As mentioned before, you'll need a few tools to successfully remove a porcelain bathroom sink. Here's a list of the tools you'll need: - Adjustable wrench - Screwdriver - Drain key or pliers - Utility knife - Bucket or towelsTools Needed for Removing a Porcelain Bathroom Sink
If you want to remove your porcelain bathroom sink without causing any damage, here are some tips to keep in mind: Tip 1: Be gentle Porcelain is a delicate material, so be sure to handle the sink with care to avoid any chips or cracks. Tip 2: Use the right tools Using the correct tools will make the removal process easier and less likely to cause damage to the sink. Tip 3: Have someone assist you Having someone help you with the removal process will ensure that the sink is lifted and moved safely without any accidental damage.Tips for Removing a Porcelain Bathroom Sink Without Damaging It
While removing a porcelain bathroom sink may seem straightforward, there are still some common mistakes that people make. Here are the top mistakes to avoid when removing a porcelain bathroom sink: Mistake 1: Not turning off the water supply Always remember to turn off the water supply before starting the removal process to avoid potential flooding or water damage. Mistake 2: Not having someone assist you Removing a porcelain bathroom sink is not a one-person job. Be sure to have someone help you with the heavy lifting and to prevent any accidents. Mistake 3: Rushing the process Removing a porcelain bathroom sink requires patience and care. Avoid rushing the process, as this may lead to accidental damage.Removing a Porcelain Bathroom Sink: Common Mistakes to Avoid
When removing a porcelain bathroom sink, it's important to take the necessary safety precautions to avoid any injuries. Here are some safety tips to keep in mind: Safety Precaution 1: Wear protective gear Be sure to wear gloves and safety glasses when removing a porcelain bathroom sink to protect yourself from any potential injuries. Safety Precaution 2: Use caution when lifting Porcelain sinks can be heavy, so be sure to use proper lifting techniques and have someone assist you to avoid any accidents. Safety Precaution 3: Disconnect the water supply Always remember to turn off the water supply and disconnect the water supply lines before starting the removal process to avoid any potential water damage.Removing a Porcelain Bathroom Sink: Safety Precautions to Take
In addition to removing the sink itself, you may also need to remove the drain from the sink. Here's a quick guide on how to remove a porcelain bathroom sink drain: Step 1: Locate the drain nut Underneath the sink, you'll find a nut that connects the drain to the sink. Use a pair of pliers or a drain key to loosen and remove the nut. Step 2: Remove the drain flange Once the nut is removed, you should be able to easily lift and remove the drain flange from the sink. Step 3: Clean the area After removing the drain, be sure to clean the area thoroughly before installing a new one.How to Remove a Porcelain Bathroom Sink Drain
When it comes to removing a porcelain bathroom sink, you may be wondering whether to hire a professional or attempt a DIY removal. Here are some factors to consider: DIY Removal Pros: - Cost-effective - Can be done on your own time - Gives you a sense of accomplishment Cons: - Requires time and effort - May not have the necessary skills or tools - Potential for mistakes and damage Professional Removal Pros: - Experienced and skilled professionals - Saves time and effort - Proper tools and techniques Cons: - More expensive - May not fit into your schedule - Less sense of accomplishment Ultimately, the decision between hiring a professional or attempting a DIY removal will depend on your budget, schedule, and skill level. If you're unsure, it's always best to consult a professional to ensure a successful and safe removal process.Professional vs. DIY: Removing a Porcelain Bathroom Sink
Why Removing a Porcelain Bathroom Sink is a Smart Choice for Your House Design

Enhance the Aesthetic Appeal of Your Bathroom
 When it comes to house design, the bathroom is often overlooked as a space for creative and unique design choices. However, the sink is one element that can make a big impact on the overall aesthetic of your bathroom. By removing a porcelain bathroom sink, you can open up a whole new world of design possibilities.
Porcelain sinks
are a popular choice for many homeowners due to their durability and classic look. However, they can also be limiting in terms of design options. Removing a porcelain sink and replacing it with a different material, such as
marble
or
concrete
, can add a touch of elegance and sophistication to your bathroom.
Maximize Space and Functionality
 Another reason to consider removing a porcelain bathroom sink is to maximize the space and functionality of your bathroom. Traditional porcelain sinks often have large, bulky designs that can take up valuable counter space. By replacing it with a
wall-mounted sink
or
pedestal sink
, you can free up more room for storage or other design elements.
In addition, removing a porcelain sink and installing a new one can also improve the functionality of your bathroom. For example, a
vessel sink
can add a modern and stylish touch while also providing more counter space.
Undermount sinks
are also a popular choice as they create a seamless and clean look in the bathroom.
Upgrade to a More Eco-Friendly Option
 In today's world, more and more homeowners are looking for ways to make their homes more environmentally friendly. By removing a porcelain bathroom sink, you can upgrade to a more eco-friendly option. Porcelain sinks are often made with non-renewable materials and can contribute to water waste. Replacing it with a
bamboo
or
recycled glass
sink can not only improve the look of your bathroom, but also reduce your carbon footprint.
In conclusion, removing a porcelain bathroom sink can be a smart choice for your house design. It can enhance the aesthetic appeal, maximize space and functionality, and even contribute to a more eco-friendly home. So if you're looking to give your bathroom a fresh and updated look, consider removing your old porcelain sink and exploring the many other design options available.


