Are you tired of constantly dealing with a slow-draining sink or having to use a plunger to unclog your bathroom sink? Installing a bathroom sink drain stopper can help solve these issues and make your daily routine a little easier. Here's our step-by-step guide on how to install a bathroom sink drain stopper. How to Install a Bathroom Sink Drain Stopper


How to Install a Bathroom Sink Drain Stopper
:max_bytes(150000):strip_icc()/bathroom-sink-drain-installation-2718843-07-2b728cbd5c994dc39179346f51bb6421.jpg)


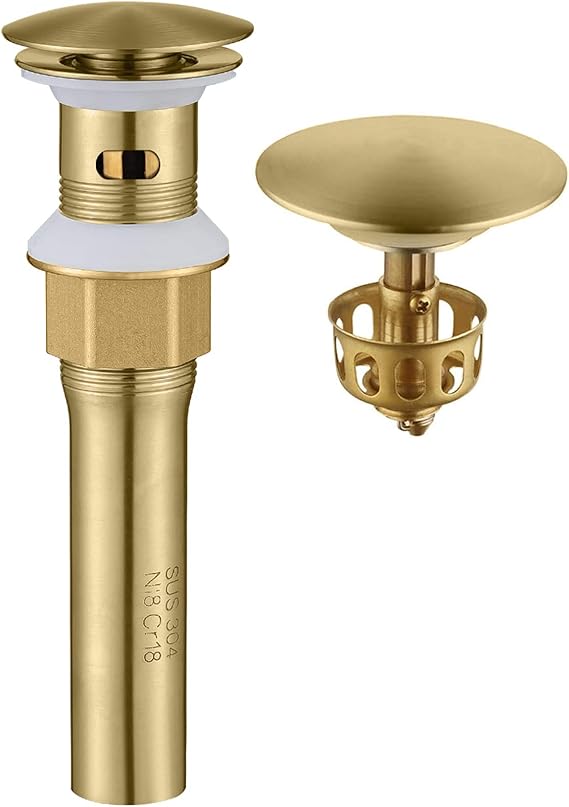
Before you begin, gather all necessary tools and materials, including a new drain stopper, plumber's putty, a wrench, and a screwdriver. Make sure to also turn off the water supply to your sink before starting the installation process. Bathroom Sink Drain Stopper Installation Guide


Bathroom Sink Drain Stopper Installation Guide


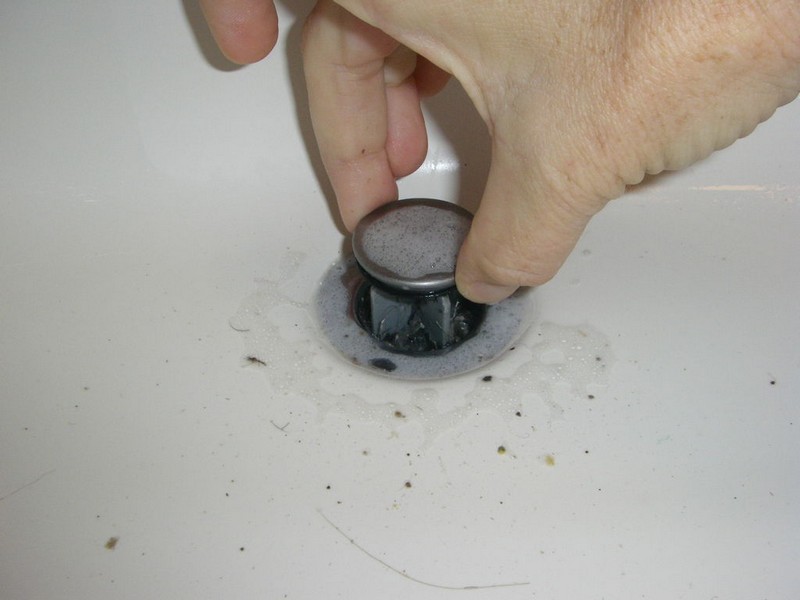
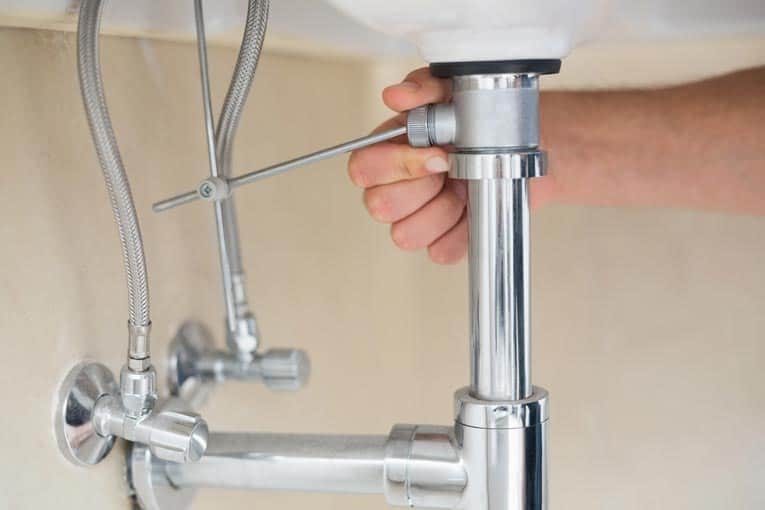
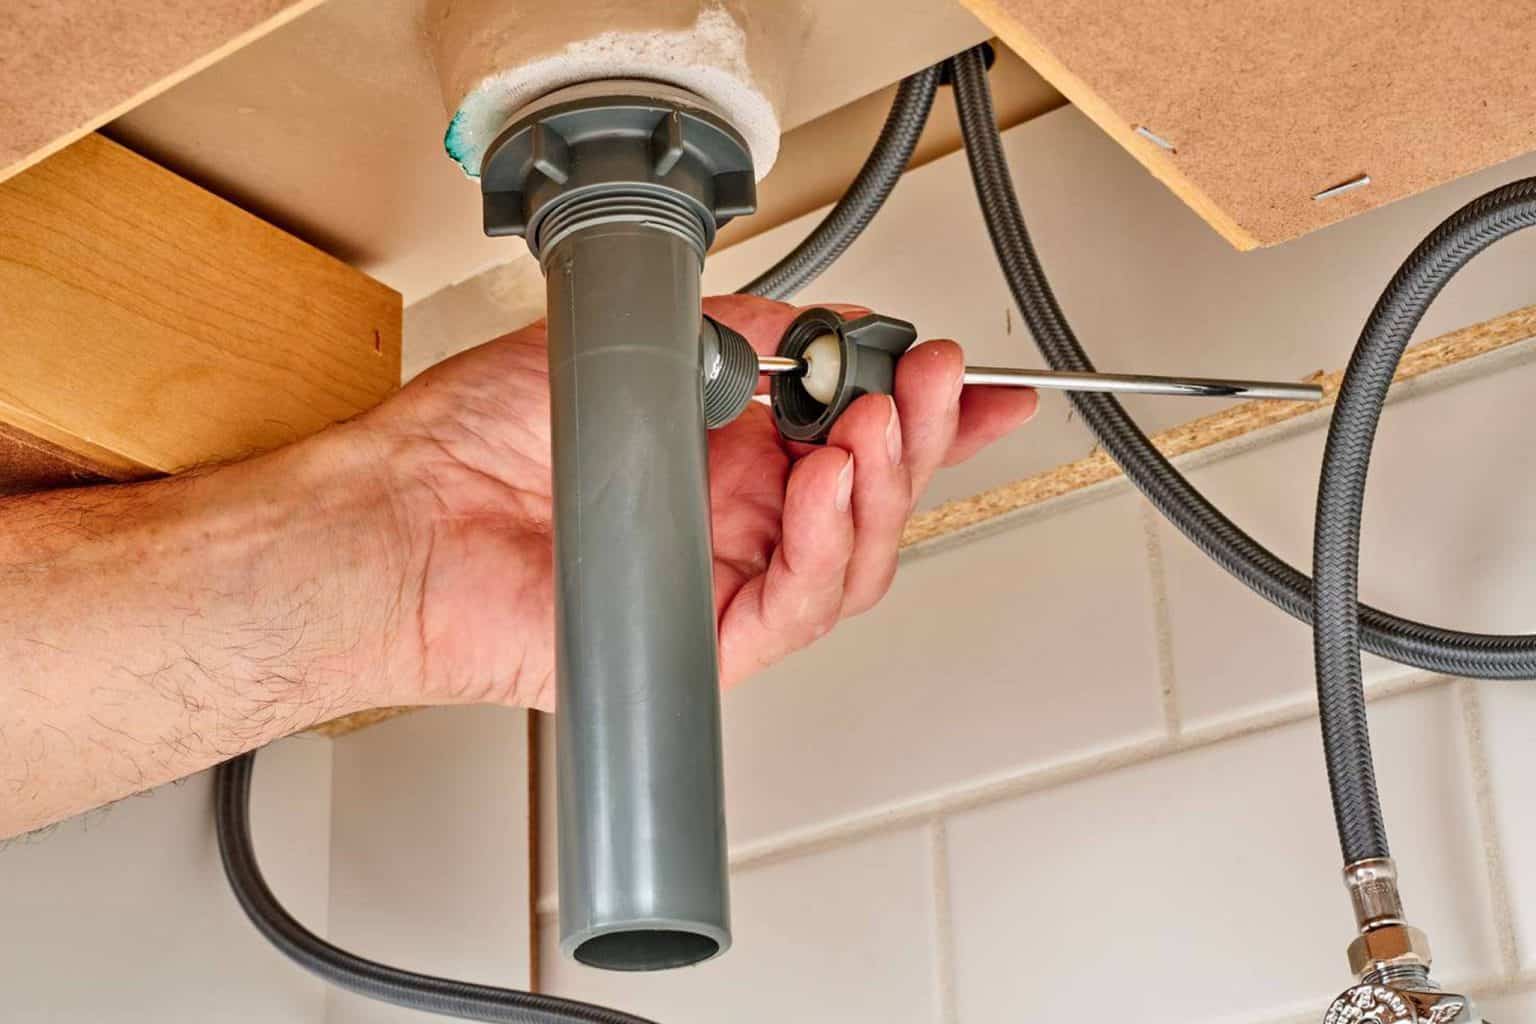
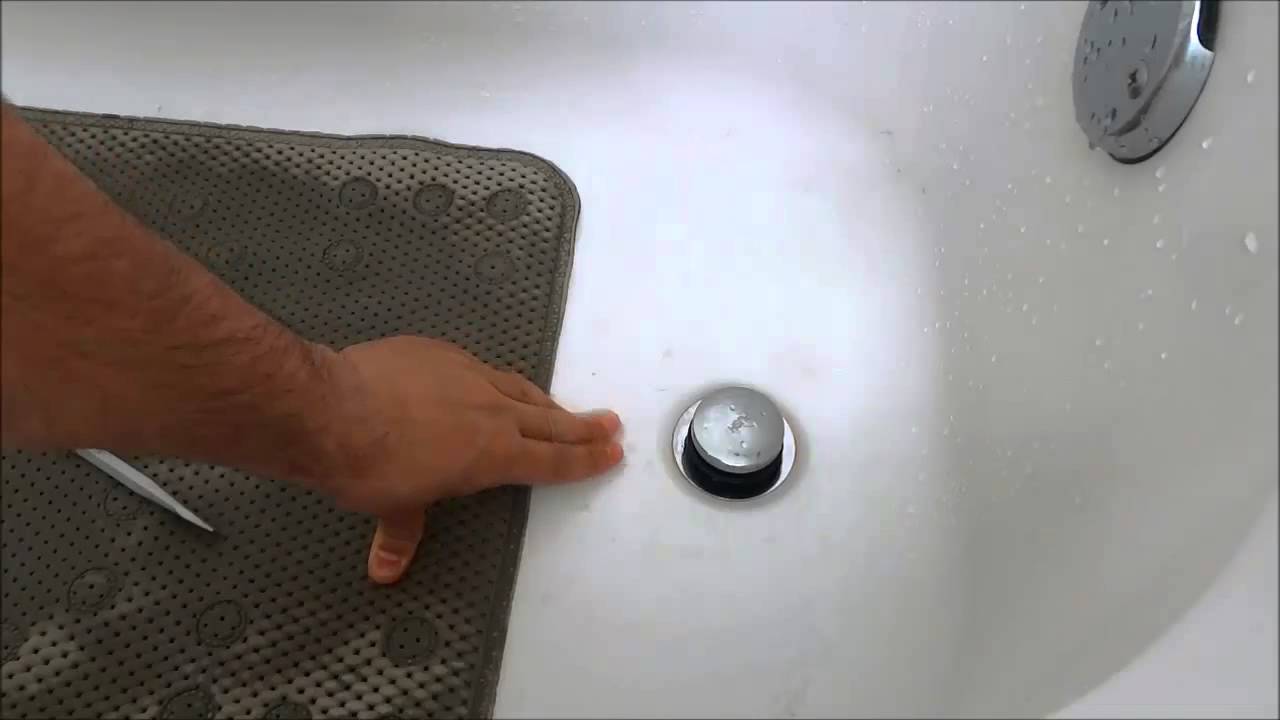
Step 1: Remove the old stopper. If you have an existing stopper, remove it by unscrewing the pivot rod and pulling out the stopper. If you have a pop-up drain, unscrew the nut at the top of the drain and remove the entire assembly. Step 2: Clean the drain. Use a rag to clean any debris or hair from the drain. This will ensure a tight seal for your new stopper. Step 3: Prepare the new stopper. If your new stopper has a rubber gasket, place it over the drain and push it down until it is snug. If it doesn't have a gasket, apply a thin layer of plumber's putty around the edge of the stopper. Step 4: Insert the stopper. Place the stopper in the drain and make sure it is in the closed position. If it has a lever on top, make sure it is facing towards the back of the sink. Step 5: Install the pivot rod. If your stopper has a pivot rod, insert it into the hole at the back of the drain and secure it with the nut provided. Make sure the rod is long enough to reach the stopper when it is in the closed position. Step 6: Test the stopper. Turn on the water supply and test the stopper by pulling up on the lever or knob. The stopper should seal tightly and hold water in the sink. Step 7: Adjust as needed. If the stopper is not sealing properly, adjust the pivot rod by loosening the nut and moving it up or down. You can also adjust the stopper by turning it clockwise or counterclockwise on the pivot rod. Step-by-Step Guide for Installing a Bathroom Sink Drain Stopper


Step-by-Step Guide for Installing a Bathroom Sink Drain Stopper


/bathroom-sink-drain-installation-2718843-03-6fee5b9d9f7d475abfe06a95ddb1f695.jpg)


/bathroom-sink-drain-installation-2718843-01-4955fe1f576b447a91abe51c126d220b.jpg)
Installing a bathroom sink drain stopper is a DIY project that can save you time and money. With the right tools and a little bit of know-how, you can easily install a new stopper in your sink and improve its functionality. DIY Bathroom Sink Drain Stopper Installation


DIY Bathroom Sink Drain Stopper Installation


With our step-by-step guide, installing a bathroom sink drain stopper is a quick and easy process. You'll have your new stopper in place and working efficiently in no time. Easy Bathroom Sink Drain Stopper Installation


Easy Bathroom Sink Drain Stopper Installation


Don't let a slow-draining sink or a constantly clogged drain slow you down. With a quick and simple bathroom sink drain stopper installation, you can have a hassle-free sink and a more enjoyable daily routine. Quick and Simple Bathroom Sink Drain Stopper Installation


Quick and Simple Bathroom Sink Drain Stopper Installation

Here are a few tips and tricks to keep in mind while installing a bathroom sink drain stopper: Installing a Bathroom Sink Drain Stopper: Tips and Tricks

Installing a Bathroom Sink Drain Stopper: Tips and Tricks


Before starting the installation process, it's important to know the type of drain you have and the necessary tools and materials needed. This will ensure a successful installation and a functioning sink. Bathroom Sink Drain Stopper Installation: What You Need to Know

Bathroom Sink Drain Stopper Installation: What You Need to Know

This step-by-step guide, along with our tips and tricks, is the ultimate guide to installing a bathroom sink drain stopper. Refer back to it whenever you need to install a new stopper or make adjustments to an existing one. The Ultimate Guide to Installing a Bathroom Sink Drain Stopper


The Ultimate Guide to Installing a Bathroom Sink Drain Stopper


By following our guide and utilizing the necessary tools and materials, you can properly install a bathroom sink drain stopper and have a fully functioning sink in no time. Say goodbye to clogs and slow-draining sinks with a properly installed stopper. How to Properly Install a Bathroom Sink Drain Stopper


How to Properly Install a Bathroom Sink Drain Stopper


Why You Should Consider Replacing Your Bathroom Sink Drain Stopper

Upgrade Your Bathroom and Improve Functionality
 The bathroom sink drain stopper may seem like a small and insignificant part of your bathroom, but it plays a crucial role in keeping your sink functioning properly. Over time, these stoppers can become worn out, rusted, or simply stop working, causing frustration and inconvenience. If you are experiencing these issues with your bathroom sink drain stopper, it may be time to consider replacing it. Not only will this improve the overall look and functionality of your bathroom, but it can also prevent potential plumbing problems in the future.
Enhance the Aesthetic of Your Bathroom
 One of the main reasons to replace your bathroom sink drain stopper is to enhance the visual appeal of your bathroom. Old and worn out stoppers can be an eyesore, taking away from the overall design of your bathroom. By choosing a new stopper, you can add a touch of modernity or elegance to your sink. There are a variety of styles and finishes to choose from, allowing you to customize the look of your bathroom to your personal taste.
Prevent Clogs and Other Plumbing Issues
 A malfunctioning or outdated sink drain stopper can cause clogs and other plumbing problems. As debris and hair build up in the drain, it can become trapped in the stopper and prevent water from draining properly. This can lead to standing water in your sink and unpleasant odors. By replacing your stopper, you can ensure that water flows smoothly down the drain, preventing clogs and potential damage to your plumbing system.
Improve Water Efficiency
 If you have an older bathroom sink drain stopper, it may not be as efficient as newer models. Newer stoppers are designed to be more water-efficient, allowing for better drainage and less water wastage. By upgrading your stopper, you can not only improve the functionality of your sink, but also do your part in conserving water and reducing your utility bills.
Conclusion
 In conclusion, replacing your bathroom sink drain stopper is a simple and cost-effective way to upgrade your bathroom and improve its functionality. With a wide range of styles and finishes to choose from, you can easily find a stopper that complements your bathroom design. Not only will this enhance the aesthetic of your bathroom, but it can also prevent clogs and improve water efficiency. Consider replacing your old and worn out stopper today and enjoy a more functional and visually appealing bathroom.