Are you looking to upgrade your bathroom with a new American Standard bathroom sink? One of the first steps in this process is installing the bathroom sink drain. While it may seem intimidating, with the right tools and knowledge, installing an American Standard bathroom sink drain can be a simple and rewarding DIY project. In this article, we will provide a step-by-step guide for installing an American Standard bathroom sink drain, as well as tips and tricks for a successful installation. Let's get started! American Standard Bathroom Sink Drain Installation
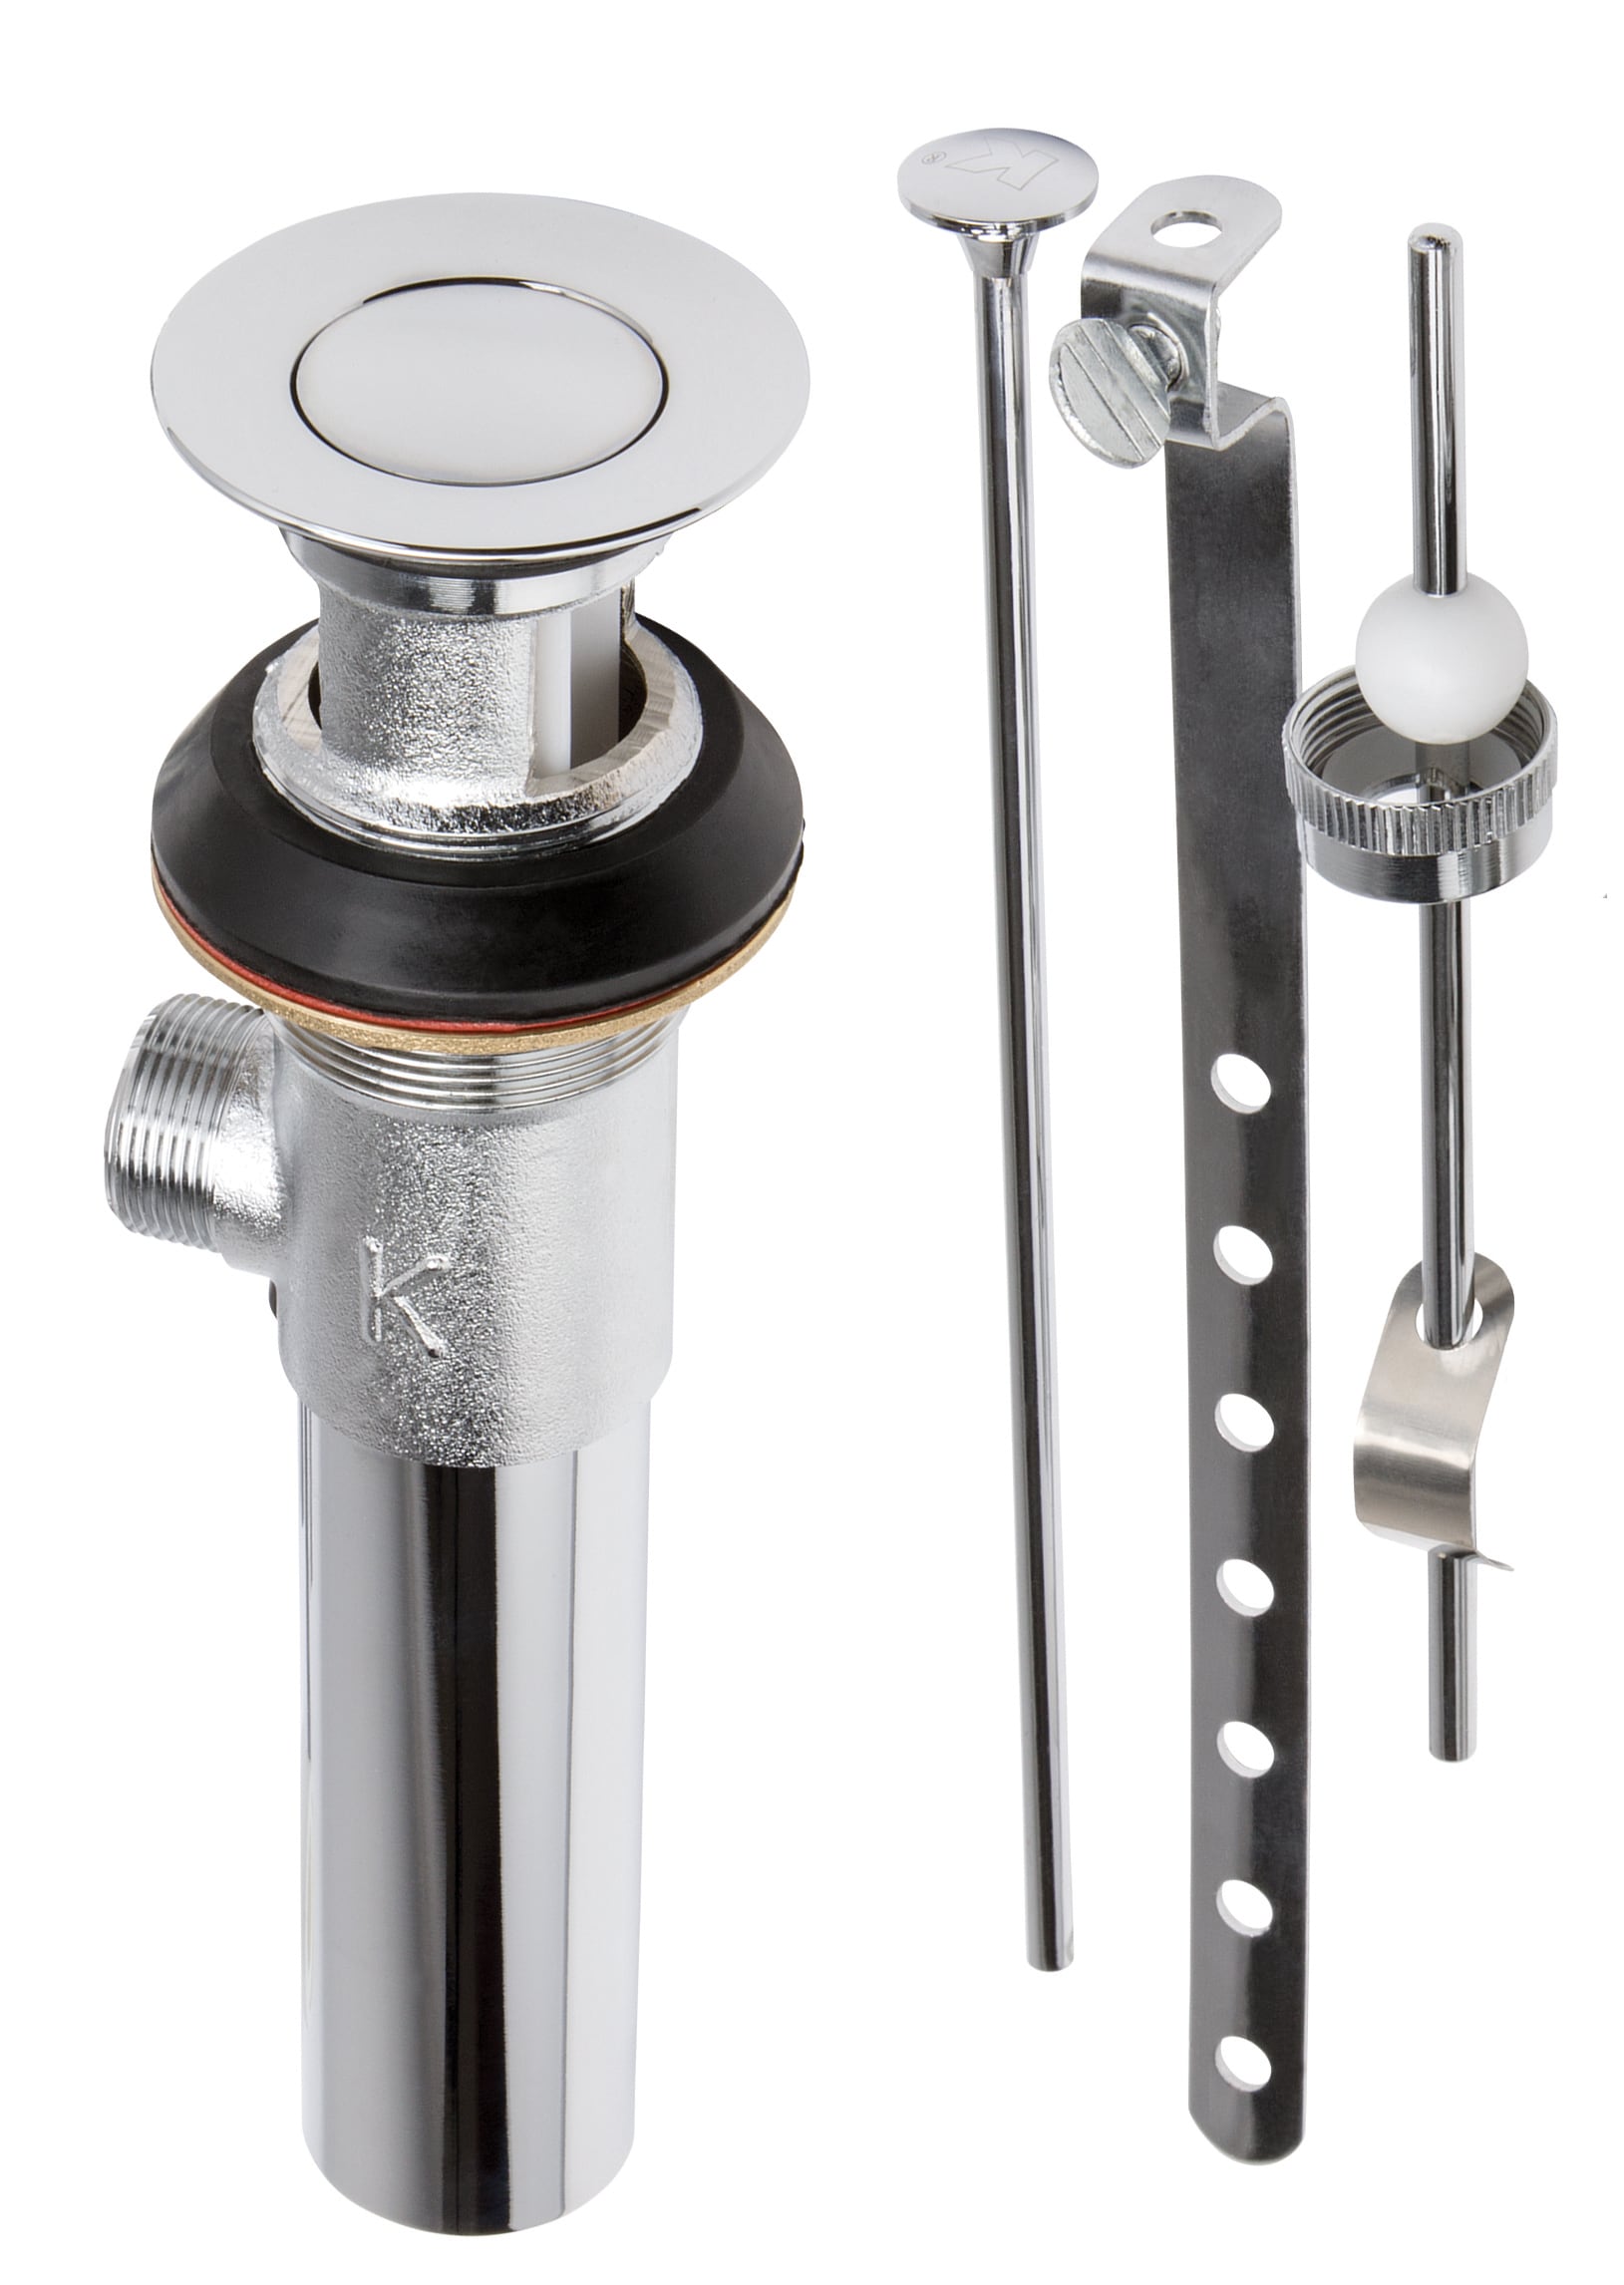
Before beginning the installation process, make sure you have all the necessary tools and materials. This includes an American Standard bathroom sink drain, plumber's putty, a wrench, a screwdriver, and plumber's tape. Once you have everything you need, follow these steps to install your new bathroom sink drain: How to Install an American Standard Bathroom Sink Drain
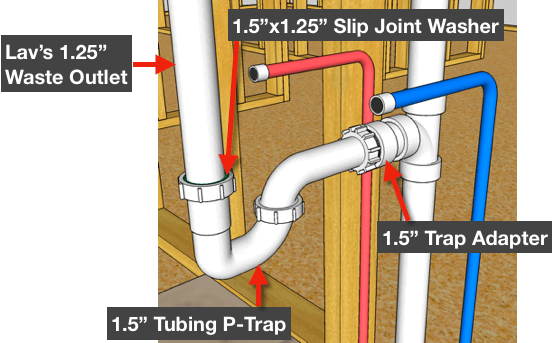
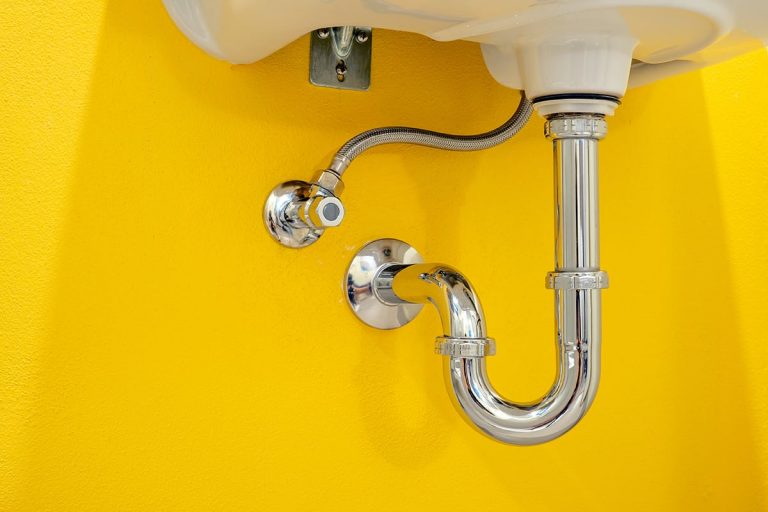
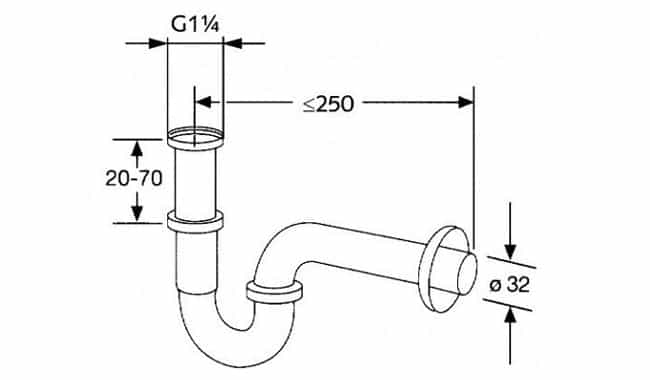
Step 1: Remove the Old Drain The first step in installing an American Standard bathroom sink drain is to remove the old drain. This can be done by using a wrench to loosen the nut that connects the drain to the bottom of the sink. Once the nut is removed, the old drain should easily come out. Step 2: Clean the Sink Before installing the new drain, it is important to clean the sink thoroughly. Use a mild cleaning solution and a soft cloth to remove any debris or residue from the sink. Step 3: Apply Plumber's Putty Take a small amount of plumber's putty and roll it into a thin rope. Apply the putty around the bottom edge of the sink opening where the drain will be placed. This will create a watertight seal once the drain is installed. Step 4: Insert the Drain Next, insert the American Standard bathroom sink drain into the sink opening. Make sure it is centered and pressed firmly into the putty. Step 5: Secure the Drain Underneath the sink, use a wrench to tighten the nut that connects the drain to the bottom of the sink. This will hold the drain in place and create a secure seal. Step 6: Connect the P-Trap The P-trap is a curved pipe that connects the drain to the plumbing system. Use plumber's tape to wrap around the threads on both ends of the P-trap. Then, connect one end to the drain and the other end to the plumbing system using a wrench to secure it in place. Step 7: Check for Leaks Turn on the water supply and let the sink run for a few minutes. Check for any leaks around the drain and P-trap. If there are leaks, tighten the connections until they stop. Step-by-Step Guide for Installing American Standard Bathroom Sink Drain
Installing an American Standard bathroom sink drain can be a satisfying DIY project for those who are handy and enjoy tackling home improvement tasks. However, if you are not comfortable with plumbing or do not have the necessary tools, it is always best to hire a professional to ensure the installation is done correctly. DIY American Standard Bathroom Sink Drain Installation
If you purchased an American Standard bathroom sink with a drain assembly, refer to the manufacturer's instructions for specific assembly instructions. These instructions may vary depending on the style and model of the sink. American Standard Bathroom Sink Drain Assembly Instructions
While installing an American Standard bathroom sink drain is typically a straightforward process, there may be some common issues that arise. These include leaks, difficulty tightening connections, and incorrect installation. If you encounter any of these issues, refer to the manufacturer's instructions or consult a professional for assistance. Troubleshooting Common Issues with American Standard Bathroom Sink Drain Installation
Having the right tools is crucial for a successful American Standard bathroom sink drain installation. Some essential tools to have on hand include a wrench, screwdriver, plumber's putty, plumber's tape, and a level. It may also be helpful to have a friend or family member assist you during the installation process. Best Tools for Installing American Standard Bathroom Sink Drain
Tip 1: Make sure to thoroughly clean the sink before installing the drain to ensure a tight seal. Tip 2: Use plumber's putty to create a watertight seal around the drain. Tip 3: Double check all connections and tighten them as necessary to prevent leaks. Tip 4: If you are unsure about any part of the installation process, consult the manufacturer's instructions or hire a professional. Tips for a Successful American Standard Bathroom Sink Drain Installation
For visual learners, there are many helpful video tutorials available online that provide step-by-step instructions for installing an American Standard bathroom sink drain. These can be a valuable resource for those tackling this project for the first time. American Standard Bathroom Sink Drain Installation Video Tutorial
If you are not comfortable with plumbing or do not have the necessary tools, it is always best to hire a professional for your American Standard bathroom sink drain installation. This will ensure that the job is done correctly and efficiently. With the right tools and knowledge, installing an American Standard bathroom sink drain can be a simple and rewarding DIY project. However, if you encounter any difficulties or are not comfortable with plumbing, do not hesitate to hire a professional for assistance. A properly installed bathroom sink drain will not only enhance the look of your bathroom but also improve its functionality. Now that you know how to install an American Standard bathroom sink drain, you can confidently tackle this project and enjoy your newly upgraded bathroom. Professional Installation Services for American Standard Bathroom Sink Drain
Why Choose American Standard Bathroom Sink Drain for Your House Design

Efficiency and Durability
 When it comes to house design, every detail counts. This includes choosing the right bathroom sink drain.
American Standard
offers efficient and durable bathroom sink drains that are designed to last for years to come. Their high-quality materials and precise engineering ensure that the drains will not only function effectively but also maintain their appearance over time.
Easy Installation Process
 Installing a new bathroom sink drain can seem like a daunting task, but with American Standard, the process is simple and hassle-free. Their
bathroom sink drain
comes with detailed instructions and all the necessary parts, making it easy to install even for those with limited plumbing experience. Additionally, their innovative design allows for a quick and seamless installation process, saving you time and effort.
Wide Range of Options
:max_bytes(150000):strip_icc()/bathroom-sink-drain-installation-2718843-02-61e5ecbee1e949be8d8f45ac4f5a6797.jpg) One of the great things about American Standard is their variety of bathroom sink drain options. They offer a range of styles and finishes to complement any house design. Whether you prefer a traditional look or a more modern aesthetic, there is a
bathroom sink drain
from American Standard that will suit your needs.
One of the great things about American Standard is their variety of bathroom sink drain options. They offer a range of styles and finishes to complement any house design. Whether you prefer a traditional look or a more modern aesthetic, there is a
bathroom sink drain
from American Standard that will suit your needs.
Enhance Your Bathroom's Aesthetics
 A bathroom sink drain may seem like a small detail, but it can have a significant impact on the overall look and feel of your bathroom. American Standard offers
innovative designs
and finishes that can add a touch of elegance and sophistication to your bathroom. With their sleek and stylish options, you can elevate the design of your bathroom and make a statement.
Trust in a Reliable Brand
 When it comes to house design, it's important to invest in products from reputable and reliable brands. American Standard has been a trusted name in the plumbing industry for over 140 years, known for their high-quality and innovative products. By choosing American Standard bathroom sink drain, you can have peace of mind knowing that you are investing in a product that is backed by years of experience and expertise.
In conclusion, when it comes to house design, every detail matters, and choosing the right bathroom sink drain is no exception. With American Standard, you can have confidence in a product that offers efficiency, durability, and aesthetic appeal. So why settle for anything less? Upgrade your bathroom with an American Standard bathroom sink drain and enjoy the benefits for years to come.








/bathroom-sink-drain-installation-2718843-01-4955fe1f576b447a91abe51c126d220b.jpg)
