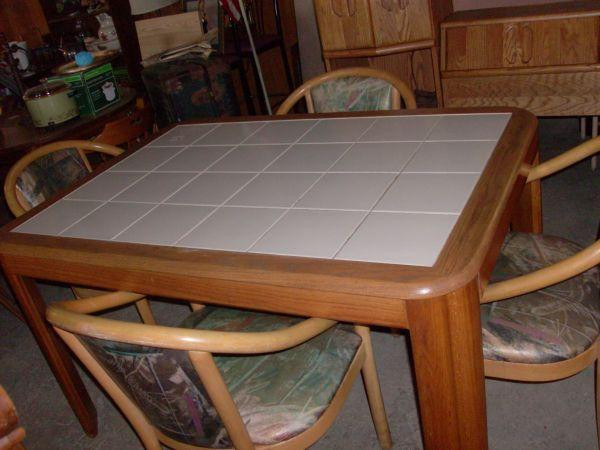
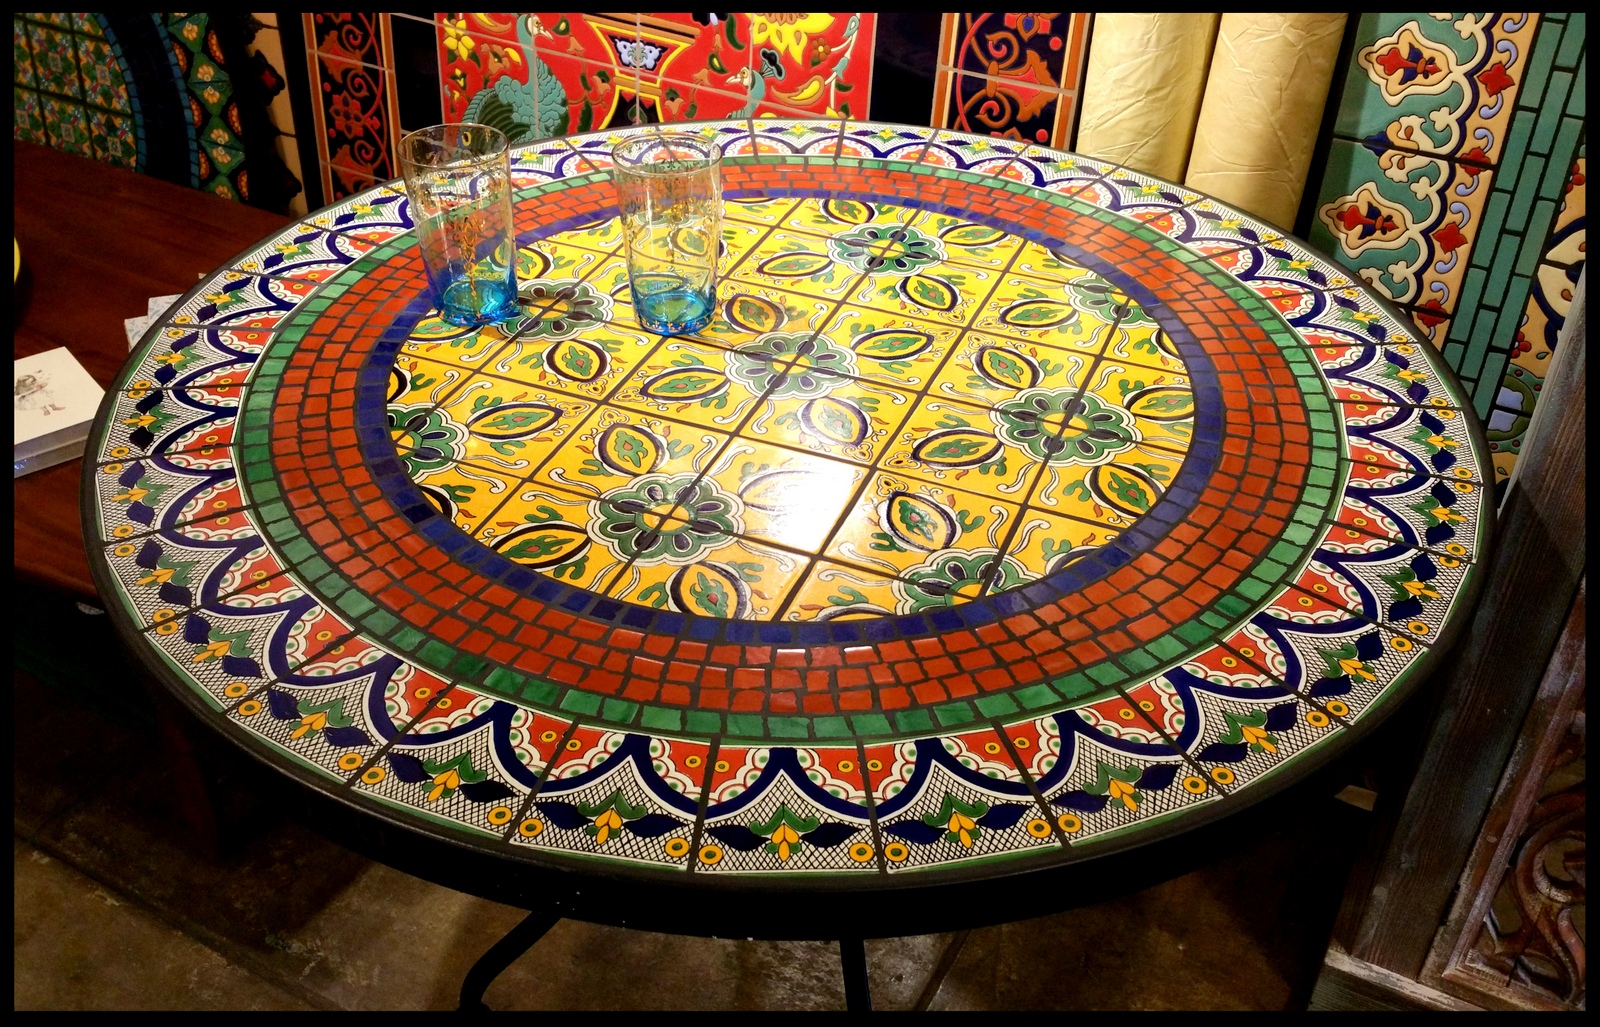
Are you tired of your boring, old kitchen table? Want to give it a fresh, new look without breaking the bank? Look no further than a DIY tile kitchen table makeover! Using tiles to update a kitchen table is a budget-friendly and creative way to transform your dining space. Not only does it add a unique touch, but it also makes for a durable and easy-to-clean surface. With just a few materials and some creativity, you can have a beautiful new table in no time. To get started, gather your supplies. You will need tiles of your choice, grout, adhesive, a trowel, a tile cutter, and a sanding block. Make sure to measure your table beforehand to determine the amount of tile and grout needed. Next, prepare the table by sanding down the surface to remove any existing finish and create a rough surface for the tile adhesive to adhere to. Then, begin applying the adhesive with a trowel in small sections, making sure to cover the entire surface. Now it's time to start placing your tiles. You can go for a simple and clean look with square or rectangular tiles, or get creative with different shapes and patterns. Make sure to leave a small gap between each tile for the grout. Once all the tiles are in place, let the adhesive dry completely before moving on to the next step. Next, mix your grout according to the package instructions and apply it to the gaps between the tiles using a grout float. Make sure to wipe away any excess grout with a damp cloth before it dries. Let the grout dry for 24 hours before sealing it with a grout sealer. This will protect your new tile tabletop from stains and make it easier to clean. And there you have it – a brand new, repurposed tile kitchen table that will surely impress your guests and add a unique touch to your dining space.1. DIY Tile Kitchen Table Makeover
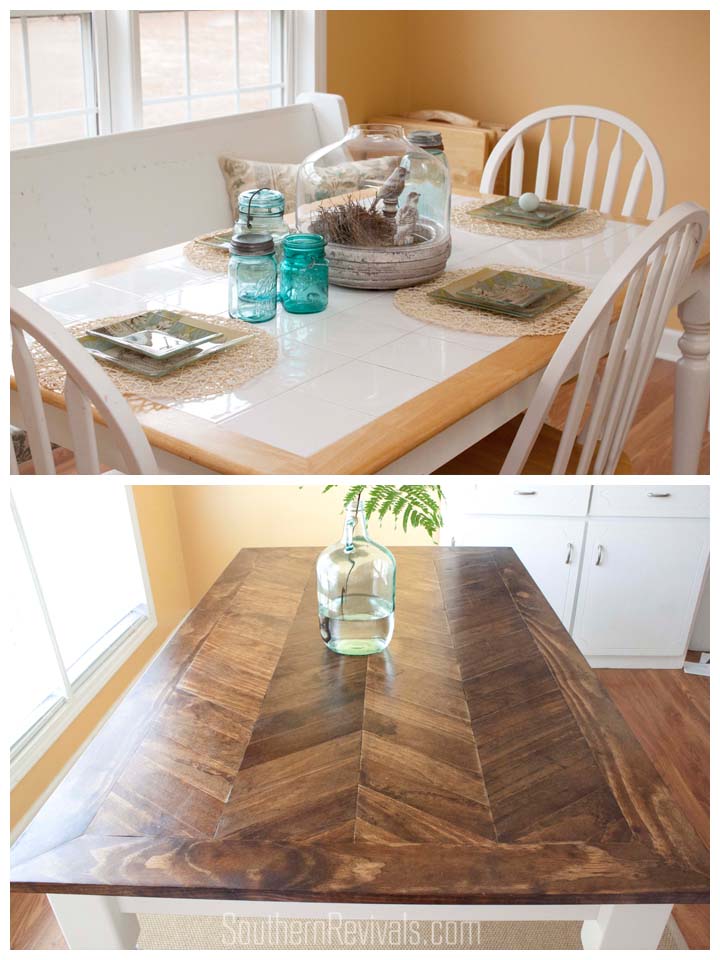

1. DIY Tile Kitchen Table Makeover


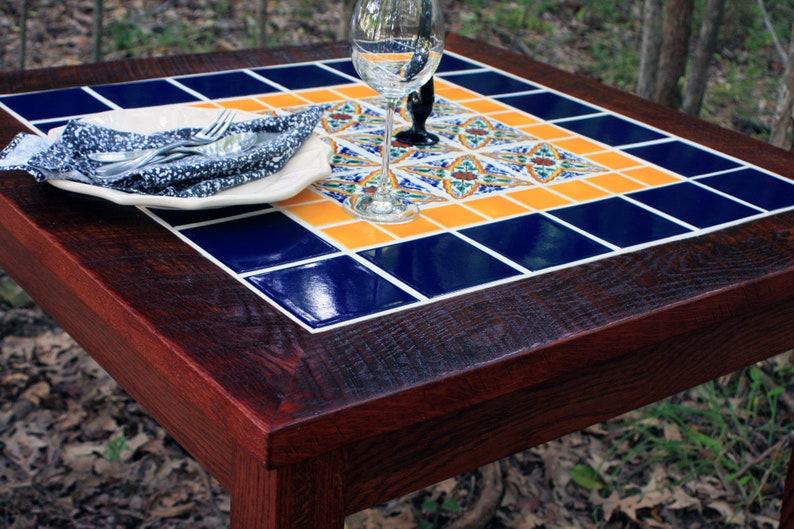
Looking for more ways to use tiles to repurpose your kitchen table? Here are some creative ideas to inspire you: Tile Mosaic Table: Instead of covering the entire tabletop with tiles, why not create a mosaic design using smaller tiles? This will add a pop of color and texture to your dining space. Chalkboard Tile Table: Turn your kitchen table into a functional and fun chalkboard by using chalkboard paint and small tiles to create a border around the tabletop. This is perfect for families with young children or for hosting game nights. Tile Top Bar Cart: Don't limit yourself to just tabletops – you can also use tiles to repurpose a bar cart. Simply replace the top surface with tiles for a stylish and durable bar cart. Outdoor Tile Dining Table: Want to spruce up your outdoor dining space? Use tiles to repurpose your old kitchen table and make it suitable for outdoor use. Just make sure to use weather-resistant tiles and seal the grout properly. Tile Coffee Table: Give your living room a unique touch by repurposing an old coffee table with tiles. You can use the same method as a kitchen table makeover or create a mosaic design. With these ideas, the possibilities are endless when it comes to repurposing your kitchen table with tiles. Let your creativity flow and have fun with it!2. Repurposed Tile Table Ideas


2. Repurposed Tile Table Ideas


Now that you have some ideas for repurposing your kitchen table with tiles, here is a step-by-step guide on how to do it: Step 1: Prepare the Table: Start by sanding down the surface of your table to remove any existing finish and create a rough surface for the tile adhesive to adhere to. Step 2: Gather Supplies: Next, gather your supplies – tiles, grout, adhesive, trowel, tile cutter, and sanding block. Step 3: Apply Adhesive: Using a trowel, apply the adhesive in small sections on the table surface. Make sure to cover the entire surface. Step 4: Place Tiles: Start placing your tiles, leaving a small gap between each one for the grout. You can use square or rectangular tiles for a simple look or get creative with different shapes and patterns. Step 5: Let Adhesive Dry: Let the adhesive dry completely before moving on to the next step. This can take anywhere from 24 to 48 hours. Step 6: Apply Grout: Mix the grout according to package instructions and apply it to the gaps between the tiles using a grout float. Wipe away any excess grout with a damp cloth. Step 7: Let Grout Dry: Let the grout dry for 24 hours before sealing it with a grout sealer. Step 8: Enjoy Your New Table: Once the grout is sealed, your repurposed tile kitchen table is ready to use and enjoy!3. How to Repurpose a Kitchen Table with Tile


3. How to Repurpose a Kitchen Table with Tile


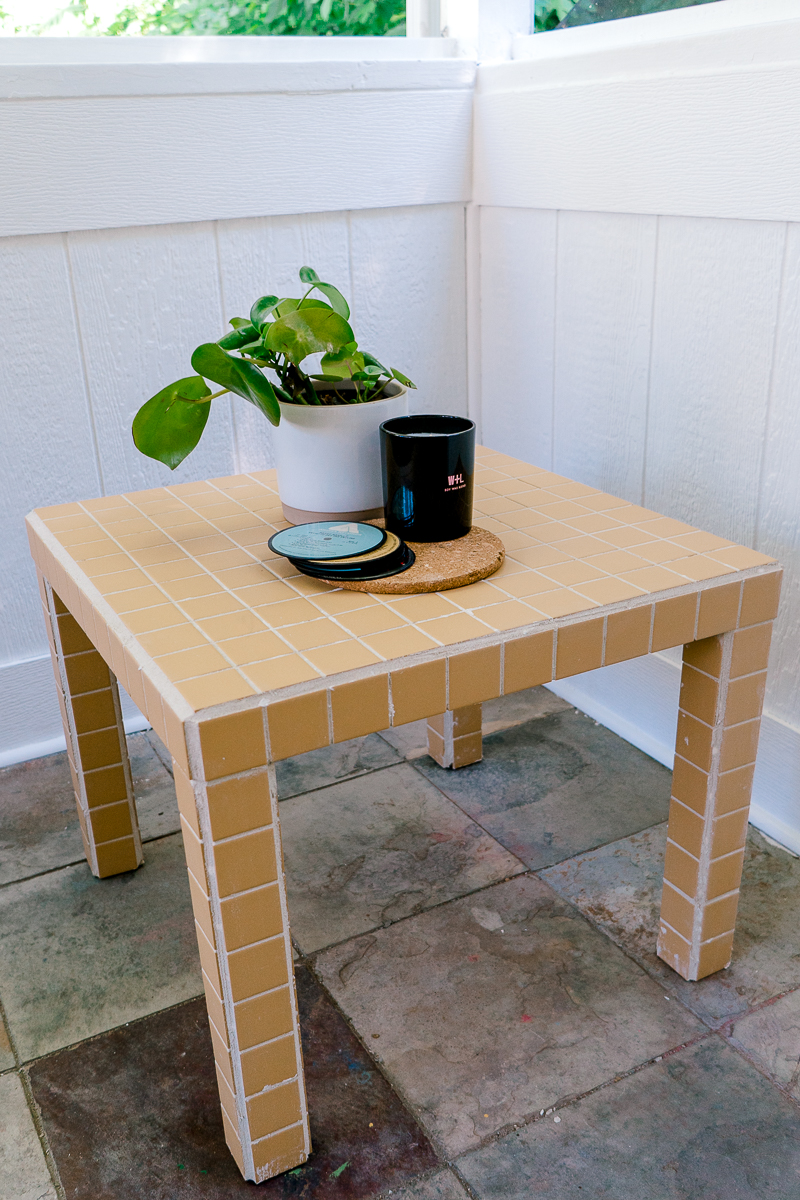
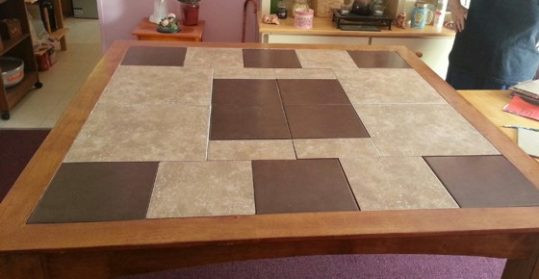
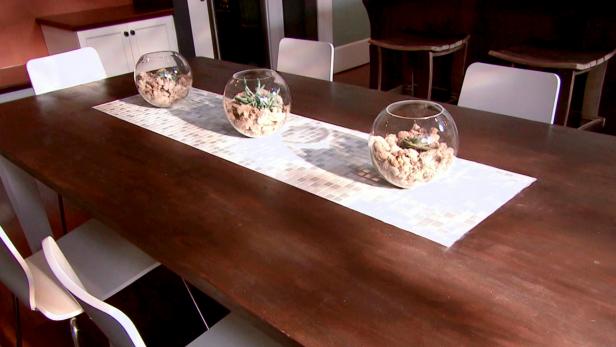
Tiles are not just for floors and backsplashes – they can add a unique touch to your kitchen table as well. Here are some creative ways to use tiles on a kitchen table: Tile Inlay: Instead of covering the entire tabletop with tiles, consider creating a tile inlay design. You can use a stencil to guide you or create a freehand design for a more personalized touch. Tile Border: For a simple yet stylish look, add a border of tiles around the edge of your kitchen table. This will give it a pop of color and texture without covering the entire surface. Tiled Legs: If you have a wooden table with legs, consider adding tiles to the legs for a unique and eye-catching detail. You can use the same tiles as the tabletop or mix and match for a fun look. Tile Table Runner: Instead of a traditional table runner, why not use tiles to create a unique and durable runner for your table? This is perfect for outdoor dining or for a more rustic look. Get creative and have fun with different ways to use tiles on your kitchen table. The possibilities are endless!4. Creative Ways to Use Tile on a Kitchen Table


4. Creative Ways to Use Tile on a Kitchen Table


If you're looking to upcycle your old kitchen table with tiles, here is a step-by-step tutorial to guide you: Step 1: Measure and Plan: Measure your table beforehand to determine the amount of tile and grout needed. You can also create a mock-up design on paper to plan the placement of the tiles. Step 2: Sand the Table: Start by sanding down the surface of your table to remove any existing finish and create a rough surface for the tile adhesive to adhere to. Step 3: Gather Supplies: Next, gather your supplies – tiles, grout, adhesive, trowel, tile cutter, and sanding block. Step 4: Apply Adhesive: Using a trowel, apply the adhesive in small sections on the table surface. Make sure to cover the entire surface. Step 5: Place Tiles: Start placing your tiles, leaving a small gap between each one for the grout. You can use square or rectangular tiles for a simple look or get creative with different shapes and patterns. Step 6: Let Adhesive Dry: Let the adhesive dry completely before moving on to the next step. This can take anywhere from 24 to 48 hours. Step 7: Apply Grout: Mix the grout according to package instructions and apply it to the gaps between the tiles using a grout float. Wipe away any excess grout with a damp cloth. Step 8: Let Grout Dry: Let the grout dry for 24 hours before sealing it with a grout sealer. Step 9: Enjoy Your New Table: Once the grout is sealed, your upcycled tile kitchen table is ready to use and enjoy!5. Upcycled Tile Kitchen Table Tutorial


5. Upcycled Tile Kitchen Table Tutorial


Looking to give your kitchen table a whole new look? Consider transforming it with tile! Here's how: Step 1: Choose Your Tiles: The first step is to choose the tiles you want to use. You can go for a simple and clean look with square or rectangular tiles, or get creative with different shapes and patterns. Step 2: Prepare the Table: Start by sanding down the surface of your table to remove any existing finish and create a rough surface for the tile adhesive to adhere to. Step 3: Gather Supplies: Next, gather your supplies – tiles, grout, adhesive, trowel, tile cutter, and sanding block. Step 4: Apply Adhesive: Using a trowel, apply the adhesive in small sections on the table surface. Make sure to cover the entire surface. Step 5: Place Tiles: Start placing your tiles, leaving a small gap between each one for the grout. You can use square or rectangular tiles for a simple look or get creative with different shapes and patterns. Step 6: Let Adhesive Dry: Let the adhesive dry completely before moving on to the next step. This can take anywhere from 24 to 48 hours. Step 7: Apply Grout: Mix the grout according to package instructions and apply it to the gaps between the tiles using a grout float. Wipe away any excess grout with a damp cloth. Step 8: Let Grout Dry: Let the grout dry for 24 hours before sealing it with a grout sealer. Step 9: Enjoy Your Transformed Table: Once the grout is sealed, your kitchen table will have a whole new look thanks to the added touch of tiles.6. Transform Your Kitchen Table with Tile

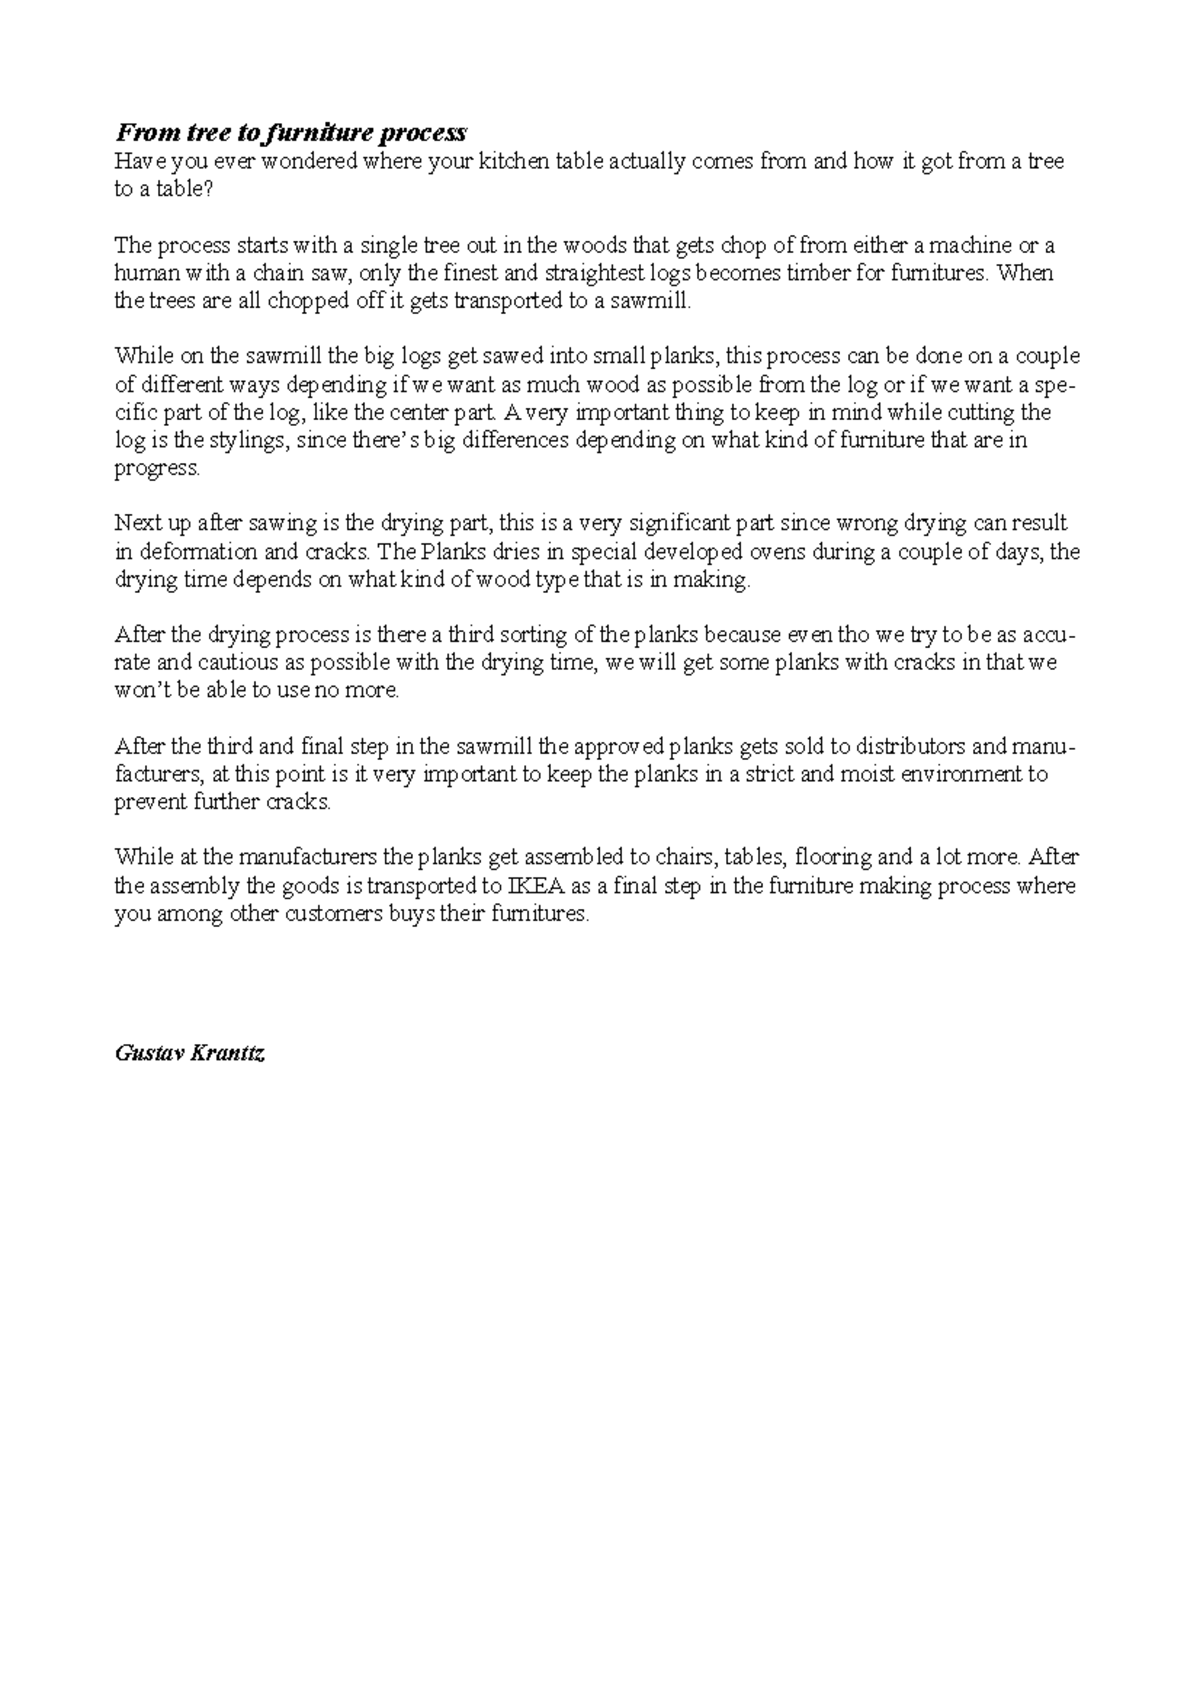

6. Transform Your Kitchen Table with Tile


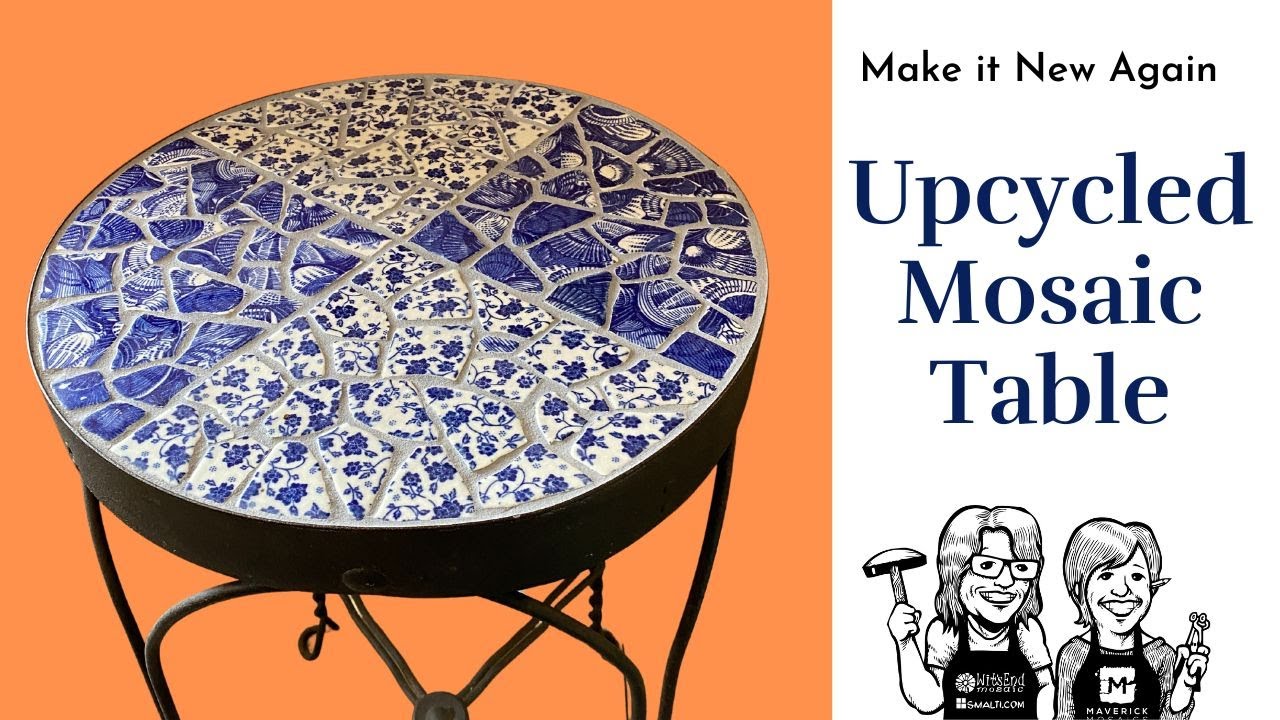
Want to add a unique and colorful touch to your kitchen table? Try creating a DIY tile mosaic table with this step-by-step guide: Step 1: Prepare the Table: Start by sanding down the surface of your table to remove any existing finish and create a rough surface for the tile adhesive to adhere to. Step 2: Gather Supplies: Next, gather your supplies – an assortment of tiles, adhesive, trowel, tile cutter, and sanding block. Step 3: Create Your Design: Play around with different tile combinations to create a mosaic design. You can use a stencil to guide you or create a freehand design for a more personalized touch. Step 4: Apply Adhesive: Using a trowel, apply the adhesive in small sections on the table surface. Make sure to cover the entire surface. Step 5: Place Tiles: Start placing your tiles, leaving a small gap between each one for the grout. You can use square or rectangular tiles for a simple look or get creative with different shapes and patterns. Step 6: Let Adhesive Dry: Let the adhesive dry completely before moving on to the next step. This can take anywhere from 24 to 48 hours. Step 7: Apply Grout: Mix the grout according to package instructions and apply it to the gaps between the tiles using a grout float. Wipe away any excess grout with a damp cloth. Step 8: Let Grout Dry: Let the grout dry for 24 hours before sealing it with a grout sealer. Step 9: Enjoy Your Colorful Creation: Once the grout is sealed, your DIY tile mosaic kitchen table is ready to use and add a pop of color to your dining space.7. DIY Tile Mosaic Kitchen Table


7. DIY Tile Mosaic Kitchen Table


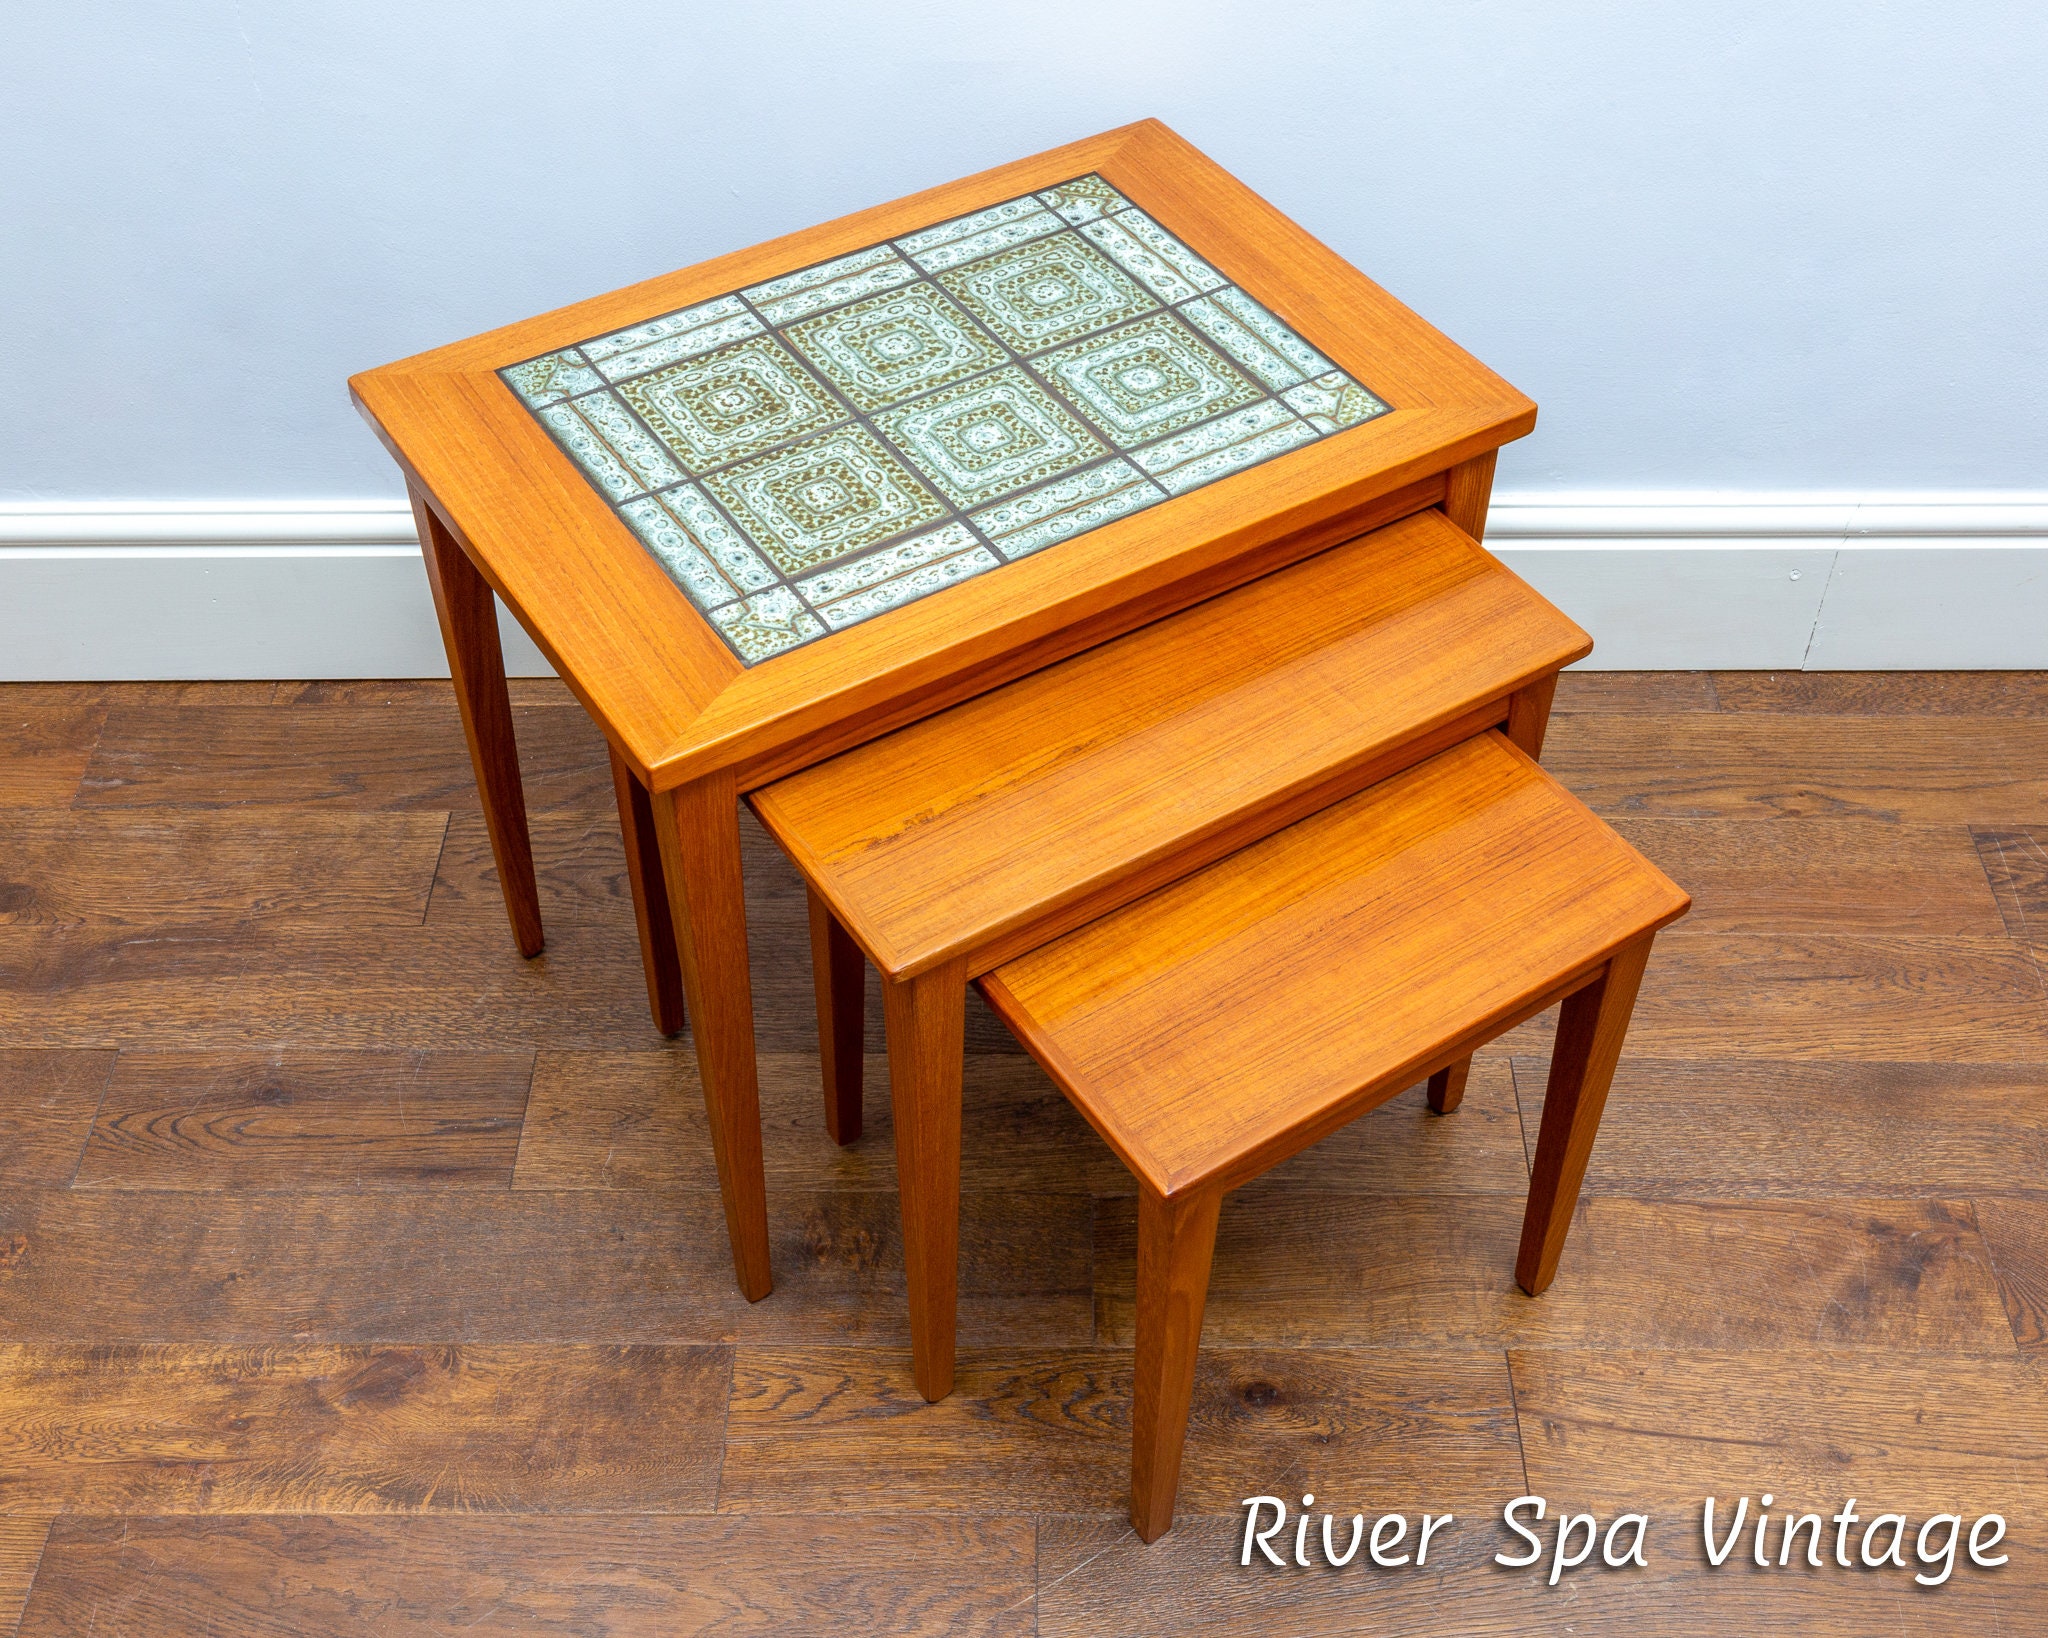
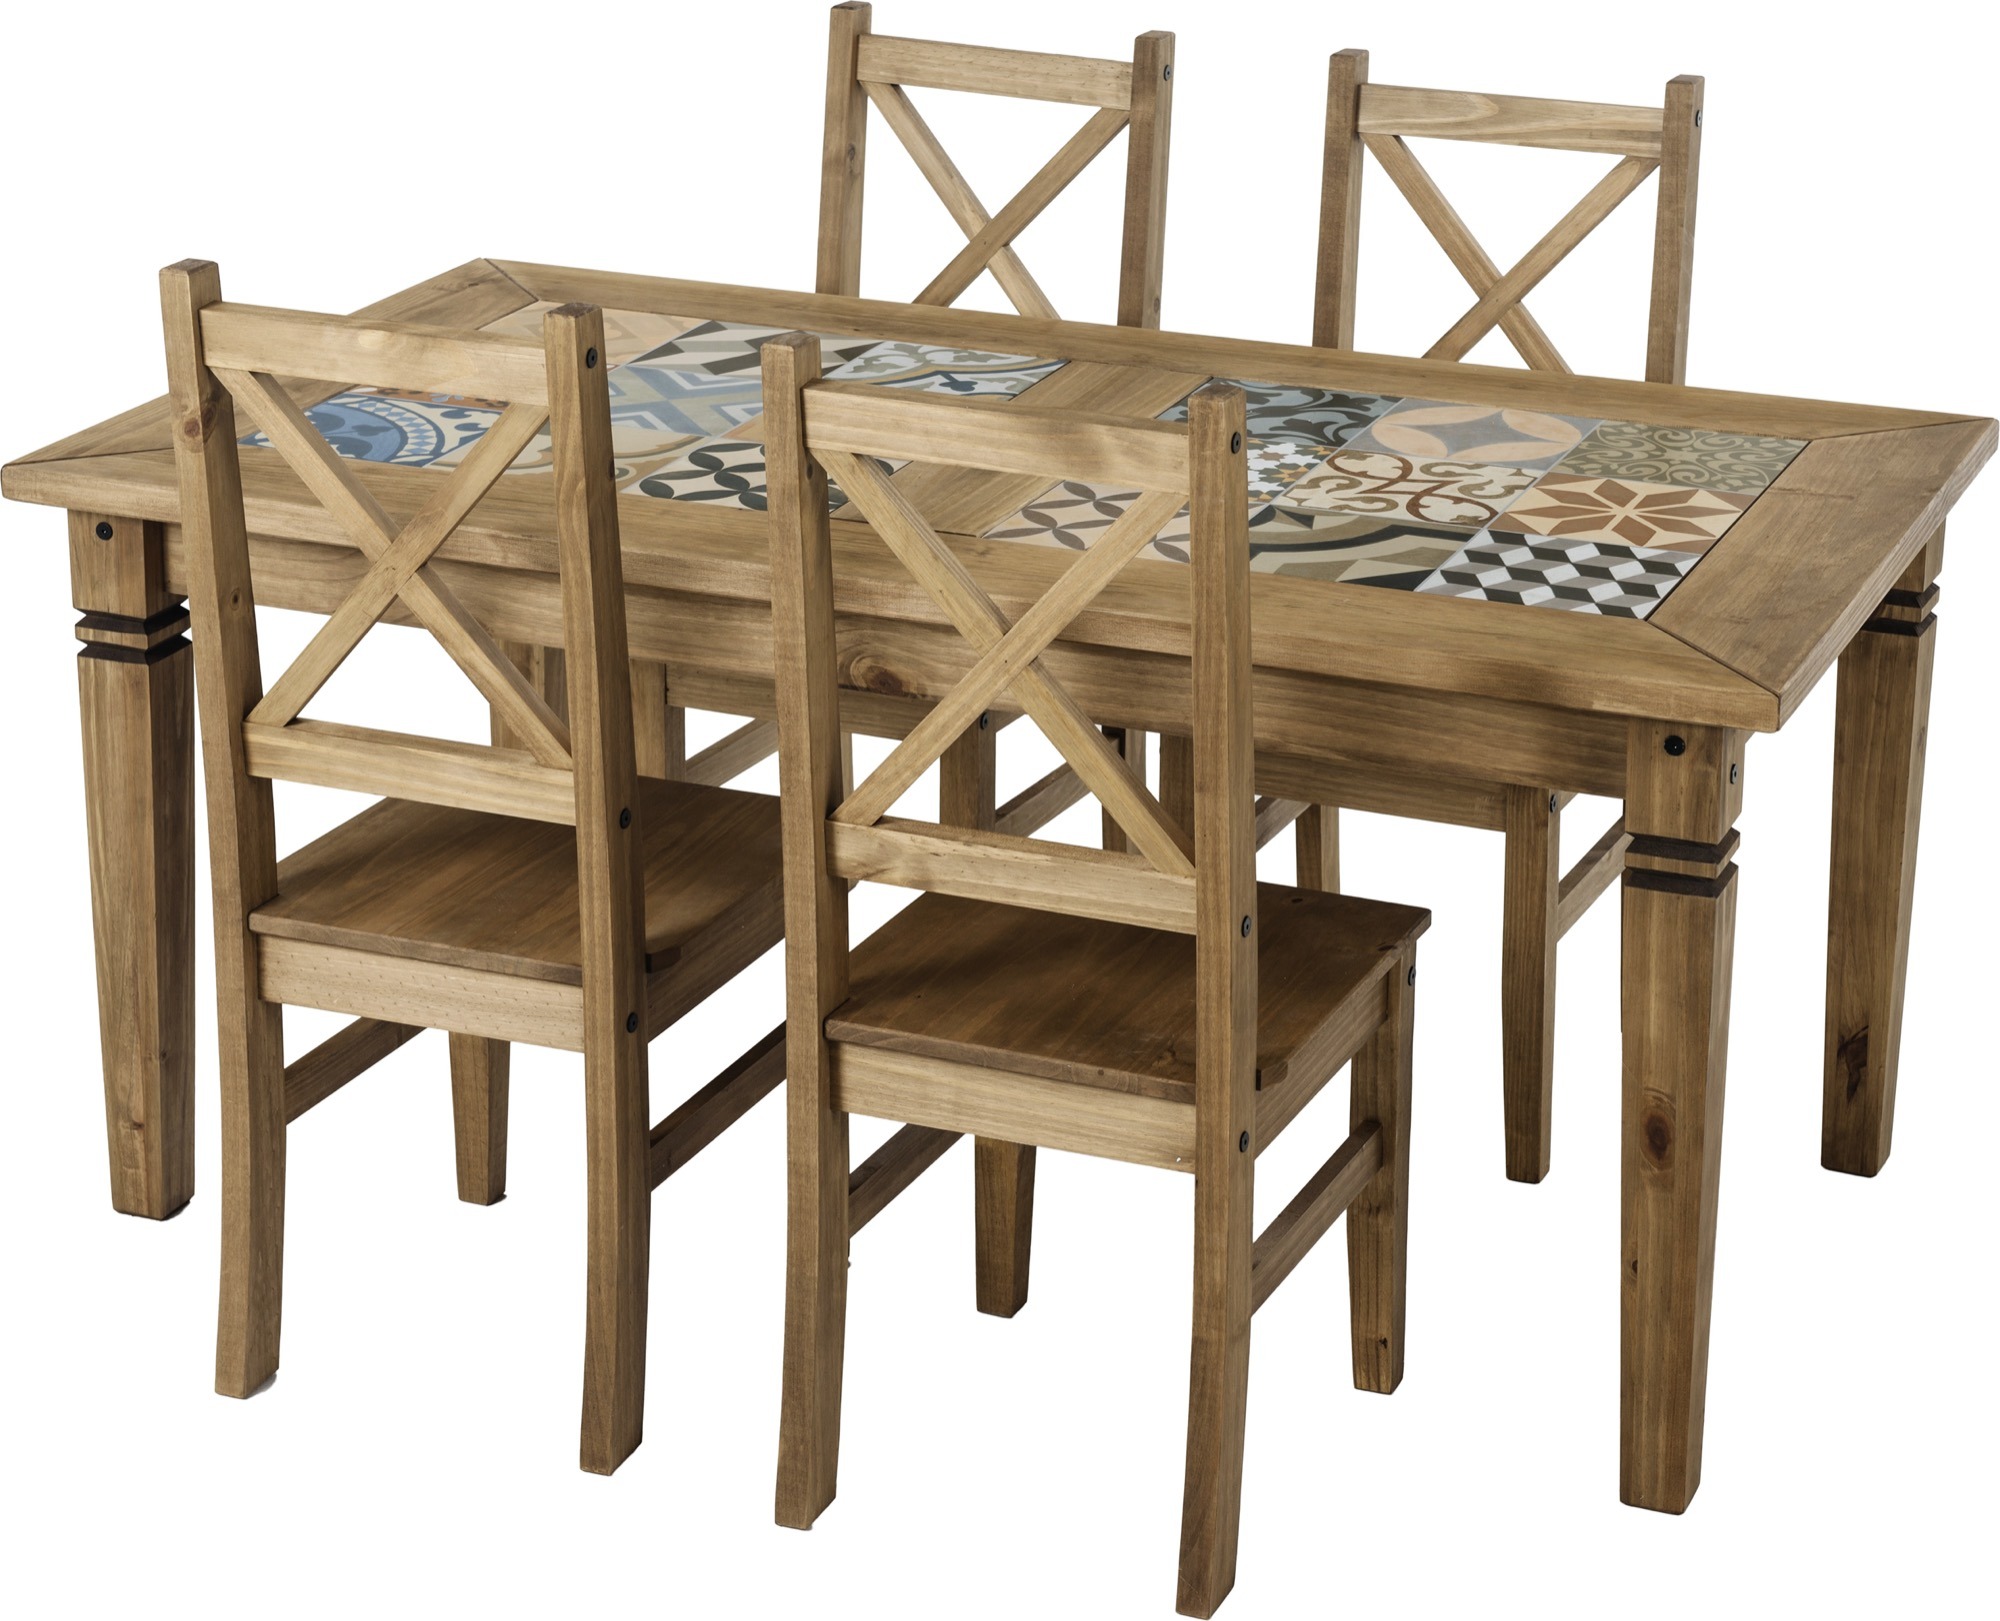
Looking to update your dining room table with a unique and durable surface? Consider repurposing it with a tile top using this simple tutorial: Step 1: Measure and Plan: Measure your table beforehand to determine the amount of tile and grout needed. You can also create a mock-up design on paper to plan the placement of the tiles. Step 2: Sand the Table: Start by sanding down the surface of your table to remove any existing finish and create a rough surface for the tile adhesive to adhere to. Step 3: Gather Supplies: Next, gather your supplies – tiles, grout, adhesive, trowel, tile cutter, and sanding block. Step 4: Apply Adhesive: Using a trowel, apply the adhesive in small sections on the table surface. Make sure to cover the entire surface.8. Repurposed Tile Top Dining Table


8. Repurposed Tile Top Dining Table


Transform Your Kitchen with a DIY Repurposed Tile Table

Bring a Unique Touch to Your Kitchen
 If you're looking to update your kitchen on a budget, a great way to do so is by repurposing old furniture. Not only is it cost-effective, but it also adds a unique and personalized touch to your home. One great piece to repurpose is a tile kitchen table. With a little creativity and some DIY skills, you can transform your old, worn-out table into a stunning centerpiece for your kitchen. In this article, we'll show you how to repurpose a tile kitchen table, step by step.
Gather Your Materials
 Before you get started, it's important to gather all the necessary materials. Most of these items can be found at your local hardware store, making this project even more budget-friendly. You will need:
- A tile kitchen table
- Sandpaper
- Primer
- Paintbrushes
- Chalk paint or regular paint
- Tile adhesive
- Grout
- Tiles of your choice
- Tile cutter
- Sponge
- Sealer
Before you get started, it's important to gather all the necessary materials. Most of these items can be found at your local hardware store, making this project even more budget-friendly. You will need:
- A tile kitchen table
- Sandpaper
- Primer
- Paintbrushes
- Chalk paint or regular paint
- Tile adhesive
- Grout
- Tiles of your choice
- Tile cutter
- Sponge
- Sealer
Prep and Paint Your Table
 The first step is to prep your table for painting. Start by sanding down the surface of the table to remove any existing paint or varnish. This will ensure that the new paint adheres properly. Once sanded, wipe the table clean with a damp cloth.
Next, apply a coat of primer to the entire table using a paintbrush. This will help the paint to stick and prevent any stains from showing through. Let the primer dry completely before moving on to the next step.
Now comes the fun part – painting! You can choose to use chalk paint for a shabby-chic look or regular paint for a more modern finish. Apply two coats of paint, letting each coat dry completely before adding the next. Once the paint is dry, you can distress it with sandpaper for a vintage look.
The first step is to prep your table for painting. Start by sanding down the surface of the table to remove any existing paint or varnish. This will ensure that the new paint adheres properly. Once sanded, wipe the table clean with a damp cloth.
Next, apply a coat of primer to the entire table using a paintbrush. This will help the paint to stick and prevent any stains from showing through. Let the primer dry completely before moving on to the next step.
Now comes the fun part – painting! You can choose to use chalk paint for a shabby-chic look or regular paint for a more modern finish. Apply two coats of paint, letting each coat dry completely before adding the next. Once the paint is dry, you can distress it with sandpaper for a vintage look.
Add the Tile Top
 Once the paint has dried, it's time to add the tile top. Measure the dimensions of your table and cut the tiles accordingly using a tile cutter. Lay out the tiles on the table to ensure they fit properly. Once you're happy with the layout, use tile adhesive to secure the tiles onto the table. Follow the manufacturer's instructions for the best results.
Grout and Seal the Tiles
 After the tile adhesive has dried, it's time to grout the tiles. Mix the grout according to the instructions and use a sponge to apply it in between the tiles. Wipe away any excess grout with a damp cloth and let it dry.
To protect the tiles and make them easier to clean, apply a sealer over the grout and tiles. This will also give your table a glossy finish.
After the tile adhesive has dried, it's time to grout the tiles. Mix the grout according to the instructions and use a sponge to apply it in between the tiles. Wipe away any excess grout with a damp cloth and let it dry.
To protect the tiles and make them easier to clean, apply a sealer over the grout and tiles. This will also give your table a glossy finish.
Enjoy Your New Kitchen Table
 Congratulations, you now have a beautiful repurposed tile kitchen table! This unique piece will add character and charm to your kitchen and will surely be a conversation starter. With some paint and tiles, you've given new life to an old piece of furniture at a fraction of the cost of buying a new one.
In conclusion, repurposing a tile kitchen table is a fun and creative way to update your kitchen without breaking the bank. With just a few materials and some DIY skills, you can transform your old table into a stunning centerpiece that reflects your personal style. So why not give it a try and see the amazing results for yourself?
Congratulations, you now have a beautiful repurposed tile kitchen table! This unique piece will add character and charm to your kitchen and will surely be a conversation starter. With some paint and tiles, you've given new life to an old piece of furniture at a fraction of the cost of buying a new one.
In conclusion, repurposing a tile kitchen table is a fun and creative way to update your kitchen without breaking the bank. With just a few materials and some DIY skills, you can transform your old table into a stunning centerpiece that reflects your personal style. So why not give it a try and see the amazing results for yourself?