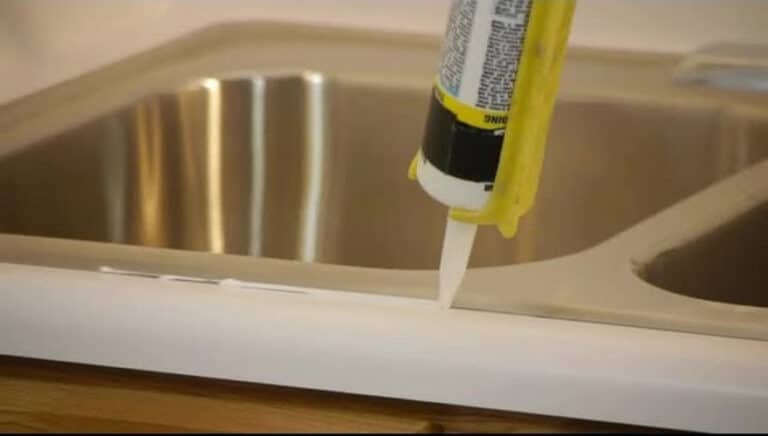
Proper caulking around your kitchen sink is essential for preventing water damage and maintaining a clean and hygienic kitchen. If you notice gaps or cracks in the caulking around your sink, it's time to learn how to caulk a kitchen sink. This simple DIY project can save you from costly repairs down the line. To start, you'll need to gather some supplies. This includes a caulking gun, caulk designed for kitchen sinks, a utility knife, and a damp cloth. You can also use a caulk smoothing tool for a professional finish. Begin by thoroughly cleaning the area around your sink to remove any old caulk, dirt, or grime. Make sure the surface is completely dry before you start caulking. Next, load the caulk into the gun and cut off the tip at a 45-degree angle. This will make it easier to apply a smooth, even bead of caulk. Starting at one end, carefully apply the caulk along the seam between the sink and the countertop. Use a steady hand and apply light pressure to the trigger of the caulking gun. Continue until you have sealed the entire length of the seam. If you have any gaps or uneven spots, use your finger or a caulk smoothing tool to smooth out the caulk and ensure a tight seal. Allow the caulk to dry completely before using your sink or getting it wet. This can take anywhere from 24-48 hours, depending on the type of caulk you use. Once it's dry, your sink should be fully sealed and protected from water damage.1. How to Caulk a Kitchen Sink


1. How to Caulk a Kitchen Sink


.jpg)


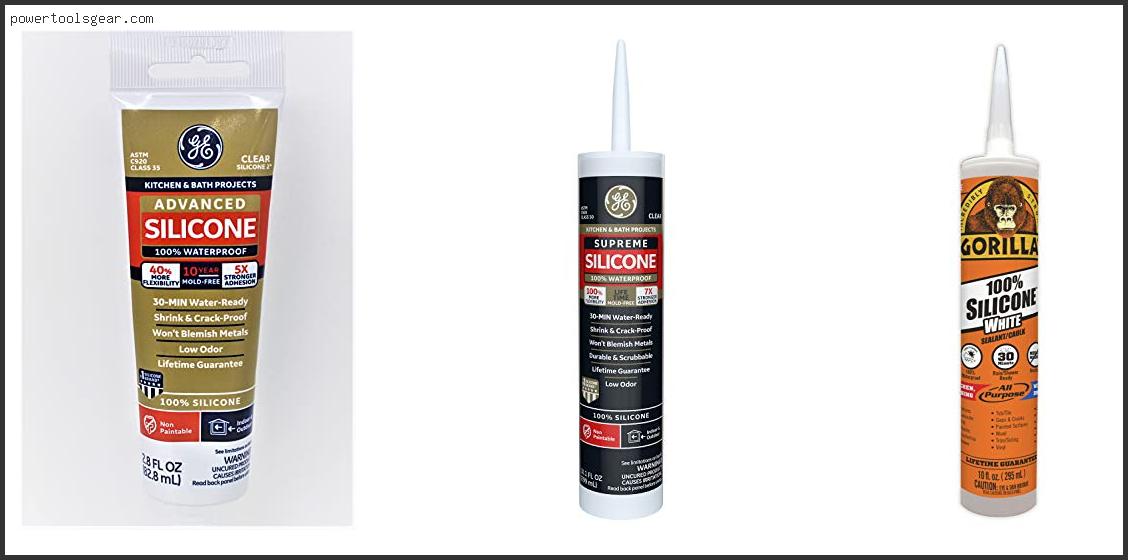
Choosing the right caulk for your kitchen sink is crucial for ensuring a long-lasting and effective seal. There are several types of caulk available, but the best caulk for kitchen sinks is silicone caulk. This type of caulk is specifically designed for use in areas that are exposed to water, making it perfect for kitchen sinks. Silicone caulk is waterproof and flexible, meaning it can withstand frequent exposure to water and movement without cracking or breaking. It also has excellent adhesion, ensuring a strong bond between the sink and the countertop. Additionally, silicone caulk is mold and mildew resistant, making it ideal for use in damp environments like kitchens. When purchasing silicone caulk, make sure to get a high-quality brand that is specifically labeled for use in kitchen and bathroom applications. This will ensure the best results and a longer-lasting seal. It's also essential to select a caulk color that matches your sink and countertop for a seamless finish.2. Best Caulk for Kitchen Sink


2. Best Caulk for Kitchen Sink


Caulking your kitchen sink may seem like a simple task, but there are a few tips and tricks that can make the process easier and more effective. First, always make sure to clean and dry the surfaces before applying caulk. Any dirt, grease, or moisture can prevent the caulk from adhering properly and lead to a weak seal. Next, use a caulk gun to apply the caulk for more precise and controlled application. Start at one end and move steadily along the seam, applying consistent pressure to the trigger. Avoid squeezing the trigger too hard, as this can cause uneven and excessive caulk application. After applying the caulk, use a damp cloth to smooth out any bumps or uneven spots. You can also use your finger or a caulk smoothing tool for a professional finish. Lastly, allow the caulk to dry completely before using your sink or getting it wet. This may take up to 48 hours, so be patient for the best results.3. Caulking Tips for Kitchen Sink


3. Caulking Tips for Kitchen Sink


Silicone caulk is the best type of caulk to use for kitchen sinks, as it is waterproof, flexible, and mold-resistant. However, within the category of silicone caulk, there are different types to choose from. Acetoxy silicone caulk is the most commonly used type and is suitable for most kitchen sink applications. It has a strong odor during application but dries quickly and forms a strong seal. Oxime silicone caulk is a low-odor alternative to acetoxy silicone caulk. It has a longer drying time, making it easier to work with, but it is also more expensive. Neutral-cure silicone caulk is a good option for sensitive surfaces, as it does not release any corrosive acids during the curing process. However, it has a longer drying time and is not as strong as acetoxy or oxime silicone caulk. When choosing the right silicone caulk for your kitchen sink, consider the strength, odor, and drying time to find the best fit for your needs.4. Silicone Caulk for Kitchen Sink

4. Silicone Caulk for Kitchen Sink


If you need to recaulk your kitchen sink, you'll first need to remove the old caulk. This may seem like a daunting task, but with the right tools and techniques, it can be relatively easy. First, use a utility knife or a caulk removal tool to carefully cut away as much of the old caulk as possible. Be sure to wear protective gloves to avoid any cuts or irritation from the caulk. Next, use a caulk softener or a mixture of equal parts white vinegar and warm water to soften and loosen any remaining caulk. Let the solution sit for about an hour before attempting to remove the caulk again. Using a scraping tool, gently scrape away any remaining caulk, being careful not to damage the sink or countertop. You may need to repeat the softening and scraping process a few times to remove all the caulk completely. Once all the caulk is removed, thoroughly clean and dry the area before applying new caulk.5. How to Remove Caulk from Kitchen Sink

5. How to Remove Caulk from Kitchen Sink


When it comes to caulking your kitchen sink, using a waterproof caulk is crucial for preventing water damage and maintaining a clean and hygienic kitchen. While silicone caulk is the best type of caulk for kitchen sinks, there are also specific waterproof options available. 100% silicone caulk is the most waterproof option and is suitable for use in areas that are frequently exposed to water. It is also mold and mildew resistant, making it perfect for use in kitchens and bathrooms. Acrylic latex caulk is another good option for waterproofing your kitchen sink. It is a water-based caulk that is easy to apply and clean up, making it a popular choice for DIYers. However, it is not as strong or durable as silicone caulk and may need to be replaced more frequently. When choosing a waterproof caulk for your kitchen sink, consider the strength, durability, and ease of application to find the best fit for your needs.6. Waterproof Caulk for Kitchen Sink

6. Waterproof Caulk for Kitchen Sink

When caulking around your kitchen sink, there are a few things to keep in mind to ensure a professional and effective seal. First, make sure to use a caulk specifically designed for kitchen sinks or other wet areas. This will ensure the best results and a longer-lasting seal. Next, apply the caulk in a continuous bead along the seam, making sure to cover any gaps or cracks. Use a finger or a caulk smoothing tool to smooth out the caulk and create an even and tight seal. After applying the caulk, remove any excess with a damp cloth or paper towel. This will help create a clean and neat finish. Lastly, allow the caulk to dry completely before using your sink or getting it wet. This can take up to 48 hours, so be patient for the best results.7. Caulking Around Kitchen Sink


7. Caulking Around Kitchen Sink


If you notice gaps or cracks in the caulking around your kitchen sink, it's essential to repair it as soon as possible to prevent water damage and maintain a hygienic kitchen. To repair kitchen sink caulking, start by removing the old caulk following the steps outlined above. Next, thoroughly clean and dry the area before applying new caulk. When applying the new caulk, make sure to cover any gaps or cracks completely and use a finger or caulk smoothing tool to create a tight and even seal. Allow the caulk to dry completely before using your sink or getting it wet. Regularly check the caulking around your kitchen sink for any signs of wear or damage and repair it as needed to ensure a strong and effective seal.8. Kitchen Sink Caulking Repair


8. Kitchen Sink Caulking Repair


Drop-in kitchen sinks, also known as top-mount or self-rimming sinks, require a slightly different caulking technique than undermount sinks. Here's how to caulk a drop-in kitchen sink for a professional and long-lasting seal. Before starting, make sure to clean and dry the area thoroughly. Next, apply a continuous bead of caulk along the edge of the sink where it meets the countertop. Use a finger or a caulk smoothing tool to smooth out the caulk and create an even and tight seal. After applying the caulk, remove any excess with a damp cloth or paper towel. This will help create a clean and neat finish. Once the caulk is dry, your drop-in kitchen sink should be securely sealed and ready for use.9. Caulking a Drop-In Kitchen Sink


9. Caulking a Drop-In Kitchen Sink
Sealing your kitchen sink with caulk is an essential step for preventing water damage and maintaining a clean and hygienic kitchen. Here's how to seal a kitchen sink with caulk in a few simple steps. First, clean and dry the area around your sink. Next, load the caulk into a caulking gun and cut off the tip at a 45-degree angle. Starting at one end, apply a continuous bead of caulk along the seam between the sink and the countertop. Use a finger or a caulk smoothing tool to smooth out the caulk and create an even and tight seal. Wipe away any excess with a damp cloth or paper towel. Allow the caulk to dry completely before using your sink or getting it wet. This can take up to 48 hours, so be patient for the best results.10. How to Seal a Kitchen Sink with Caulk


10. How to Seal a Kitchen Sink with Caulk

Caulking for Kitchen Sink: A Must for a Well-Designed Kitchen

The Importance of Caulking in Kitchen Design
 Caulking is an essential step in the process of designing a kitchen. It helps to create a seamless and polished look while also providing protection against water damage and mold growth. Caulking is especially important for kitchen sinks as they are constantly exposed to water and other liquids. Without proper caulking, water can seep into the gaps between the sink and the countertop, causing damage to the cabinets and creating an unhygienic environment.
Choosing the Right Caulk for Your Kitchen Sink
 When it comes to caulking for kitchen sinks, not all caulk is created equal. It is important to choose a high-quality, waterproof caulk that is specifically designed for use in kitchens and bathrooms. Look for caulk that is labeled as "mildew-resistant" or "kitchen and bath caulk," as these will have added protection against moisture and mold growth.
Silicone caulk
is a popular choice for kitchen sinks as it is highly waterproof and flexible, making it ideal for filling in gaps and seams. It is also resistant to heat and chemicals, making it perfect for use around a sink that may be exposed to hot water and various cleaning products.
Polyurethane caulk
is another great option for kitchen sinks. It is extremely durable and can withstand both extreme temperatures and movement, making it less likely to crack or shrink over time. However, it can be more difficult to work with and may require more skill to apply.
When it comes to caulking for kitchen sinks, not all caulk is created equal. It is important to choose a high-quality, waterproof caulk that is specifically designed for use in kitchens and bathrooms. Look for caulk that is labeled as "mildew-resistant" or "kitchen and bath caulk," as these will have added protection against moisture and mold growth.
Silicone caulk
is a popular choice for kitchen sinks as it is highly waterproof and flexible, making it ideal for filling in gaps and seams. It is also resistant to heat and chemicals, making it perfect for use around a sink that may be exposed to hot water and various cleaning products.
Polyurethane caulk
is another great option for kitchen sinks. It is extremely durable and can withstand both extreme temperatures and movement, making it less likely to crack or shrink over time. However, it can be more difficult to work with and may require more skill to apply.
The Importance of Proper Application
 To ensure a professional-looking finish, proper application of caulk is crucial. Before starting, make sure to thoroughly clean the area around the sink with a degreaser and let it dry completely. Use a caulk gun to apply the caulk in a continuous bead along the seam between the sink and the countertop. Use a damp finger or a caulk smoothing tool to smooth out the caulk and create a neat, even finish.
Tip:
For a more precise application, you can also use painter's tape to create straight edges and prevent excess caulk from getting on the countertop.
To ensure a professional-looking finish, proper application of caulk is crucial. Before starting, make sure to thoroughly clean the area around the sink with a degreaser and let it dry completely. Use a caulk gun to apply the caulk in a continuous bead along the seam between the sink and the countertop. Use a damp finger or a caulk smoothing tool to smooth out the caulk and create a neat, even finish.
Tip:
For a more precise application, you can also use painter's tape to create straight edges and prevent excess caulk from getting on the countertop.
Maintenance and Repair
 Over time, caulk may wear down or develop cracks, especially in areas that are constantly exposed to water. It is important to regularly inspect the caulk around your kitchen sink and reapply it as needed. This will help to prevent water damage and keep your kitchen looking clean and well-maintained.
In conclusion,
caulking for kitchen sinks
is an essential step in the process of designing a functional and aesthetically pleasing kitchen. Choosing the right caulk and properly applying it will not only protect your kitchen from water damage but also provide a professional and polished finish. Don't overlook this important step in your kitchen design process and ensure that your kitchen sink is properly caulked for both practical and aesthetic purposes.
Over time, caulk may wear down or develop cracks, especially in areas that are constantly exposed to water. It is important to regularly inspect the caulk around your kitchen sink and reapply it as needed. This will help to prevent water damage and keep your kitchen looking clean and well-maintained.
In conclusion,
caulking for kitchen sinks
is an essential step in the process of designing a functional and aesthetically pleasing kitchen. Choosing the right caulk and properly applying it will not only protect your kitchen from water damage but also provide a professional and polished finish. Don't overlook this important step in your kitchen design process and ensure that your kitchen sink is properly caulked for both practical and aesthetic purposes.


