If you're looking to update your bathroom, one simple and cost-effective way to do so is by changing out your bathroom sink drain. Not only does it give your sink a fresh new look, but it also helps with proper drainage and preventing clogs. Assembling a bathroom sink drain may seem like a daunting task, but with the right tools and knowledge, it can easily be done on your own. In this guide, we'll show you how to assemble a bathroom sink drain step by step, along with some tips and common mistakes to avoid.Assemble Bathroom Sink Drain


Assemble Bathroom Sink Drain


The first step in assembling a bathroom sink drain is to gather all the necessary tools and materials. You will need a pair of pliers, a wrench, plumber's putty, a drain flange, a drain body, a rubber gasket, a cardboard washer, and a locknut. Once you have all your tools, follow these steps: Step 1: Apply a layer of plumber's putty around the underside of the drain flange. This will help create a watertight seal when the drain is installed. Step 2: Insert the drain flange into the drain hole in the sink, making sure the putty is in contact with the sink surface. Step 3: Place the rubber gasket over the drain flange from the underside of the sink. Step 4: Next, insert the drain body into the drain flange from the top of the sink. Step 5: From the underside of the sink, place the cardboard washer over the drain body, followed by the locknut. Step 6: Use pliers or a wrench to tighten the locknut, securing the drain body in place. Step 7: Wipe away any excess putty that may have squeezed out from the edges of the drain flange.How to Assemble a Bathroom Sink Drain


How to Assemble a Bathroom Sink Drain
For a more detailed guide on how to assemble a bathroom sink drain, here is a step-by-step breakdown of the process: Step 1: Prepare the Sink - Before installing the drain, make sure the sink is clean and free of any debris. This will ensure a proper seal and prevent any leaks. Step 2: Apply Plumber's Putty - As mentioned earlier, apply a layer of plumber's putty around the underside of the drain flange. Step 3: Install the Drain Flange - Insert the drain flange into the drain hole in the sink, making sure it is centered and level. Step 4: Add the Rubber Gasket - Place the rubber gasket over the drain flange from the underside of the sink. Step 5: Insert the Drain Body - Insert the drain body into the drain flange from the top of the sink. Step 6: Secure the Drain Body - From the underside of the sink, place the cardboard washer over the drain body, followed by the locknut. Use pliers or a wrench to tighten the locknut, making sure the drain body is held securely in place. Step 7: Clean Up Excess Putty - Use a damp cloth to wipe away any excess putty that may have squeezed out from the edges of the drain flange. Step 8: Test for Leaks - Run water through the drain to test for any leaks. If there are any, tighten the locknut further or reapply plumber's putty as needed.Step-by-Step Guide to Assembling a Bathroom Sink Drain


Step-by-Step Guide to Assembling a Bathroom Sink Drain


:max_bytes(150000):strip_icc()/bathroom-sink-drain-installation-2718843-02-61e5ecbee1e949be8d8f45ac4f5a6797.jpg)


While hiring a professional to install your bathroom sink drain may be tempting, assembling it yourself is not as difficult as it may seem. With the right tools and knowledge, it can easily be done as a DIY project. Not only will this save you money, but it will also give you a sense of accomplishment. Follow the steps outlined in this guide, and you'll have a new bathroom sink drain assembled in no time.DIY Bathroom Sink Drain Assembly


DIY Bathroom Sink Drain Assembly


As mentioned earlier, the tools you will need to assemble a bathroom sink drain are pliers, a wrench, plumber's putty, a drain flange, a drain body, a rubber gasket, a cardboard washer, and a locknut. These tools are readily available at most hardware stores and can also be purchased online. It's important to have the right tools for the job to ensure a successful installation.Tools Needed for Assembling a Bathroom Sink Drain


Tools Needed for Assembling a Bathroom Sink Drain

:max_bytes(150000):strip_icc()/bathroom-sink-drain-installation-2718843-11-675b59e962dd4f69b510d5c9e1fd215f.jpg)

Here are some tips to keep in mind when assembling a bathroom sink drain: Tip 1: Use a small amount of plumber's putty to avoid excess putty oozing out from the edges, which can be messy to clean up. Tip 2: Make sure the drain flange is centered and level before tightening the locknut. Tip 3: Use a wrench or pliers to tighten the locknut, but be careful not to overtighten, as this can cause damage to the drain body. Tip 4: Test for leaks before completing the installation to avoid any issues down the road.Tips for Assembling a Bathroom Sink Drain


Tips for Assembling a Bathroom Sink Drain


Here are some common mistakes to avoid when assembling a bathroom sink drain: Mistake 1: Not using enough plumber's putty, resulting in leaks. Mistake 2: Not properly aligning the drain flange, causing an uneven or crooked installation. Mistake 3: Overtightening the locknut, which can damage the drain body. Mistake 4: Not testing for leaks before completing the installation, leading to future issues.Common Mistakes When Assembling a Bathroom Sink Drain


Common Mistakes When Assembling a Bathroom Sink Drain


If you encounter any issues when assembling your bathroom sink drain, here are some troubleshooting tips: Issue 1: Leaks - If you notice any leaks, try tightening the locknut or reapplying plumber's putty. Issue 2: Drain doesn't fit - If the drain flange doesn't fit properly in the sink hole, double-check the size and make sure it is the correct fit for your sink. Issue 3: Drain isn't level - If the drain flange is uneven or crooked, try adjusting the rubber gasket and cardboard washer to ensure a level installation.Troubleshooting Assembling a Bathroom Sink Drain


Troubleshooting Assembling a Bathroom Sink Drain


If you prefer a visual guide, there are many video tutorials available online that can help with assembling a bathroom sink drain. It can be helpful to see the process in action before attempting it yourself.Video Tutorial: Assembling a Bathroom Sink Drain


Video Tutorial: Assembling a Bathroom Sink Drain

If you're still unsure about assembling a bathroom sink drain on your own, it's always best to consult with a professional plumber. They can offer expert advice and ensure the installation is done correctly. It's also a good idea to read product reviews and do some research before purchasing a new sink drain to ensure it is the right fit for your sink and to avoid any issues during installation. Now that you have a step-by-step guide, tips, and troubleshooting advice, you should feel confident in assembling a bathroom sink drain on your own. With a little DIY spirit and the right tools, you'll have a new and functional sink drain in no time. Happy assembling!Expert Advice on Assembling a Bathroom Sink Drain


Expert Advice on Assembling a Bathroom Sink Drain


How to Assemble a Bathroom Sink Drain: A Guide to House Design

Introduction
 Welcome to our guide on how to assemble a bathroom sink drain. The bathroom sink is an essential part of any house, and its functionality and design can greatly impact the overall style and feel of your home. Assembling a bathroom sink drain may seem like a daunting task, but with the right tools and steps, it can be a simple and rewarding project. In this article, we will walk you through the process of assembling a bathroom sink drain, providing you with valuable information on house design and functionality.
Gathering the Necessary Tools
 Before we dive into the steps of assembling a bathroom sink drain, it is essential to gather all the necessary tools. These tools include a
wrench
,
plumbers putty
,
screwdriver
,
drain assembly kit
, and
plunger
. Make sure you have all these tools on hand before starting the project to ensure a smooth and efficient assembly.
Before we dive into the steps of assembling a bathroom sink drain, it is essential to gather all the necessary tools. These tools include a
wrench
,
plumbers putty
,
screwdriver
,
drain assembly kit
, and
plunger
. Make sure you have all these tools on hand before starting the project to ensure a smooth and efficient assembly.
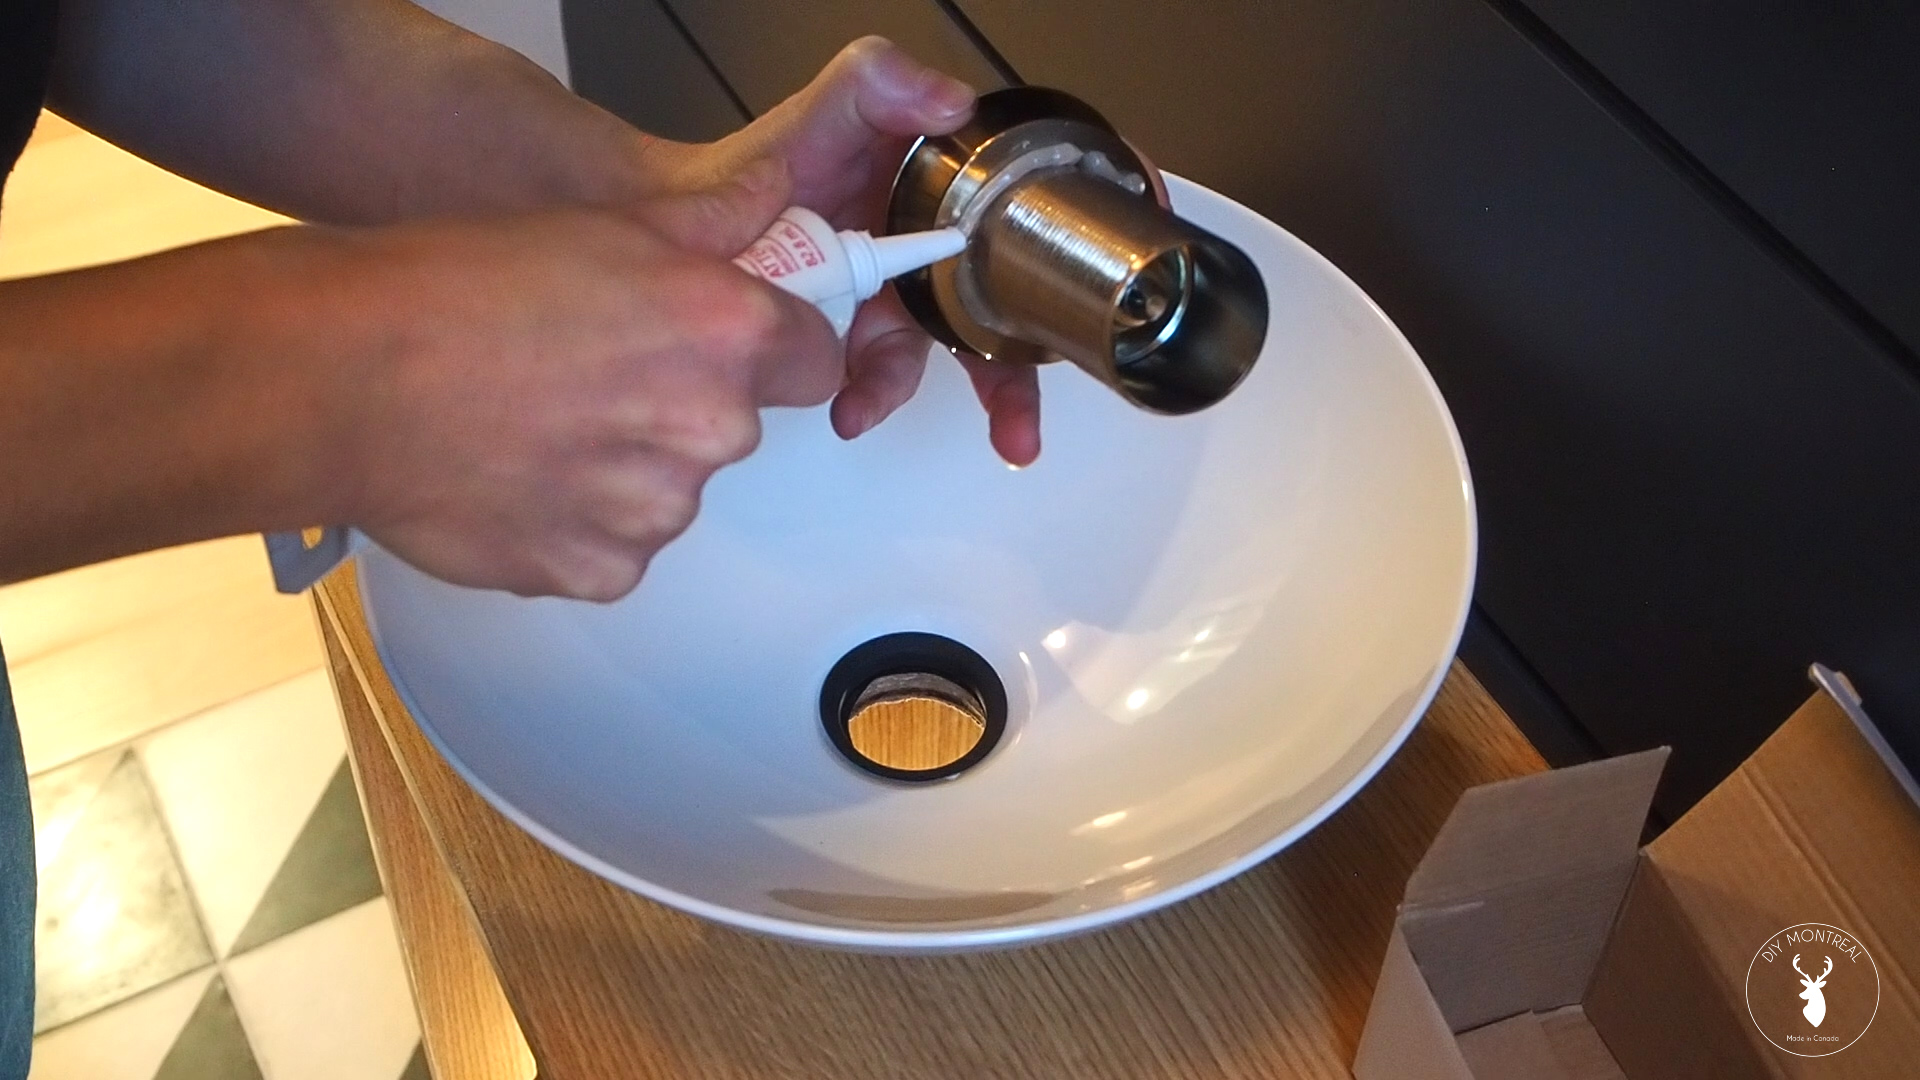
Step 1: Prepare the Sink
 The first step in assembling a bathroom sink drain is to prepare the sink. This involves cleaning the area and removing any debris or old putty from the sink's drain hole. Once the area is clean and dry, you can apply a thin layer of
plumbers putty
around the drain hole to create a watertight seal.
The first step in assembling a bathroom sink drain is to prepare the sink. This involves cleaning the area and removing any debris or old putty from the sink's drain hole. Once the area is clean and dry, you can apply a thin layer of
plumbers putty
around the drain hole to create a watertight seal.
Step 2: Install the Drain Flange
 Next, take the
drain flange
and insert it into the drain hole, making sure it sits evenly on the putty. Secure the flange in place by tightening the
flange nut
from underneath the sink with a wrench.
Next, take the
drain flange
and insert it into the drain hole, making sure it sits evenly on the putty. Secure the flange in place by tightening the
flange nut
from underneath the sink with a wrench.
Step 3: Attach the Drain Pipe
 Now it's time to attach the
drain pipe
. This is the pipe that connects the sink to the main drain. Start by inserting the pipe into the drain flange and securing it with the
pipe nut
. Then, connect the other end of the pipe to the main drain, using a
screwdriver
to tighten the
pipe nut
.
Now it's time to attach the
drain pipe
. This is the pipe that connects the sink to the main drain. Start by inserting the pipe into the drain flange and securing it with the
pipe nut
. Then, connect the other end of the pipe to the main drain, using a
screwdriver
to tighten the
pipe nut
.
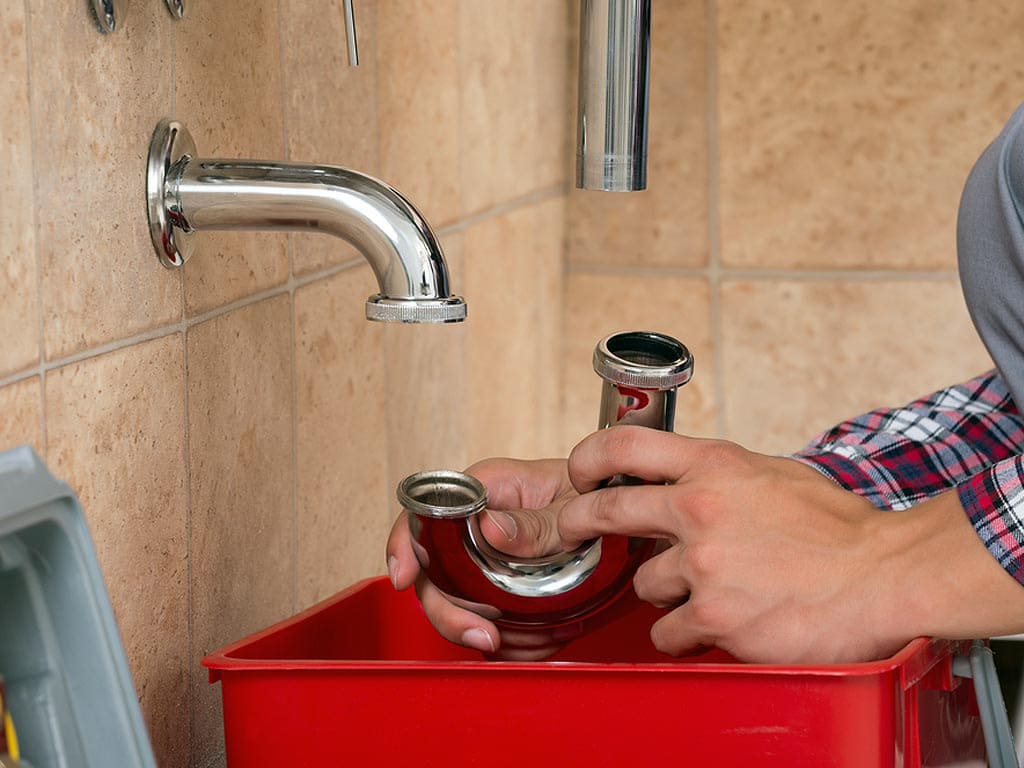
Step 4: Test and Adjust
 With the drain pipe in place, it's time to test the assembly. Run water into the sink and check for any leaks. If there are any, use the plunger to adjust and tighten the connections until the assembly is watertight.
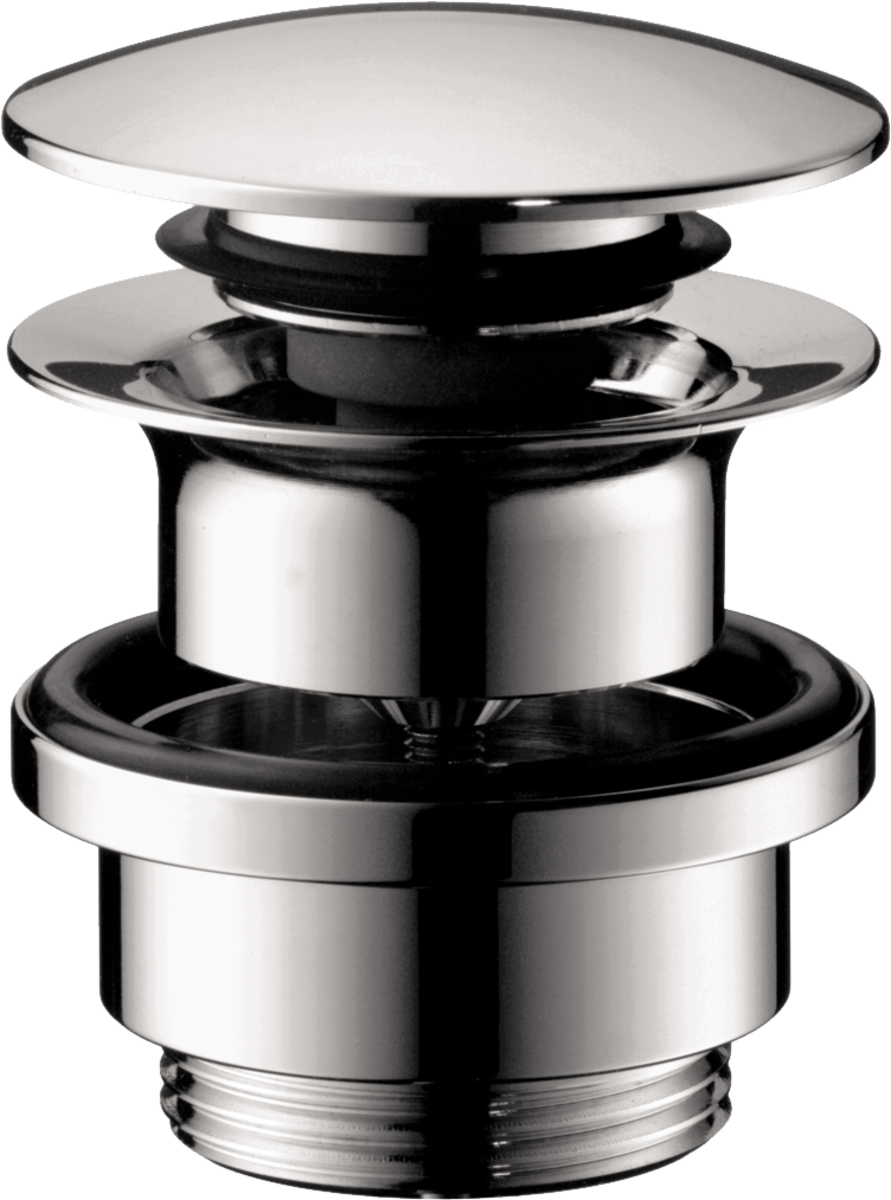
Step 5: Finishing Touches
 Finally, you can add the finishing touches to your bathroom sink drain. This includes installing the
drain stopper
and any other additional parts that may come with your drain assembly kit. Make sure all connections are secure and test the drain one last time before using it regularly.
Finally, you can add the finishing touches to your bathroom sink drain. This includes installing the
drain stopper
and any other additional parts that may come with your drain assembly kit. Make sure all connections are secure and test the drain one last time before using it regularly.
Conclusion
 Assembling a bathroom sink drain may seem like a complicated task, but with the right tools and steps, it can be a simple and rewarding project. By following our guide, you can not only learn how to assemble a bathroom sink drain but also gain valuable knowledge on house design and functionality. We hope this article has been helpful, and happy assembling!