Sealing your kitchen table is an important step in maintaining its beauty and durability. Not only does it protect the table from spills and stains, but it also enhances its natural beauty. If you're wondering how to seal a kitchen table, don't worry, it's a simple process that you can easily do yourself. Here's a step-by-step guide to help you get started. The first step is to choose the right sealant for your kitchen table. There are many types of sealants available, such as polyurethane, varnish, and tung oil. Each has its own advantages, so make sure to do your research and choose the one that best suits your needs. Next, prepare your kitchen table for sealing by sanding it down with fine-grit sandpaper. This will help the sealant adhere better and create a smooth finish. Make sure to wipe down the table with a damp cloth afterward to remove any dust or debris. Now it's time to apply the sealant. Using a clean, lint-free cloth or brush, apply a thin and even layer of sealant to the entire surface of the table. Make sure to follow the grain of the wood for a more natural look. Let the first coat dry completely before applying a second coat for added protection. After the second coat has dried, lightly sand the surface with fine-grit sandpaper to smooth out any imperfections or bumps. Wipe down the table again with a damp cloth before applying a final coat of sealant. This will give your kitchen table a shiny and durable finish. Once the final coat has dried, your kitchen table is now sealed and ready to use. It's important to let the sealant cure for at least 24 hours before placing any items on the table. This will ensure that the sealant has fully hardened and will provide maximum protection. Remember to always read and follow the instructions on the sealant product for the best results. With these simple steps, you can easily seal your kitchen table and enjoy its beauty and durability for years to come.1. How to Seal a Kitchen Table: A Step-by-Step Guide
Choosing the right sealant for your kitchen table can be overwhelming with so many options available. To help you in your decision-making process, here are our top picks for the best sealants for kitchen tables. Polyurethane: This is one of the most popular sealants for kitchen tables due to its durability and water-resistant properties. It comes in both oil-based and water-based formulas, with the latter being more eco-friendly and easier to clean up. However, oil-based polyurethane tends to provide a richer and deeper finish. Varnish: Varnish is another common sealant for kitchen tables. It's a clear, protective coating that is resistant to heat, water, and chemicals. It also provides a glossy finish, making your table look more polished and elegant. Tung Oil: This sealant is derived from the nut of the tung tree and is known for its natural and eco-friendly properties. It penetrates deep into the wood, providing a matte finish and enhancing the natural grain of the wood. However, it may require multiple coats for maximum protection. When choosing the best sealant for your kitchen table, consider the type of wood, the level of protection you need, and your personal preference for the finish. Whichever sealant you choose, make sure to follow the instructions carefully for the best results.2. Best Sealant for Kitchen Tables: Top Picks and Reviews
If you're on a budget or prefer a more hands-on approach, you can seal your kitchen table yourself with a few simple tips and tricks. Use a sanding block: A sanding block will make it easier to sand down the surface of your table, providing a more even and smooth finish. You can also use it to reach corners and edges that a power sander may miss. Apply sealant in thin coats: It's better to apply several thin coats of sealant rather than one thick coat. This will ensure that the sealant dries evenly and doesn't create a sticky or uneven surface. Wipe off excess sealant: After applying the sealant, make sure to wipe off any excess with a clean cloth. This will prevent drips and bubbles from forming and will give your table a smoother finish. Protect the floor: To avoid any spills or stains, place a drop cloth or old newspaper underneath your kitchen table before starting the sealing process. With these DIY tips and tricks, you can seal your kitchen table like a pro without breaking the bank.3. DIY Kitchen Table Sealing: Tips and Tricks
Sealing your kitchen table is not just about making it look shiny and new. It also has many practical benefits that make it an essential step in maintaining your table's longevity. Protection from spills and stains: Kitchen tables are prone to spills and stains, especially if you have young children or frequently entertain guests. Sealing your table creates a barrier that will prevent liquids from seeping into the wood and damaging it. Enhanced durability: Sealing your kitchen table adds an extra layer of protection that will help it withstand daily wear and tear. It can also prevent scratches and dents from forming, keeping your table looking like new for longer. Improved appearance: A sealed kitchen table has a glossy and smooth finish that enhances the natural beauty of the wood. It also makes it easier to clean and maintain, giving your table a polished and elegant look. Sealing your kitchen table is a small but important step that can save you time and money in the long run. It will keep your table looking beautiful and functional for many years to come.4. The Importance of Sealing Your Kitchen Table
The frequency of sealing your kitchen table depends on the type of sealant used and the amount of wear and tear it receives. Generally, it's recommended to seal your table every 1-2 years to maintain its protection and appearance. If you notice any signs of wear on your table, such as scratches, water rings, or dullness, it may be time to reseal it. You can also perform a simple water test by sprinkling a few drops of water on the surface of the table. If the water beads up, then your table is still adequately sealed. However, if it soaks into the wood, it's time to reseal. Regularly sealing your kitchen table will ensure that it stays in top condition and prolong its lifespan.5. How Often Should You Seal Your Kitchen Table?
If you're looking for a more environmentally friendly option, there are several natural sealants available for your kitchen table. Carnauba wax: This wax is derived from the leaves of the carnauba palm tree and is known for its water-repellent properties. It also provides a shiny and smooth finish to your kitchen table. Beeswax: Beeswax is a natural wax produced by honeybees. It's non-toxic and creates a protective barrier on your table's surface, making it resistant to water and stains. Linseed oil: This oil is extracted from flax seeds and is a popular choice for sealing wooden surfaces. It penetrates deep into the wood, enhancing its natural color and providing a matte finish. These natural sealants are a great alternative to harsh chemicals and can provide excellent protection for your kitchen table.6. Natural Sealants for Kitchen Tables: Eco-Friendly Options
Proper preparation is crucial before sealing your kitchen table to ensure the best results. First, make sure to clean the table thoroughly with a wood cleaner or a mixture of warm water and mild soap. This will remove any dirt, grime, or residue that may interfere with the sealing process. Next, sand down the surface with fine-grit sandpaper, following the grain of the wood. This will help the sealant adhere better and create a smooth finish. After sanding, wipe down the table with a damp cloth to remove any dust or debris. Let the table dry completely before applying the sealant. By properly prepping your kitchen table, you can ensure that the sealant will bond well and provide maximum protection.7. How to Prep Your Kitchen Table for Sealing
While sealing a kitchen table may seem like a simple task, there are some common mistakes that can affect the outcome. Not sanding properly: Sanding is a crucial step in prepping your table for sealing. Make sure to sand in the direction of the wood grain and remove any rough spots or imperfections. Applying too much sealant: It's better to apply multiple thin coats of sealant rather than one thick coat. Applying too much sealant can result in a sticky and uneven surface. Not letting the sealant dry completely: It's important to let each coat of sealant dry completely before applying the next one. Rushing the process can lead to an uneven or tacky finish. Using the wrong type of sealant: Make sure to choose a sealant that is suitable for your type of wood and provides the level of protection you need. Using the wrong sealant can affect the appearance and durability of your kitchen table. By avoiding these common mistakes, you can ensure that your kitchen table sealing process goes smoothly and results in a beautiful and long-lasting finish.8. Common Mistakes to Avoid When Sealing a Kitchen Table
With so many types of sealants available, it can be challenging to choose the right one for your kitchen table. Here are some factors to consider when making your decision. Type of wood: Different types of wood require different types of sealants. For example, softwoods like pine may need a more durable sealant, while hardwoods like oak may only require a light coat of wax. Level of protection: If your table is used frequently and is prone to spills and stains, you may want to choose a more durable sealant like polyurethane. However, if your table is rarely used, a more natural and eco-friendly sealant may suffice. Desired finish: The type of sealant you choose will also affect the appearance of your kitchen table. Some sealants provide a glossy finish, while others have a more matte look. Consider your personal preference and the style of your kitchen when making your choice. By considering these factors, you can choose the right sealant that will provide the best protection and appearance for your kitchen table.9. How to Choose the Right Sealant for Your Kitchen Table
To keep your kitchen table looking beautiful and well-protected, here are some dos and don'ts to keep in mind. Do:10. Maintaining a Sealed Kitchen Table: Dos and Don'ts
How to Properly Seal a Kitchen Table for a Beautiful and Durable Finish
The Importance of Sealing a Kitchen Table
 When it comes to designing a kitchen, the table is often the centerpiece of the room. It not only serves as a functional space for meal prep and dining, but also adds to the overall aesthetic of the space. As such, it's important to properly
seal
your kitchen table to protect it from spills, stains, and scratches, as well as to enhance its natural beauty.
Sealing
your kitchen table will not only make it easier to maintain and clean, but also extend its lifespan, making it a worthwhile investment.
Choose the Right Sealant
 Before you start the
sealing
process, it's important to choose the right
sealant
for your kitchen table. There are various types of
sealants
available in the market, such as polyurethane, varnish, lacquer, and wax. Each has its own pros and cons, and choosing the right one will depend on the type of wood and finish you have on your table.
Polyurethane
is a popular choice as it provides a durable and waterproof finish, while
varnish
and
lacquer
offer a glossy finish. On the other hand,
wax
provides a more natural, matte finish and is easier to repair if damaged.
Prepare Your Kitchen Table
 Before
sealing
your kitchen table, make sure it is clean and free of any dust or debris. Use a damp cloth to wipe down the surface and let it dry completely. If there are any scratches or dents on the table, sand them down gently with sandpaper. This will ensure a smooth surface for the
sealant
to adhere to.
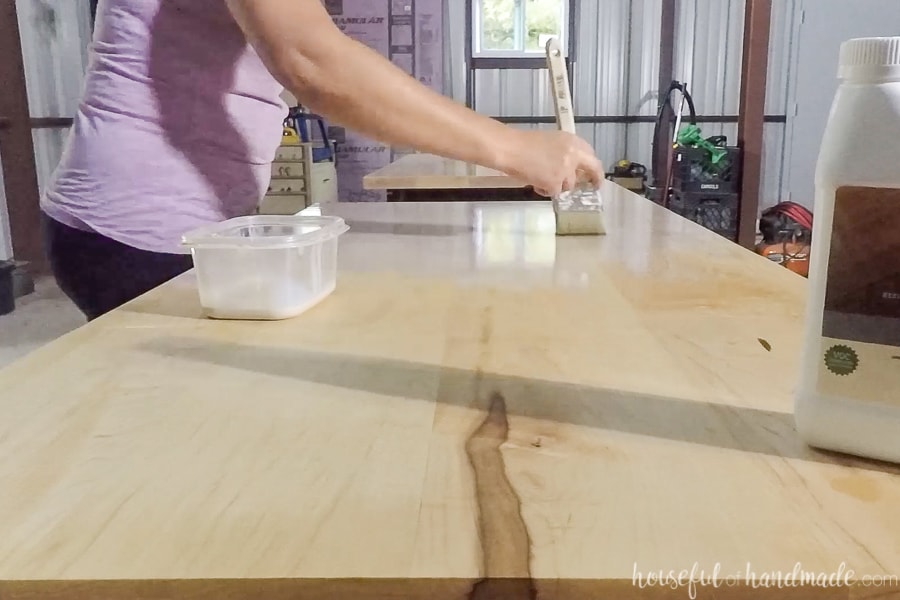
Sealing Your Kitchen Table
 Now it's time to
seal
your kitchen table. Use a high-quality brush or foam roller to apply the
sealant
in long, even strokes, following the grain of the wood. Be sure to apply a thin layer and let it dry completely before applying a second coat. This will prevent any drips or bubbles from forming. Once the final coat is dry, lightly sand the surface with fine-grit sandpaper to remove any imperfections.
Maintaining Your Sealed Kitchen Table
 To ensure your kitchen table stays in top condition, it's important to maintain it regularly. Avoid using harsh chemicals or abrasive cleaners, as they can damage the
sealant
. Instead, use a mild soap and water solution to clean the surface and dry it immediately. If your table gets scratched or damaged, simply sand down the affected area and apply a fresh coat of
sealant
to restore its beauty.
In conclusion, properly
sealing
your kitchen table is crucial for both its appearance and longevity. By choosing the right
sealant
, preparing the surface properly, and following the
sealing
process, you can ensure a beautiful and durable finish for your kitchen table. So don't wait any longer, follow these tips and give your kitchen table the
seal
of approval it deserves.
