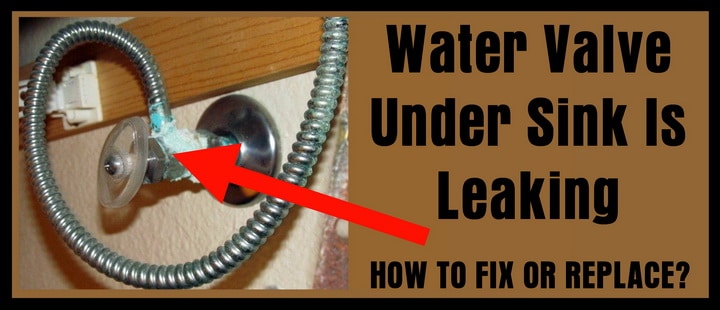
If you've noticed a leak coming from under your kitchen sink, it's likely that the valves need to be replaced. Valves are an important component of your sink's plumbing system, controlling the flow of water into and out of the sink. Over time, these valves can become worn or damaged, causing leaks and potentially leading to bigger issues if not addressed promptly. In this guide, we'll walk you through the steps of replacing valves under the kitchen sink, as well as provide helpful tips and precautions to take along the way.Replacing Valves Under Kitchen Sink


Replacing Valves Under Kitchen Sink

Replacing valves under the kitchen sink may seem like a daunting task, but with the right tools and a little bit of know-how, it can be a fairly straightforward process. Here's a step-by-step guide on how to replace valves under the kitchen sink:How to Replace Valves Under Kitchen Sink


How to Replace Valves Under Kitchen Sink


Before you begin, make sure you have all the necessary tools on hand. This includes a pair of pliers, an adjustable wrench, a screwdriver, and a replacement valve. It's also a good idea to have a bucket and some old towels or rags to catch any water that may leak during the process.Step 1: Gather Your Tools


Step-by-Step Guide for Replacing Valves Under Kitchen Sink


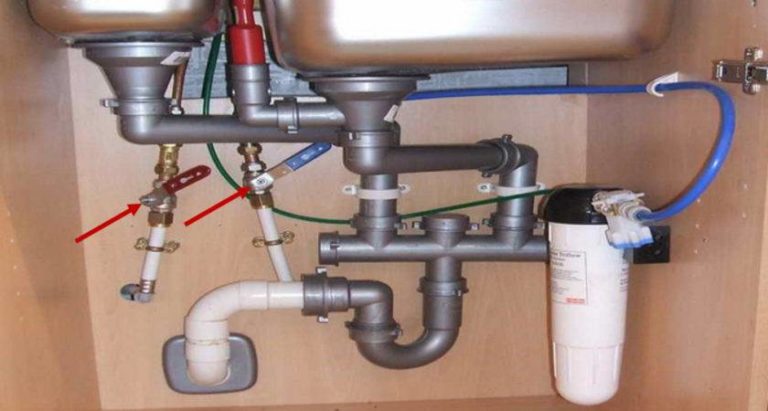


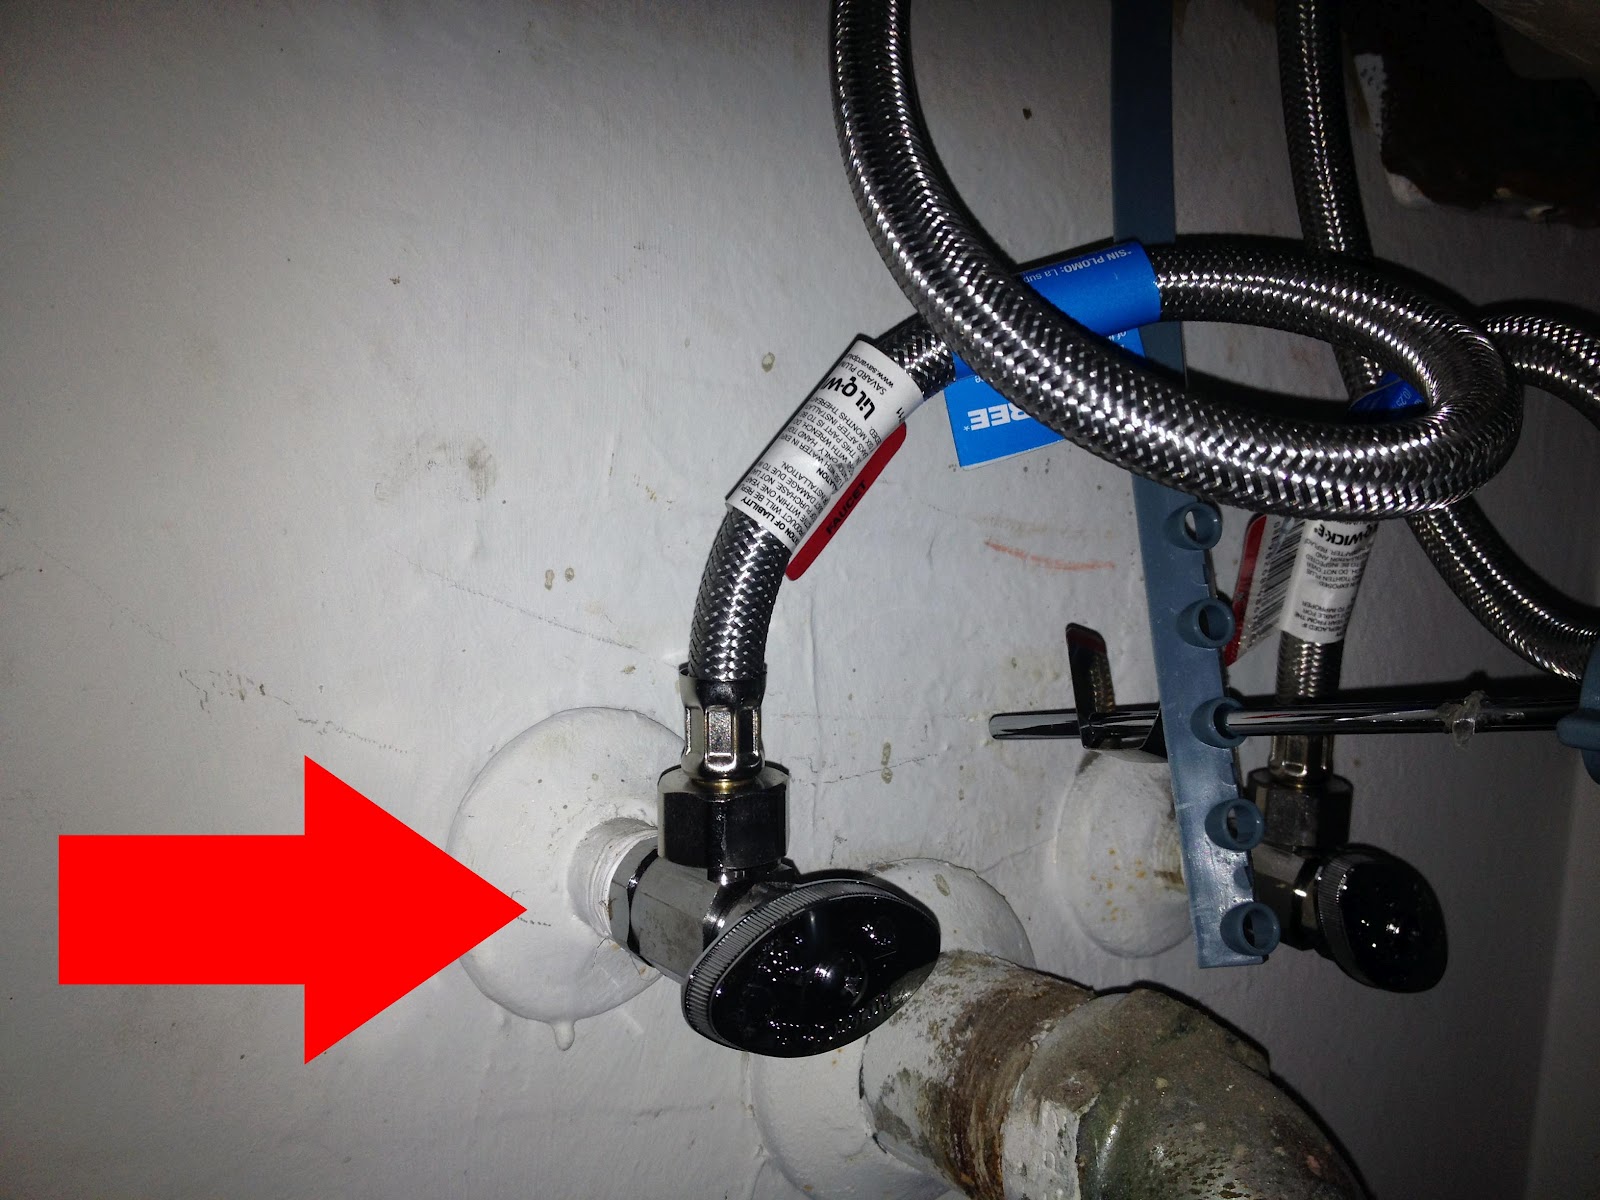
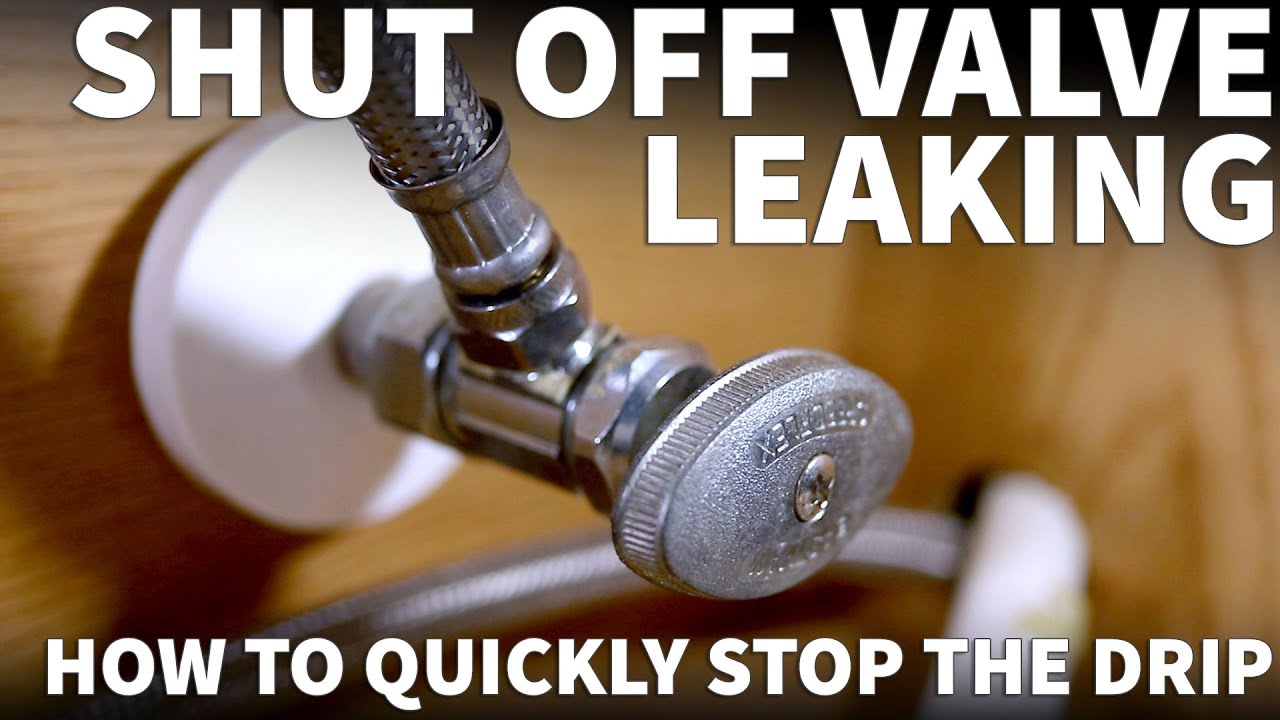
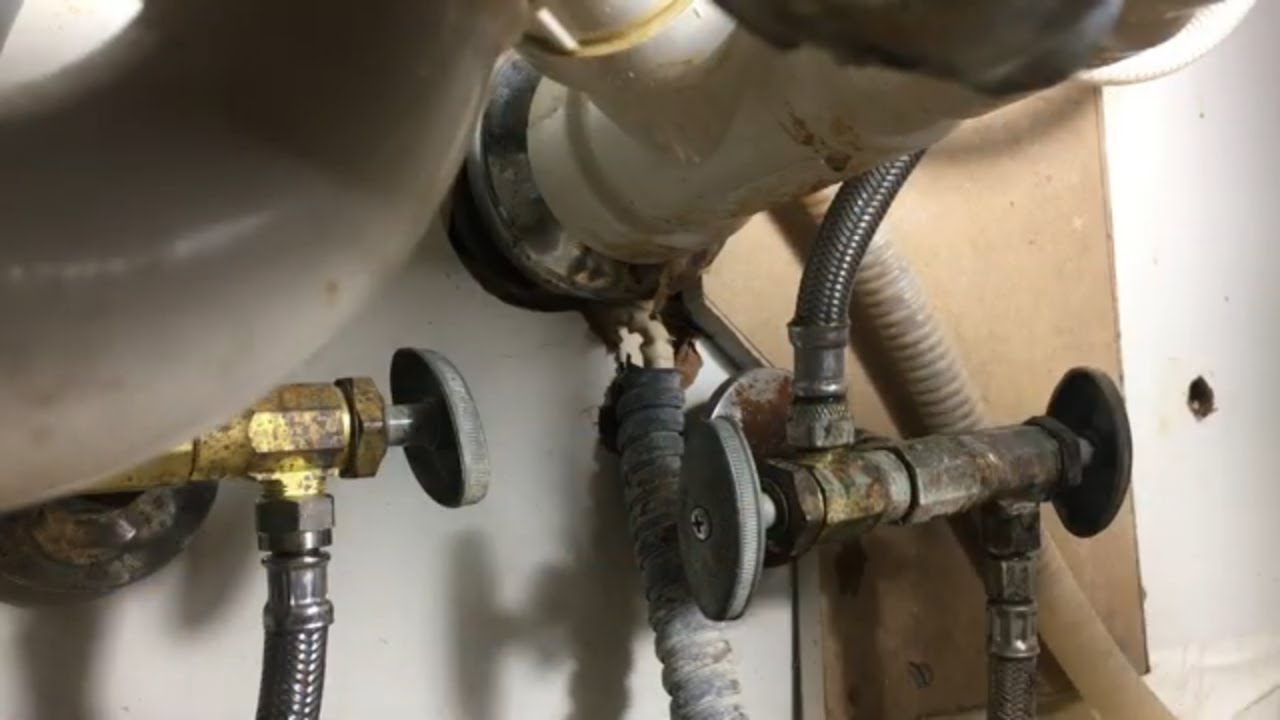
The first step in any plumbing project is to shut off the water supply. Locate the shut-off valves for your kitchen sink, which are usually located under the sink or in the basement. Turn the valves clockwise to shut off the water supply. Don't forget to open the faucet to drain any remaining water in the pipes.Step 2: Shut Off the Water Supply


Tools Needed for Replacing Valves Under Kitchen Sink


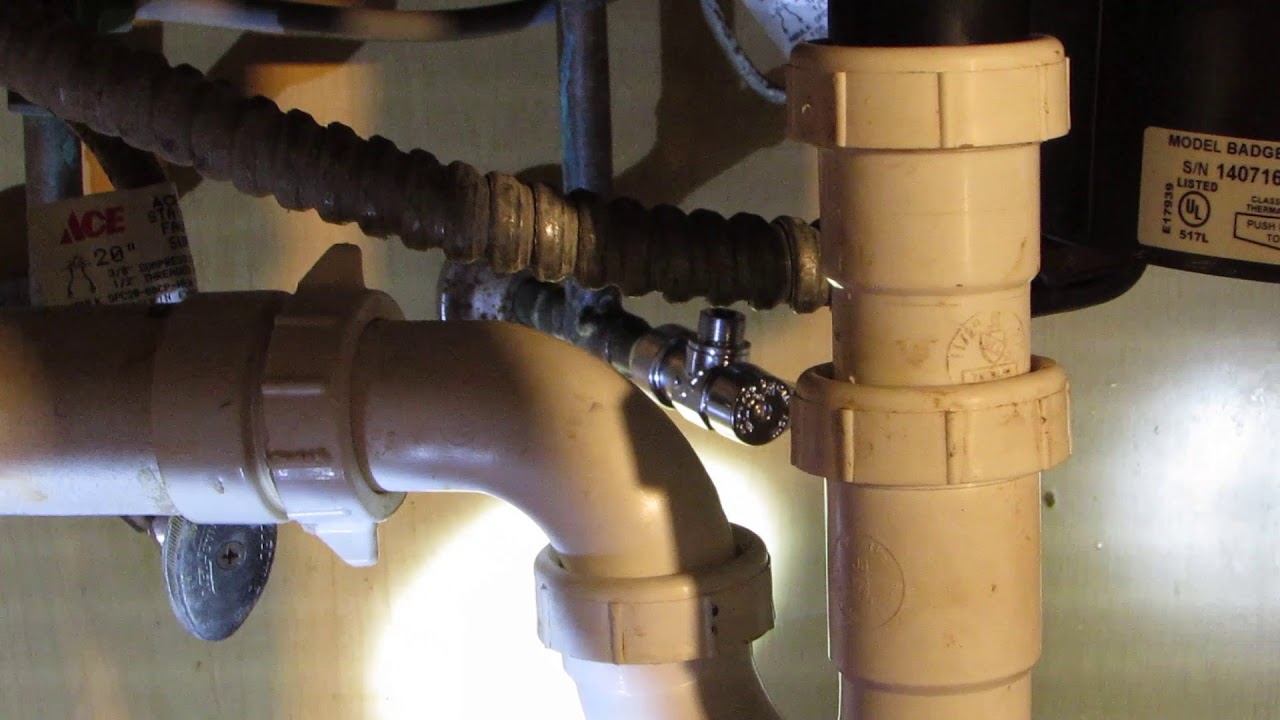
Using your pliers or wrench, loosen the nuts connecting the old valve to the water supply pipes. Once the nuts are loosened, remove the old valve from the pipes. You may need to use a screwdriver to remove any screws holding the valve in place.Step 3: Remove the Old Valves


Common Issues When Replacing Valves Under Kitchen Sink


/cdn.vox-cdn.com/uploads/chorus_image/image/65889227/sink_shutoff_valves_x.0.jpg)
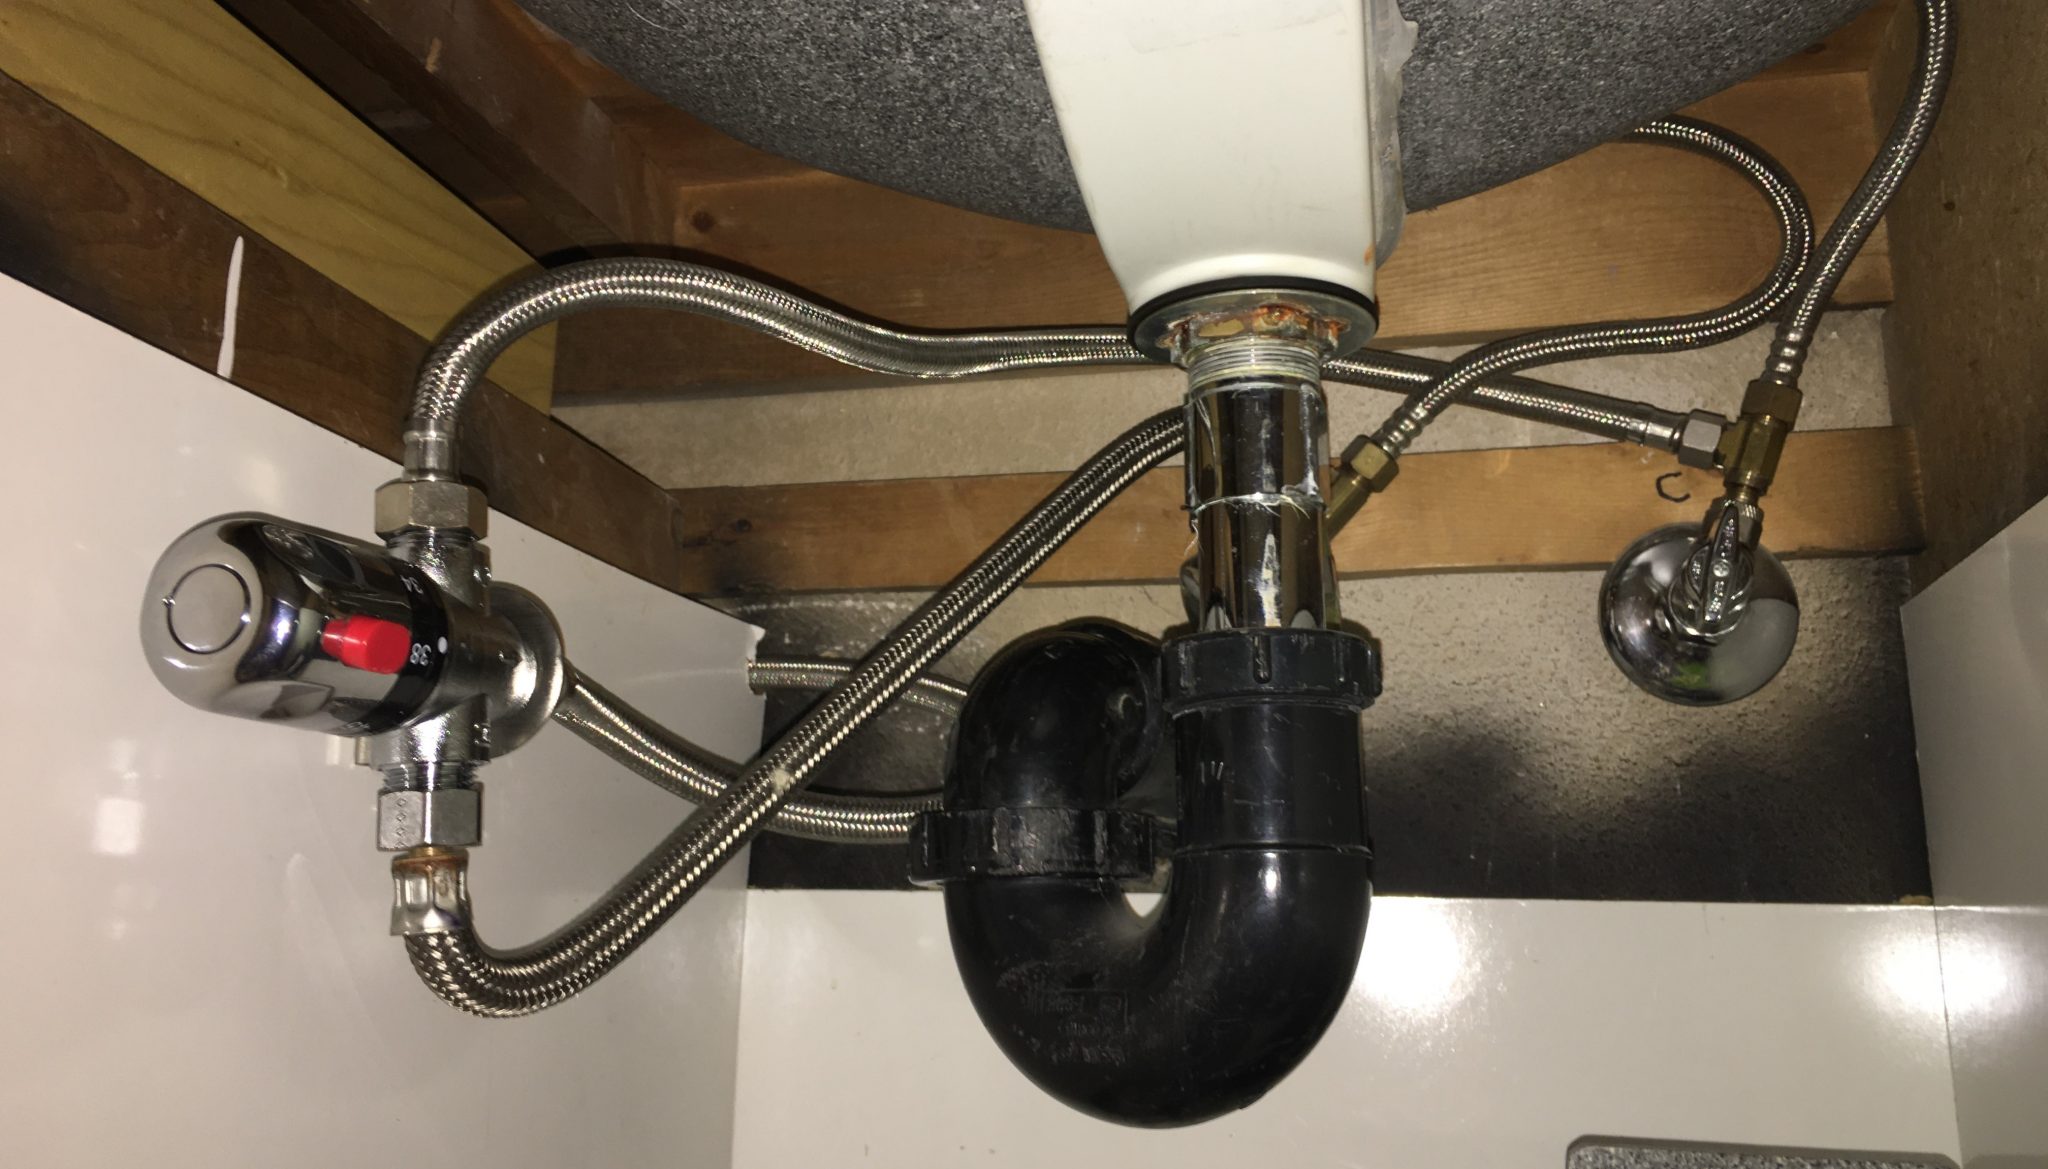
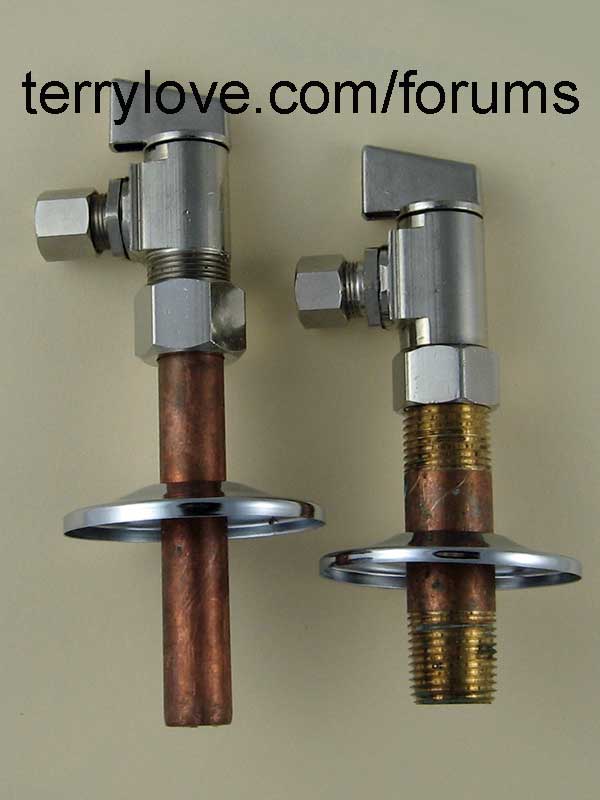
Take your new valve and place it onto the water supply pipes, making sure it is properly aligned. Use your pliers or wrench to tighten the nuts and secure the valve in place. If the valve came with any screws, use your screwdriver to secure them in place.Step 4: Install the New Valve
Tips for Replacing Valves Under Kitchen Sink
Once the new valve is installed, turn the water supply back on by turning the shut-off valves counterclockwise. Test the new valve by turning on the faucet and checking for any leaks. If there are no leaks, you're good to go!Step 5: Turn On the Water Supply


Video Tutorial: Replacing Valves Under Kitchen Sink

To replace valves under the kitchen sink, you will need the following tools:Tools Needed for Replacing Valves Under Kitchen Sink

Cost of Replacing Valves Under Kitchen Sink
While replacing valves under the kitchen sink is a straightforward process, there are a few common issues that may arise:Common Issues When Replacing Valves Under Kitchen Sink


Professional vs DIY: Replacing Valves Under Kitchen Sink

Here are a few helpful tips to keep in mind when replacing valves under the kitchen sink:Tips for Replacing Valves Under Kitchen Sink
Precautions to Take When Replacing Valves Under Kitchen Sink

Why Replacing Valves Under Kitchen Sink is Important for Your Home's Design
Ensuring Proper Functionality
 When it comes to designing a house, every detail matters. From the color of the walls to the type of flooring, each element plays a role in creating a cohesive and functional space. One often overlooked aspect is the
kitchen sink
. It may seem like a small and insignificant part of the kitchen, but the valves under the sink are crucial for ensuring proper functionality of your plumbing system.
Replacing these valves
when necessary is an important step in maintaining the overall design and functionality of your home.
When it comes to designing a house, every detail matters. From the color of the walls to the type of flooring, each element plays a role in creating a cohesive and functional space. One often overlooked aspect is the
kitchen sink
. It may seem like a small and insignificant part of the kitchen, but the valves under the sink are crucial for ensuring proper functionality of your plumbing system.
Replacing these valves
when necessary is an important step in maintaining the overall design and functionality of your home.
Preventing Costly Water Damage
 One of the main reasons to replace valves under the kitchen sink is to prevent potential water damage. Over time, these valves can become worn out or corroded, leading to leaks and water damage to your cabinets and flooring. This not only affects the
aesthetics
of your kitchen, but it can also result in costly repairs. By regularly checking and replacing the valves, you can avoid these issues and keep your kitchen looking beautiful and functioning properly.
One of the main reasons to replace valves under the kitchen sink is to prevent potential water damage. Over time, these valves can become worn out or corroded, leading to leaks and water damage to your cabinets and flooring. This not only affects the
aesthetics
of your kitchen, but it can also result in costly repairs. By regularly checking and replacing the valves, you can avoid these issues and keep your kitchen looking beautiful and functioning properly.
Improving Efficiency
 Replacing valves under the kitchen sink not only prevents water damage, but it also improves the efficiency of your plumbing system. Old and faulty valves can result in low water pressure and slow drainage, making tasks like washing dishes or filling up a pot of water a frustrating and time-consuming experience. By
upgrading to new and efficient valves
, you can save time and effort in your daily routine and make your kitchen more functional and enjoyable.
Replacing valves under the kitchen sink not only prevents water damage, but it also improves the efficiency of your plumbing system. Old and faulty valves can result in low water pressure and slow drainage, making tasks like washing dishes or filling up a pot of water a frustrating and time-consuming experience. By
upgrading to new and efficient valves
, you can save time and effort in your daily routine and make your kitchen more functional and enjoyable.
Enhancing the Design
 In addition to the practical reasons for replacing valves under the kitchen sink, it can also have a positive impact on the overall design of your home.
Old and rusty valves
can be an eyesore in an otherwise beautiful kitchen. By replacing them, you can add a touch of elegance and modernity to your space. There are various styles and finishes available, so you can choose valves that match the aesthetic of your kitchen and enhance its design.
In addition to the practical reasons for replacing valves under the kitchen sink, it can also have a positive impact on the overall design of your home.
Old and rusty valves
can be an eyesore in an otherwise beautiful kitchen. By replacing them, you can add a touch of elegance and modernity to your space. There are various styles and finishes available, so you can choose valves that match the aesthetic of your kitchen and enhance its design.
Final Thoughts
 When it comes to designing a house, every detail counts.
Replacing valves under the kitchen sink
may seem like a small task, but it can have a big impact on the functionality and design of your home. By ensuring proper functionality, preventing water damage, improving efficiency, and enhancing the overall design, replacing these valves is an important step in creating a beautiful and functional space. So don't overlook this crucial aspect of your kitchen and make sure to regularly check and replace these valves for a well-designed and fully functioning home.
When it comes to designing a house, every detail counts.
Replacing valves under the kitchen sink
may seem like a small task, but it can have a big impact on the functionality and design of your home. By ensuring proper functionality, preventing water damage, improving efficiency, and enhancing the overall design, replacing these valves is an important step in creating a beautiful and functional space. So don't overlook this crucial aspect of your kitchen and make sure to regularly check and replace these valves for a well-designed and fully functioning home.