How to Replace a Kitchen Sink Basket Assembly
If you're tired of constantly dealing with a leaky or clogged kitchen sink, it may be time to replace the basket assembly. This may seem like a daunting task, but with the right tools and knowledge, you can easily tackle this DIY project. In this guide, we'll walk you through the steps of replacing a kitchen sink basket assembly and provide helpful tips and tricks along the way.


How to Replace a Kitchen Sink Basket Assembly


Replacing a Kitchen Sink Basket Assembly: A Step-by-Step Guide
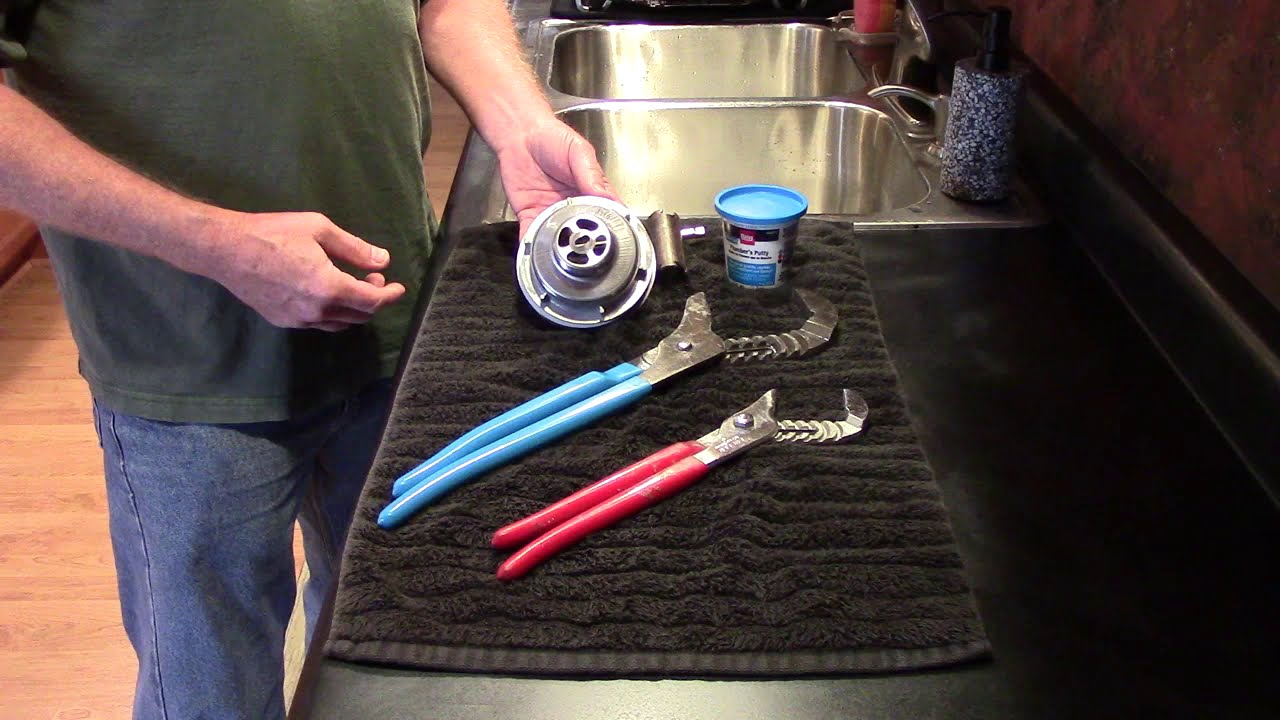
Before you begin the replacement process, it's important to gather all necessary tools and materials. You will need a new basket assembly, a pair of pliers, a putty knife, and a screwdriver. Once you have everything ready, follow these steps:


Replacing a Kitchen Sink Basket Assembly: A Step-by-Step Guide

DIY: Replacing a Kitchen Sink Basket Assembly
Replacing a kitchen sink basket assembly is a relatively simple DIY project that can save you both time and money. Instead of calling a plumber, consider tackling this task on your own with these helpful tips:


DIY: Replacing a Kitchen Sink Basket Assembly


Replacing a Kitchen Sink Basket Assembly: Tips and Tricks
Replacing a kitchen sink basket assembly may seem like a simple task, but there are a few tips and tricks that can make the process even smoother:


Replacing a Kitchen Sink Basket Assembly: Tips and Tricks


The Importance of Replacing a Kitchen Sink Basket Assembly
The basket assembly plays a crucial role in the functionality of your kitchen sink. Replacing it when necessary can prevent leaks, clogs, and other plumbing issues. It also improves the overall appearance of your sink and kitchen.


The Importance of Replacing a Kitchen Sink Basket Assembly


Replacing a Kitchen Sink Basket Assembly: Common Mistakes to Avoid
While replacing a kitchen sink basket assembly may seem like a simple task, there are a few common mistakes to watch out for:

Replacing a Kitchen Sink Basket Assembly: Common Mistakes to Avoid

Tools You'll Need for Replacing a Kitchen Sink Basket Assembly
In order to successfully replace a kitchen sink basket assembly, you will need the following tools:


Tools You'll Need for Replacing a Kitchen Sink Basket Assembly


Replacing a Kitchen Sink Basket Assembly: What You Need to Know
Before starting the replacement process, there are a few important things to keep in mind:


Replacing a Kitchen Sink Basket Assembly: What You Need to Know

Step-by-Step Guide to Replacing a Kitchen Sink Basket Assembly
To recap, here is a step-by-step guide to replacing a kitchen sink basket assembly:

Step-by-Step Guide to Replacing a Kitchen Sink Basket Assembly
:no_upscale()/cdn.vox-cdn.com/uploads/chorus_asset/file/19495086/drain_0.jpg)


Replacing a Kitchen Sink Basket Assembly: Troubleshooting Common Issues
If you encounter any issues during the replacement process, here are some troubleshooting tips:
Replacing a Kitchen Sink Basket Assembly: Troubleshooting Common Issues


Replacing a Kitchen Sink Basket Assembly: A Step-by-Step Guide
Why Replace Your Kitchen Sink Basket Assembly?
 Upgrading your kitchen sink basket assembly may not be the most glamorous home improvement project, but it is essential for maintaining a functional and hygienic kitchen. Over time, the basket assembly can become rusty, clogged with food debris, or damaged, leading to leaks and unpleasant odors. By replacing it, you can ensure a clean and efficient kitchen sink for years to come.
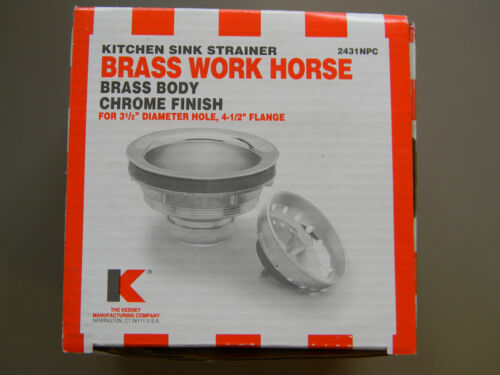
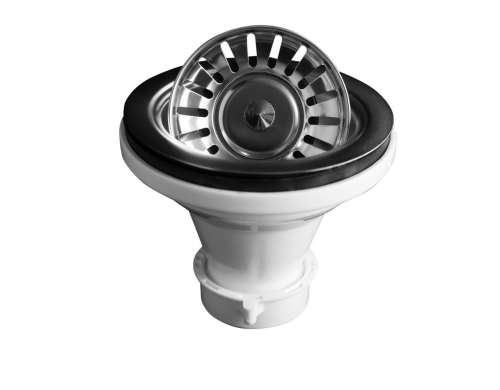
What You Will Need
/how-to-install-a-sink-drain-2718789-hero-b5b99f72b5a24bb2ae8364e60539cece.jpg) Before diving into the replacement process, make sure you have the necessary tools and materials on hand. You will need a new kitchen sink basket assembly, pliers, a wrench, plumber's putty, and a bucket or basin to catch any water that may spill during the replacement.
Before diving into the replacement process, make sure you have the necessary tools and materials on hand. You will need a new kitchen sink basket assembly, pliers, a wrench, plumber's putty, and a bucket or basin to catch any water that may spill during the replacement.
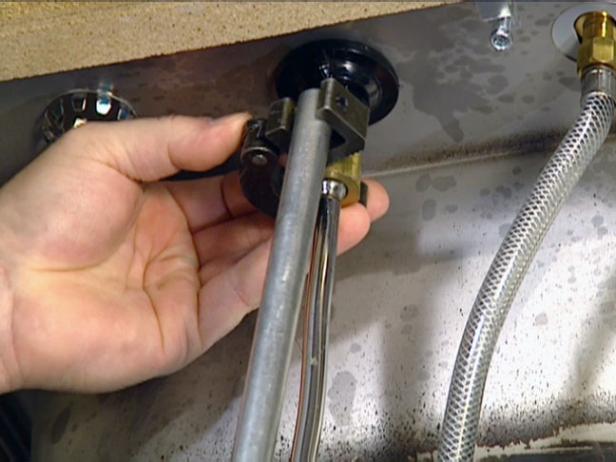
Step 1: Remove the Old Basket Assembly
 Start by turning off the water supply to your sink and placing the bucket or basin underneath the sink to catch any water. Next, use the pliers to loosen the nuts that hold the old basket assembly in place. Once the nuts are loose, you can remove the old assembly by pulling it up and out of the sink.
Step 2: Clean the Sink Area
 With the old basket assembly removed, you can now clean the sink area thoroughly. Use a mild cleaner to remove any grime or build-up around the opening of the drain.
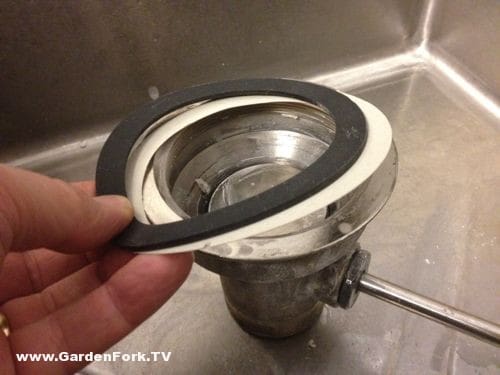
Step 3: Apply Plumber's Putty
 To create a watertight seal between the new basket assembly and the sink, you will need to apply plumber's putty. Take a small amount of putty and roll it into a thin, snake-like shape. Then, place the putty around the opening of the drain, making sure it is evenly distributed.
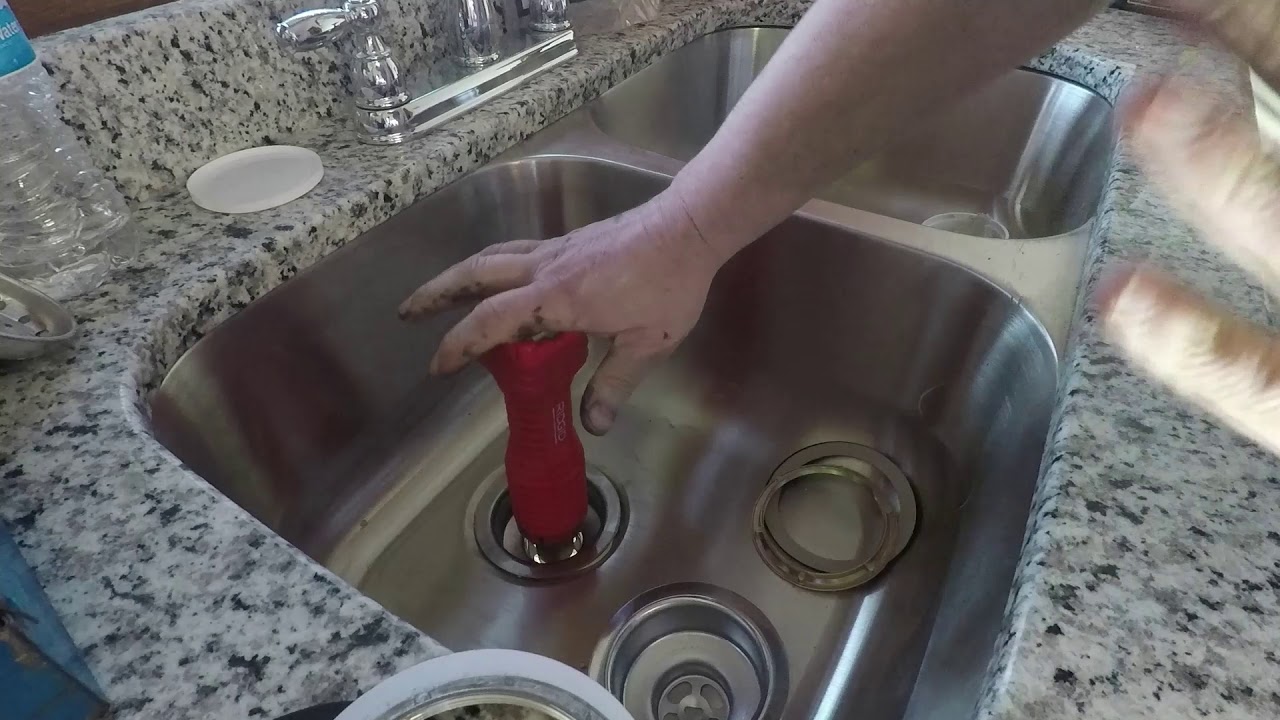
Step 4: Install the New Basket Assembly
 Once the putty is in place, you can insert the new basket assembly into the sink. Make sure it is lined up correctly, and then tighten the nuts by hand. Use the wrench to secure the nuts firmly, but be careful not to over-tighten, as this can damage the assembly.
Step 5: Reconnect the Plumbing
 With the new basket assembly in place, you can now reconnect the plumbing. Use the pliers to reattach the drain pipe and tighten the connections. Turn on the water supply and check for any leaks. If everything looks good, you're all done!
In Conclusion
 Replacing a kitchen sink basket assembly may seem like a daunting task, but with the right tools and a little know-how, it can be a relatively straightforward process. By following these steps and regularly maintaining your sink, you can keep your kitchen functioning at its best. Say goodbye to leaks and unpleasant odors and hello to a clean and efficient sink.