How to Replace a Glacier Bay Bathroom Sink Faucet
If you're looking to update your bathroom's look and functionality, replacing your old faucet is a great place to start. And if you have a Glacier Bay bathroom sink faucet, you're in luck – these faucets are known for their quality and affordability. In this guide, we'll walk you through the steps of replacing your Glacier Bay bathroom sink faucet, so you can upgrade your bathroom without breaking the bank.

How to Replace a Glacier Bay Bathroom Sink Faucet


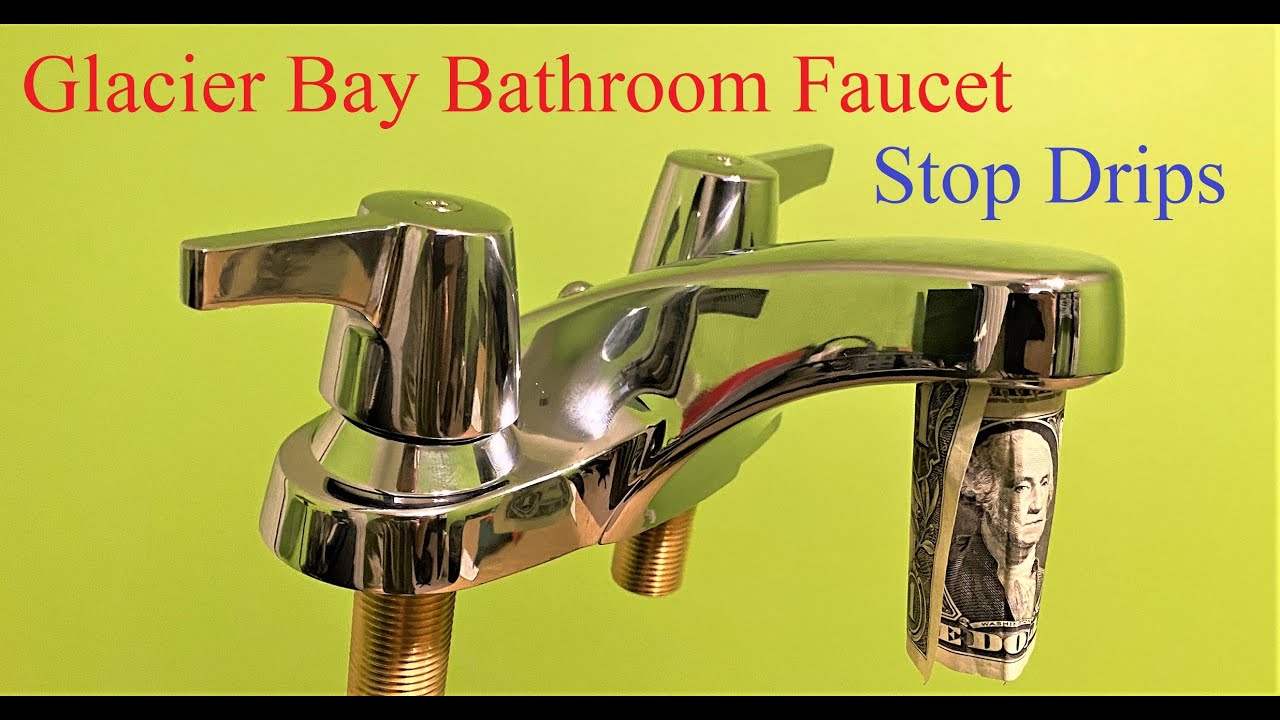
Replacing a Glacier Bay Bathroom Sink Faucet: A Step-by-Step Guide
Before you begin, make sure to gather all necessary tools and materials. This includes a new Glacier Bay bathroom sink faucet, adjustable wrench, pliers, bucket, towels, and plumber's putty. Once you have everything you need, follow these steps:
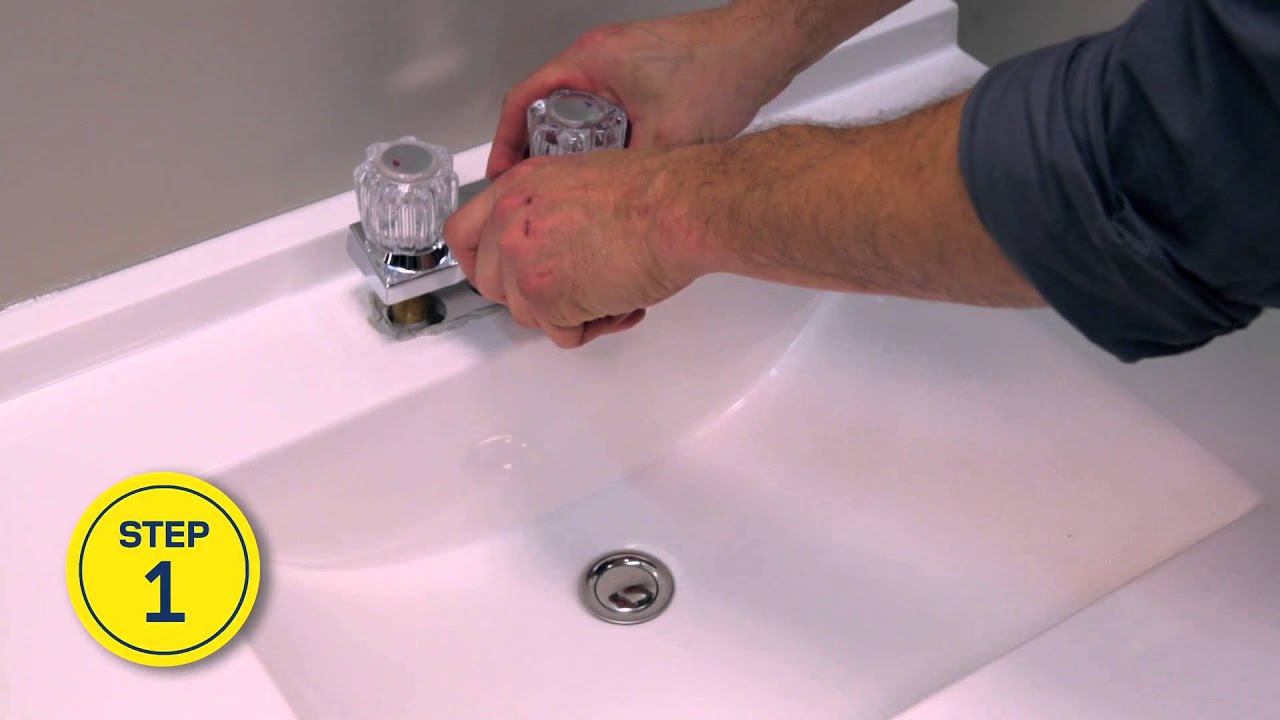
Step 1: Shut off the Water Supply
The first and most important step in any plumbing project is to shut off the water supply. Look for the shut-off valves under the sink and turn them clockwise to stop the flow of water. If your sink doesn't have shut-off valves, you'll need to turn off the main water supply.
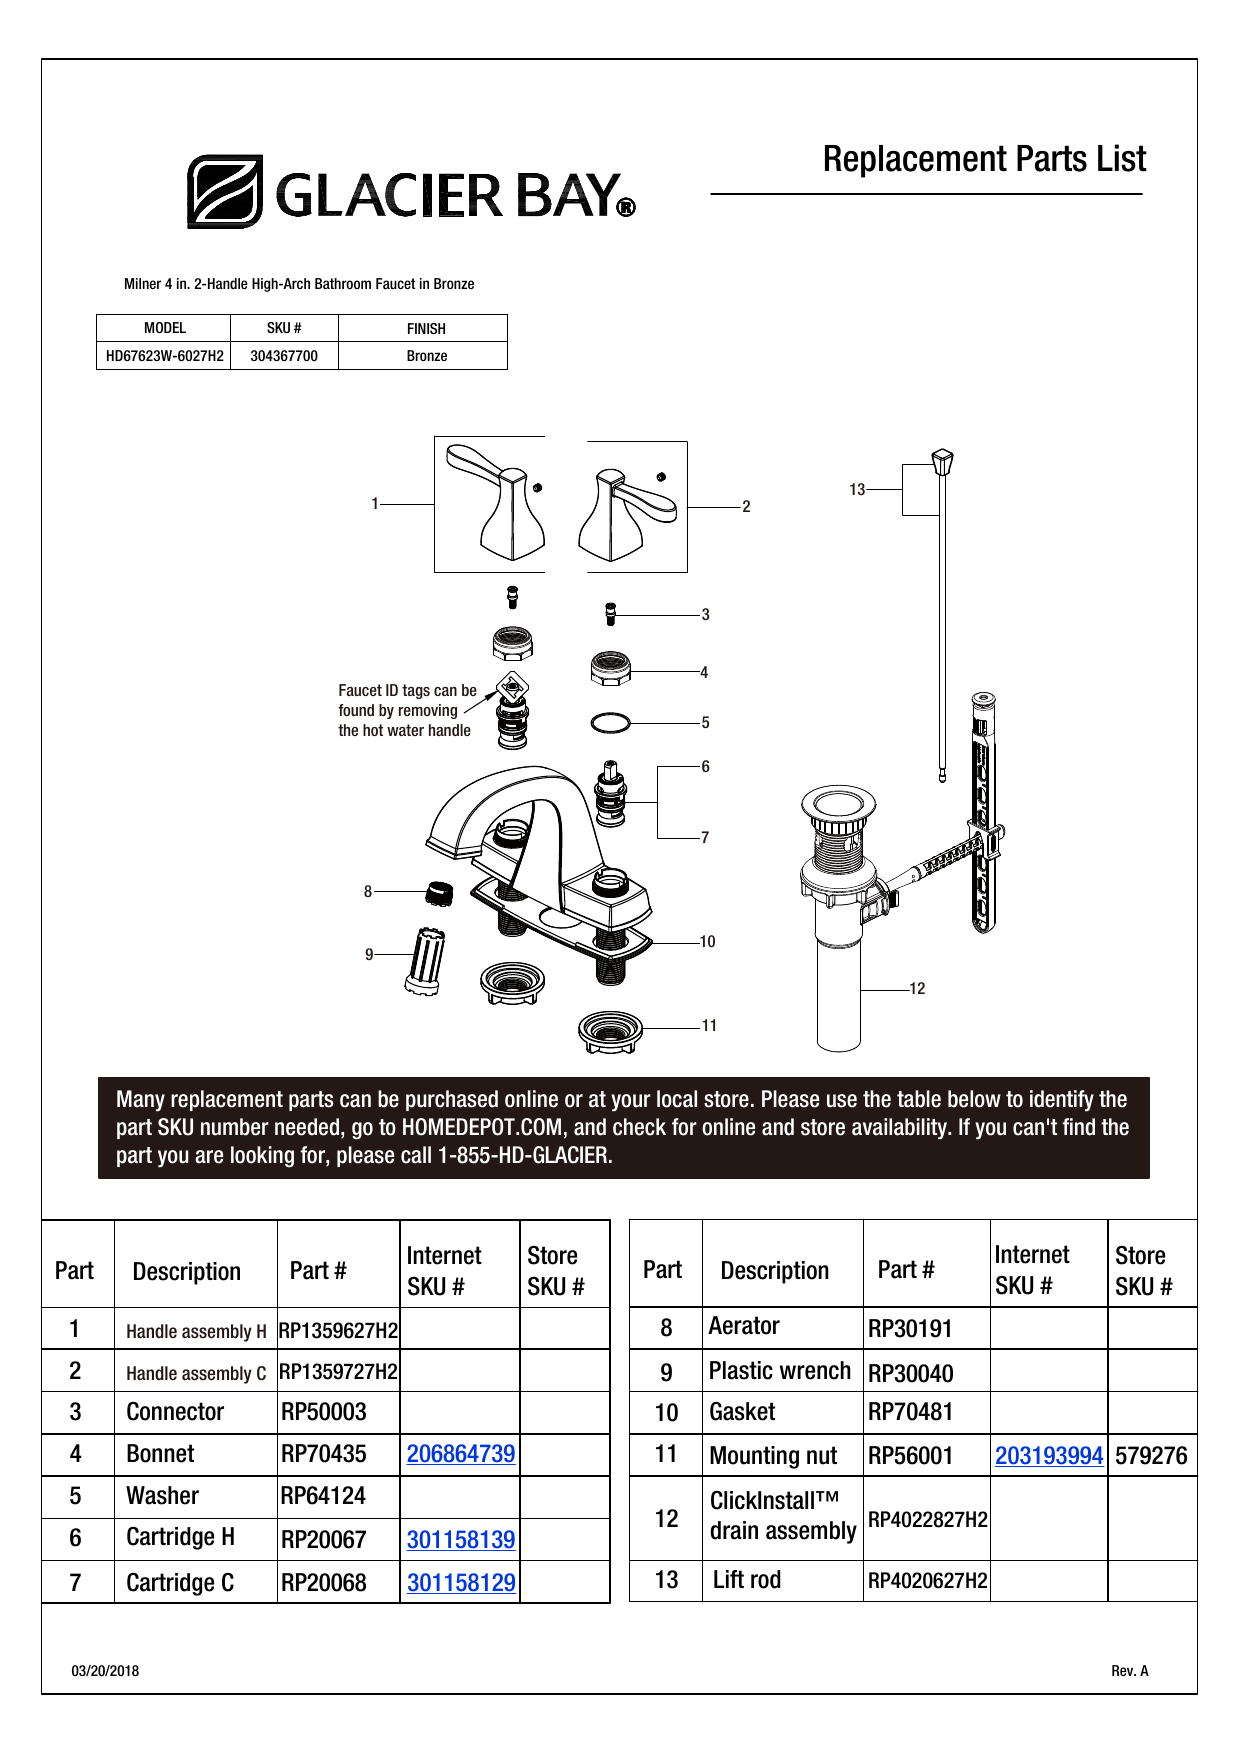
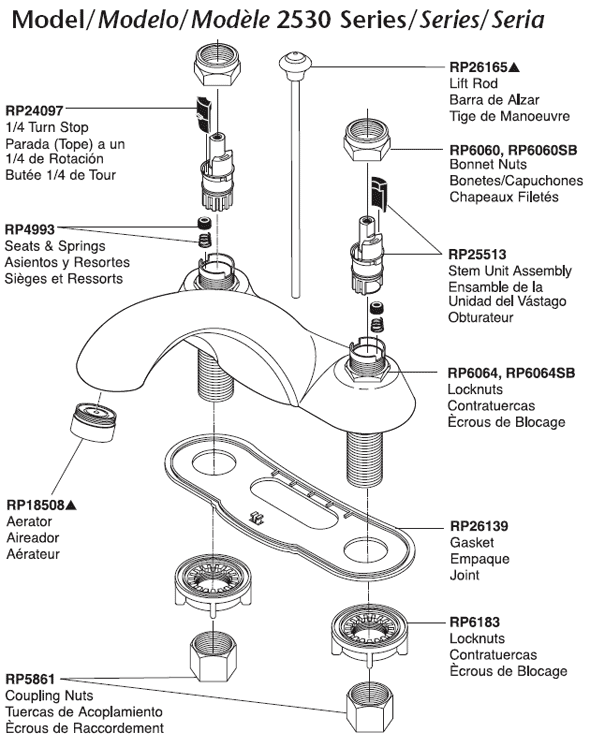
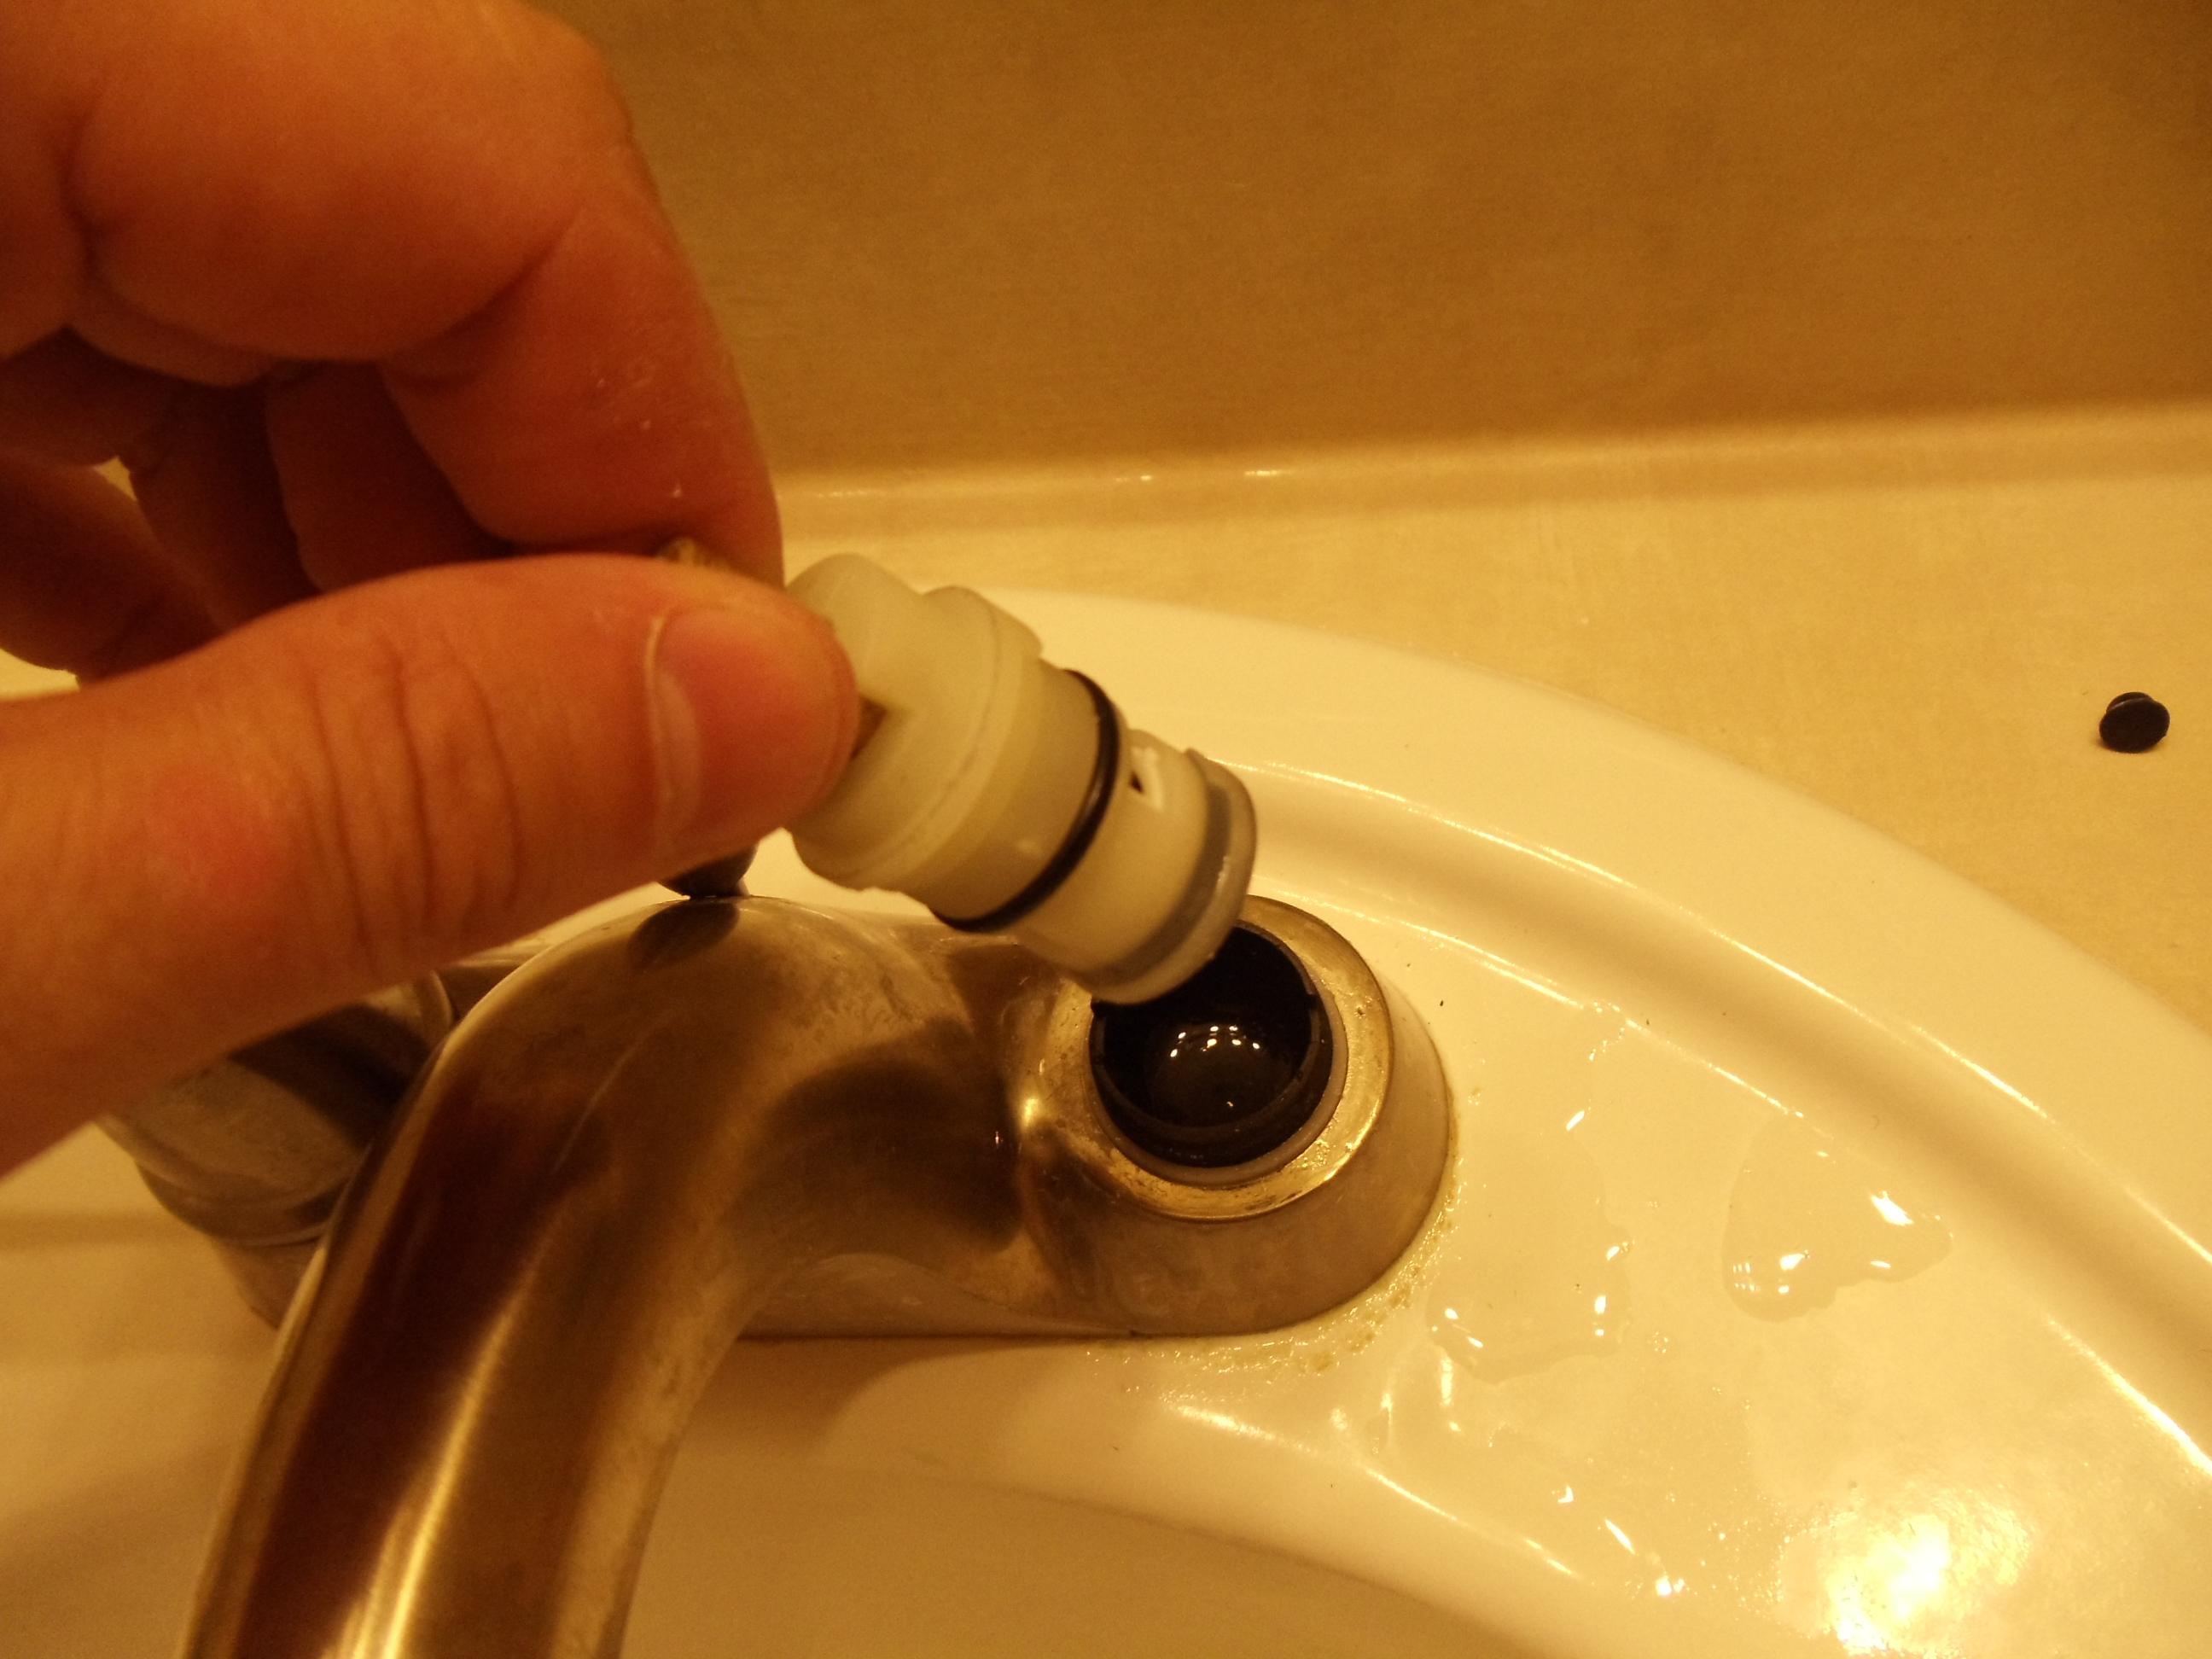
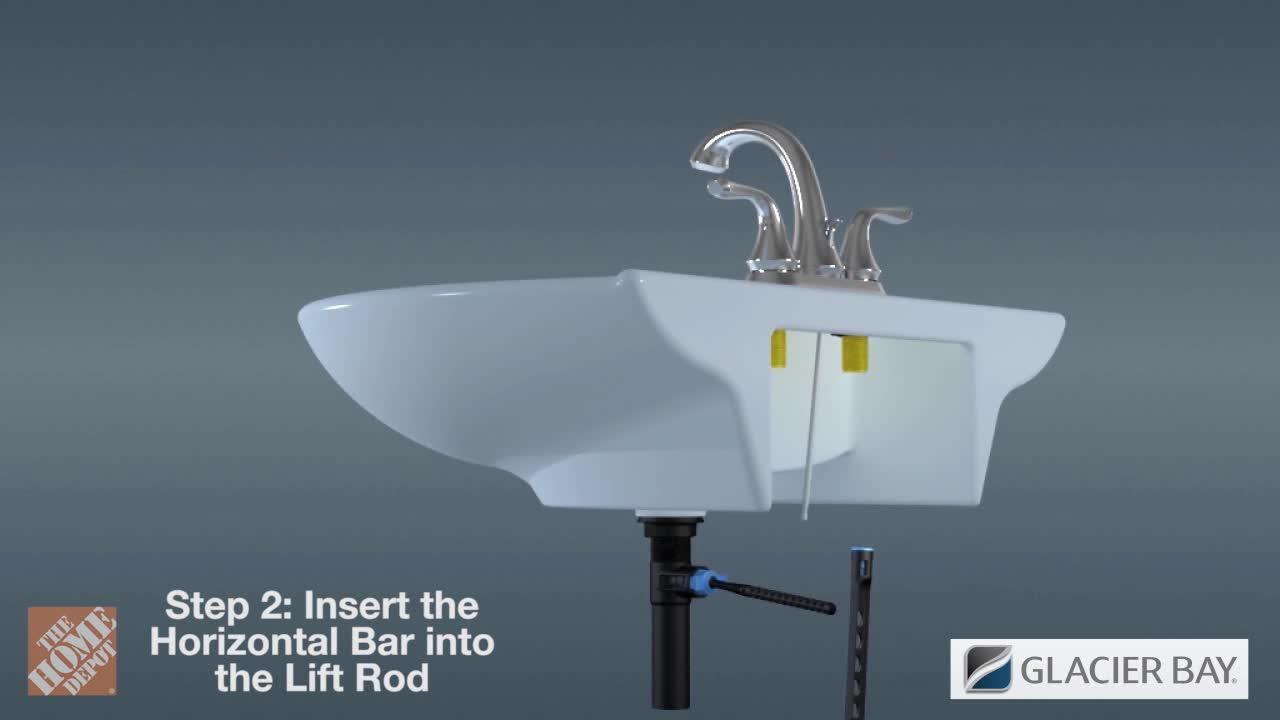
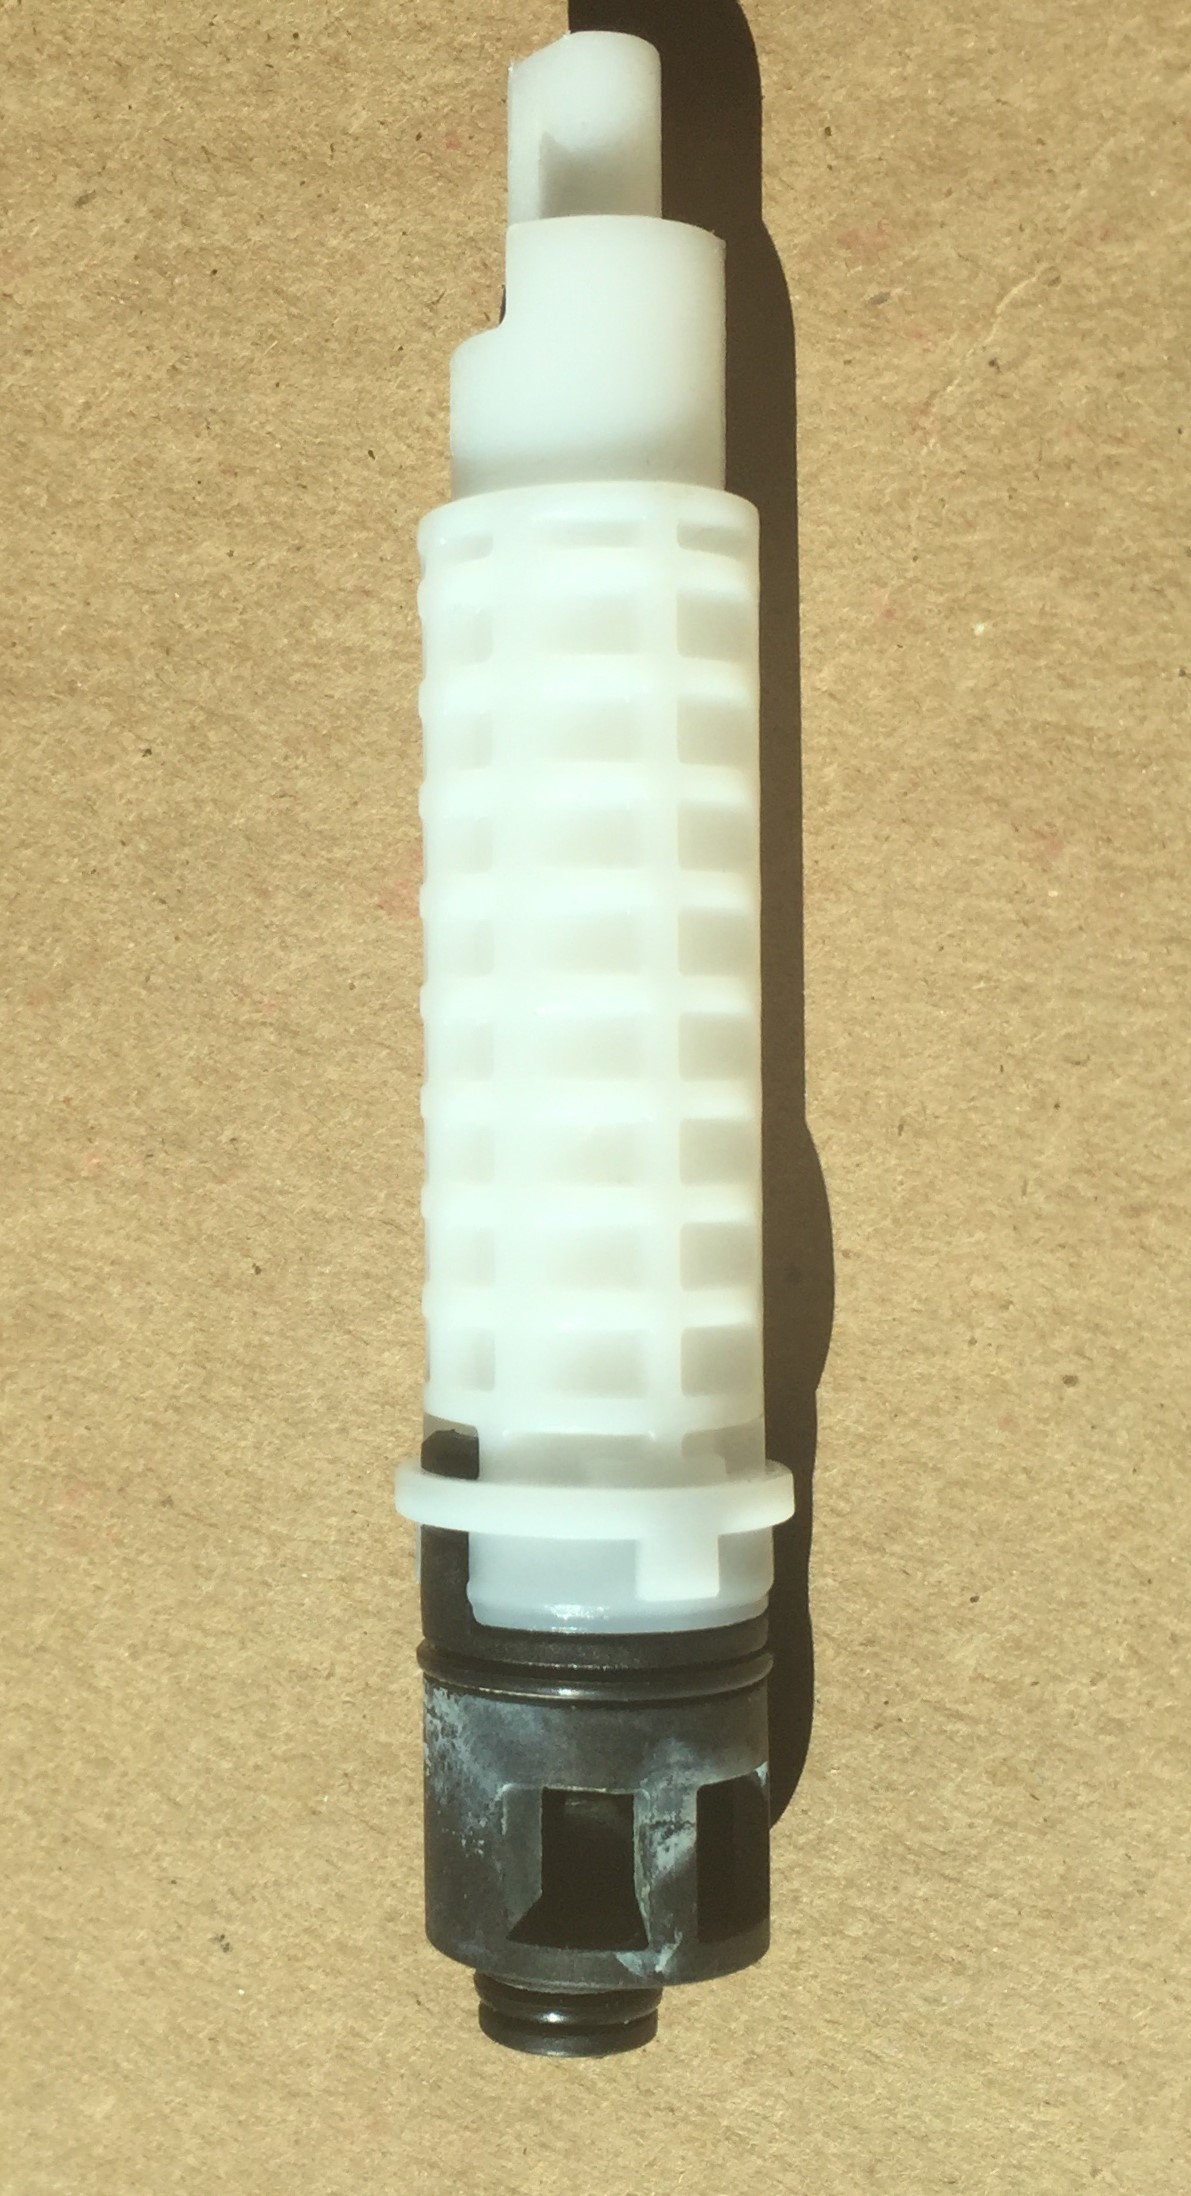
Step 2: Remove the Old Faucet
Using an adjustable wrench, disconnect the supply lines from the faucet and remove any mounting hardware. Then, carefully lift the old faucet off the sink.
Step 3: Clean and Prep the Sink
Before installing the new faucet, clean the sink thoroughly and remove any leftover putty or debris. Then, apply a thin layer of plumber's putty around the base of the new faucet.
Step 4: Install the New Faucet
Place the new faucet onto the sink and make sure it is centered and level. Then, secure it in place using the mounting hardware and hand-tighten the nuts. Use pliers to tighten them just enough to keep the faucet in place.
Step 5: Connect the Supply Lines
Attach the supply lines to the corresponding hot and cold water inlets on the new faucet. Use an adjustable wrench to tighten the connections, but be careful not to overtighten and damage the threads.
Step 6: Turn the Water Supply Back On
Once everything is securely connected, turn the water supply back on and check for any leaks. If you notice any, tighten the connections as needed.
Step 7: Clean and Test the Faucet
Using a damp cloth, clean off any excess putty or debris from around the base of the faucet. Then, turn on the water and test the faucet to make sure it is working properly.


Replacing a Glacier Bay Bathroom Sink Faucet: A Step-by-Step Guide


DIY: Replacing a Glacier Bay Bathroom Sink Faucet
Replacing a bathroom sink faucet is a relatively simple DIY project that can save you money on hiring a professional. However, it's important to note that if you have little to no plumbing experience, it may be best to hire a professional to ensure the job is done correctly.
If you do decide to tackle this project yourself, make sure to follow the steps outlined above and take your time to avoid any mistakes. And always turn off the water supply before beginning any plumbing work.


DIY: Replacing a Glacier Bay Bathroom Sink Faucet


Replacing a Glacier Bay Bathroom Sink Faucet: Tips and Tricks
When replacing a bathroom sink faucet, there are a few tips and tricks that can make the process go more smoothly:
Tip #1: Take Pictures
Before removing the old faucet, take pictures of the setup and connections. This will make it easier to remember how everything goes back together when installing the new faucet.
Tip #2: Use the Right Tools
Having the right tools on hand can make all the difference when replacing a faucet. Make sure you have an adjustable wrench and pliers that are the appropriate size for your faucet's connections.
Tip #3: Don't Overtighten
When connecting the supply lines and mounting hardware, be careful not to overtighten. This can damage the threads and cause leaks.
Tip #4: Check for Leaks
After installing the new faucet, check for any leaks by turning on the water supply and running the faucet. If you notice any leaks, tighten the connections as needed.

Replacing a Glacier Bay Bathroom Sink Faucet: Tips and Tricks

The Ultimate Guide to Replacing a Glacier Bay Bathroom Sink Faucet
If you're still feeling unsure about replacing your Glacier Bay bathroom sink faucet, don't worry. This comprehensive guide has all the information you need to successfully complete the project and upgrade your bathroom's look.
From gathering the necessary tools and materials to troubleshooting common issues, this guide covers it all. With step-by-step instructions and helpful tips, you'll have a new faucet installed in no time.


The Ultimate Guide to Replacing a Glacier Bay Bathroom Sink Faucet

Replacing a Glacier Bay Bathroom Sink Faucet: Common Mistakes to Avoid
While replacing a bathroom sink faucet may seem like a straightforward task, there are a few common mistakes that can turn this DIY project into a disaster:
Mistake #1: Forgetting to Shut Off the Water
Not shutting off the water supply can result in a big mess and potential damage to your plumbing. Always remember to turn off the water before beginning any plumbing work.
Mistake #2: Using the Wrong Tools
If you don't have the right tools for the job, you risk damaging the faucet and making the project more difficult than it needs to be. Make sure to have the appropriate tools on hand before starting.
Mistake #3: Overtightening Connections
As mentioned before, overtightening connections can cause damage and leaks. Use a gentle touch and only tighten the connections enough to keep everything in place.
Mistake #4: Ignoring Leaks
If you notice any leaks after installing the new faucet, don't ignore them. Tighten the connections as needed to prevent any further issues.

Replacing a Glacier Bay Bathroom Sink Faucet: Common Mistakes to Avoid
Step-by-Step Tutorial: Replacing a Glacier Bay Bathroom Sink Faucet
If you're a visual learner, a step-by-step tutorial can be a helpful resource when tackling a project like replacing a bathroom sink faucet. There are many tutorials available online, including videos that walk you through each step of the process.
Watching a tutorial can also give you a better idea of what tools and materials you'll need and what to expect during the installation process.

Step-by-Step Tutorial: Replacing a Glacier Bay Bathroom Sink Faucet


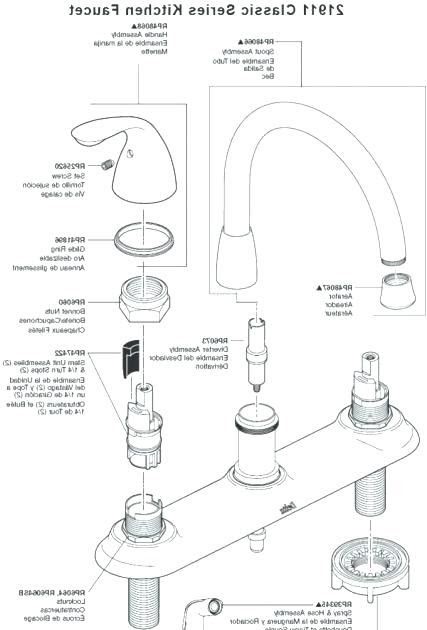
Replacing a Glacier Bay Bathroom Sink Faucet: Tools and Materials You'll Need
To make sure you have everything you need before beginning the project, here's a list of the tools and materials you'll need to replace a Glacier Bay bathroom sink faucet:
- New Glacier Bay bathroom sink faucet
- Adjustable wrench
- Pliers
- Bucket
- Towels
- Plumber's putty
Having these tools and materials on hand will make the installation process much smoother and more efficient.

Replacing a Glacier Bay Bathroom Sink Faucet: Tools and Materials You'll Need


Replacing a Glacier Bay Bathroom Sink Faucet: Troubleshooting Common Issues
Even with proper preparation and following all steps correctly, sometimes issues can still arise during the installation process. Here are some common issues and how to troubleshoot them:
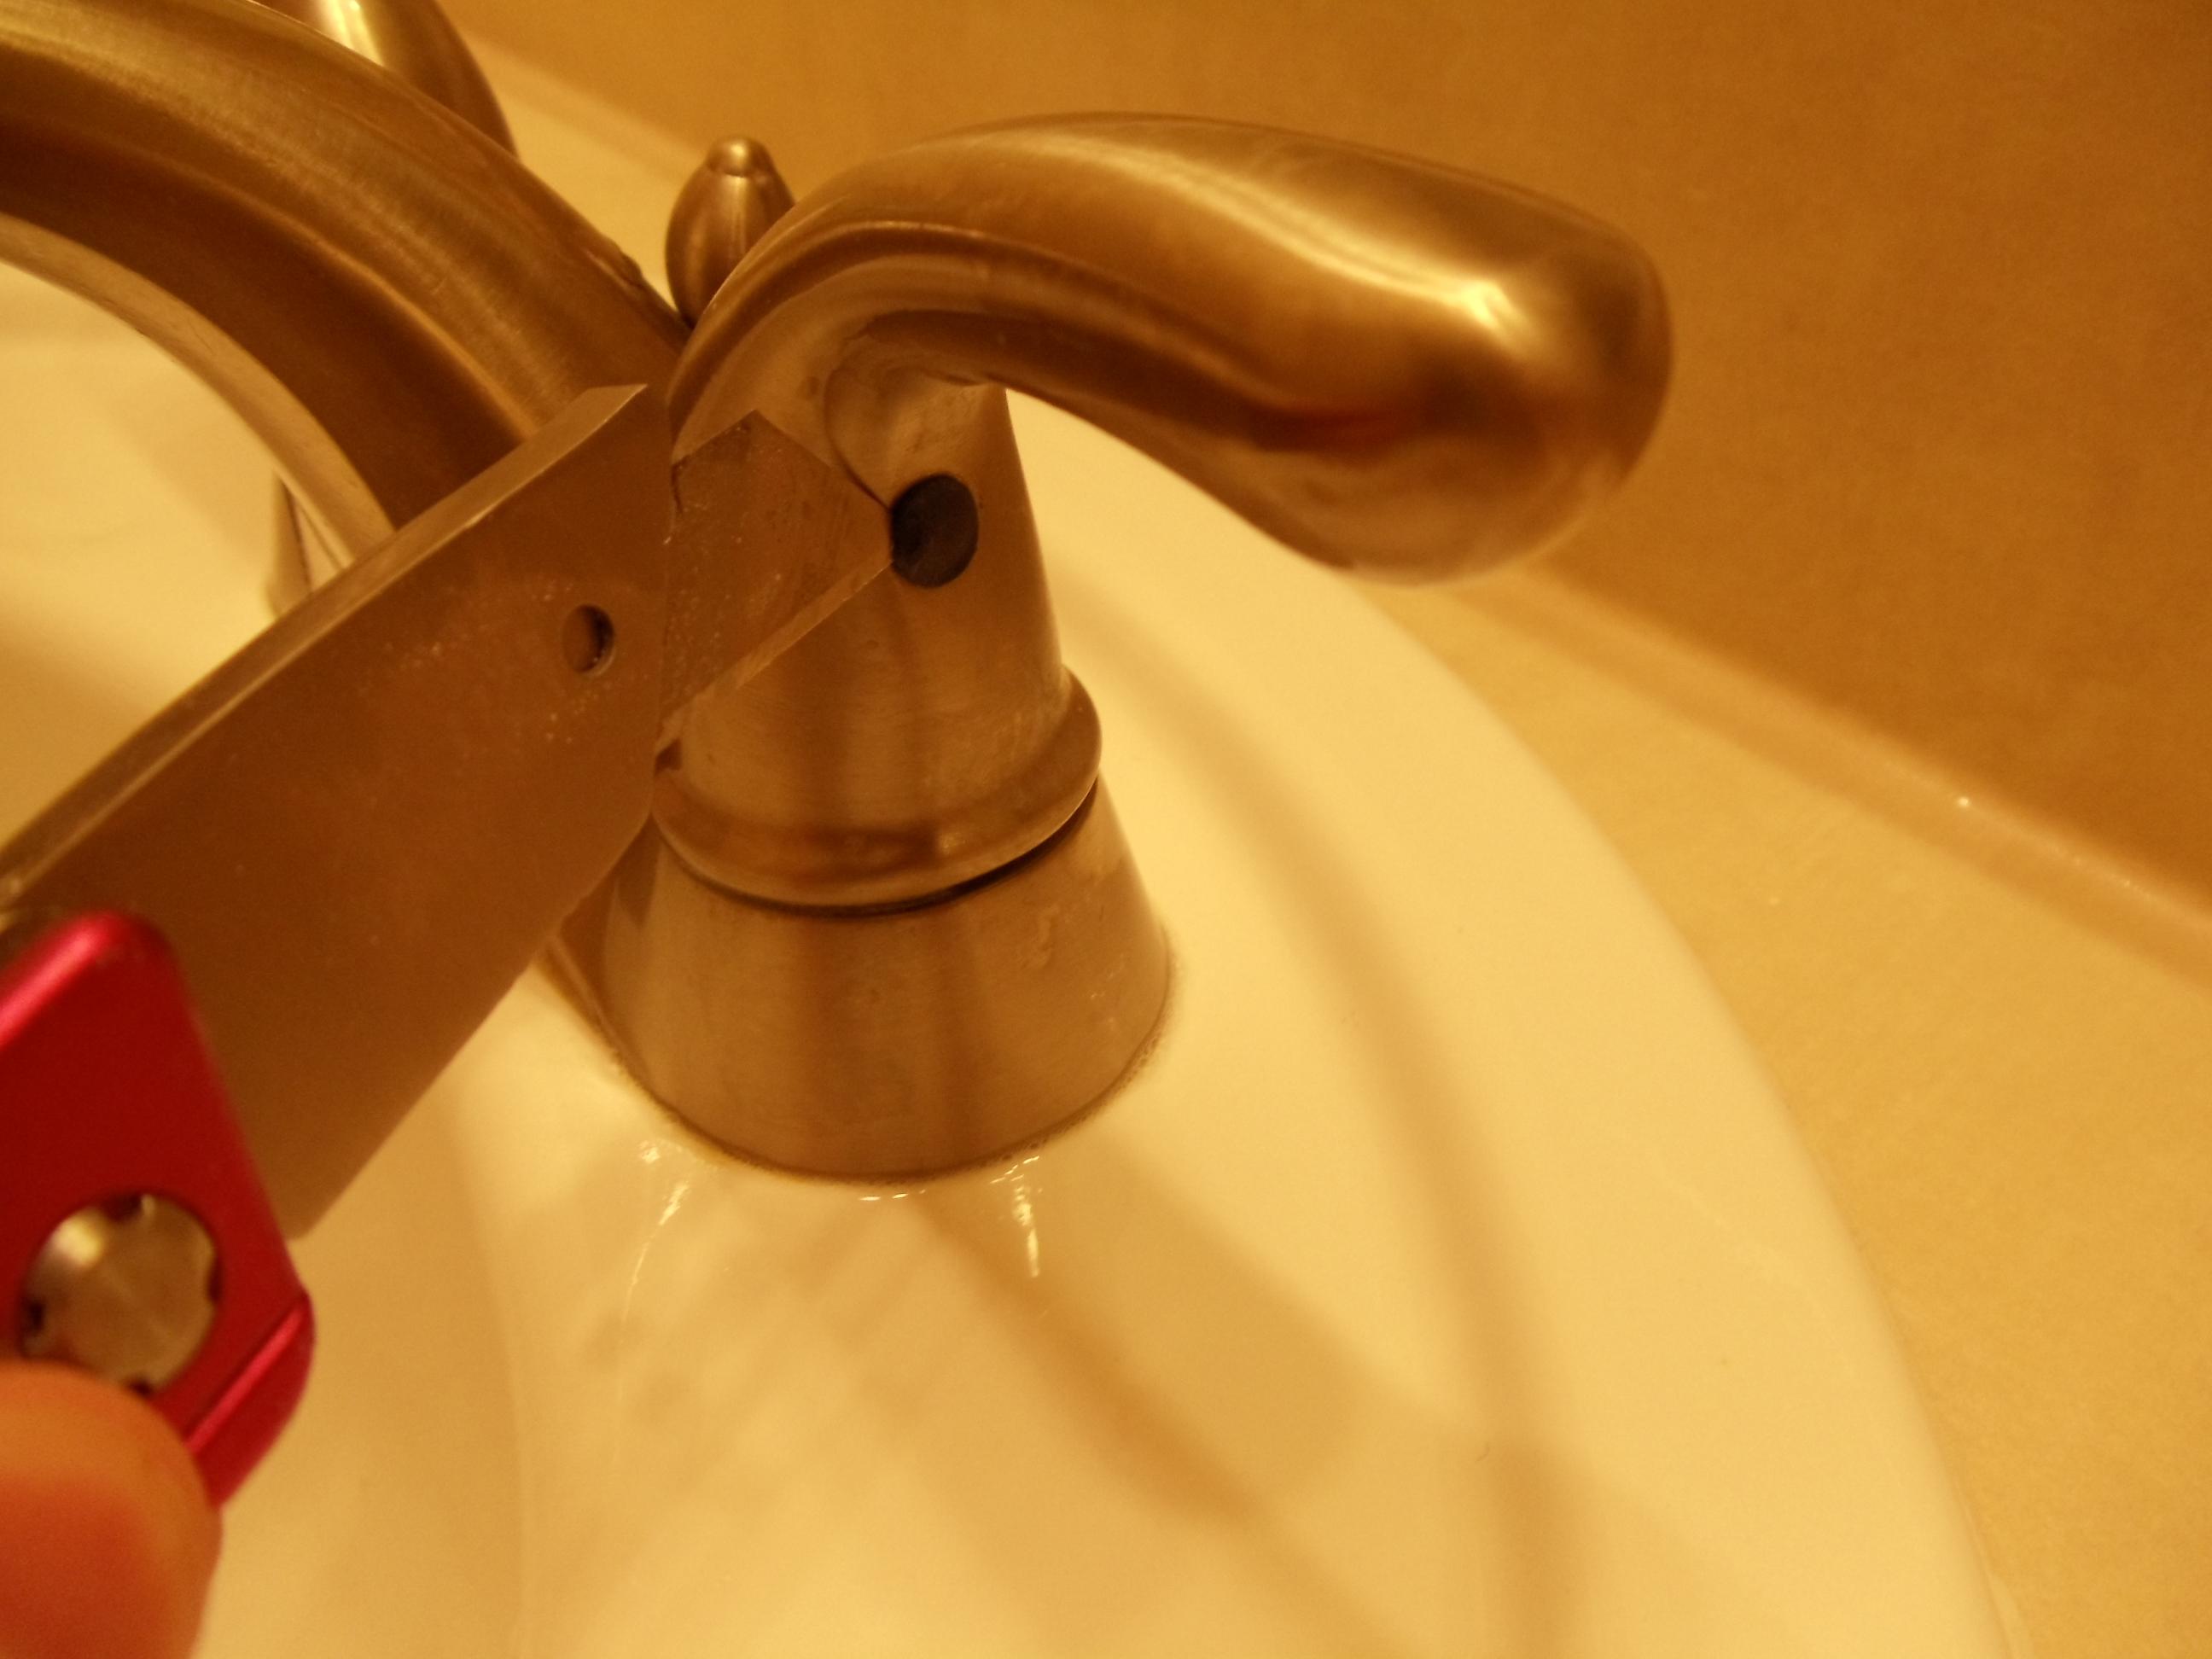
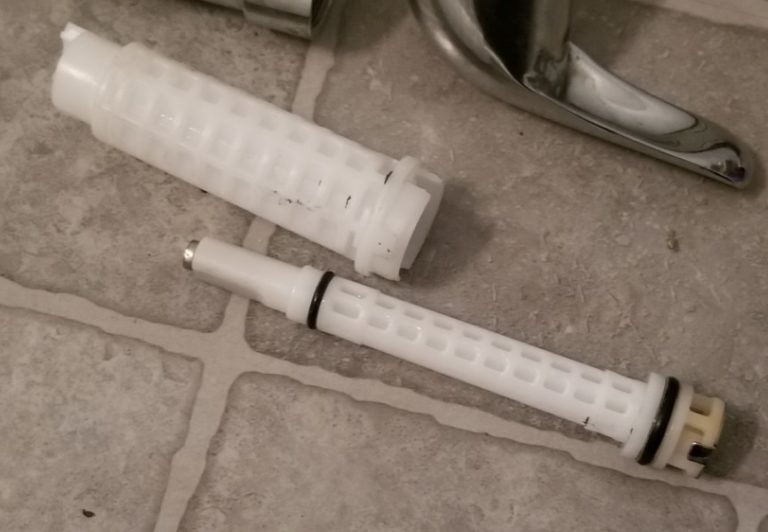
Issue #1: Leaking Connections
If you notice any leaks from the connections, try tightening them with an adjustable wrench. If the leak persists, you may need to replace the supply lines or washers.
Issue #2: Uneven or Loose Faucet
If the faucet feels loose or isn't level, try tightening the mounting hardware. If this doesn't solve the issue, you may need to add a rubber gasket under the faucet to level it out.
Issue #3: Low Water Pressure
If you notice a decrease in water pressure after installing the new faucet, there may be debris blocking the aerator. Simply unscrew the aerator and clean it out before reattaching it.

Replacing a Glacier Bay Bathroom Sink Faucet: Troubleshooting Common Issues
Replacing a Glacier Bay Bathroom Sink Faucet: Pros and Cons of DIY vs Hiring a Professional
Deciding whether to tackle a home improvement project yourself or hire a professional can be a tough decision. Here are some pros and cons of DIY vs hiring a professional to replace your Glacier Bay bathroom sink faucet:
DIY
Pros: Can save money, sense of accomplishment, can be done on your own time.
Cons: Risk of mistakes, may take longer for inexperienced individuals, potential for unexpected issues.
Hiring a Professional
Pros: Experienced and knowledgeable, can save time, guaranteed quality work.
Cons: More expensive, may have to schedule around professional's availability.
Ultimately, the decision comes down to your comfort level and experience with plumbing projects. If you feel confident in your abilities and have the necessary tools and materials, DIY may be the way to go. However, if you're unsure or don't have the time to dedicate to the project, hiring a professional may be the better option.
Now that you have a comprehensive guide to replacing your Glacier Bay bathroom sink faucet, you can confidently upgrade your bathroom with a new and improved faucet. Just remember to take your time, follow the steps, and don't be afraid to ask for help if needed. Happy renovating!


Replacing a Glacier Bay Bathroom Sink Faucet: Pros and Cons of DIY vs Hiring a Professional

Why Replace Your Glacier Bay Bathroom Sink Faucet?

Improved Functionality
 One of the main reasons to consider replacing your Glacier Bay bathroom sink faucet is to improve its functionality. Over time, faucets can become worn down and develop leaks or other issues that can make them difficult to use. By replacing your old faucet with a new one, you can ensure that you have a properly functioning fixture that makes your daily routine easier.
Upgrade Your Design
 Another reason to replace your Glacier Bay bathroom sink faucet is to upgrade your design. As with any other element in your house, your bathroom sink faucet plays a big role in the overall aesthetic of the space. By choosing a new, modern faucet, you can give your bathroom a fresh and updated look. Plus, with a wide variety of styles, finishes, and features available, you can find a faucet that perfectly complements your personal style and enhances your bathroom's design.
Save Money in the Long Run
 While replacing your Glacier Bay bathroom sink faucet may seem like an unnecessary expense, it can actually save you money in the long run. Old, leaky faucets can waste a significant amount of water, leading to higher water bills. By replacing your faucet with a newer, more efficient model, you can reduce water waste and save money on your utility bills.
Easy Installation
 Many people are hesitant to replace their own faucet because they think it will be a difficult and complicated process. However, replacing a Glacier Bay bathroom sink faucet is actually a relatively simple and straightforward task. With the right tools and instructions, you can easily install your new faucet yourself and save money on hiring a professional.
In conclusion,
replacing your Glacier Bay bathroom sink faucet can improve functionality, upgrade your design, save you money, and be a simple DIY project. So if you're looking to give your bathroom a small but impactful upgrade, consider replacing your old faucet with a new and improved one.
Many people are hesitant to replace their own faucet because they think it will be a difficult and complicated process. However, replacing a Glacier Bay bathroom sink faucet is actually a relatively simple and straightforward task. With the right tools and instructions, you can easily install your new faucet yourself and save money on hiring a professional.
In conclusion,
replacing your Glacier Bay bathroom sink faucet can improve functionality, upgrade your design, save you money, and be a simple DIY project. So if you're looking to give your bathroom a small but impactful upgrade, consider replacing your old faucet with a new and improved one.