How to Replace a Fluorescent Light Fixture in the Kitchen
Replacing a fluorescent light fixture in the kitchen may seem like a daunting task, but with the right tools and instructions, it can be a simple and rewarding DIY project. In this guide, we will walk you through the steps of replacing your old fluorescent fixture with a new, more energy-efficient option, whether it be LED or recessed lighting. Get ready to upgrade your kitchen lighting and give your space a fresh new look!


How to Replace a Fluorescent Light Fixture in the Kitchen


Step 1: Gather Your Materials
The first step in any DIY project is to gather all the necessary materials. For this project, you will need:


Replacing a Fluorescent Light Fixture in the Kitchen: A Step-by-Step Guide


Step 2: Turn Off Power
Before beginning any electrical project, it is crucial to turn off the power to the area you will be working in. Locate the circuit breaker or fuse box and turn off the power to the kitchen. Use a circuit tester to double-check that the power is indeed off before proceeding.


DIY: Replacing a Fluorescent Light Fixture in the Kitchen


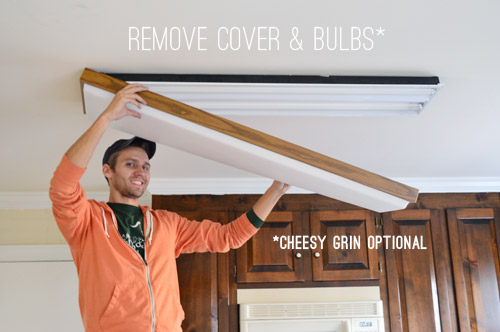

Step 3: Remove the Old Fixture
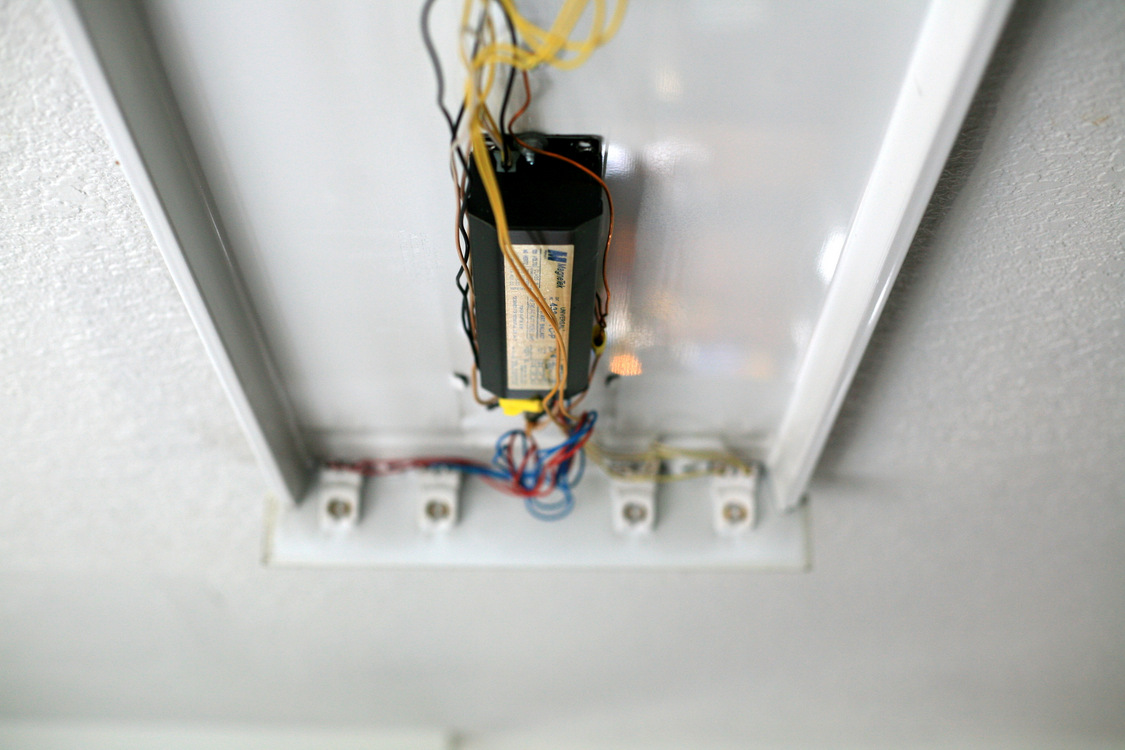
Using a screwdriver, remove the screws or clips that hold the old fixture in place. Carefully remove the fixture from the ceiling, and set it aside. Be cautious as the fixture may still have some wires attached.


Upgrade Your Kitchen Lighting: How to Replace a Fluorescent Fixture


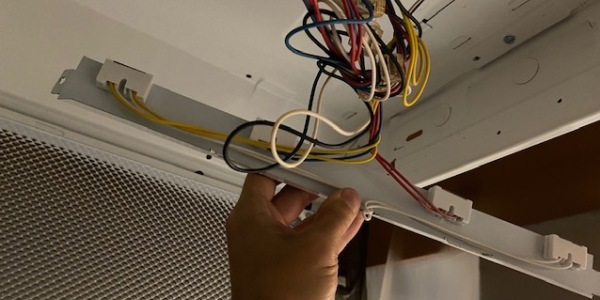
Step 4: Disconnect the Wires
Using wire cutters, disconnect the wires from the old fixture. You may need to strip the end of the wires to expose the bare copper. Be sure to label each wire with tape or a marker to ensure you can reconnect them correctly later.


Replacing a Fluorescent Light Fixture with LED in the Kitchen


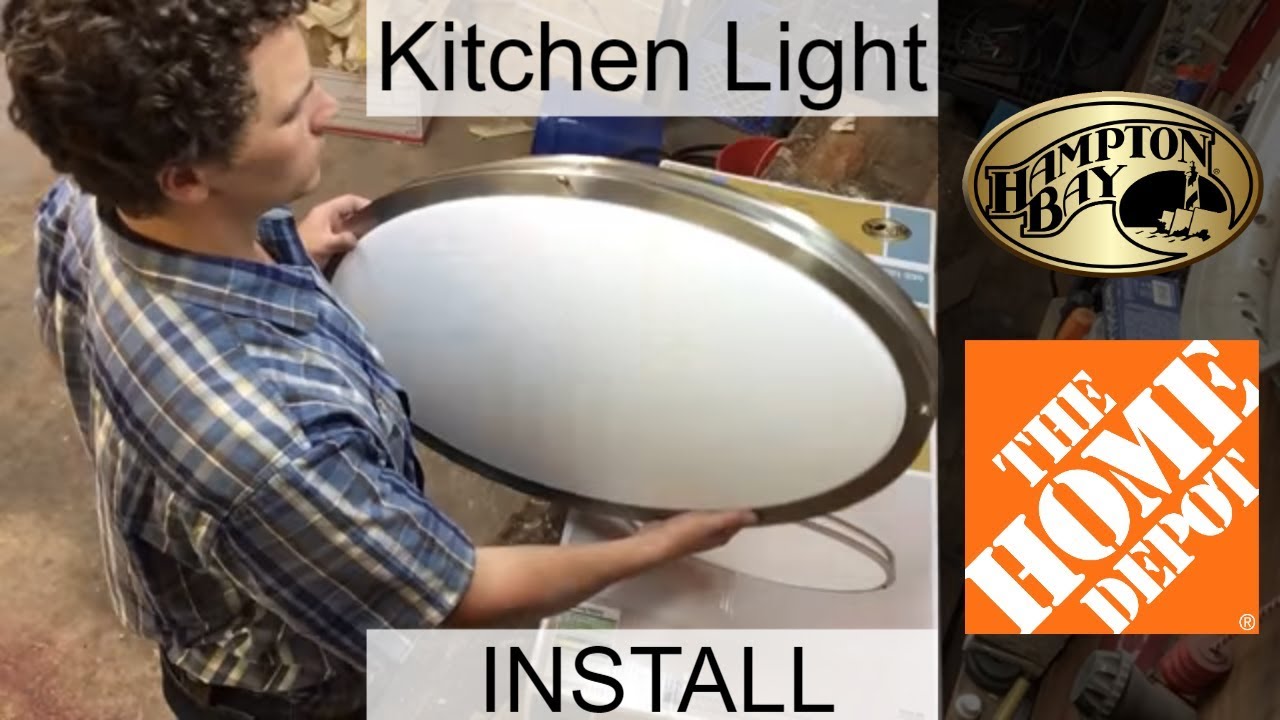
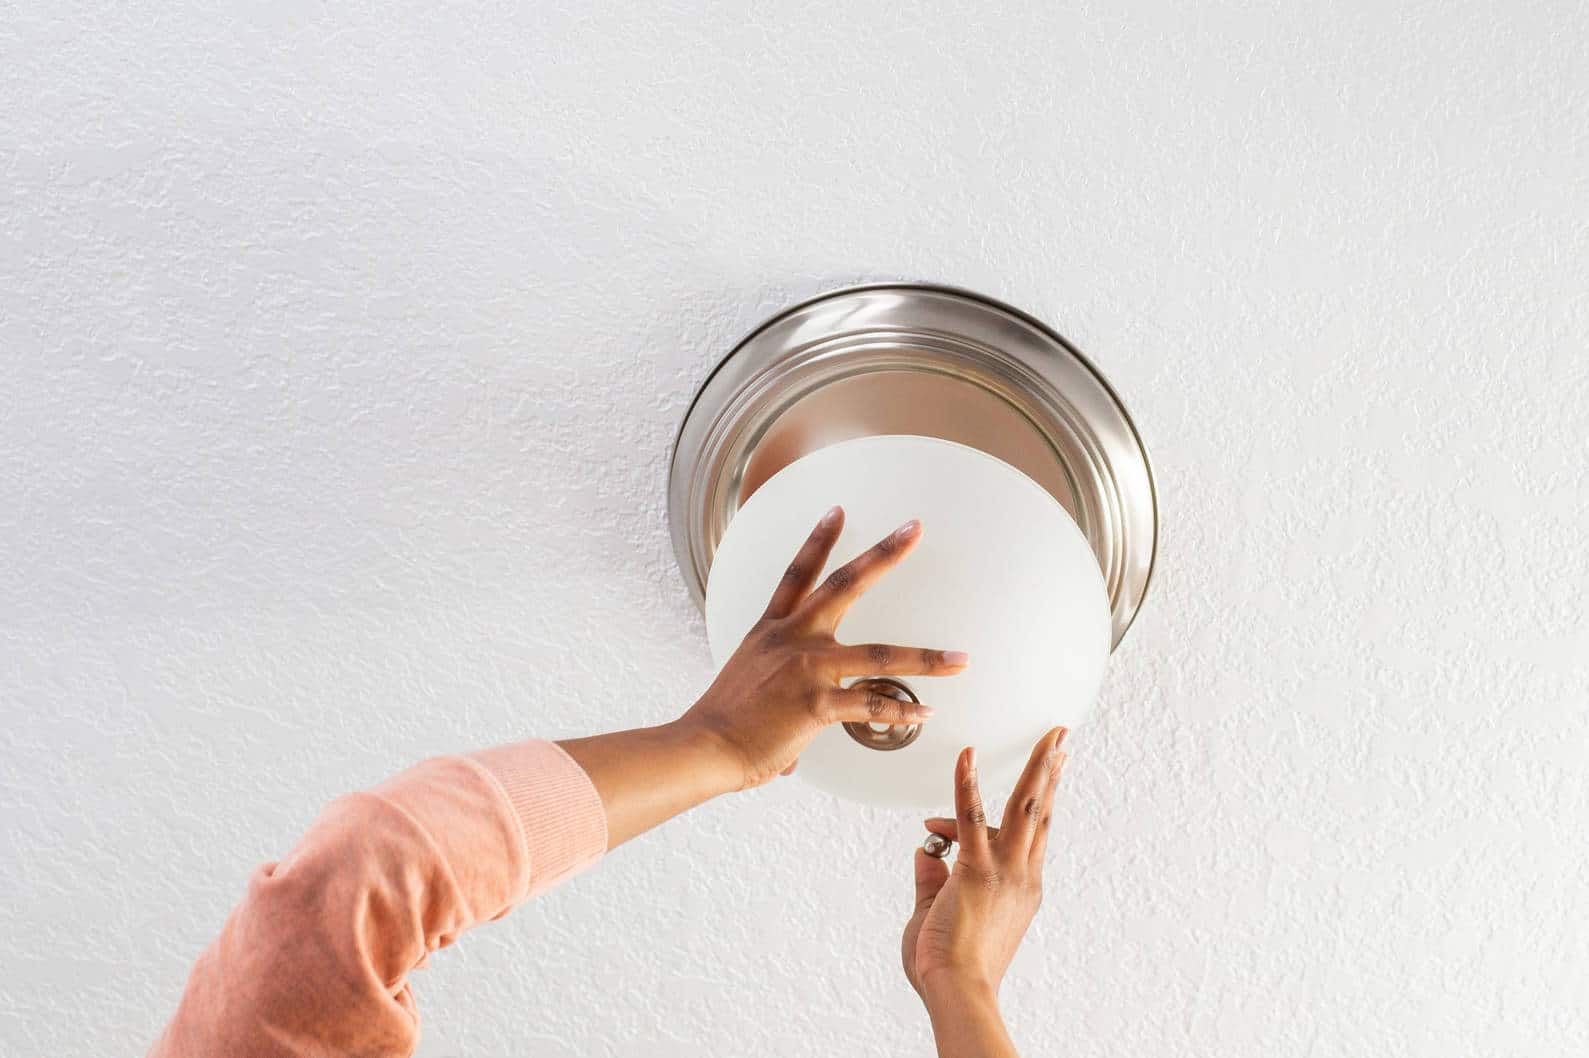
Step 5: Install the New Fixture
Follow the manufacturer's instructions to install the new fixture. Typically, this will involve attaching the fixture's mounting bracket to the ceiling and connecting the wires using wire nuts. Make sure all connections are secure and tucked into the electrical box.


Step-by-Step Guide to Replacing a Fluorescent Light Fixture in the Kitchen


Step 6: Turn on the Power and Test the Fixture
Once the new fixture is installed, turn the power back on and test it to make sure it is working correctly. If everything looks good, you can proceed to the next step. If there are any issues, double-check the connections and make sure the power is correctly turned on.

How to Remove and Replace a Fluorescent Light Fixture in the Kitchen


Step 7: Clean Up
Before calling it a day, make sure to clean up any debris or dust that may have accumulated during the project. A vacuum or broom will do the trick.


Replacing an Old Fluorescent Light Fixture in the Kitchen: Tips and Tricks

Upgrade Your Kitchen Lighting Today!
Replacing a fluorescent light fixture in the kitchen may seem like a daunting task, but with these simple steps, it can be a smooth and rewarding project. Whether you choose to upgrade to LED or recessed lighting, your kitchen will have a fresh new look and better lighting. So gather your materials and get started on upgrading your kitchen today!


Upgrade Your Kitchen: How to Replace a Fluorescent Light Fixture with Recessed Lighting

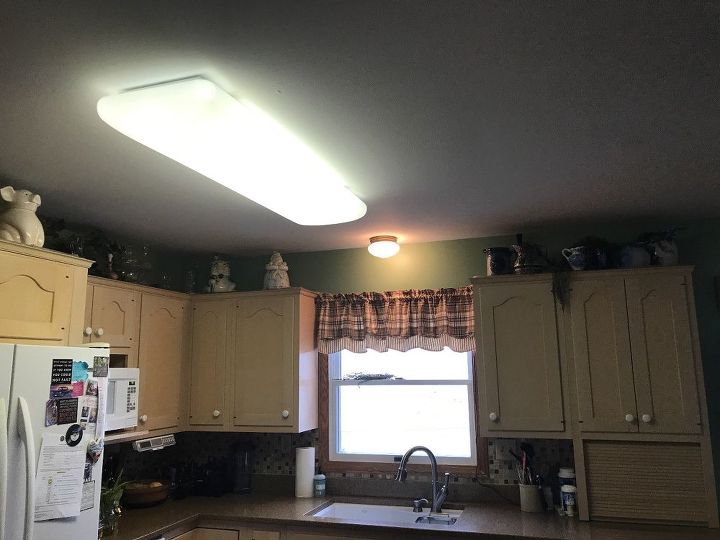
Why You Should Consider Replacing Your Fluorescent Light Fixture in the Kitchen
The Importance of Proper Lighting in Your Kitchen
 When it comes to designing your home, the kitchen is often considered the heart of the house. It is where we gather to cook, eat, and spend time with family and friends. That's why it is crucial to have proper lighting in your kitchen to create a warm and inviting atmosphere.
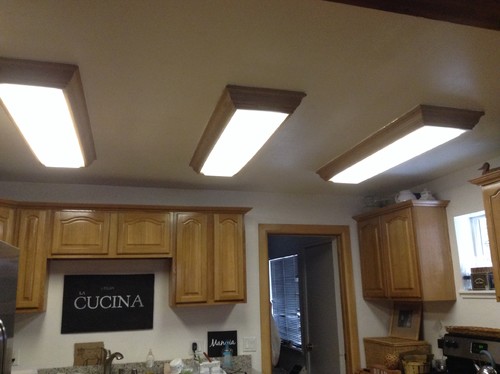
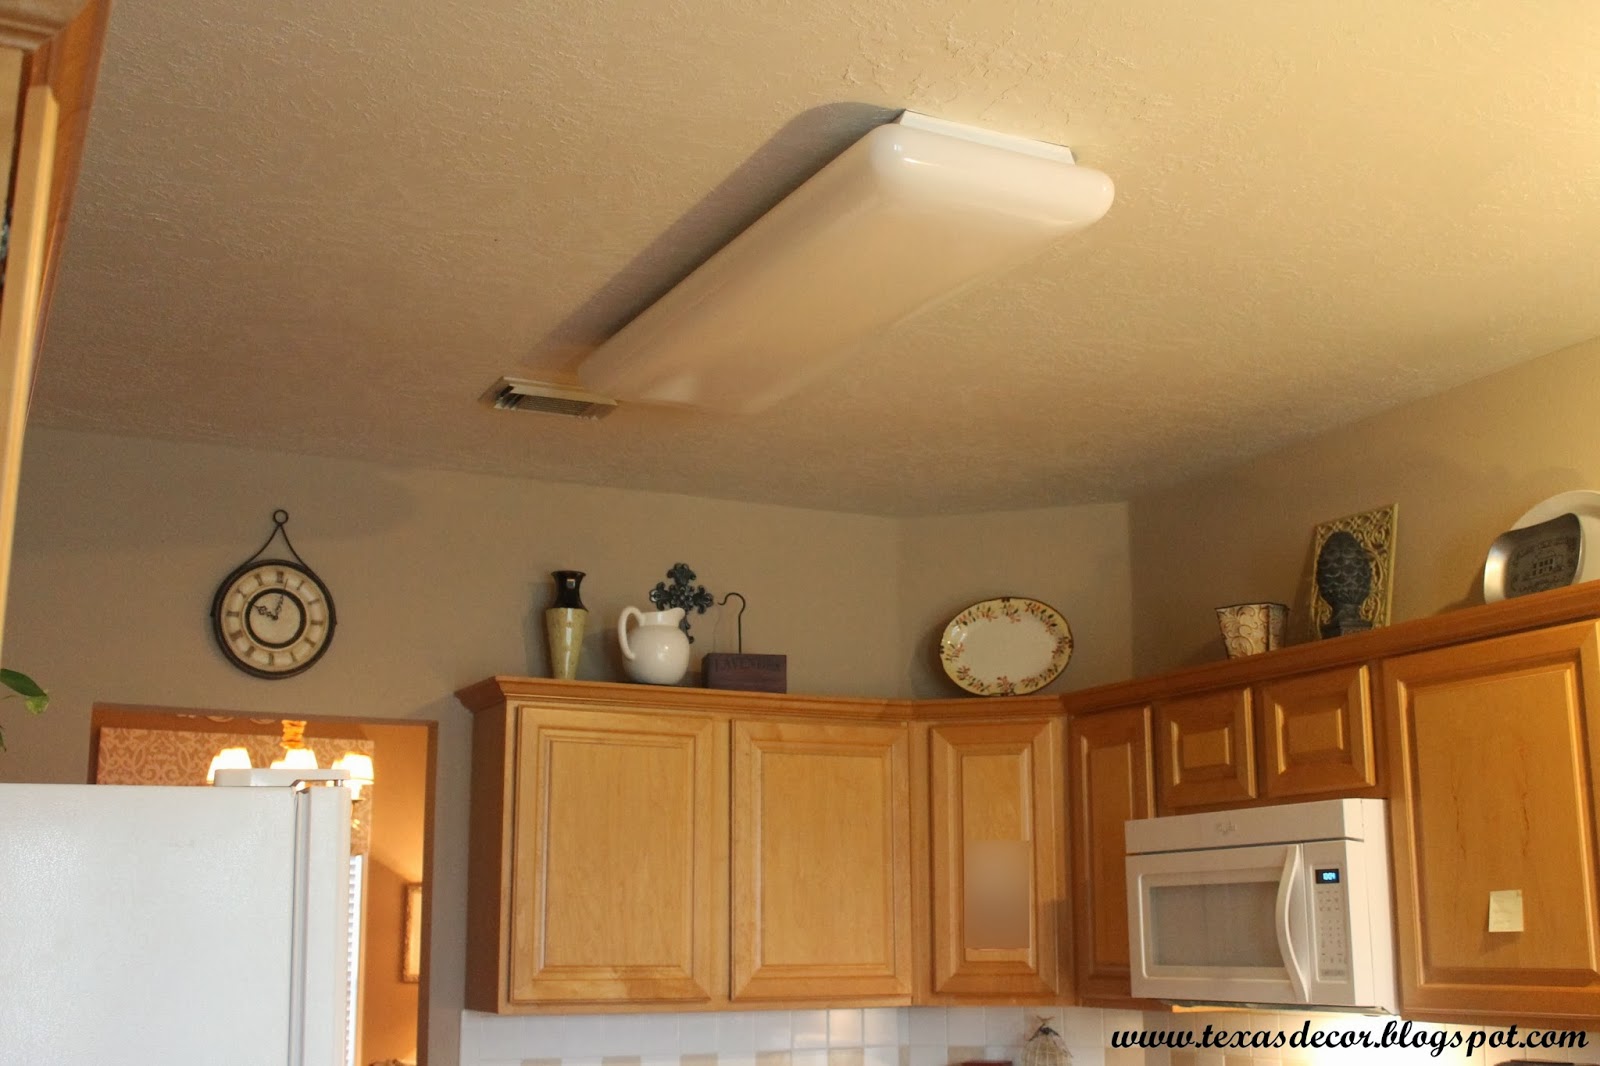
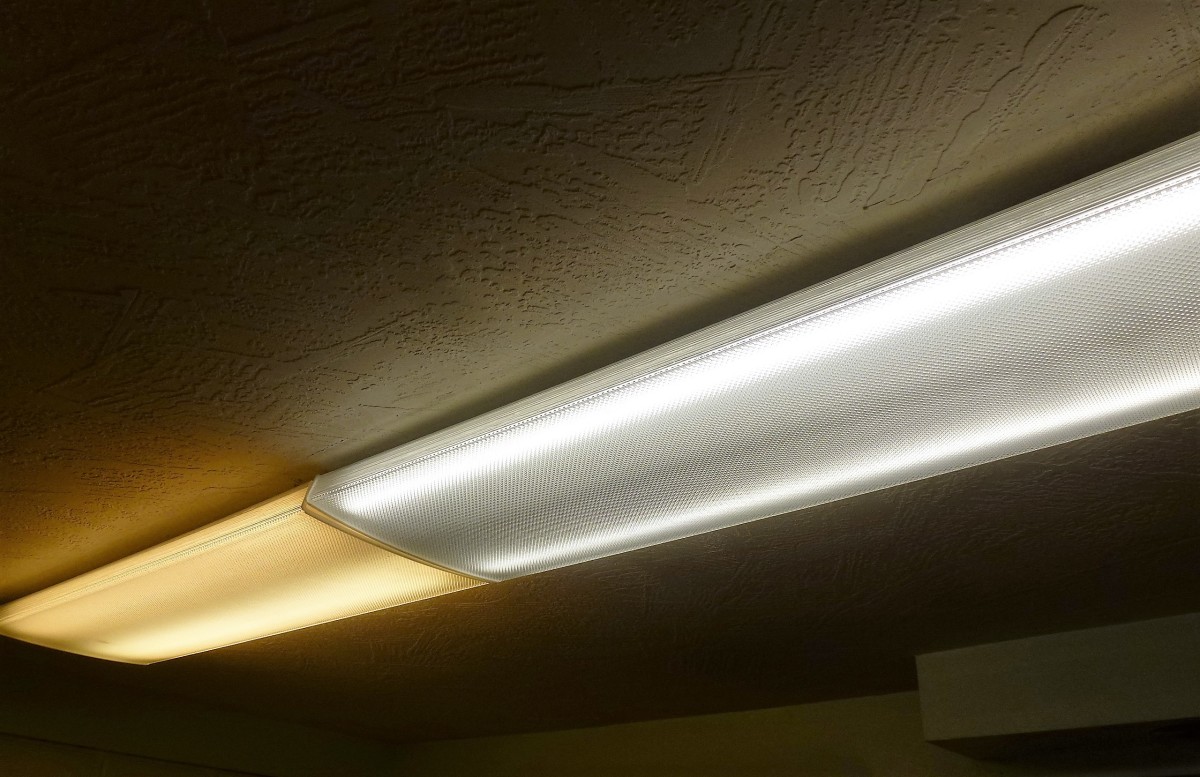
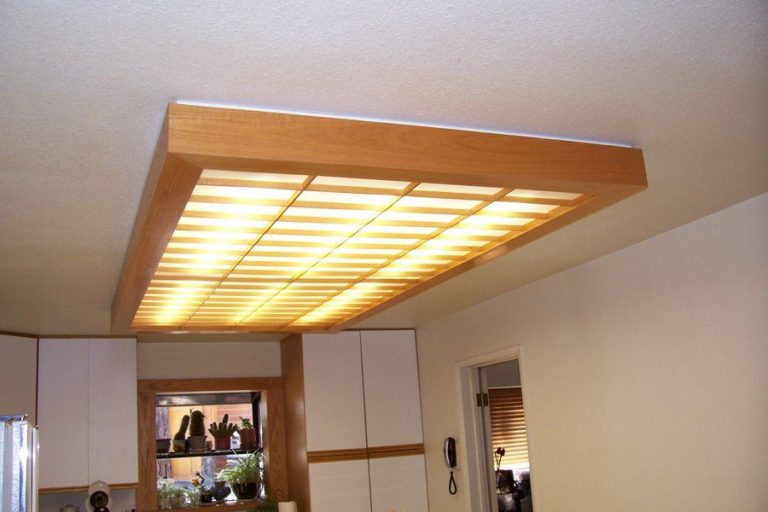
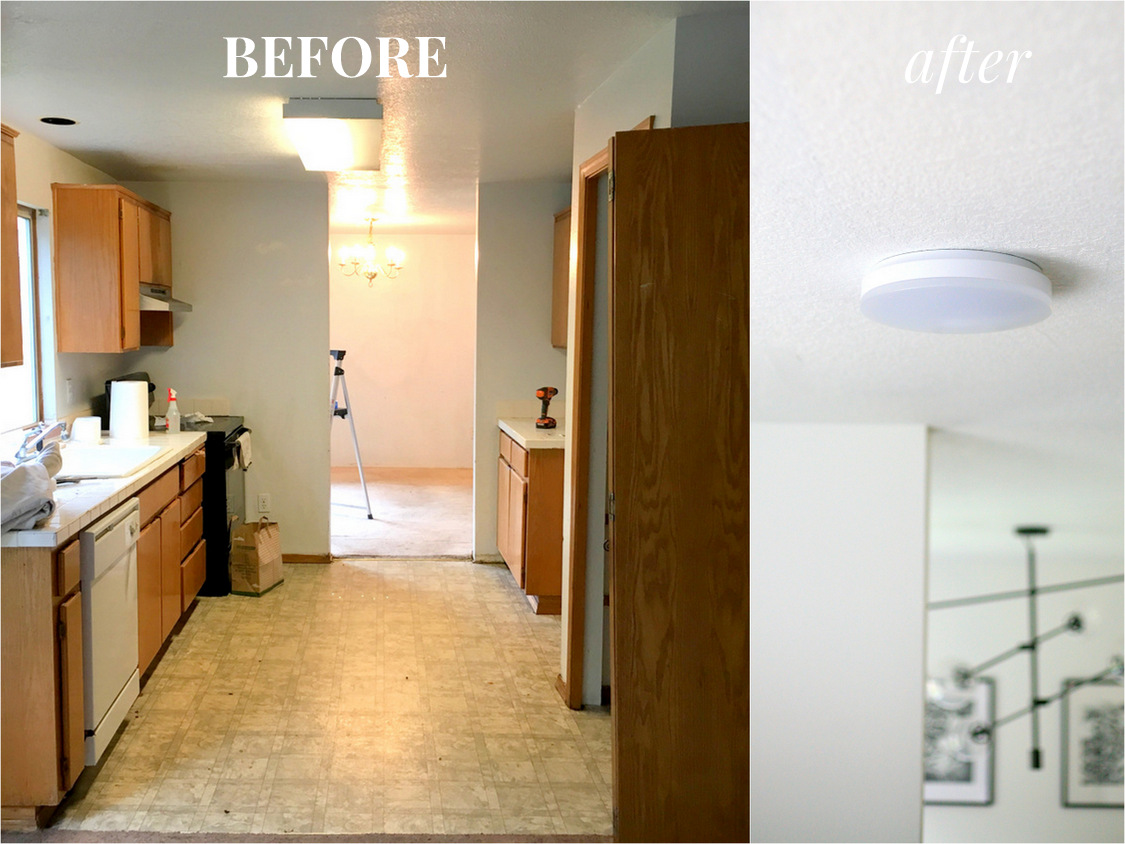
However, if you have an old fluorescent light fixture in your kitchen, it may be time for an upgrade. Not only do these fixtures give off a harsh and unflattering light, but they also consume a significant amount of energy. This can lead to high electricity bills and a negative impact on the environment.
Replacing your fluorescent light fixture in the kitchen can not only improve the overall look and feel of your space but also have a positive impact on your energy usage.
When it comes to designing your home, the kitchen is often considered the heart of the house. It is where we gather to cook, eat, and spend time with family and friends. That's why it is crucial to have proper lighting in your kitchen to create a warm and inviting atmosphere.
However, if you have an old fluorescent light fixture in your kitchen, it may be time for an upgrade. Not only do these fixtures give off a harsh and unflattering light, but they also consume a significant amount of energy. This can lead to high electricity bills and a negative impact on the environment.
Replacing your fluorescent light fixture in the kitchen can not only improve the overall look and feel of your space but also have a positive impact on your energy usage.
The Benefits of Upgrading to LED Lights
 One of the best options for replacing your fluorescent light fixture in the kitchen is to switch to LED lights. LED lights are a popular choice amongst homeowners for their energy efficiency, longevity, and versatility in design.
LED lights use up to 80% less energy than traditional fluorescent bulbs, making them a more eco-friendly and cost-effective lighting option.
They also have a longer lifespan, lasting up to 25 times longer than traditional bulbs. This means you won't have to replace them as frequently, saving you both time and money.
Moreover, LED lights come in a variety of styles and colors, allowing you to customize the lighting in your kitchen to suit your personal taste and design aesthetic. You can choose from warm or cool tones, dimmable options, and even smart LED lights that can be controlled through your smartphone.
One of the best options for replacing your fluorescent light fixture in the kitchen is to switch to LED lights. LED lights are a popular choice amongst homeowners for their energy efficiency, longevity, and versatility in design.
LED lights use up to 80% less energy than traditional fluorescent bulbs, making them a more eco-friendly and cost-effective lighting option.
They also have a longer lifespan, lasting up to 25 times longer than traditional bulbs. This means you won't have to replace them as frequently, saving you both time and money.
Moreover, LED lights come in a variety of styles and colors, allowing you to customize the lighting in your kitchen to suit your personal taste and design aesthetic. You can choose from warm or cool tones, dimmable options, and even smart LED lights that can be controlled through your smartphone.
The Process of Replacing Your Fluorescent Light Fixture
 Replacing your fluorescent light fixture may seem like a daunting task, but with the right tools and instructions, it can be a simple and straightforward process. The first step is to turn off the power to the fixture and remove the old fixture from the ceiling.
Next, you will need to install the new LED fixture, making sure to follow the manufacturer's instructions carefully. Once the fixture is securely in place, you can turn the power back on and enjoy your new and improved kitchen lighting.
By replacing your fluorescent light fixture with LED lights, you can enhance the look and functionality of your kitchen while also reducing your energy consumption.
So why not make the switch today and enjoy the benefits of modern and eco-friendly kitchen lighting.
Replacing your fluorescent light fixture may seem like a daunting task, but with the right tools and instructions, it can be a simple and straightforward process. The first step is to turn off the power to the fixture and remove the old fixture from the ceiling.
Next, you will need to install the new LED fixture, making sure to follow the manufacturer's instructions carefully. Once the fixture is securely in place, you can turn the power back on and enjoy your new and improved kitchen lighting.
By replacing your fluorescent light fixture with LED lights, you can enhance the look and functionality of your kitchen while also reducing your energy consumption.
So why not make the switch today and enjoy the benefits of modern and eco-friendly kitchen lighting.