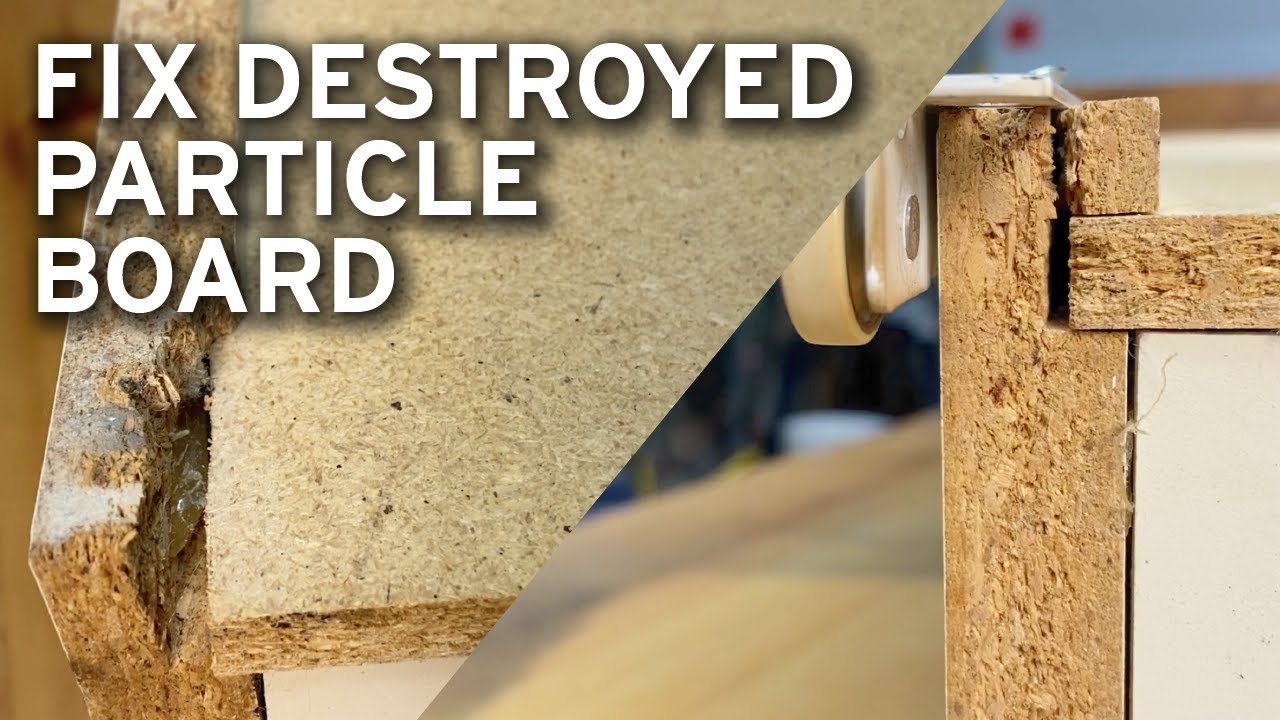
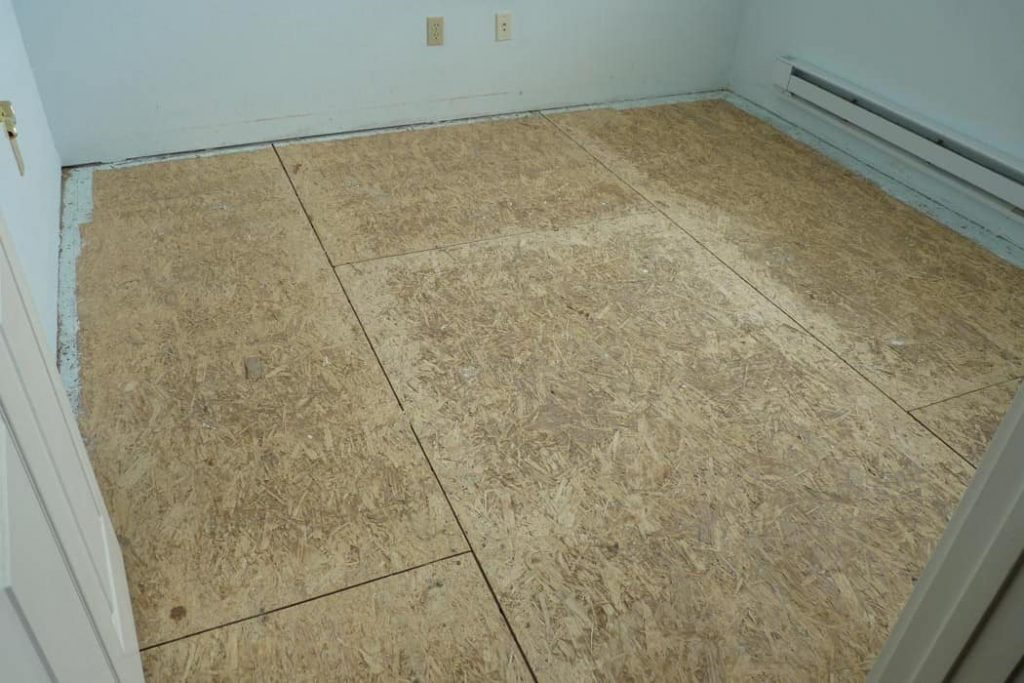
Dealing with a rotten particle board underneath your kitchen sink can seem like a daunting task, but with the right tools and techniques, it can be a simple DIY project. Whether it's due to water damage or simply old age, removing the rotten particle board is crucial for the overall health and safety of your kitchen. Follow these steps for a successful removal process.1. How to Remove Rotten Particle Board from Beneath the Kitchen Sink


1. How to Remove Rotten Particle Board from Beneath the Kitchen Sink
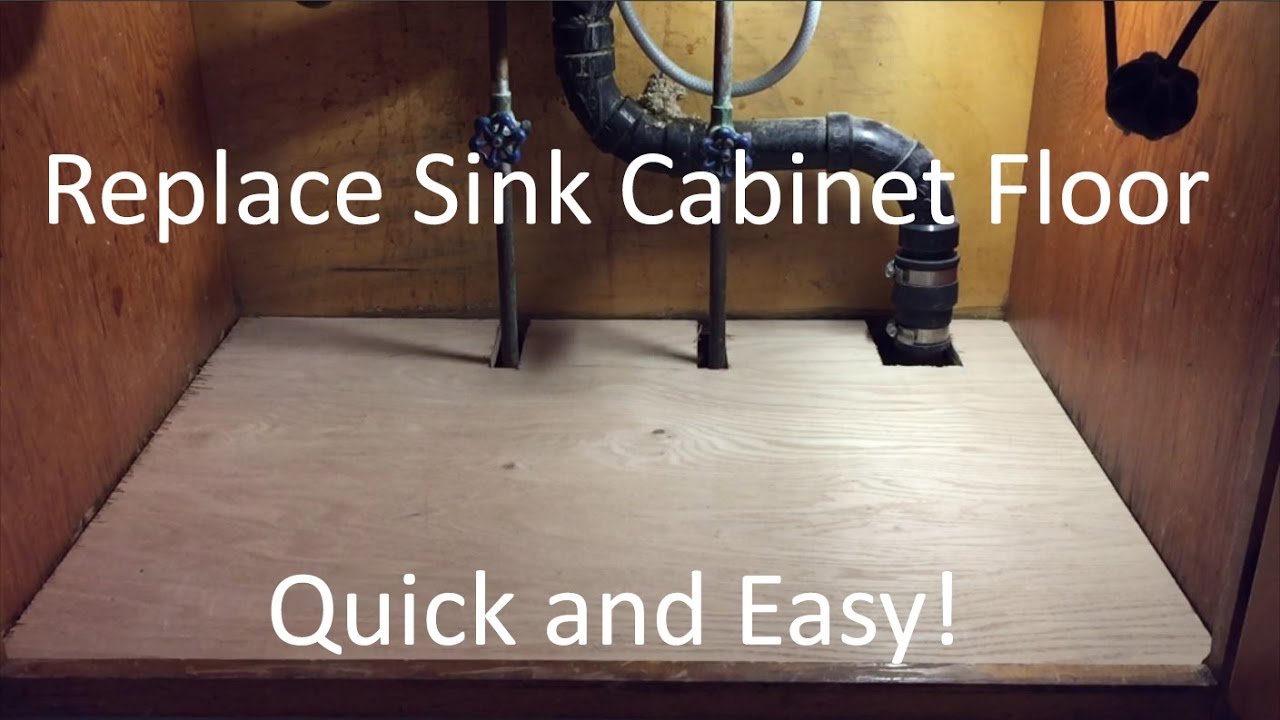


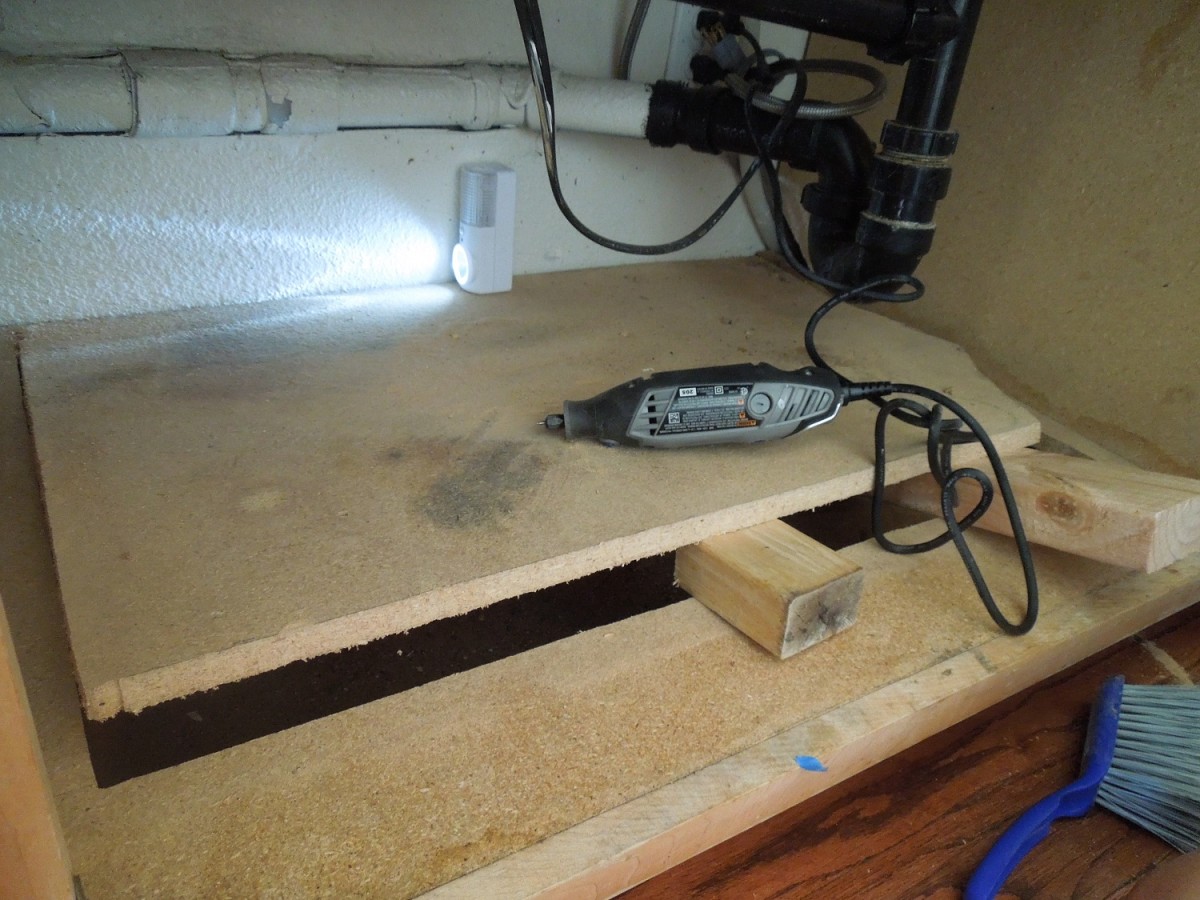
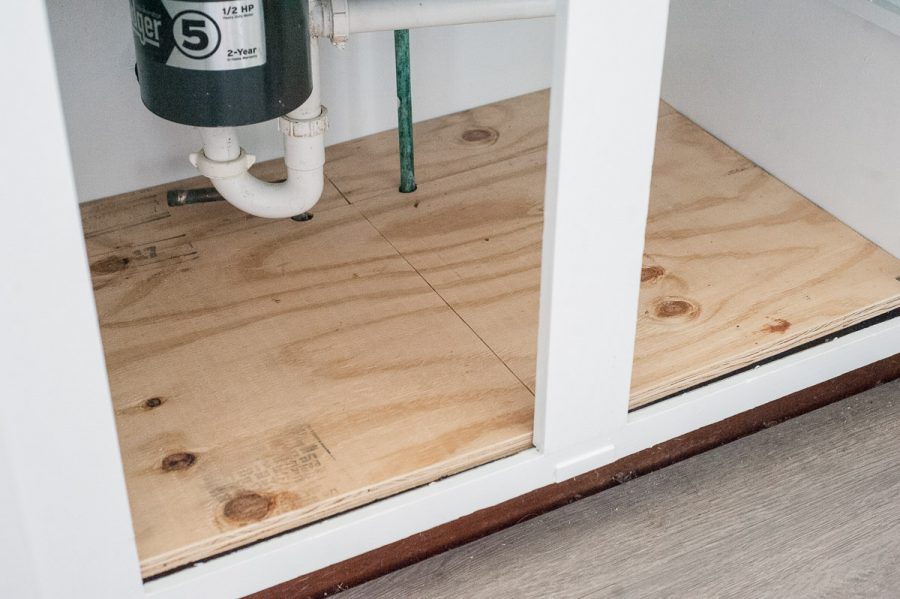
The first step in removing the rotten particle board is to empty out the contents of your kitchen sink cabinet. This will give you more space to work and prevent any items from getting damaged during the removal process. Next, use a utility knife to cut away any caulk or adhesive that may be securing the particle board in place. Once the caulk is removed, you can easily lift the board out of the cabinet. After the board is removed, use a scraper or pry bar to remove any remaining adhesive or caulk from the cabinet floor. This will ensure a clean surface for the replacement board to adhere to. Now, measure the dimensions of the cabinet floor and cut a new piece of particle board to fit. You can purchase pre-cut boards from your local hardware store or cut one yourself using a saw. Once the new board is cut, apply a layer of construction adhesive to the cabinet floor and carefully place the new board on top. Use clamps to secure the board in place while the adhesive dries. Lastly, re-caulk around the edges of the board and allow the adhesive to fully dry before placing any items back in the cabinet.2. Step-by-Step Guide for Removing Rotten Particle Board from Under the Kitchen Sink


2. Step-by-Step Guide for Removing Rotten Particle Board from Under the Kitchen Sink


Removing the rotten particle board from under your kitchen sink is a task that can easily be done by yourself. Not only will it save you money on hiring a professional, but it can also be a satisfying and rewarding project to complete on your own. Just be sure to follow the proper safety precautions and take your time to ensure a successful removal.3. DIY: Removing Rotten Particle Board from Beneath the Kitchen Sink


3. DIY: Removing Rotten Particle Board from Beneath the Kitchen Sink

:max_bytes(150000):strip_icc()/CabinetMakerConstructingCabinets-170616039-56aa60543df78cf772b11b3e.jpg)


While removing the rotten particle board may seem like a simple task, it's important to take certain safety precautions to protect yourself and your kitchen. Wear gloves and a mask to avoid any potential contact with mold or harmful chemicals. Also, be sure to properly dispose of the rotten board to prevent any further damage or contamination.4. Tips for Safely Removing Rotten Particle Board from Under the Kitchen Sink


4. Tips for Safely Removing Rotten Particle Board from Under the Kitchen Sink

Leaving a rotten particle board in place can lead to even bigger issues down the road. Not only can it attract pests and cause unpleasant odors, but it can also compromise the structural integrity of your kitchen cabinet. By removing it promptly, you can prevent any further damage and ensure the safety of your kitchen.5. The Importance of Removing Rotten Particle Board from Beneath the Kitchen Sink

5. The Importance of Removing Rotten Particle Board from Beneath the Kitchen Sink
:max_bytes(150000):strip_icc()/CabinetMakerConstructingCabinets-170616039-56aa60543df78cf772b11b3e.jpg)

Before starting the removal process, it's important to have all the necessary tools on hand. This includes a utility knife, scraper or pry bar, clamps, construction adhesive, and a saw if you need to cut a new board. Having these tools readily available will make the process much smoother and more efficient.6. Tools You'll Need for Removing Rotten Particle Board from Under the Kitchen Sink


6. Tools You'll Need for Removing Rotten Particle Board from Under the Kitchen Sink


To prevent future issues with rotten particle board under your kitchen sink, it's important to address any leaks or water damage as soon as possible. Regularly check for any signs of moisture and fix any issues immediately to avoid costly repairs in the future.7. How to Prevent Rotten Particle Board from Forming Underneath Your Kitchen Sink


7. How to Prevent Rotten Particle Board from Forming Underneath Your Kitchen Sink


One common mistake people make when removing rotten particle board is not properly supporting the cabinet floor while the new board is drying. This can lead to the board shifting and causing unevenness or gaps. Be sure to use clamps to secure the board in place until the adhesive is fully dried.8. Common Mistakes to Avoid When Removing Rotten Particle Board from Beneath the Kitchen Sink


8. Common Mistakes to Avoid When Removing Rotten Particle Board from Beneath the Kitchen Sink


If the damage to the particle board is extensive or if you feel uncomfortable with the removal process, it's best to call a professional for help. They will have the necessary tools and expertise to safely and effectively remove the rotten board and replace it with a new one.9. When to Call a Professional for Removing Rotten Particle Board from Under the Kitchen Sink

9. When to Call a Professional for Removing Rotten Particle Board from Under the Kitchen Sink


Not only will removing the rotten particle board improve the appearance and functionality of your kitchen, but it will also prevent any potential health hazards. By taking the time to remove and replace the damaged board, you are ensuring the longevity and safety of your kitchen space.10. The Benefits of Removing Rotten Particle Board from Beneath the Kitchen Sink


10. The Benefits of Removing Rotten Particle Board from Beneath the Kitchen Sink

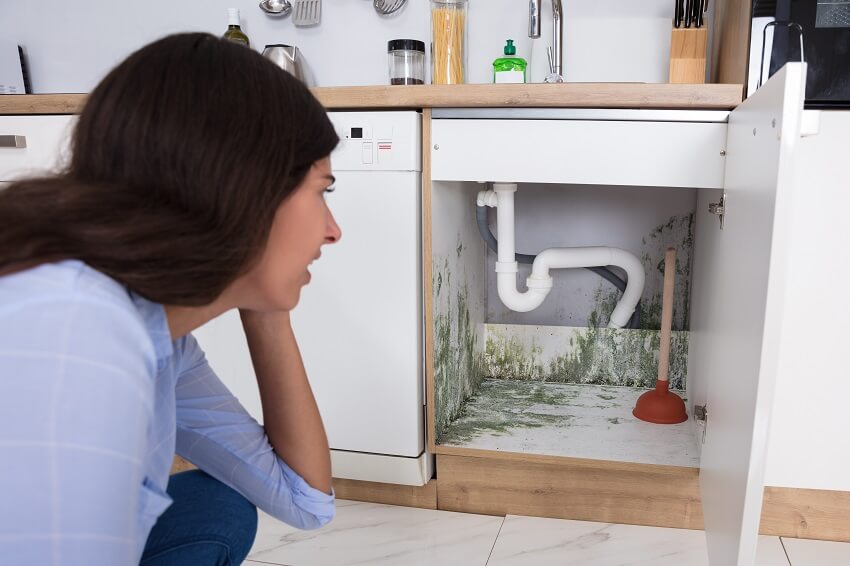
Why Rotten Particle Board Under the Kitchen Sink Should Be Removed
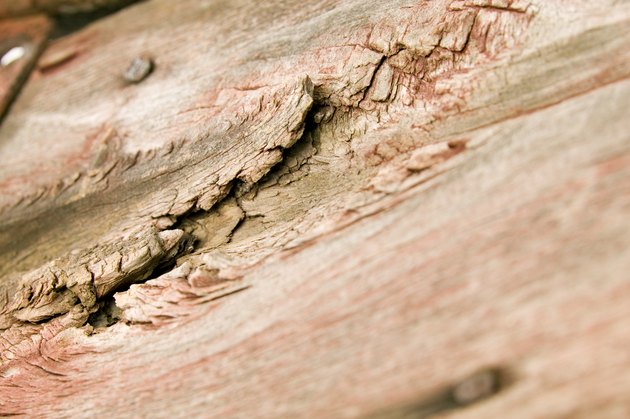
The Dangers of Rotten Particle Board
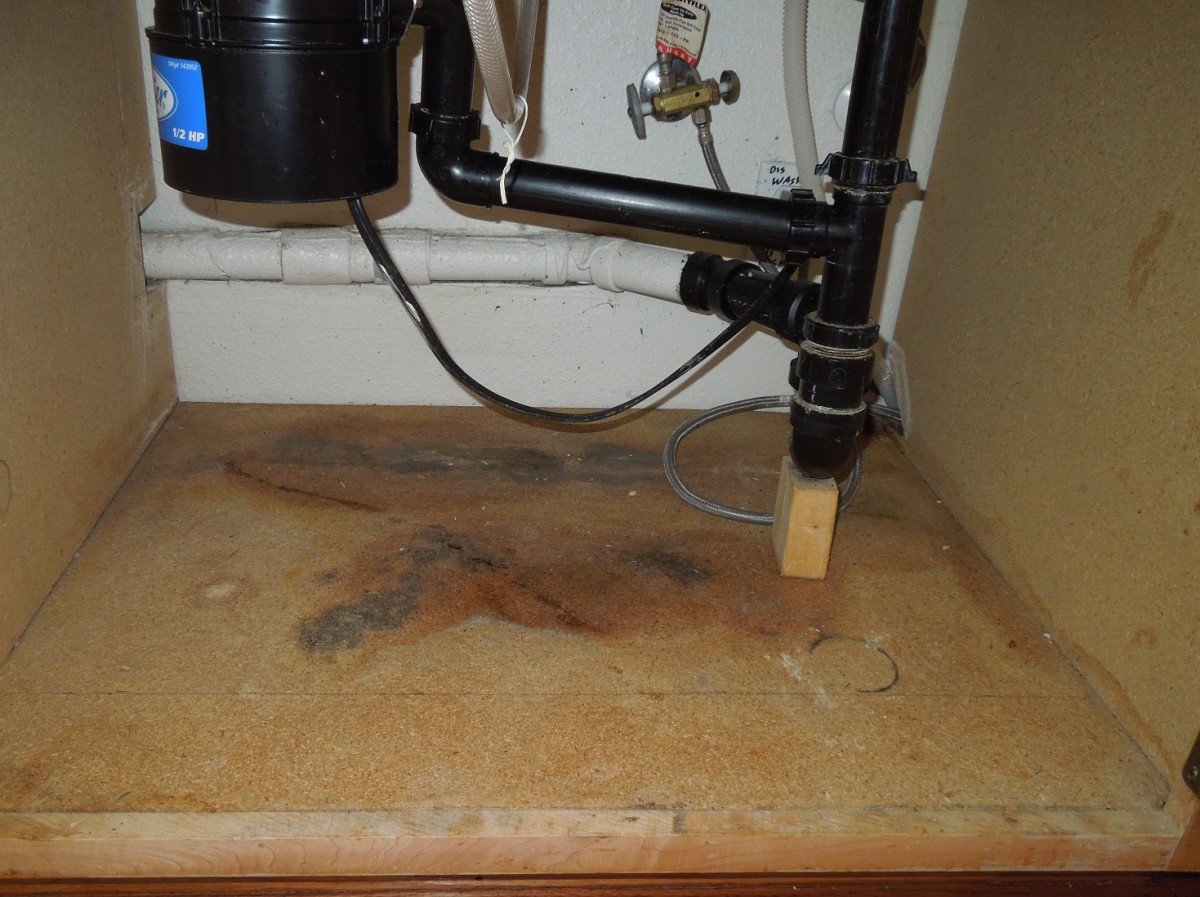
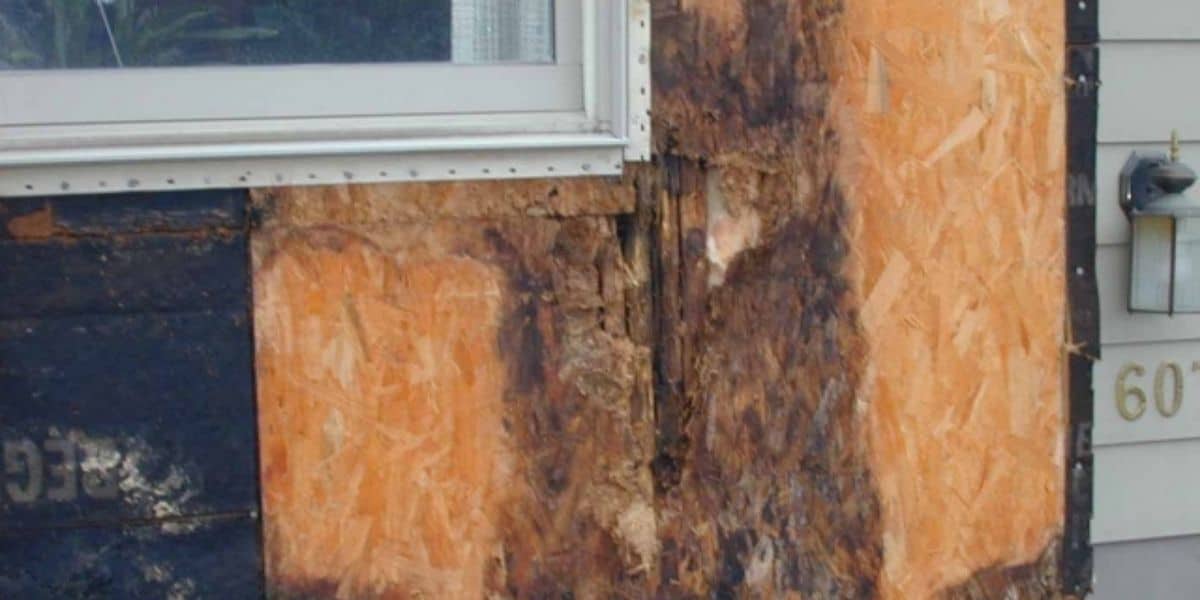
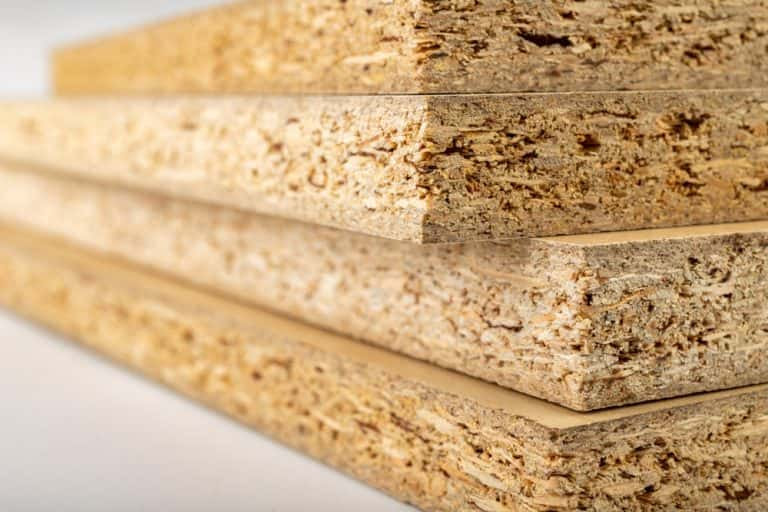
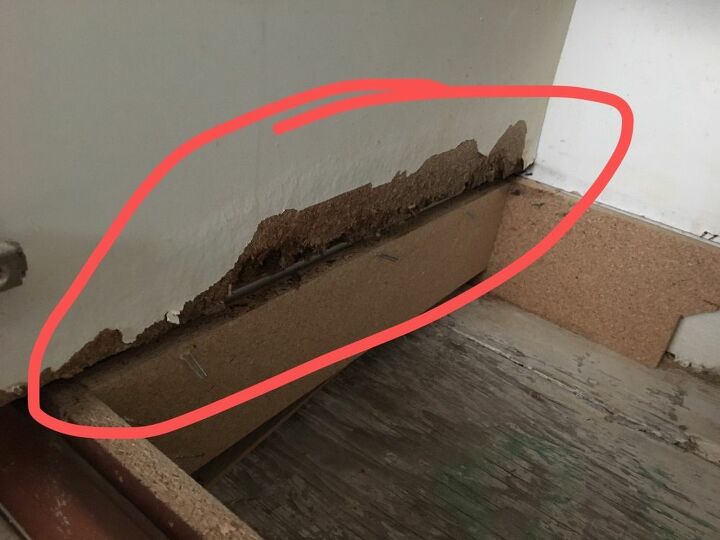
 When it comes to house design, every detail matters. This includes the materials used in your kitchen, specifically the particle board under your kitchen sink. Particle board is a popular choice due to its affordability, but it is also prone to rotting. This is especially true for areas where it is constantly exposed to moisture, such as under the kitchen sink. Rotten particle board can lead to a host of problems, making it important to remove it as soon as possible.
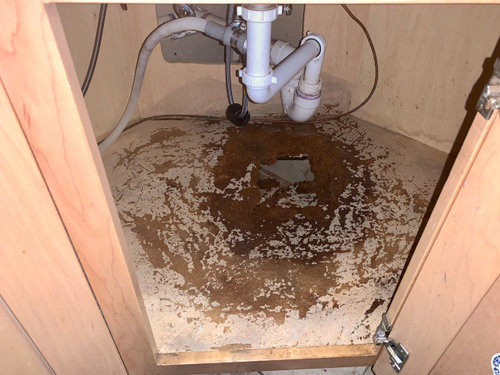
Discoloration and Unpleasant Odors
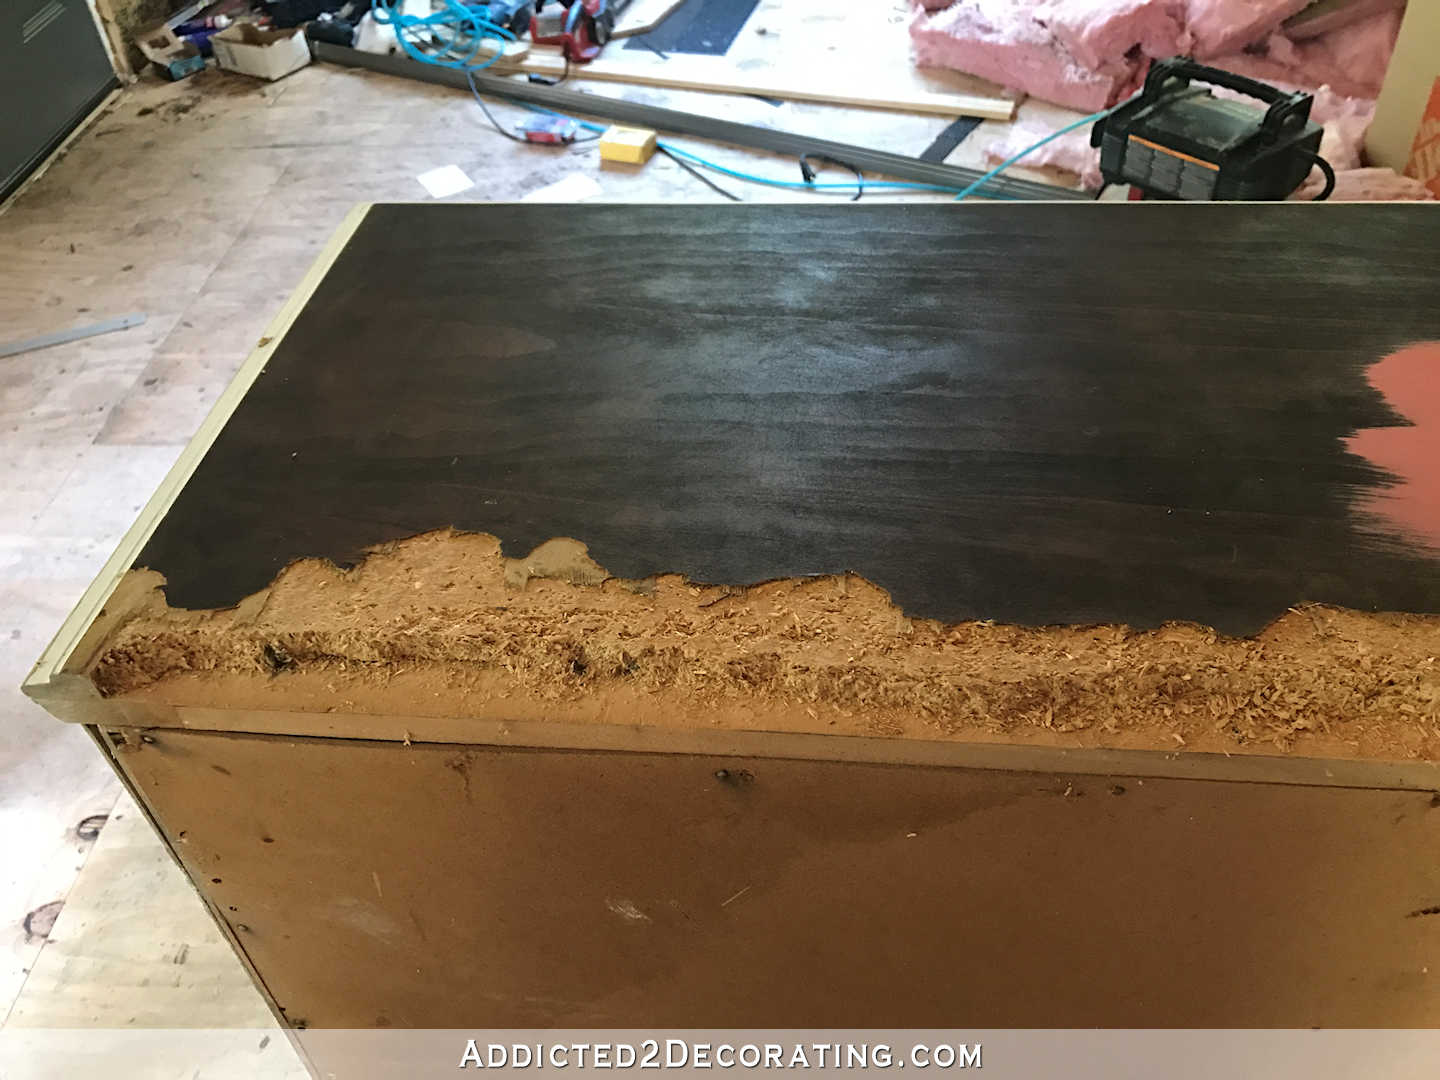
 One of the first signs of a rotting particle board under your kitchen sink is discoloration. As the wood decays, it can turn dark and develop dark spots or streaks. This can be unsightly and can also affect the overall look of your kitchen. Additionally, rotting particle board can emit unpleasant odors, making it difficult to enjoy spending time in your kitchen.
Pest Infestation
 Rotten wood is a magnet for pests like termites, ants, and cockroaches. These pests are not only a nuisance, but they can also cause damage to your home and potentially spread disease. If you notice an increase in pest activity in your kitchen, it could be a sign of rotting particle board. Removing it can help prevent further infestation and keep your kitchen clean and pest-free.
Structural Damage
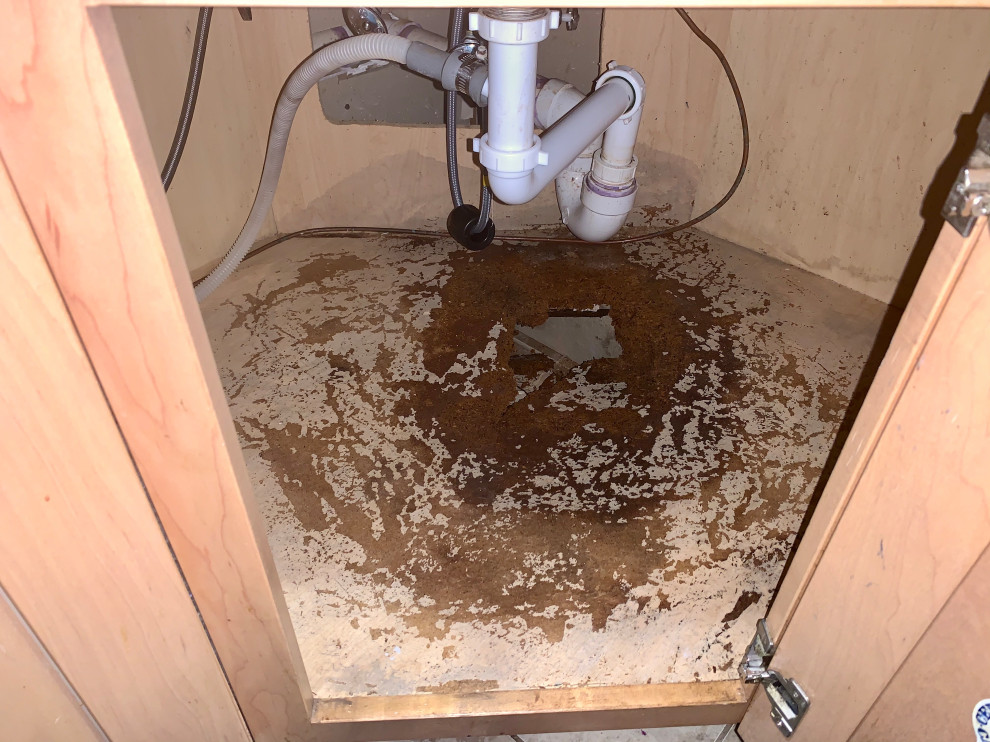
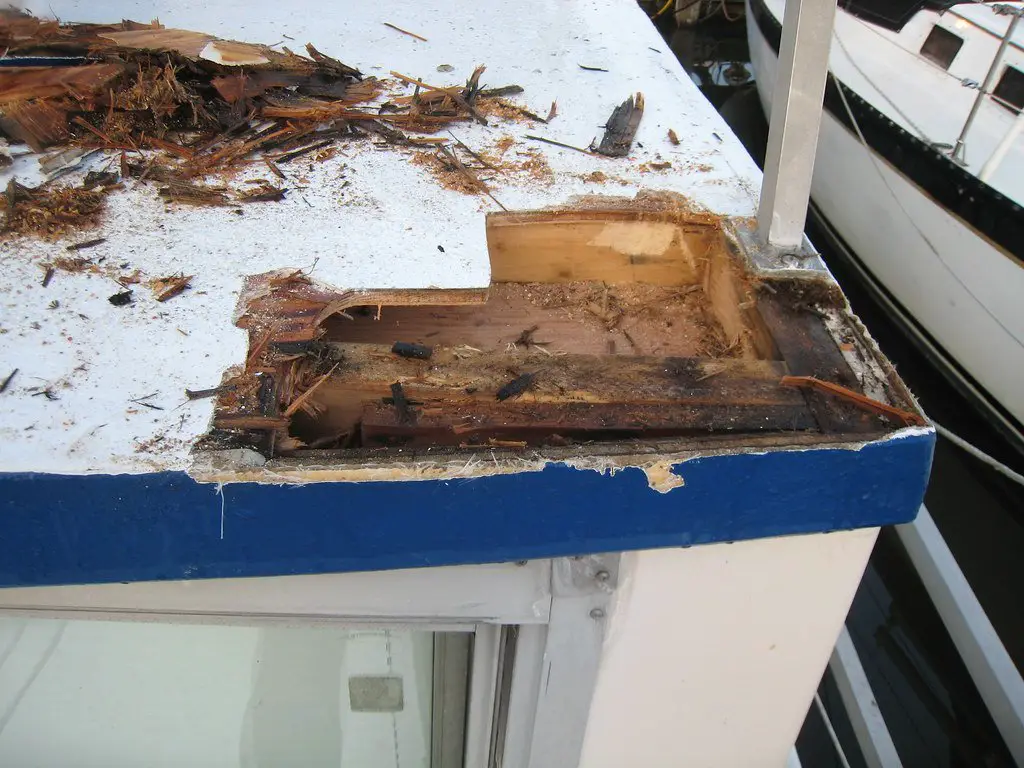
 Aside from aesthetic and pest problems, rotten particle board can also cause structural damage to your kitchen. As it decays, it becomes weaker and can no longer provide proper support for your sink and the cabinets above it. This can lead to sagging or collapsing, creating a safety hazard in your kitchen. By removing the rotten particle board, you can prevent potential accidents and keep your kitchen structurally sound.
Preventing Further Damage
 Removing the rotten particle board from under your kitchen sink is not only necessary for safety and aesthetic reasons, but it can also prevent further damage. Moisture from leaks or spills can easily seep into the wood and cause it to rot, which can spread to other areas of your kitchen. By removing the rotten particle board and replacing it with a more durable material, you can prevent future issues and potentially save money on costly repairs.
In Conclusion
, the particle board under your kitchen sink may seem like a small and insignificant detail in your house design, but it can have a big impact on the overall functionality and safety of your kitchen. If you notice signs of rotting, it is important to take action and remove it as soon as possible. By doing so, you can prevent further damage and ensure that your kitchen remains a beautiful and functional space in your home.
Removing the rotten particle board from under your kitchen sink is not only necessary for safety and aesthetic reasons, but it can also prevent further damage. Moisture from leaks or spills can easily seep into the wood and cause it to rot, which can spread to other areas of your kitchen. By removing the rotten particle board and replacing it with a more durable material, you can prevent future issues and potentially save money on costly repairs.
In Conclusion
, the particle board under your kitchen sink may seem like a small and insignificant detail in your house design, but it can have a big impact on the overall functionality and safety of your kitchen. If you notice signs of rotting, it is important to take action and remove it as soon as possible. By doing so, you can prevent further damage and ensure that your kitchen remains a beautiful and functional space in your home.