Removing kitchen sink sealant may seem like a daunting task, but with the right tools and techniques, it can be done easily and efficiently. Whether you're looking to replace your old sealant or simply want to clean up the area around your sink, our step-by-step guide will help you get the job done in no time.How to Remove Kitchen Sink Sealant


How to Remove Kitchen Sink Sealant


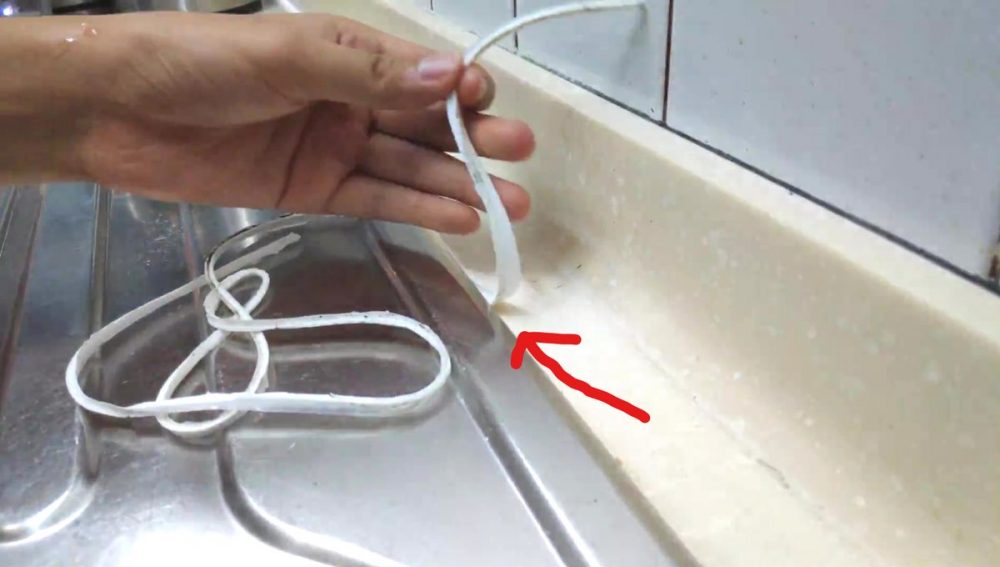
Step 1: Gather your tools Before you begin, make sure you have all the necessary tools on hand. These may include a putty knife, utility knife, caulk remover, and a plastic scraper. You may also need a hairdryer or heat gun if the sealant is particularly stubborn. Step 2: Soften the sealant If the sealant is old and hard, you may need to soften it before attempting to remove it. Use a hairdryer or heat gun on a low setting to gently heat up the sealant. This will make it easier to scrape away later on. Step 3: Scrape away the sealant Using a putty knife or utility knife, carefully scrape away the sealant from the edges of your sink. Be sure to work slowly and steadily to avoid damaging the surrounding surfaces. If you encounter any stubborn spots, use a plastic scraper to gently pry them loose. Step 4: Use a caulk remover If there are still small bits of sealant left after scraping, you can use a caulk remover to dissolve them. Simply apply the remover to the affected areas and let it sit for a few minutes before wiping it away with a clean cloth. Step 5: Clean the area Once all the sealant has been removed, clean the area with warm soapy water and a scrub brush. This will help to remove any remaining residue and leave your sink looking clean and fresh.Removing Kitchen Sink Sealant: A Step-by-Step Guide


Removing Kitchen Sink Sealant: A Step-by-Step Guide


If you're looking to save some money and do the job yourself, removing kitchen sink sealant can be a great DIY project. Just follow the steps outlined above and take your time to ensure a thorough and successful removal.DIY: Removing Kitchen Sink Sealant


DIY: Removing Kitchen Sink Sealant

Here are a few tips and tricks to keep in mind when removing kitchen sink sealant: - Always work slowly and carefully to avoid damaging your sink or countertops. - Use a plastic scraper to gently pry away stubborn sealant without causing any scratches or dents. - If using a caulk remover, be sure to follow the instructions on the label and wear gloves to protect your hands. - For particularly stubborn sealant, you can try using a razor blade to carefully scrape it away.Removing Kitchen Sink Sealant: Tips and Tricks


Removing Kitchen Sink Sealant: Tips and Tricks

Here are some common mistakes to avoid when removing kitchen sink sealant: - Using a sharp tool to scrape away the sealant can cause damage to your sink or surrounding surfaces. - Not wearing gloves when using a caulk remover can lead to skin irritation. - Rushing the process can result in an incomplete removal, leaving behind bits of old sealant.Removing Kitchen Sink Sealant: Common Mistakes to Avoid


Removing Kitchen Sink Sealant: Common Mistakes to Avoid


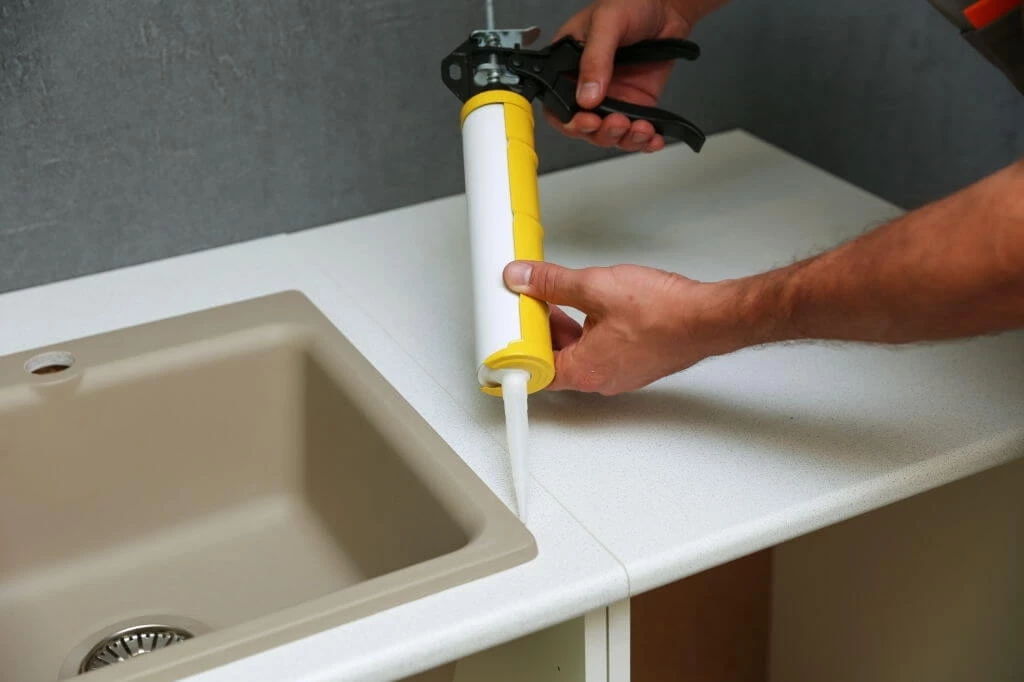
Here are the essential tools you'll need to remove kitchen sink sealant: - Putty knife or utility knife - Plastic scraper - Caulk remover - Hairdryer or heat gun - Warm soapy water and scrub brushRemoving Kitchen Sink Sealant: Tools You'll Need


Removing Kitchen Sink Sealant: Tools You'll Need

When removing kitchen sink sealant, it's important to take some safety precautions: - Wear gloves to protect your hands from any chemicals or sharp tools. - Use caution when using a heat gun or hairdryer to soften the sealant. Be sure to keep the heat on a low setting to avoid damaging your sink or countertops. - Work in a well-ventilated area to avoid inhaling any fumes from the caulk remover.Removing Kitchen Sink Sealant: Safety Precautions

Removing Kitchen Sink Sealant: Safety Precautions

If you're having trouble removing the sealant using traditional methods, there are a few alternative techniques you can try: - Use a specialized caulk removal tool, which is designed specifically for removing old sealant. - Try using a chemical solvent, such as acetone or mineral spirits, to dissolve the sealant. - If all else fails, you can hire a professional to remove the sealant for you.Removing Kitchen Sink Sealant: Alternative Methods


Removing Kitchen Sink Sealant: Alternative Methods

If you encounter any issues while removing kitchen sink sealant, here are a few troubleshooting tips: - If the sealant is not coming off easily, try using a hairdryer or heat gun to soften it further. - If you accidentally damage your sink or countertops while removing the sealant, you can use a repair kit to fix any scratches or dents.Removing Kitchen Sink Sealant: Troubleshooting

Removing Kitchen Sink Sealant: Troubleshooting


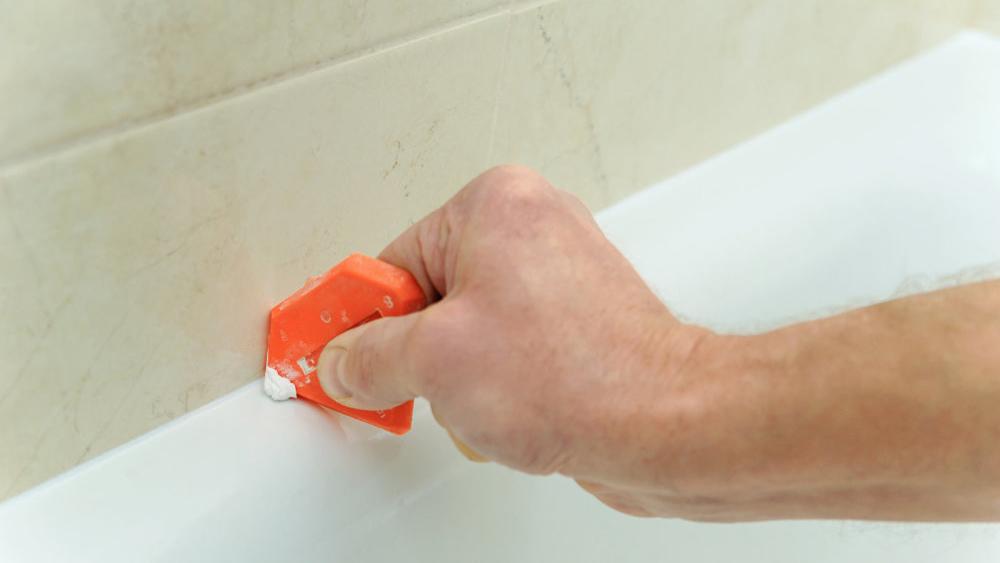
Once you have successfully removed the sealant, be sure to clean the area thoroughly with warm soapy water and a scrub brush. You can also use a disinfectant cleaner to ensure the area is sanitized. Before applying new sealant, be sure to let the area dry completely. In conclusion, removing kitchen sink sealant may seem like a daunting task, but with the right tools and techniques, it can be done easily and efficiently. By following our step-by-step guide and taking the necessary safety precautions, you can achieve a clean and professional-looking result without having to hire a professional. Remember to take your time and work carefully to avoid any mistakes or damage. Good luck!Removing Kitchen Sink Sealant: Final Steps and Clean Up
Removing Kitchen Sink Sealant: Final Steps and Clean Up


Why Sealant Removal is Important for Your Kitchen Design
The Importance of a Clean and Well-Maintained Kitchen
 A kitchen is often considered the heart of a home, where meals are prepared, memories are made, and families gather. As such, it is essential to keep this space clean and well-maintained to ensure a healthy and comfortable living environment. One crucial aspect of kitchen maintenance is the
removal of kitchen sink sealant
. Over time, sealant can become worn and cracked, leading to potential leaks and damage in your kitchen. Not only does this affect the aesthetics of your kitchen, but it can also cause more significant issues such as water damage and mold growth. Therefore, it is crucial to regularly check and replace the sealant to maintain the functionality and design of your kitchen.
A kitchen is often considered the heart of a home, where meals are prepared, memories are made, and families gather. As such, it is essential to keep this space clean and well-maintained to ensure a healthy and comfortable living environment. One crucial aspect of kitchen maintenance is the
removal of kitchen sink sealant
. Over time, sealant can become worn and cracked, leading to potential leaks and damage in your kitchen. Not only does this affect the aesthetics of your kitchen, but it can also cause more significant issues such as water damage and mold growth. Therefore, it is crucial to regularly check and replace the sealant to maintain the functionality and design of your kitchen.
The Process of Removing Kitchen Sink Sealant
 The process of removing kitchen sink sealant may seem daunting, but with the right tools and techniques, it can be a straightforward task. The first step is to identify the type of sealant used in your kitchen. There are various types, such as silicone, latex, and acrylic, and each requires a slightly different removal method. Once you have identified the type of sealant, you can begin by using a utility knife or razor blade to carefully scrape away the old sealant.
It is essential to be gentle and avoid damaging the surrounding surfaces.
Next, use a sealant remover or a mixture of warm water and dish soap to soften and loosen any remaining sealant. Finally, thoroughly clean the area and allow it to dry before applying a new layer of sealant.
The process of removing kitchen sink sealant may seem daunting, but with the right tools and techniques, it can be a straightforward task. The first step is to identify the type of sealant used in your kitchen. There are various types, such as silicone, latex, and acrylic, and each requires a slightly different removal method. Once you have identified the type of sealant, you can begin by using a utility knife or razor blade to carefully scrape away the old sealant.
It is essential to be gentle and avoid damaging the surrounding surfaces.
Next, use a sealant remover or a mixture of warm water and dish soap to soften and loosen any remaining sealant. Finally, thoroughly clean the area and allow it to dry before applying a new layer of sealant.
The Benefits of Removing Old Sealant
 Aside from preventing potential damage and maintaining the overall design of your kitchen, there are several other benefits to removing old sealant.
Firstly, it allows for a better seal and more efficient use of your sink.
Over time, sealant can become discolored and worn, affecting its ability to create a watertight seal. By removing old sealant and replacing it, you can ensure a more efficient and leak-free sink. Additionally,
it provides an opportunity to update the design of your kitchen.
With the wide variety of sealant colors and finishes available, you can use this as an opportunity to freshen up the look of your sink and add a personal touch to your kitchen design.
In conclusion, removing kitchen sink sealant is an essential aspect of kitchen maintenance that should not be overlooked. By regularly checking and replacing old sealant, you can prevent potential damage, maintain the functionality and design of your kitchen, and even give it a fresh new look. With the right tools and techniques, this task can be easily accomplished, ensuring a clean and well-maintained kitchen for you and your family to enjoy.
Aside from preventing potential damage and maintaining the overall design of your kitchen, there are several other benefits to removing old sealant.
Firstly, it allows for a better seal and more efficient use of your sink.
Over time, sealant can become discolored and worn, affecting its ability to create a watertight seal. By removing old sealant and replacing it, you can ensure a more efficient and leak-free sink. Additionally,
it provides an opportunity to update the design of your kitchen.
With the wide variety of sealant colors and finishes available, you can use this as an opportunity to freshen up the look of your sink and add a personal touch to your kitchen design.
In conclusion, removing kitchen sink sealant is an essential aspect of kitchen maintenance that should not be overlooked. By regularly checking and replacing old sealant, you can prevent potential damage, maintain the functionality and design of your kitchen, and even give it a fresh new look. With the right tools and techniques, this task can be easily accomplished, ensuring a clean and well-maintained kitchen for you and your family to enjoy.