Is the caulk around your kitchen sink looking old and worn out? Are you tired of seeing mold and mildew build-up in the corners? It's time to remove that old caulk and give your sink a fresh new look. Here are 10 easy steps to help you remove kitchen sink caulk like a pro.Removing Kitchen Sink Caulk: 10 Easy Steps


Removing Kitchen Sink Caulk: 10 Easy Steps


Removing caulk can be a tricky task, especially when you're trying to avoid damaging your countertop. But don't worry, with the right tools and techniques, you can remove the caulk without any scratches or dents. Follow these steps for a safe and damage-free caulk removal process.How to Remove Kitchen Sink Caulk Without Damaging Your Countertop


How to Remove Kitchen Sink Caulk Without Damaging Your Countertop


There are various products available in the market specifically designed for removing caulk. But not all are created equal. To ensure you get the best results, look for products that contain citrus-based solvents or those specially formulated for kitchen and bathroom caulk. These products are gentle on surfaces and effectively break down the caulk for easy removal.Best Products for Removing Kitchen Sink Caulk


Best Products for Removing Kitchen Sink Caulk


Removing caulk can be a messy and time-consuming process. To make it easier, here are some tips and tricks you can use:Removing Kitchen Sink Caulk: Tips and Tricks


Removing Kitchen Sink Caulk: Tips and Tricks


Now that you have all the necessary tools and tips, let's get to the step-by-step guide for removing kitchen sink caulk.Step-by-Step Guide to Removing Kitchen Sink Caulk


Step-by-Step Guide to Removing Kitchen Sink Caulk


While removing caulk may seem like a simple task, there are some common mistakes that people make which can lead to a messy and unsatisfactory result. Here are a few mistakes you should avoid:Removing Kitchen Sink Caulk: Common Mistakes to Avoid

Removing Kitchen Sink Caulk: Common Mistakes to Avoid


Some caulk can be more stubborn to remove than others. If you're having trouble removing the caulk, try these methods:How to Remove Stubborn Kitchen Sink Caulk


How to Remove Stubborn Kitchen Sink Caulk


Removing kitchen sink caulk can be a time-consuming and messy task. If you're not confident in your DIY skills, it may be best to hire a professional to do the job. However, if you're up for the challenge, doing it yourself can save you some money. Just make sure to follow the proper safety precautions and take your time to avoid any mistakes.Removing Kitchen Sink Caulk: DIY vs Hiring a Professional


Removing Kitchen Sink Caulk: DIY vs Hiring a Professional

If you're conscious about the environment and want to avoid using harsh chemicals, there are some eco-friendly methods you can try to remove caulk:Eco-Friendly Methods for Removing Kitchen Sink Caulk

Eco-Friendly Methods for Removing Kitchen Sink Caulk
When working with caulk, it's important to take safety precautions to protect yourself and your surroundings. Here are some safety measures you should take:Removing Kitchen Sink Caulk: Safety Precautions to Take


Removing Kitchen Sink Caulk: Safety Precautions to Take
:max_bytes(150000):strip_icc()/caulk-removal-tool-56ec7f1b3df78ce5f83535fe.jpg)


Why Removing Kitchen Sink Caulk is Essential for a Clean and Functional Kitchen

The Importance of Properly Removing Kitchen Sink Caulk
Tools and Materials Needed for Removing Kitchen Sink Caulk
 Before diving into the process of removing caulk, it is important to gather all the necessary tools and materials. These may include a caulk removal tool, a utility knife, a putty knife, a scraper, a heat gun or hairdryer, a cleaning solution, and a caulk gun. Having these items on hand will make the caulk removal process much smoother and more efficient.
Step-by-Step Guide to Removing Kitchen Sink Caulk
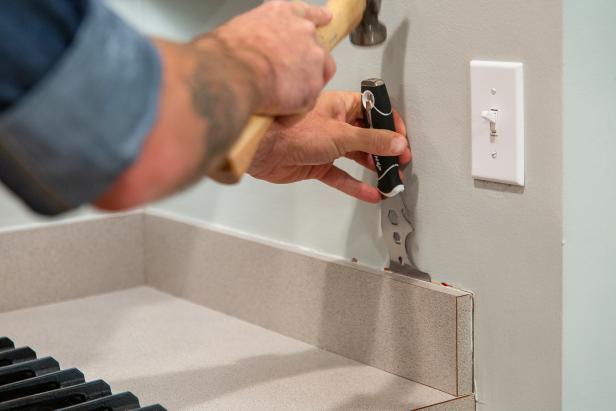
/caulk-removal-tool-56ec7f1b3df78ce5f83535fe.jpg) 1. Start by using a caulk removal tool or utility knife to score along the edges of the caulk. This will help loosen and lift the caulk from the surface.
2. Next, use a putty knife or scraper to gently pry and scrape away the old caulk. Be careful not to damage the surface underneath.
3. If the caulk is particularly stubborn, you can use a heat gun or hairdryer on a low setting to soften it and make it easier to remove.
4. Once all the old caulk has been removed, use a cleaning solution to thoroughly clean the area. This will help remove any remaining residue and prepare the surface for new caulk.
5. When the surface is completely dry, use a caulk gun to apply a new bead of caulk. Be sure to smooth it out with your finger or a caulk smoothing tool for a clean and professional finish.
1. Start by using a caulk removal tool or utility knife to score along the edges of the caulk. This will help loosen and lift the caulk from the surface.
2. Next, use a putty knife or scraper to gently pry and scrape away the old caulk. Be careful not to damage the surface underneath.
3. If the caulk is particularly stubborn, you can use a heat gun or hairdryer on a low setting to soften it and make it easier to remove.
4. Once all the old caulk has been removed, use a cleaning solution to thoroughly clean the area. This will help remove any remaining residue and prepare the surface for new caulk.
5. When the surface is completely dry, use a caulk gun to apply a new bead of caulk. Be sure to smooth it out with your finger or a caulk smoothing tool for a clean and professional finish.
Benefits of Removing Kitchen Sink Caulk
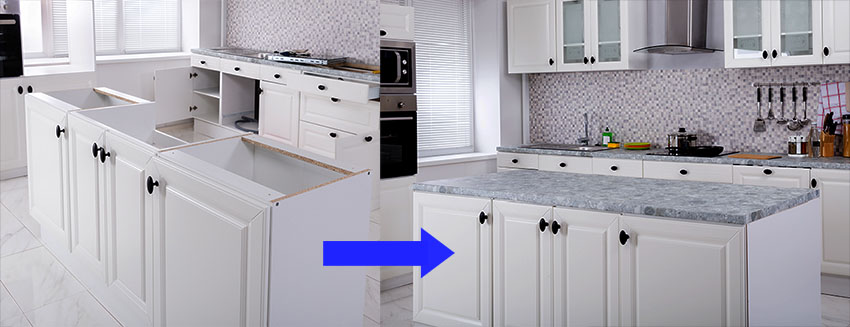
 Removing old caulk and replacing it with new caulk has several benefits. Firstly, it improves the overall appearance of your kitchen by eliminating unsightly discoloration, cracks, and mold. Additionally, it helps prevent potential health hazards by getting rid of bacteria and germs that may have accumulated in the old caulk. Lastly, proper caulk removal and replacement can also help prevent water damage and leaks, ensuring the longevity of your kitchen sink and countertop.
In conclusion, removing kitchen sink caulk is an essential task for maintaining a clean and functional kitchen. By following the step-by-step guide and having the necessary tools and materials, you can easily remove old caulk and replace it with new, improving the overall appearance and health of your kitchen. So don't wait any longer, give your kitchen the care it deserves by properly removing and replacing kitchen sink caulk.
Removing old caulk and replacing it with new caulk has several benefits. Firstly, it improves the overall appearance of your kitchen by eliminating unsightly discoloration, cracks, and mold. Additionally, it helps prevent potential health hazards by getting rid of bacteria and germs that may have accumulated in the old caulk. Lastly, proper caulk removal and replacement can also help prevent water damage and leaks, ensuring the longevity of your kitchen sink and countertop.
In conclusion, removing kitchen sink caulk is an essential task for maintaining a clean and functional kitchen. By following the step-by-step guide and having the necessary tools and materials, you can easily remove old caulk and replace it with new, improving the overall appearance and health of your kitchen. So don't wait any longer, give your kitchen the care it deserves by properly removing and replacing kitchen sink caulk.