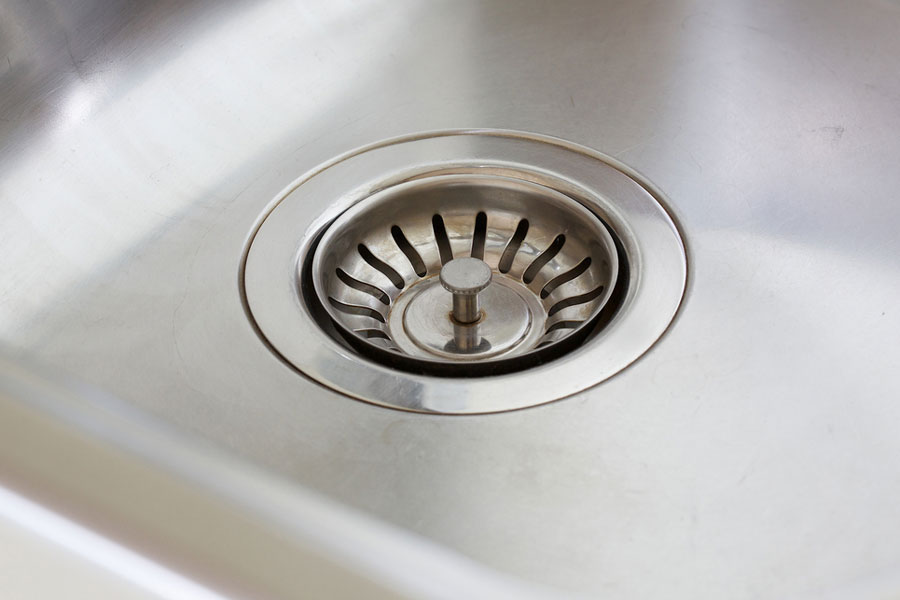
Removing a kitchen sink strainer may seem like a daunting task, but it is actually a simple process that can be done in just a few steps. Whether you need to replace a damaged strainer or just want to clean it, we’ve got you covered with this guide on how to remove a kitchen sink strainer. Kitchen sink strainer refers to the metal or plastic piece that sits in the drain of your kitchen sink, preventing large food particles and debris from clogging your pipes. Over time, these strainers can become rusted, clogged, or simply need to be replaced. No matter the reason, here’s how you can remove a kitchen sink strainer in no time.How to Remove a Kitchen Sink Strainer


How to Remove a Kitchen Sink Strainer


If your kitchen sink strainer is damaged beyond repair or if you just want to upgrade to a newer model, you’ll need to know how to replace it. Luckily, the process is almost identical to removing a strainer, with just a few extra steps involved. The first step is to purchase a new kitchen sink strainer that is the same size and shape as your current one. Once you have the new strainer, you can begin the replacement process. Replacing a kitchen sink strainer involves removing the old strainer, cleaning the area, and installing the new strainer. You can follow the steps outlined in this guide for removing a strainer, and then proceed to install the new one.How to Replace a Kitchen Sink Strainer


How to Replace a Kitchen Sink Strainer


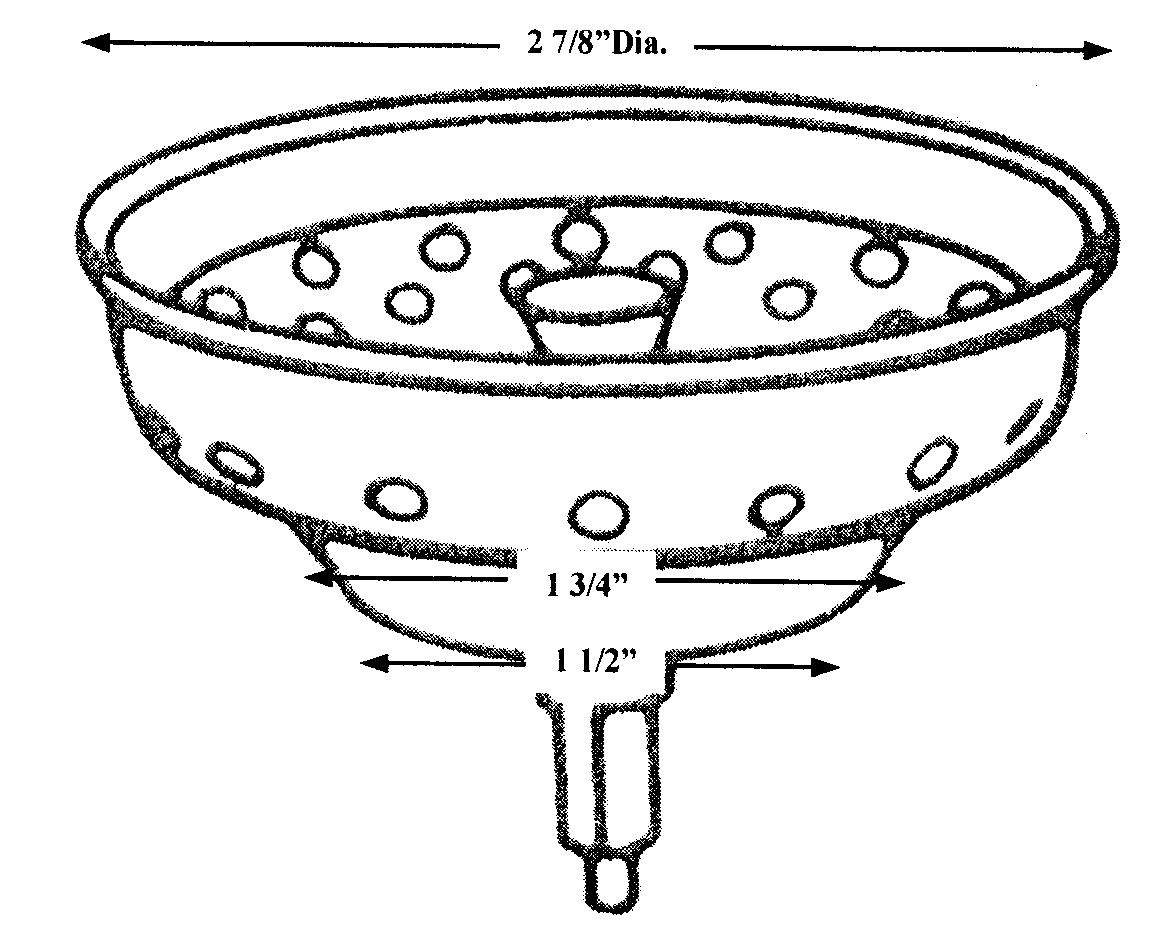
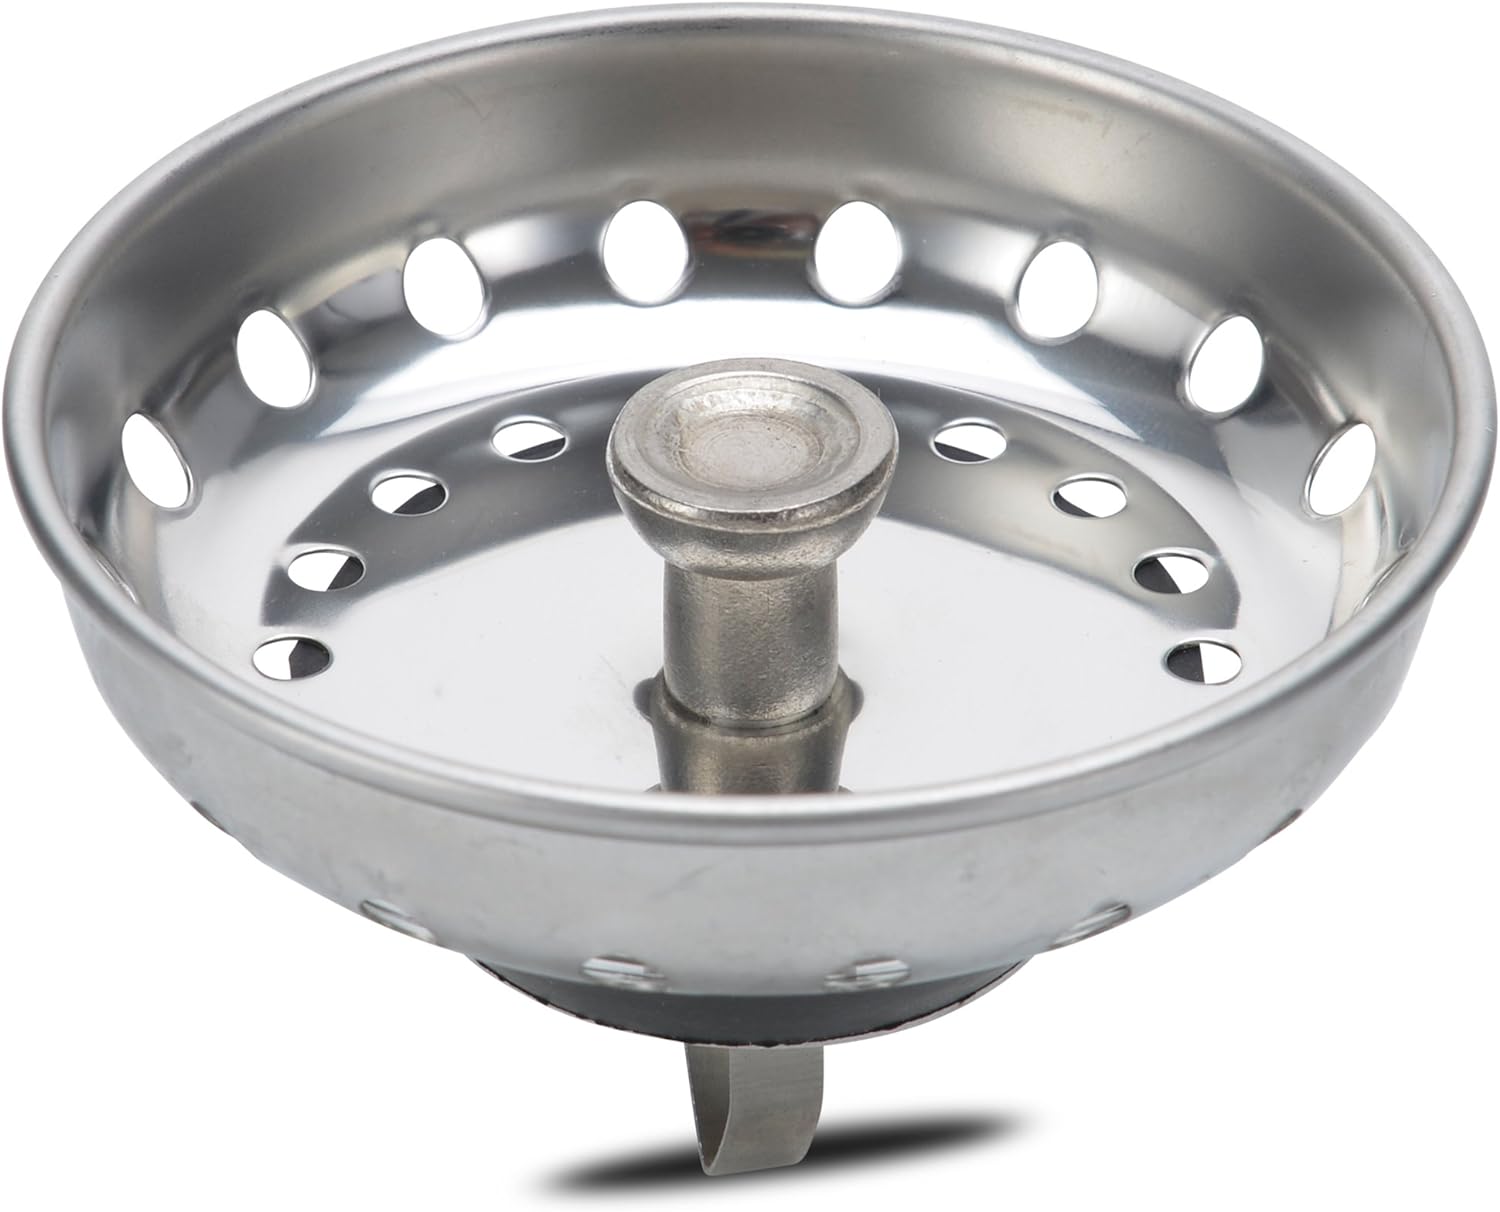
Some kitchen sink strainers have a removable basket that sits inside the strainer and catches food particles. This basket can become clogged or damaged over time and may need to be removed for cleaning or replacement. If you need to remove the kitchen sink strainer basket, you can follow the same steps as outlined in this guide for removing the entire strainer. Once the strainer is removed, you can easily take out the basket and clean or replace it as needed.Removing a Kitchen Sink Strainer Basket


Removing a Kitchen Sink Strainer Basket


If your kitchen sink strainer basket is damaged or no longer functioning properly, you’ll need to replace it. This process is similar to replacing the entire strainer, but with a few extra steps involved. The first step is to purchase a new strainer basket that is the same size and style as your current one. Once you have the new basket, you can follow the steps outlined in this guide for removing the entire strainer and then proceed to install the new basket.Replacing a Kitchen Sink Strainer Basket


Replacing a Kitchen Sink Strainer Basket


In some cases, you may need to both remove and replace a kitchen sink strainer. This could be due to a damaged strainer or a clogged basket that needs to be replaced. Whatever the reason, the process for removing and replacing a strainer is essentially the same as outlined in this guide. The only difference is that instead of simply removing the strainer, you’ll also need to install a new one. Just make sure to purchase a strainer that is the same size and shape as your current one to ensure a proper fit.Removing and Replacing a Kitchen Sink Strainer

Removing and Replacing a Kitchen Sink Strainer


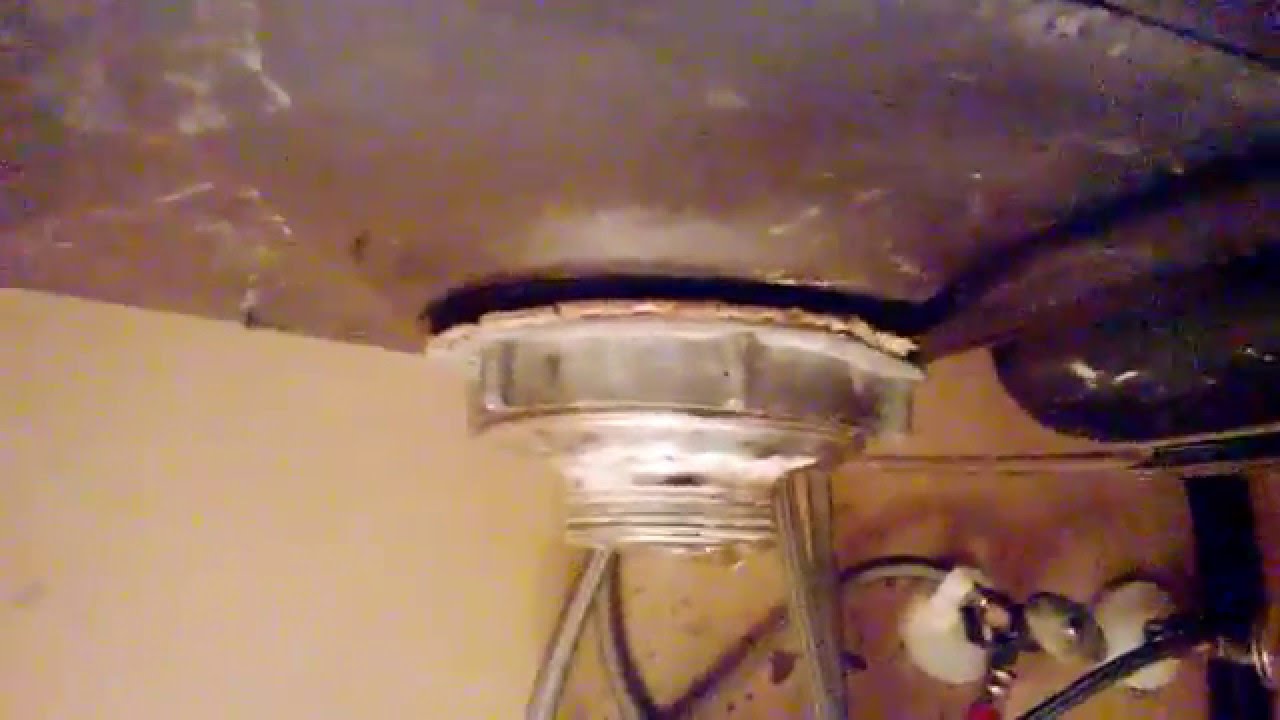
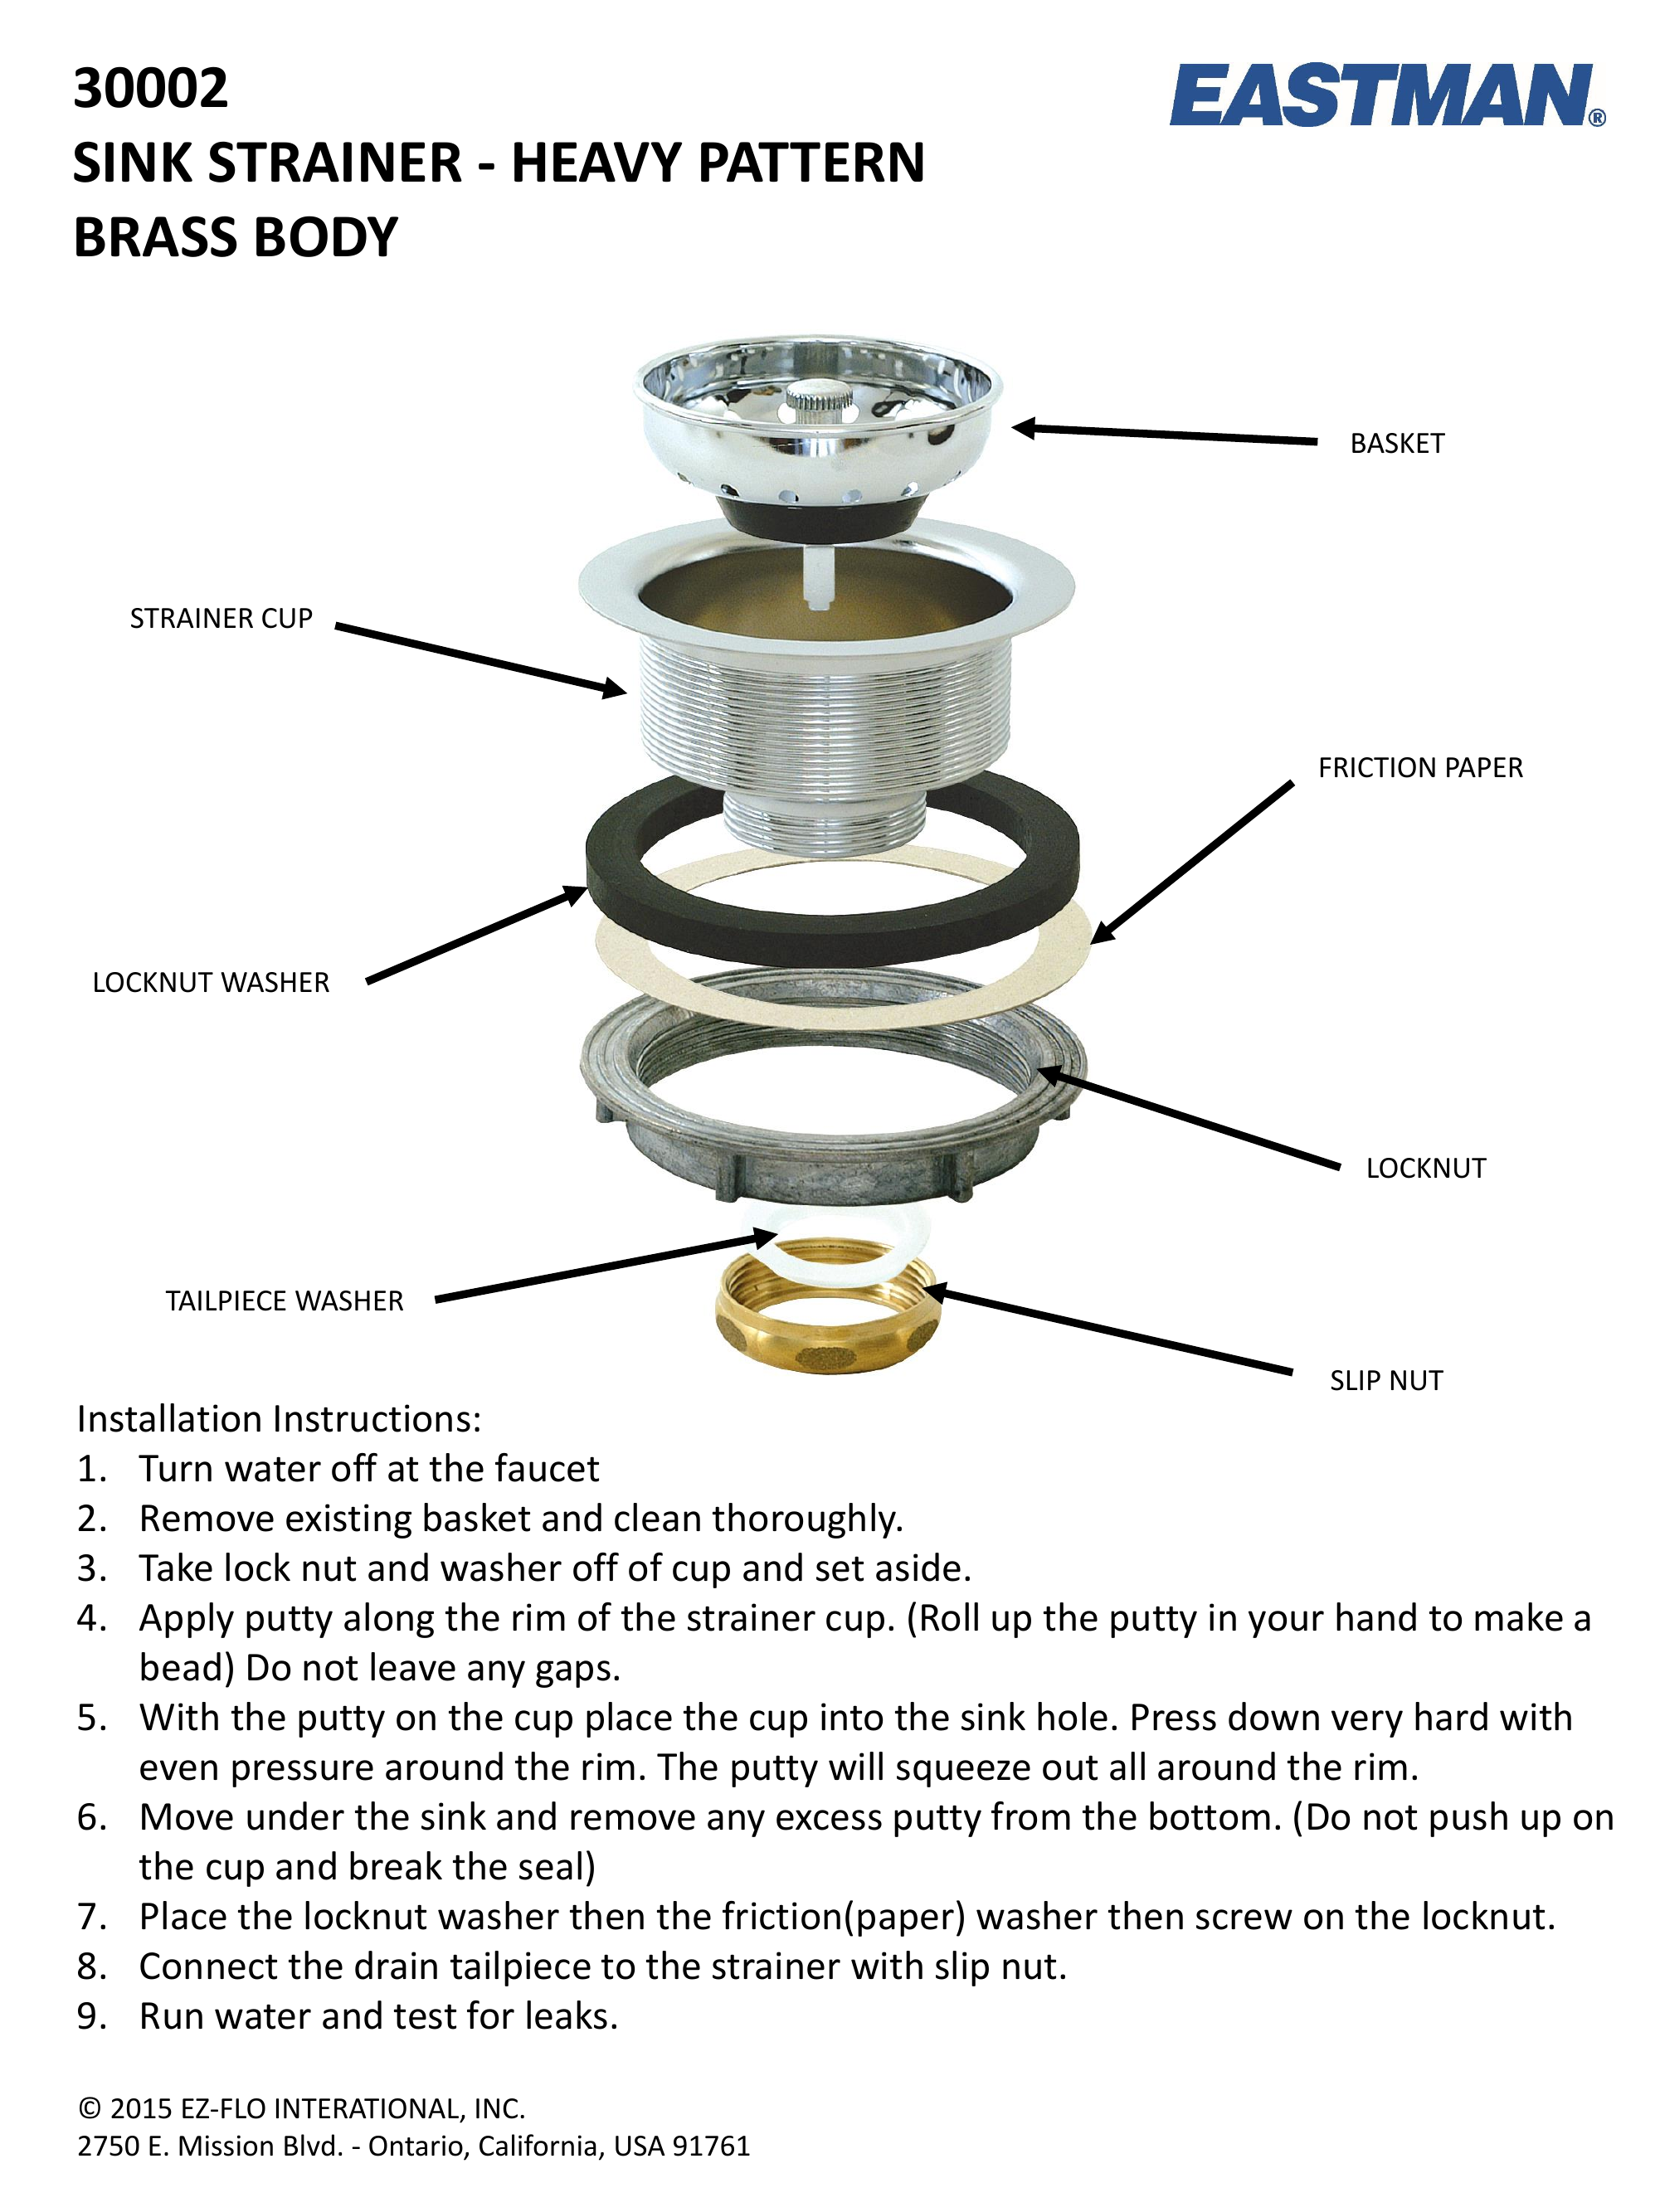
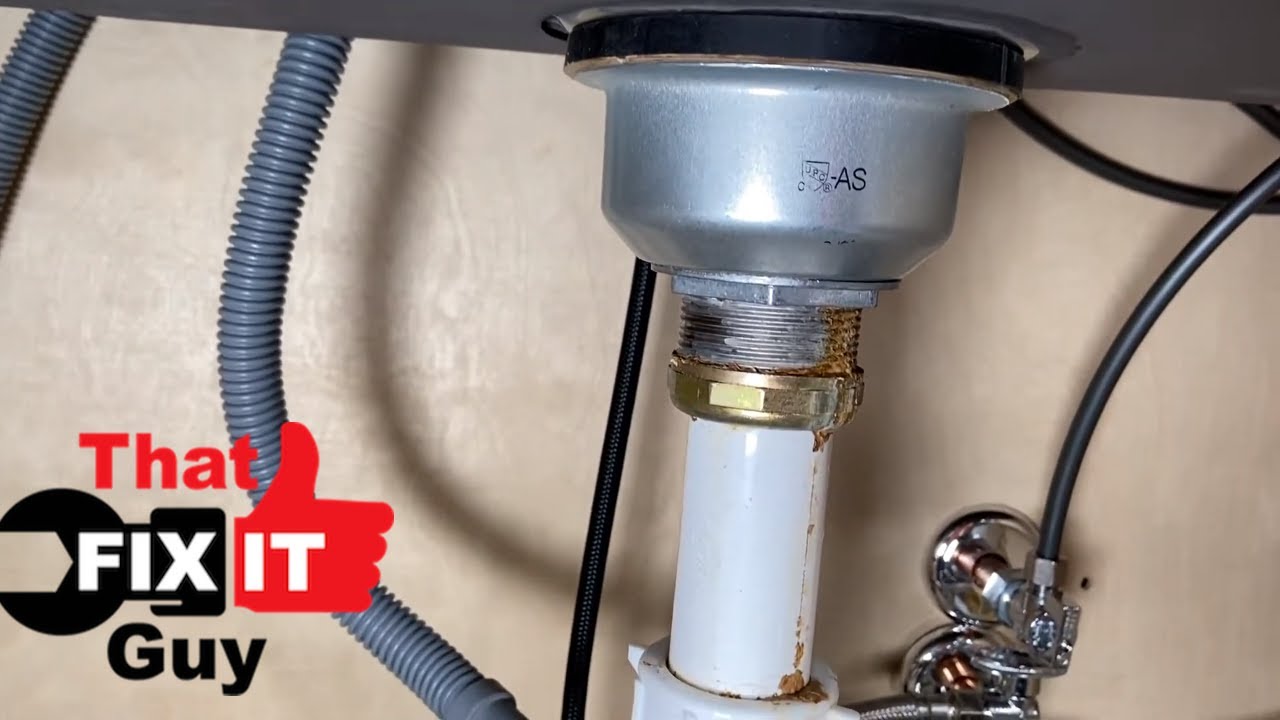
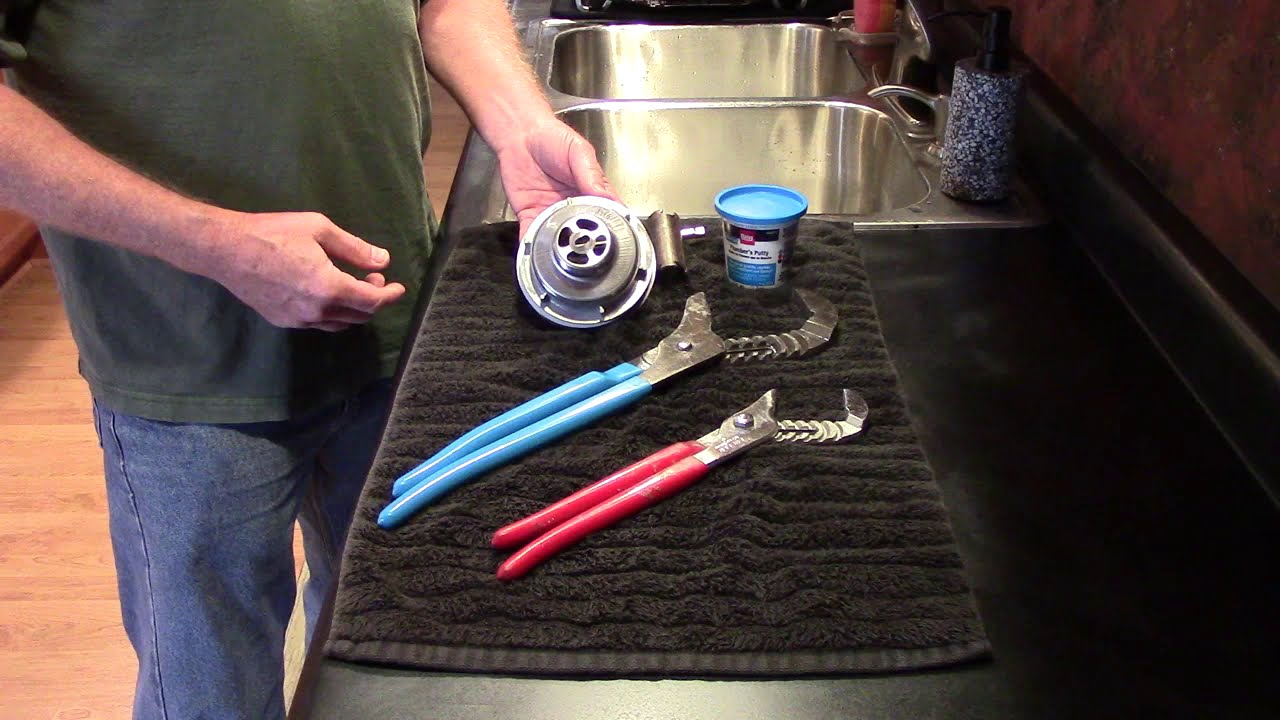
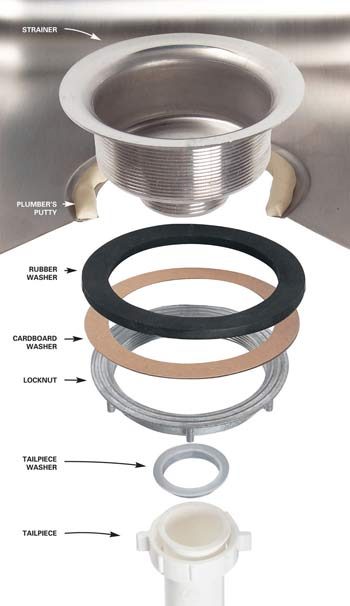
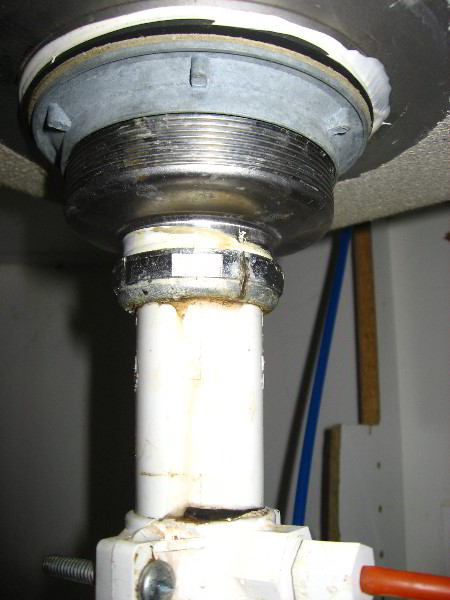
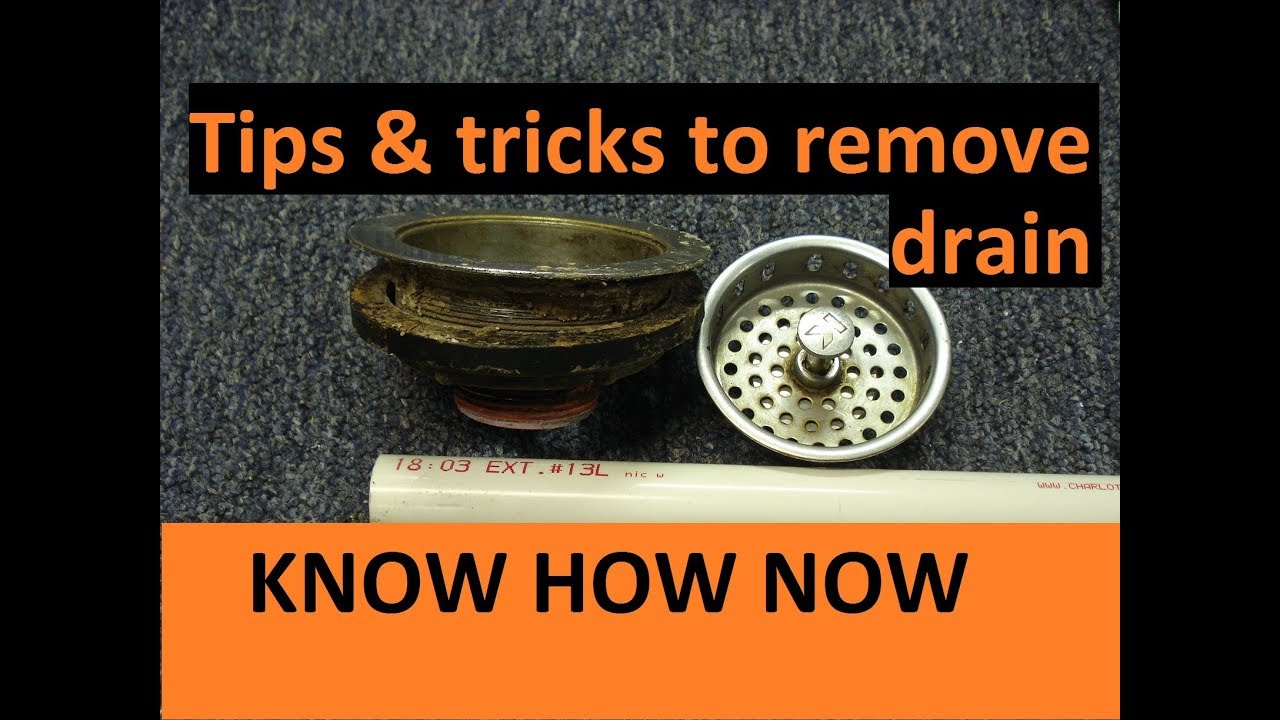
If you’re ready to remove your kitchen sink strainer, here’s a step-by-step guide to help you through the process. Step 1: Begin by turning off the water supply to your sink. This will prevent any water from flowing through the pipes while you work. Step 2: Next, place a bucket or large bowl beneath the sink to catch any water that may spill out during the process. Step 3: Use pliers to loosen the locknut that holds the strainer in place. This is typically located on the underside of the sink and may be covered by a gasket. Step 4: Once the locknut is loose, you should be able to remove the strainer by pulling it out from the top of the sink. Step 5: If the strainer is stuck, you may need to use a screwdriver to gently pry it loose. Step 6: Once the strainer is removed, you can clean the area and replace the strainer or basket as needed. Step 7: Finally, use the pliers to tighten the locknut back in place and turn the water supply back on.Step-by-Step Guide to Removing a Kitchen Sink Strainer


Step-by-Step Guide to Removing a Kitchen Sink Strainer


If you’re feeling handy and want to save some money, you can remove a kitchen sink strainer yourself with just a few simple tools. All you’ll need is a pair of pliers and a screwdriver. Just follow the steps outlined in this guide and you’ll have your strainer removed in no time. Just remember to turn off the water supply and be careful not to damage the sink or pipes while removing the strainer.DIY Kitchen Sink Strainer Removal


DIY Kitchen Sink Strainer Removal


If your kitchen sink strainer is stuck and won’t budge, don’t panic. There are a few things you can try to loosen it and make it easier to remove. First, you can try using a pipe wrench to grip the strainer and twist it counterclockwise. If that doesn’t work, you can also try using a hammer and gently tapping the strainer from various angles to loosen it. If all else fails, you may need to call a professional plumber to help remove the stuck strainer without damaging your sink or pipes.Removing a Stuck Kitchen Sink Strainer


Removing a Stuck Kitchen Sink Strainer


If your kitchen sink strainer is rusted, it may be more difficult to remove. The rust can cause the strainer to become stuck or even break apart while trying to remove it. To remove a rusty kitchen sink strainer, you can try using a rust-removing solution or a mixture of vinegar and baking soda to loosen the rust. You can also try using a wire brush to scrub away any surface rust before attempting to remove the strainer. If the strainer is still stuck, you may need to call a professional plumber to remove it without causing damage to your sink.Removing a Rusty Kitchen Sink Strainer


Removing a Rusty Kitchen Sink Strainer


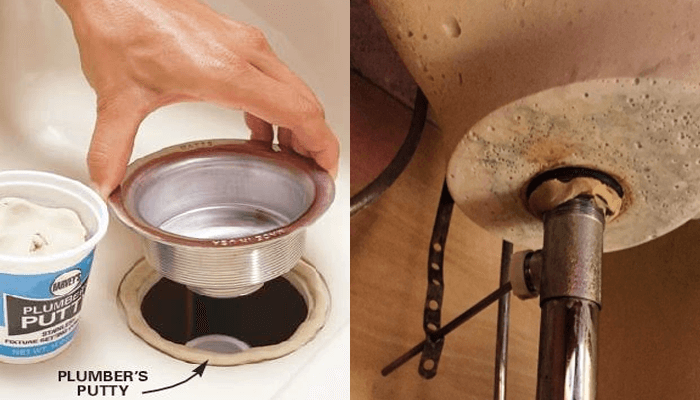
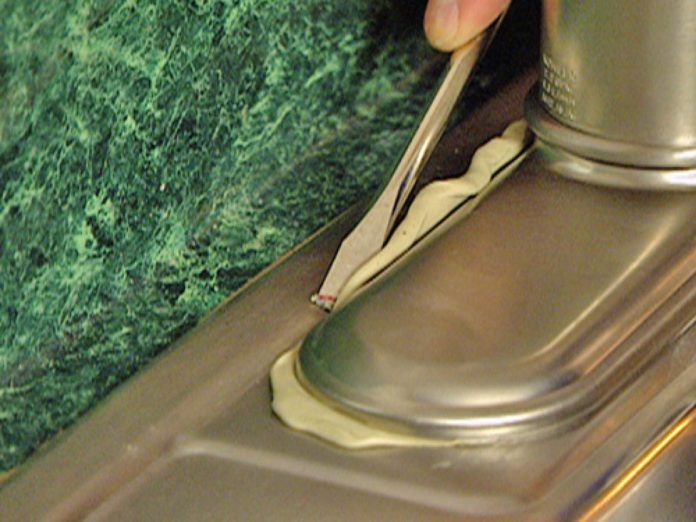
Some kitchen sink strainers are installed using plumbers putty, which is a type of sealant. If your strainer is installed with this method, you’ll need to remove the putty before you can remove the strainer. To do this, you can use a putty knife to carefully scrape away the putty from around the strainer. Once the putty is removed, you can then follow the steps outlined in this guide to remove the strainer. Removing a kitchen sink strainer may seem like a daunting task, but with the right tools and knowledge, it can be done easily. Whether you’re replacing a damaged strainer or just cleaning it, following these steps will ensure a smooth and successful removal process. Just remember to always turn off the water supply and be careful not to damage your sink or pipes while removing the strainer.Removing a Kitchen Sink Strainer with Plumbers Putty

Removing a Kitchen Sink Strainer with Plumbers Putty


Why You Should Consider Removing Your Kitchen Sink Strainer

The Importance of a Kitchen Sink Strainer
 A kitchen sink strainer is a small but essential part of your kitchen sink. Its purpose is to catch food scraps and other debris, preventing them from clogging your drain. This helps to keep your sink and plumbing system in good condition and avoids the need for costly repairs in the future. However, there are times when removing the kitchen sink strainer may be necessary or beneficial.
When to Remove Your Kitchen Sink Strainer
 One reason you may want to remove your kitchen sink strainer is if it is damaged or worn out. Over time, the strainer may become cracked or rusted, making it less effective in catching debris. In this case, it is important to replace the strainer to avoid potential clogs and plumbing issues.
Another reason to remove your kitchen sink strainer is for cleaning purposes. Despite its purpose to catch debris, food particles and other grime can still build up on the strainer. Regularly removing and cleaning the strainer can help to maintain good hygiene in your kitchen and prevent foul odors.
One reason you may want to remove your kitchen sink strainer is if it is damaged or worn out. Over time, the strainer may become cracked or rusted, making it less effective in catching debris. In this case, it is important to replace the strainer to avoid potential clogs and plumbing issues.
Another reason to remove your kitchen sink strainer is for cleaning purposes. Despite its purpose to catch debris, food particles and other grime can still build up on the strainer. Regularly removing and cleaning the strainer can help to maintain good hygiene in your kitchen and prevent foul odors.
The Benefits of Removing Your Kitchen Sink Strainer
 Aside from maintenance and cleaning reasons, there are also other benefits to removing your kitchen sink strainer. One of the main reasons is to improve water flow. Over time, debris can build up in the strainer and hinder the flow of water, causing it to drain slower. By removing the strainer, water can flow freely and quickly down the drain.
Another benefit is for larger items that may need to be washed in the sink. With the strainer removed, there is more space in the sink for washing pots and pans, making it easier to clean and maneuver them.
Aside from maintenance and cleaning reasons, there are also other benefits to removing your kitchen sink strainer. One of the main reasons is to improve water flow. Over time, debris can build up in the strainer and hinder the flow of water, causing it to drain slower. By removing the strainer, water can flow freely and quickly down the drain.
Another benefit is for larger items that may need to be washed in the sink. With the strainer removed, there is more space in the sink for washing pots and pans, making it easier to clean and maneuver them.
How to Remove Your Kitchen Sink Strainer
 Removing a kitchen sink strainer is a relatively simple process. First, turn off the water supply to your sink. Then, using a screwdriver, loosen the screws that hold the strainer in place. Once the screws are removed, the strainer should easily come out. Clean the area where the strainer was attached and install a new strainer if necessary.
In conclusion, while a kitchen sink strainer serves an important purpose, there are times when it may need to be removed. Whether it is for maintenance, cleaning or to improve water flow, removing the strainer can have its benefits. Remember to regularly clean and inspect your strainer to ensure it is functioning properly, and replace it when necessary. By doing so, you can keep your kitchen sink and plumbing system in good condition.
Removing a kitchen sink strainer is a relatively simple process. First, turn off the water supply to your sink. Then, using a screwdriver, loosen the screws that hold the strainer in place. Once the screws are removed, the strainer should easily come out. Clean the area where the strainer was attached and install a new strainer if necessary.
In conclusion, while a kitchen sink strainer serves an important purpose, there are times when it may need to be removed. Whether it is for maintenance, cleaning or to improve water flow, removing the strainer can have its benefits. Remember to regularly clean and inspect your strainer to ensure it is functioning properly, and replace it when necessary. By doing so, you can keep your kitchen sink and plumbing system in good condition.