Removing a kitchen sink handle may seem like a daunting task, but with the right tools and knowledge, it can be a simple and straightforward process. Whether you're looking to replace a faulty handle or just give your sink a new look, this step-by-step guide will walk you through the process of removing a kitchen sink handle from the popular brand Perrless.How to Remove a Kitchen Sink Handle


How to Remove a Kitchen Sink Handle

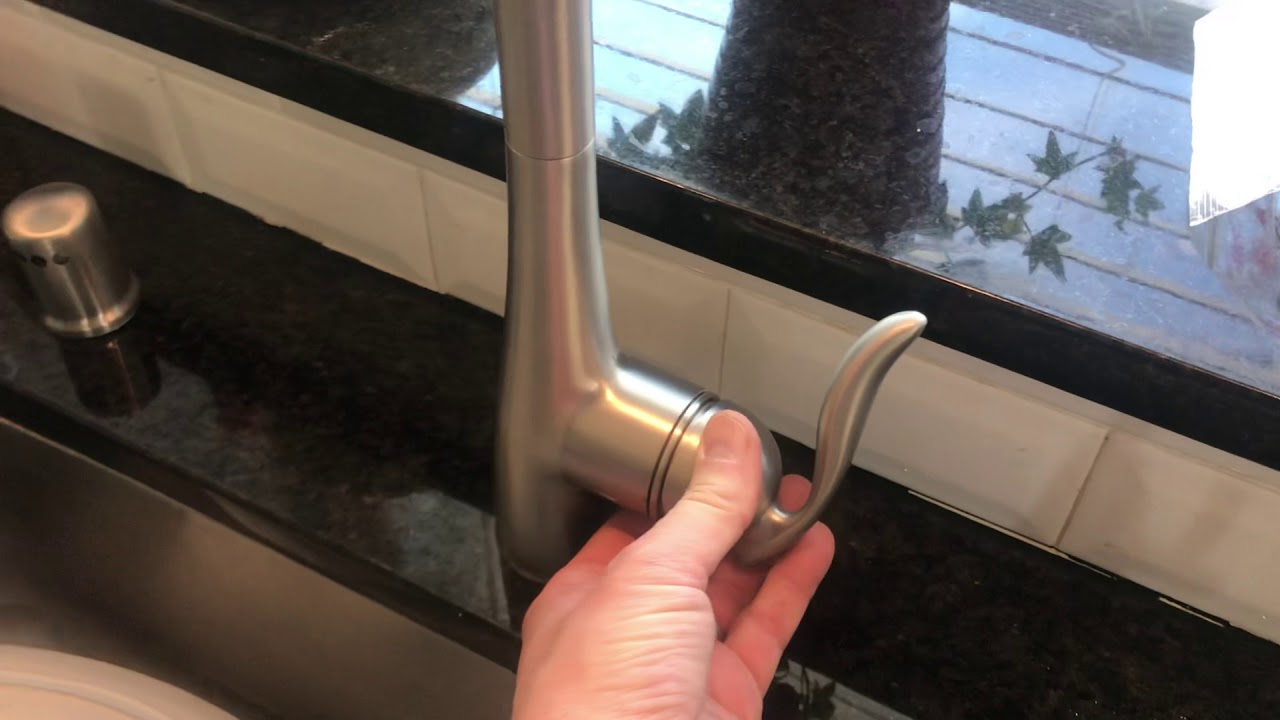


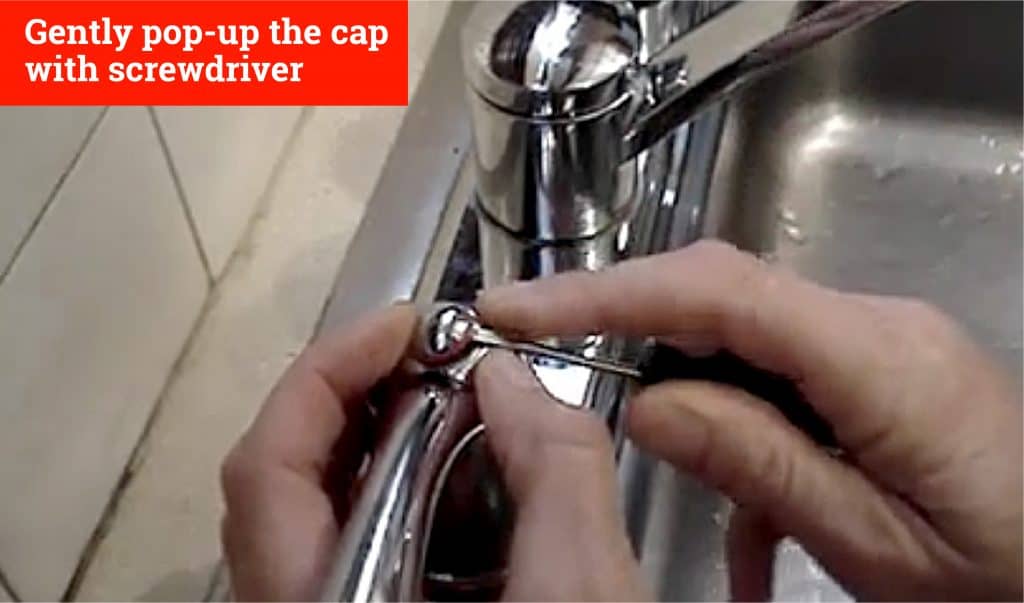
Before you begin, make sure to gather all the necessary tools and materials. You will need a flathead screwdriver, an Allen wrench, and a pair of pliers. It's also a good idea to have a towel or cloth handy to protect your sink and provide a better grip. Step 1: Shut off the Water Supply Before you start working on your sink handle, it's important to turn off the water supply to avoid any potential mess or accidents. Look for the shut-off valves under your sink and turn them to the off position. Step 2: Remove the Handle's Cap Using a flathead screwdriver, gently pry off the cap on top of the handle. This cap is usually made of plastic and may be labeled with the brand name Perrless. Once the cap is removed, you will see a screw or a small hexagonal hole underneath. Step 3: Unscrew the Handle If there is a screw underneath the cap, use the appropriate screwdriver to unscrew it in a counterclockwise direction. If there is a hexagonal hole, use an Allen wrench to loosen the set screw by turning it counterclockwise. This will release the handle from the valve stem. Step 4: Remove the Handle Once the screw or set screw is removed, you can easily pull the handle off of the valve stem. If the handle is stuck, use a pair of pliers to gently twist and pull it off. Be careful not to damage the valve stem or any other components.Removing a Kitchen Sink Handle: A Step-by-Step Guide


Removing a Kitchen Sink Handle: A Step-by-Step Guide


If you're feeling adventurous and want to try removing the kitchen sink handle yourself, here are a few tips to keep in mind: - Make sure to follow the manufacturer's instructions and any safety precautions. - Take your time and work carefully to avoid damaging any parts. - If you encounter any difficulties, do not force the handle off. Seek professional help if needed.DIY: How to Remove a Kitchen Sink Handle


DIY: How to Remove a Kitchen Sink Handle


Removing a kitchen sink handle from Perrless may have its own set of challenges, but with these tips and tricks, the process can be smoother and more efficient: - Use a hairdryer to warm up the handle if it seems stuck. This will loosen any adhesive or rust that may be holding it in place. - Apply a lubricant, such as WD-40, to any stubborn parts to make them easier to remove. - Keep all the small parts in a safe place to avoid losing them.Removing a Perrless Kitchen Sink Handle: Tips and Tricks


Removing a Perrless Kitchen Sink Handle: Tips and Tricks


Now that you have a better understanding of the process, here is a step-by-step guide on removing a kitchen sink handle from Perrless: Step 1: Shut off the Water Supply Step 2: Remove the Handle's Cap Step 3: Unscrew the Handle Step 4: Remove the Handle Step 5: Clean and Inspect the Parts Step 6: Replace or Install a New Handle Step 7: Turn on the Water Supply and Test the HandleStep-by-Step Guide to Removing a Kitchen Sink Handle from Perrless


Step-by-Step Guide to Removing a Kitchen Sink Handle from Perrless


Before starting any plumbing project, it's essential to have some basic knowledge about the brand and type of sink you have. Here are a few things to keep in mind when removing a kitchen sink handle from Perrless: - Perrless handles come in different sizes, shapes, and materials, so make sure to have the correct replacement handle. - Some models may have additional parts, such as a cartridge or bonnet nut, that need to be removed before the handle can be taken off. - If your sink handle is still under warranty, it's best to contact the manufacturer for assistance.Removing a Kitchen Sink Handle from Perrless: What You Need to Know


Removing a Kitchen Sink Handle from Perrless: What You Need to Know


If you're short on time or just want a quick overview of the process, here's a summary of the steps to remove a kitchen sink handle from Perrless: Step 1: Shut off the Water Supply. Step 2: Remove the Handle's Cap. Step 3: Unscrew the Handle. Step 4: Remove the Handle. Step 5: Clean and Inspect the Parts. Step 6: Replace or Install a New Handle. Step 7: Turn on the Water Supply and Test the Handle.Quick and Easy Guide to Removing a Kitchen Sink Handle from Perrless


Quick and Easy Guide to Removing a Kitchen Sink Handle from Perrless


While removing a kitchen sink handle may seem like a simple task, there are a few common mistakes that can happen. Here's what to avoid: - Forcing the handle off without following the proper steps. - Using the wrong tools, which can damage the handle or the valve stem. - Neglecting to turn off the water supply, which can lead to a messy and potentially dangerous situation.Removing a Kitchen Sink Handle from Perrless: Common Mistakes to Avoid

Removing a Kitchen Sink Handle from Perrless: Common Mistakes to Avoid


By now, you should have a good understanding of how to remove a kitchen sink handle from Perrless. Remember to take your time, follow the steps carefully, and seek professional help if needed. With these tips and tricks, you can successfully remove your kitchen sink handle and give your sink a fresh new look.How to Remove a Kitchen Sink Handle from Perrless: A Comprehensive Guide


How to Remove a Kitchen Sink Handle from Perrless: A Comprehensive Guide


If you encounter any difficulties or have any questions, here are a few troubleshooting tips to help you out: - If the handle is stuck, try spraying some vinegar or lemon juice around the base to loosen it up. - If the handle is still not coming off, it may be necessary to replace the entire faucet. - If the handle is loose or wobbly, check the valve stem and tighten any loose parts. With these tips and tricks, you can confidently remove a kitchen sink handle from Perrless and give your sink a fresh new look. Remember to always take safety precautions and seek professional help if needed.Removing a Kitchen Sink Handle from Perrless: Troubleshooting Tips

Removing a Kitchen Sink Handle from Perrless: Troubleshooting Tips


Why You Should Consider Removing Your Kitchen Sink Handle: A Practical Guide for House Design

Introduction
 House design is an ever-evolving process, with homeowners constantly looking for ways to improve the functionality and aesthetics of their living spaces. One often overlooked aspect of house design is the kitchen sink handle. While it may seem like a trivial detail, the type of handle you choose can greatly impact the overall look and feel of your kitchen. In this article, we will discuss the benefits of removing your kitchen sink handle and how it can enhance the design of your home.
The Problem with Traditional Kitchen Sink Handles
 Traditional kitchen sink handles, such as the Perrless model, are often bulky and can be difficult to maneuver. They also tend to accumulate dirt and grime, making them unhygienic and unsightly. Moreover, these handles can clash with the design of your kitchen, especially if you have opted for a more modern or minimalist look. The good news is that there is a solution to this problem – removing the kitchen sink handle altogether.
The Benefits of Removing the Kitchen Sink Handle
 Improved Aesthetics:
By removing the kitchen sink handle, you can achieve a sleek and seamless look for your kitchen. This is especially beneficial for smaller kitchens, as it creates an illusion of more space.
Better Functionality:
Without a bulky handle in the way, you can easily clean and maneuver around your sink. This is particularly useful for those who have limited mobility or struggle with gripping and turning objects.
Enhanced Hygiene:
As mentioned earlier, traditional kitchen sink handles can be a breeding ground for bacteria and grime. By removing them, you eliminate this issue and create a more hygienic environment for food preparation.
Improved Aesthetics:
By removing the kitchen sink handle, you can achieve a sleek and seamless look for your kitchen. This is especially beneficial for smaller kitchens, as it creates an illusion of more space.
Better Functionality:
Without a bulky handle in the way, you can easily clean and maneuver around your sink. This is particularly useful for those who have limited mobility or struggle with gripping and turning objects.
Enhanced Hygiene:
As mentioned earlier, traditional kitchen sink handles can be a breeding ground for bacteria and grime. By removing them, you eliminate this issue and create a more hygienic environment for food preparation.
How to Remove Your Kitchen Sink Handle
 Step 1:
Start by turning off the water supply to your sink.
Step 2:
Next, locate the screw or bolt that holds the handle in place.
Step 3:
Use a screwdriver or wrench to remove the screw or bolt.
Step 4:
Once the screw or bolt is removed, gently pull the handle away from the sink.
Step 5:
Clean the area where the handle was attached to remove any dirt or residue.
Step 1:
Start by turning off the water supply to your sink.
Step 2:
Next, locate the screw or bolt that holds the handle in place.
Step 3:
Use a screwdriver or wrench to remove the screw or bolt.
Step 4:
Once the screw or bolt is removed, gently pull the handle away from the sink.
Step 5:
Clean the area where the handle was attached to remove any dirt or residue.
Conclusion
 Removing your kitchen sink handle is a simple and effective way to improve the design and functionality of your kitchen. It not only enhances the aesthetics of your space, but also promotes better hygiene and ease of use. So, if you're looking to upgrade your kitchen design, consider removing your kitchen sink handle and enjoy the benefits it has to offer.