If you have an old-fashioned kitchen sink that is looking dull and worn out, re-enameling it can give it a fresh new look without having to replace it entirely. This DIY project is a great way to save money and restore the charm of your vintage kitchen. In this guide, we'll go over the steps to re-enameling an old-fashioned kitchen sink and give you some helpful tips and tricks along the way.How to Re-Enamel an Old-Fashioned Kitchen Sink


How to Re-Enamel an Old-Fashioned Kitchen Sink


Re-enameling a kitchen sink may seem like a daunting task, but with the right tools and techniques, it can be a relatively simple project. This guide will walk you through the process step-by-step, so you can confidently tackle this project on your own. No need to hire a professional, you can achieve professional results with a little bit of know-how.DIY Guide: Re-Enameling an Old-Fashioned Kitchen Sink


DIY Guide: Re-Enameling an Old-Fashioned Kitchen Sink


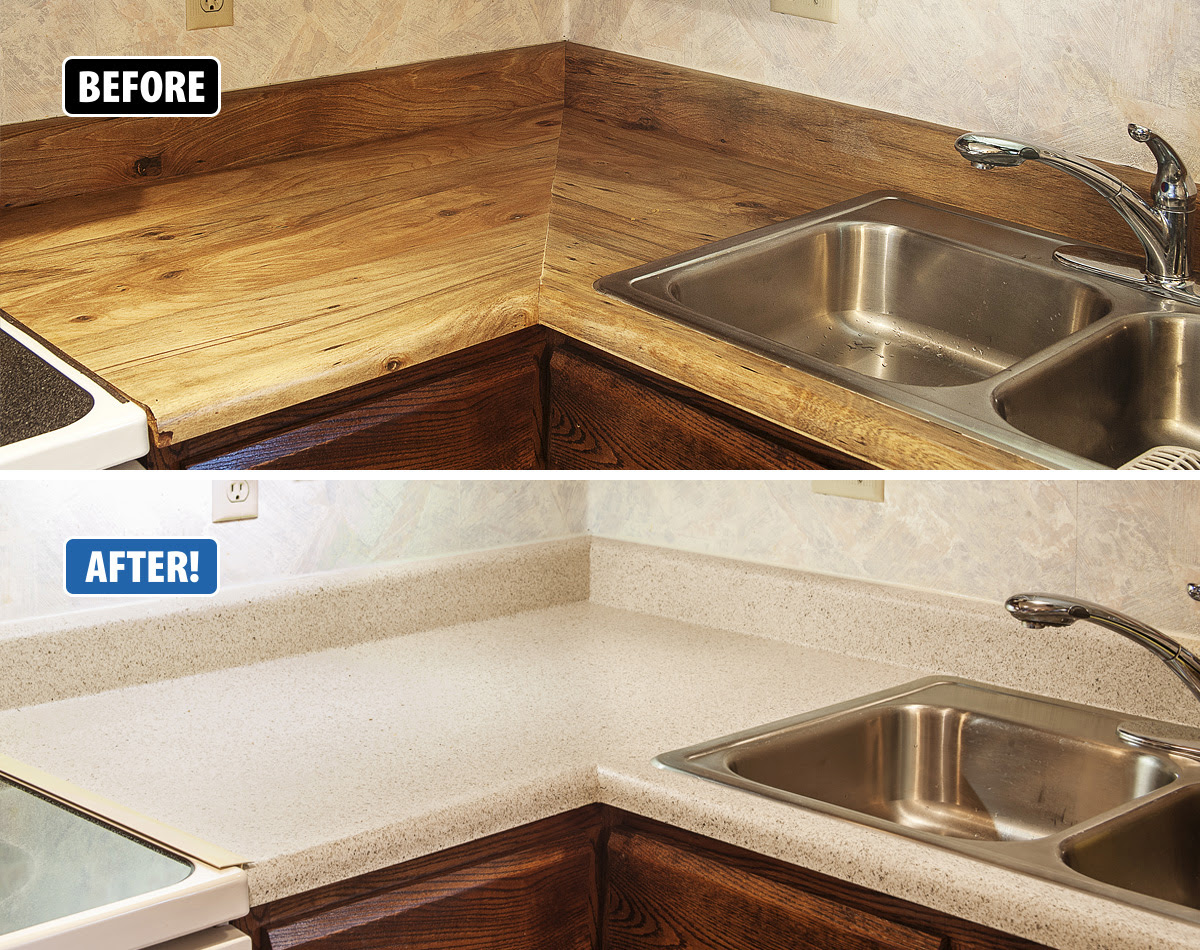
The first step in re-enameling an old-fashioned kitchen sink is to thoroughly clean and prep the surface. Use a non-abrasive cleaner to remove any dirt or grime. Next, sand down the surface with fine-grit sandpaper to create a smooth, even surface. Wipe down the sink with a damp cloth to remove any dust or debris. Now it's time to apply the re-enamel. Using a foam roller, apply the re-enamel in thin, even coats. Be sure to follow the manufacturer's instructions for drying time and number of coats needed. Once the final coat is dry, your sink will have a beautiful, glossy finish that looks brand new.Step-by-Step Instructions for Re-Enameling an Old-Fashioned Kitchen Sink


Step-by-Step Instructions for Re-Enameling an Old-Fashioned Kitchen Sink


When re-enameling an old-fashioned kitchen sink, there are a few tips and tricks that can make the process easier and give you better results. First, make sure to properly ventilate the area you are working in. The fumes from the re-enamel can be strong, so open windows and use a fan if possible. Additionally, it's essential to follow the manufacturer's instructions carefully. This will ensure that you are using the re-enamel correctly and achieving the best results. Finally, be patient and allow the re-enamel to fully dry between coats for a smooth and even finish.Re-Enameling an Old-Fashioned Kitchen Sink: Tips and Tricks


Re-Enameling an Old-Fashioned Kitchen Sink: Tips and Tricks


Before starting your re-enameling project, make sure you have all the necessary materials. Some of the key items you will need include a non-abrasive cleaner, fine-grit sandpaper, a foam roller, and the re-enamel of your choice. You may also want to have a fan and protective gear, such as gloves and a mask, on hand for safety.Materials Needed for Re-Enameling an Old-Fashioned Kitchen Sink


Materials Needed for Re-Enameling an Old-Fashioned Kitchen Sink
There are many re-enameling products on the market, so it can be overwhelming trying to choose the best one for your project. Some popular options include Rust-Oleum Specialty Tub & Tile Re-enamel, Homax Tough as Tile Re-enamel, and Krylon Appliance Re-enamel. Do some research and read reviews to determine which product will work best for your specific sink.Best Products for Re-Enameling an Old-Fashioned Kitchen Sink


Best Products for Re-Enameling an Old-Fashioned Kitchen Sink


Proper preparation is crucial for a successful re-enameling project. As mentioned earlier, start by thoroughly cleaning and sanding the surface. It's also a good idea to remove any fixtures or hardware attached to the sink, such as faucets and drains, before starting. This will make it easier to get an even coat of re-enamel on the sink's surface.How to Prep an Old-Fashioned Kitchen Sink for Re-Enameling
How to Prep an Old-Fashioned Kitchen Sink for Re-Enameling


:max_bytes(150000):strip_icc()/janetbeasley_12566514614_ASA-56a2fa885f9b58b7d0cff872.jpg)
Re-enameling a kitchen sink is not a difficult task, but there are some common mistakes that can be easily avoided. One of the biggest mistakes is not allowing enough drying time between coats. This can result in a bumpy or uneven finish. Another mistake is not properly cleaning and sanding the surface before applying the re-enamel, which can cause the re-enamel to peel or chip.Common Mistakes to Avoid When Re-Enameling an Old-Fashioned Kitchen Sink

Common Mistakes to Avoid When Re-Enameling an Old-Fashioned Kitchen Sink


Re-enameling an old-fashioned kitchen sink has its advantages and disadvantages. On the plus side, it is a cost-effective way to give your sink a brand new look. It's also a relatively easy DIY project for those with some experience in home improvement. However, some downsides include the strong fumes during application and the need for proper ventilation. It's also essential to follow the instructions carefully to achieve the best results.Pros and Cons of Re-Enameling an Old-Fashioned Kitchen Sink


Pros and Cons of Re-Enameling an Old-Fashioned Kitchen Sink


While hiring a professional to re-enamel your kitchen sink may seem like the easier option, it can also be quite expensive. By taking on this project yourself, you can save money and have the satisfaction of completing a DIY project. With the right materials and techniques, you can achieve professional-looking results on your own. With these tips and instructions, you are now ready to re-enamel your old-fashioned kitchen sink and give it a fresh new look. Remember to properly prep the surface, follow the manufacturer's instructions, and have patience for the best results. With a little bit of effort, you can have a beautiful and restored vintage sink in your kitchen.Professional vs. DIY: Re-Enameling an Old-Fashioned Kitchen Sink
Professional vs. DIY: Re-Enameling an Old-Fashioned Kitchen Sink

Why Re-Enameling an Old-Fashioned Kitchen Sink is Worth Considering

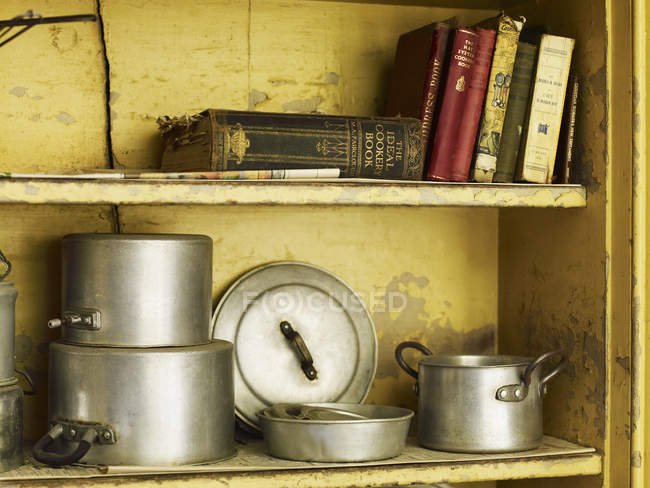
The Charm of an Old-Fashioned Kitchen Sink
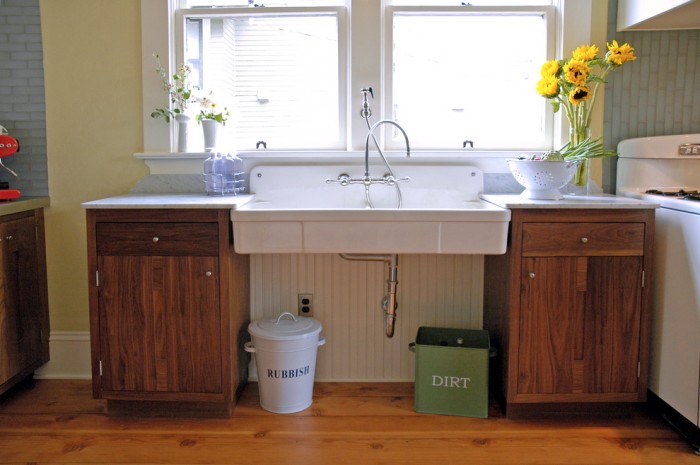 Old-fashioned kitchen sinks have a charm that cannot be replicated by modern designs. They add a touch of nostalgia and character to any kitchen, making them a popular choice for homeowners looking to add a vintage touch to their homes. However, over time, these sinks can become worn out and lose their shine, making them an eyesore in an otherwise beautifully designed kitchen. This is where
re-enameling
comes in.
Old-fashioned kitchen sinks have a charm that cannot be replicated by modern designs. They add a touch of nostalgia and character to any kitchen, making them a popular choice for homeowners looking to add a vintage touch to their homes. However, over time, these sinks can become worn out and lose their shine, making them an eyesore in an otherwise beautifully designed kitchen. This is where
re-enameling
comes in.
The Benefits of Re-Enameling
 Re-enameling an old-fashioned kitchen sink involves applying a new coat of enamel on the surface, giving it a fresh and shiny look. This process not only restores the original beauty of the sink but also has several other benefits.
Cost-effective:
Replacing an old-fashioned kitchen sink can be costly, especially if you want to maintain the vintage look and feel. Re-enameling, on the other hand, is a more affordable option that can save you hundreds of dollars.
Time-saving:
Removing an old sink and installing a new one can be a time-consuming process. Re-enameling, on the other hand, can be completed in a day, allowing you to use your kitchen sink again in no time.
Eco-friendly:
By re-enameling your sink instead of replacing it, you are reducing the amount of waste that goes into landfills, making it an environmentally friendly option.
Re-enameling an old-fashioned kitchen sink involves applying a new coat of enamel on the surface, giving it a fresh and shiny look. This process not only restores the original beauty of the sink but also has several other benefits.
Cost-effective:
Replacing an old-fashioned kitchen sink can be costly, especially if you want to maintain the vintage look and feel. Re-enameling, on the other hand, is a more affordable option that can save you hundreds of dollars.
Time-saving:
Removing an old sink and installing a new one can be a time-consuming process. Re-enameling, on the other hand, can be completed in a day, allowing you to use your kitchen sink again in no time.
Eco-friendly:
By re-enameling your sink instead of replacing it, you are reducing the amount of waste that goes into landfills, making it an environmentally friendly option.
The Re-Enameling Process
 The process of re-enameling an old-fashioned kitchen sink involves several steps, starting with cleaning and sanding the surface to remove any old enamel. Then, a new enamel coating is applied and the sink is baked at a high temperature to cure the enamel and give it a long-lasting finish. The result is a sink that looks brand new and is more resistant to scratches and stains.
Choosing the Right Professional
 While there are DIY kits available for re-enameling, it is recommended to hire a professional for the job. A professional will have the necessary tools and expertise to ensure a smooth and flawless finish. Make sure to do your research and choose a reputable company with experience in re-enameling old-fashioned kitchen sinks.
In conclusion, re-enameling an old-fashioned kitchen sink is a cost-effective, time-saving, and eco-friendly way to restore its beauty and charm. With the help of a professional, you can give your kitchen sink a new lease on life and continue to enjoy its vintage appeal for years to come.
While there are DIY kits available for re-enameling, it is recommended to hire a professional for the job. A professional will have the necessary tools and expertise to ensure a smooth and flawless finish. Make sure to do your research and choose a reputable company with experience in re-enameling old-fashioned kitchen sinks.
In conclusion, re-enameling an old-fashioned kitchen sink is a cost-effective, time-saving, and eco-friendly way to restore its beauty and charm. With the help of a professional, you can give your kitchen sink a new lease on life and continue to enjoy its vintage appeal for years to come.