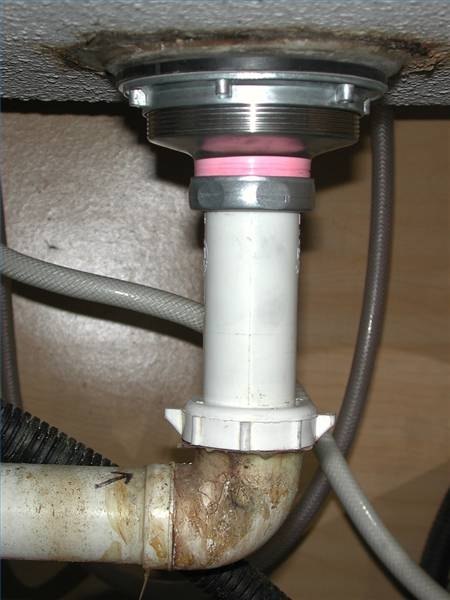
Before you can install a new kitchen sink drain, it's important to understand the basics of plumbing. The drain system includes a trap, a tailpiece, and a P-trap, which are all essential components for proper drainage. The trap prevents sewer gases from entering your home, while the tailpiece connects the sink to the drain. The P-trap, on the other hand, traps water to create a seal and prevent odors from escaping. Knowing these basics will help you navigate the installation process with ease.1. Understanding the Basics of Kitchen Sink Drain Plumbing


How to Install a Kitchen Sink Drain
/how-to-install-a-sink-drain-2718789-hero-b5b99f72b5a24bb2ae8364e60539cece.jpg)


:max_bytes(150000):strip_icc()/how-to-install-a-sink-drain-2718789-hero-24e898006ed94c9593a2a268b57989a3.jpg)
Before you begin the installation process, it's important to have all the necessary tools and materials on hand. This includes a wrench, pliers, plumber's putty, Teflon tape, and a new drain assembly. Make sure to also have a bucket and towels nearby to catch any water or debris that may spill during the installation process.2. Gathering the Right Tools and Materials


How to Install a Kitchen Sink Drain


The first step in installing a new kitchen sink drain is to remove the old drain assembly. This can be done by loosening the slip nut that connects the tailpiece to the drain and removing the tailpiece from the sink. Next, use a wrench to loosen the slip nut that connects the P-trap to the drain and remove the P-trap. Once the old drain assembly is removed, clean the area around the sink thoroughly.3. Removing the Old Drain Assembly
How to Install a Kitchen Sink Drain


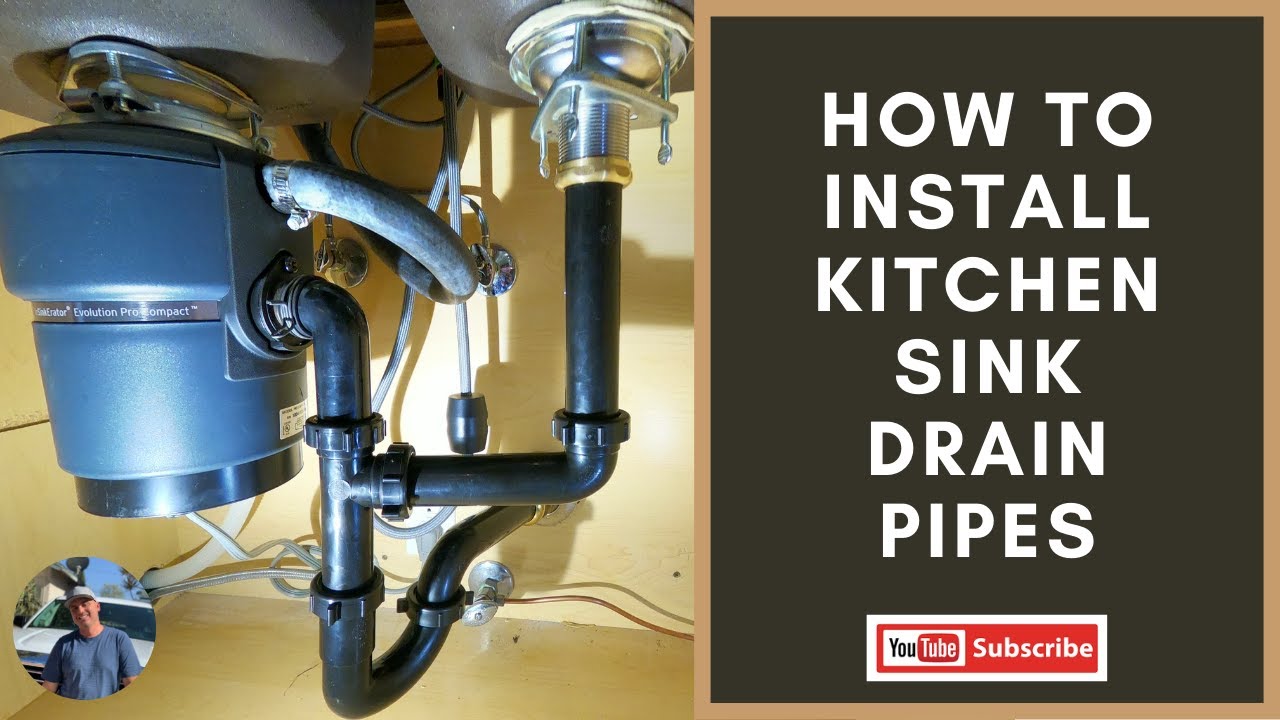
Once the old drain assembly is removed, it's time to install the new one. Start by applying plumber's putty to the underside of the drain flange. Then, insert the flange into the drain hole in the sink and secure it in place with the provided locknut. Next, attach the tailpiece to the bottom of the flange and tighten the slip nut to secure it. Finally, connect the P-trap to the tailpiece and tighten the slip nut to create a seal.4. Installing the New Drain Assembly

How to Install a Kitchen Sink Drain
After the new drain assembly is installed, it's time to connect it to the existing plumbing. Start by wrapping Teflon tape around the threads of the drain outlet. Then, attach the drain to the existing drainpipe and tighten the slip nut to create a tight seal. If necessary, use a wrench to secure the slip nut in place.5. Connecting the Drain to the Existing Plumbing
How to Install a Kitchen Sink Drain
Once the new drain is connected to the existing plumbing, it's important to check for any leaks. Run water through the sink and check for any signs of leakage. If there are no leaks, you can move on to the next step. However, if there are leaks, tighten any loose connections or add more Teflon tape to create a tight seal.6. Checking for Leaks
How to Install a Kitchen Sink Drain
After checking for leaks and making any necessary adjustments, it's time to reattach the P-trap. Use a wrench to tighten the slip nut that connects the P-trap to the drain. Make sure the P-trap is at the correct angle to allow for proper drainage. If necessary, adjust the position of the P-trap and tighten the slip nut again.7. Reattaching the P-Trap
How to Install a Kitchen Sink Drain
Once the P-trap is securely attached, it's important to test the drainage of the sink. Run water through the sink and check to make sure it drains properly. If there are any issues, such as slow drainage or gurgling sounds, this may indicate a clog or an improper installation. If necessary, disassemble the drain and troubleshoot the issue.8. Testing the Drainage
How to Install a Kitchen Sink Drain
:no_upscale()/cdn.vox-cdn.com/uploads/chorus_asset/file/19495086/drain_0.jpg)


After the drain is successfully installed and functioning properly, it's time to add the finishing touches. This includes cleaning up any excess putty or debris and making sure the sink is securely attached to the countertop. You can also add a drain cover or strainer to prevent larger debris from clogging the drain in the future.9. Finishing Touches
How to Install a Kitchen Sink Drain

If you're not confident in your plumbing skills or are unsure about the installation process, it's always a good idea to hire a professional. A licensed plumber can ensure that the drain is installed correctly and can troubleshoot any issues that may arise. It may cost more upfront, but it can save you time and money in the long run by preventing potential issues or mistakes.10. Hiring a Professional
How to Install a Kitchen Sink Drain
Understanding the Importance of Plumbing Diagrams for Kitchen Sink Drains
/how-to-install-a-sink-drain-2718789-hero-24e898006ed94c9593a2a268b57989a3.jpg)
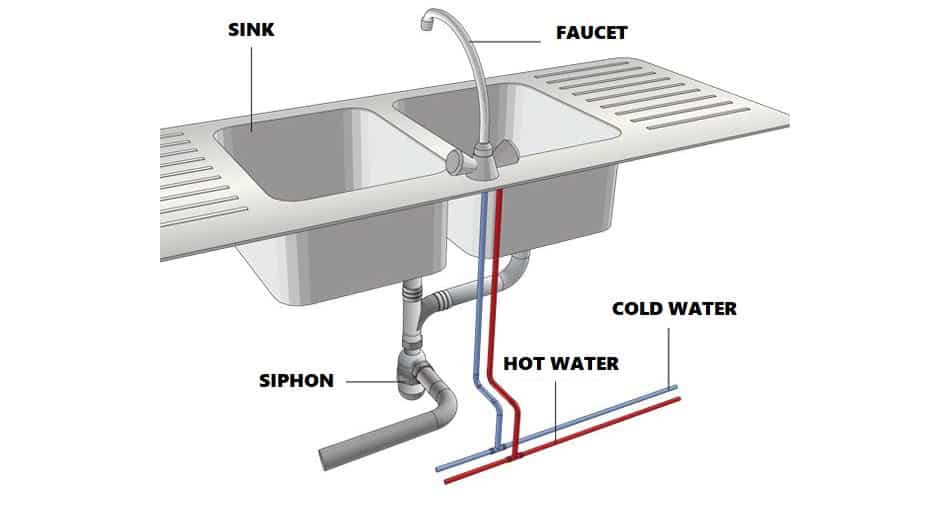
Efficient Drainage System for a Functional Kitchen
 Having a well-designed and functional kitchen is a top priority for any homeowner. It is the heart of the home, where meals are prepared and memories are made. One of the key elements of a functional kitchen is having a properly functioning
kitchen sink
. This is where plumbing diagrams for kitchen sink drains come into play. These diagrams provide a detailed layout of the pipes and connections that make up the drainage system. Understanding the importance of these diagrams is crucial in ensuring your kitchen sink drains efficiently and effectively.
Having a well-designed and functional kitchen is a top priority for any homeowner. It is the heart of the home, where meals are prepared and memories are made. One of the key elements of a functional kitchen is having a properly functioning
kitchen sink
. This is where plumbing diagrams for kitchen sink drains come into play. These diagrams provide a detailed layout of the pipes and connections that make up the drainage system. Understanding the importance of these diagrams is crucial in ensuring your kitchen sink drains efficiently and effectively.
Preventing Clogs and Blockages
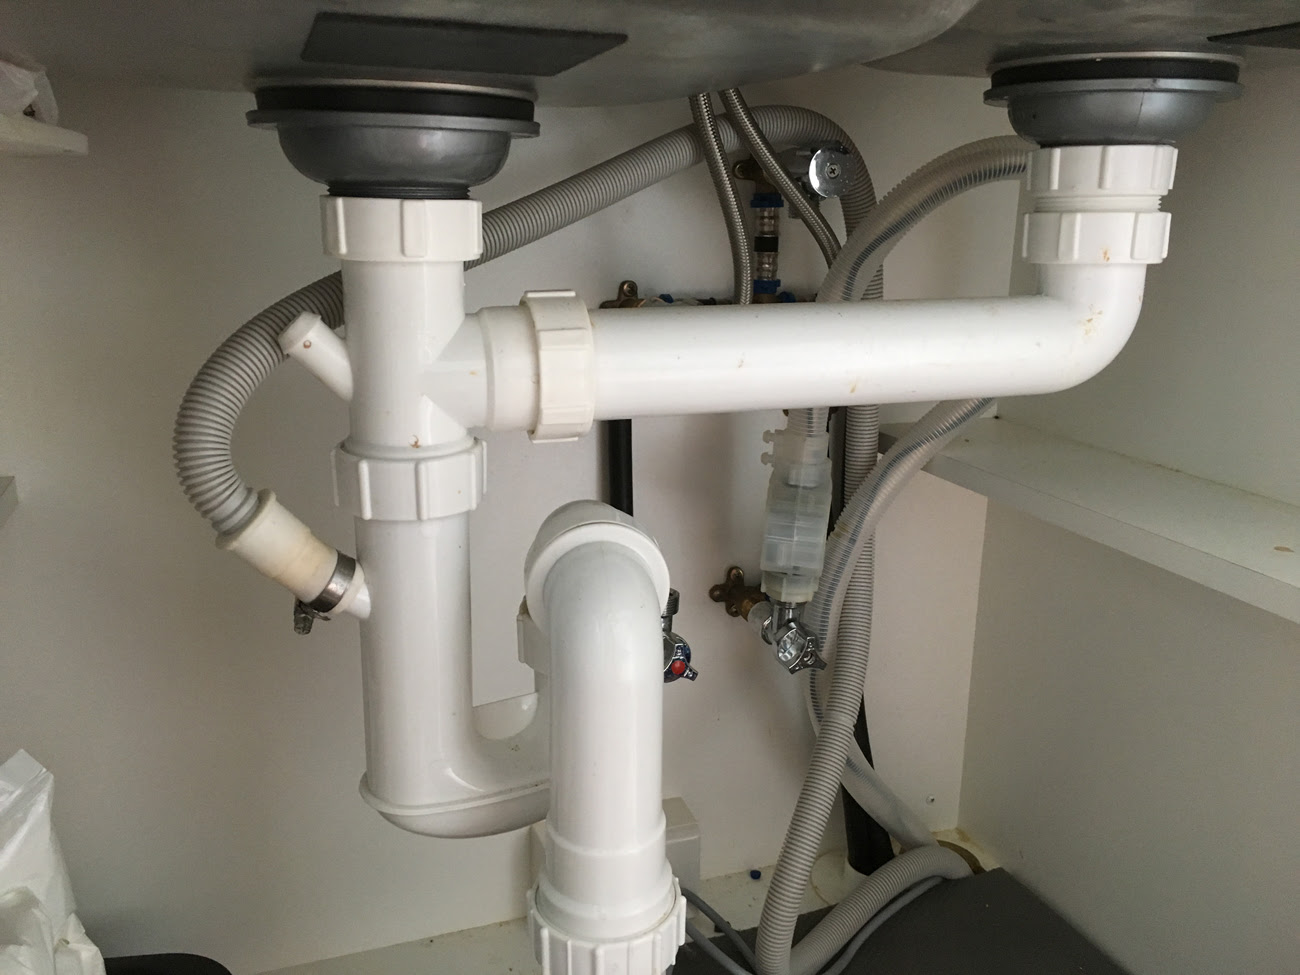 The main purpose of a plumbing diagram for a kitchen sink drain is to prevent clogs and blockages. As we use our kitchen sinks daily, food scraps, grease, and other debris can easily find their way into the drains. Without a well-designed drainage system, these materials can cause clogs and blockages, resulting in slow draining or even complete blockage. This not only affects the functionality of your kitchen sink but can also lead to unpleasant odors and potential water damage.
Protecting Your Home from Water Damage
 Another important reason to have a plumbing diagram for your kitchen sink drain is to protect your home from water damage. If there are any leaks or issues with the pipes, the diagram can help you identify the problem and address it before it causes any major damage. Additionally, having a clear understanding of the layout and connections of your kitchen sink drain can help you prevent any future issues and save you from costly repairs.
Ensuring Compliance with Building Codes
 Plumbing diagrams for kitchen sink drains are also essential in ensuring compliance with building codes. These codes set standards for plumbing systems to ensure they are safe and functional. When installing or renovating your kitchen sink, it is important to follow these codes to avoid any legal issues or complications in the future. A plumbing diagram provides a clear and detailed representation of your drain system, making it easier to comply with these codes.
Conclusion
 In conclusion, plumbing diagrams for kitchen sink drains are an essential component of a functional and efficient kitchen. They not only prevent clogs and blockages but also protect your home from water damage and ensure compliance with building codes. It is important to consult a professional plumber and have a detailed diagram before installing or making any changes to your kitchen sink drain system. This will help you avoid any potential issues and ensure your kitchen sink functions properly for years to come.