Replacing a kitchen sink basket strainer may seem like a daunting task, but with the right tools and know-how, it can be a simple and straightforward DIY project. Not only can replacing a worn or damaged basket strainer improve the appearance of your sink, but it can also prevent water leaks and other plumbing issues. In this step-by-step guide, we will go over everything you need to know to successfully replace a kitchen sink basket strainer.How to Replace a Kitchen Sink Basket Strainer
Replacing a kitchen sink basket strainer is a relatively easy task that can be done by any homeowner with basic DIY skills. You will need a few tools and materials, such as a screwdriver, pliers, and a new basket strainer, which can be found at your local hardware store. By following these simple steps, you can save money on hiring a professional plumber and make your sink look and function like new again.DIY Kitchen Sink Basket Strainer Replacement
Step 1: Turn off the water supply to your sink. This can usually be done by turning off the shut-off valves under the sink. Step 2: Remove any items from the sink and clear out the cabinet underneath. Step 3: Place a bucket or container under the sink to catch any excess water that may leak out. Step 4: Use a screwdriver to loosen and remove the screws that hold the old basket strainer in place. Step 5: Once the old basket strainer is removed, use a pair of pliers to disconnect the drain pipe from the bottom of the sink. Step 6: Clean the area around the sink where the old basket strainer was installed. Step 7: Take your new basket strainer and apply a thin layer of plumber's putty around the rim. Step 8: Place the new basket strainer into the sink hole and press it down firmly. Step 9: From underneath the sink, attach the nut and gasket to secure the basket strainer in place. Step 10: Reattach the drain pipe to the bottom of the sink and tighten with pliers. Step 11: Turn the water supply back on and check for any leaks. If there are no leaks, you have successfully replaced your kitchen sink basket strainer!Step-by-Step Guide for Replacing a Kitchen Sink Basket Strainer
- Screwdriver - Pliers - New basket strainer - Bucket or container - Plumber's putty - GasketTools and Materials Needed for Replacing a Kitchen Sink Basket Strainer
If you encounter any issues or complications while replacing your kitchen sink basket strainer, here are a few troubleshooting tips: - If the new basket strainer does not fit properly, try adjusting the gasket or using more plumber's putty to create a better seal. - If there are still leaks after installation, double-check that all connections are tight and secure. - If the sink is still clogged after replacing the basket strainer, the issue may be deeper in the pipes and may require professional assistance.Troubleshooting Common Issues with Kitchen Sink Basket Strainer Replacement
Here are a few tips to keep in mind to ensure a successful and hassle-free kitchen sink basket strainer replacement: - Always turn off the water supply before starting any plumbing project. - Use a bucket or container to catch excess water and prevent a mess. - Make sure to clean the area thoroughly before installing the new basket strainer. - Don't be afraid to ask for help if you encounter any difficulties or have questions.Tips for a Successful Kitchen Sink Basket Strainer Replacement
If you prefer visual instructions, there are plenty of helpful video tutorials available online that can guide you through the process of replacing a kitchen sink basket strainer. These videos can provide a more in-depth and detailed demonstration, making it easier for you to complete the task successfully.Video Tutorial: How to Replace a Kitchen Sink Basket Strainer
While it is possible to hire a professional plumber to replace your kitchen sink basket strainer, it is a relatively simple task that can be done by any homeowner with basic DIY skills. By doing it yourself, you can save money and have the satisfaction of completing a home improvement project on your own. However, if you are uncomfortable with plumbing tasks or encounter any complications, it is always best to seek professional assistance. In conclusion, replacing a kitchen sink basket strainer is a DIY project that can improve the appearance and functionality of your sink. With the right tools and steps, you can easily complete this task and enjoy a leak-free sink once again.Professional vs. DIY Kitchen Sink Basket Strainer Replacement
How to Replace a Kitchen Sink Basket Strainer

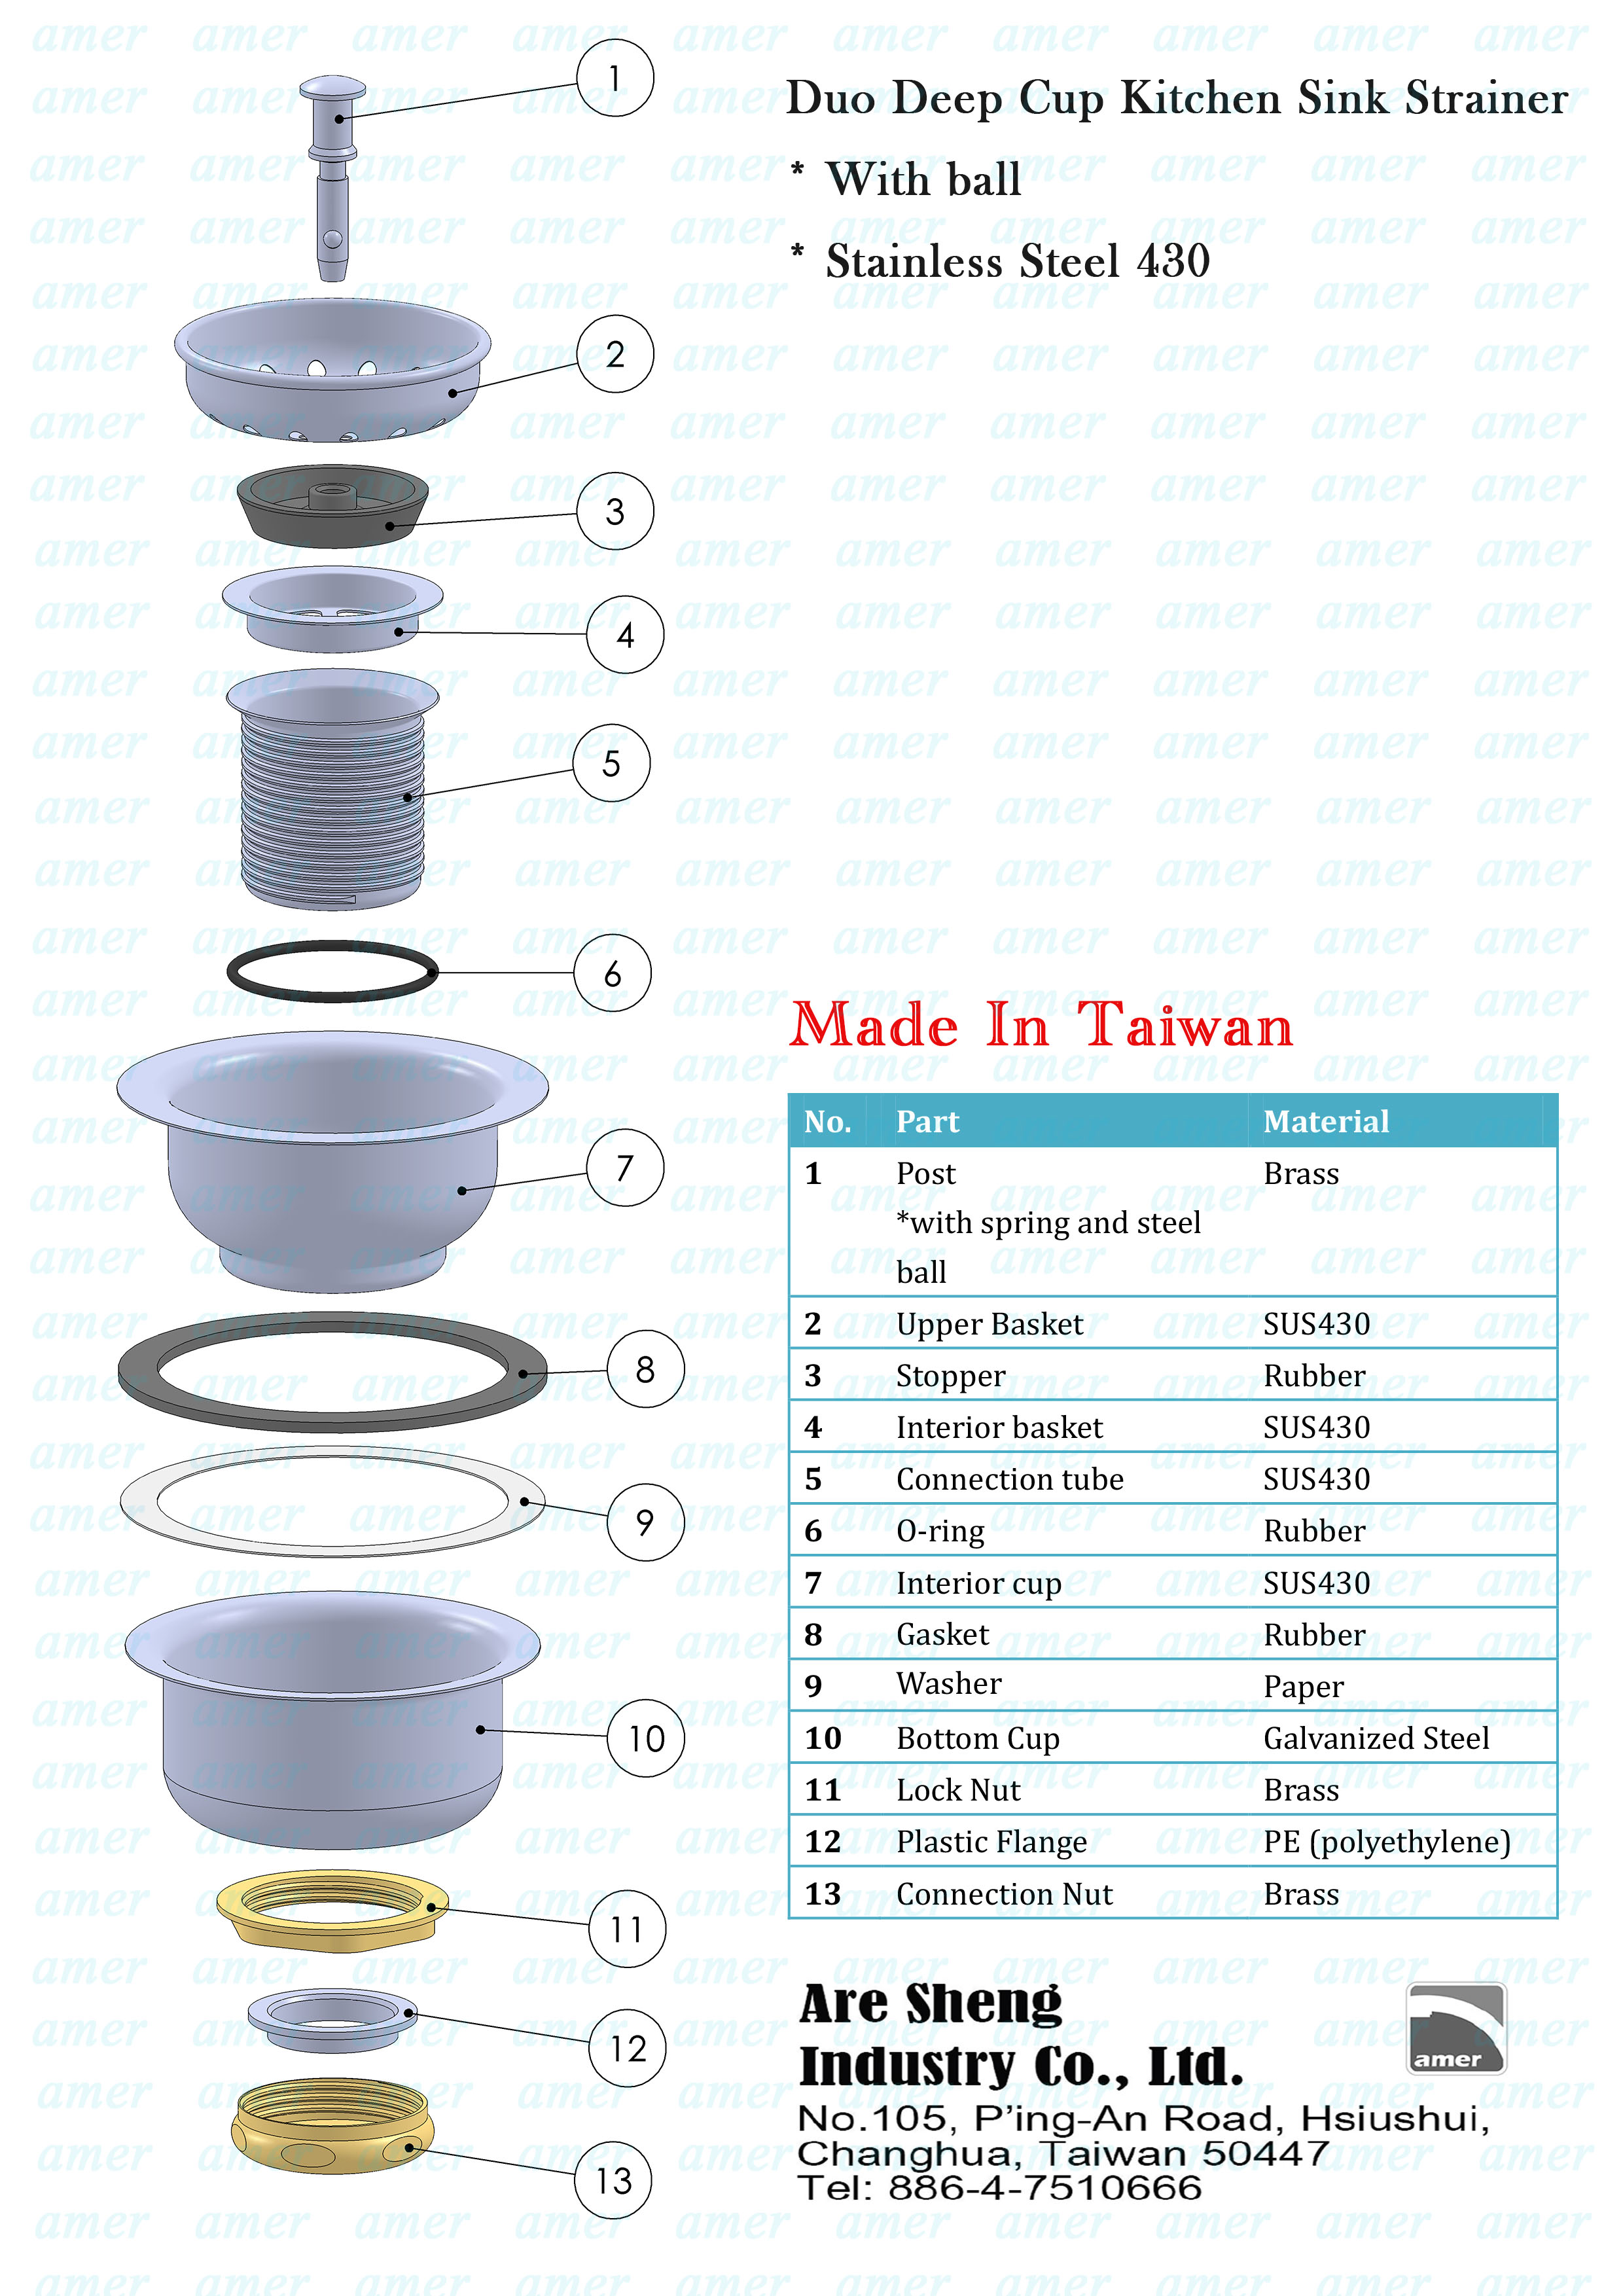
Step 1: Gather Your Materials
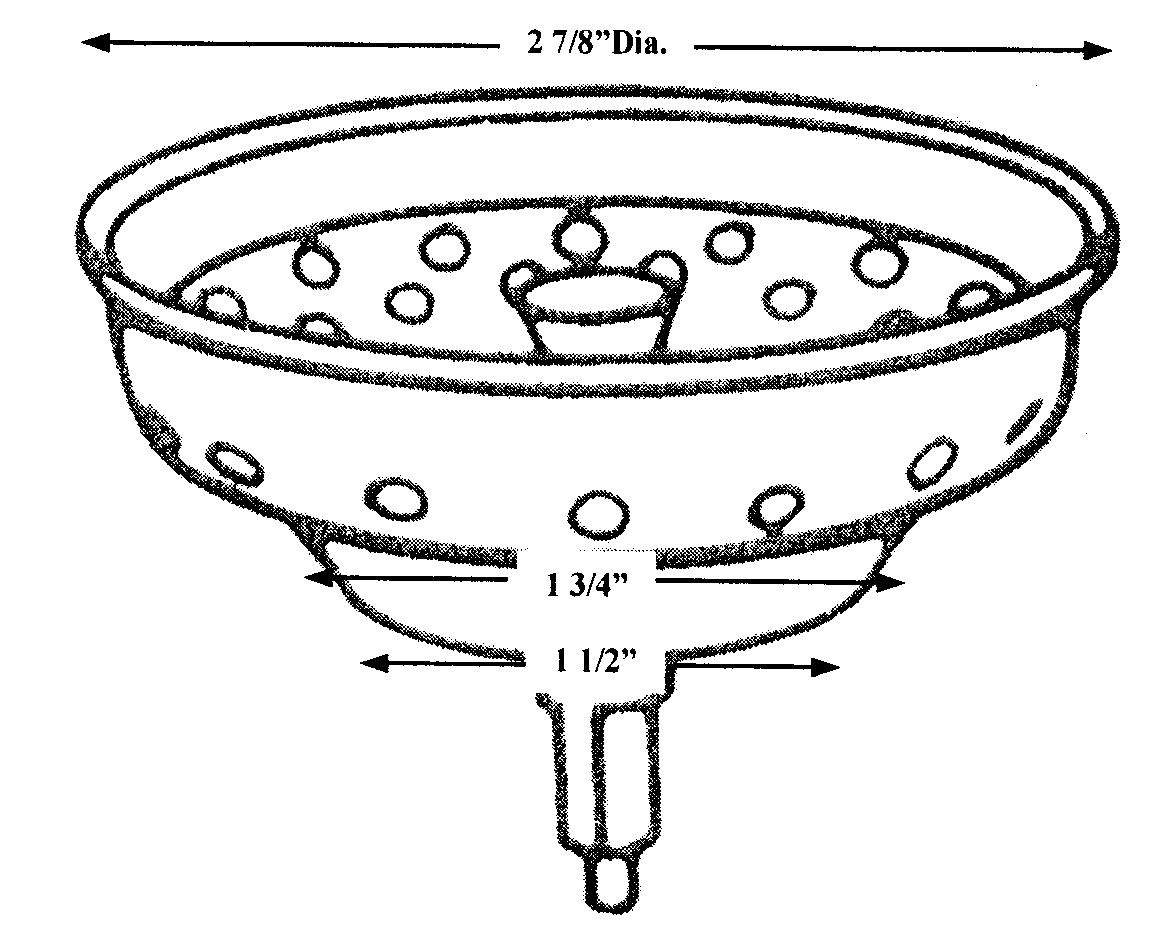
 Before you start replacing your kitchen sink basket strainer, it's important to have all the necessary materials on hand. You will need a new basket strainer, plumber's putty, a putty knife, a wrench, and a screwdriver. It's always a good idea to purchase a replacement basket strainer that matches the diameter and style of your current one to ensure a proper fit.
Step 2: Prepare the Sink
 Before removing the old basket strainer, you will need to prepare the sink by cleaning around the drain opening. Use a mild cleaner and a scrub brush to remove any buildup or debris. This will ensure that the new basket strainer will seal properly.
Step 3: Remove the Old Basket Strainer
 Using a wrench, loosen the nut that holds the basket strainer in place. Once the nut is loose, you should be able to remove the old basket strainer from the sink. If the strainer is stuck, you can use a screwdriver to pry it out.
Step 4: Apply Plumber's Putty
 Take a small amount of plumber's putty and roll it into a thin rope. Place the putty around the underside of the new basket strainer and press it into the sink opening. The putty will act as a sealant and prevent any leaks.
Step 5: Secure the New Basket Strainer
 Place the new basket strainer into the sink opening and secure it in place with the mounting nut. Use a wrench to tighten the nut until the basket strainer is firmly in place.
Step 6: Clean Up
 Wipe away any excess putty that may have squeezed out from under the basket strainer. Use a damp cloth to clean the area around the sink opening.
Step 7: Test for Leaks
 Turn on the water and check for any leaks around the basket strainer. If you notice any leaks, tighten the mounting nut a little more until the leak stops.
Replacing a kitchen sink basket strainer may seem like a daunting task, but with the right tools and materials, it can be a simple and straightforward process. By following these steps, you can have a new basket strainer installed in no time, ensuring a properly functioning and leak-free sink. Remember to always use a professional and well-organized approach when working on any house design projects.


