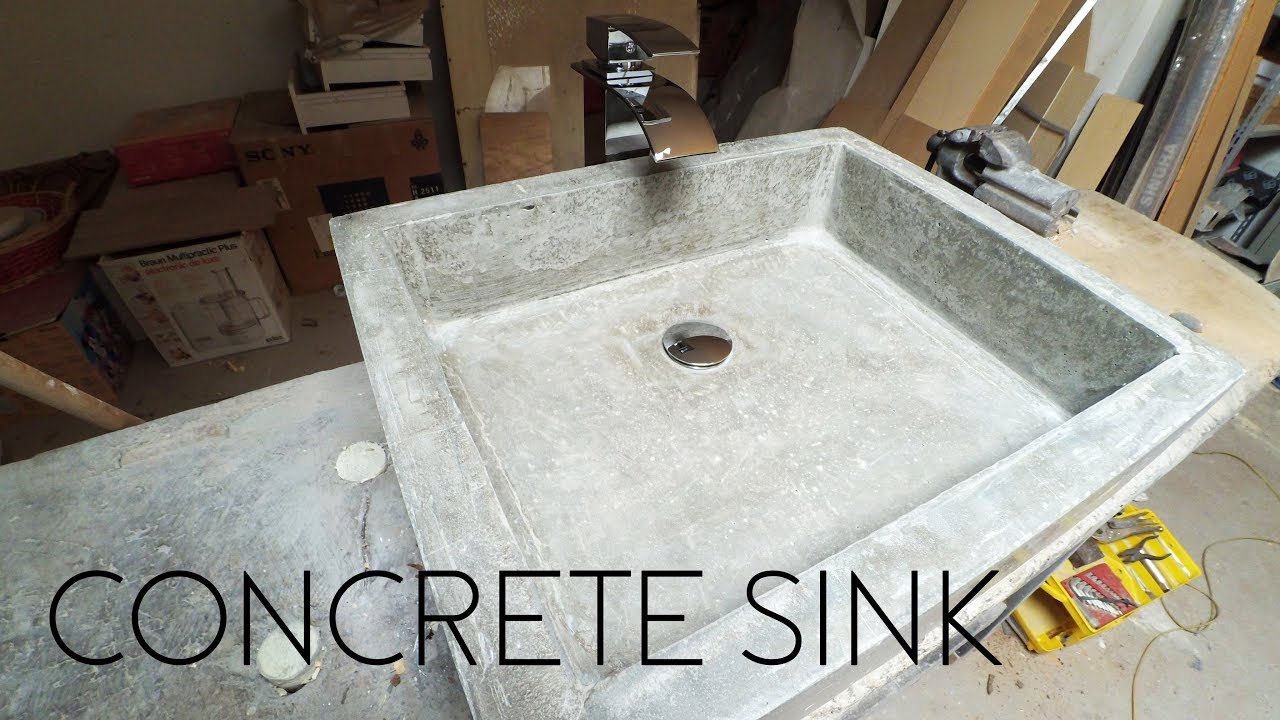
Concrete kitchen sinks are becoming increasingly popular in modern homes as they provide a unique and durable alternative to traditional sinks. If you're looking to add a touch of industrial chic to your kitchen, why not try making your own concrete kitchen sink? Not only will it save you money, but it will also give you a sense of satisfaction knowing that you created a one-of-a-kind piece for your home. Here's a step-by-step guide on how to make a concrete kitchen sink yourself.DIY Concrete Kitchen Sink: How to Make One Yourself


DIY Concrete Kitchen Sink: How to Make One Yourself


Making a concrete kitchen sink may seem like a daunting task, but with the right tools and materials, it can be a fun and rewarding DIY project. The first step is to decide on the design and size of your sink. Will it be a single or double sink? Do you want a sleek and modern look or a more rustic and textured finish? Once you have a clear idea, gather the necessary materials and follow these steps:How to Make a Concrete Sink for Your Kitchen


How to Make a Concrete Sink for Your Kitchen


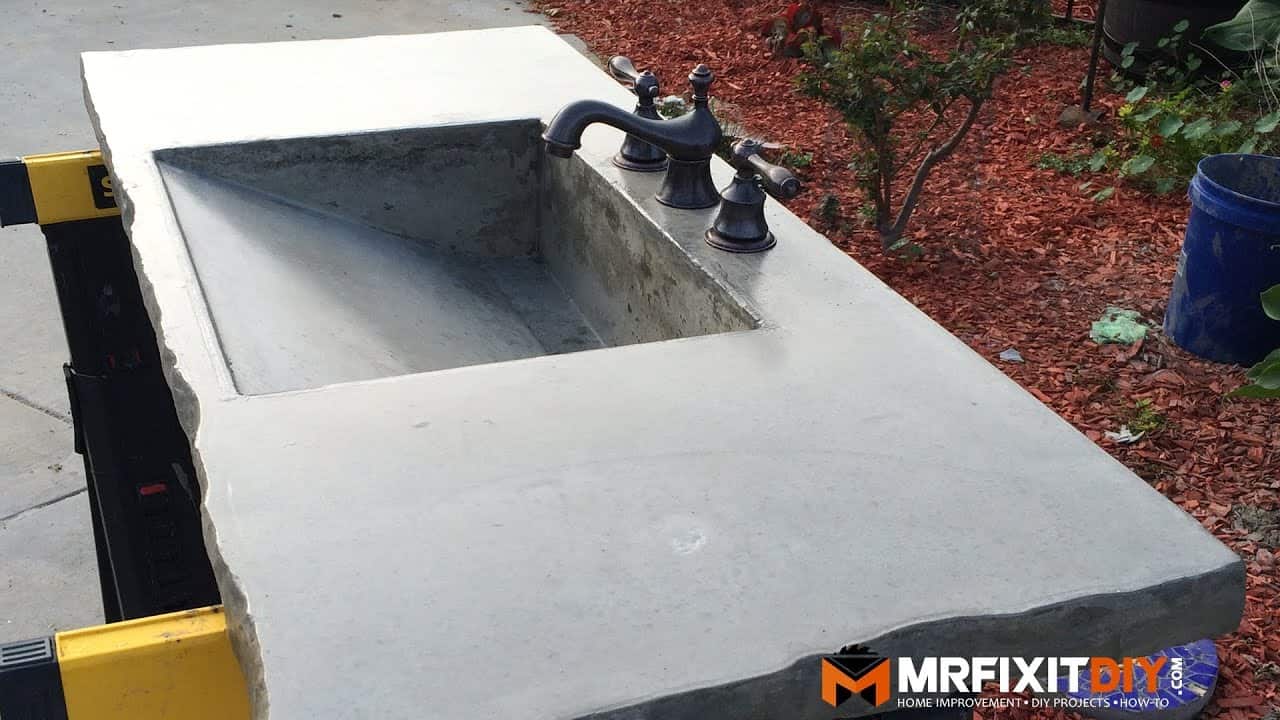
Step 1: Create a Mold The first step is to create a mold for your sink. This can be done using melamine boards or any other smooth and non-porous material. Cut the boards according to your desired sink size and use screws to assemble them together. Make sure to seal any gaps with silicone to prevent the concrete from leaking out. Step 2: Prepare the Concrete Mix Next, mix the concrete according to the manufacturer's instructions. You can also add color pigments to the mix to achieve a specific hue. Make sure the consistency is thick but pourable. Step 3: Pour the Concrete Carefully pour the concrete mix into the mold, making sure to fill all the corners and edges. Use a trowel to smooth out the surface and remove any air bubbles. You can also add reinforcement mesh for added strength. Step 4: Shape the Sink Once the concrete has set for about an hour, use a wet sponge to shape the sink. You can also use a putty knife or any other tool to create a drainage slope and smooth out the edges. Step 5: Let it Cure Leave the sink to cure for at least 24 hours. You can also cover it with plastic to prevent it from drying out too quickly. Step 6: Remove the Mold After the concrete has fully cured, carefully remove the mold by unscrewing the boards and gently pulling them away from the sink. Sand down any rough edges or imperfections with sandpaper. Step 7: Seal the Sink Finally, seal the sink with a concrete sealer to protect it from stains and water damage. You can also add a waterproofing membrane underneath the sink to ensure that it stays dry.Step-by-Step Guide to Making a Concrete Kitchen Sink


Step-by-Step Guide to Making a Concrete Kitchen Sink


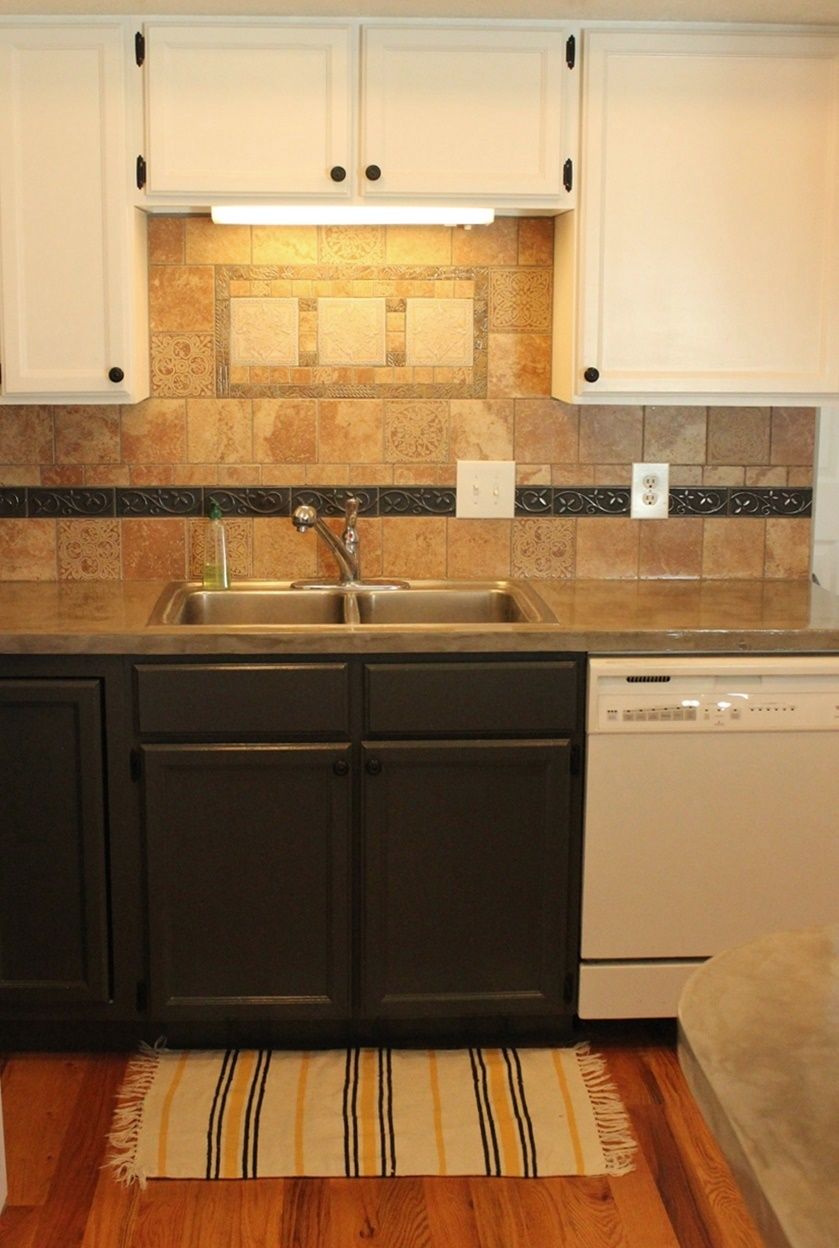
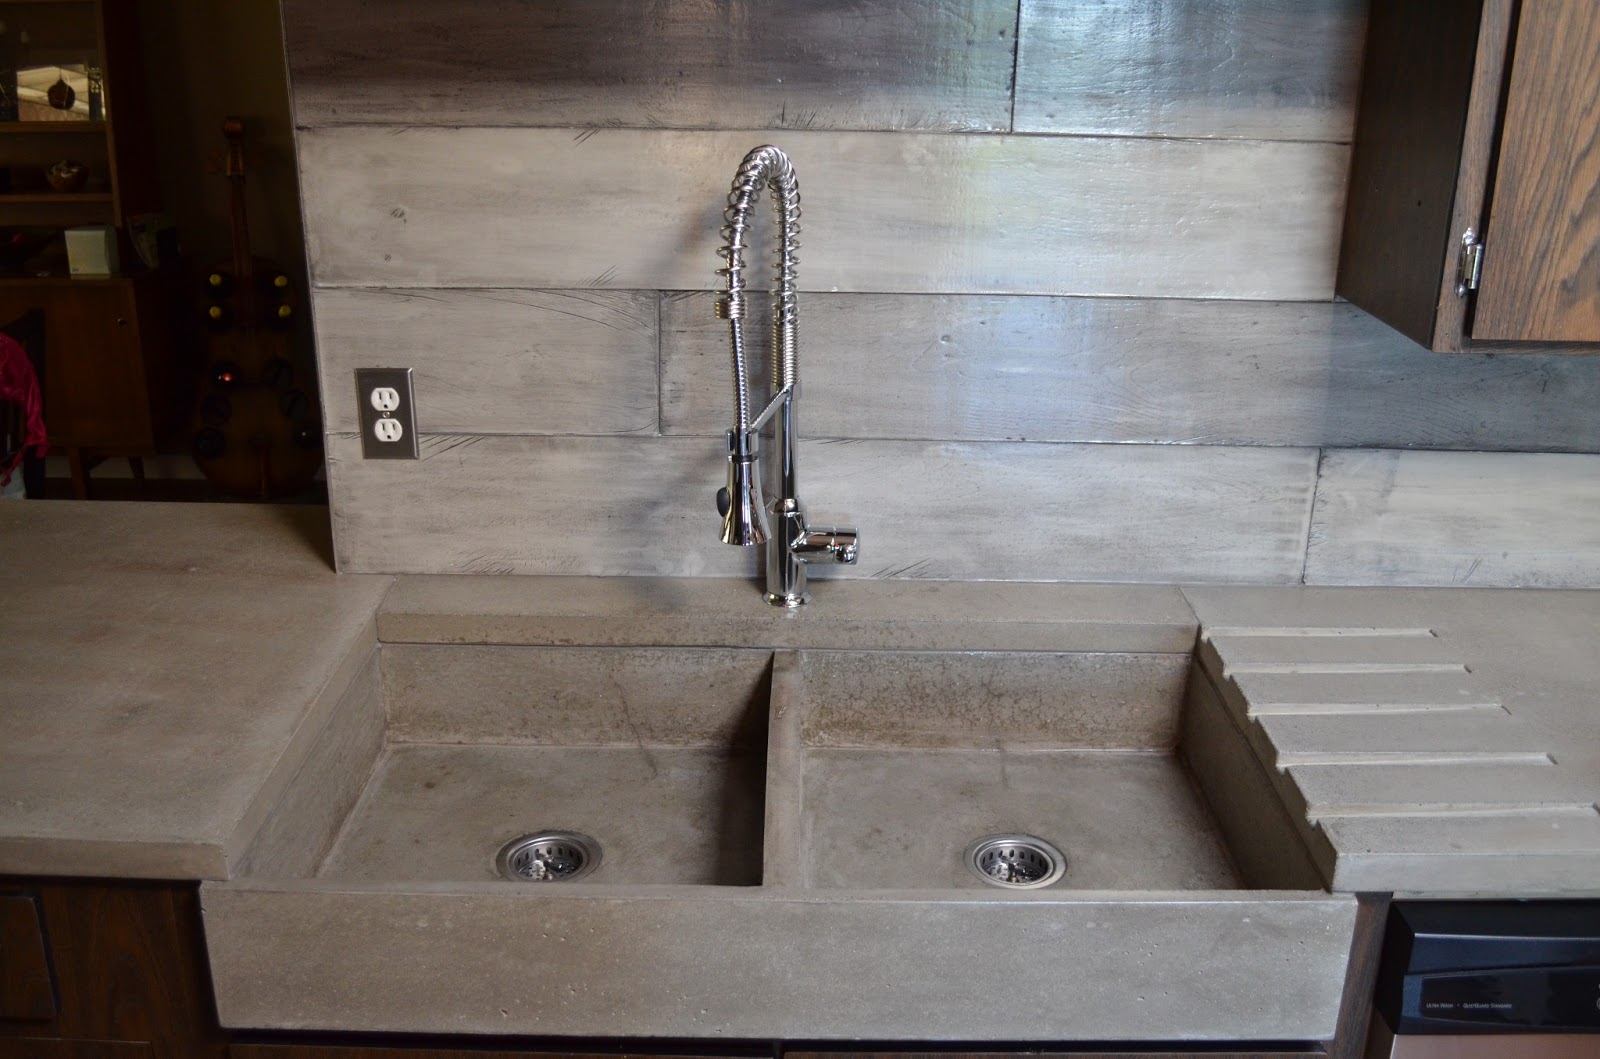
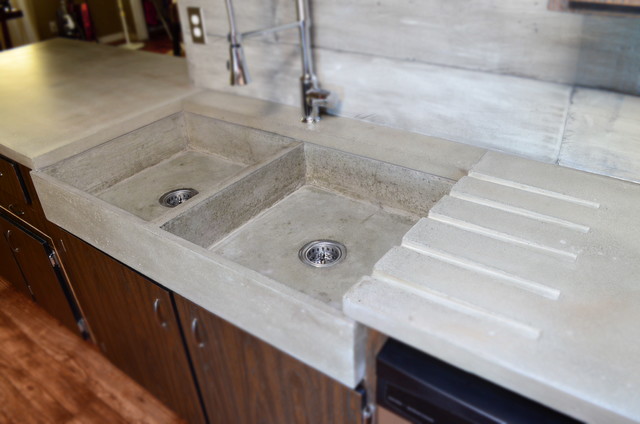
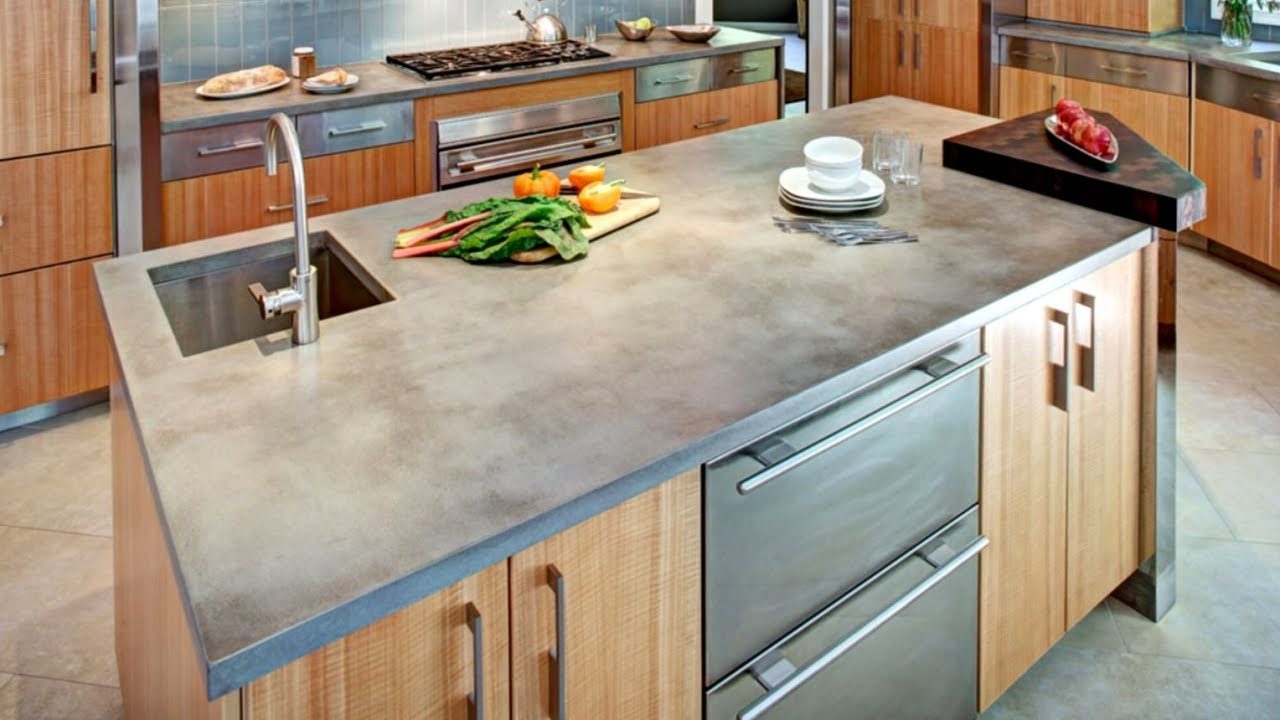
A concrete kitchen sink is not only a functional addition to your home, but it also adds a unique and stylish touch to your kitchen. Its durability and resistance to scratches and stains make it a practical choice for busy kitchens. Plus, since each sink is handmade, you can be sure that yours is one of a kind.Concrete Kitchen Sink: A Unique Addition to Your Home

Concrete Kitchen Sink: A Unique Addition to Your Home


.JPG)

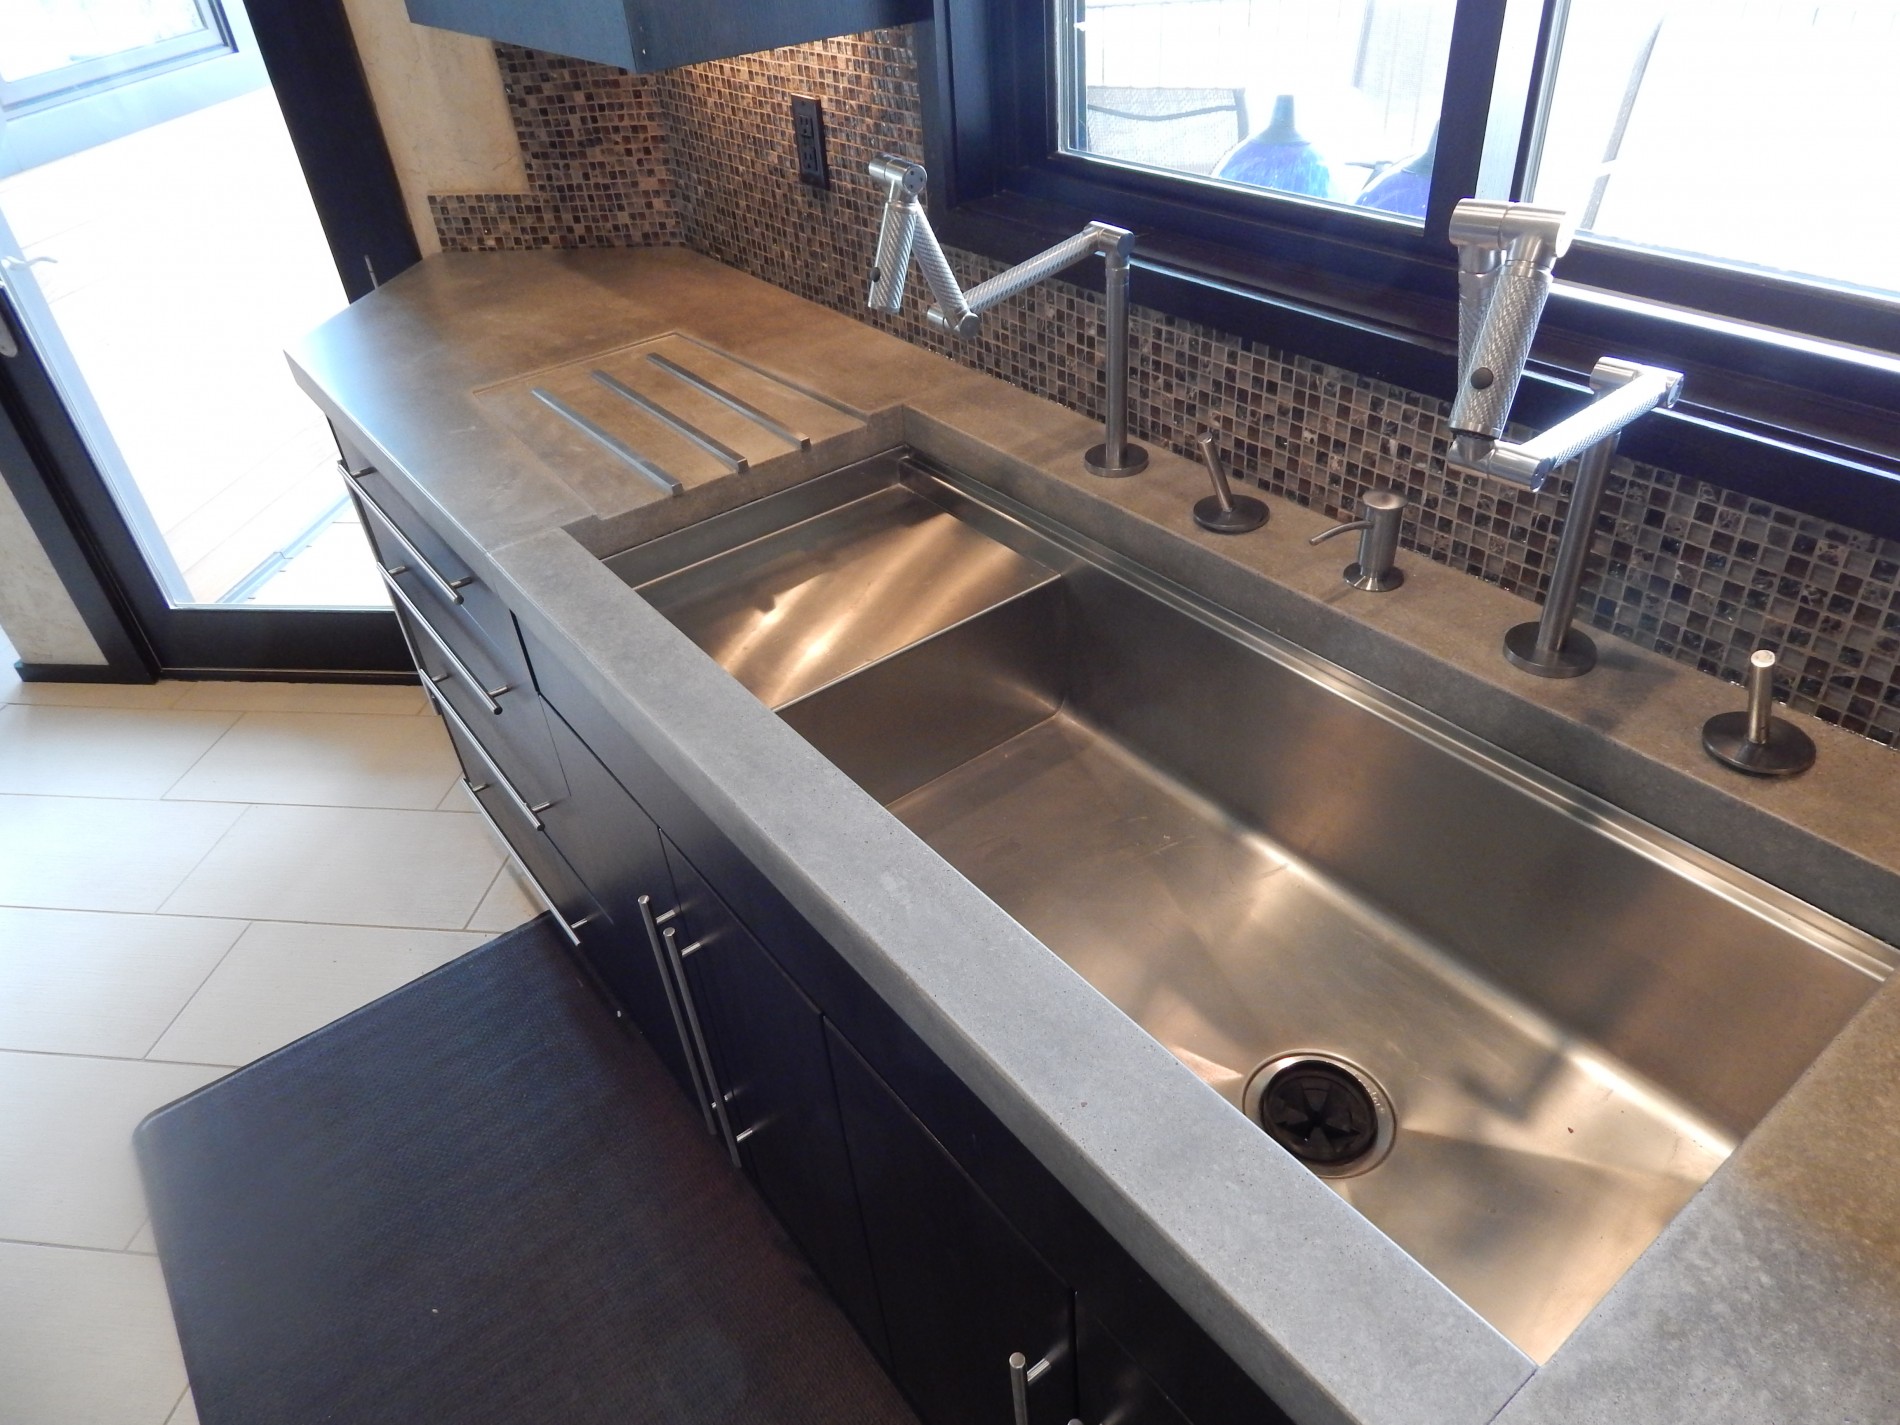
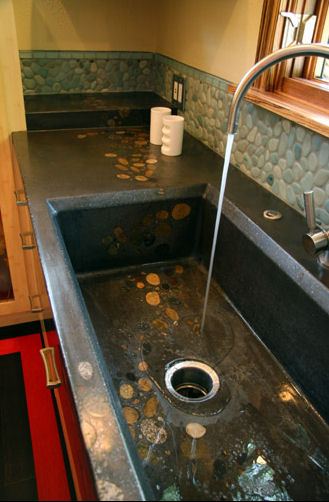
If you want to take your concrete sink to the next level, consider adding some custom features. You can embed decorative items such as shells, pebbles, or glass pieces into the concrete mix to give your sink a personalized touch. You can also add a built-in soap dish or a drainboard for added functionality.How to Build a Custom Concrete Kitchen Sink

How to Build a Custom Concrete Kitchen Sink


.JPG)

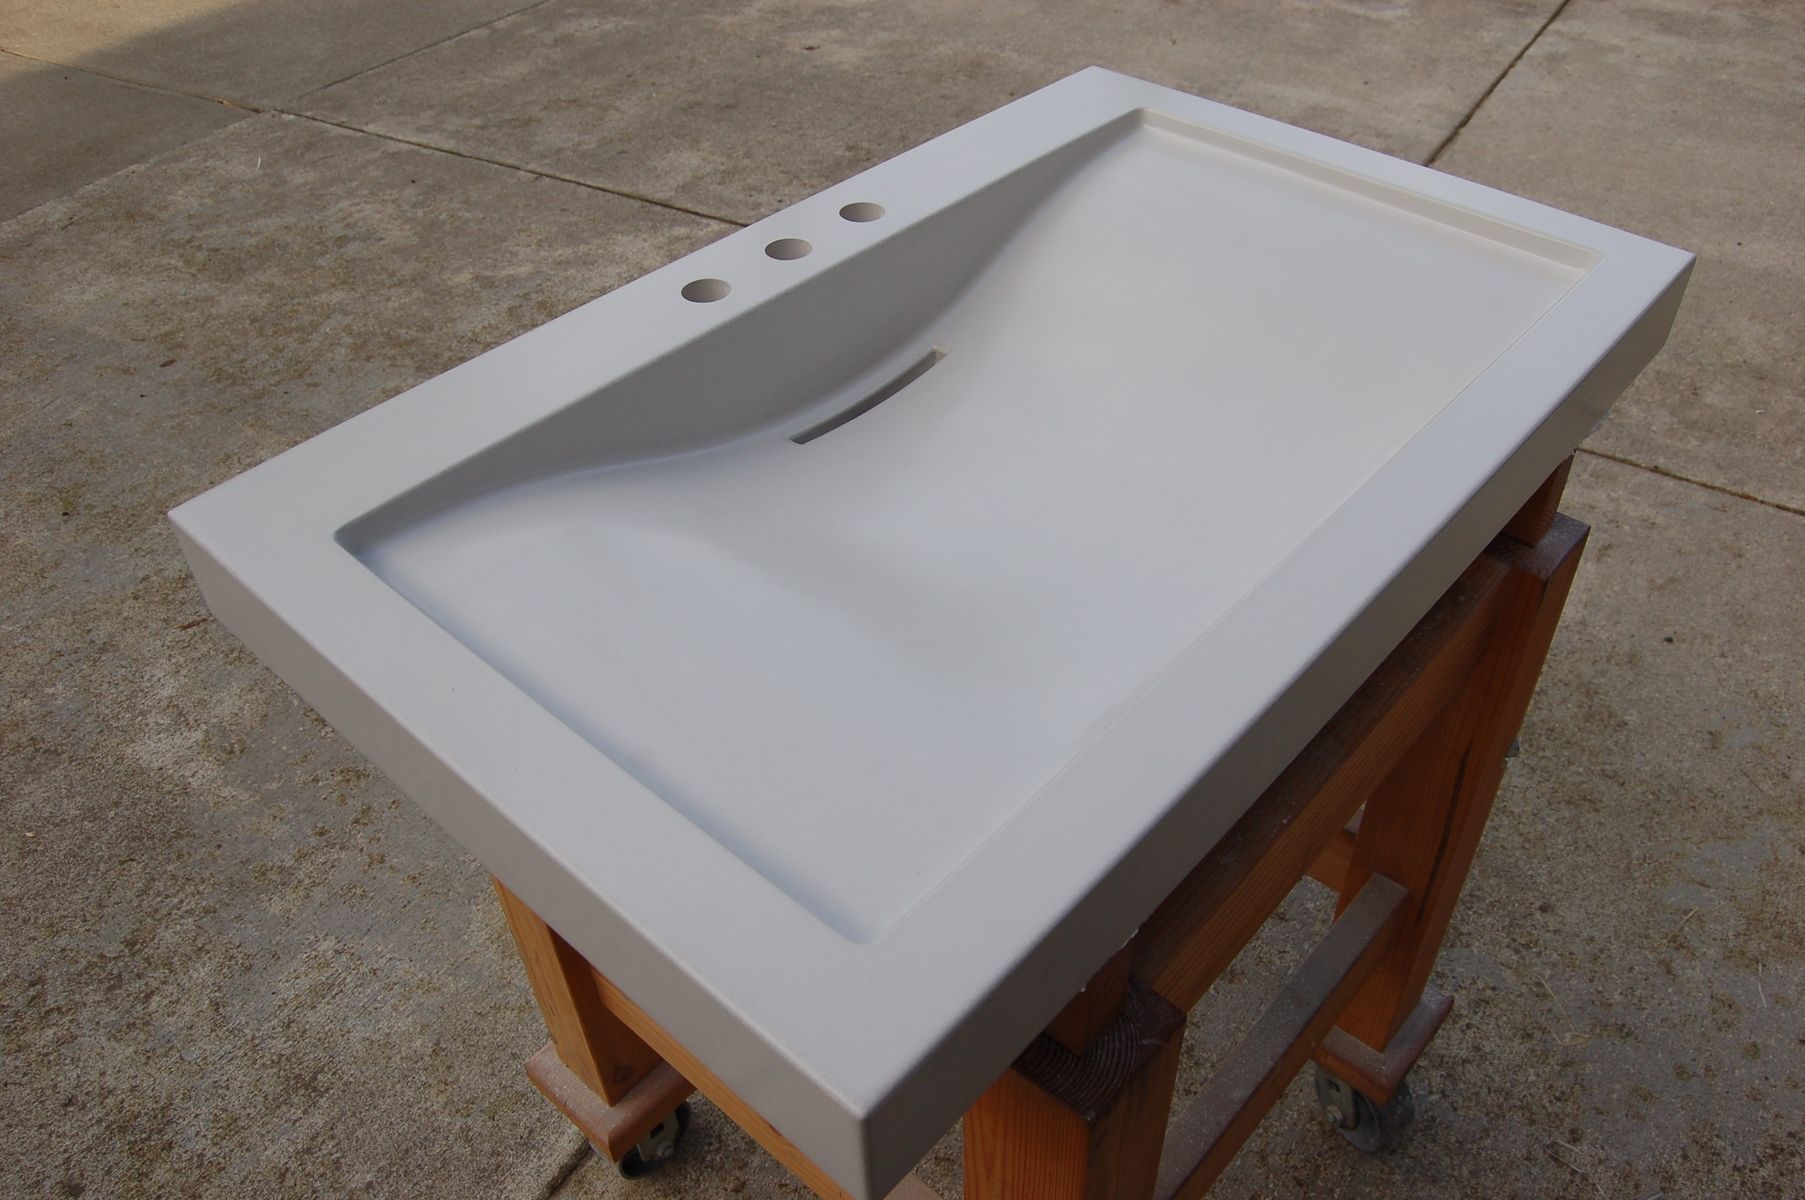
Concrete is known for its strength and durability, making it the perfect material for a kitchen sink. Not only is it resistant to heat, scratches, and stains, but it also requires minimal maintenance. To keep your sink looking its best, avoid using harsh chemicals and abrasive cleaners. Instead, clean it regularly with a mild soap and water and dry it with a soft cloth.Creating a Durable and Stylish Concrete Kitchen Sink

Creating a Durable and Stylish Concrete Kitchen Sink

.JPG)

Pros: - Durable and long-lasting - Customizable design options - Easy to clean and maintain - Adds a unique touch to your kitchen Cons: - Heavy and difficult to install - Requires a longer curing time compared to other materials - Can be prone to hairline cracks if not properly reinforcedConcrete Kitchen Sink: Pros and Cons

Concrete Kitchen Sink: Pros and Cons


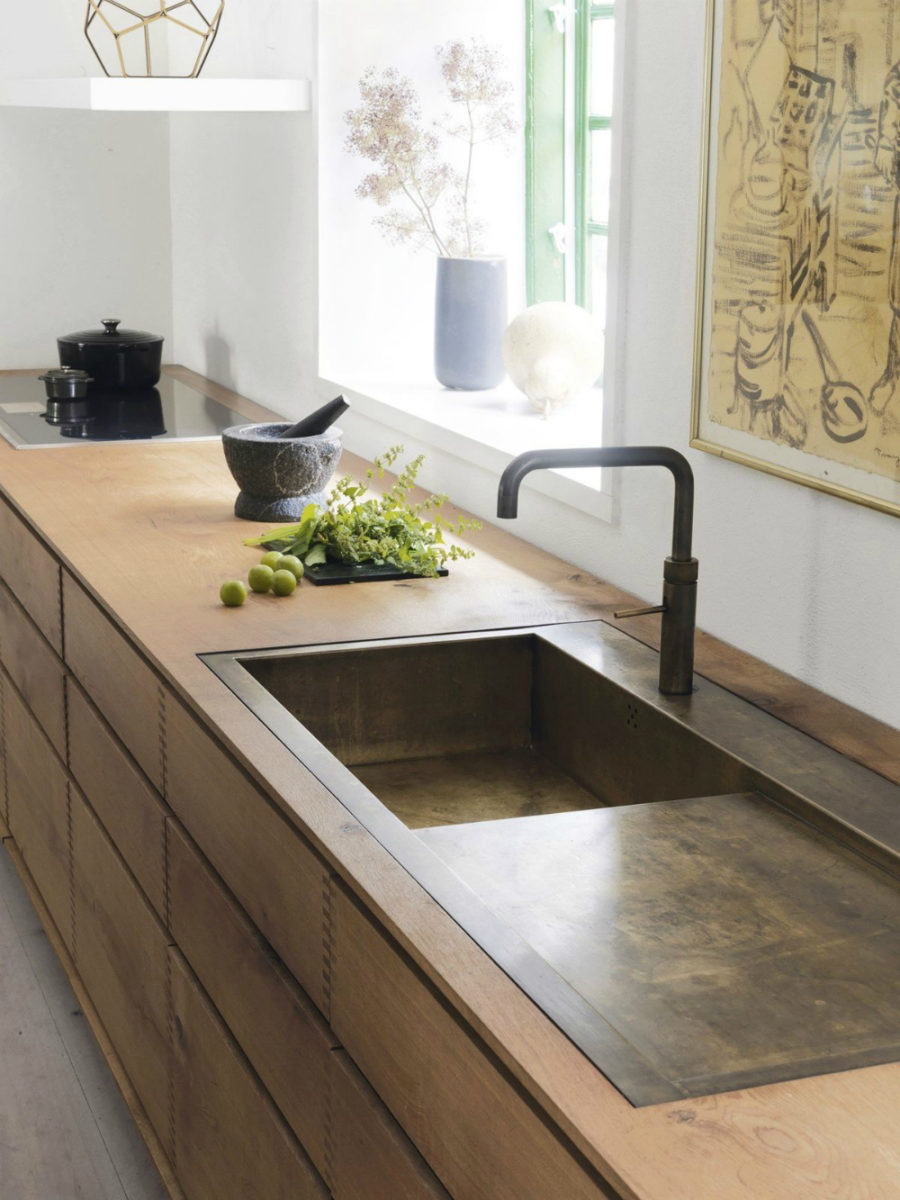
The possibilities are endless when it comes to designing a concrete kitchen sink. You can choose from a variety of colors, textures, and shapes to match your kitchen's style. Some popular design ideas include: - A sleek and modern rectangular sink with a polished finish - A rustic and textured sink with an organic shape - A colorful sink with embedded decorative objects - A double sink with a built-in drainboardDesign Ideas for a Concrete Kitchen Sink


Design Ideas for a Concrete Kitchen Sink


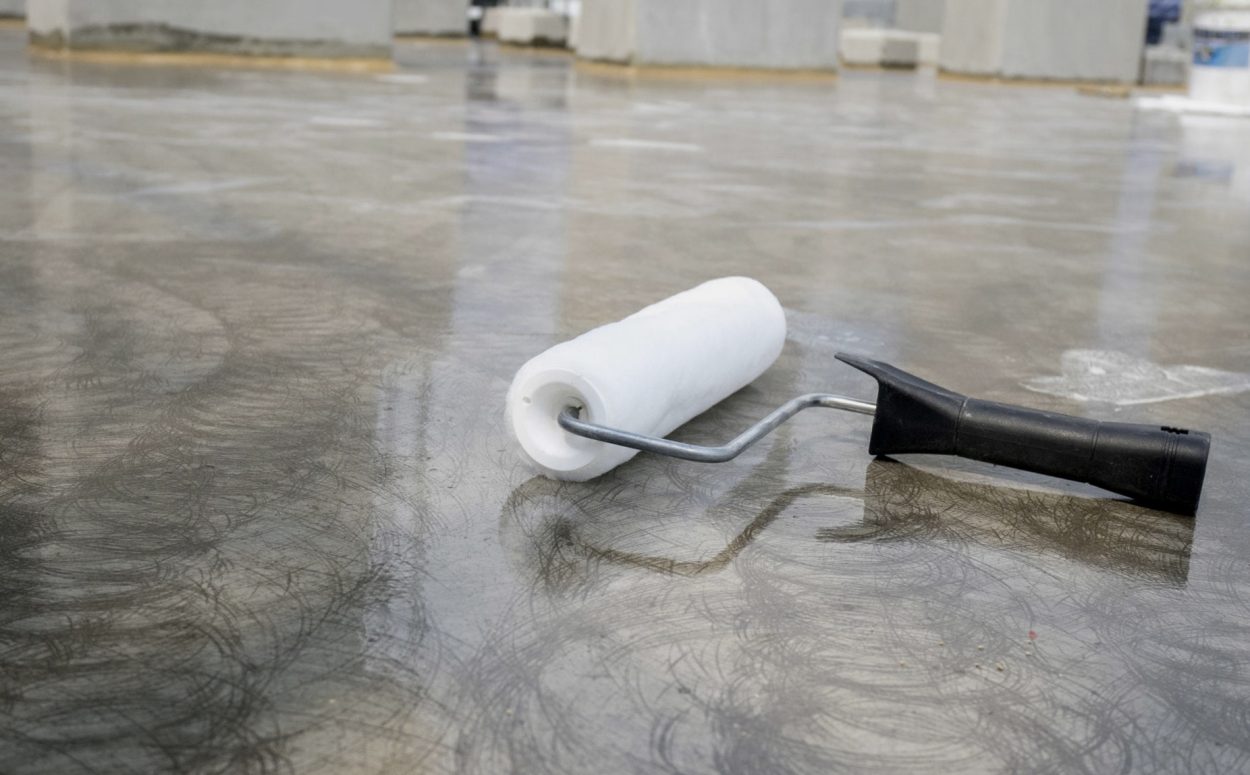
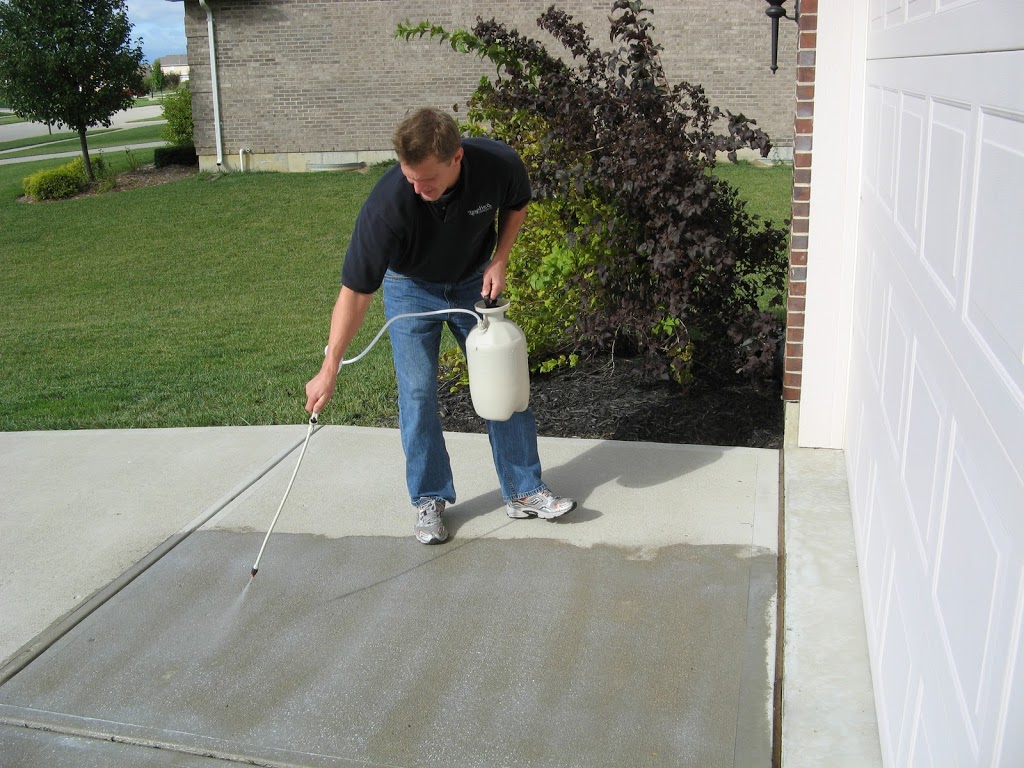
To ensure that your concrete kitchen sink stays in top condition, it's essential to seal and maintain it properly. Here are some tips to help you: Sealing: - Use a high-quality concrete sealer - Apply the sealer according to the manufacturer's instructions - Reapply the sealer every 1-2 years or as needed Maintenance: - Clean spills and stains immediately - Avoid using harsh chemicals and abrasive cleaners - Use a cutting board to prevent scratches - Dry the sink after each use to prevent water spotsHow to Seal and Maintain Your Concrete Kitchen Sink


How to Seal and Maintain Your Concrete Kitchen Sink

The cost of a concrete kitchen sink can vary depending on the size, design, and additional features. On average, a DIY concrete sink can cost anywhere from $200-$500, while professionally made sinks can cost upwards of $1000. The installation process can also be challenging for beginners, so it's best to hire a professional if you're not confident in your skills. A concrete kitchen sink is a unique and durable addition to any home. With the right tools, materials, and instructions, you can create a stunning sink that will be the focal point of your kitchen. So, why not give it a try and add a touch of industrial charm to your home?Concrete Kitchen Sink: Cost and Installation Guide
Concrete Kitchen Sink: Cost and Installation Guide


Concrete sinks have become a popular choice for modern kitchens, thanks to their durability and sleek design. These sinks are made from a mixture of cement, sand, and water, and can be customized to fit any kitchen style. But why settle for a store-bought concrete sink when you can make your own? In this article, we'll show you how to make a concrete kitchen sink that will not only add a unique touch to your kitchen but also save you money in the process.
Why Choose a Concrete Sink?
 Concrete sinks offer many benefits that make them a desirable choice for modern kitchens.
Durability
is one of the main reasons why concrete sinks are becoming increasingly popular. They can withstand heavy use and are resistant to scratches, stains, and heat. This makes them an ideal choice for busy kitchens where there is a lot of cooking and cleaning. Additionally, concrete sinks can be
customized
to fit any kitchen design and style, making them a versatile option for homeowners looking to personalize their space.
Concrete sinks offer many benefits that make them a desirable choice for modern kitchens.
Durability
is one of the main reasons why concrete sinks are becoming increasingly popular. They can withstand heavy use and are resistant to scratches, stains, and heat. This makes them an ideal choice for busy kitchens where there is a lot of cooking and cleaning. Additionally, concrete sinks can be
customized
to fit any kitchen design and style, making them a versatile option for homeowners looking to personalize their space.
Materials Needed
 Before we dive into the steps of making a concrete kitchen sink, let's go over the materials you will need for this project. You will need
cement, sand, water, a mold, and a release agent
to create your sink. You can choose to use either regular cement or a
fiber-reinforced cement
for added strength and durability. The release agent is essential for easy removal of the sink from the mold without causing any damage.
Before we dive into the steps of making a concrete kitchen sink, let's go over the materials you will need for this project. You will need
cement, sand, water, a mold, and a release agent
to create your sink. You can choose to use either regular cement or a
fiber-reinforced cement
for added strength and durability. The release agent is essential for easy removal of the sink from the mold without causing any damage.
Building the Mold
 The first step to making a concrete kitchen sink is to build a mold. You can either use a pre-made mold or create your own using materials such as plywood or foam.
Measure and cut the mold to the desired size and shape of your sink
. Make sure to add an extra inch to the measurement to account for the thickness of the concrete. You can also add any design elements such as patterns or textures to the mold to give your sink a unique look.
The first step to making a concrete kitchen sink is to build a mold. You can either use a pre-made mold or create your own using materials such as plywood or foam.
Measure and cut the mold to the desired size and shape of your sink
. Make sure to add an extra inch to the measurement to account for the thickness of the concrete. You can also add any design elements such as patterns or textures to the mold to give your sink a unique look.
Mixing and Pouring the Concrete
 Once you have your mold ready, it's time to mix the concrete.
Follow the instructions on the cement bag to get the right consistency
. Add the water gradually and mix until you get a smooth, workable mixture. Next, pour the concrete into the mold, making sure to fill all the corners and edges. Use a trowel to smooth out the surface and remove any air pockets.
Once you have your mold ready, it's time to mix the concrete.
Follow the instructions on the cement bag to get the right consistency
. Add the water gradually and mix until you get a smooth, workable mixture. Next, pour the concrete into the mold, making sure to fill all the corners and edges. Use a trowel to smooth out the surface and remove any air pockets.
Curing and Finishing
 After pouring the concrete, let it cure for at least 24 hours before removing it from the mold. Once it's cured, carefully remove the sink from the mold and let it dry for another 24 hours. You can then use sandpaper to smooth out any rough edges and add a sealant to protect the sink from stains and water damage. And there you have it, a beautiful and durable
concrete kitchen sink
that you can proudly say you made yourself.
Making your own concrete kitchen sink is not only a fun and rewarding project, but it also allows you to create a unique and personalized piece for your home. With the right materials and a little bit of patience, you can have a beautiful and functional sink that will be the centerpiece of your kitchen. So why settle for a standard store-bought sink when you can make your own concrete masterpiece?
After pouring the concrete, let it cure for at least 24 hours before removing it from the mold. Once it's cured, carefully remove the sink from the mold and let it dry for another 24 hours. You can then use sandpaper to smooth out any rough edges and add a sealant to protect the sink from stains and water damage. And there you have it, a beautiful and durable
concrete kitchen sink
that you can proudly say you made yourself.
Making your own concrete kitchen sink is not only a fun and rewarding project, but it also allows you to create a unique and personalized piece for your home. With the right materials and a little bit of patience, you can have a beautiful and functional sink that will be the centerpiece of your kitchen. So why settle for a standard store-bought sink when you can make your own concrete masterpiece?