If you've recently purchased the Kohler Barossa kitchen sink faucet, congratulations! This sleek and modern faucet is not only aesthetically pleasing, but also highly functional and durable. However, before you can start enjoying all its benefits, you'll need to install it first. Don't worry, installing the Kohler Barossa kitchen sink faucet is not as daunting as it may seem. With the right tools and some basic plumbing knowledge, you can easily do it yourself. In this guide, we'll take you through the step-by-step process of installing your new faucet, so you can have it up and running in no time.1. Kohler Barossa Kitchen Sink Faucet Installation Guide


1. Kohler Barossa Kitchen Sink Faucet Installation Guide


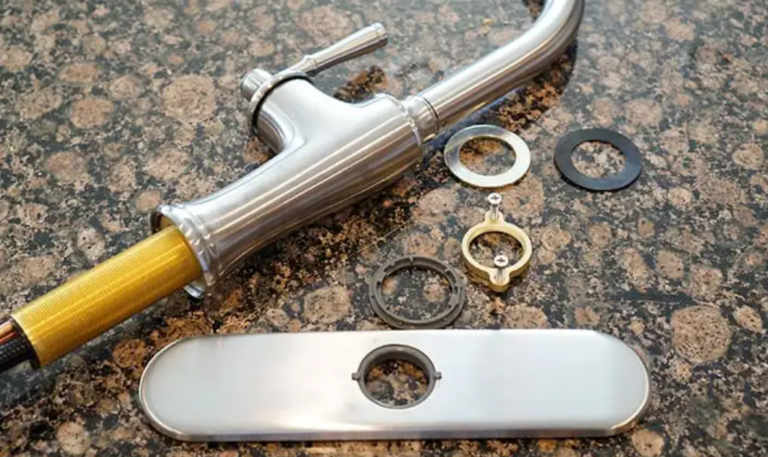
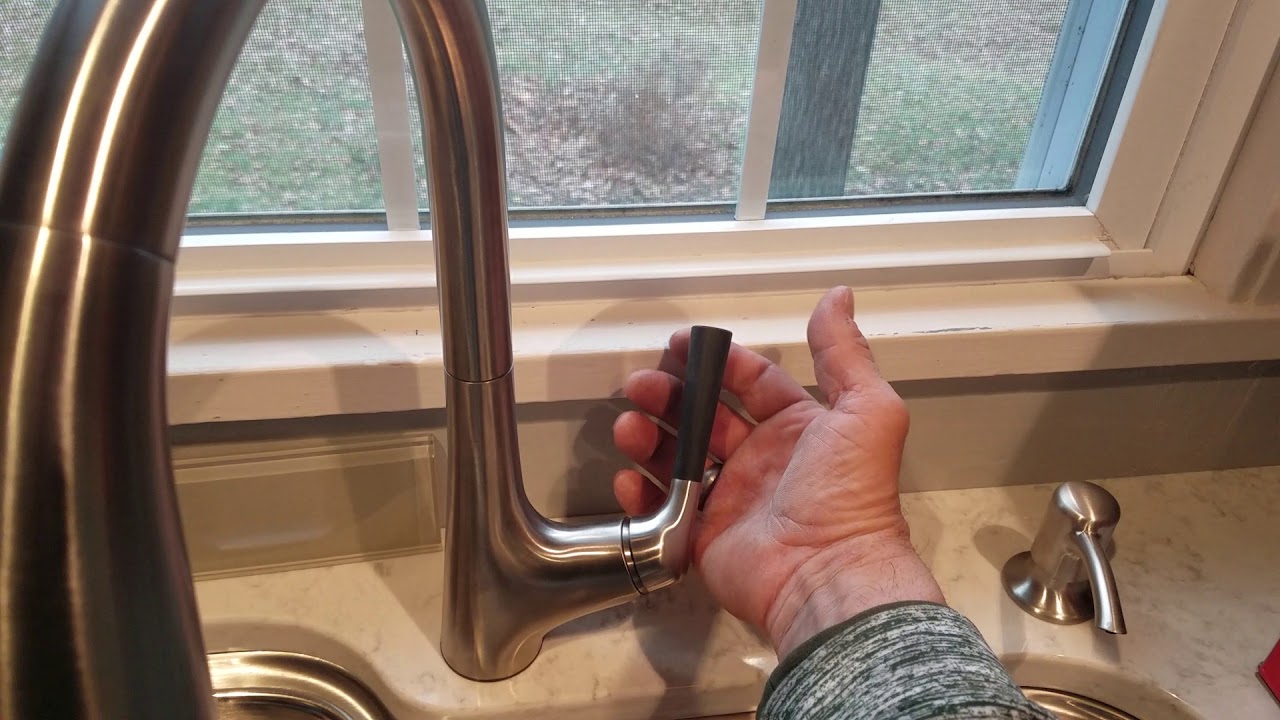
Before you begin the installation process, make sure you have all the necessary tools and materials. These include a wrench, pliers, Teflon tape, silicone sealant, and of course, your Kohler Barossa kitchen sink faucet. Step 1: Turn off the water supply. Before you start any plumbing work, always make sure to turn off the water supply to your kitchen sink. This will prevent any accidents or water damage during the installation process. Step 2: Remove the old faucet (if applicable). If you're replacing an old faucet, you'll need to remove it first. Use a wrench or pliers to loosen and remove the nuts and bolts that hold the faucet in place. Then, carefully pull out the old faucet and clean the area where the new faucet will be installed. Step 3: Assemble the Kohler Barossa kitchen sink faucet. Before installing the faucet, you'll need to assemble it according to the manufacturer's instructions. This may involve attaching the handles, spout, and other components to the main body of the faucet. Step 4: Install the faucet. With the faucet assembled, it's time to install it in your sink. Start by placing the base of the faucet onto the sink, making sure it fits snugly. Then, from underneath the sink, secure the faucet in place using the nuts and washers provided. Step 5: Connect the water supply lines. Once the faucet is securely attached, you can connect the water supply lines. Use Teflon tape to wrap the threads of the supply lines before attaching them to the corresponding hot and cold water shut-off valves. Tighten the connections with a wrench, making sure not to overtighten. Step 6: Connect the sprayer hose (if applicable). If your Kohler Barossa kitchen sink faucet comes with a sprayer, you'll need to connect the hose to the faucet and the other end to the sprayer head. This may involve attaching a weight to the hose to ensure it retracts properly. Step 7: Test the faucet. Before you finish the installation, it's important to test the faucet to make sure everything is working properly. Turn on the water supply and check for any leaks or drips. If everything looks good, you can move on to the final step. Step 8: Apply silicone sealant. To ensure a watertight seal, apply silicone sealant around the base of the faucet where it meets the sink. This will also help to secure the faucet in place. Congratulations, you have successfully installed your Kohler Barossa kitchen sink faucet! You can now enjoy its sleek design and convenient features.2. How to Install a Kohler Barossa Kitchen Sink Faucet


2. How to Install a Kohler Barossa Kitchen Sink Faucet


If you prefer a more visual guide, here is a step-by-step breakdown of the installation process for the Kohler Barossa kitchen sink faucet: Step 1: Turn off the water supply. Step 2: Remove the old faucet (if applicable). Step 3: Assemble the Kohler Barossa kitchen sink faucet. Step 4: Install the faucet. Step 5: Connect the water supply lines. Step 6: Connect the sprayer hose (if applicable). Step 7: Test the faucet. Step 8: Apply silicone sealant.3. Step-by-Step Guide for Installing the Kohler Barossa Kitchen Sink Faucet


3. Step-by-Step Guide for Installing the Kohler Barossa Kitchen Sink Faucet


Installing the Kohler Barossa kitchen sink faucet yourself can save you time and money. Not only that, but it can also be a satisfying experience to see something you installed yourself in your own kitchen. Just make sure to follow the manufacturer's instructions carefully and have all the necessary tools and materials on hand.4. DIY: Installing the Kohler Barossa Kitchen Sink Faucet

4. DIY: Installing the Kohler Barossa Kitchen Sink Faucet

Here are some helpful tips to keep in mind when installing your Kohler Barossa kitchen sink faucet: - Make sure to read the installation instructions carefully before starting. - Have a friend or family member assist you, especially when attaching the faucet from underneath the sink. - Use Teflon tape on all threaded connections to prevent leaks. - Don't overtighten any connections, as this can cause damage to the faucet or plumbing. - If you encounter any issues during installation, consult the manufacturer's website or contact their customer service for assistance.5. Tips for Installing the Kohler Barossa Kitchen Sink Faucet

5. Tips for Installing the Kohler Barossa Kitchen Sink Faucet

While installing the Kohler Barossa kitchen sink faucet is relatively straightforward, there are some common mistakes that can easily be avoided: - Forgetting to turn off the water supply before starting the installation process. - Not reading or following the installation instructions carefully. - Using the wrong tools or materials. - Overtightening connections. - Rushing through the installation process, which can result in mistakes or accidents.6. Common Mistakes to Avoid When Installing the Kohler Barossa Kitchen Sink Faucet

6. Common Mistakes to Avoid When Installing the Kohler Barossa Kitchen Sink Faucet


Here is a list of tools and materials you will need for a successful installation of the Kohler Barossa kitchen sink faucet: - Wrench - Pliers - Teflon tape - Silicone sealant - Screwdriver (if required) - Towels or rags for cleanup7. Tools You Will Need for Installing the Kohler Barossa Kitchen Sink Faucet

7. Tools You Will Need for Installing the Kohler Barossa Kitchen Sink Faucet


If you're replacing an old kitchen sink faucet with the Kohler Barossa, the process is very similar to a new installation. Simply follow the same steps as outlined above, with the addition of removing the old faucet first. You may also need to clean the area where the old faucet was installed, and possibly make some adjustments to fit the new faucet properly.8. How to Remove and Replace an Old Kitchen Sink Faucet with the Kohler Barossa

8. How to Remove and Replace an Old Kitchen Sink Faucet with the Kohler Barossa


If you encounter any issues during the installation process, here are some troubleshooting tips to help you out: - If there are leaks, make sure all connections are tight and use Teflon tape on the threads. - If the faucet is wobbly, double-check that all connections are secure and that the faucet is properly installed on the sink. - If the water flow is weak, you may need to clean the aerator or check the water supply lines for any obstructions. - If you're having trouble with the sprayer, make sure the hose is properly connected and that there are no kinks or blockages.9. Troubleshooting Tips for Installing the Kohler Barossa Kitchen Sink Faucet


9. Troubleshooting Tips for Installing the Kohler Barossa Kitchen Sink Faucet
Ultimately, the decision to hire a professional or install the Kohler Barossa kitchen sink faucet yourself depends on your level of experience and comfort with plumbing work. If you have little to no experience with plumbing, it may be best to hire a professional to ensure the faucet is installed correctly and to avoid any potential issues. However, if you have some basic plumbing knowledge and the right tools, installing the faucet yourself can save you money and give you a sense of accomplishment. Whichever route you choose, we hope this guide has been helpful in showing you how to install the Kohler Barossa kitchen sink faucet. With its sleek design and convenient features, it's sure to be a welcomed addition to your kitchen. Happy installing!10. Professional Installation vs. DIY: Which is Best for the Kohler Barossa Kitchen Sink Faucet?


10. Professional Installation vs. DIY: Which is Best for the Kohler Barossa Kitchen Sink Faucet?


Benefits of Installing the Kohler Barossa Kitchen Sink Faucet
Efficiency and Convenience
 One of the main benefits of installing the Kohler Barossa Kitchen Sink Faucet is its efficiency and convenience. This faucet is equipped with advanced Touchless technology, allowing you to turn it on and off with a simple wave of your hand. This not only eliminates the need for handles or knobs, but also prevents cross-contamination in the kitchen. This feature is especially useful when your hands are dirty or full while cooking and you need to wash them quickly. Additionally, the faucet has a high-arch spout and a 360-degree swivel, making it easy to maneuver and reach all corners of your sink.
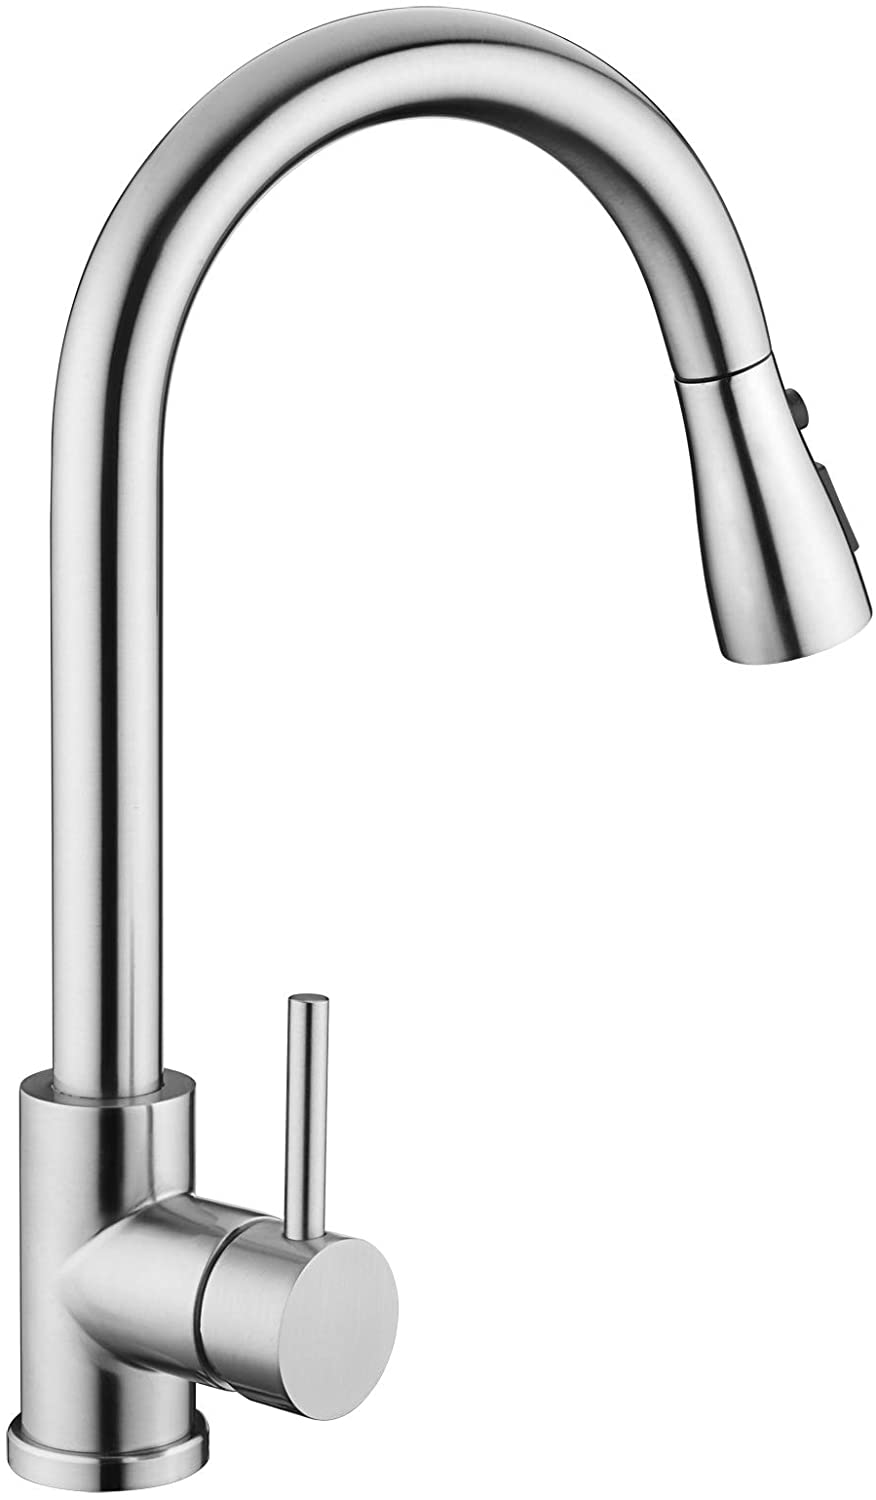
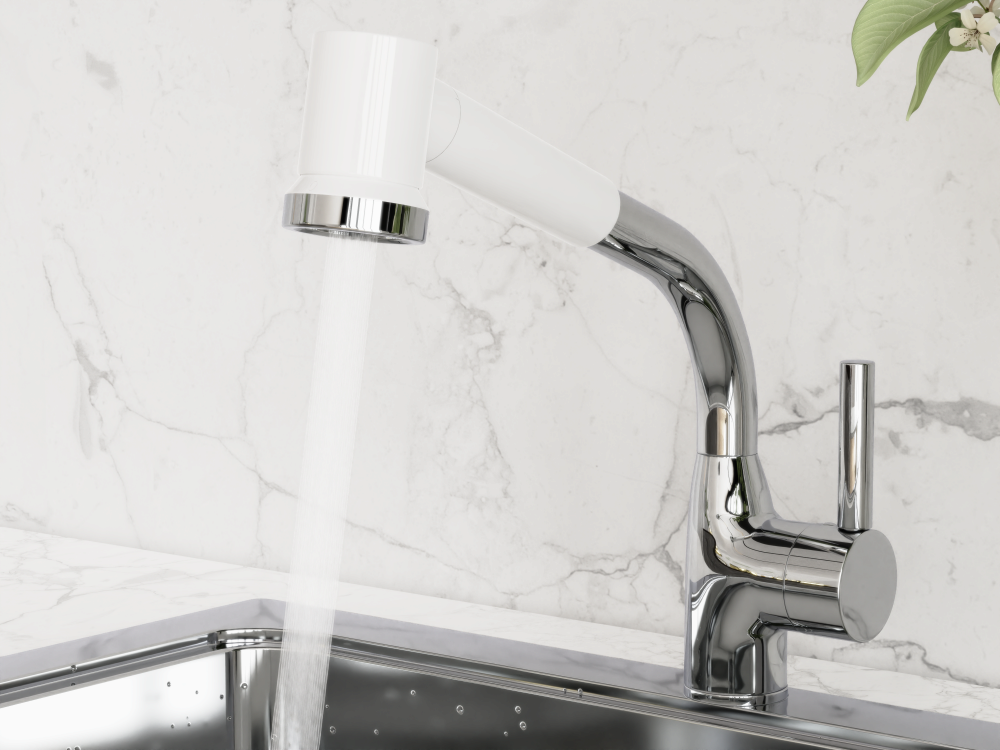
Sleek and Modern Design
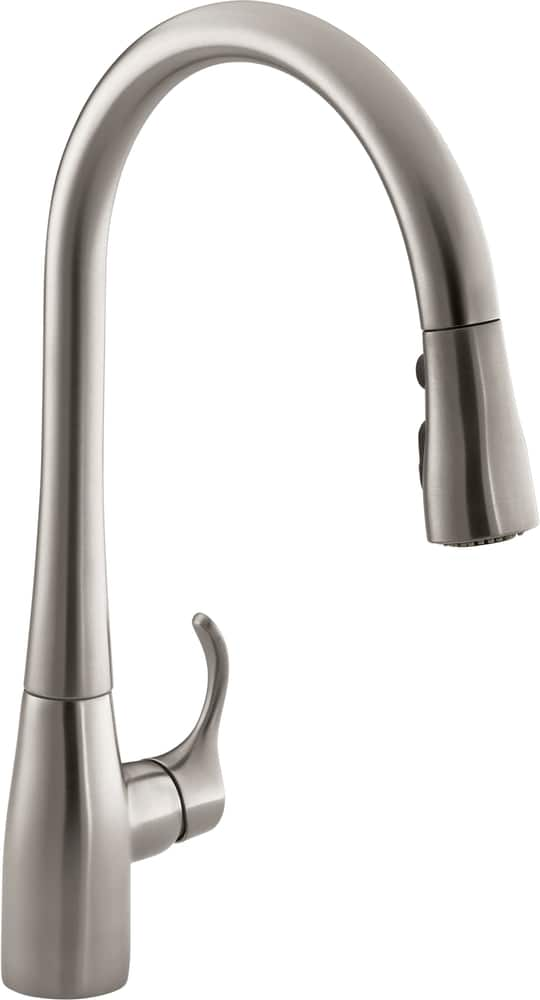
 In addition to its functionality, the Kohler Barossa Kitchen Sink Faucet also adds a touch of modern elegance to your kitchen design. With its sleek and minimalistic design, this faucet will instantly upgrade the look and feel of your kitchen. It is available in three finishes – vibrant stainless, polished chrome, and matte black – allowing you to choose the one that best complements your kitchen décor. Its compact size and simple design also make it a perfect fit for both small and large kitchen spaces.
Durability and Longevity
 Investing in a high-quality kitchen faucet is crucial for its longevity and durability. The Kohler Barossa Kitchen Sink Faucet is made with premium materials and is built to last. Its ceramic disc valves ensure a smooth and leak-free operation for years to come. The faucet also comes with a limited lifetime warranty, giving you peace of mind and assurance in your purchase. This makes it a cost-effective and reliable choice for your kitchen.
Easy Installation
 Installing the Kohler Barossa Kitchen Sink Faucet is a breeze, thanks to its easy-to-follow instructions and simple installation process. You do not need any special tools or plumbing experience to install this faucet. It comes with flexible supply lines and a quick connect system, making it easy to connect to your existing water lines. In just a few simple steps, you can have a brand new, high-quality faucet installed in your kitchen.
Conclusion
 The Kohler Barossa Kitchen Sink Faucet is a top-of-the-line choice for any kitchen. Its efficiency, sleek design, durability, and easy installation make it a perfect addition to any household. With its advanced technology and modern features, this faucet will not only make your daily kitchen tasks easier, but also elevate the overall look and functionality of your kitchen. Upgrade your kitchen today with the Kohler Barossa Kitchen Sink Faucet and experience the difference for yourself.