Installing a bathroom sink drain assembly may seem like a daunting task, but with the right tools and knowledge, it can be a simple DIY project. In this guide, we'll walk you through the step-by-step process of installing a bathroom sink drain assembly, from choosing the right parts to connecting it to your sink. So let's get started!1. Installing a Bathroom Sink Drain Assembly: What You Need to Know


installing bathroom sink drain assembly


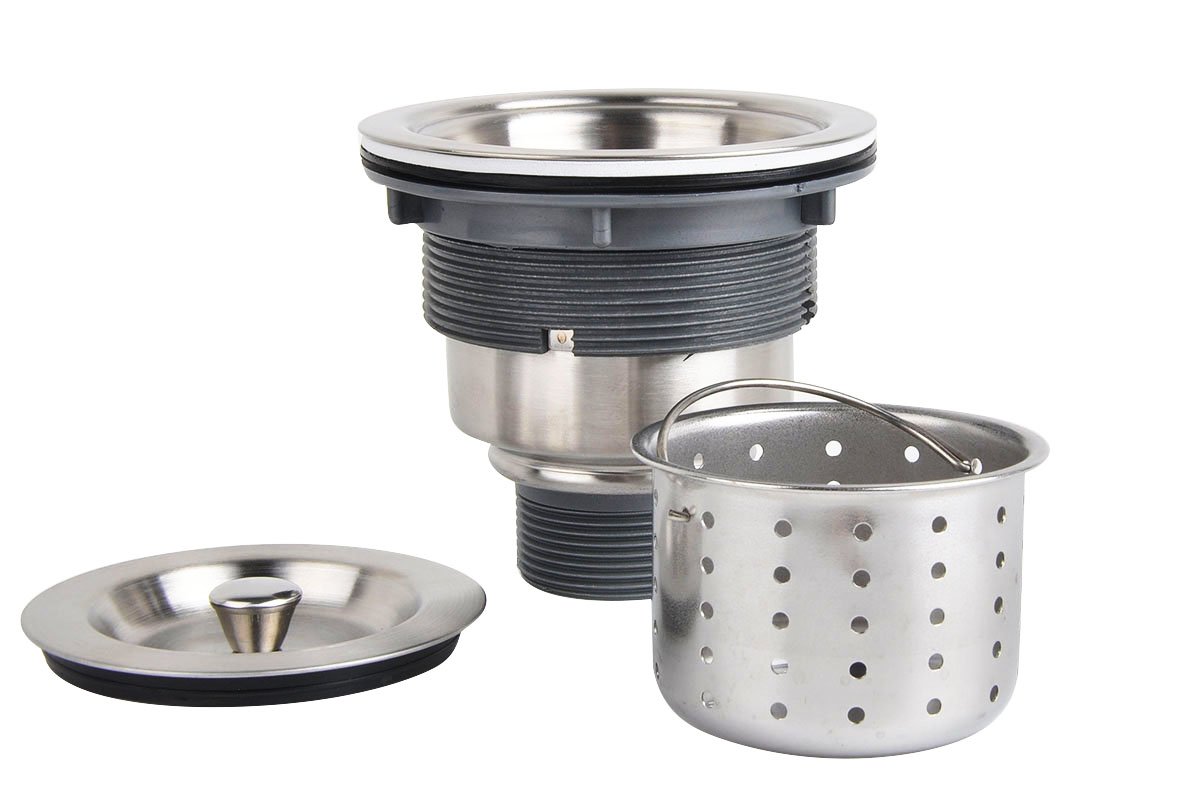
Before you start installing, it's important to choose the right bathroom sink drain assembly for your sink. There are a few different types of drain assemblies, including pop-up drains, push-button drains, and grid drains. Consider the style and design of your sink, as well as your personal preferences, when choosing the right assembly.2. Choosing the Right Bathroom Sink Drain Assembly


bathroom sink drain assembly


Before you begin, make sure you have all the necessary tools on hand. These may include a wrench, pliers, screwdriver, plumber's putty, and pipe joint compound. It's also a good idea to have a bucket or towel nearby to catch any water that may spill out during the installation process.3. Tools You'll Need for Installing a Bathroom Sink Drain Assembly


installing bathroom sink drain


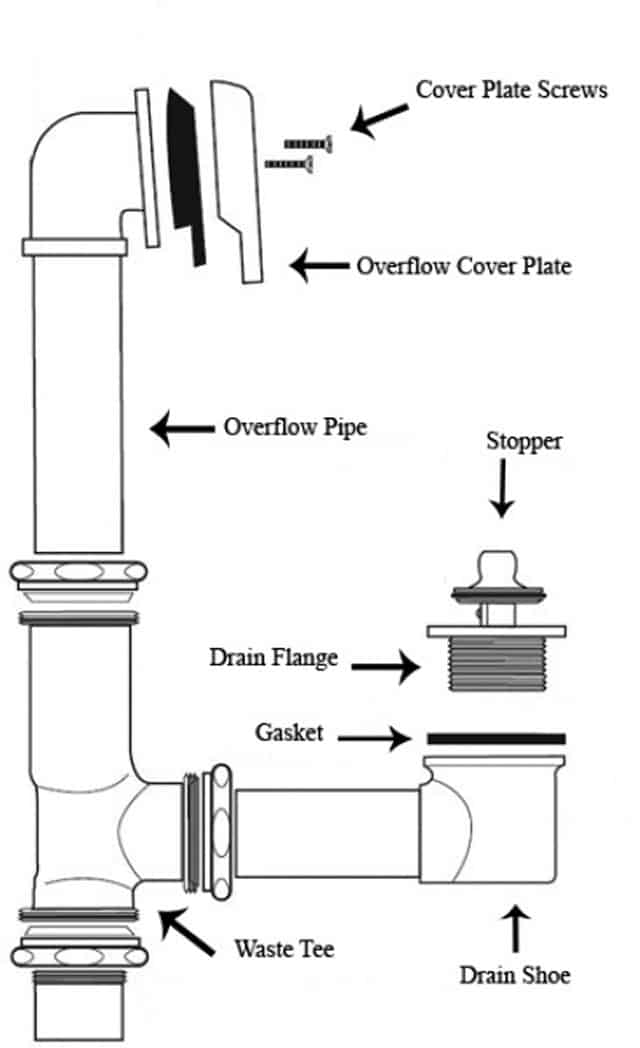
If you're replacing an existing drain assembly, the first step is to remove the old one. Start by removing the pop-up or stopper from the sink. Then, use pliers or a wrench to loosen and remove the nut holding the drain tailpiece in place. Finally, use a screwdriver to remove the screws holding the drain flange in place.4. Removing the Old Bathroom Sink Drain Assembly


bathroom sink drain


/bathroom-sink-drain-installation-2718843-03-6fee5b9d9f7d475abfe06a95ddb1f695.jpg)
Before you install the new drain assembly, you'll need to prepare both the sink and the drain. If your sink has an overflow, apply a thin layer of plumber's putty around the opening. Next, apply pipe joint compound to the threads of the drain tailpiece. This will help create a watertight seal.5. Preparing the Sink and Drain for Installation
/7_IMG_3765-56a4a2743df78cf772835b6f.JPG)

/grey-painted-mirror-surround-above-washbasin---london-103585284-59b6f74e845b3400105d81d3.jpg)
installing bathroom sink


:max_bytes(150000):strip_icc()/8_IMG_3767-56a4a2753df78cf772835b72.JPG)
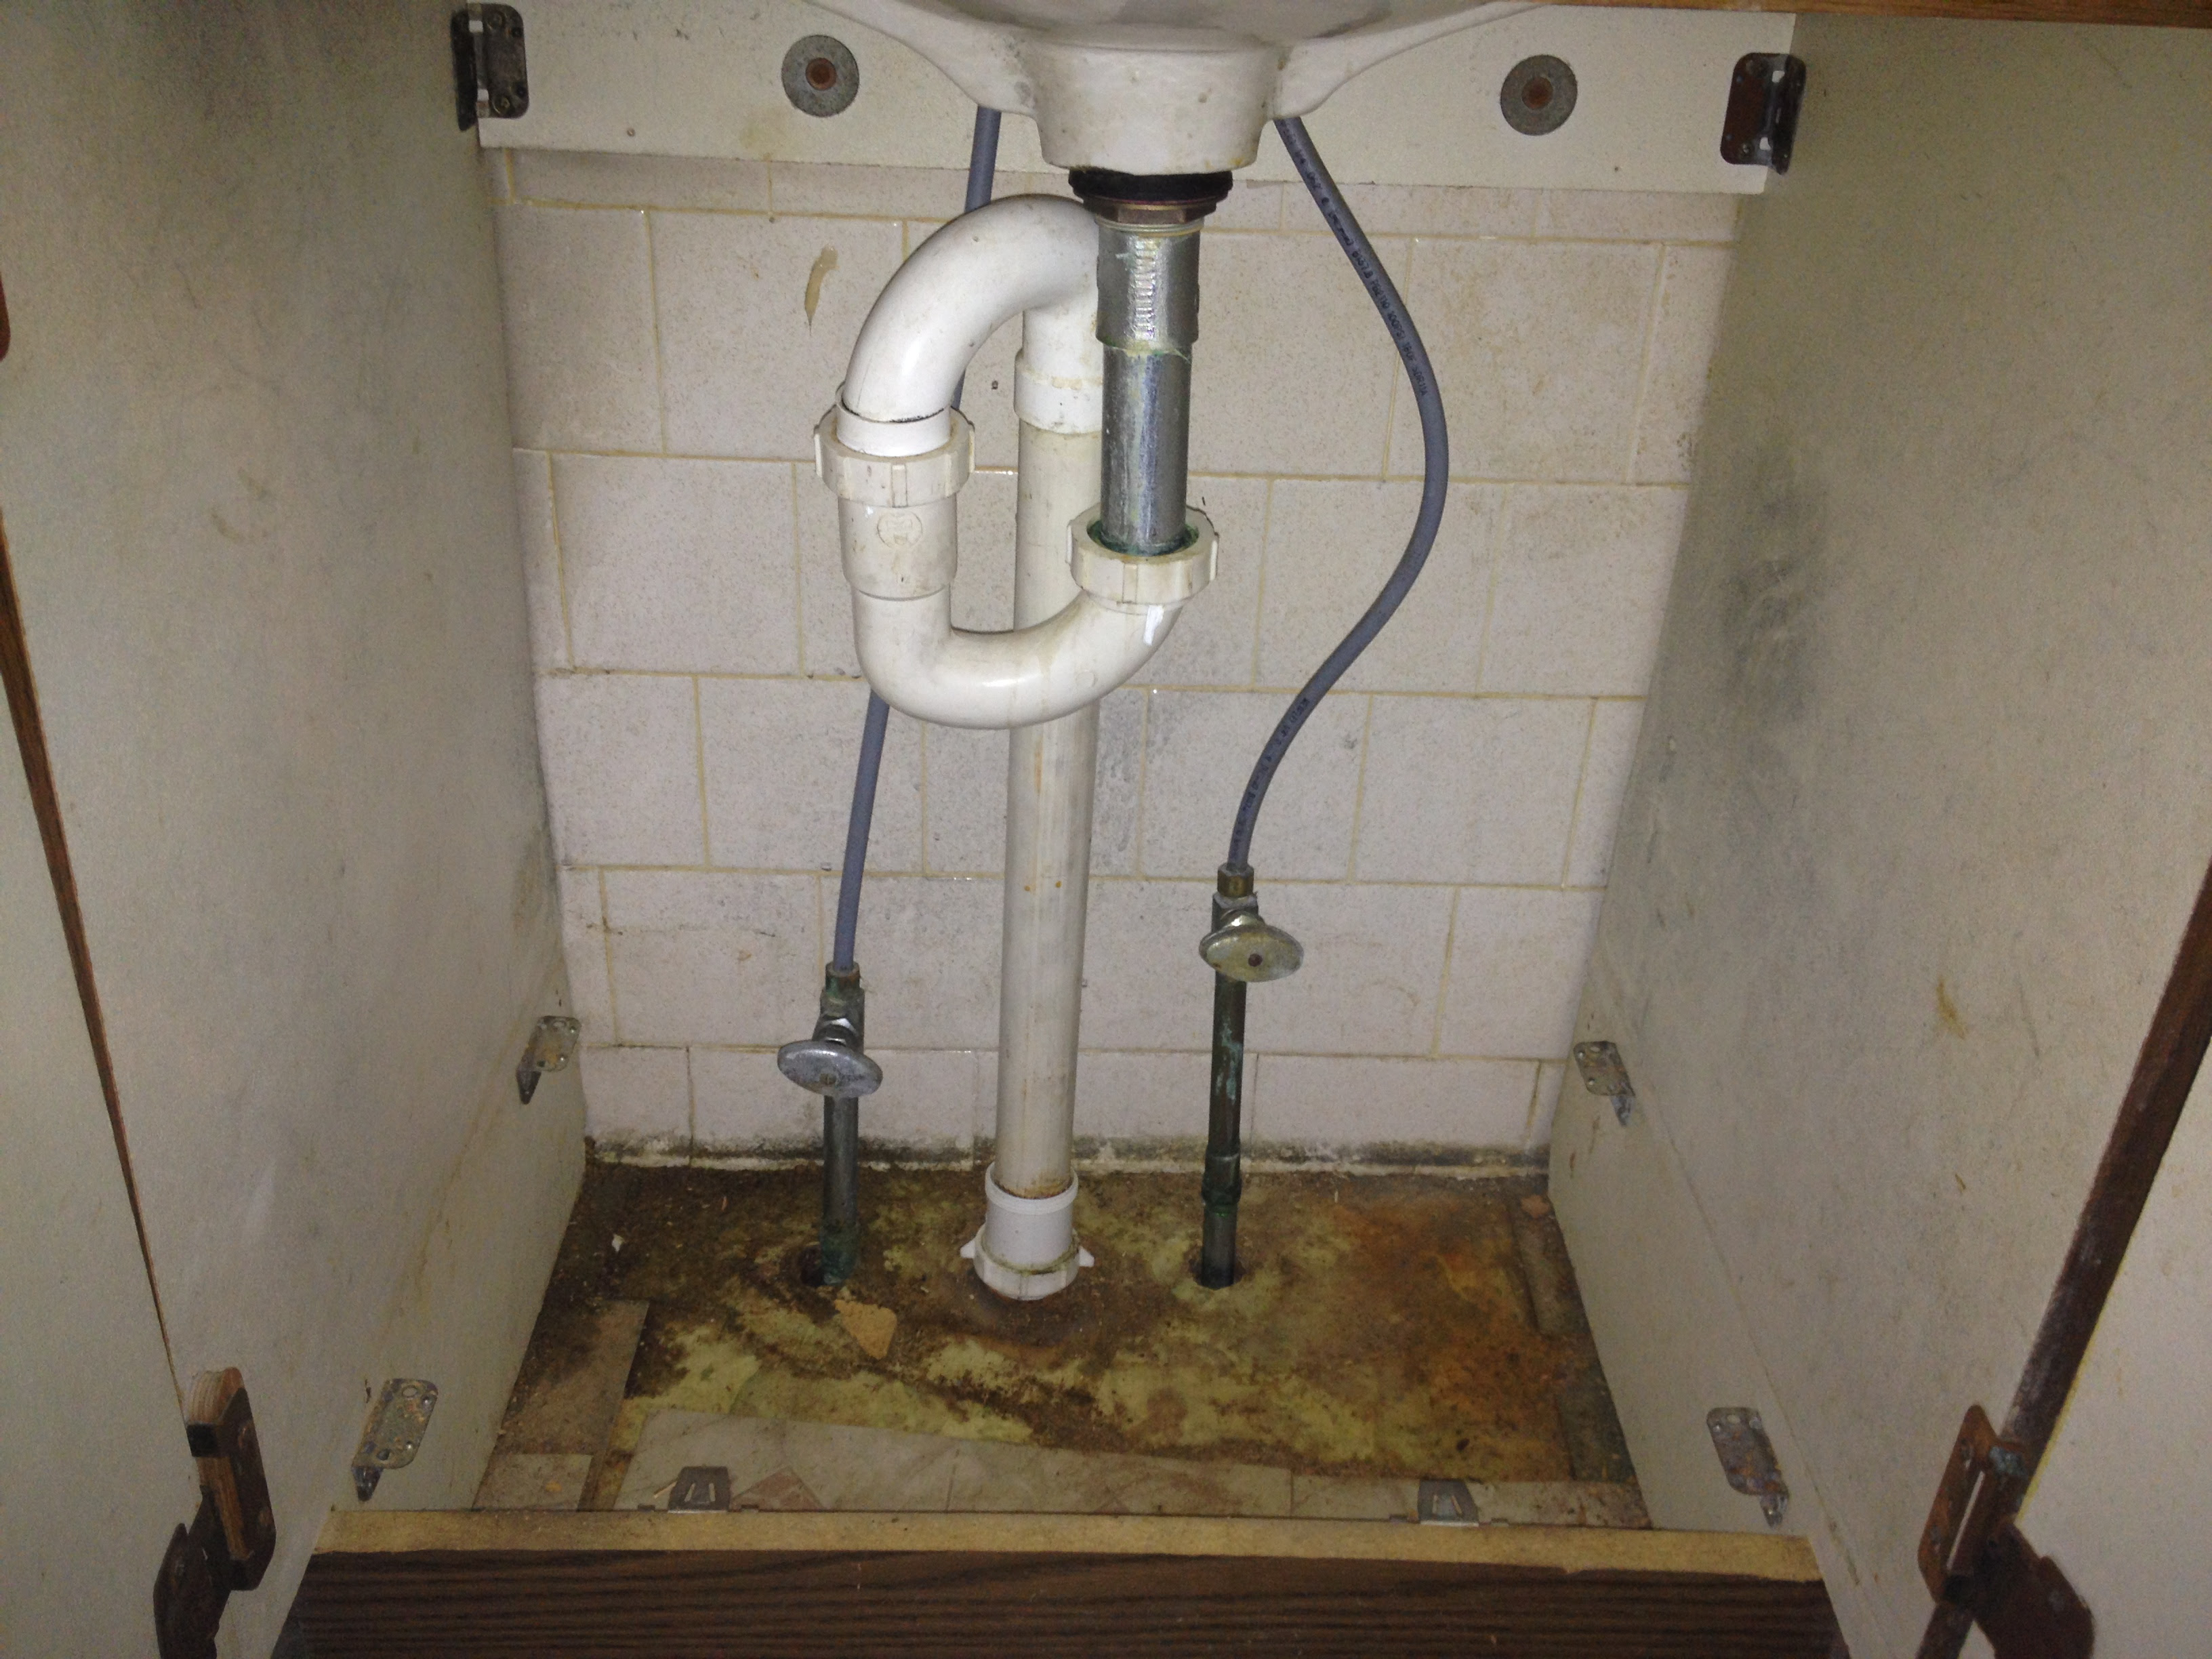


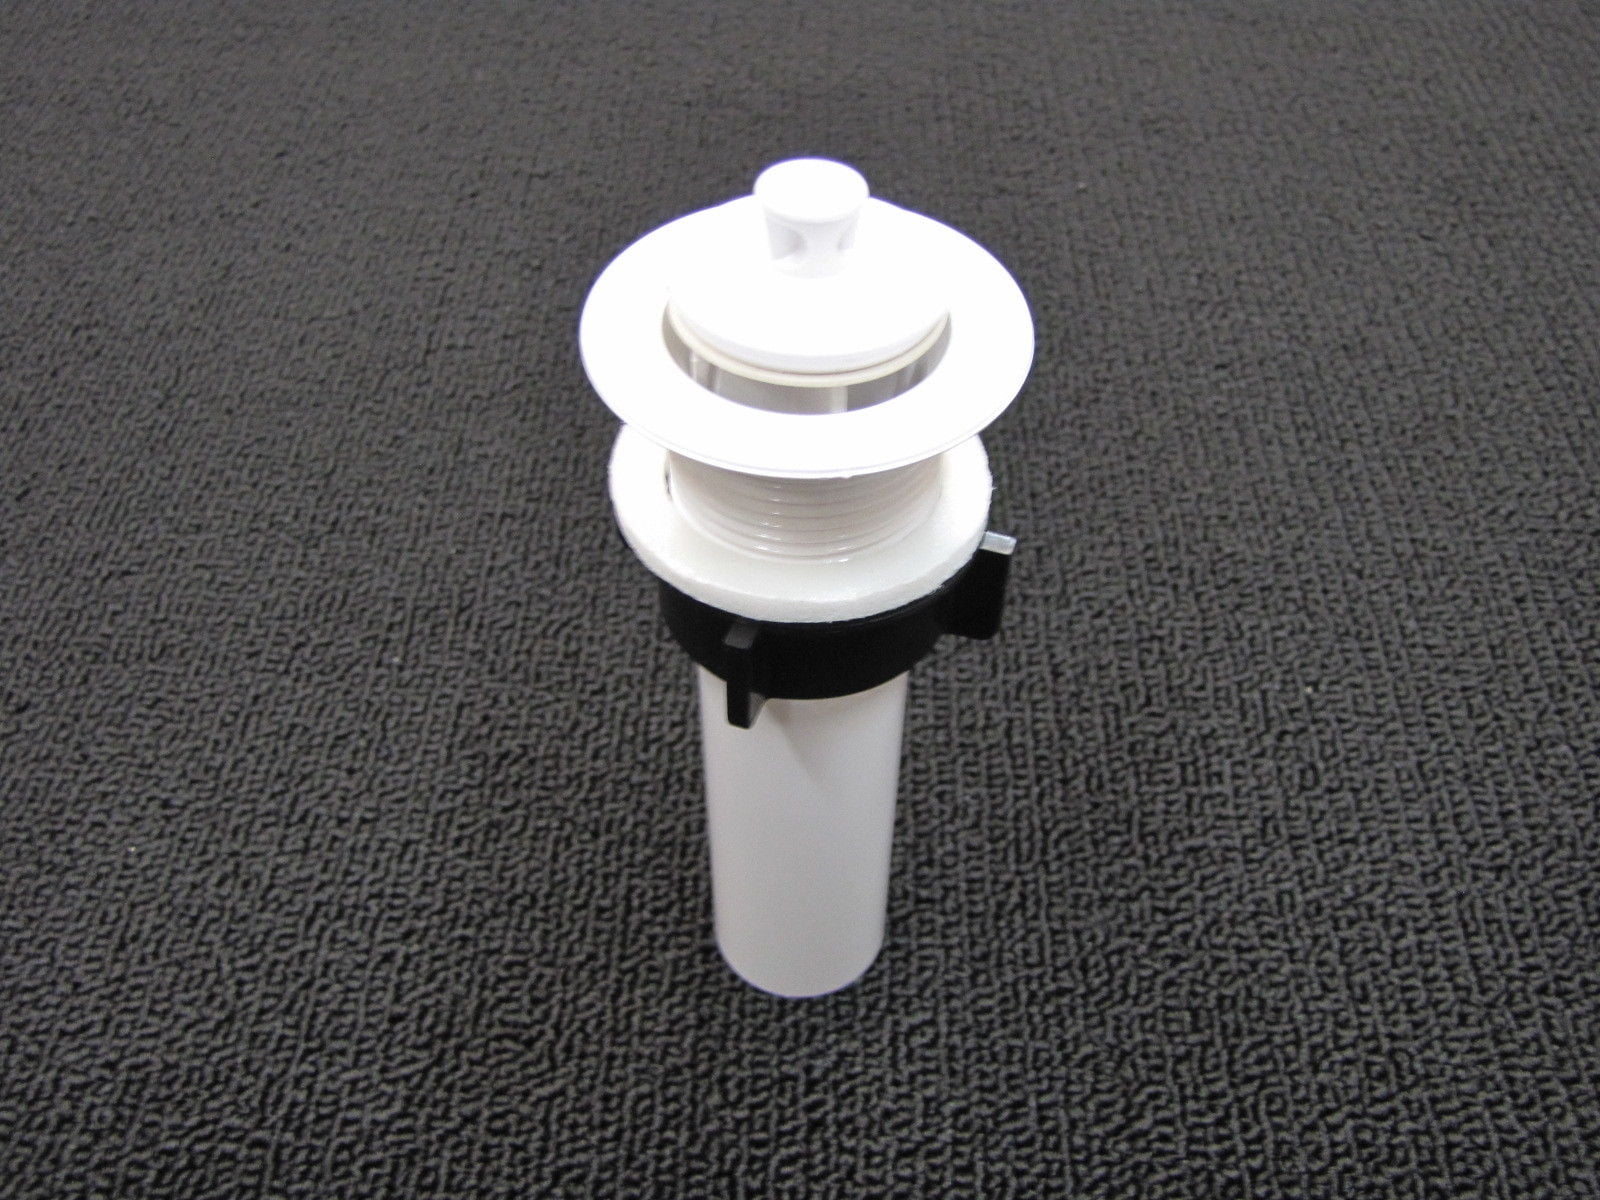
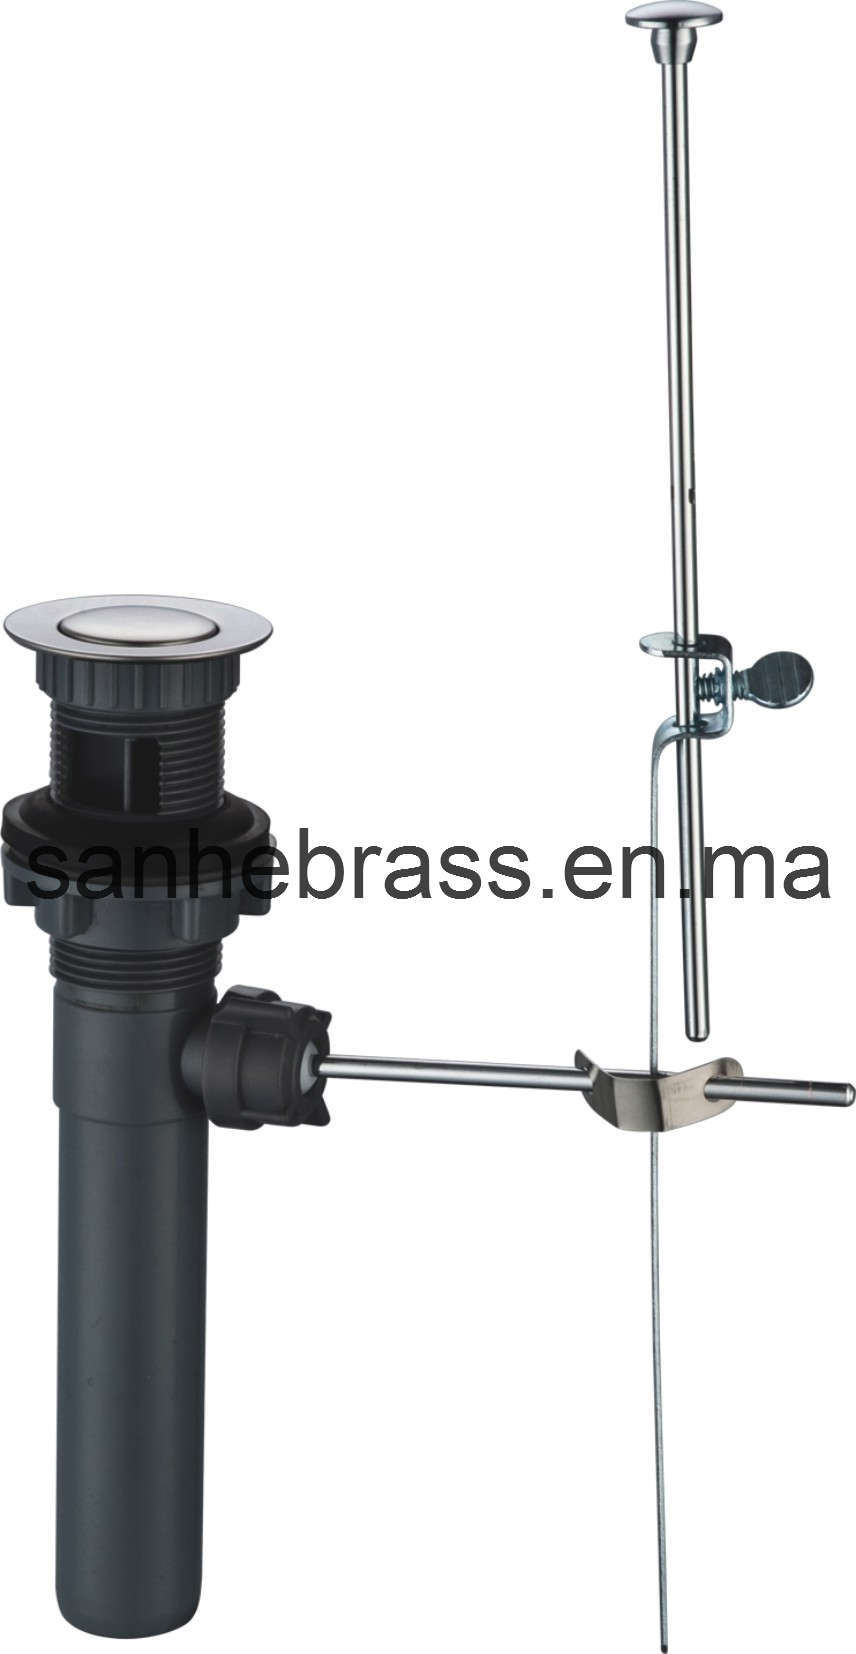
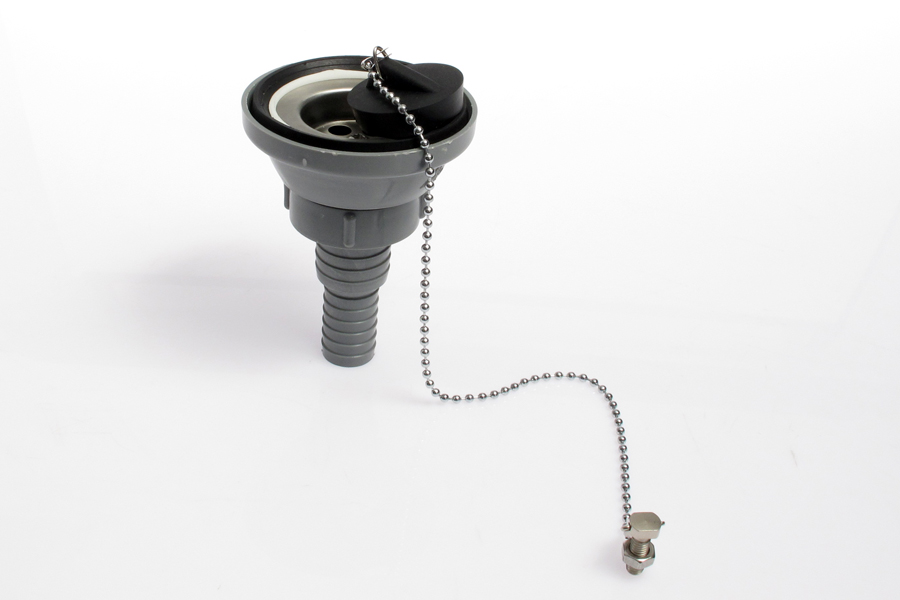
Now it's time to install the new drain assembly. Start by inserting the drain tailpiece into the sink opening and tightening the nut to secure it in place. Then, place the rubber gasket and cardboard washer on the drain flange and insert it into the drain opening. Secure it with the screws provided.6. Installing the Bathroom Sink Drain


bathroom sink installation


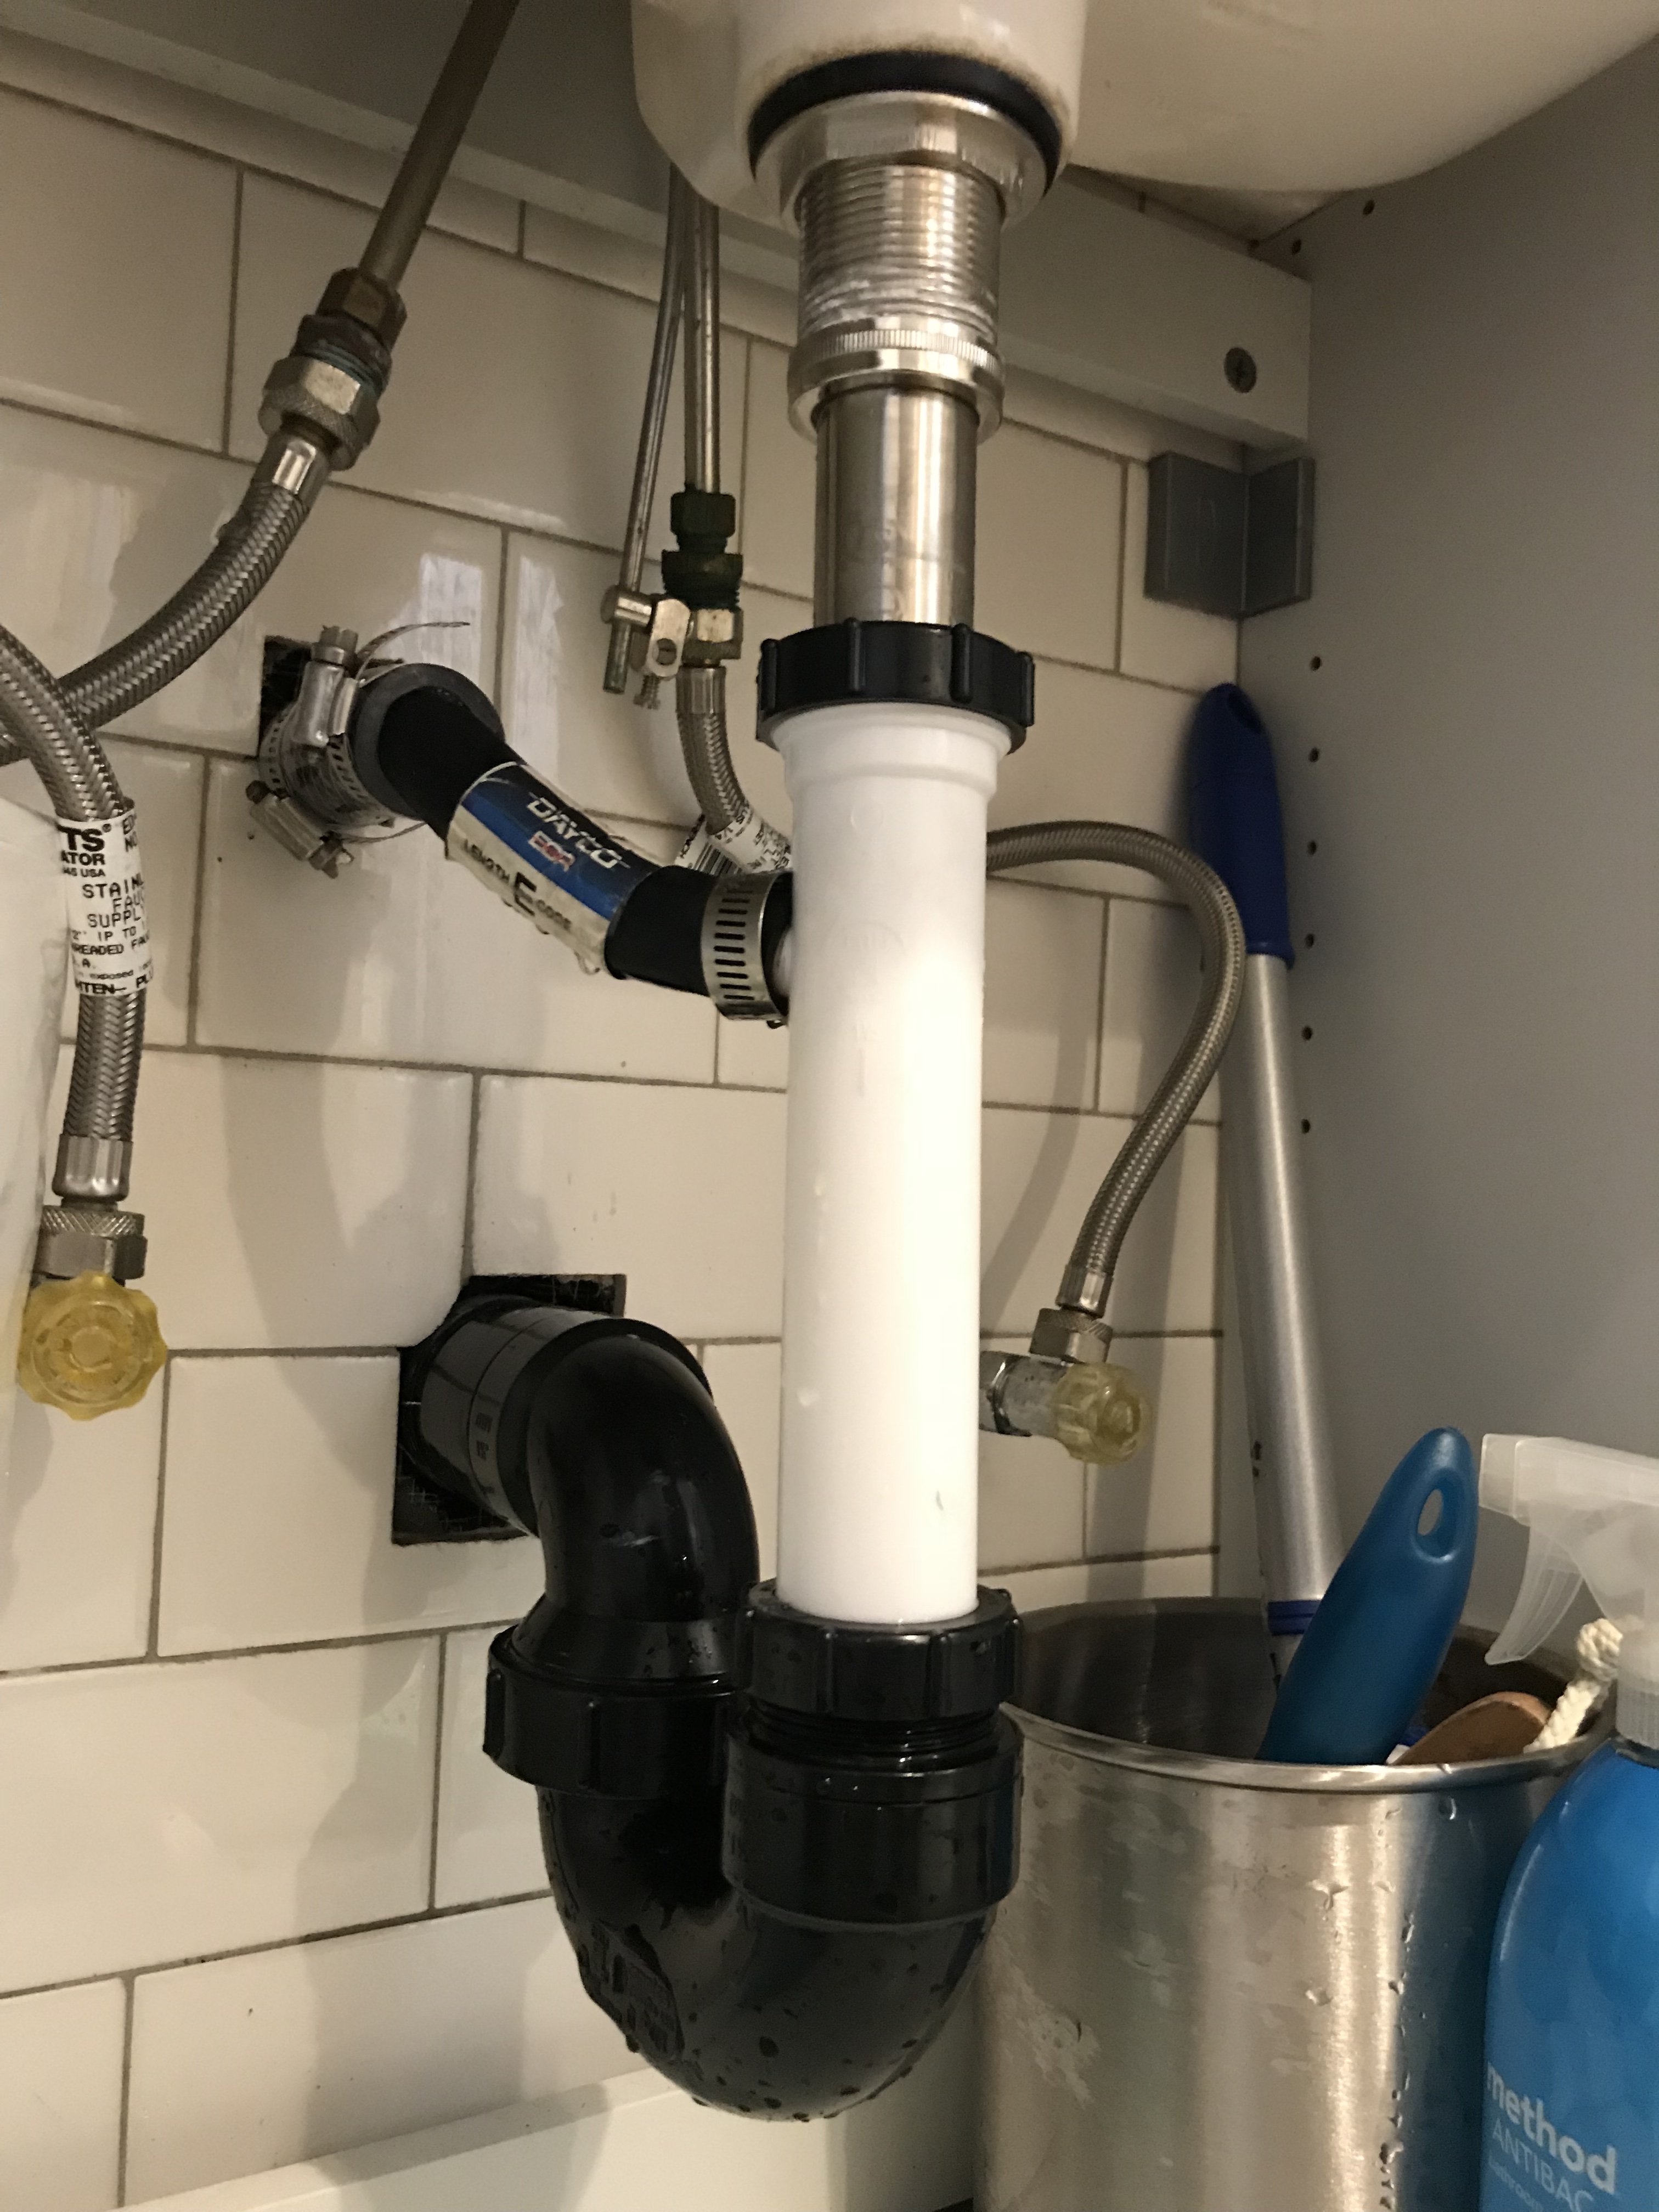
Next, you'll need to connect the drain to the tailpiece. If your drain assembly came with a pop-up or push-button mechanism, you'll need to connect it to the tailpiece according to the manufacturer's instructions. If not, simply connect the drain to the tailpiece using a compression nut and washer.7. Connecting the Drain to the Tailpiece

sink drain assembly


Once the drain assembly is in place, it's important to test for leaks before using the sink. Fill the sink with water and let it drain to check for any leaks. If you notice any leaks, tighten the connections or use plumber's putty to create a better seal.8. Testing for Leaks

bathroom sink drain installation


Here are a few additional tips to keep in mind when installing a bathroom sink drain assembly:9. Additional Tips for Installing a Bathroom Sink Drain Assembly

sink drain installation


:max_bytes(150000):strip_icc()/how-to-install-a-sink-drain-2718789-hero-24e898006ed94c9593a2a268b57989a3.jpg?strip=all)
Now that you know how to install a bathroom sink drain assembly, you can confidently tackle this project on your own. Just remember to choose the right assembly, have all the necessary tools, and follow the steps carefully. With a little bit of patience and know-how, your bathroom sink will be functioning like new in no time!10. Conclusion

bathroom sink assembly


Installing a Bathroom Sink Drain Assembly: A Guide for a Smooth and Efficient Process

Introduction
 When it comes to designing and renovating a house, every detail counts. From the paint color of the walls to the small fixtures, everything plays a significant role in creating the perfect space. One of the essential components of a functional and aesthetically pleasing bathroom is the sink drain assembly. Not only does it keep the sink area clean and tidy, but it also ensures proper drainage of water. In this article, we will guide you on how to install a bathroom sink drain assembly, making the process simple and hassle-free.
Materials Needed
 Before we dive into the installation process, let's go through the materials you will need. Make sure to have these items on hand before starting the installation:
- Bathroom sink drain assembly kit
- Plumber's putty
- Adjustable wrench
- Screwdriver
- Plumbing tape
- Bucket
- Towel
Step-by-Step Guide
 Now that you have all the necessary materials, let's get started with the installation process.
Step 1: Prepare the Sink Area
Start by clearing out the area under the sink. Place a towel in the cabinet to protect it from any water or debris that may fall during the installation process.
Step 2: Apply Plumber's Putty
Take a small amount of plumber's putty and roll it into a thin rope. Apply it around the base of the sink drain opening. This putty will create a watertight seal between the drain assembly and the sink.
Step 3: Install the Drain Assembly
Place the drain assembly into the opening, making sure the rubber gasket is in place. Secure it in place by tightening the locknut underneath the sink with an adjustable wrench.
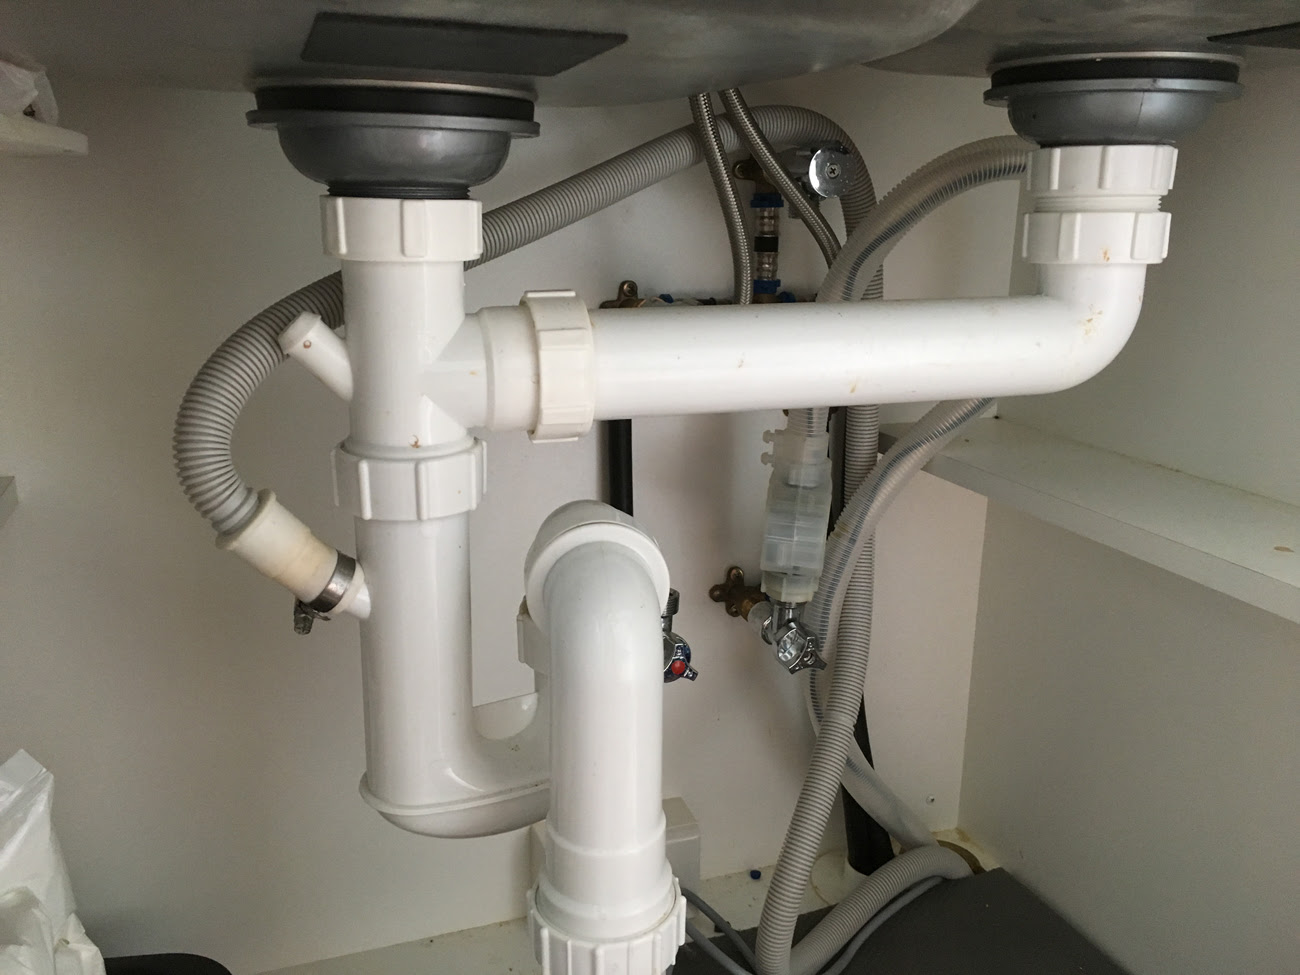
Step 4: Attach the P-Trap
Take the P-trap and attach it to the drain assembly. Make sure to use plumbing tape on the threads to create a watertight seal.
Step 5: Connect the Drain to the Wall
Using the adjustable wrench, connect the P-trap to the drainpipe coming out of the wall. Make sure all connections are tight and secure.
Step 6: Test the Drain
Run water into the sink and check for any leaks. If there are any, tighten the connections as needed.
Now that you have all the necessary materials, let's get started with the installation process.
Step 1: Prepare the Sink Area
Start by clearing out the area under the sink. Place a towel in the cabinet to protect it from any water or debris that may fall during the installation process.
Step 2: Apply Plumber's Putty
Take a small amount of plumber's putty and roll it into a thin rope. Apply it around the base of the sink drain opening. This putty will create a watertight seal between the drain assembly and the sink.
Step 3: Install the Drain Assembly
Place the drain assembly into the opening, making sure the rubber gasket is in place. Secure it in place by tightening the locknut underneath the sink with an adjustable wrench.
Step 4: Attach the P-Trap
Take the P-trap and attach it to the drain assembly. Make sure to use plumbing tape on the threads to create a watertight seal.
Step 5: Connect the Drain to the Wall
Using the adjustable wrench, connect the P-trap to the drainpipe coming out of the wall. Make sure all connections are tight and secure.
Step 6: Test the Drain
Run water into the sink and check for any leaks. If there are any, tighten the connections as needed.
Conclusion
 Installing a bathroom sink drain assembly may seem like a daunting task, but with the right tools and techniques, it can be a smooth and efficient process. By following these steps, you can have a functional and visually appealing sink area in no time. Remember to always double check for any leaks before considering the installation process complete. Now, go ahead and give your bathroom a fresh new look with a newly installed sink drain assembly.