Installing kitchen wall unit pelmets is a simple and cost-effective way to add a touch of style and sophistication to your kitchen. These decorative pieces not only provide a finishing touch to your cabinets, but they also help to hide the gaps between the wall and the top of your units. In this guide, we will take you through the step-by-step process of fitting kitchen wall unit pelmets.How to Install Kitchen Wall Unit Pelmets


How to Install Kitchen Wall Unit Pelmets


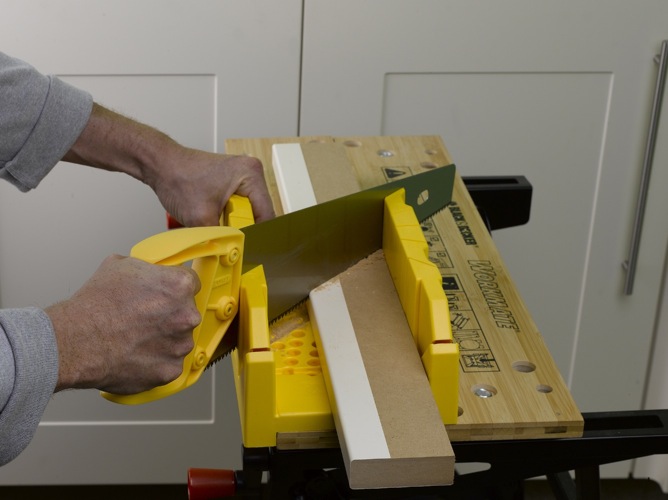
Before you begin the installation process, it is important to have all the necessary tools and materials on hand. This includes measuring tape, a saw, screws, a drill, and the pelmet itself. Once you have everything you need, follow these steps: Step 1: Measure the Space Using a measuring tape, measure the width of your kitchen wall unit. This will determine the length of the pelmet you will need. It is important to measure accurately to avoid any errors during installation. Step 2: Cut the Pelmets If your pelmet comes in one long piece, you will need to cut it to the desired length using a saw. Make sure to measure and mark the cutting points accurately before making any cuts. Step 3: Attach the Pelmets Using screws, attach the pelmet to the top of the kitchen wall unit. Make sure to drill pilot holes first to prevent splitting the wood. The pelmet should be flush with the front of the unit and the wall, with no gaps. Step 4: Add Finishing Touches To give your pelmet a polished look, you can add decorative moulding or trim to the front edge. This will also help to hide any rough edges from cutting.Fitting Kitchen Wall Unit Pelmets: A Step-by-Step Guide


Fitting Kitchen Wall Unit Pelmets: A Step-by-Step Guide


If you are a DIY enthusiast, installing kitchen wall unit pelmets can be a fun and rewarding project. Not only will it add a personal touch to your kitchen, but it will also save you money on hiring a professional. Here are some tips for a successful DIY installation: Tip 1: Start with Accurate Measurements As mentioned earlier, accurate measurements are crucial for a successful installation. Make sure to measure multiple times to ensure accuracy before making any cuts or attaching the pelmet. Tip 2: Use a Level When attaching the pelmet, use a level to make sure it is straight and even. This will help prevent any gaps or crookedness in the finished product. Tip 3: Take Your Time Rushing through the installation process can lead to mistakes and a less-than-perfect result. Take your time and follow each step carefully to ensure a professional-looking finish.DIY Kitchen Wall Unit Pelmet Installation


DIY Kitchen Wall Unit Pelmet Installation


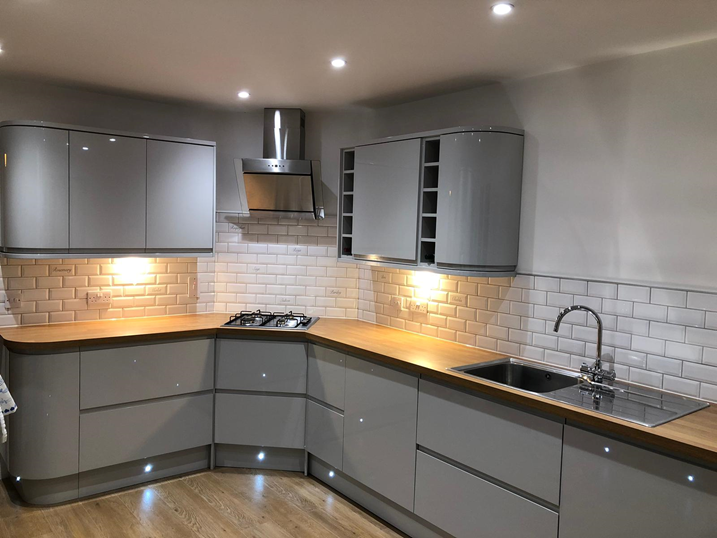
Here are a few additional tips to keep in mind when fitting kitchen wall unit pelmets: Tip 1: Consider Your Kitchen Design When choosing a pelmet, consider the overall design of your kitchen. You want to make sure it complements the style and color scheme of the room. Tip 2: Don't Forget about Lighting If you have under-cabinet lighting, make sure to install the pelmet in a way that allows the light to shine through. This will enhance the overall look of your kitchen. Tip 3: Use Quality Materials Invest in high-quality pelmets and materials to ensure durability and longevity. This will also give your kitchen a more polished and professional look.Tips for Fitting Kitchen Wall Unit Pelmets


Tips for Fitting Kitchen Wall Unit Pelmets

Installing a pelmet on a kitchen wall unit is a simple and straightforward process that can easily be done by anyone with basic DIY skills. With the right tools and materials, you can achieve a professional-looking finish in no time.Installing a Pelmet on a Kitchen Wall Unit


Installing a Pelmet on a Kitchen Wall Unit


For a quick and easy installation, follow this step-by-step guide for fitting kitchen wall unit pelmets: Step 1: Measure the Space As mentioned earlier, accurate measurements are key. Measure the width of your kitchen wall unit to determine the length of the pelmet you will need. Step 2: Cut the Pelmets If necessary, cut the pelmet to the desired length using a saw. Make sure to measure and mark the cutting points accurately before making any cuts. Step 3: Attach the Pelmets Using screws, attach the pelmet to the top of the kitchen wall unit. Drill pilot holes first to prevent splitting the wood and make sure the pelmet is flush with the front of the unit and the wall. Step 4: Add Finishing Touches To give your pelmet a more polished look, add decorative moulding or trim to the front edge. This will also help to hide any rough edges from cutting.Step-by-Step Guide for Fitting Kitchen Wall Unit Pelmets


Step-by-Step Guide for Fitting Kitchen Wall Unit Pelmets


With the right tools, materials, and a little bit of patience, installing kitchen wall unit pelmets can be an easy and enjoyable DIY project. Just follow the steps outlined in this guide and you will have a beautiful and functional addition to your kitchen in no time.Easy DIY Kitchen Wall Unit Pelmet Installation


Easy DIY Kitchen Wall Unit Pelmet Installation
Fitting a pelmet on a kitchen wall unit is a simple and cost-effective way to enhance the overall look of your kitchen. With a few basic tools and some basic DIY skills, you can easily achieve a professional-looking finish.How to Fit a Pelmet on a Kitchen Wall Unit


How to Fit a Pelmet on a Kitchen Wall Unit
If you are new to DIY projects, installing kitchen wall unit pelmets can be a great place to start. With easy-to-follow steps and minimal tools needed, it is a great way to gain some experience and add a personal touch to your kitchen.Installing Kitchen Wall Unit Pelmets: A Beginner's Guide


Installing Kitchen Wall Unit Pelmets: A Beginner's Guide


Lastly, here are a few more tips and tricks to make your kitchen wall unit pelmet installation a success: Tip 1: Use Screws Instead of Nails Screws will provide a stronger and more secure hold compared to nails, which can loosen over time. Tip 2: Sand the Edges If you have made any cuts to the pelmet, make sure to sand down the edges to create a smooth and seamless finish. Tip 3: Get Help if Needed If you are unsure of anything or need an extra set of hands, don't be afraid to ask for help. It is always better to have assistance than risk making mistakes. With these tips and a little bit of effort, you can easily install kitchen wall unit pelmets and give your kitchen a stylish and finished look. So why wait? Get started on your DIY project today and enjoy a beautiful and functional kitchen in no time!Fitting Kitchen Wall Unit Pelmets: Tips and Tricks


Fitting Kitchen Wall Unit Pelmets: Tips and Tricks
Fitting Kitchen Wall Unit Pelmet: A Must-Have for Any Modern Kitchen

The Importance of a Kitchen Wall Unit Pelmet
 When it comes to designing a kitchen, every detail matters. From the color of the cabinets to the type of countertops, each element plays a crucial role in creating a functional and aesthetically pleasing space. One often overlooked aspect of kitchen design is the
kitchen wall unit pelmet
. This small yet essential feature not only adds to the overall look of the kitchen but also serves a practical purpose.
When it comes to designing a kitchen, every detail matters. From the color of the cabinets to the type of countertops, each element plays a crucial role in creating a functional and aesthetically pleasing space. One often overlooked aspect of kitchen design is the
kitchen wall unit pelmet
. This small yet essential feature not only adds to the overall look of the kitchen but also serves a practical purpose.
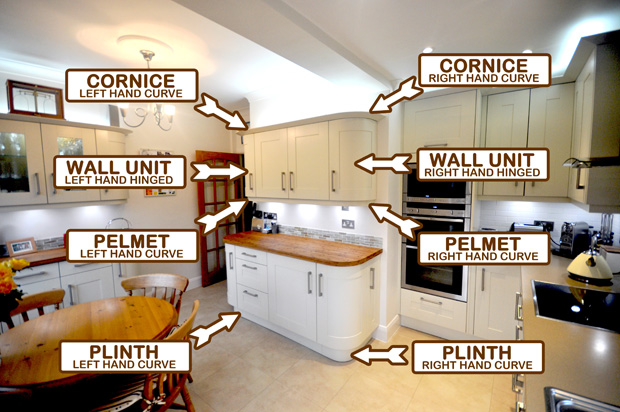
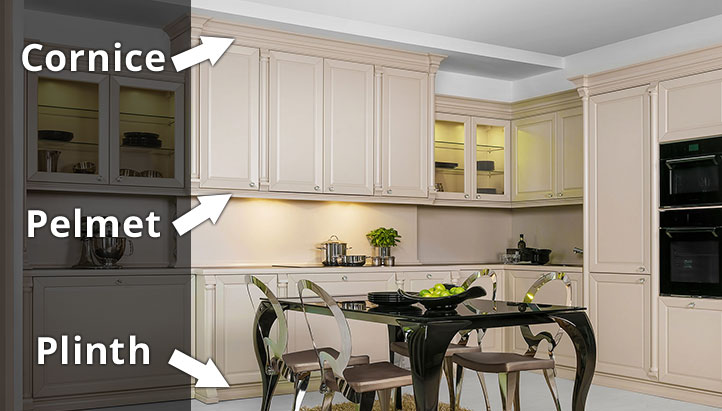
What is a Kitchen Wall Unit Pelmet?
 A
kitchen wall unit pelmet
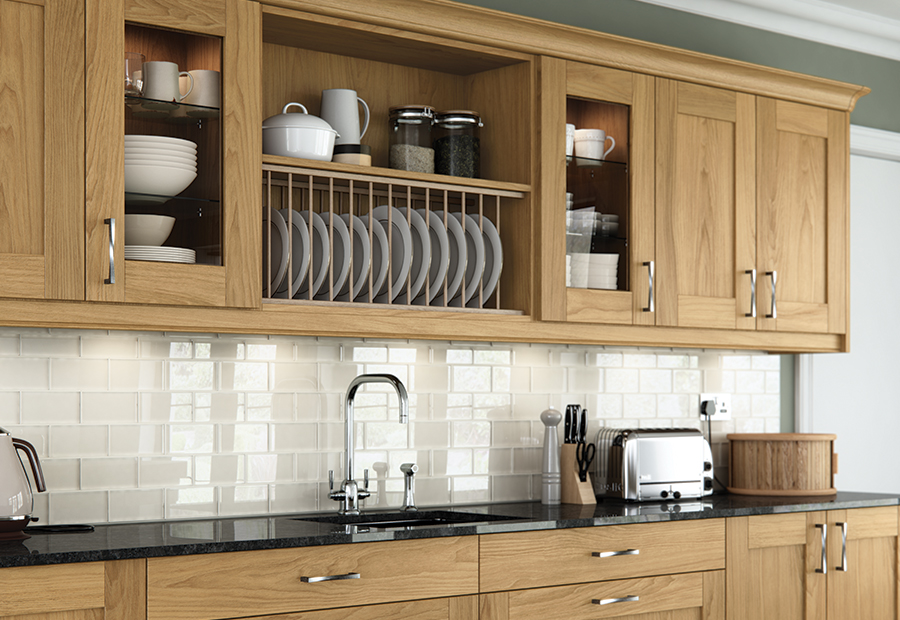
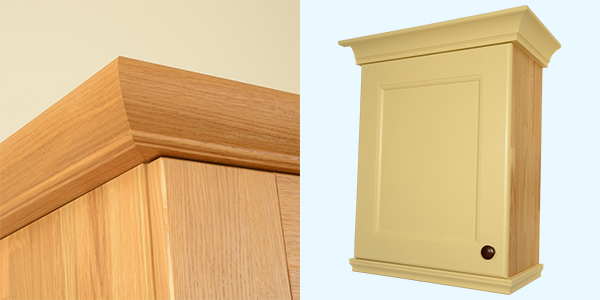
is a decorative panel that is placed at the top of wall cabinets. It is typically made of the same material as the cabinets and is designed to hide the gap between the top of the cabinets and the ceiling. This not only gives a seamless and polished look to the kitchen but also prevents dust and debris from collecting on top of the cabinets.
A
kitchen wall unit pelmet
is a decorative panel that is placed at the top of wall cabinets. It is typically made of the same material as the cabinets and is designed to hide the gap between the top of the cabinets and the ceiling. This not only gives a seamless and polished look to the kitchen but also prevents dust and debris from collecting on top of the cabinets.
Functionality Meets Design
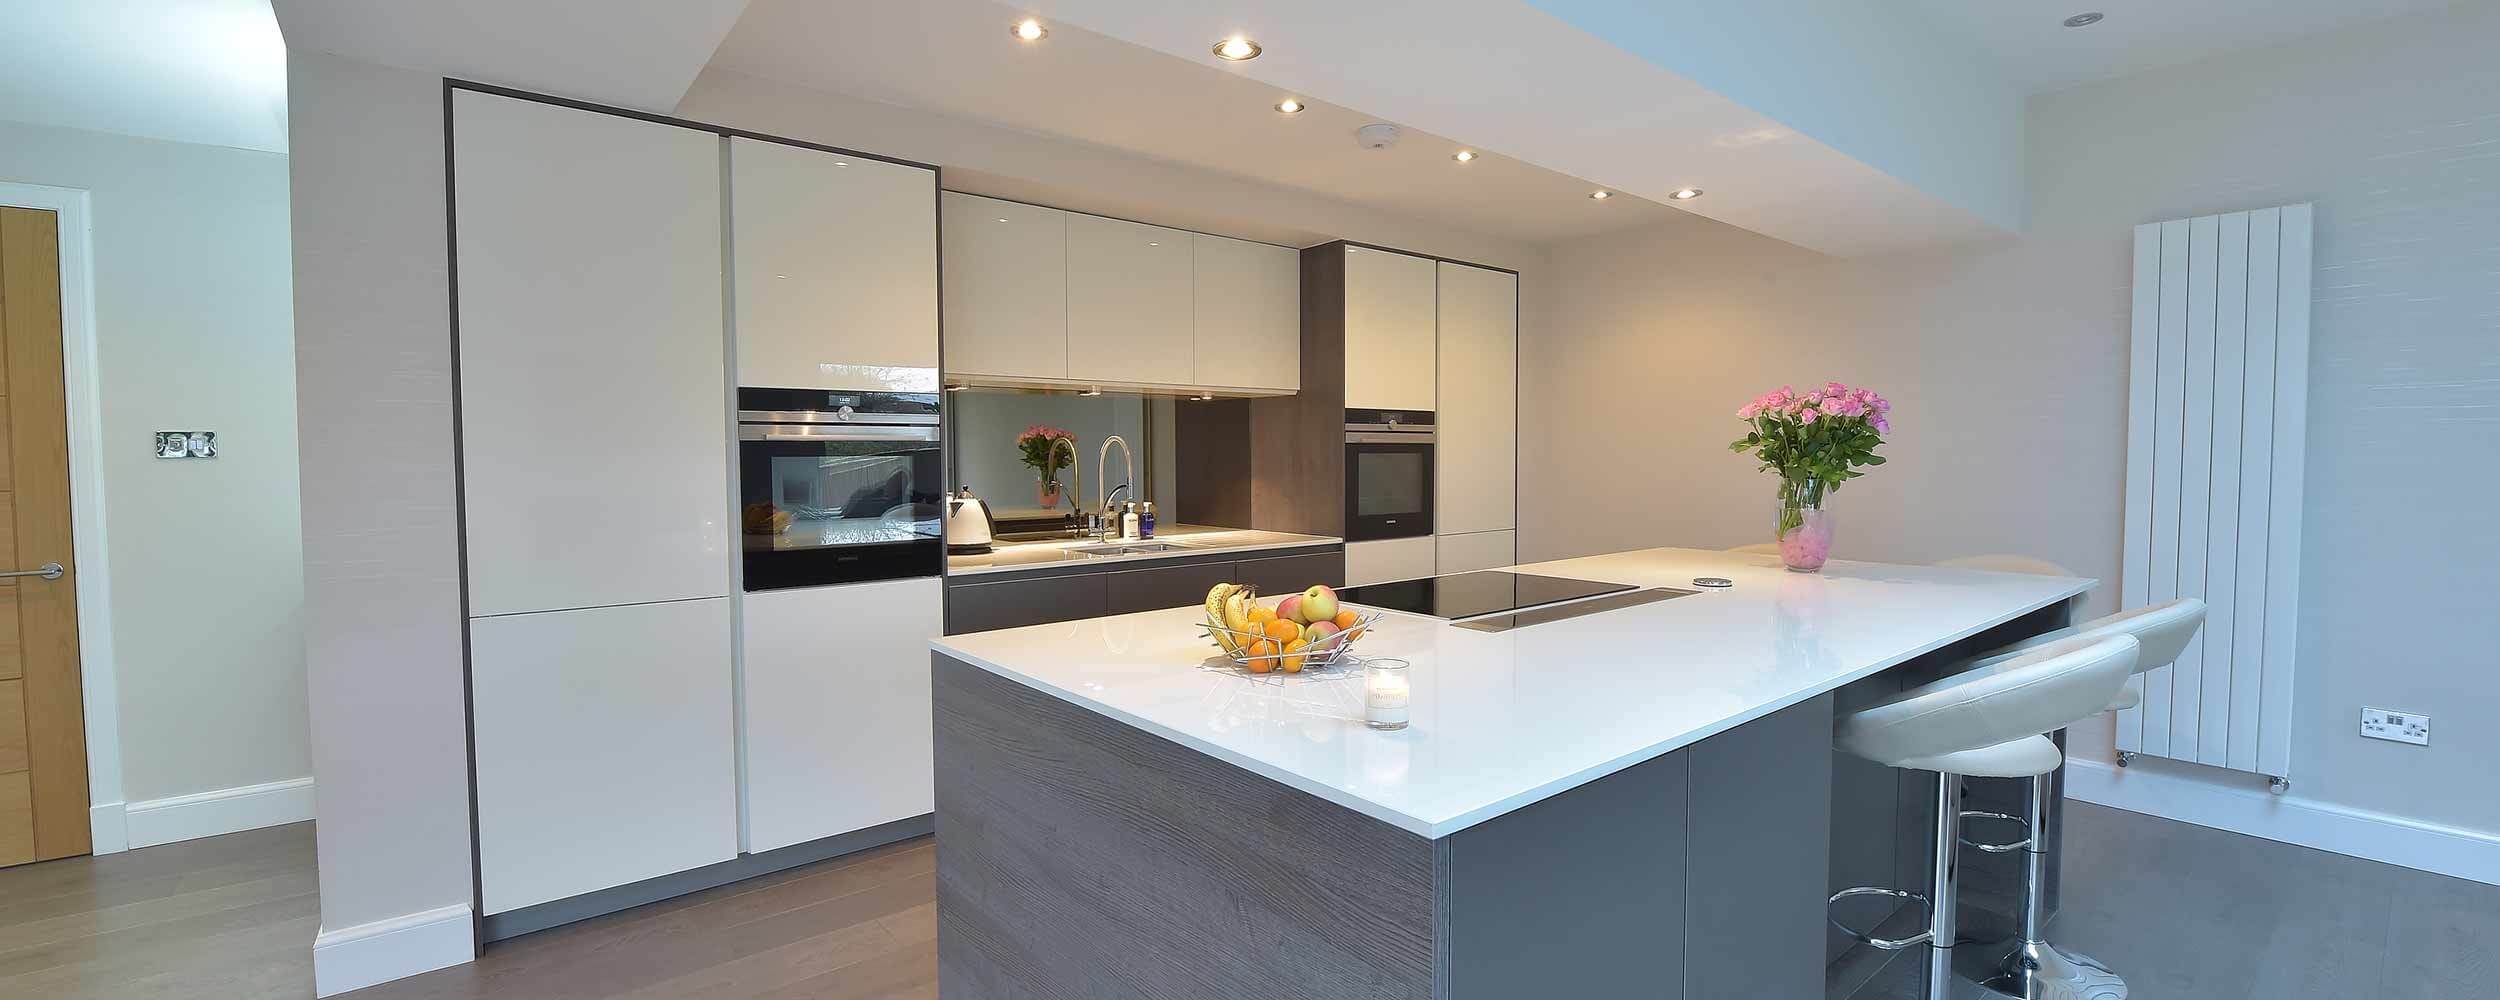
 Apart from its functional benefits, a
kitchen wall unit pelmet
can also add to the overall design of the kitchen. With the wide range of materials, colors, and designs available, it can easily complement any style of kitchen. Whether you have a modern, minimalist kitchen or a traditional and cozy one, there is a
kitchen wall unit pelmet
that will suit your taste.
Apart from its functional benefits, a
kitchen wall unit pelmet
can also add to the overall design of the kitchen. With the wide range of materials, colors, and designs available, it can easily complement any style of kitchen. Whether you have a modern, minimalist kitchen or a traditional and cozy one, there is a
kitchen wall unit pelmet
that will suit your taste.
Easy to Install and Maintain
 Another great aspect of a
kitchen wall unit pelmet
is that it is easy to install and maintain. It can be easily attached to the top of the cabinets with screws or adhesive, and once in place, it requires minimal upkeep. Simply wipe it down with a damp cloth every once in a while to keep it looking pristine.
Another great aspect of a
kitchen wall unit pelmet
is that it is easy to install and maintain. It can be easily attached to the top of the cabinets with screws or adhesive, and once in place, it requires minimal upkeep. Simply wipe it down with a damp cloth every once in a while to keep it looking pristine.
Final Thoughts
 In conclusion, a
kitchen wall unit pelmet
is an essential element of any modern kitchen. Its functionality, design, and ease of maintenance make it a must-have for any homeowner looking to add the finishing touches to their kitchen. So when designing your dream kitchen, don't forget to include a
kitchen wall unit pelmet
to achieve a seamless and stylish look.
In conclusion, a
kitchen wall unit pelmet
is an essential element of any modern kitchen. Its functionality, design, and ease of maintenance make it a must-have for any homeowner looking to add the finishing touches to their kitchen. So when designing your dream kitchen, don't forget to include a
kitchen wall unit pelmet
to achieve a seamless and stylish look.