Are you looking to upgrade your kitchen sink and add a sewer vent for better drainage? It may seem like a daunting task, but with the right tools and knowledge, you can easily change your kitchen sink with a sewer vent on your own. In this step-by-step guide, we will walk you through the process of replacing your kitchen sink and adding a sewer vent. Let's get started!How to Change a Kitchen Sink with a Sewer Vent


How to Change a Kitchen Sink with a Sewer Vent


Before you begin, make sure you have all the necessary tools and materials. This includes a new kitchen sink with a sewer vent, a wrench, pliers, plumber's putty, silicone sealant, and a hacksaw. Once you have everything ready, follow these steps:Replacing a Kitchen Sink with a Sewer Vent


Replacing a Kitchen Sink with a Sewer Vent


Step 1: Start by turning off the water supply to your kitchen sink. You can usually find the shut-off valve under the sink or in your basement. Step 2: Next, disconnect the water supply lines and the drain pipes from your old sink. Use a wrench or pliers to loosen and remove the connections. Step 3: Carefully remove your old sink from the countertop. You may need to use a putty knife to loosen any sealant holding the sink in place. Step 4: Measure and mark the location for your new sink and sewer vent on the countertop. Use a template provided with your sink or measure the dimensions yourself. Step 5: Use a hacksaw to cut a hole in the countertop for the sewer vent. Make sure the hole is slightly larger than the vent to allow for proper installation. Step 6: Install the sewer vent according to the manufacturer's instructions. This typically involves attaching the vent to the drainpipe and securing it with clamps. Step 7: Apply plumber's putty around the edge of the sink opening and carefully place the new sink on top. Make sure it is centered and level. Step 8: Secure the sink in place by tightening the clips provided by the manufacturer. This will create a tight seal between the sink and the countertop. Step 9: Reattach the water supply lines and drain pipes to the new sink. Use silicone sealant to create a watertight seal. Step 10: Turn the water supply back on and test your new sink and sewer vent to ensure everything is working properly.Step-by-Step Guide for Changing a Kitchen Sink with a Sewer Vent

Step-by-Step Guide for Changing a Kitchen Sink with a Sewer Vent


:no_upscale()/cdn.vox-cdn.com/uploads/chorus_asset/file/19495086/drain_0.jpg)


If you are confident in your DIY skills, you can easily replace your kitchen sink and add a sewer vent on your own. However, if you are unsure or uncomfortable with any part of the process, it is always best to hire a professional plumber to ensure the job is done correctly.DIY Kitchen Sink Replacement with a Sewer Vent


DIY Kitchen Sink Replacement with a Sewer Vent


Adding a sewer vent to your kitchen sink can greatly improve the functionality and efficiency of your plumbing system. The vent allows air to escape, preventing water from backing up and creating clogs. This can save you from costly repairs and headaches in the future.Upgrading Your Kitchen Sink with a Sewer Vent


Upgrading Your Kitchen Sink with a Sewer Vent


Tip 1: Make sure to turn off the water supply before beginning any work to avoid any potential flooding. Tip 2: Measure and double-check all dimensions to ensure your new sink and sewer vent will fit properly. Tip 3: Use high-quality materials and tools to ensure a secure and lasting installation. Tip 4: Don't be afraid to seek professional help if you are unsure or uncomfortable with any part of the process.Tips for Changing a Kitchen Sink with a Sewer Vent


Tips for Changing a Kitchen Sink with a Sewer Vent
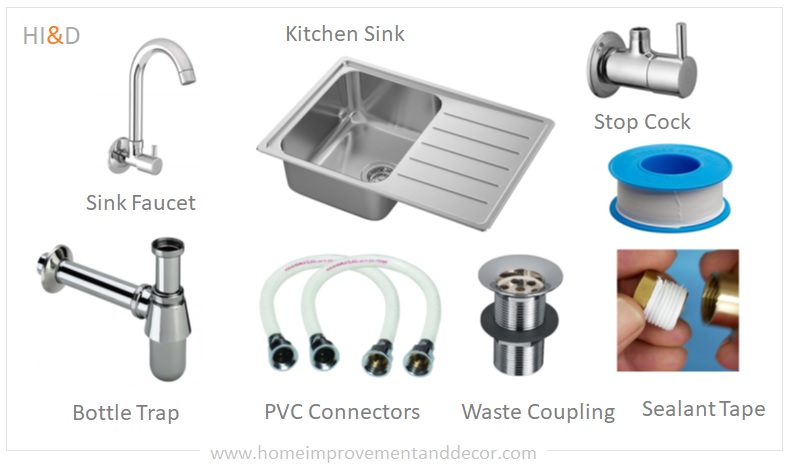
Here is a list of the tools and materials needed for changing a kitchen sink with a sewer vent: - New kitchen sink with a sewer vent - Wrench - Pliers - Plumber's putty - Silicone sealant - HacksawTools and Materials Needed for Changing a Kitchen Sink with a Sewer Vent


Tools and Materials Needed for Changing a Kitchen Sink with a Sewer Vent


/how-to-install-a-sink-drain-2718789-hero-24e898006ed94c9593a2a268b57989a3.jpg)

Mistake 1: Not turning off the water supply before beginning work. Mistake 2: Not measuring or double-checking dimensions before cutting the countertop. Mistake 3: Using low-quality materials or tools. Mistake 4: Ignoring any warnings or instructions provided by the manufacturer.Common Mistakes to Avoid When Changing a Kitchen Sink with a Sewer Vent


Common Mistakes to Avoid When Changing a Kitchen Sink with a Sewer Vent


Installing a sewer vent for your kitchen sink is a relatively simple process. Just follow the manufacturer's instructions and make sure to use the proper tools and materials. If you are unsure or uncomfortable with any part of the process, it is always best to seek professional help.How to Install a Sewer Vent for Your Kitchen Sink

How to Install a Sewer Vent for Your Kitchen Sink

:no_upscale()/cdn.vox-cdn.com/uploads/chorus_asset/file/19495086/drain_0.jpg)
Adding a sewer vent to your kitchen sink can provide numerous benefits, including: - Improved drainage and prevention of clogs - Increased efficiency and functionality of your plumbing system - Protection from costly repairs in the future Now that you know how to change a kitchen sink with a sewer vent, you can easily upgrade your kitchen and enjoy the benefits of a properly functioning plumbing system. Remember to take your time, use the right tools and materials, and don't hesitate to seek professional help if needed. Happy renovating!Benefits of Adding a Sewer Vent to Your Kitchen Sink


Benefits of Adding a Sewer Vent to Your Kitchen Sink


How to Change Your Kitchen Sink and Add a Sewer Vent: The Ultimate Guide
Why Change Your Kitchen Sink?
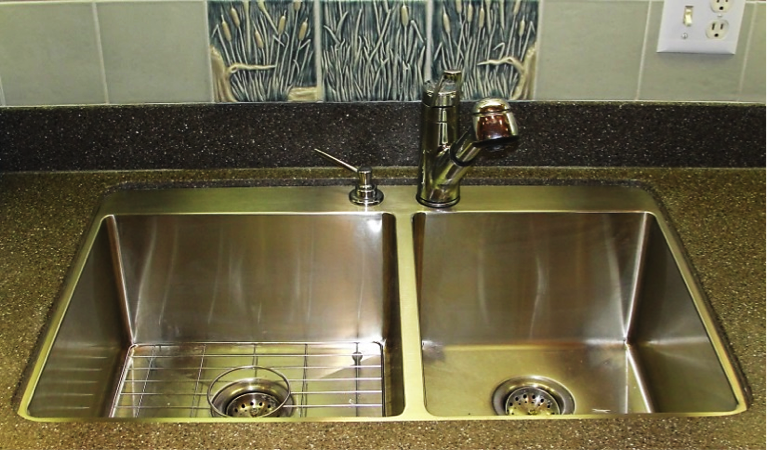
 The kitchen sink is an essential part of every household. It is where we wash our dishes, prepare our meals, and even fill up our glasses with water. Over time, our kitchen sinks can become worn out, stained, or damaged, making it necessary to replace them. Additionally, adding a sewer vent to your kitchen sink can improve the overall functionality of your kitchen and prevent any unpleasant odors from coming from your drains. In this article, we will guide you through the process of changing your kitchen sink and adding a sewer vent.
Step 1: Plan and Gather Materials
 Before starting the process of changing your kitchen sink and adding a sewer vent, it is essential to plan and gather all the necessary materials. This includes the new sink, faucet, plumbing tools, and a sewer vent kit. Make sure to measure your new sink and compare it to your existing sink to ensure it will fit properly.
Step 2: Turn Off the Water Supply
 To avoid any water damage, it is crucial to turn off the water supply to your kitchen sink before starting the installation process. Locate the shut-off valves under your sink and turn them clockwise to close them.
Step 3: Remove Old Sink and Faucet
 Once the water supply is turned off, you can start removing the old sink and faucet. Start by disconnecting the water supply lines and the drain pipes. Then, loosen the clips or fasteners that hold the sink in place. With the help of a friend, carefully lift the old sink out and set it aside.
Step 4: Install the New Sink and Faucet
 With the old sink removed, it is time to install the new one. Follow the manufacturer's instructions for installing the sink and faucet. Make sure to properly seal the sink with caulk to prevent any leaks in the future.
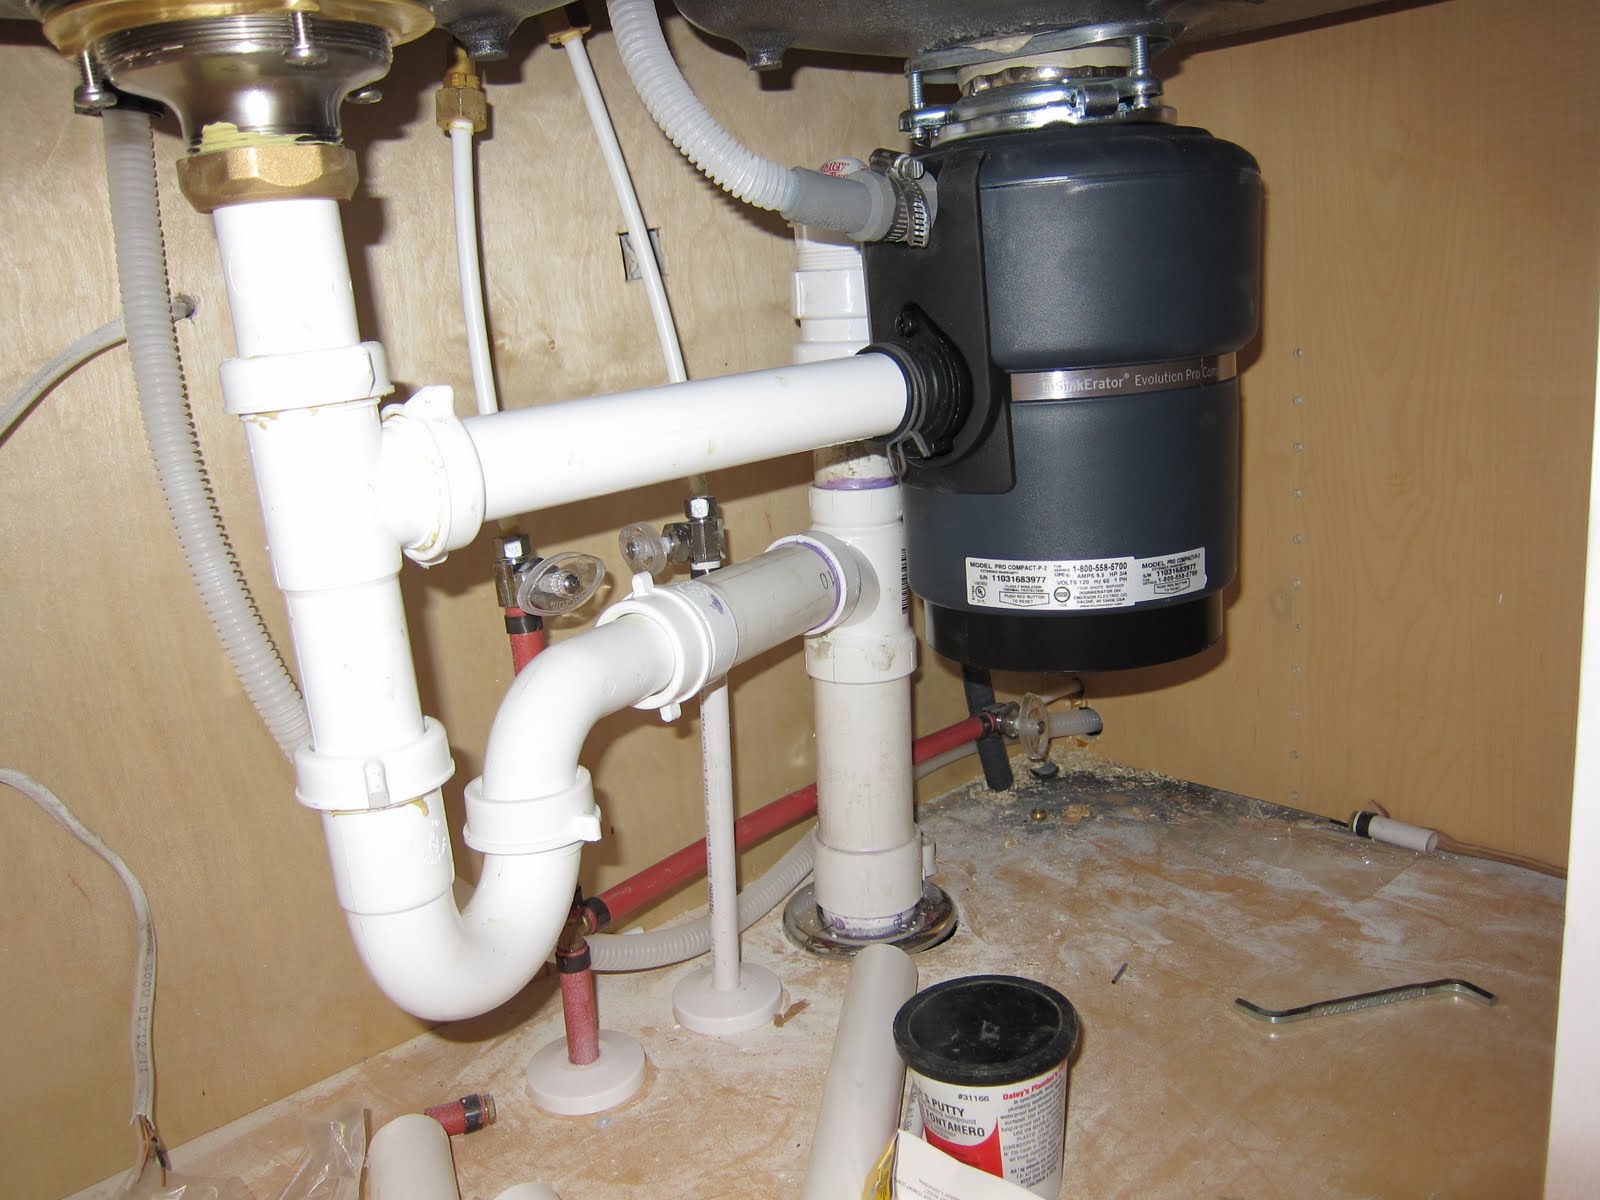
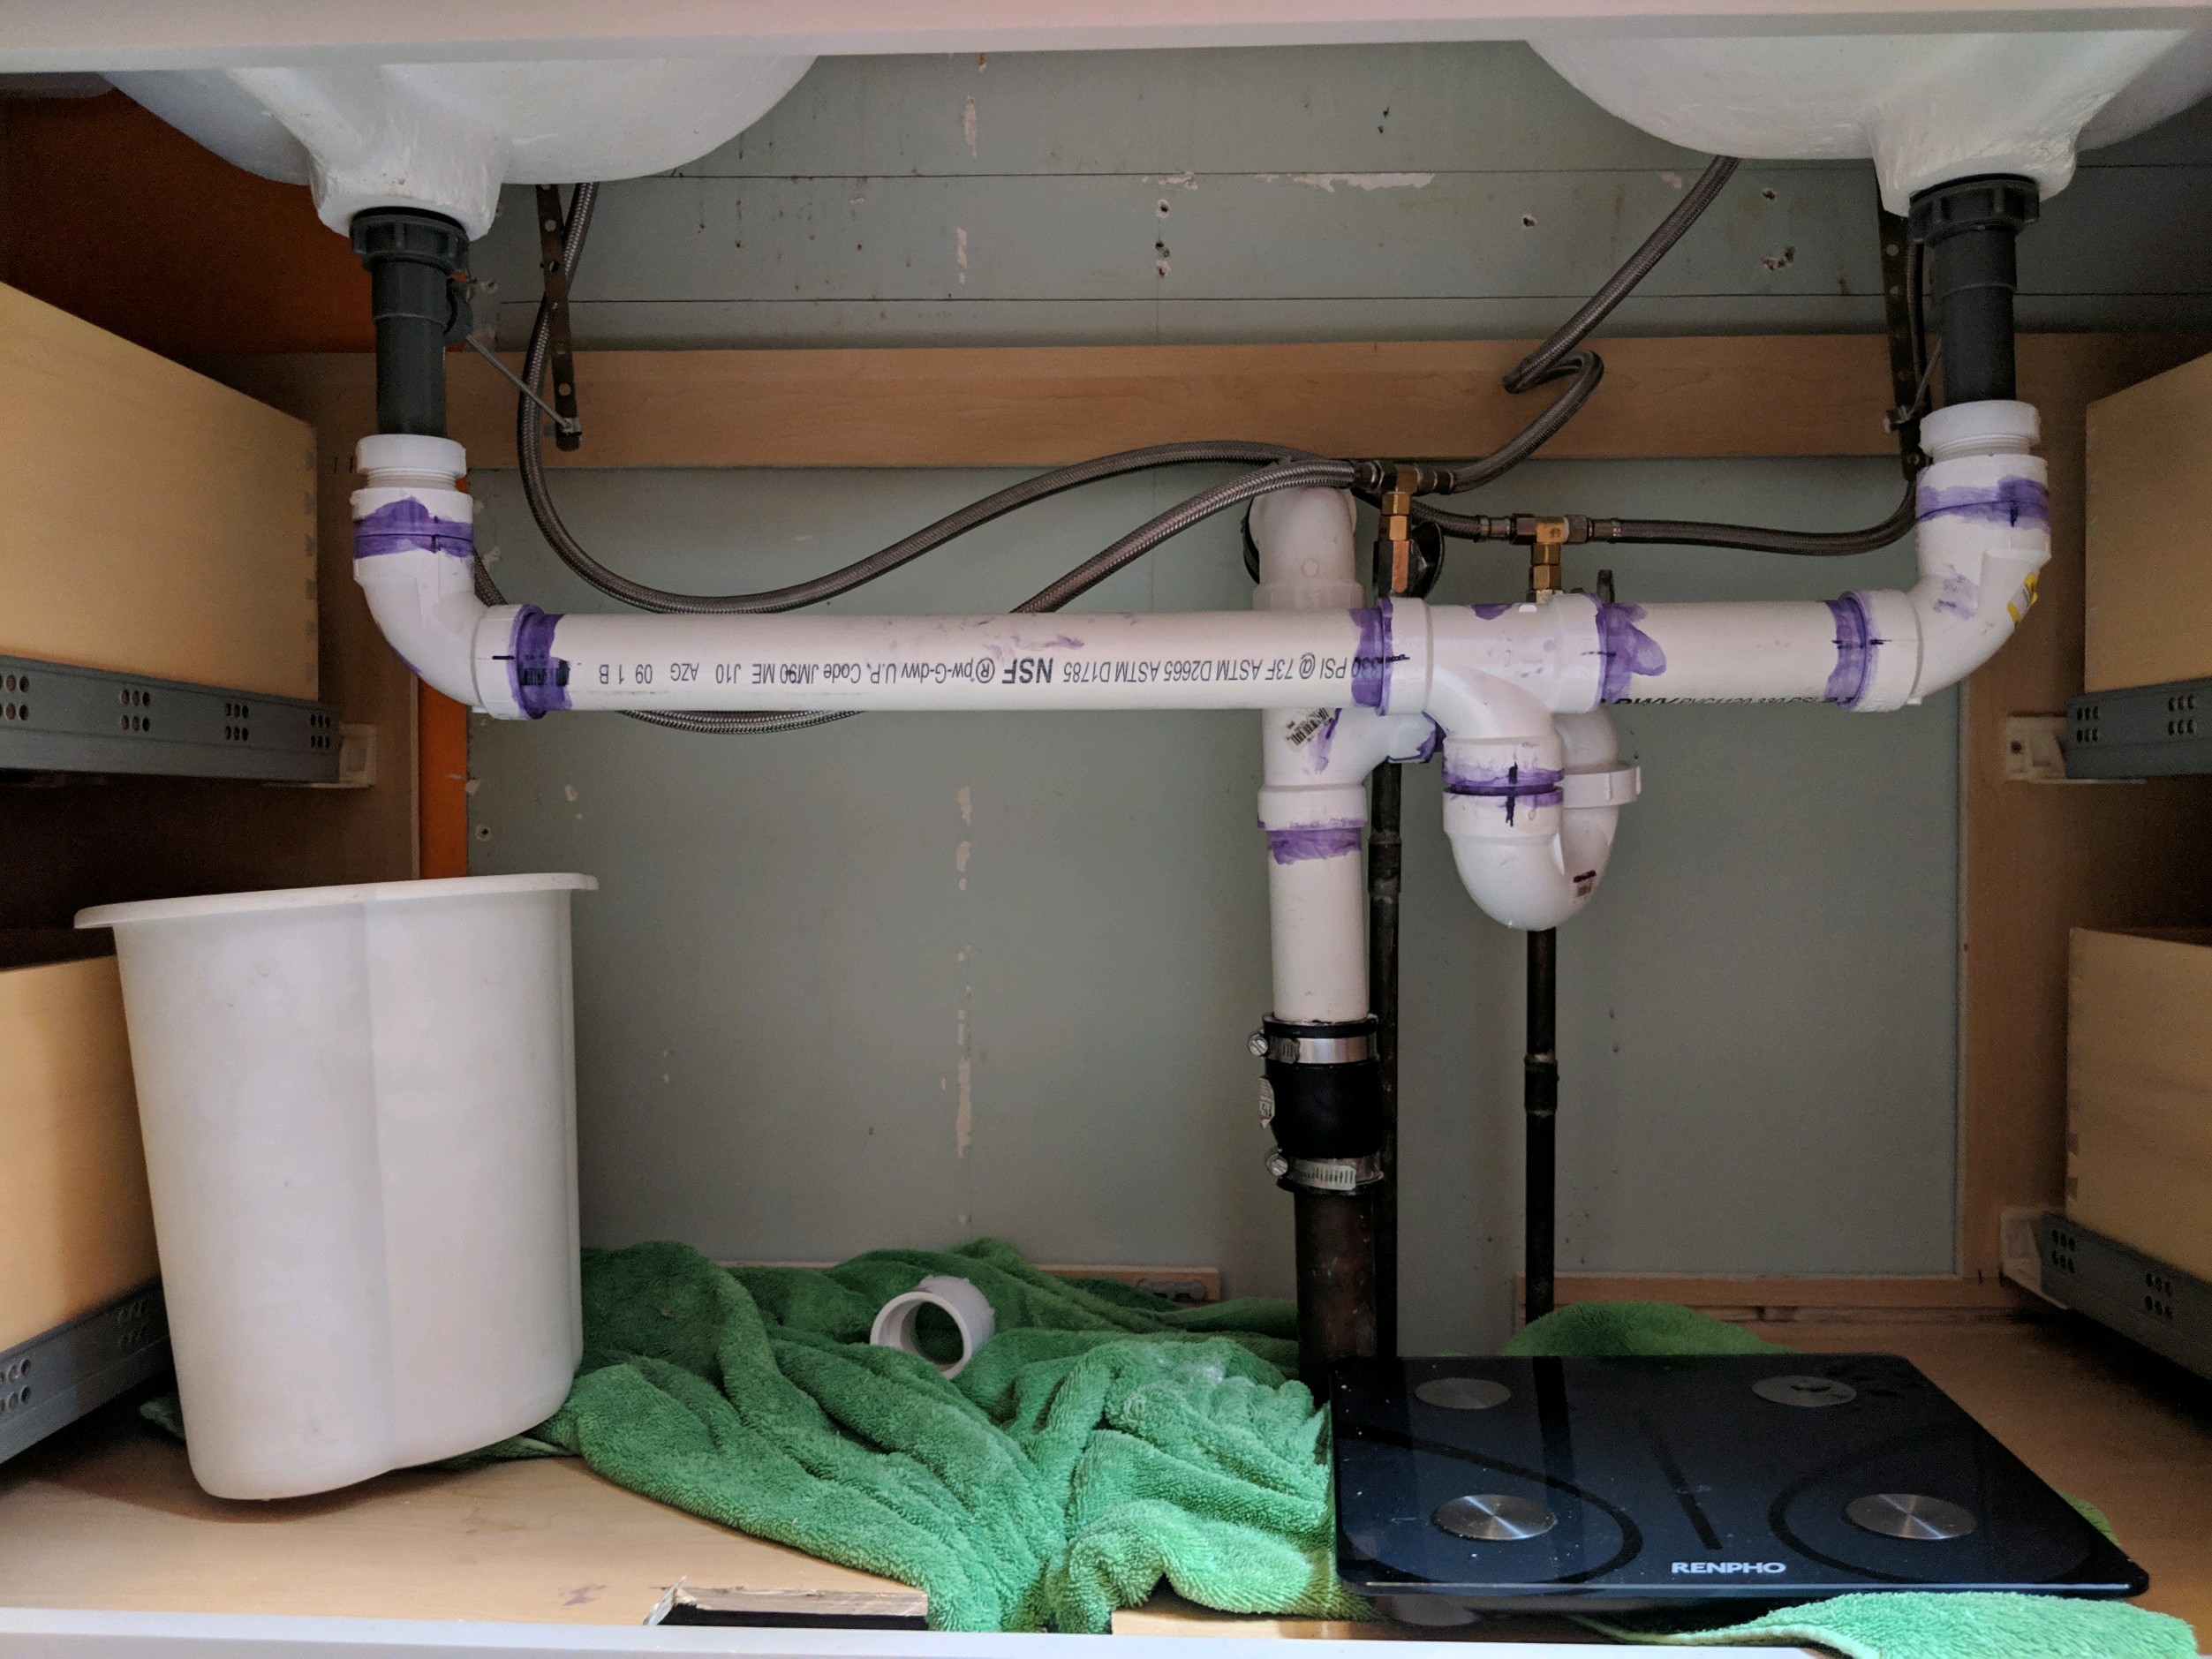
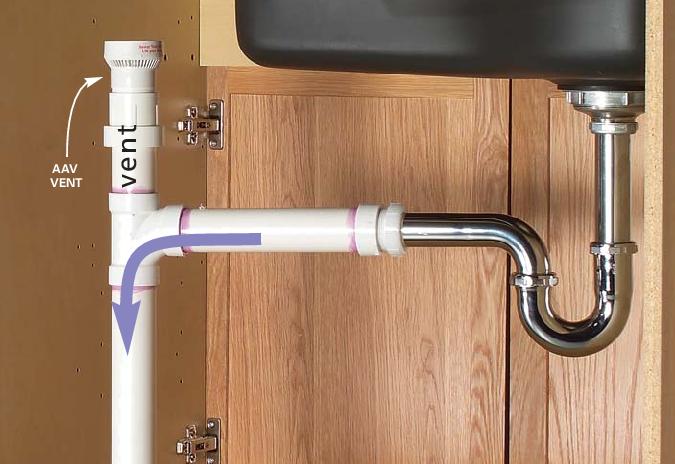
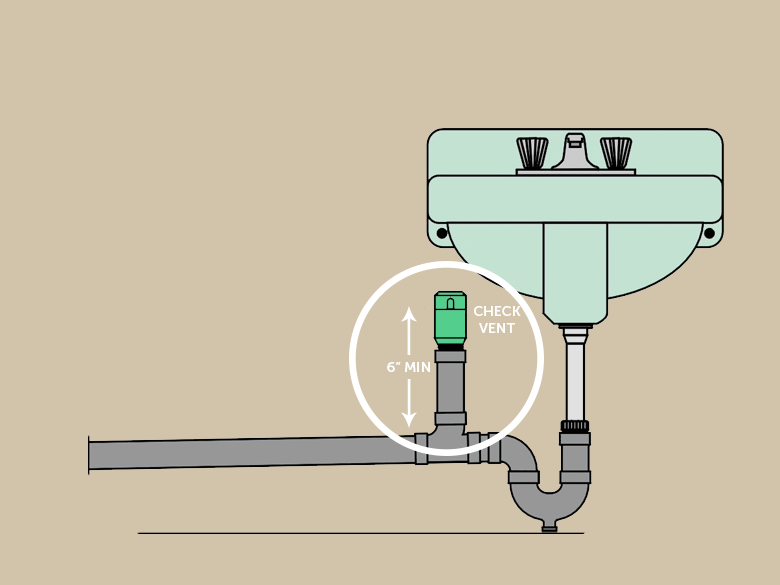
Step 5: Add the Sewer Vent
 To add a sewer vent to your kitchen sink, you will need to install a T-joint into your drain line. Make sure to position the joint above the P-trap and use a hack saw to cut the necessary holes. Then, attach the sewer vent kit to the T-joint and secure it in place.
Step 6: Test for Leaks and Turn Water Supply Back On
 Before using your new sink, it is essential to test for any leaks. Turn the water supply back on and check for any drips or puddles. If everything looks good, you can start using your new kitchen sink with a functioning sewer vent.
Changing your kitchen sink and adding a sewer vent may seem like a daunting task, but with the right tools and guidance, it can be a straightforward process. By following these steps, you can upgrade your kitchen and improve its functionality. Remember to always plan and gather all necessary materials before starting any DIY project.
Before using your new sink, it is essential to test for any leaks. Turn the water supply back on and check for any drips or puddles. If everything looks good, you can start using your new kitchen sink with a functioning sewer vent.
Changing your kitchen sink and adding a sewer vent may seem like a daunting task, but with the right tools and guidance, it can be a straightforward process. By following these steps, you can upgrade your kitchen and improve its functionality. Remember to always plan and gather all necessary materials before starting any DIY project.