If you've noticed water seeping out from around your kitchen sink, it's time to caulk. Caulking is an essential part of keeping your sink area watertight and preventing damage to your cabinets and countertops. It may seem like a daunting task, but with the right tools and techniques, you can easily caulk around your kitchen sink like a pro.How to Caulk Around a Kitchen Sink


How to Caulk Around a Kitchen Sink


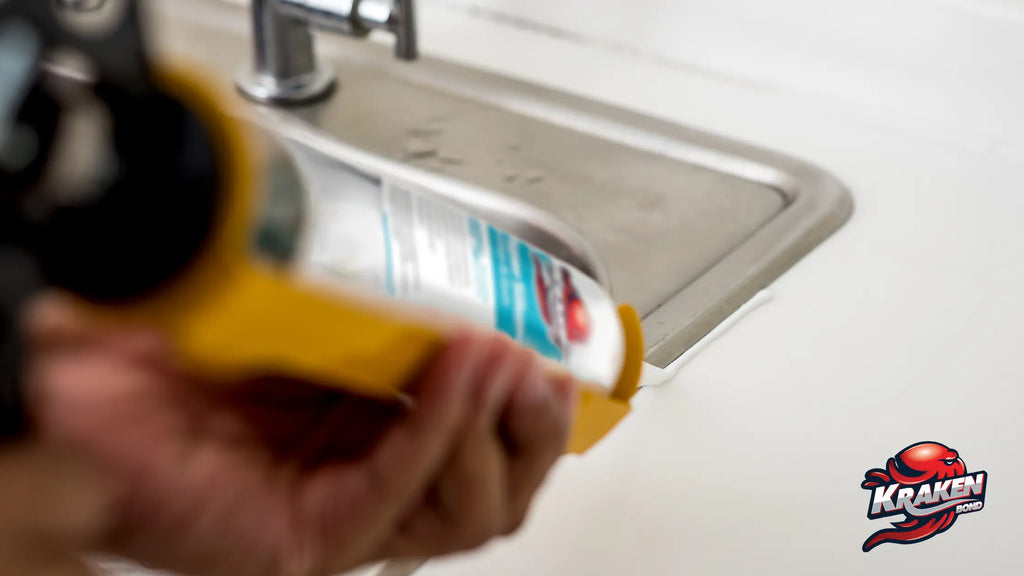
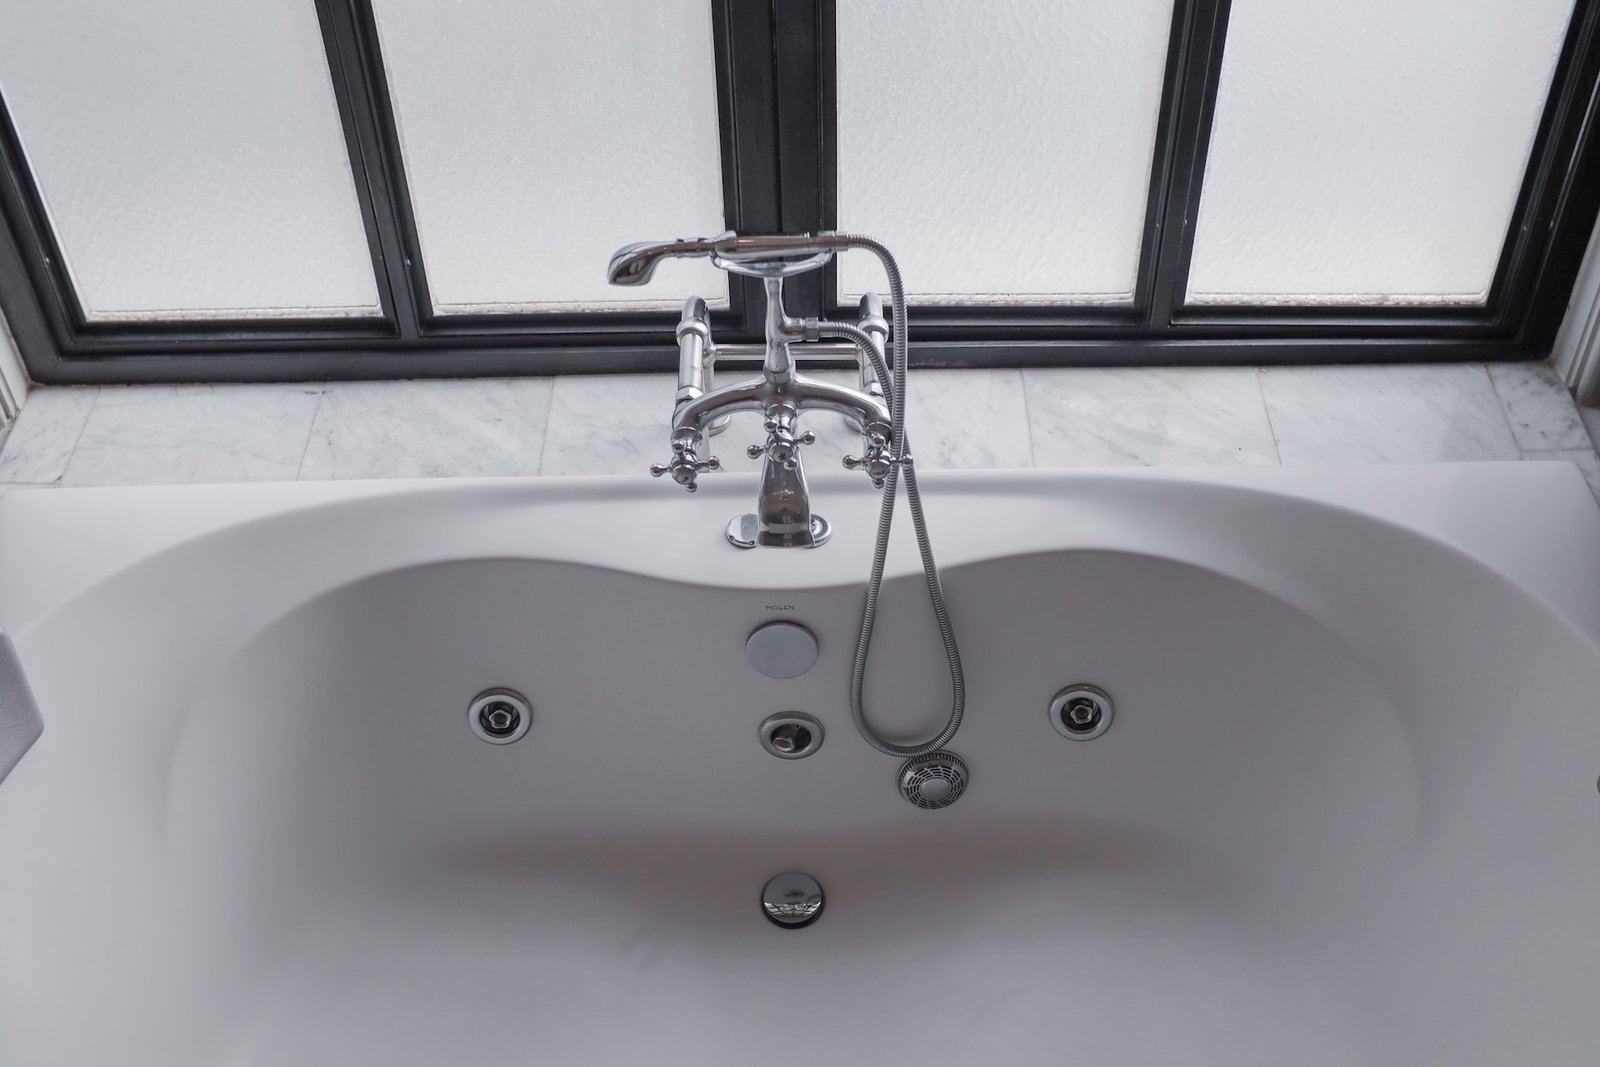
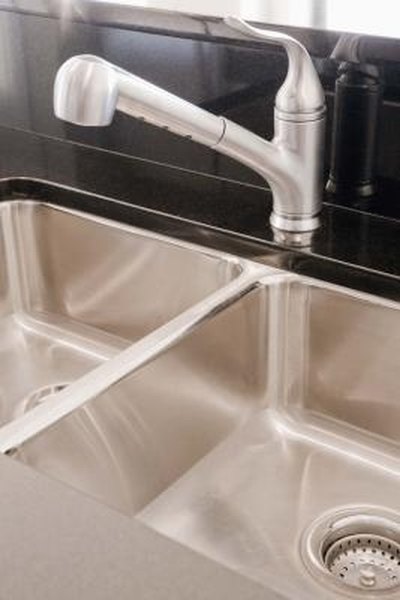
Before you start caulking, it's important to choose the right type of caulk for your kitchen sink. Silicone caulk is the most commonly used type for sinks as it is waterproof and flexible. Look for a caulk specifically designed for kitchen and bathroom use to ensure it can withstand high levels of moisture. It's also important to select a color that matches your sink and countertop for a seamless finish.Best Caulk for Kitchen Sink


Best Caulk for Kitchen Sink


.jpg)

Before you begin, make sure to thoroughly clean and dry the area around your sink. Use a mild cleaner to remove any residue, and dry the area with a clean cloth. Next, use painter's tape to mark off the edges of your sink to create clean, straight lines. This will also help prevent any excess caulk from getting on your sink or countertop.Tips for Caulking Around a Kitchen Sink


Tips for Caulking Around a Kitchen Sink


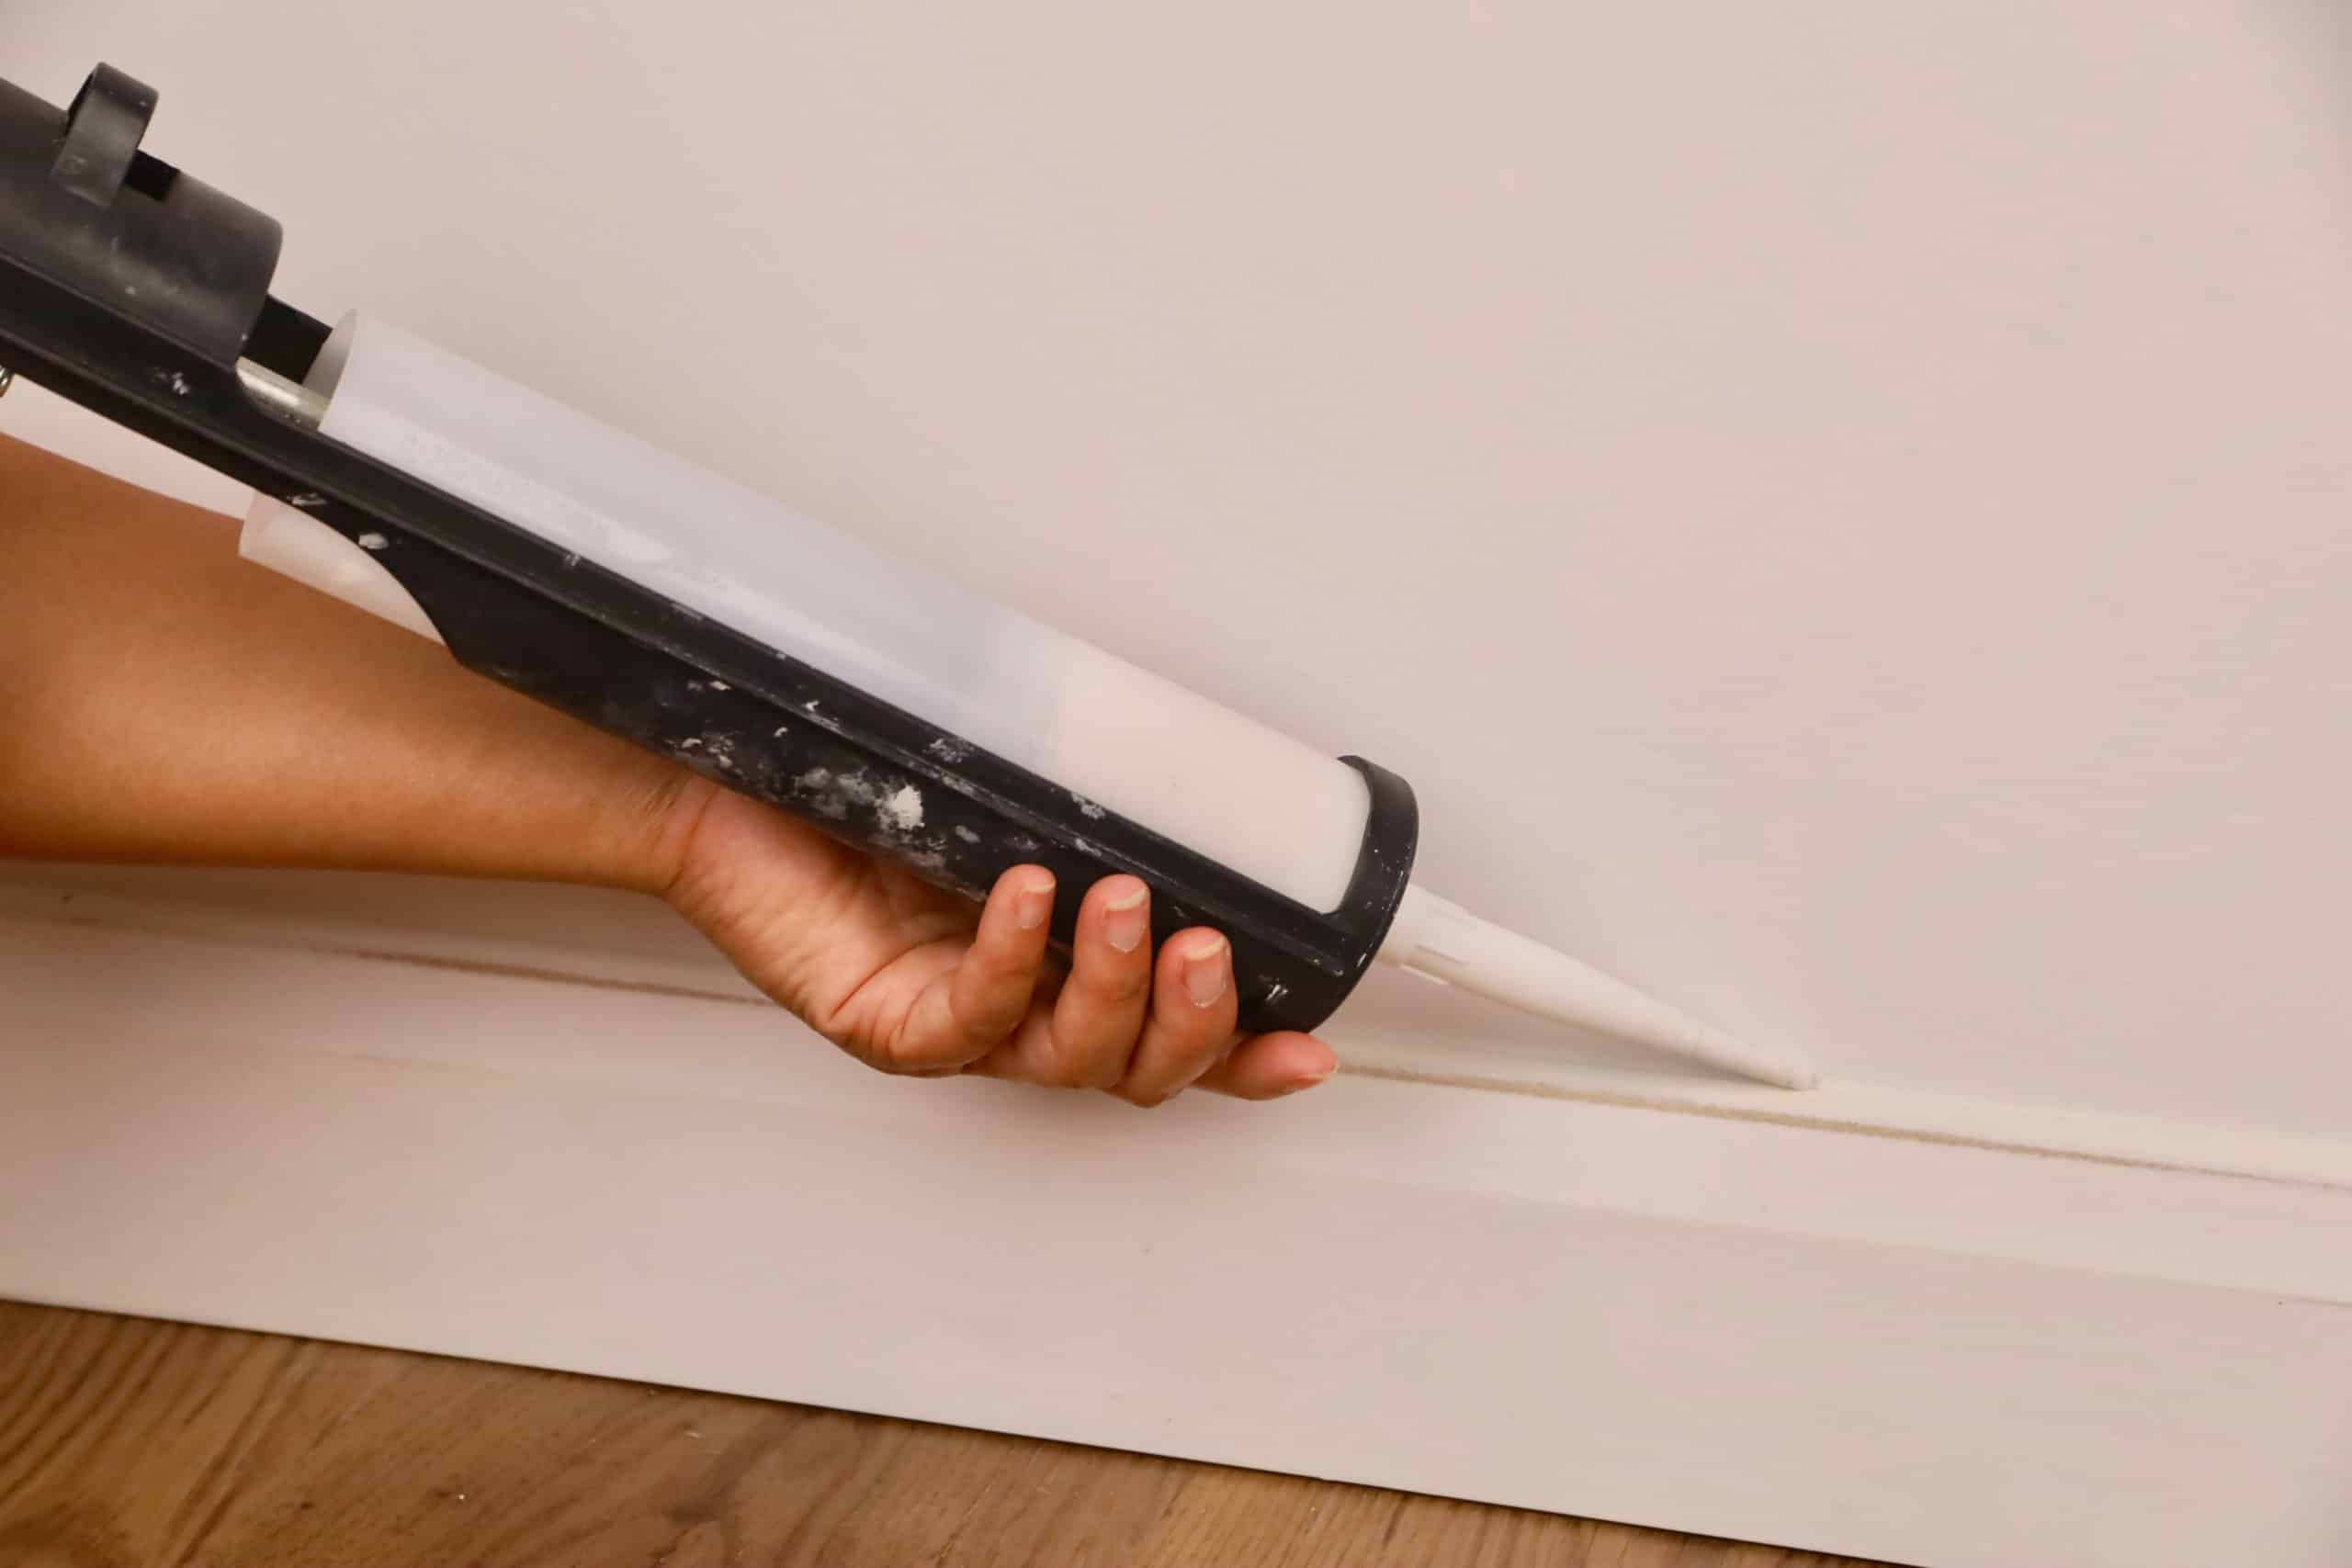
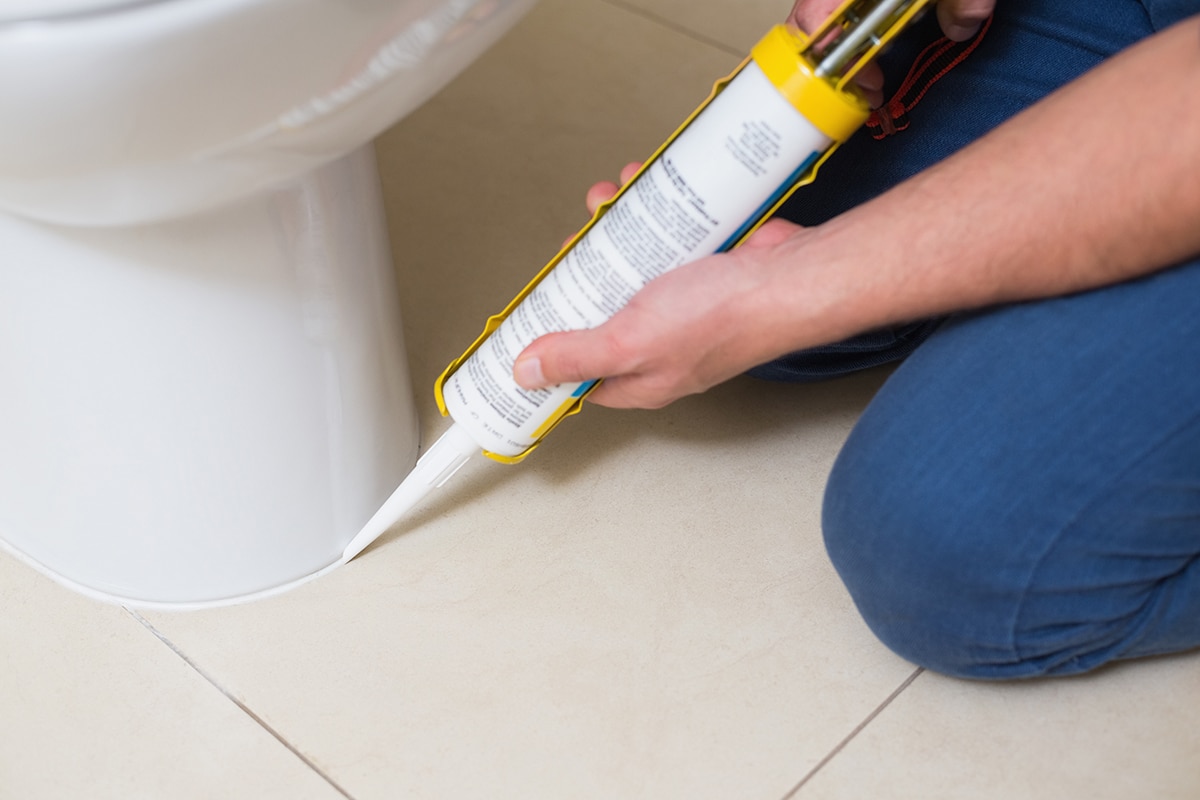
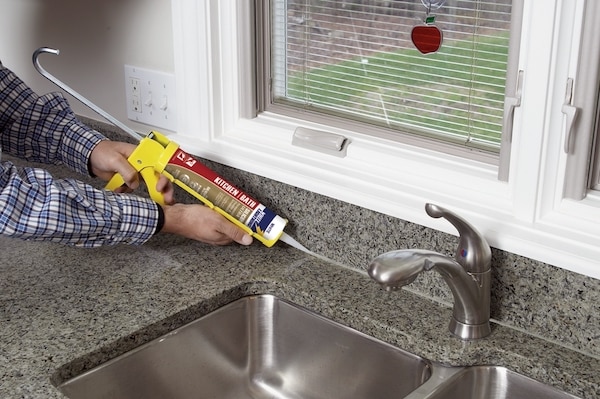
Start by cutting the tip of your caulk tube at a 45-degree angle. This will help create a smooth, even bead of caulk. Next, insert the tube into a caulk gun and begin applying the caulk along the edge of your sink, starting from one end and moving towards the other. Use steady pressure and keep the caulk gun at a 45-degree angle for a consistent bead. Once you've completed one side, use your finger or a caulk smoothing tool to smooth out the caulk. Remove the painter's tape immediately after smoothing to avoid pulling up any caulk.Step-by-Step Guide for Caulking Around a Kitchen Sink


Step-by-Step Guide for Caulking Around a Kitchen Sink


One common mistake when caulking around a kitchen sink is not using enough caulk. Make sure to apply a generous amount to create a strong seal. Another mistake is not smoothing out the caulk properly, which can result in a messy finish. Take your time when smoothing and use a clean finger or caulk smoothing tool for best results.Common Mistakes When Caulking Around a Kitchen Sink


Common Mistakes When Caulking Around a Kitchen Sink

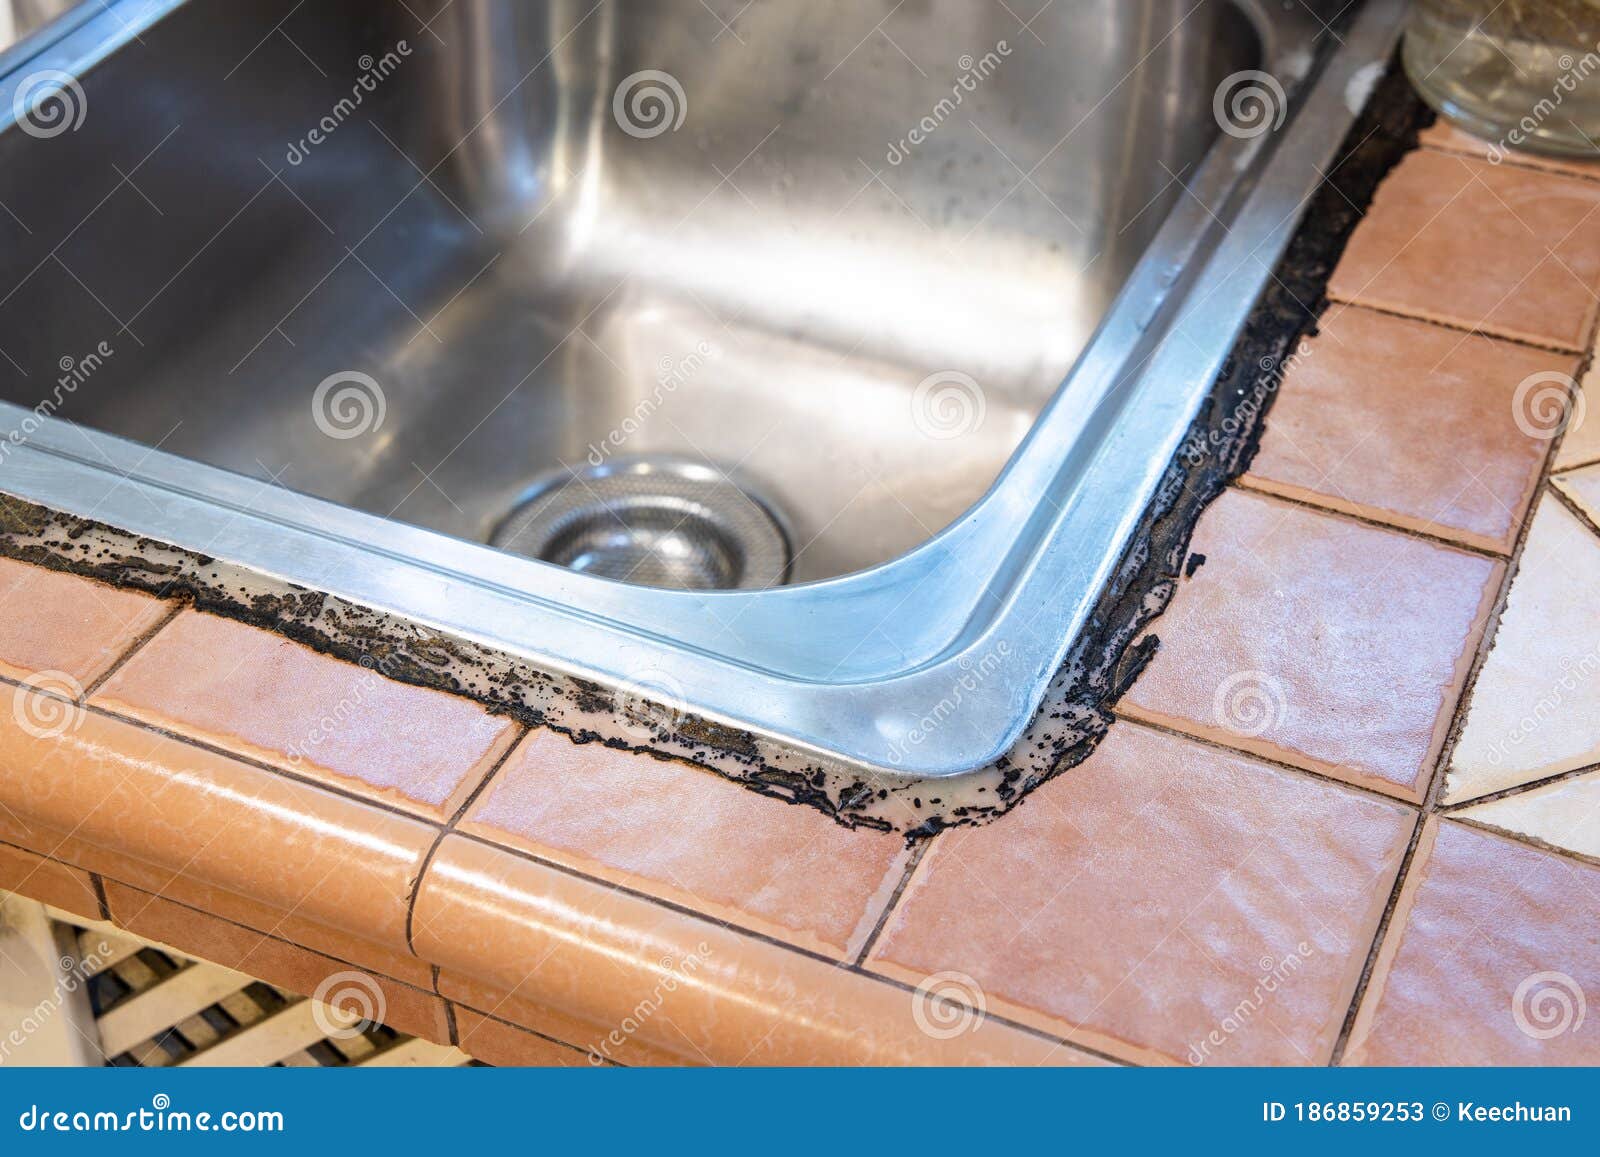
It's recommended to check the caulk around your kitchen sink every six months. If you notice any cracks or gaps, it's time to recaulk. Over time, caulk can shrink and become less effective, so it's important to keep an eye on it and replace it when necessary.How Often Should You Caulk Around a Kitchen Sink?


How Often Should You Caulk Around a Kitchen Sink?

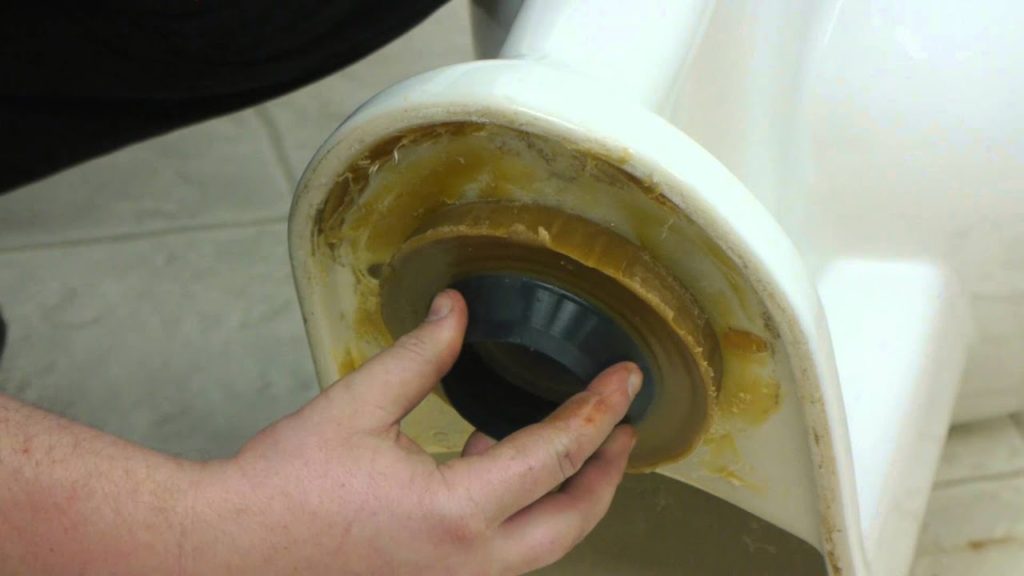


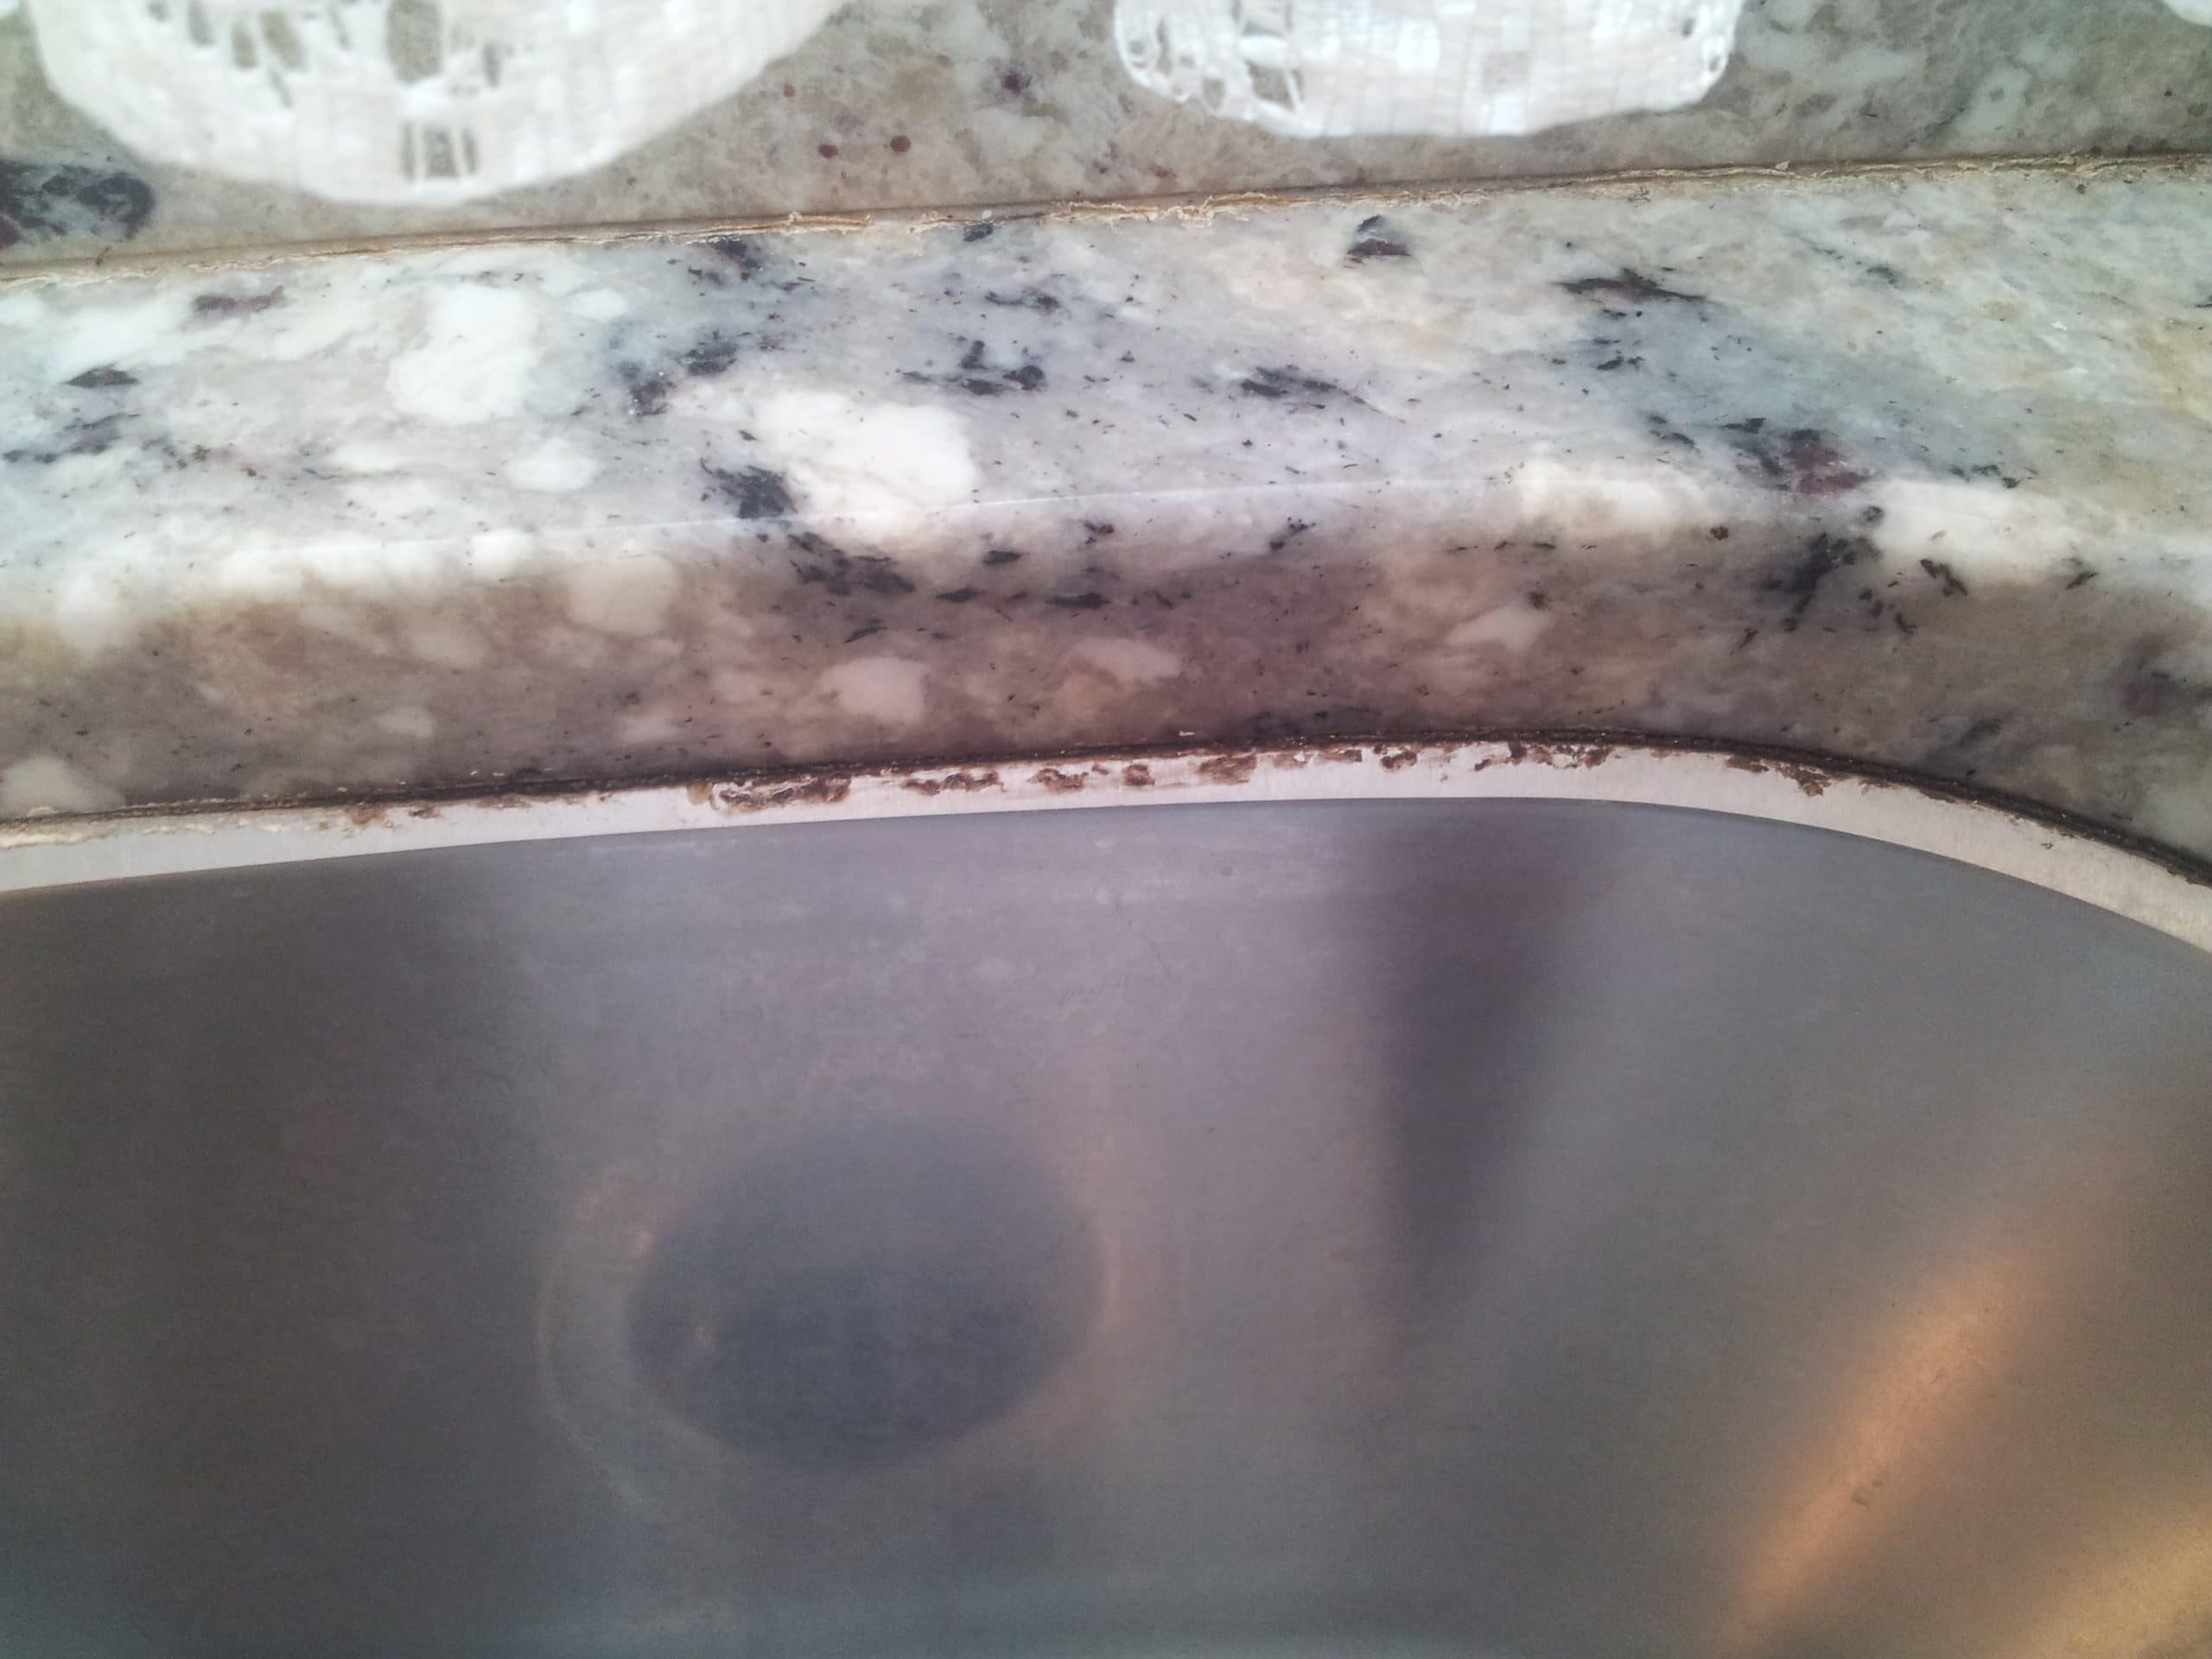
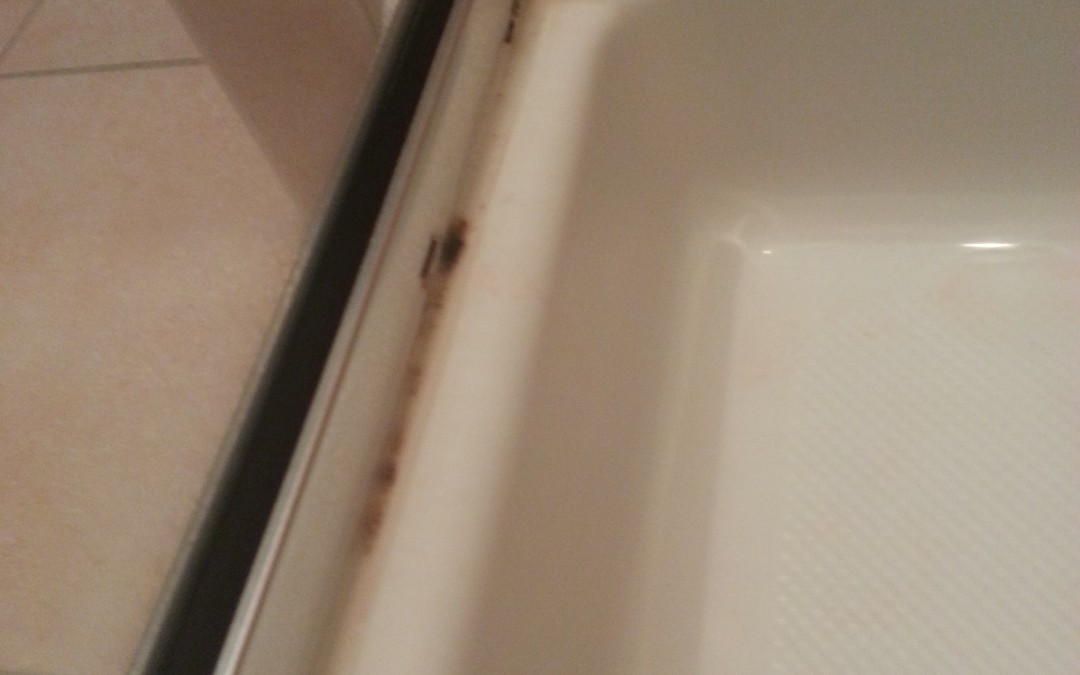
If you're replacing old caulk, you'll need to remove the old caulk first. Use a caulk remover tool or a utility knife to carefully scrape away the old caulk. Make sure to remove all traces of the old caulk before applying new caulk for a proper seal.Removing Old Caulk Around a Kitchen Sink


Removing Old Caulk Around a Kitchen Sink
:max_bytes(150000):strip_icc()/how-to-remove-old-caulk-1824827-01-3d0370c59e124dbbaa6560c68bab111c.jpg)


As mentioned before, silicone caulk is the best option for waterproofing your kitchen sink. You can also look for caulk specifically labeled as "waterproof" for added protection against moisture. It's also important to make sure the caulk is labeled for use in kitchens and bathrooms, as these areas are prone to high levels of moisture.Waterproof Caulking for Kitchen Sink


Waterproof Caulking for Kitchen Sink


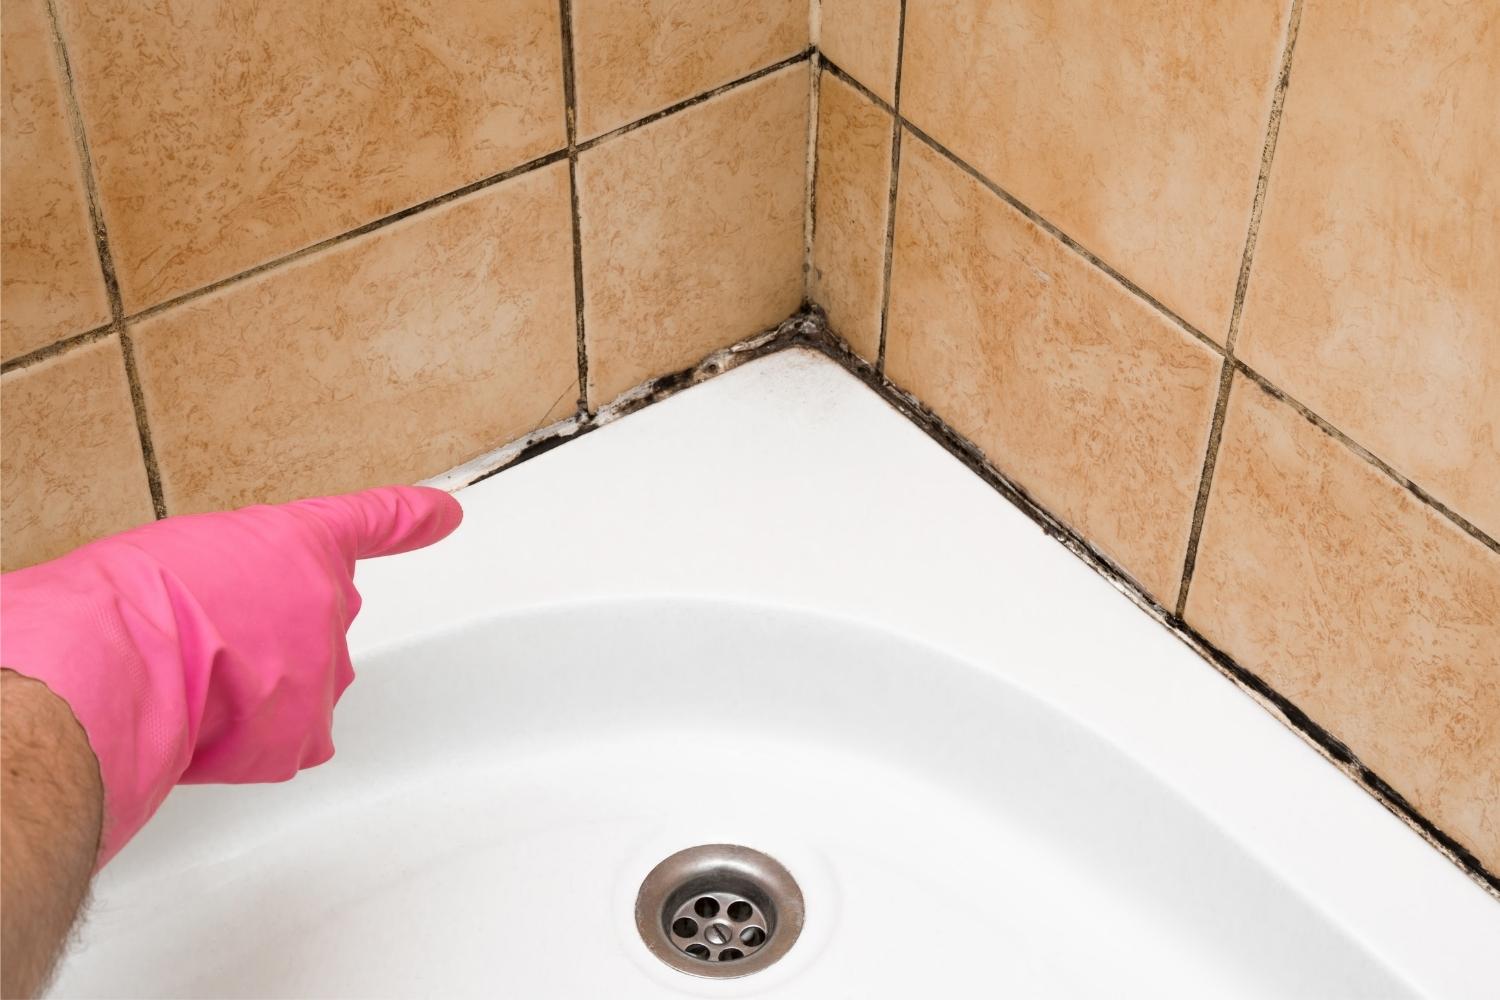
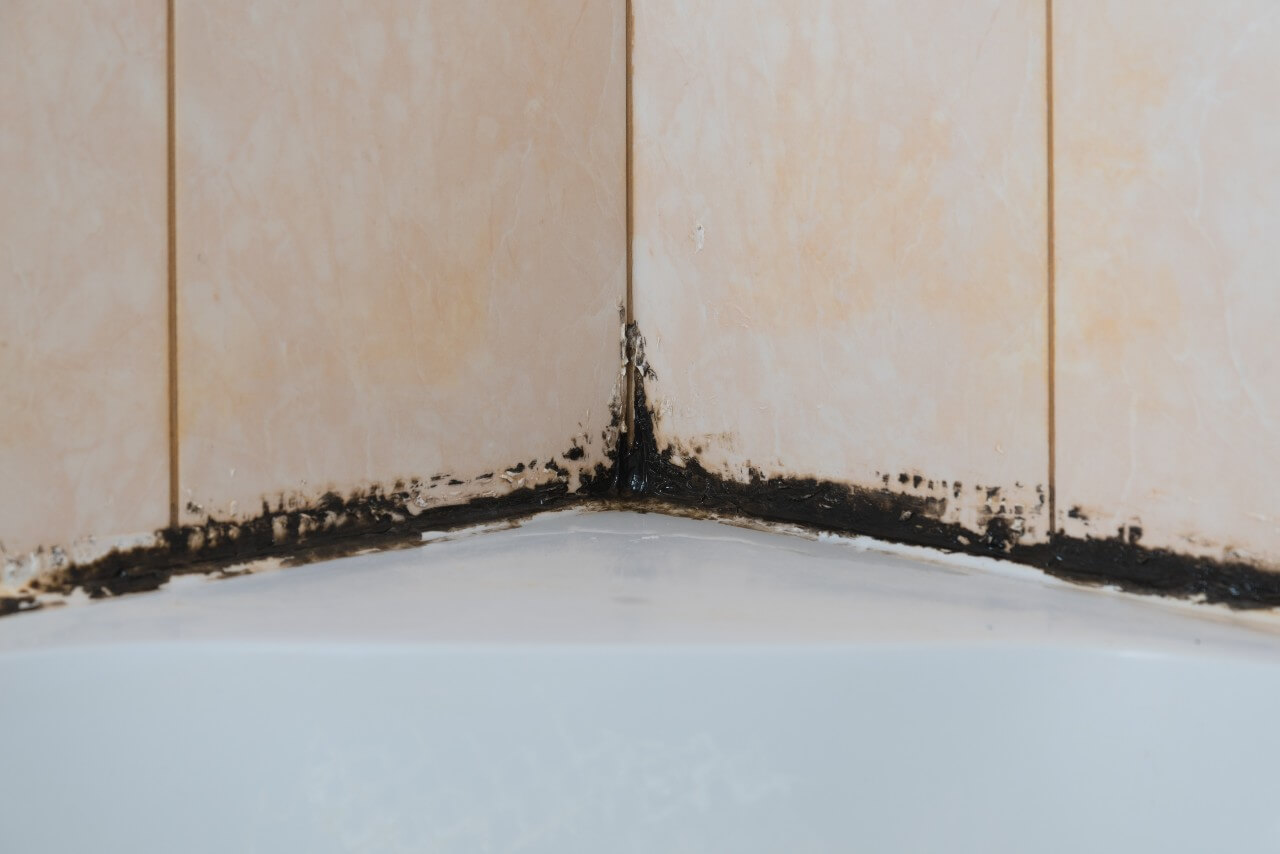
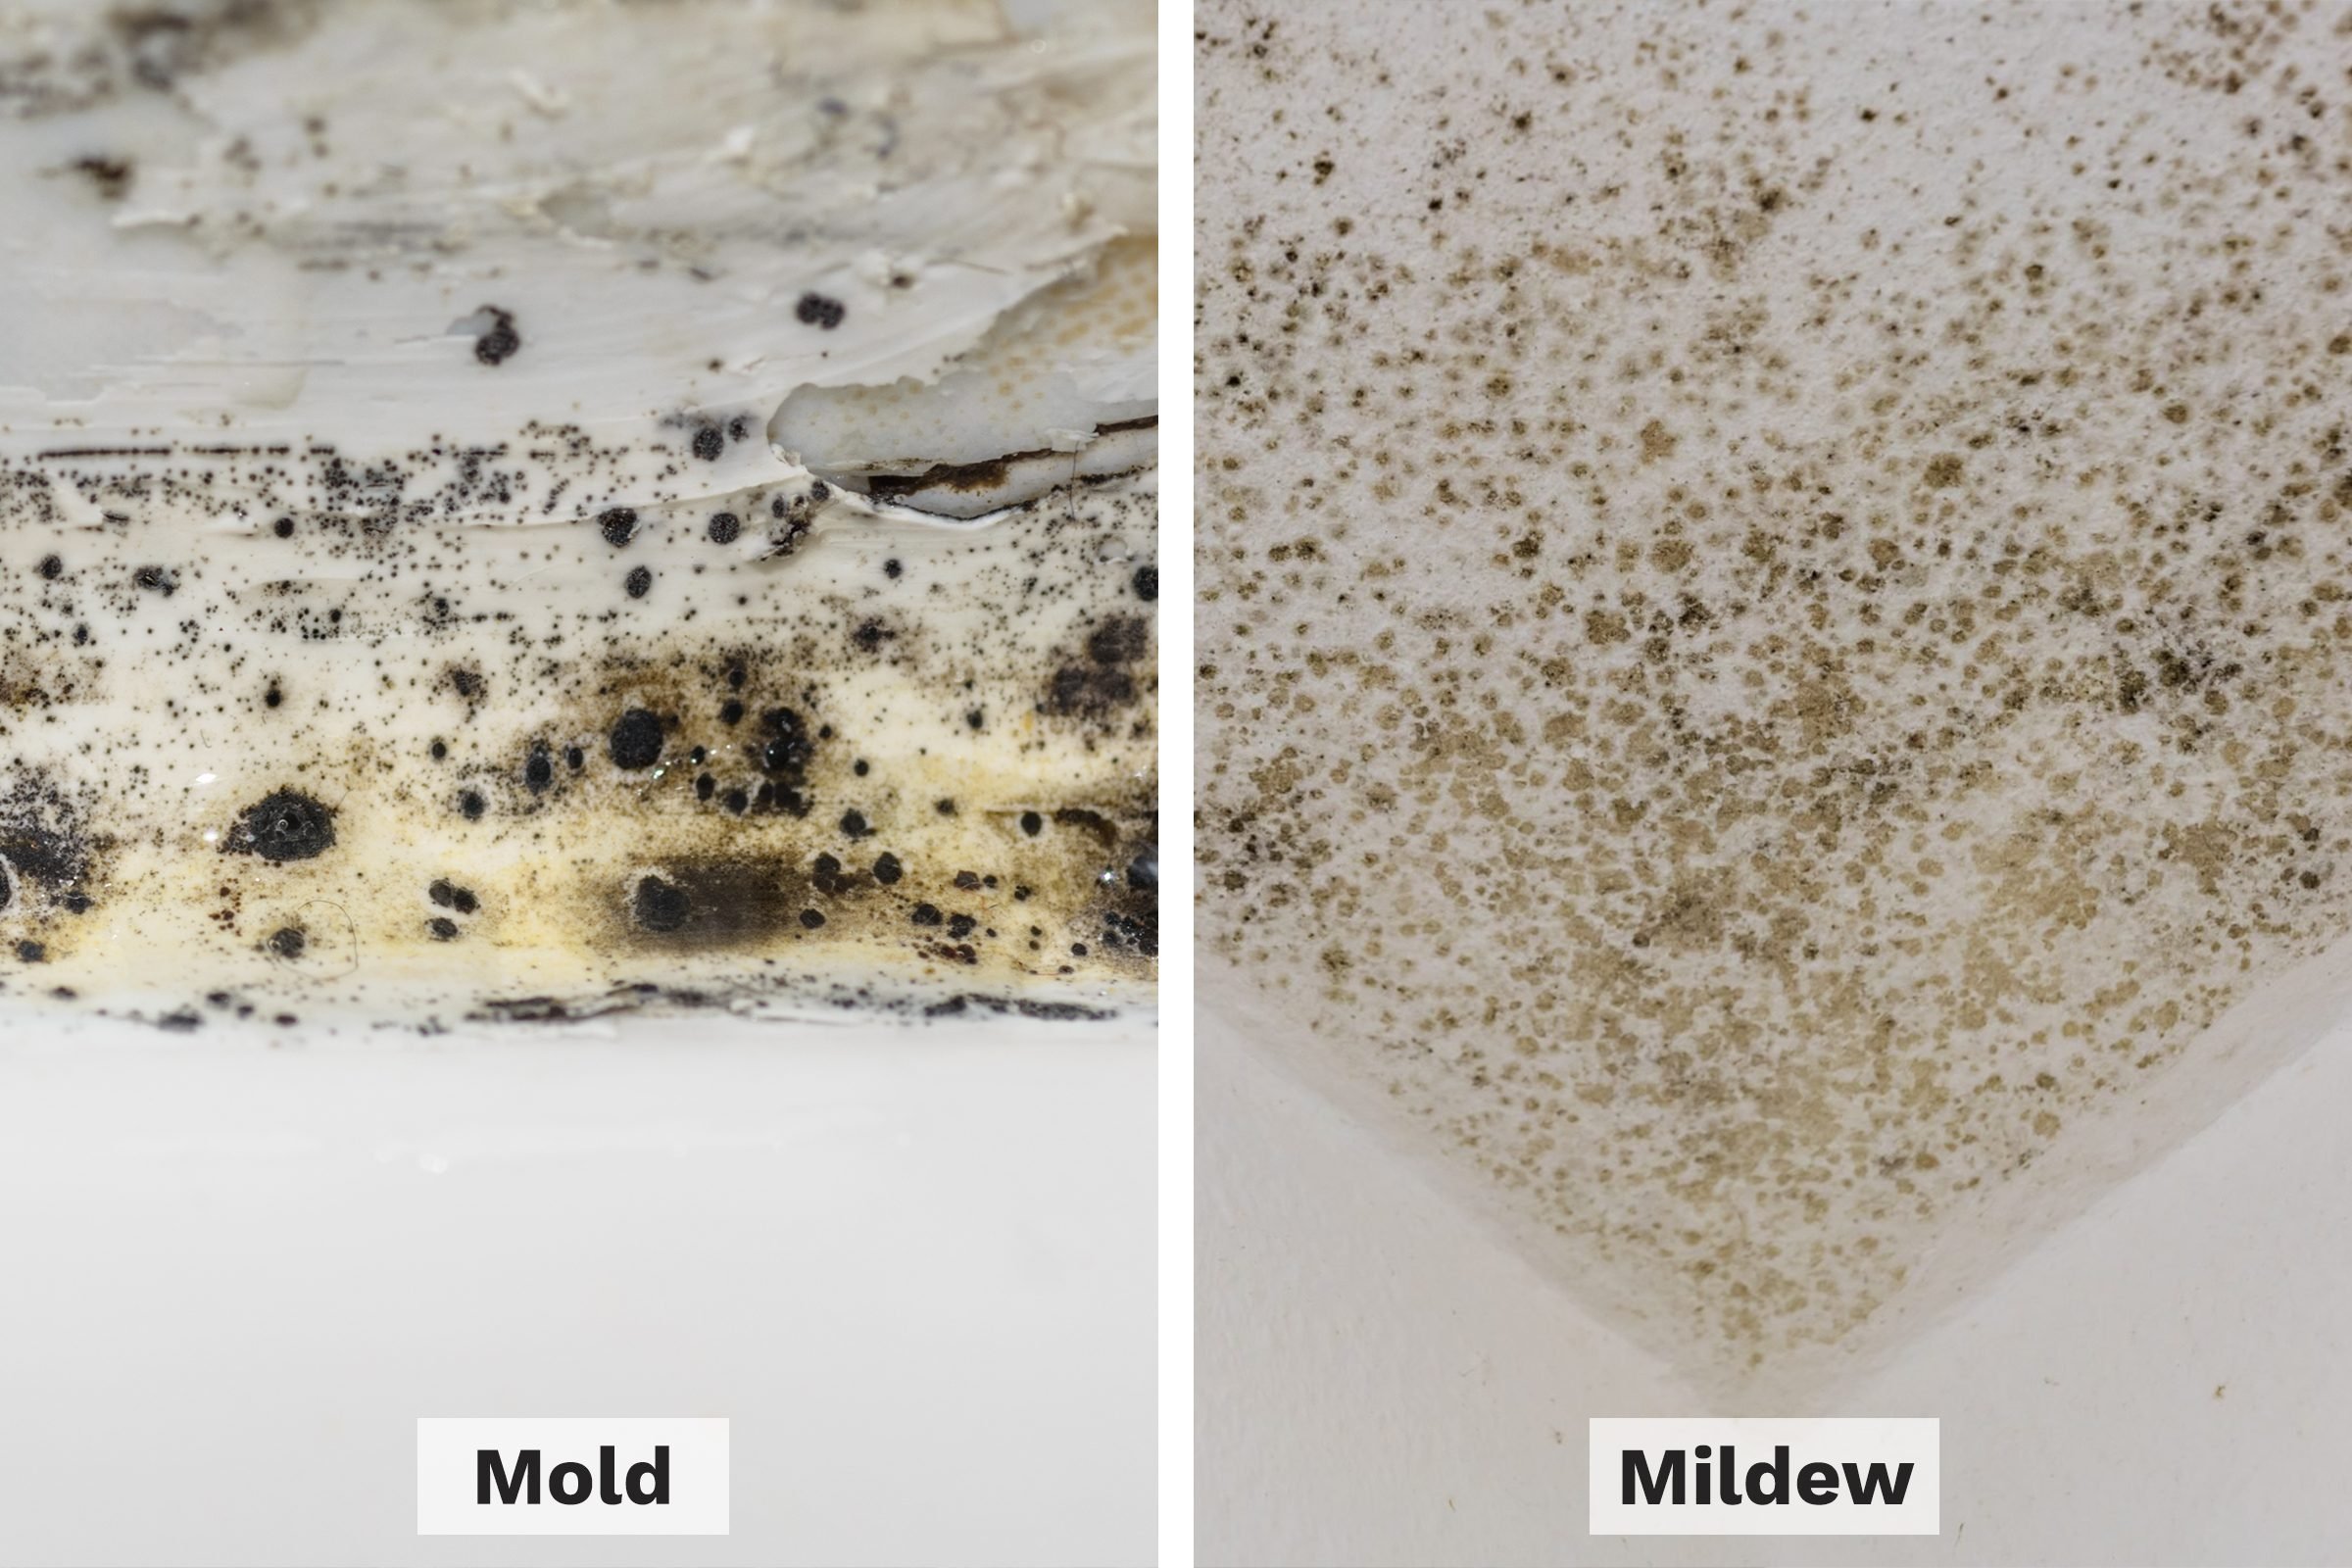
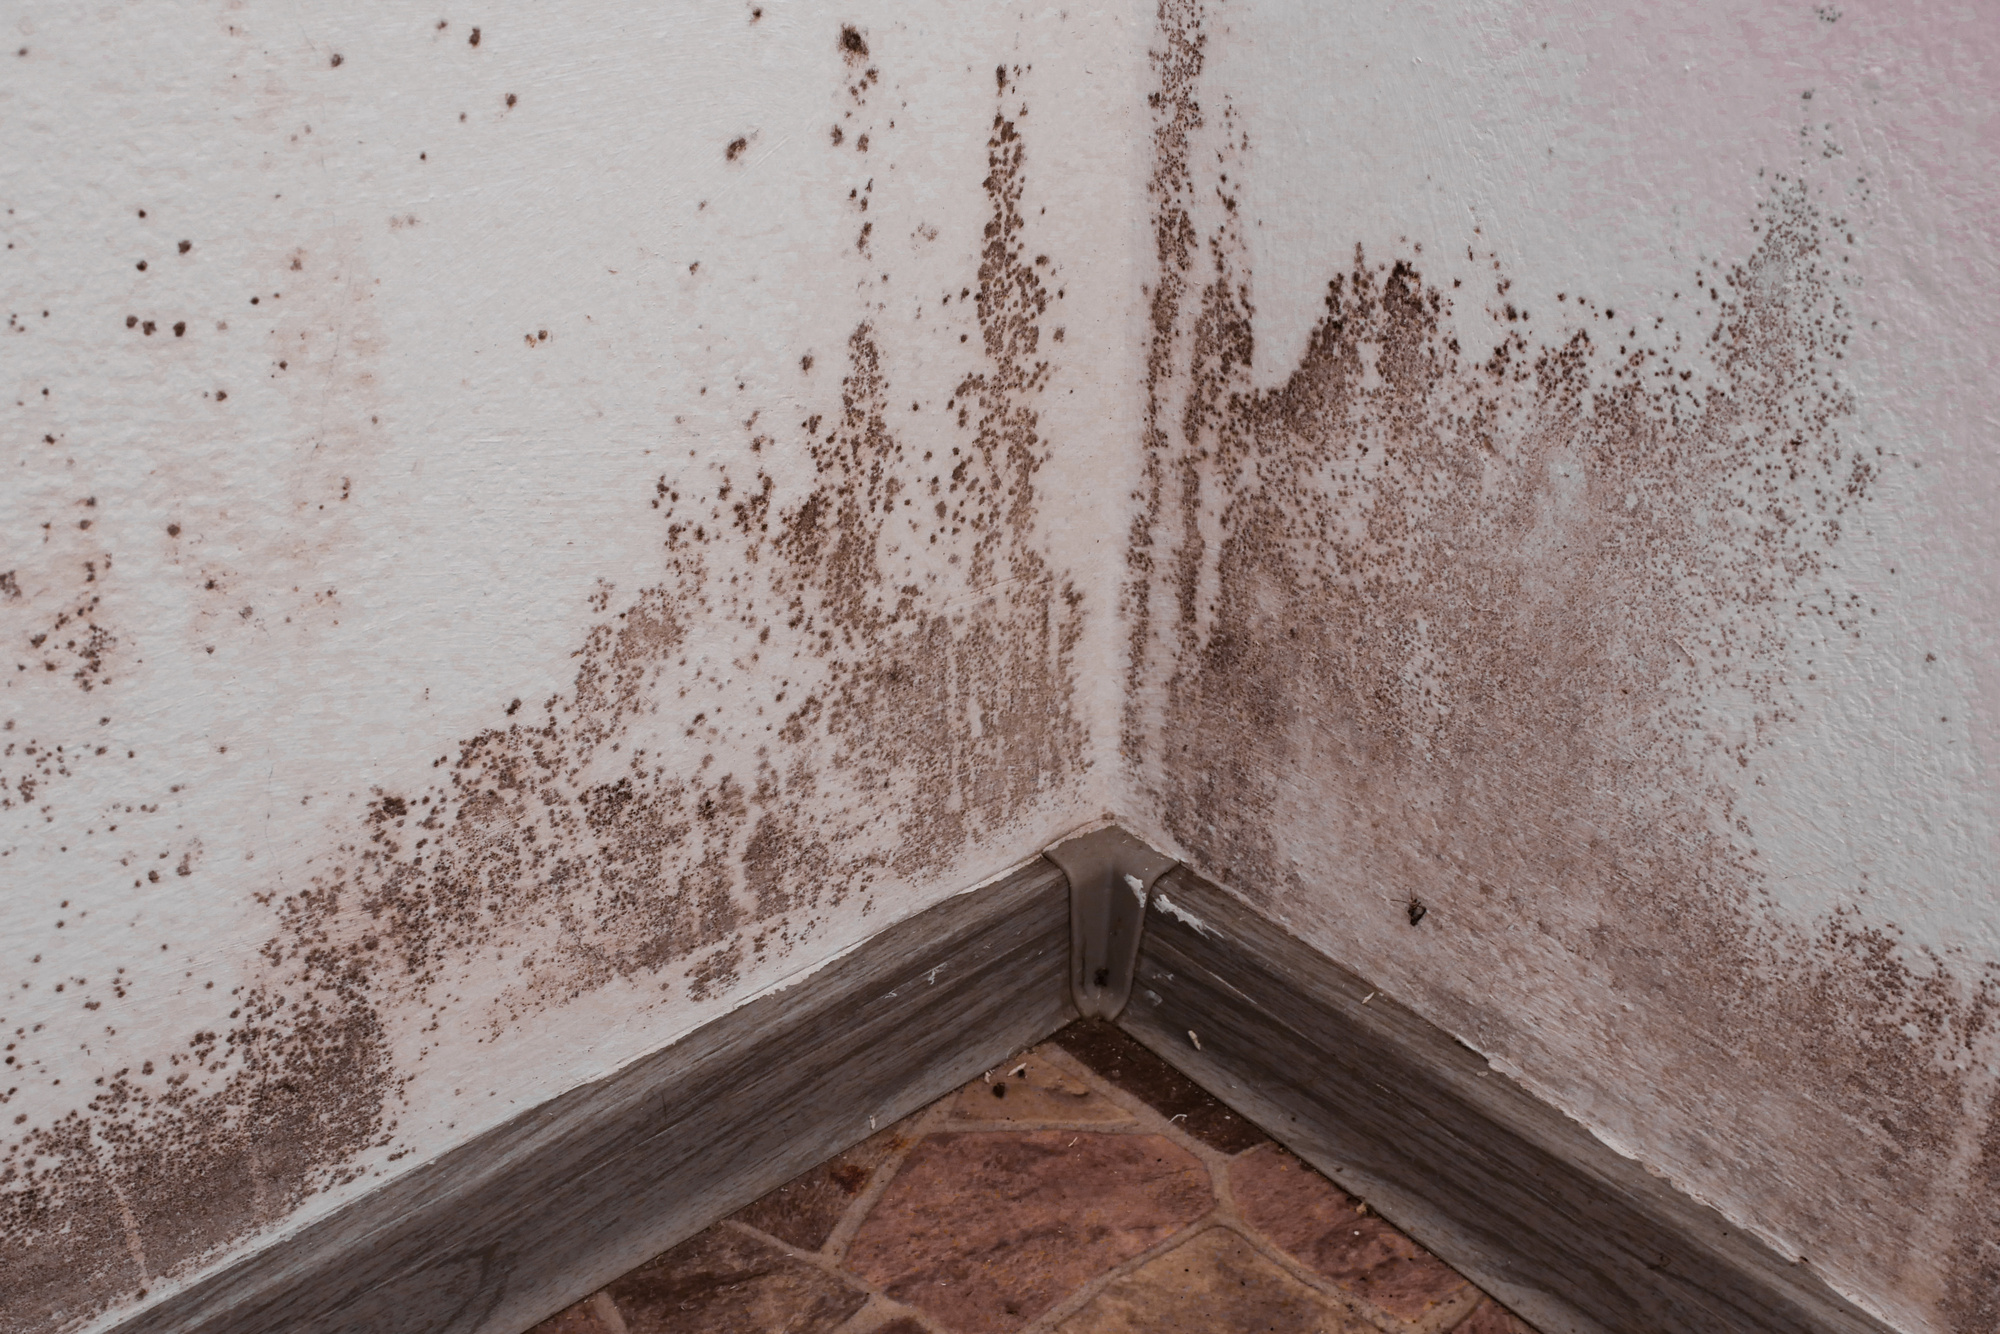
Mold and mildew can quickly grow in areas with excess moisture, so it's important to take preventative measures when caulking around your kitchen sink. Make sure the area is thoroughly cleaned and dried before applying new caulk. You can also use a mold and mildew resistant caulk to further prevent growth. Regularly checking and replacing old caulk can also help prevent mold and mildew from forming.How to Prevent Mold and Mildew When Caulking Around a Kitchen Sink


How to Prevent Mold and Mildew When Caulking Around a Kitchen Sink


In addition to a caulk gun and caulk remover tool, there are a few other tools that can make caulking around a kitchen sink easier. A caulk smoothing tool or a wet finger can help create a smooth finish, and a utility knife can be used to remove any excess caulk. You may also want to have a clean cloth on hand to wipe away any stray caulk.Best Tools for Caulking Around a Kitchen Sink

Best Tools for Caulking Around a Kitchen Sink


The Importance of Caulking Around the Kitchen Sink for a Well-Designed Home

Why Caulking is Essential for Your Kitchen Sink
 When it comes to designing a functional and aesthetically pleasing kitchen, caulking around the sink may not be the first thing that comes to mind. However, this seemingly small detail plays a crucial role in ensuring the overall durability and cleanliness of your kitchen. Caulking is the process of sealing gaps between different surfaces, and in the case of the kitchen sink, it is crucial for preventing water damage and maintaining a clean and hygienic space.
Preventing Water Damage
One of the main purposes of caulking around the kitchen sink is to prevent water from seeping into the gaps between the sink and the countertop or backsplash. Over time, water can cause damage to these areas, leading to mold growth and potential structural issues. By properly caulking your kitchen sink, you can protect your home from costly water damage repairs and maintain the integrity of your kitchen design.
Keeping Your Kitchen Clean
In addition to preventing water damage, caulking also plays a crucial role in keeping your kitchen clean and free of bacteria. When there are gaps between the sink and surrounding surfaces, food particles and other debris can easily get trapped, creating a breeding ground for bacteria. Proper caulking ensures a tight seal, making it easier to clean and maintain a hygienic kitchen. This is especially important for food preparation areas where cleanliness is of the utmost importance.
When it comes to designing a functional and aesthetically pleasing kitchen, caulking around the sink may not be the first thing that comes to mind. However, this seemingly small detail plays a crucial role in ensuring the overall durability and cleanliness of your kitchen. Caulking is the process of sealing gaps between different surfaces, and in the case of the kitchen sink, it is crucial for preventing water damage and maintaining a clean and hygienic space.
Preventing Water Damage
One of the main purposes of caulking around the kitchen sink is to prevent water from seeping into the gaps between the sink and the countertop or backsplash. Over time, water can cause damage to these areas, leading to mold growth and potential structural issues. By properly caulking your kitchen sink, you can protect your home from costly water damage repairs and maintain the integrity of your kitchen design.
Keeping Your Kitchen Clean
In addition to preventing water damage, caulking also plays a crucial role in keeping your kitchen clean and free of bacteria. When there are gaps between the sink and surrounding surfaces, food particles and other debris can easily get trapped, creating a breeding ground for bacteria. Proper caulking ensures a tight seal, making it easier to clean and maintain a hygienic kitchen. This is especially important for food preparation areas where cleanliness is of the utmost importance.
The Caulking Process
 Now that we understand the importance of caulking around the kitchen sink, let's take a closer look at the process. First, you will need to choose the right type of caulk for the job. Silicone caulk is the most commonly used for kitchen sink caulking as it is waterproof and flexible. Next, you will need to thoroughly clean and dry the area where the caulk will be applied. Using a caulk gun, carefully apply a thin and even layer of caulk along the edges of the sink, making sure to fill any gaps completely. Finally, use a damp cloth to smooth out the caulk and remove any excess. Allow the caulk to dry completely before using the sink.
Final Thoughts
In conclusion, caulking around the kitchen sink may seem like a minor detail, but it plays a significant role in the functionality and cleanliness of your kitchen. By properly caulking your sink, you can prevent water damage and maintain a hygienic space for food preparation. So when designing your dream kitchen, don't overlook the importance of proper caulking.
Now that we understand the importance of caulking around the kitchen sink, let's take a closer look at the process. First, you will need to choose the right type of caulk for the job. Silicone caulk is the most commonly used for kitchen sink caulking as it is waterproof and flexible. Next, you will need to thoroughly clean and dry the area where the caulk will be applied. Using a caulk gun, carefully apply a thin and even layer of caulk along the edges of the sink, making sure to fill any gaps completely. Finally, use a damp cloth to smooth out the caulk and remove any excess. Allow the caulk to dry completely before using the sink.
Final Thoughts
In conclusion, caulking around the kitchen sink may seem like a minor detail, but it plays a significant role in the functionality and cleanliness of your kitchen. By properly caulking your sink, you can prevent water damage and maintain a hygienic space for food preparation. So when designing your dream kitchen, don't overlook the importance of proper caulking.