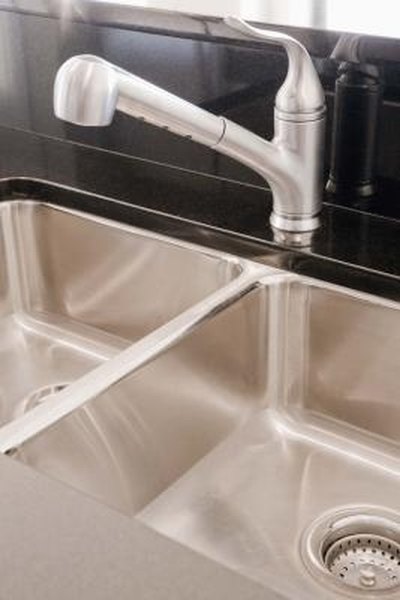
How to Caulk Around a Kitchen Sink Drain
Caulking around a kitchen sink drain is an important step in maintaining a leak-free and clean sink area. Over time, caulk can deteriorate and crack, allowing water to seep through and causing damage to your kitchen cabinets and countertops. In this guide, we'll walk you through the process of caulking around a kitchen sink drain to ensure a professional and long-lasting result.


How to Caulk Around a Kitchen Sink Drain


How to Replace Caulk Around a Kitchen Sink Drain
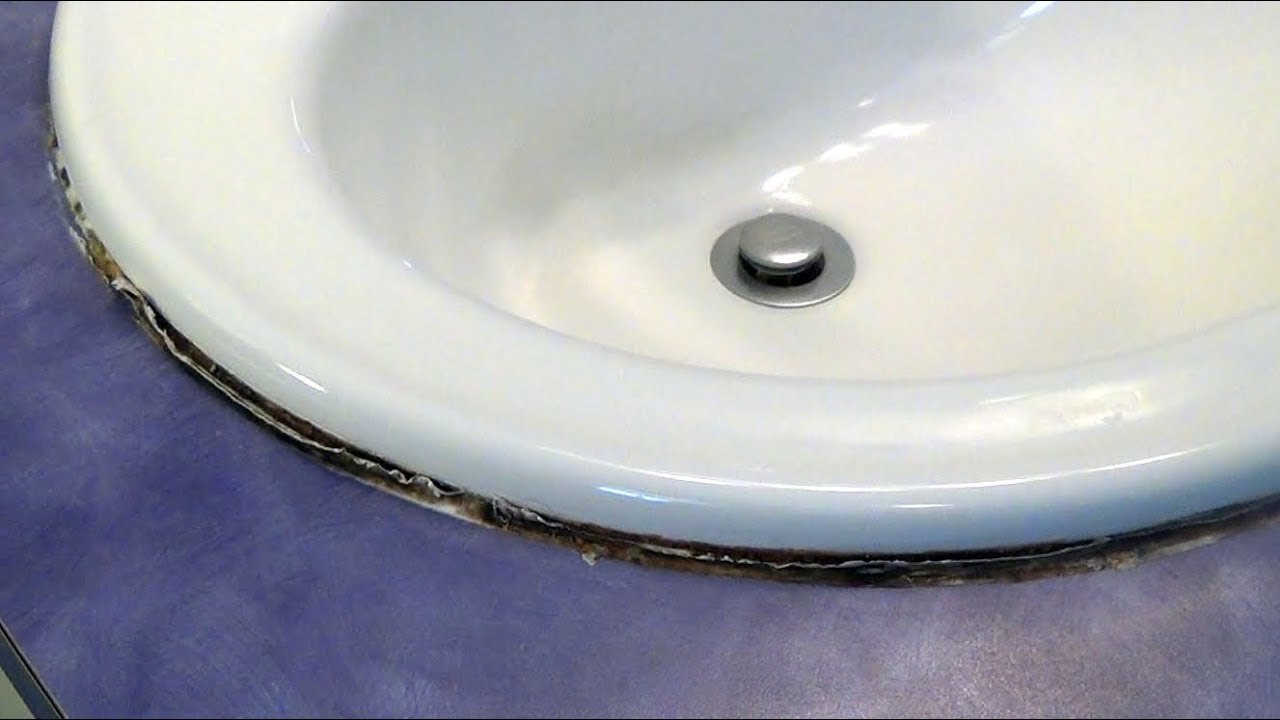
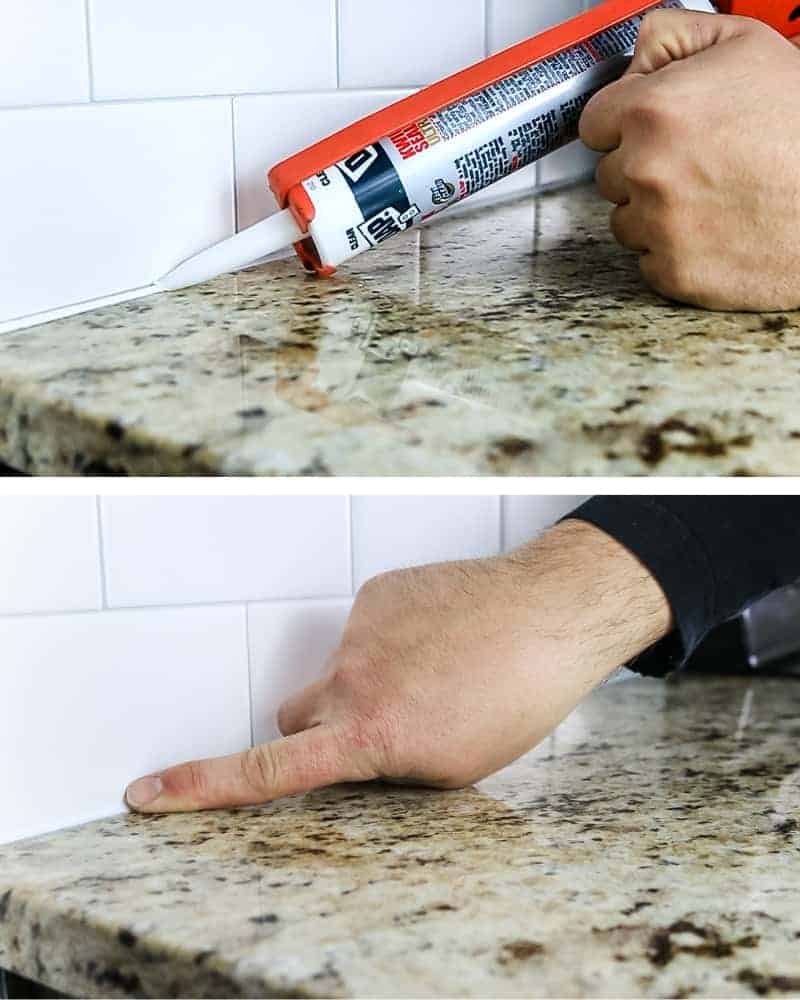
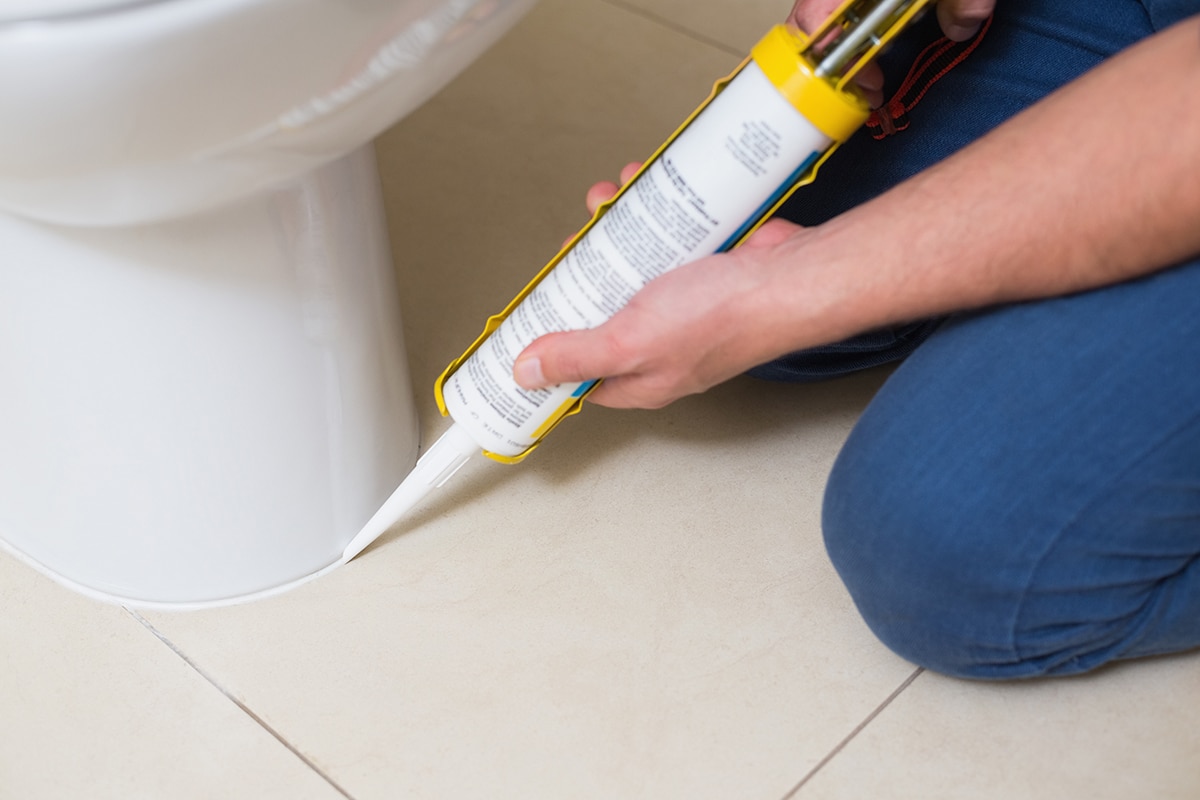
If you notice that the caulk around your kitchen sink drain is starting to crack or peel, it's time to replace it. The first step is to remove the old caulk. Use a caulk remover tool or a razor blade to carefully scrape off the old caulk. Make sure to clean the area thoroughly before applying new caulk. Next, choose a high-quality caulk that is specifically designed for use in the kitchen and around plumbing fixtures. Apply a thin, even bead of caulk around the edges of the drain, smoothing it out with your finger or a caulk smoothing tool. Wipe away any excess caulk and let it dry completely before using the sink.


How to Replace Caulk Around a Kitchen Sink Drain


/how-to-install-a-sink-drain-2718789-hero-b5b99f72b5a24bb2ae8364e60539cece.jpg)

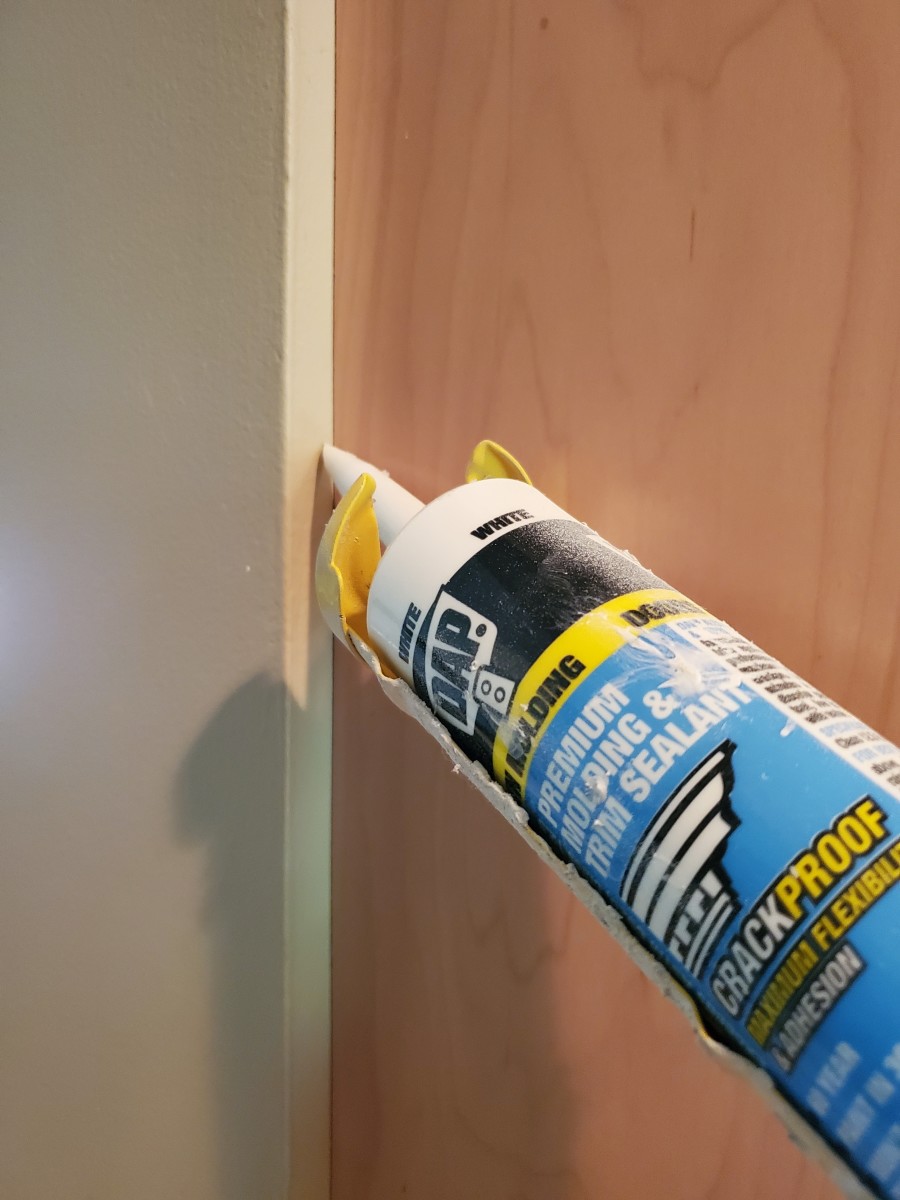
Best Caulk for Kitchen Sink Drain
Choosing the right caulk for your kitchen sink drain is crucial for a successful and long-lasting seal. Look for a waterproof and mold-resistant caulk that is specifically designed for use in the kitchen. Siliconized acrylic caulk is a popular choice for kitchen sink drains as it is flexible, easy to work with, and provides a strong seal. Make sure to read reviews and choose a caulk that has a good reputation for its durability and performance.


Best Caulk for Kitchen Sink Drain


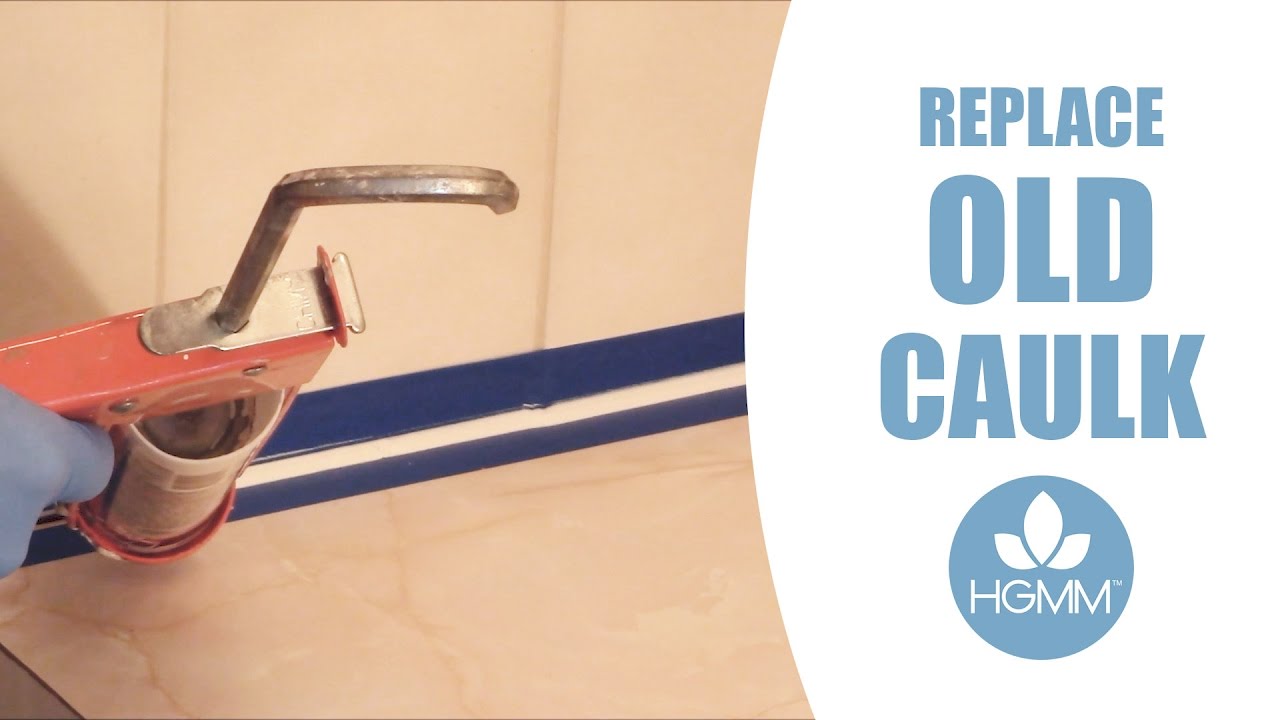
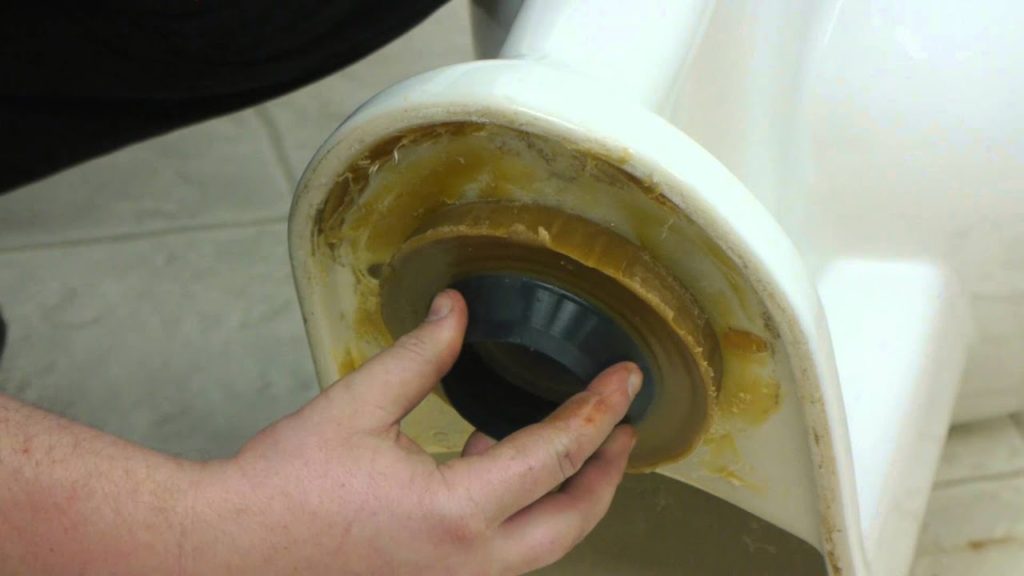
How to Remove Old Caulk Around Kitchen Sink Drain
Removing old caulk around a kitchen sink drain can be a tedious and time-consuming task, but it's important to do it properly to ensure a clean and effective application of new caulk. Start by softening the old caulk with a caulk remover solution or by using a hairdryer on a low setting. Once the caulk is softened, use a caulk removal tool or a razor blade to carefully scrape away the old caulk. Be careful not to damage the surface of your sink or countertop. Once all the old caulk is removed, clean the area thoroughly before applying new caulk.


How to Remove Old Caulk Around Kitchen Sink Drain

Tips for Caulking Around Kitchen Sink Drain
Before you start caulking around your kitchen sink drain, here are a few tips to help you achieve a professional-looking result:

Tips for Caulking Around Kitchen Sink Drain


How to Seal Kitchen Sink Drain with Caulk
Sealing your kitchen sink drain with caulk is an important step in preventing water damage and maintaining a clean and leak-free sink area. Start by thoroughly cleaning the area around the drain. Next, apply a thin and even bead of caulk around the edges of the drain. Use a caulk smoothing tool or your finger to smooth out the caulk and create a clean and even seal. Wipe away any excess caulk and let it dry completely before using the sink.


How to Seal Kitchen Sink Drain with Caulk


Caulking Tools for Kitchen Sink Drain
Having the right tools for the job can make all the difference when it comes to caulking around a kitchen sink drain. Here are a few tools that will come in handy:

Caulking Tools for Kitchen Sink Drain


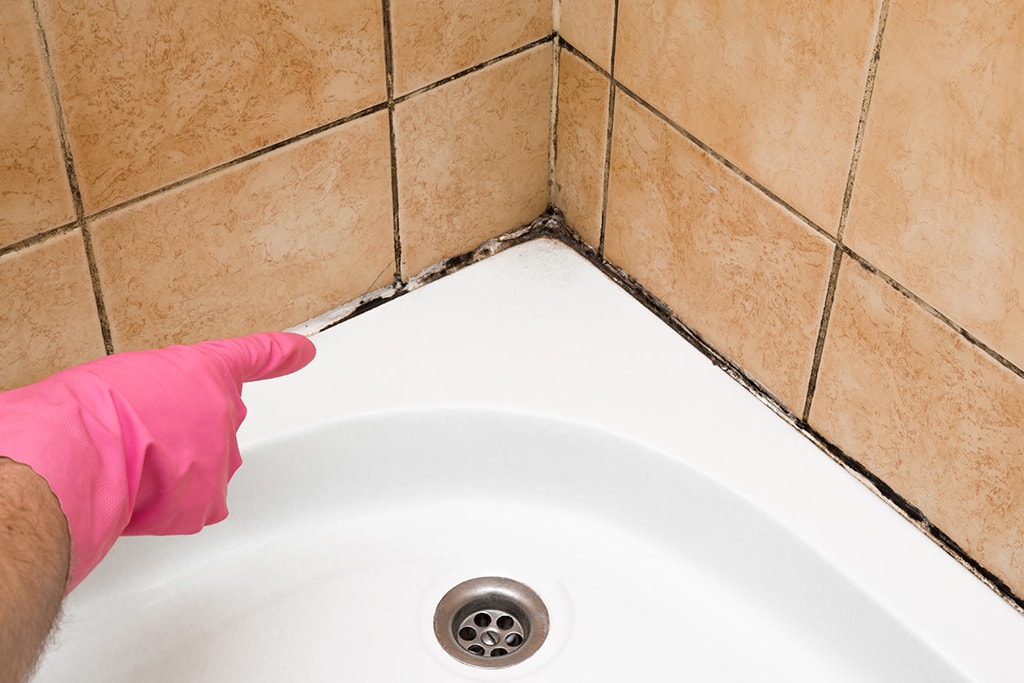
How to Prevent Mold in Caulk Around Kitchen Sink Drain
Mold can be a common problem in caulk around a kitchen sink drain due to the constant exposure to water and moisture. To prevent mold from growing, make sure to choose a caulk that is specifically designed to be mold-resistant. You can also regularly clean and dry the area around the drain to prevent moisture buildup. If you notice any mold growth, use a mold-killing solution and re-caulk the area to ensure a clean and healthy seal.


How to Prevent Mold in Caulk Around Kitchen Sink Drain
How Often Should You Caulk Around Kitchen Sink Drain
It's recommended to check and replace caulk around a kitchen sink drain every 1-2 years. However, this may vary depending on the type of caulk used and the amount of wear and tear it receives. Keep an eye out for any cracks or peeling in the caulk and make sure to replace it when necessary to prevent water damage and maintain a clean and leak-free sink area.


How Often Should You Caulk Around Kitchen Sink Drain


How to Clean and Re-caulk Kitchen Sink Drain
To clean and re-caulk your kitchen sink drain, start by removing the old caulk as described earlier. Next, thoroughly clean the area with a mild cleaning solution and dry it completely. Choose a high-quality caulk that is specifically designed for use in the kitchen and around plumbing fixtures. Apply a thin, even bead of caulk around the drain and smooth it out with a caulk smoothing tool. Wipe away any excess caulk and let it dry completely before using the sink. Regularly cleaning and re-caulking your kitchen sink drain will help maintain a strong and leak-free seal.
How to Clean and Re-caulk Kitchen Sink Drain


Why Caulking Around Your Kitchen Sink Drain is Essential for Proper House Design

The Importance of Proper Caulking
 When it comes to designing a house, there are many details that need to be considered in order to ensure functionality and longevity. One of these often overlooked details is the caulking around your kitchen sink drain. While it may seem like a small and insignificant task, proper caulking is actually essential for maintaining a well-designed and functional kitchen. Here's why:
Prevents Water Damage
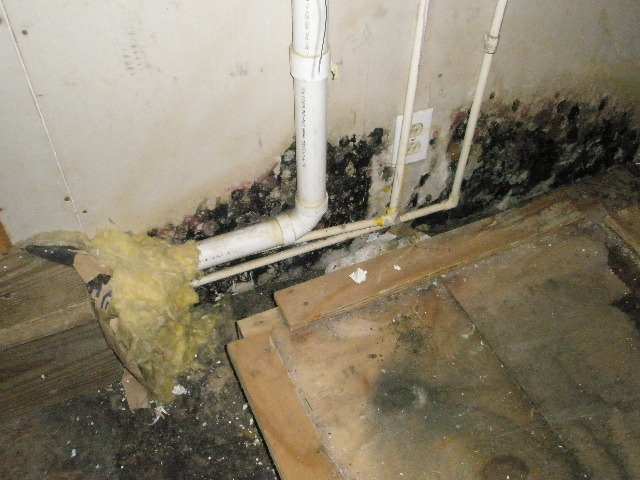
The main purpose of caulking around your kitchen sink drain is to prevent water from seeping into the areas below your sink and causing damage. Without proper caulking, water can easily seep into cracks and crevices, leading to mold growth, rotting wood, and other costly repairs. By sealing the gaps around your drain with caulk, you can ensure that any water that accidentally spills or leaks will be redirected into the sink and not into your cabinets.
Improves Aesthetics
Aside from its functional benefits, caulking can also improve the overall appearance of your kitchen. Without proper caulking, your sink area can look messy and unpolished with visible gaps and cracks. By using a high-quality caulk, you can achieve a clean and seamless look that adds to the overall aesthetics of your kitchen design.
Increases Hygiene
A properly caulked sink area also promotes better hygiene in your kitchen. The gaps in and around your sink can be a breeding ground for bacteria and mold, making it difficult to keep the area clean and sanitary. By caulking these gaps, you eliminate potential hiding places for germs and make it easier to maintain a clean and hygienic kitchen.
Long-Term Cost Savings
While caulking around your kitchen sink drain may seem like a small and insignificant task, it can actually save you money in the long run. By preventing water damage, you can avoid costly repairs and replacements down the road. Additionally, proper caulking can also help to conserve energy by preventing air leaks, which can save you money on your utility bills.
When it comes to designing a house, there are many details that need to be considered in order to ensure functionality and longevity. One of these often overlooked details is the caulking around your kitchen sink drain. While it may seem like a small and insignificant task, proper caulking is actually essential for maintaining a well-designed and functional kitchen. Here's why:
Prevents Water Damage
The main purpose of caulking around your kitchen sink drain is to prevent water from seeping into the areas below your sink and causing damage. Without proper caulking, water can easily seep into cracks and crevices, leading to mold growth, rotting wood, and other costly repairs. By sealing the gaps around your drain with caulk, you can ensure that any water that accidentally spills or leaks will be redirected into the sink and not into your cabinets.
Improves Aesthetics
Aside from its functional benefits, caulking can also improve the overall appearance of your kitchen. Without proper caulking, your sink area can look messy and unpolished with visible gaps and cracks. By using a high-quality caulk, you can achieve a clean and seamless look that adds to the overall aesthetics of your kitchen design.
Increases Hygiene
A properly caulked sink area also promotes better hygiene in your kitchen. The gaps in and around your sink can be a breeding ground for bacteria and mold, making it difficult to keep the area clean and sanitary. By caulking these gaps, you eliminate potential hiding places for germs and make it easier to maintain a clean and hygienic kitchen.
Long-Term Cost Savings
While caulking around your kitchen sink drain may seem like a small and insignificant task, it can actually save you money in the long run. By preventing water damage, you can avoid costly repairs and replacements down the road. Additionally, proper caulking can also help to conserve energy by preventing air leaks, which can save you money on your utility bills.
How to Properly Caulk Your Kitchen Sink Drain
 Now that you understand the importance of caulking around your kitchen sink drain, here are some tips for properly completing this task:
- Start by cleaning the area around your sink drain to remove any dirt, grime, or old caulk.
- Use a high-quality caulk that is specifically designed for kitchen and bathroom use.
- Apply the caulk in a continuous line around the perimeter of your sink drain, making sure to fill in any gaps or cracks.
- Use a damp finger or caulk smoothing tool to smooth out the caulk and create a seamless finish.
- Allow the caulk to dry completely before using your sink.
In conclusion, while caulking around your kitchen sink drain may seem like a small and insignificant task, it is actually an essential part of proper house design. By preventing water damage, improving aesthetics, promoting hygiene, and saving you money in the long run, proper caulking is a simple yet important step in creating a well-designed and functional kitchen. So, don't overlook this important detail and make sure to properly caulk your kitchen sink drain.
Now that you understand the importance of caulking around your kitchen sink drain, here are some tips for properly completing this task:
- Start by cleaning the area around your sink drain to remove any dirt, grime, or old caulk.
- Use a high-quality caulk that is specifically designed for kitchen and bathroom use.
- Apply the caulk in a continuous line around the perimeter of your sink drain, making sure to fill in any gaps or cracks.
- Use a damp finger or caulk smoothing tool to smooth out the caulk and create a seamless finish.
- Allow the caulk to dry completely before using your sink.
In conclusion, while caulking around your kitchen sink drain may seem like a small and insignificant task, it is actually an essential part of proper house design. By preventing water damage, improving aesthetics, promoting hygiene, and saving you money in the long run, proper caulking is a simple yet important step in creating a well-designed and functional kitchen. So, don't overlook this important detail and make sure to properly caulk your kitchen sink drain.