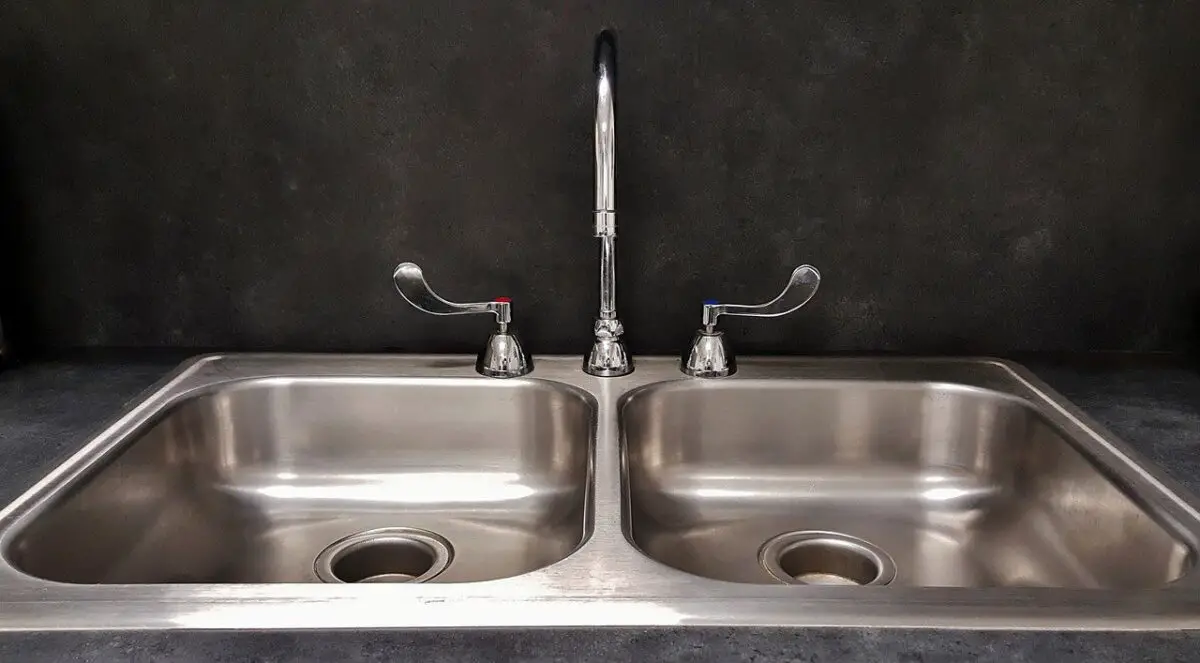
Adding a vent to your kitchen sink may seem like a daunting task, but it is an essential step in ensuring proper drainage and preventing unpleasant odors in your kitchen. A vent allows air to enter the plumbing system, balancing the pressure and helping water flow smoothly down the drain. In this article, we will walk you through the process of installing a vent for your kitchen sink.1. Installing a Vent for a Kitchen Sink


1. Installing a Vent for a Kitchen Sink


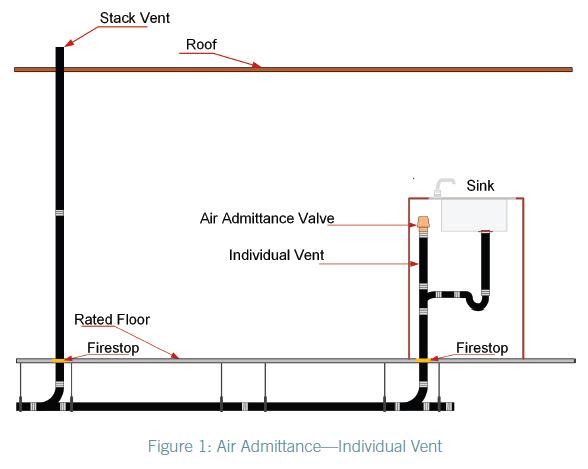
The first step in adding a vent to your kitchen sink is to determine the location of the vent. The best spot for the vent is usually behind the sink, directly above the drain. This will ensure that any air trapped in the pipe can easily escape. Once you have chosen the location, mark it on the wall and cut a hole using a keyhole saw.2. How to Add a Vent to a Kitchen Sink

2. How to Add a Vent to a Kitchen Sink


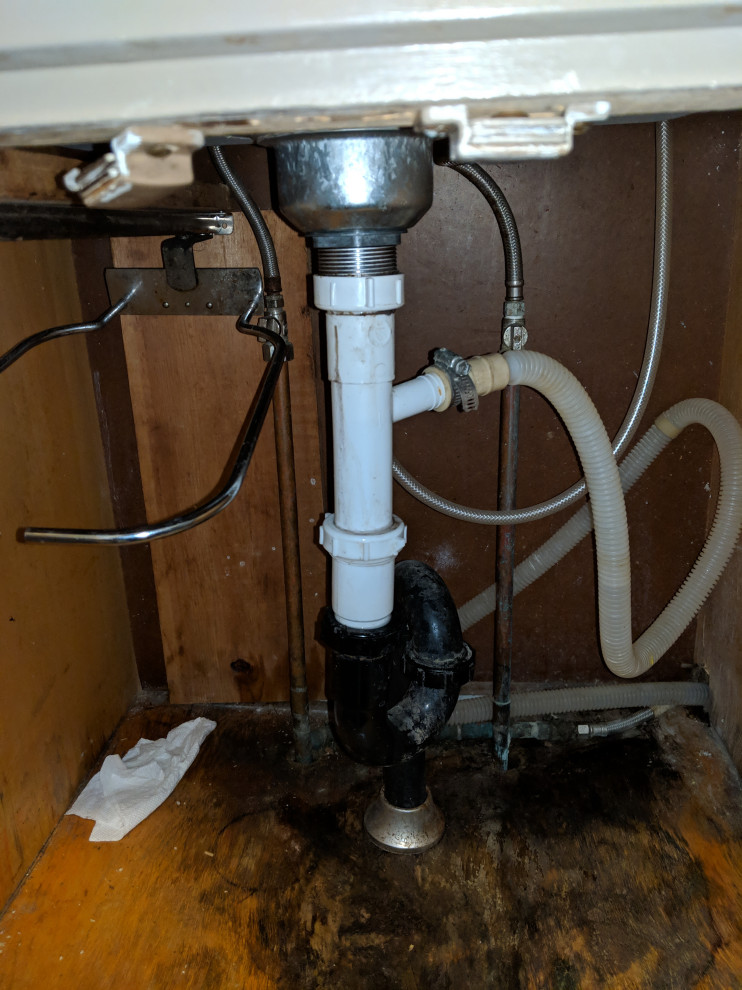
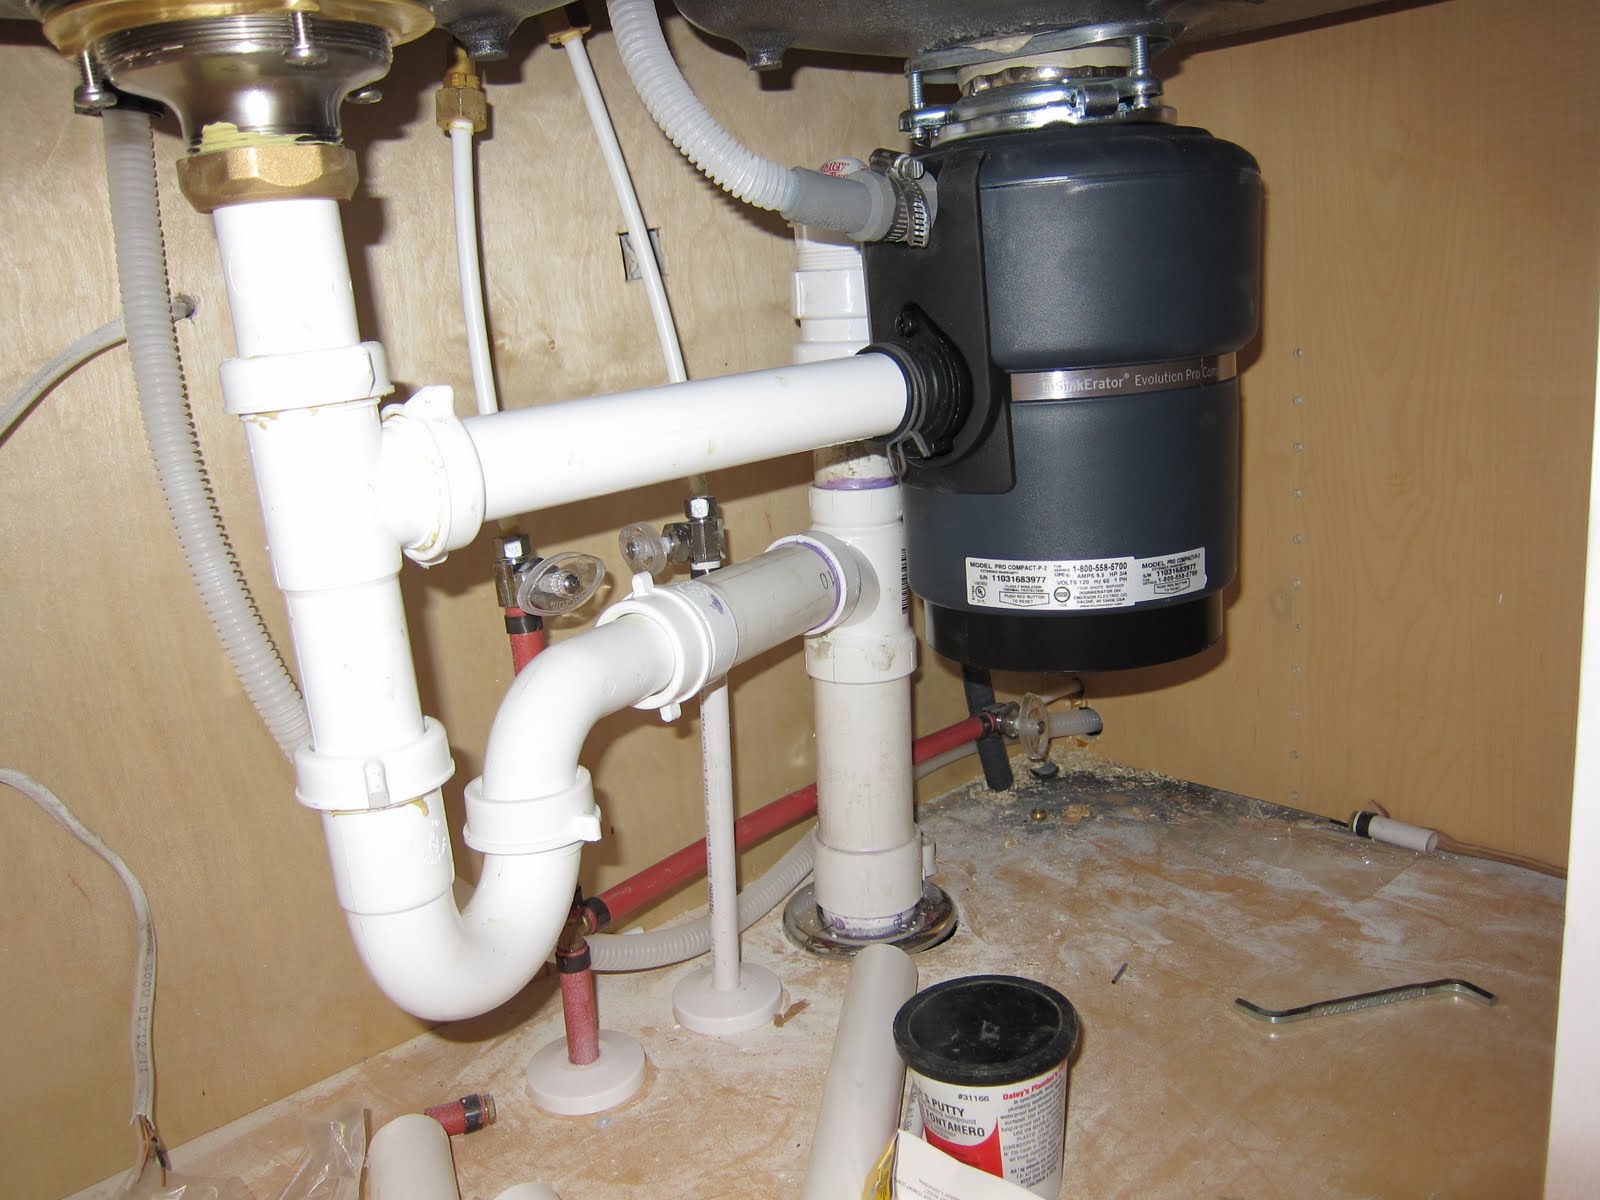
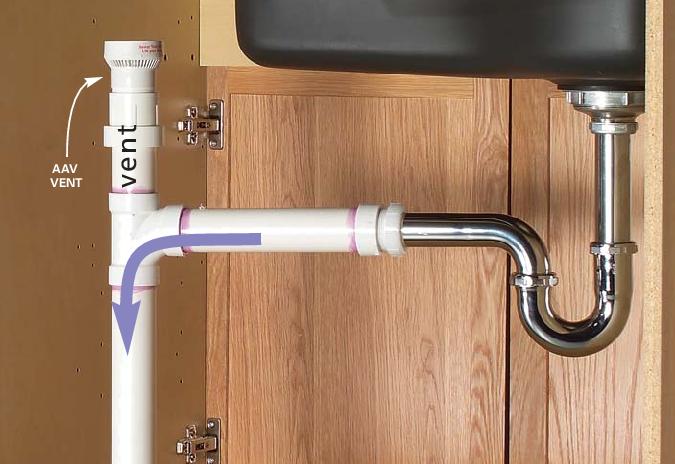
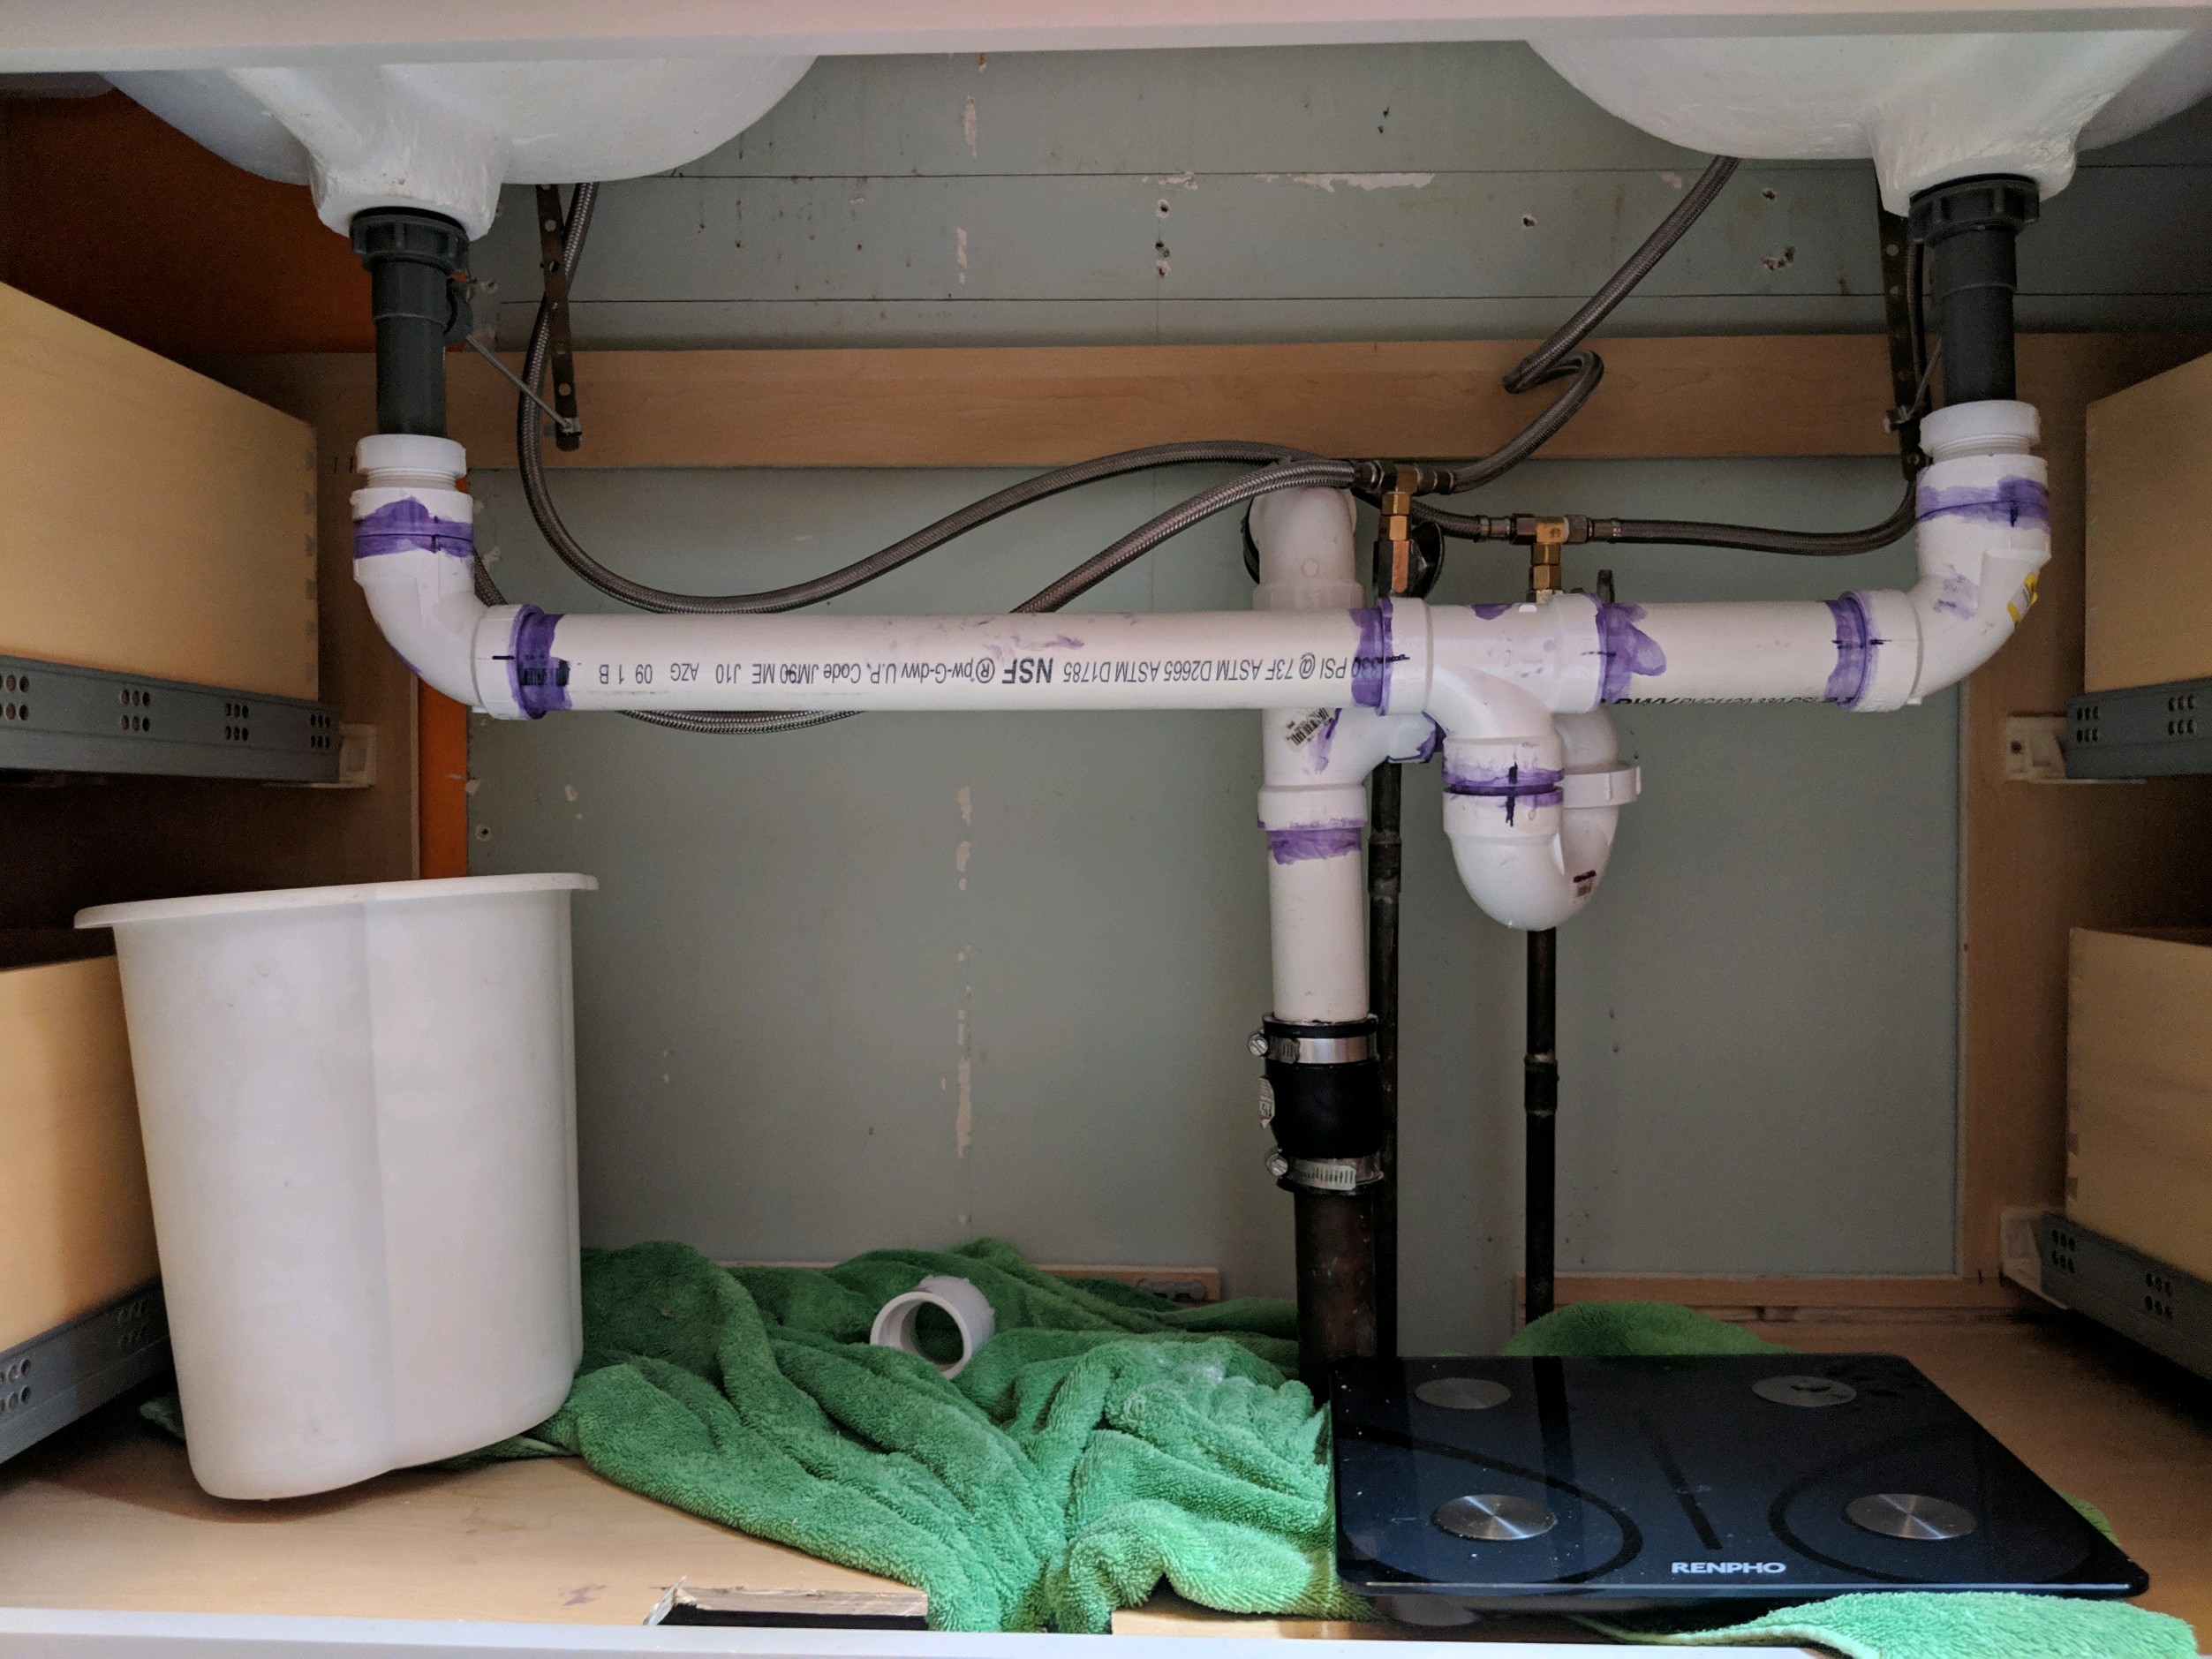
If you are a DIY enthusiast, you can easily install a vent for your kitchen sink on your own. You will need a few tools and materials for the job, including a vent pipe, PVC fittings, a drill, a keyhole saw, and PVC cement. Begin by drilling a hole through the exterior wall where the vent will exit. Then, connect the vent pipe to the drainpipe using the PVC fittings and secure them with PVC cement.3. DIY Kitchen Sink Vent Installation


3. DIY Kitchen Sink Vent Installation


:max_bytes(150000):strip_icc()/sink-vent-installing-an-auto-vent-2718828-03-7d2c3b9c51024155a1ea47f7ae35cadd.jpg)

If you are new to plumbing, it may be helpful to follow a step-by-step guide to ensure a successful vent installation. First, cut a hole in the wall for the vent using a keyhole saw. Next, attach the vent pipe to the drainpipe using a 90-degree elbow fitting. Secure the connection with PVC cement. Then, connect the vent pipe to the vent cap and attach it to the hole in the wall using screws. Finally, seal any gaps around the vent pipe with caulk.4. Step-by-Step Guide for Adding a Vent to a Kitchen Sink


4. Step-by-Step Guide for Adding a Vent to a Kitchen Sink

Before you begin the installation process, make sure you have all the necessary tools and materials. These include a keyhole saw, a drill, PVC pipes and fittings, PVC cement, a vent cap, and screws. It is also helpful to have a measuring tape and a pencil to mark the location of the vent on the wall.5. Necessary Tools for Installing a Vent in a Kitchen Sink


5. Necessary Tools for Installing a Vent in a Kitchen Sink


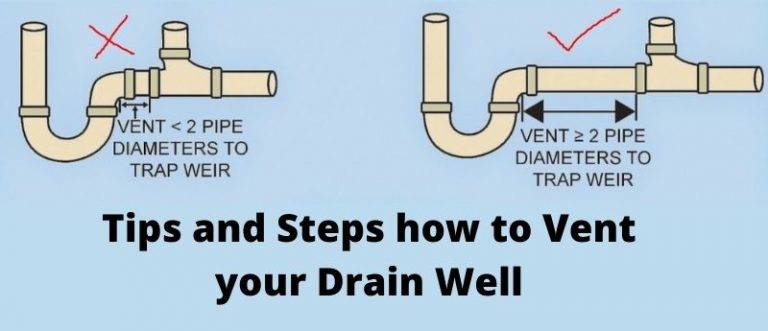
Properly venting a kitchen sink is crucial to avoid issues such as clogs and foul odors. Here are some tips to ensure a successful vent installation: • Measure accurately: The location of the vent is critical, so make sure to measure and mark it correctly on the wall. • Use the right materials: PVC pipes and fittings are the most commonly used materials for vents. Make sure to use the correct size and type for your specific installation. • Seal any gaps: To prevent any air leaks, seal any gaps around the vent pipe with caulk. • Follow building codes: Check with your local building codes to ensure you are following proper installation guidelines.6. Tips for Properly Venting a Kitchen Sink

6. Tips for Properly Venting a Kitchen Sink


/sink-vent-installing-an-auto-vent-2718828-05-ca0dcb2915be457b9693ccd2655e6c21.jpg)

While installing a vent for your kitchen sink may seem straightforward, there are some common mistakes that you should avoid, including: • Not measuring accurately: As mentioned before, the location of the vent is crucial. Make sure to measure and mark it correctly on the wall. • Using the wrong materials: Using the wrong type or size of pipes and fittings can lead to leaks and other issues. • Forgetting to seal gaps: Sealing any gaps around the vent pipe is crucial to prevent air leaks. • Not following building codes: Make sure to check with your local building codes to ensure you are following proper installation guidelines.7. Common Mistakes to Avoid When Adding a Vent to a Kitchen Sink


7. Common Mistakes to Avoid When Adding a Vent to a Kitchen Sink


Installing a vent for your kitchen sink has several benefits, including: • Preventing clogs: A vent allows air to enter the plumbing system, preventing any air locks that can lead to clogs. • Reducing odors: A vent helps balance the pressure in the pipes, preventing any unpleasant odors from entering your kitchen. • Improving drainage: With proper venting, water can flow smoothly down the drain without any backups or gurgling noises.8. Benefits of Installing a Vent in Your Kitchen Sink


8. Benefits of Installing a Vent in Your Kitchen Sink


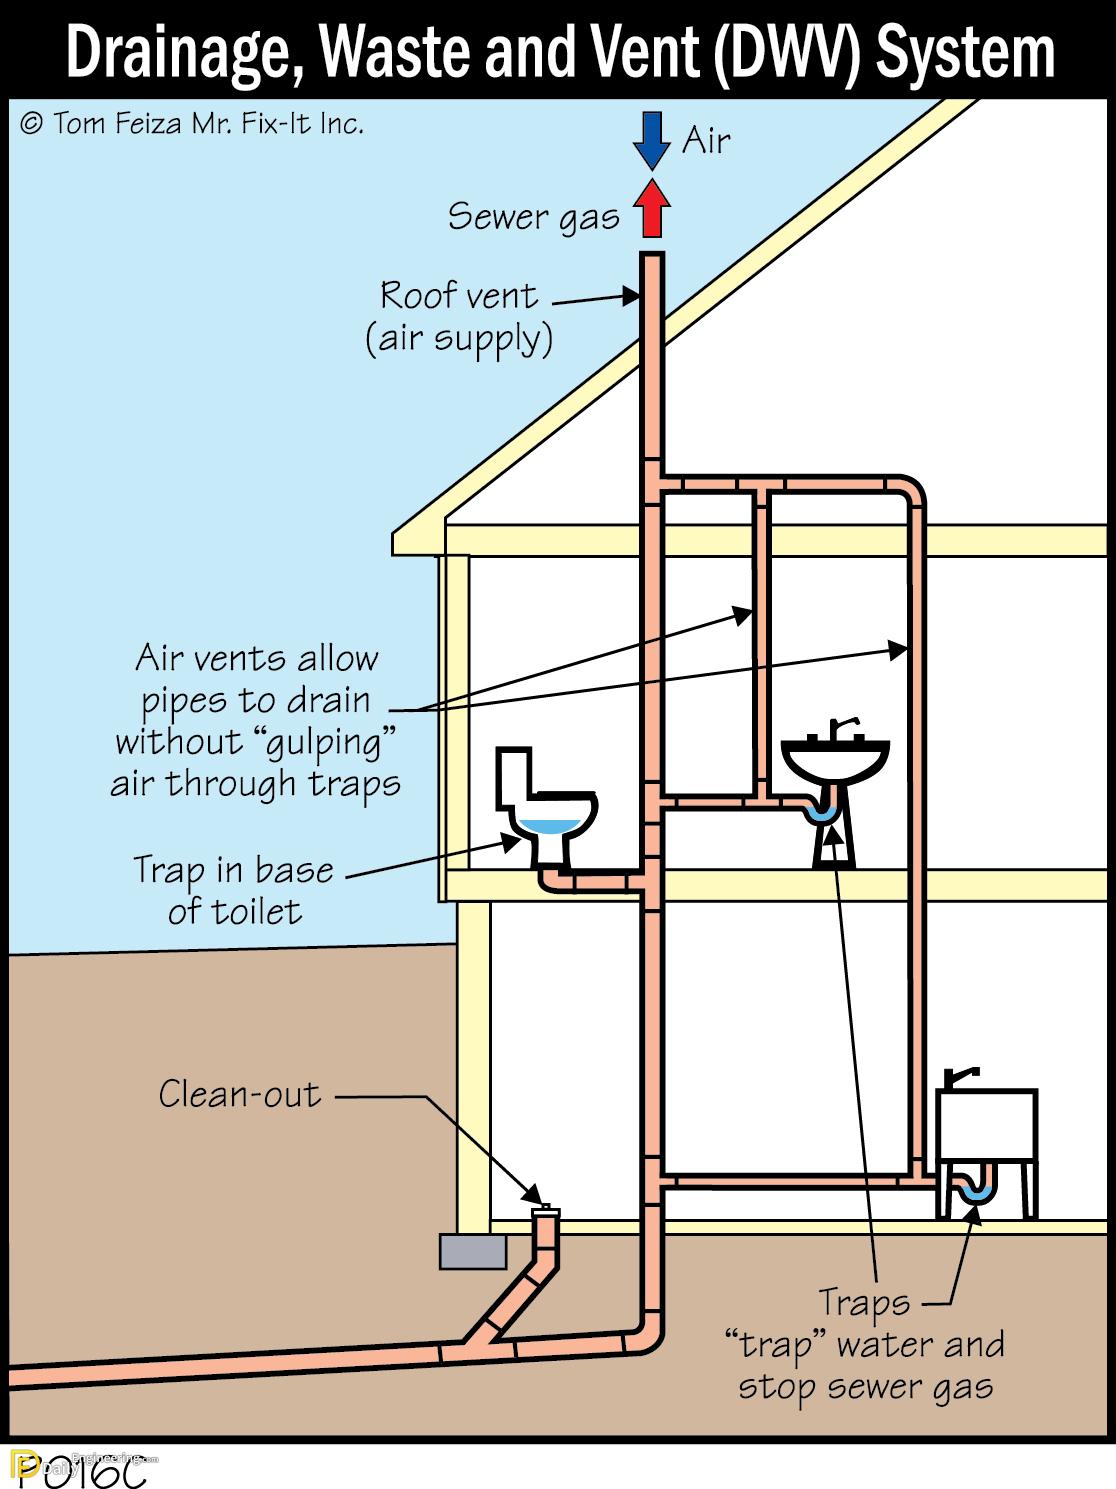
As mentioned before, the best location for a kitchen sink vent is behind the sink, directly above the drain. This will allow air to enter the pipes and prevent any air locks. Additionally, the vent should be at least 6 inches above the flood rim of the sink to prevent any water from entering the vent.9. How to Determine the Best Location for a Kitchen Sink Vent


9. How to Determine the Best Location for a Kitchen Sink Vent


Deciding whether to hire a professional or do the installation yourself ultimately depends on your skills and comfort level with plumbing. If you are inexperienced or uncomfortable with tackling this task, it may be best to hire a professional to ensure a proper and safe installation. However, if you are confident in your abilities, a DIY installation can save you money and give you a sense of accomplishment. In conclusion, adding a vent to your kitchen sink is an important step in maintaining proper drainage and preventing unpleasant odors. With the right tools, materials, and knowledge, you can successfully install a vent for your kitchen sink and enjoy its benefits for years to come.10. Professional vs. DIY Kitchen Sink Vent Installation: Which is Right for You?
10. Professional vs. DIY Kitchen Sink Vent Installation: Which is Right for You?
/how-to-install-a-sink-drain-2718789-hero-24e898006ed94c9593a2a268b57989a3.jpg)

:no_upscale()/cdn.vox-cdn.com/uploads/chorus_asset/file/19495086/drain_0.jpg)

Why Adding a Vent to Your Kitchen Sink is Important for House Design
The Importance of Proper Ventilation in House Design
 Proper ventilation is an essential aspect of house design that is often overlooked. However, it plays a crucial role in maintaining a healthy and comfortable living space. Ventilation systems help to circulate fresh air, remove excess moisture and odors, and prevent the buildup of harmful gases. In the kitchen, having proper ventilation is especially important as it is a high-traffic area where a variety of activities take place, including cooking, washing dishes, and cleaning. Adding a vent to your kitchen sink is a simple but effective way to improve the overall house design and ensure a well-ventilated and pleasant environment.
The Challenges of a Kitchen Sink Without a Vent
 A kitchen sink without a vent can lead to a range of problems that can affect the overall functionality and aesthetics of your kitchen. Without proper ventilation, the steam and odors from cooking and cleaning can become trapped, causing a musty and unpleasant smell. This can also lead to the growth of mold and mildew, which can be harmful to your health and damage the surrounding surfaces. Additionally, without a vent, the moisture from washing dishes can linger in the air, making the kitchen feel damp and uncomfortable. These issues not only affect the kitchen but can also impact the rest of the house, making it crucial to address them by adding a vent to your kitchen sink.
The Benefits of Adding a Vent to Your Kitchen Sink
 Adding a vent to your kitchen sink can bring a range of benefits to your house design. The most obvious advantage is improved air circulation and ventilation, which can help to eliminate unpleasant odors and prevent the growth of mold and mildew. This can also contribute to a healthier living environment for you and your family. Additionally, a vented kitchen sink can also improve the overall aesthetics of your kitchen by removing excess moisture and preventing water stains on the surrounding surfaces. It can also help to reduce condensation on windows and other surfaces, making your kitchen more comfortable and enjoyable to use.
Choosing the Right Vent for Your Kitchen Sink
 When it comes to adding a vent to your kitchen sink, there are a variety of options available, including overhead vents, downdraft vents, and under-sink vents. It is essential to consider the layout and design of your kitchen to determine which type of vent will work best for your space. It is also crucial to ensure that the vent is properly installed and maintained to ensure its effectiveness. Consulting with a professional contractor can help you choose the right vent for your kitchen sink and ensure that it is installed correctly.
In conclusion, adding a vent to your kitchen sink is a simple but significant step in improving your house design. It not only helps to keep your kitchen and the rest of your house free from unpleasant odors and moisture but also contributes to a healthier and more comfortable living environment. So, if you want to enhance your house design and make your kitchen a more enjoyable space, consider adding a vent to your kitchen sink today.
When it comes to adding a vent to your kitchen sink, there are a variety of options available, including overhead vents, downdraft vents, and under-sink vents. It is essential to consider the layout and design of your kitchen to determine which type of vent will work best for your space. It is also crucial to ensure that the vent is properly installed and maintained to ensure its effectiveness. Consulting with a professional contractor can help you choose the right vent for your kitchen sink and ensure that it is installed correctly.
In conclusion, adding a vent to your kitchen sink is a simple but significant step in improving your house design. It not only helps to keep your kitchen and the rest of your house free from unpleasant odors and moisture but also contributes to a healthier and more comfortable living environment. So, if you want to enhance your house design and make your kitchen a more enjoyable space, consider adding a vent to your kitchen sink today.