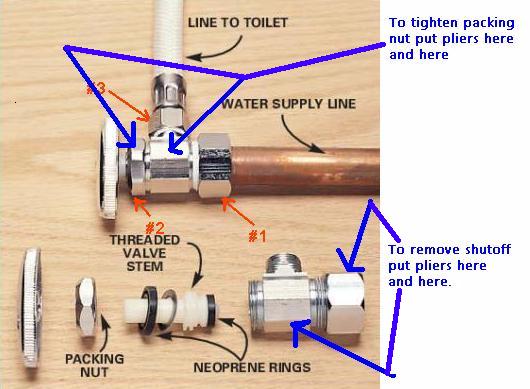
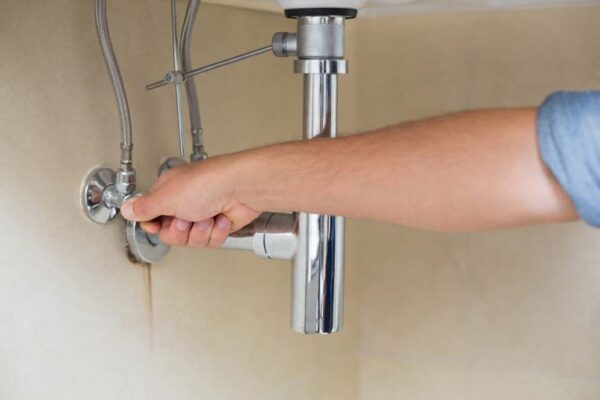
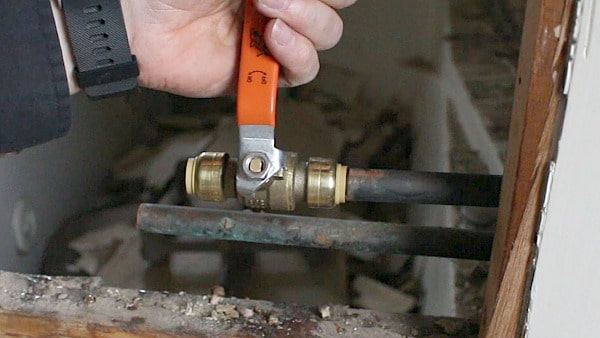
1. How to Replace a Kitchen Sink Shut-Off Valve
If you're experiencing a leaky or malfunctioning shut-off valve under your kitchen sink, it's important to replace it as soon as possible to avoid any further damage. Luckily, with a few simple tools and some basic knowledge, you can easily replace a kitchen sink shut-off valve yourself.
The first step is to turn off the water supply to your sink. This can usually be done by turning the valve located near your water meter to the closed position. Then, turn on the sink faucet to drain any remaining water from the pipes.
Next, use a wrench to loosen and remove the nuts connecting the shut-off valve to the water supply line and the sink's water line. Once the valve is disconnected, you can remove it and replace it with a new one.
When installing the new valve, make sure to use plumber's tape on the threaded ends to ensure a watertight seal. Then, reattach the valve to the water supply line and the sink's water line, making sure to tighten the nuts securely.
Finally, turn the water supply back on and test the new shut-off valve by running water through the sink. If there are no leaks and the valve is functioning properly, you're all set!

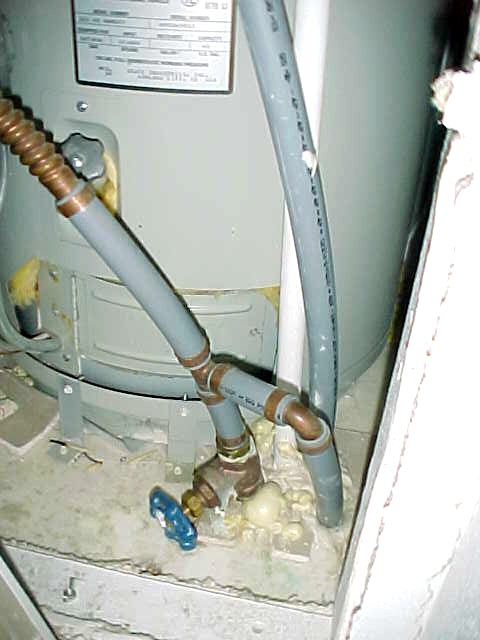

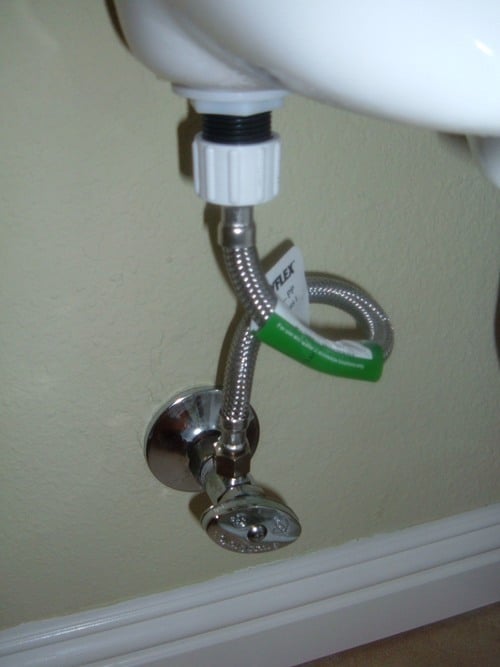
1. How to Replace a Kitchen Sink Shut-Off Valve


:max_bytes(150000):strip_icc()/sink-pipe-under-wash-basin-119001607-75542e154b364e7bb52032249f293908.jpg)

2. How to Install a Water Shut-Off Valve for a Kitchen Sink
If your kitchen sink doesn't have a shut-off valve, it's important to install one to make future plumbing repairs or maintenance easier. Installing a shut-off valve for your kitchen sink can also prevent water damage in case of a leak or burst pipe.
The first step is to locate the main water supply line and turn off the water. Then, use a pipe cutter to cut the water supply line where you want to install the shut-off valve. Make sure to leave enough space between the cut and the sink so that the valve can be easily accessed.
Next, attach the shut-off valve to the cut end of the water supply line by tightening the compression fittings with a wrench. Then, attach the other end of the valve to the sink's water line using the same method.
Once the valve is securely attached, turn the main water supply back on and test the valve by running water through the sink. If there are no leaks and the valve is functioning properly, you have successfully installed a shut-off valve for your kitchen sink.


2. How to Install a Water Shut-Off Valve for a Kitchen Sink


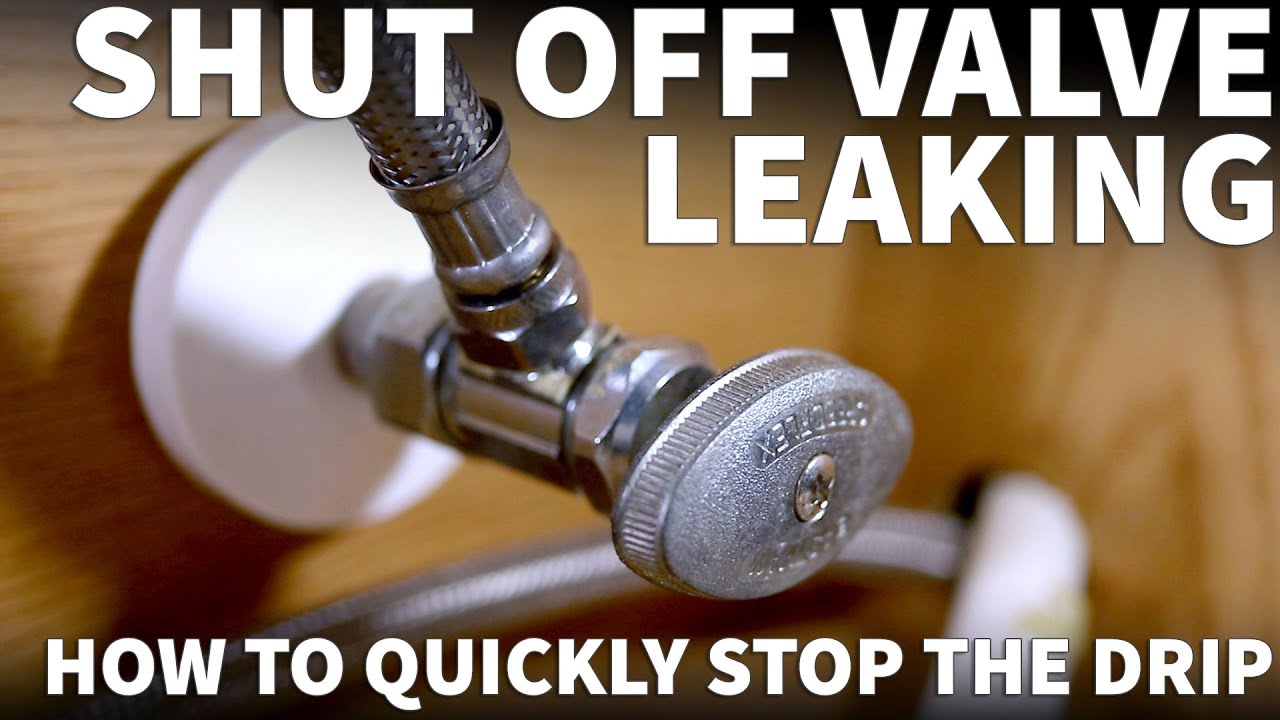
3. How to Fix a Leaky Kitchen Sink Shut-Off Valve
A leaky shut-off valve under your kitchen sink can be a frustrating and messy problem to deal with. However, with a few simple steps, you can fix this issue and prevent any further leaks.
The first step is to turn off the water supply to your sink. Then, use a wrench to tighten the nut connecting the shut-off valve to the water supply line. If the leak persists, you may need to replace the compression fitting or the entire valve.
To replace the compression fitting, use a wrench to loosen and remove the nut and then replace it with a new one. If the entire valve needs to be replaced, follow the steps outlined in "How to Replace a Kitchen Sink Shut-Off Valve."
Once the new fitting or valve is in place, turn the water supply back on and test for any leaks. If the problem persists, it may be best to call a professional plumber for assistance.


3. How to Fix a Leaky Kitchen Sink Shut-Off Valve


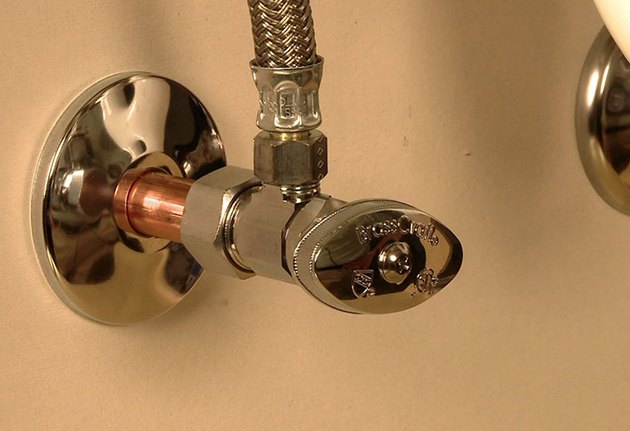
4. How to Turn Off the Water Supply to a Kitchen Sink
In case of an emergency or for plumbing repairs, it's important to know how to turn off the water supply to your kitchen sink. This can prevent any further damage or flooding in your home.
The first step is to locate the main water shut-off valve for your home. This is typically located near the water meter. Once you have found the valve, turn it clockwise to shut off the water supply.
If your kitchen sink has a shut-off valve, you can also turn it off by closing the valve located under the sink. This will only shut off the water supply to the sink, not the entire house.
Once the necessary repairs or emergency situation has been resolved, remember to turn the water supply back on by turning the valve counterclockwise. If you have turned off the main water supply, make sure to turn off any faucets in your home and then slowly turn the main valve back on to avoid any bursts or leaks.


4. How to Turn Off the Water Supply to a Kitchen Sink
/sink-pipe-under-wash-basin-119001607-75542e154b364e7bb52032249f293908.jpg)


5. How to Replace a Shut-Off Valve Under the Kitchen Sink
If your kitchen sink shut-off valve is old or damaged, it's important to replace it to prevent any further issues. With the right tools and some basic knowledge, you can easily replace the shut-off valve under your kitchen sink.
The first step is to turn off the water supply to your sink. Then, use a wrench to disconnect the valve from the water supply line and the sink's water line. If the valve is stuck or difficult to remove, you may need to use a pipe cutter to remove it.
Next, install the new valve by attaching it to the water supply line and the sink's water line using plumber's tape and a wrench to secure the connections. Once the new valve is in place, turn the water supply back on and test for any leaks.
If you are unsure about how to replace the shut-off valve, it's best to call a professional plumber for assistance.

5. How to Replace a Shut-Off Valve Under the Kitchen Sink
6. How to Install a Shut-Off Valve for a Kitchen Sink Water Line
If your kitchen sink doesn't have a shut-off valve for the water line, it's important to install one to make future plumbing repairs or maintenance easier. With the right tools and some basic knowledge, you can easily install a shut-off valve for your kitchen sink water line.
The first step is to turn off the main water supply to your home. Then, use a pipe cutter to cut the water line where you want to install the shut-off valve. Make sure to leave enough space between the cut and the sink so that the valve can be easily accessed.
Next, attach the shut-off valve to the cut end of the water line and secure it with a wrench. Then, attach the other end of the valve to the sink's water line using the same method.
Once the valve is securely attached, turn the main water supply back on and test for any leaks. If there are no leaks and the valve is functioning properly, you have successfully installed a shut-off valve for your kitchen sink water line.


6. How to Install a Shut-Off Valve for a Kitchen Sink Water Line

7. How to Fix a Stuck Shut-Off Valve Under the Kitchen Sink
If your kitchen sink shut-off valve is stuck and difficult to turn on or off, it's important to fix it to prevent any further issues. With a few simple steps, you can easily fix a stuck shut-off valve under your kitchen sink.
The first step is to turn off the water supply to your sink. Then, use a wrench to loosen and remove the nut connecting the valve to the water supply line. If the valve is still stuck, you may need to use a pair of pliers to turn it or apply some WD-40 to loosen it.
If the valve is still stuck, it may be best to replace it with a new one. Follow the steps outlined in "How to Replace a Shut-Off Valve Under the Kitchen Sink."
Once the new valve is in place, turn the water supply back on and test for any leaks. If the problem persists, it may be best to call a professional plumber for assistance.

7. How to Fix a Stuck Shut-Off Valve Under the Kitchen Sink


8. How to Shut Off the Water Supply to a Kitchen Sink for Plumbing Repairs
In case of a plumbing emergency or for repairs, it's important to know how to shut off the water supply to your kitchen sink. This can prevent any further damage or flooding in your home.
The first step is to locate the main water shut-off valve for your home. This is typically located near the water meter. Once you have found the valve, turn it clockwise to shut off the water supply.
If your kitchen sink has a shut-off valve, you can also turn it off by closing the valve located under the sink. This will only shut off the water supply to the sink, not the entire house.
Once the necessary repairs have been completed, remember to turn the water supply back on by turning the valve counterclockwise. If you have turned off the main water supply, make sure to turn off any faucets in your home and then slowly turn the main valve back on to avoid any bursts or leaks.


8. How to Shut Off the Water Supply to a Kitchen Sink for Plumbing Repairs


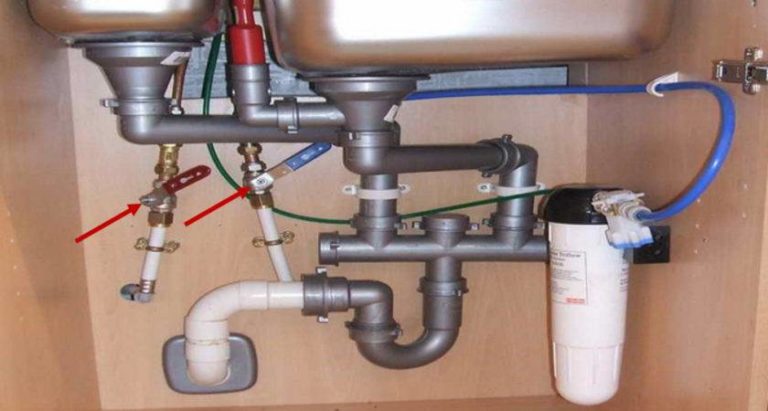
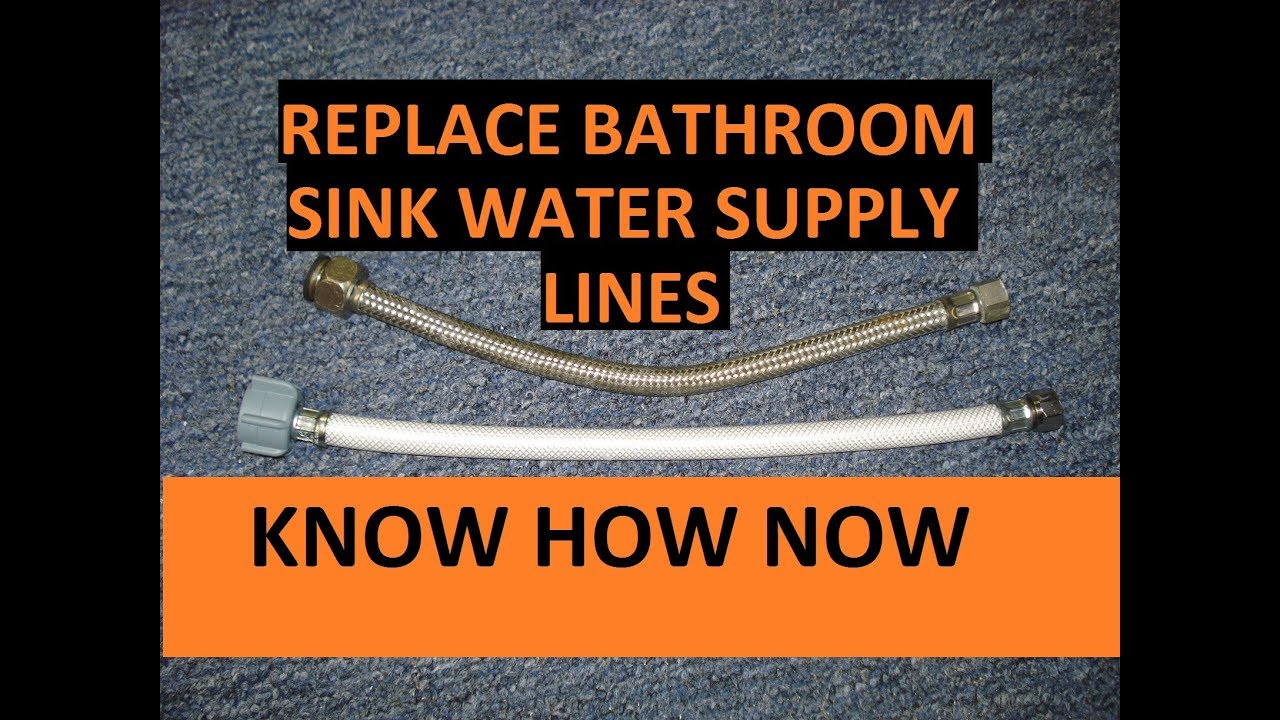
9. How to Replace a Kitchen Sink Water Supply Line
If your kitchen sink water supply line is old or damaged, it's important to replace it to prevent any further issues. With the right tools and some basic knowledge, you can easily replace the water supply line for your kitchen sink.
The first step is to turn off the water supply to your sink. Then, use a wrench to disconnect the old supply line from the shut-off valve and the sink's water line. If the line is stuck or difficult to remove, you may need to use a pipe cutter to remove it.
Next, attach the new supply line to the shut-off valve and the sink's water line using plumber's tape and a wrench to secure the connections. Once the new supply line is in place, turn the water supply back on and test for any leaks.
If you are unsure about how to replace the supply line, it's best to call a professional plumber for assistance.


9. How to Replace a Kitchen Sink Water Supply Line


:max_bytes(150000):strip_icc()/how-to-install-a-sink-drain-2718789-hero-24e898006ed94c9593a2a268b57989a3.jpg)

10. How to Install a Water Shut-Off Valve for a Kitchen Sink with PEX Tubing
If your kitchen sink has PEX tubing instead of copper or plastic supply lines, it's important to know how to install a shut-off valve specifically for PEX tubing. With the right tools and some basic knowledge, you can easily install a shut-off valve for your kitchen sink with PEX tubing.
The first step is to turn off the main water supply to your home. Then, use a pipe cutter to cut the PEX tubing where you want to install the shut-off valve. Make sure to leave enough space between the cut and the sink so that the valve can be easily accessed.
Next, attach the shut-off valve to the cut end of the PEX tubing and secure it with a clamp. Then, attach the other end of the valve to the sink's water line using a PEX fitting and a crimp ring.
Once the valve is securely attached, turn the main water supply back on and test for any leaks. If there are no leaks and the valve is functioning properly, you have successfully installed a shut-off valve for your kitchen sink with PEX tubing.


10. How to Install a Water Shut-Off Valve for a Kitchen Sink with PEX Tubing
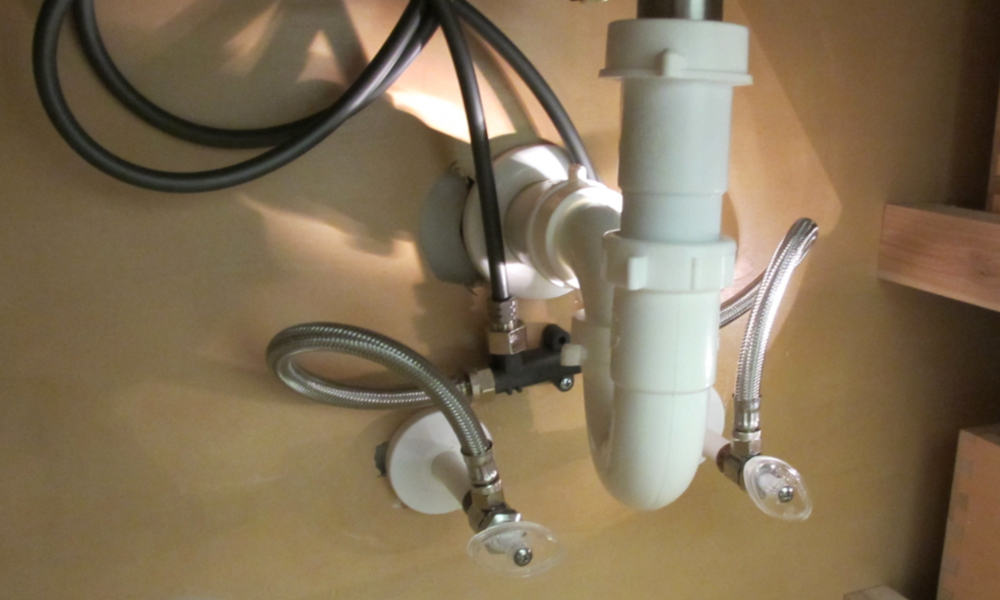
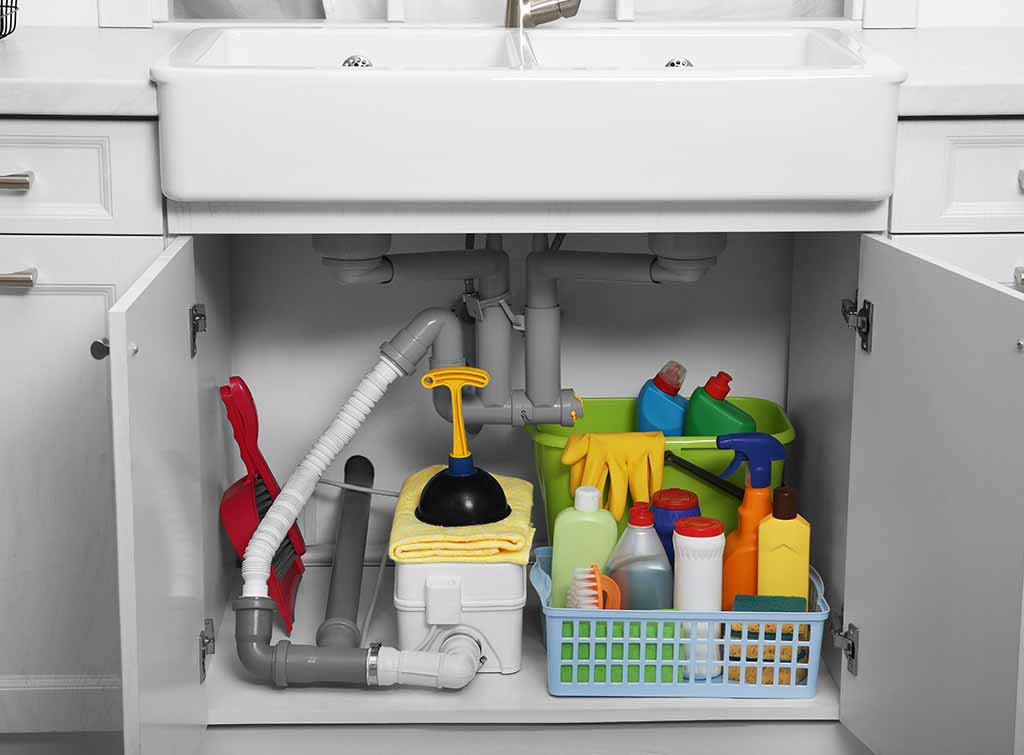
The Importance of Properly Installed Under Kitchen Sink Water Supply Shut Off Valves
:max_bytes(150000):strip_icc()/sink-pipe-under-wash-basin-119001607-6f28aec4c66944efb7a9a38cb622ab8b.jpg)
Protecting Your Home from Water Damage
 When it comes to designing a functional and efficient kitchen, one often overlooked aspect is the under kitchen sink water supply shut off valve. This small but crucial component is responsible for controlling the flow of water to your sink, dishwasher, and other kitchen appliances. Without a properly installed shut off valve, you could be putting your home at risk for potential water damage.
Water damage is a common and costly issue that many homeowners face.
It can occur from a variety of sources, such as burst pipes, leaky plumbing, and malfunctioning appliances. However, one of the most common causes of water damage in the kitchen is a faulty or non-existent shut off valve. In the event of a plumbing emergency, a shut off valve allows you to quickly and easily stop the flow of water, preventing further damage to your home.
When it comes to designing a functional and efficient kitchen, one often overlooked aspect is the under kitchen sink water supply shut off valve. This small but crucial component is responsible for controlling the flow of water to your sink, dishwasher, and other kitchen appliances. Without a properly installed shut off valve, you could be putting your home at risk for potential water damage.
Water damage is a common and costly issue that many homeowners face.
It can occur from a variety of sources, such as burst pipes, leaky plumbing, and malfunctioning appliances. However, one of the most common causes of water damage in the kitchen is a faulty or non-existent shut off valve. In the event of a plumbing emergency, a shut off valve allows you to quickly and easily stop the flow of water, preventing further damage to your home.
Ensuring Proper Installation
 Proper installation of under kitchen sink water supply shut off valves is crucial for their effectiveness.
It is important to hire a professional plumber to install your shut off valve to ensure it is done correctly.
A trained plumber will have the knowledge and experience to properly seal the valve and prevent any potential leaks. They will also be able to determine the best location for the shut off valve to ensure easy access in case of an emergency.
Additionally, it is important to
regularly check and maintain your shut off valve to ensure it is functioning properly.
Over time, valves can become corroded or damaged, which can affect their ability to shut off the water supply. By regularly checking and maintaining your shut off valve, you can prevent potential issues and ensure it will work when you need it most.
Proper installation of under kitchen sink water supply shut off valves is crucial for their effectiveness.
It is important to hire a professional plumber to install your shut off valve to ensure it is done correctly.
A trained plumber will have the knowledge and experience to properly seal the valve and prevent any potential leaks. They will also be able to determine the best location for the shut off valve to ensure easy access in case of an emergency.
Additionally, it is important to
regularly check and maintain your shut off valve to ensure it is functioning properly.
Over time, valves can become corroded or damaged, which can affect their ability to shut off the water supply. By regularly checking and maintaining your shut off valve, you can prevent potential issues and ensure it will work when you need it most.
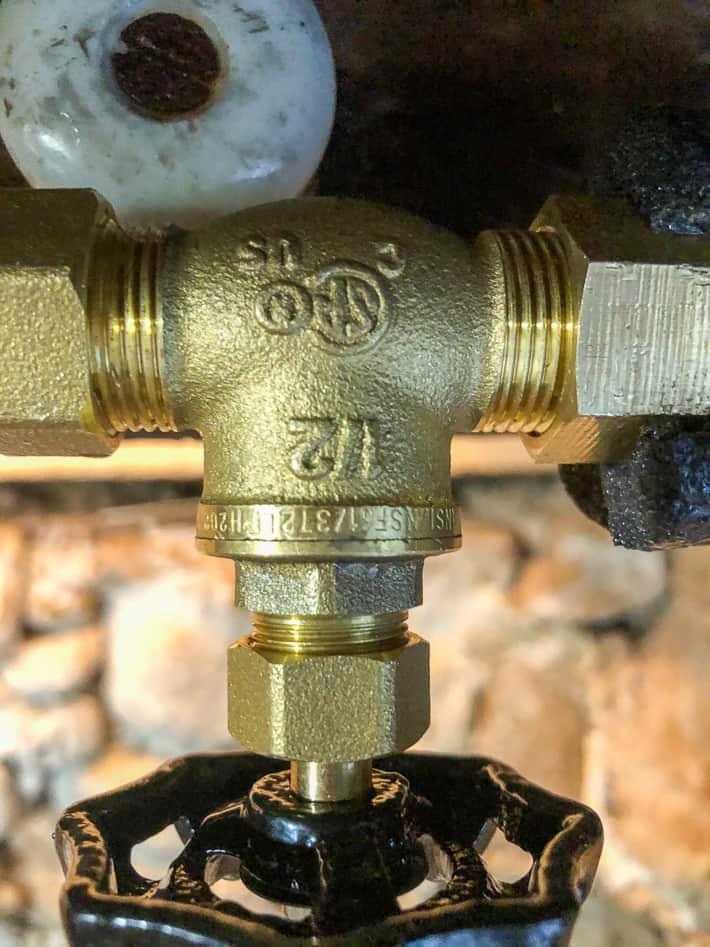
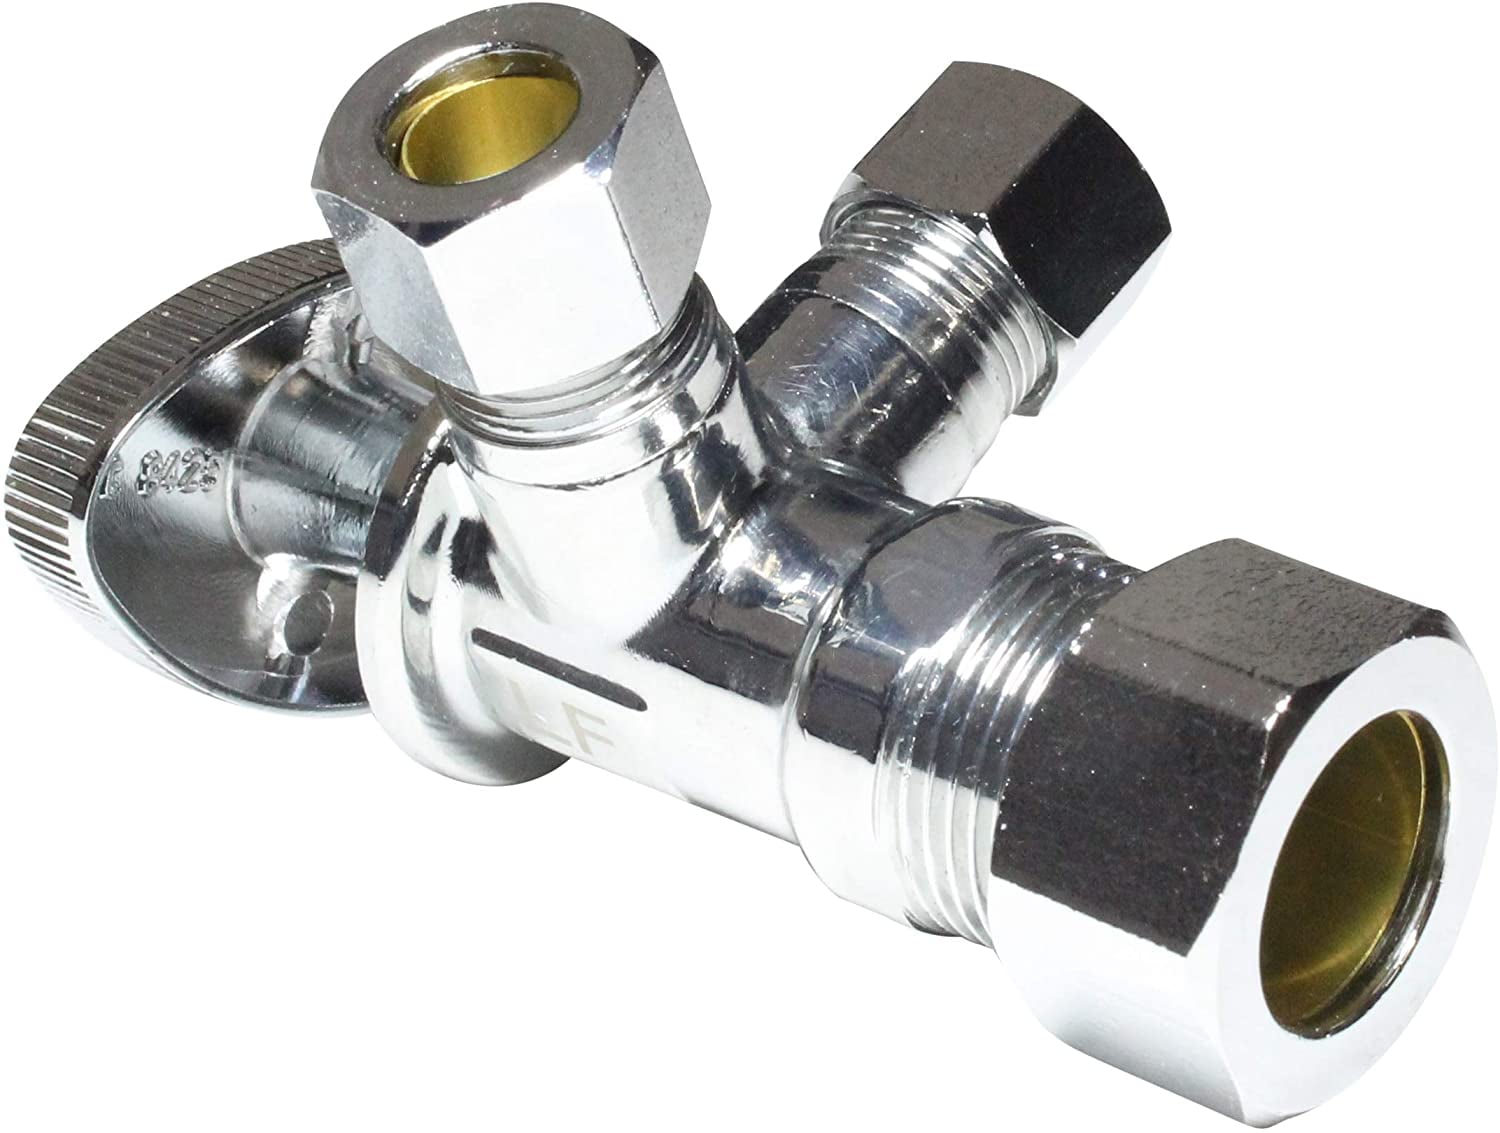
Choosing the Right Shut Off Valve
 There are several types of shut off valves available for under kitchen sink use, including compression, quarter-turn, and ball valves.
It is important to choose the right type of valve for your specific needs.
Compression valves are often used for older homes with copper pipes, while quarter-turn and ball valves are more commonly used in newer homes with PVC pipes. A professional plumber can help you determine the best type of shut off valve for your home.
In conclusion, properly installed and maintained under kitchen sink water supply shut off valves are crucial for protecting your home from potential water damage. By hiring a professional plumber and choosing the right type of valve, you can ensure your shut off valve will function effectively in case of an emergency. Don't overlook this small but important component in your kitchen design to avoid costly and damaging water disasters.
There are several types of shut off valves available for under kitchen sink use, including compression, quarter-turn, and ball valves.
It is important to choose the right type of valve for your specific needs.
Compression valves are often used for older homes with copper pipes, while quarter-turn and ball valves are more commonly used in newer homes with PVC pipes. A professional plumber can help you determine the best type of shut off valve for your home.
In conclusion, properly installed and maintained under kitchen sink water supply shut off valves are crucial for protecting your home from potential water damage. By hiring a professional plumber and choosing the right type of valve, you can ensure your shut off valve will function effectively in case of an emergency. Don't overlook this small but important component in your kitchen design to avoid costly and damaging water disasters.