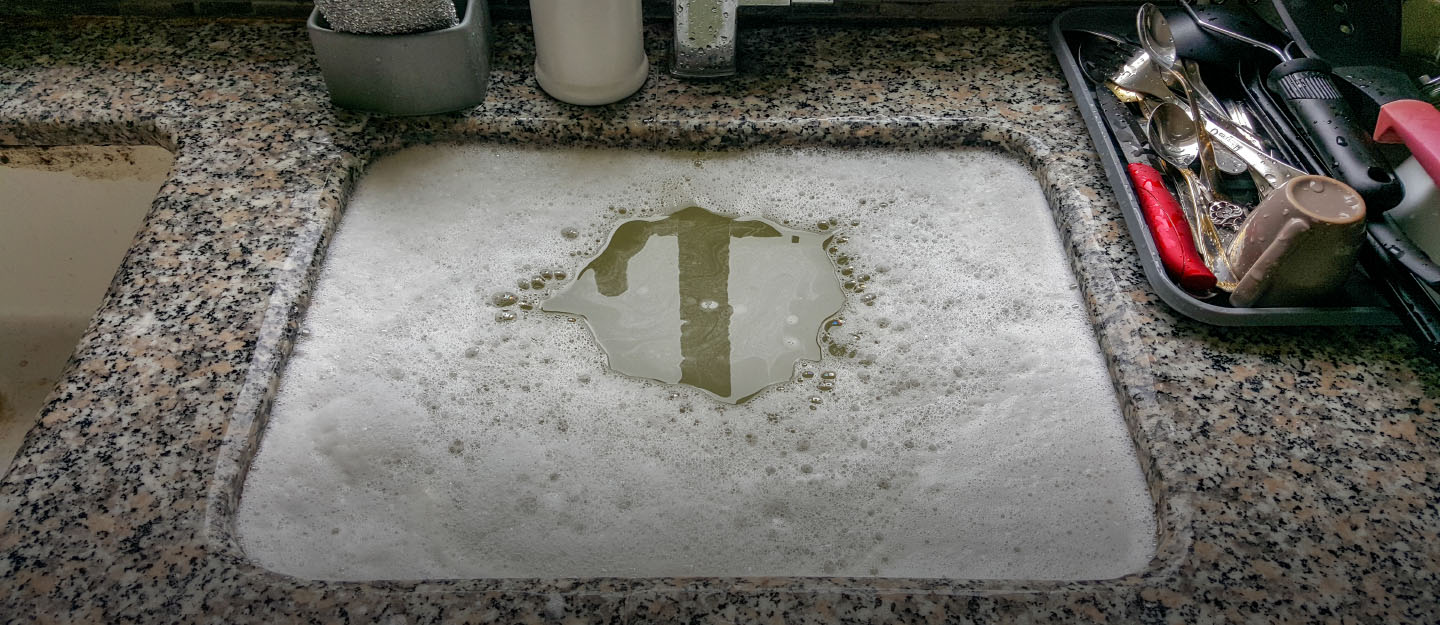
If you're experiencing a clogged kitchen sink, the culprit may be a trap that is filled with debris and gunk. But before you call a plumber, you can try taking apart the kitchen sink trap yourself. Not only will this save you money, but it's also a useful skill to have for future plumbing issues. Here's a step-by-step guide on how to take apart a kitchen sink trap.How to Take Apart a Kitchen Sink Trap


How to Take Apart a Kitchen Sink Trap

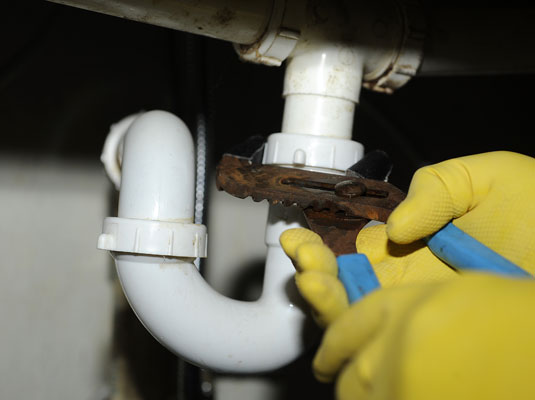


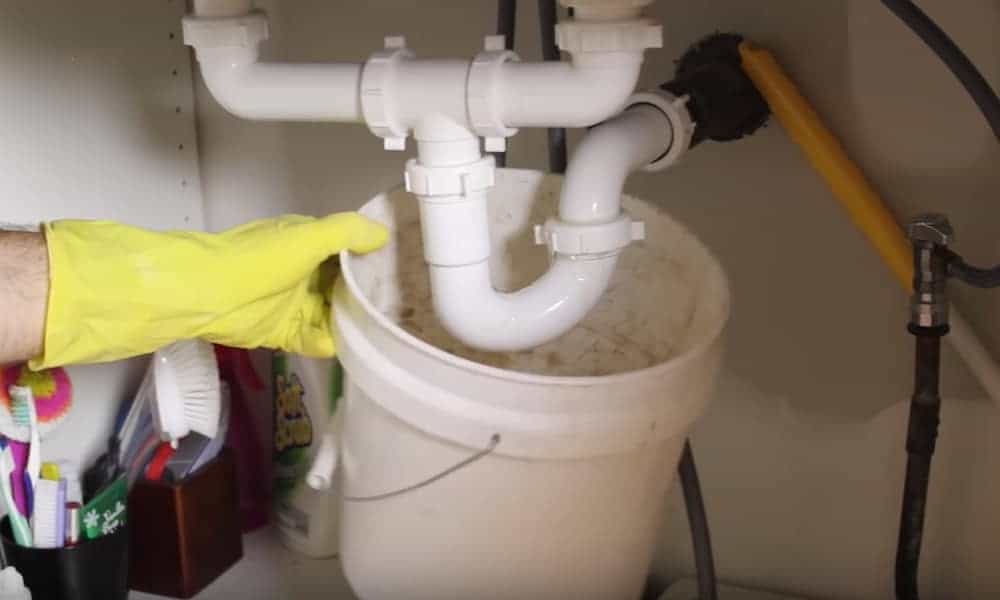
The first step to removing a kitchen sink trap is to gather the necessary tools. You will need a pair of slip-joint pliers, a bucket or large bowl, and a pipe wrench. Once you have these tools, follow these steps: Step 1: Start by placing the bucket or bowl underneath the kitchen sink trap to catch any water that may spill out. Step 2: With the slip-joint pliers, loosen the slip nuts on both ends of the trap. These are the connectors that hold the trap in place. Step 3: Once the slip nuts are loosened, use the pipe wrench to loosen and remove the compression nut that connects the trap to the drain pipe. Step 4: Carefully remove the trap and empty out any debris or gunk that has accumulated inside.How to Remove a Kitchen Sink Trap

How to Remove a Kitchen Sink Trap


Removing a kitchen sink trap yourself is a simple task that can be done in just a few steps. Not only will you save money on calling a plumber, but it also gives you the opportunity to inspect the trap for any damage or wear and tear. Here are a few tips for a successful DIY kitchen sink trap removal: Tip 1: Before removing the trap, turn off the water supply to avoid any potential leaks. Tip 2: Use a flashlight to inspect the trap for any cracks or damage that may require replacement. Tip 3: If the slip nuts are too tight, use some WD-40 to loosen them before attempting to remove them.DIY Kitchen Sink Trap Removal


DIY Kitchen Sink Trap Removal


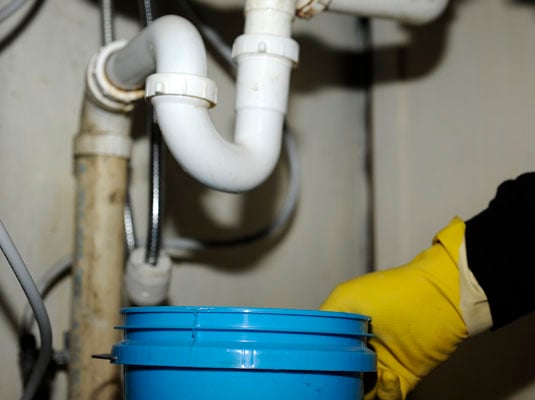
Following a step-by-step guide is essential for successfully removing a kitchen sink trap. Here's a detailed guide to help you through the process: Step 1: Turn off the water supply to the sink. Step 2: Place a bucket or bowl underneath the trap to catch any water that may spill out. Step 3: Loosen the slip nuts on both ends of the trap using slip-joint pliers. Step 4: Use a pipe wrench to loosen and remove the compression nut that connects the trap to the drain pipe. Step 5: Carefully remove the trap and empty out any debris or gunk. Step 6: If the trap is damaged, replace it with a new one. Step 7: Reconnect the trap by tightening the slip nuts and compression nut. Step 8: Turn the water supply back on and test to see if the sink is draining properly.Step-by-Step Guide for Removing a Kitchen Sink Trap


Step-by-Step Guide for Removing a Kitchen Sink Trap


Having the right tools is crucial for a successful kitchen sink trap removal. Here are the essential tools you will need: Slip-joint pliers: These are used to loosen the slip nuts on the trap. Pipe wrench: This tool is used to loosen the compression nut that connects the trap to the drain pipe. Bucket or large bowl: This will catch any water that may spill out during the trap removal. Flashlight: Use a flashlight to inspect the trap for any damage or buildup.Tools Needed for Taking Apart a Kitchen Sink Trap

Tools Needed for Taking Apart a Kitchen Sink Trap


Removing a stubborn kitchen sink trap can be a frustrating task. Here are a few tips to help make the process easier: Tip 1: Use WD-40 to loosen tight slip nuts and compression nuts. Tip 2: Use a hairdryer to heat up the slip nuts and make them easier to loosen. Tip 3: If the trap is still difficult to remove, try using a hacksaw to cut it off.Tips for Removing a Stubborn Kitchen Sink Trap


Tips for Removing a Stubborn Kitchen Sink Trap


While taking apart a kitchen sink trap may seem like a simple task, there are a few common mistakes that can cause problems. Here are some mistakes to avoid: Mistake 1: Forgetting to turn off the water supply before removing the trap. Mistake 2: Using too much force and damaging the slip nuts or compression nut. Mistake 3: Reusing a damaged trap instead of replacing it with a new one.Common Mistakes to Avoid When Taking Apart a Kitchen Sink Trap

Common Mistakes to Avoid When Taking Apart a Kitchen Sink Trap


Cleaning a kitchen sink trap is an essential part of maintenance to keep your sink draining properly. Here's how to clean it: Step 1: Remove the trap following the steps mentioned above. Step 2: Use a scrub brush and hot soapy water to clean the trap and remove any buildup or debris. Step 3: Rinse the trap with hot water and dry it thoroughly before reattaching it to the sink.How to Clean a Kitchen Sink Trap


How to Clean a Kitchen Sink Trap


:max_bytes(150000):strip_icc()/how-to-unclog-a-kitchen-sink-2718799_sketch_FINAL-8c5caa805a69493ab22dfb537c72a1b7.png)

If your kitchen sink trap is damaged or beyond repair, it will need to be replaced. Here's what you need to know before replacing a kitchen sink trap: Cost: The cost of a replacement trap can vary depending on its material and brand. On average, a new trap can cost anywhere from $15 to $50. Material: Kitchen sink traps are typically made of plastic, chrome, or metal. Each material has its pros and cons, so choose one that best fits your needs and budget. Installation: While you can install a new trap yourself, it's recommended to hire a professional plumber for a proper and secure installation.Replacing a Kitchen Sink Trap: What You Need to Know
Replacing a Kitchen Sink Trap: What You Need to Know
/sink-drain-trap-185105402-5797c5f13df78ceb869154b5.jpg)


Deciding between hiring a professional plumber or doing the kitchen sink trap removal yourself can be a tough decision. Here are a few factors to consider: Cost: Doing the trap removal yourself can save you money, but it's important to weigh the cost of tools and potential mistakes that may result in additional expenses. Skill level: If you're not confident in your plumbing skills, it's best to hire a professional to avoid causing more damage. Time: Removing a kitchen sink trap may seem like a simple task, but it can be time-consuming, especially if you encounter any difficulties.Professional vs. DIY Kitchen Sink Trap Removal: Which is Best?


Professional vs. DIY Kitchen Sink Trap Removal: Which is Best?


Why You Should Invest in a Kitchen Sink Trap

Ensuring Proper Drainage and Hygiene
 Kitchen sink traps
may not be the most glamorous feature of your house, but they play a crucial role in keeping your kitchen clean and functional. These simple yet essential plumbing fixtures are installed beneath the sink to prevent clogs and blockages in your drainage system. Without a properly functioning trap, you could be facing unpleasant odors, slow drainage, and even potential health hazards.
Kitchen sink traps
may not be the most glamorous feature of your house, but they play a crucial role in keeping your kitchen clean and functional. These simple yet essential plumbing fixtures are installed beneath the sink to prevent clogs and blockages in your drainage system. Without a properly functioning trap, you could be facing unpleasant odors, slow drainage, and even potential health hazards.
Preventing Costly Plumbing Issues
 Investing in a
kitchen sink trap
may seem like an unnecessary expense, but it can save you from costly plumbing repairs in the long run. A trap works by trapping solid debris such as food scraps, grease, and hair, preventing them from clogging your pipes. Without a trap, these substances can accumulate and cause blockages, which can lead to burst pipes and water damage. By investing in a trap, you can avoid these costly and inconvenient issues.
Investing in a
kitchen sink trap
may seem like an unnecessary expense, but it can save you from costly plumbing repairs in the long run. A trap works by trapping solid debris such as food scraps, grease, and hair, preventing them from clogging your pipes. Without a trap, these substances can accumulate and cause blockages, which can lead to burst pipes and water damage. By investing in a trap, you can avoid these costly and inconvenient issues.
Choosing the Right Kitchen Sink Trap
 When it comes to
kitchen sink traps
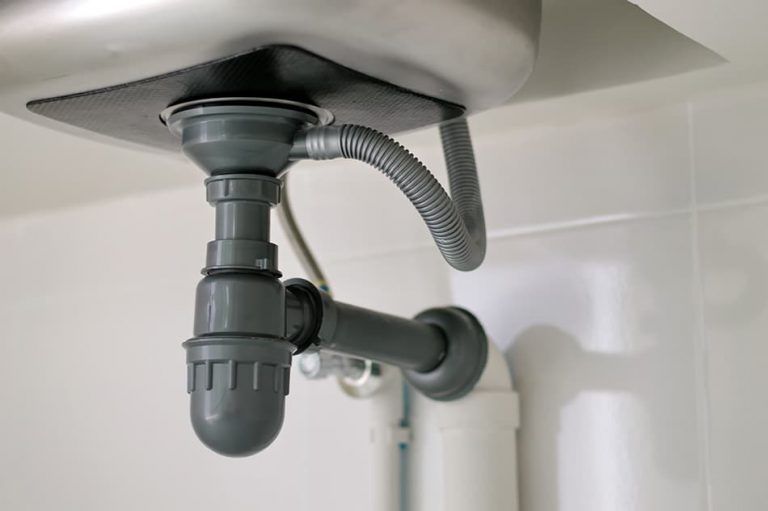
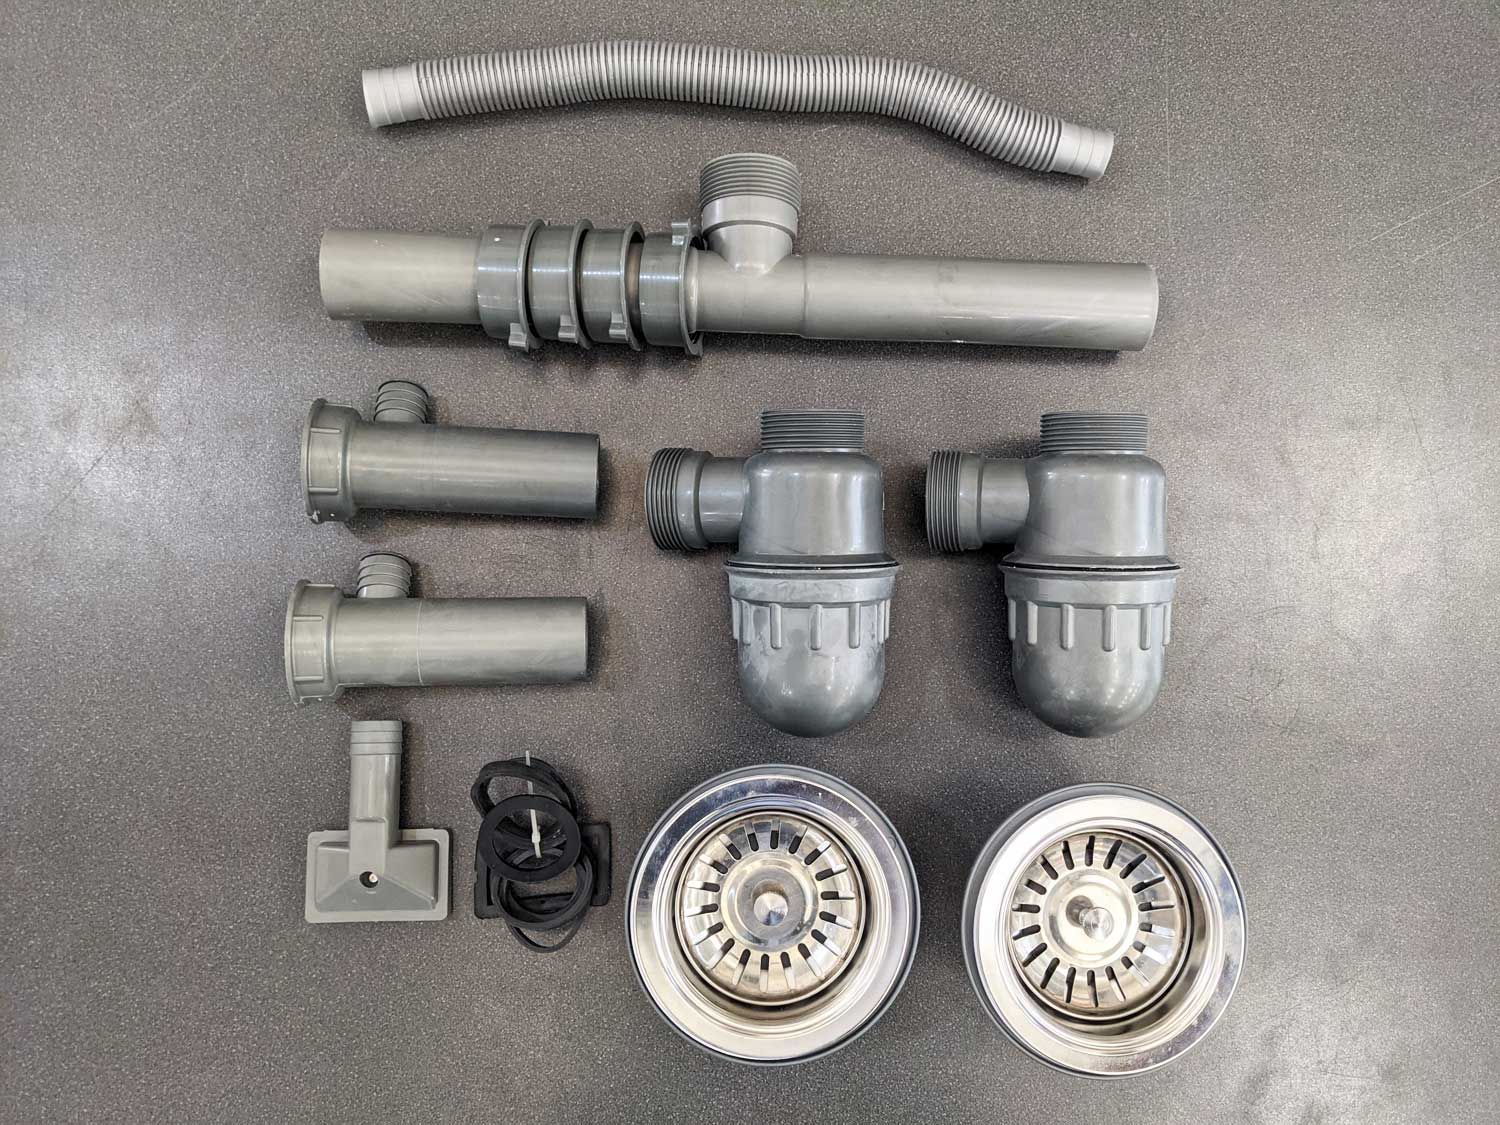
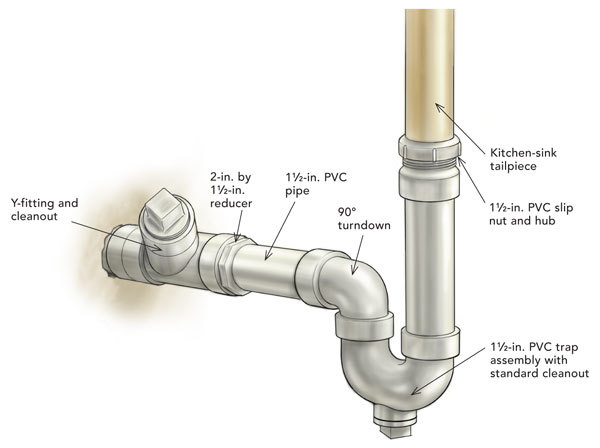
, there are various types available on the market. The most common ones include P-traps, S-traps, and bottle traps. P-traps are the most popular choice as they are easy to install and clean. S-traps, on the other hand, are more suitable for sinks that are not near a wall. Bottle traps, with their sleek and modern design, are a great choice for those looking for a stylish option. Consider the layout and design of your kitchen before choosing the right trap for your sink.
When it comes to
kitchen sink traps
, there are various types available on the market. The most common ones include P-traps, S-traps, and bottle traps. P-traps are the most popular choice as they are easy to install and clean. S-traps, on the other hand, are more suitable for sinks that are not near a wall. Bottle traps, with their sleek and modern design, are a great choice for those looking for a stylish option. Consider the layout and design of your kitchen before choosing the right trap for your sink.
Maintaining Your Kitchen Sink Trap
 To ensure your
kitchen sink trap
continues to function properly, regular maintenance is crucial. Make sure to clean your trap regularly, removing any debris that may have accumulated. You can also pour a mixture of hot water and vinegar down your sink to help break down any build-up. If you notice any leaks or strange odors, it may be time to replace your trap.
In conclusion, a kitchen sink trap may not be the most exciting feature of your house, but it is an essential one. By investing in a trap, you can ensure proper drainage, prevent costly plumbing issues, and maintain a hygienic kitchen. So don't overlook this crucial component of your kitchen and make sure to choose the right trap for your needs.
To ensure your
kitchen sink trap
continues to function properly, regular maintenance is crucial. Make sure to clean your trap regularly, removing any debris that may have accumulated. You can also pour a mixture of hot water and vinegar down your sink to help break down any build-up. If you notice any leaks or strange odors, it may be time to replace your trap.
In conclusion, a kitchen sink trap may not be the most exciting feature of your house, but it is an essential one. By investing in a trap, you can ensure proper drainage, prevent costly plumbing issues, and maintain a hygienic kitchen. So don't overlook this crucial component of your kitchen and make sure to choose the right trap for your needs.