Replacing the water valves under your kitchen sink may seem like a daunting task, but with the right tools and knowledge, it can be a DIY project that you can easily tackle. Whether you're experiencing a leak or simply want to update your old valves, replacing them is an important maintenance task that can save you from potential water damage and costly repairs. In this step-by-step guide, we'll walk you through the process of replacing water valves under your kitchen sink.How to Replace Water Valves Under a Kitchen Sink


How to Replace Water Valves Under a Kitchen Sink


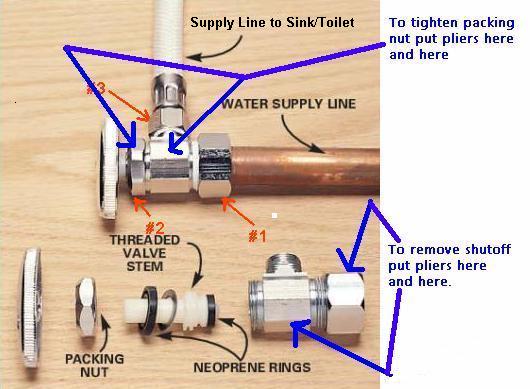

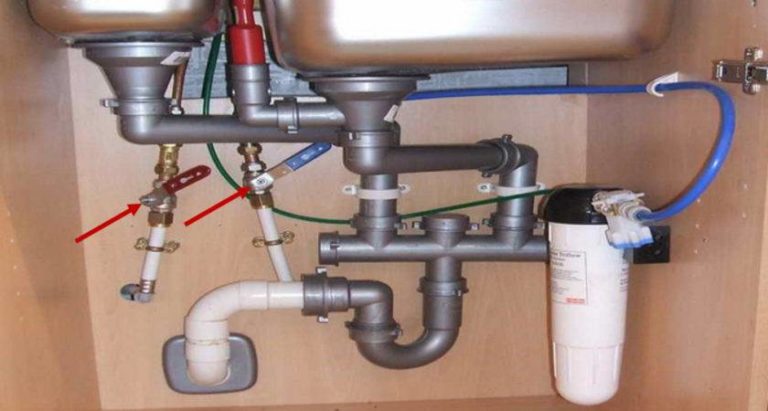
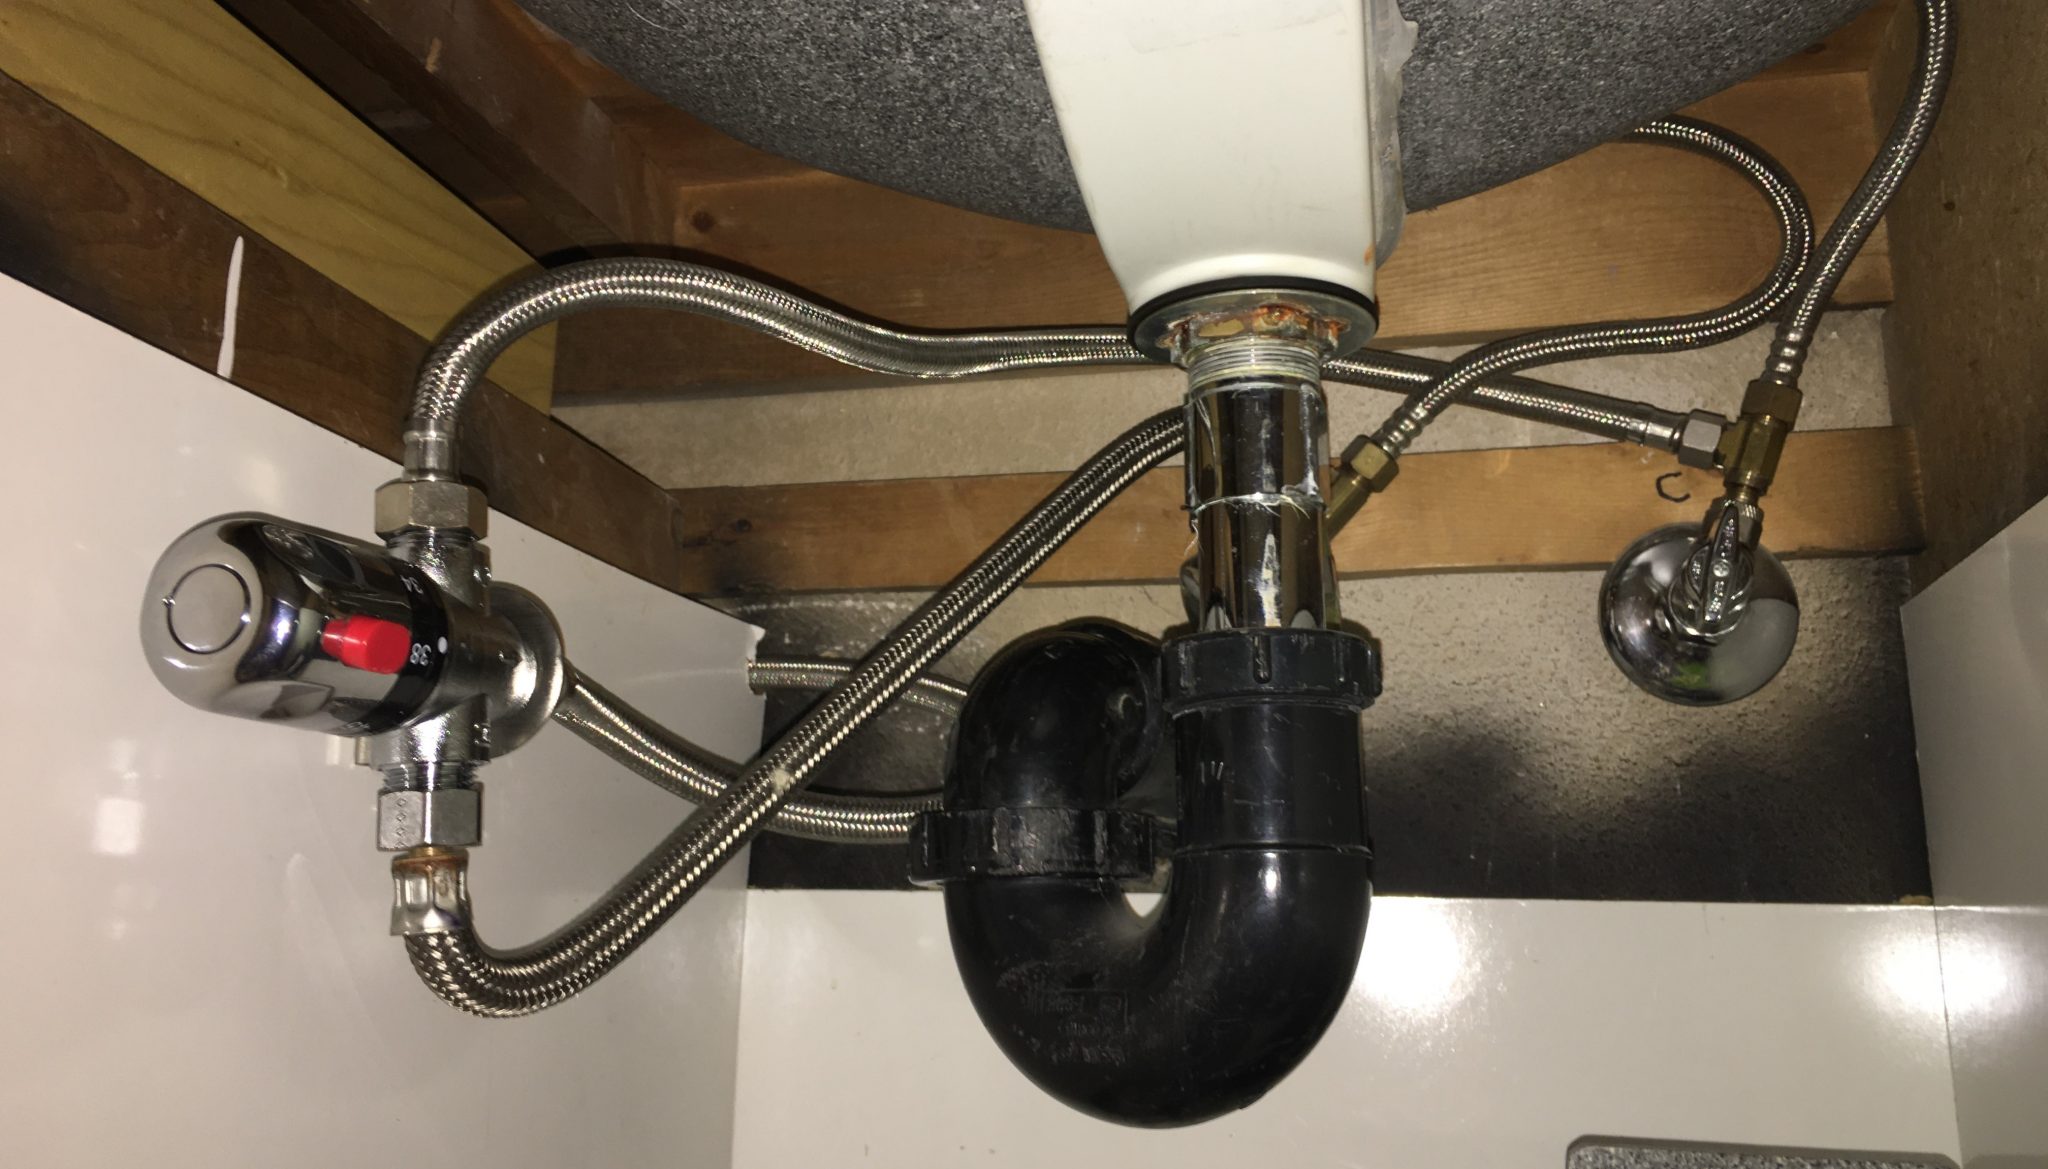
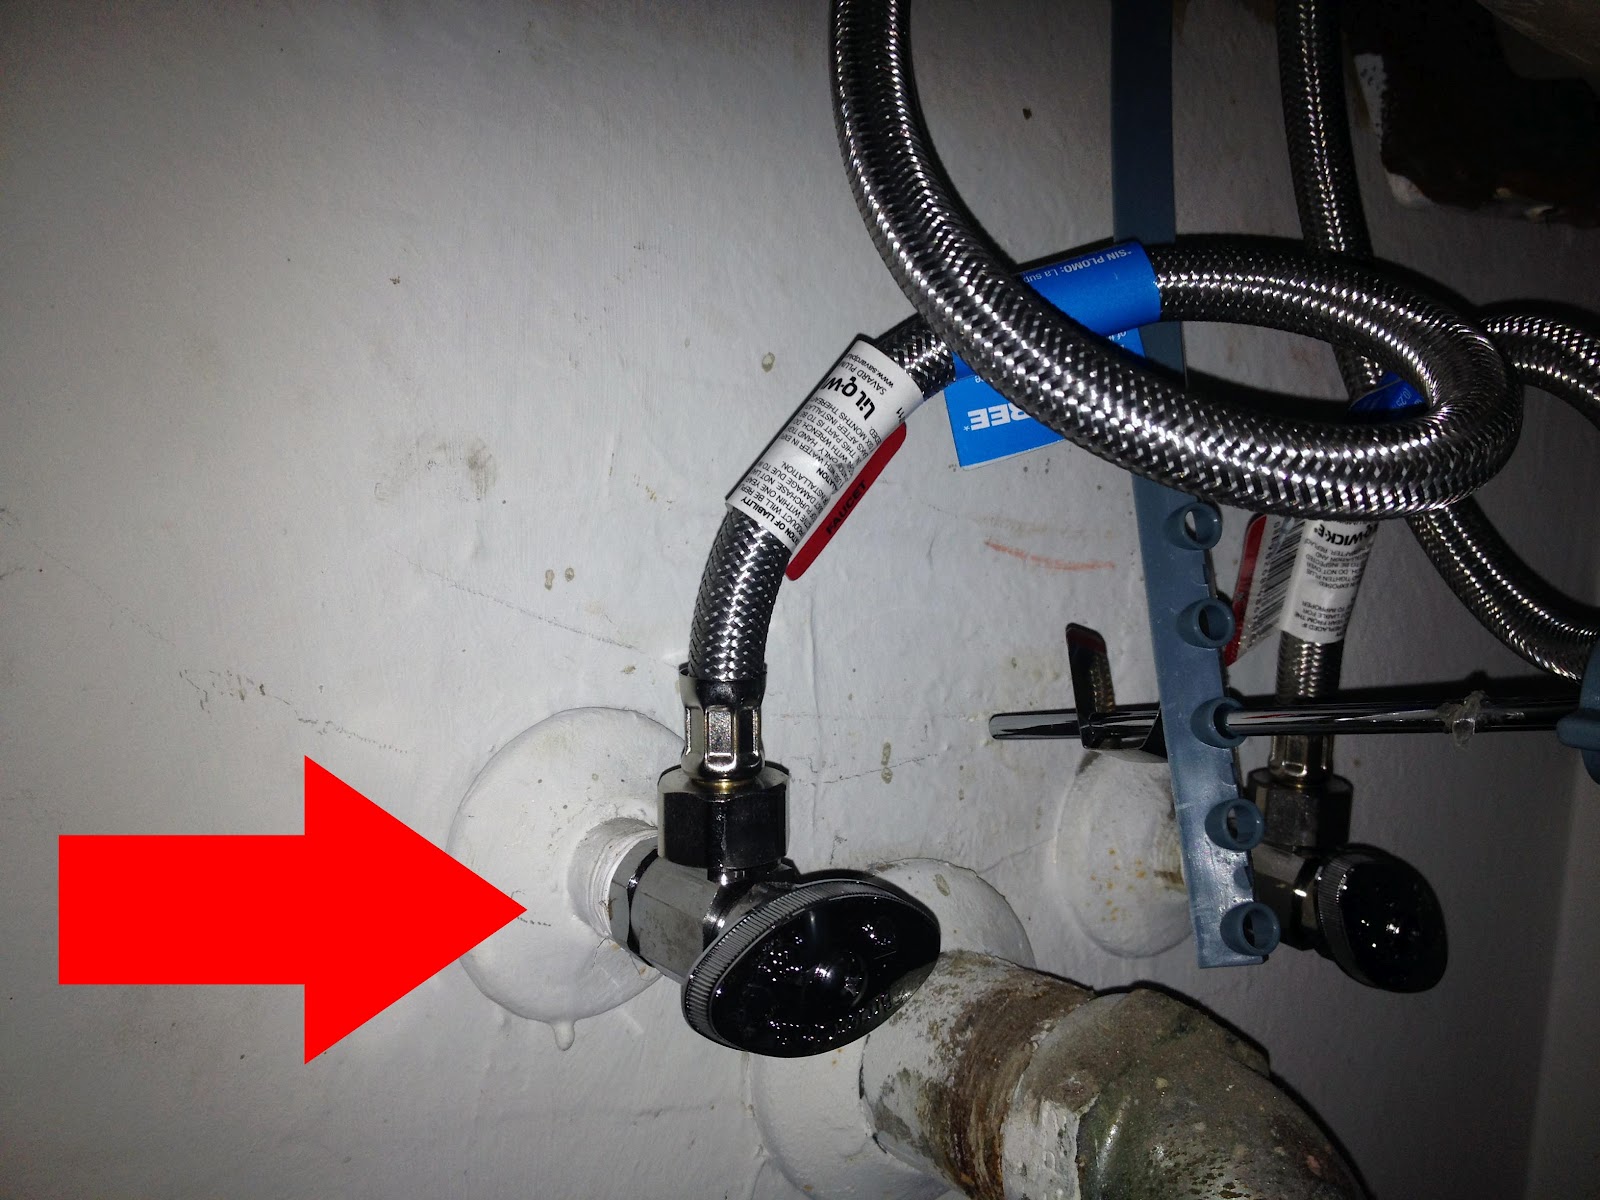
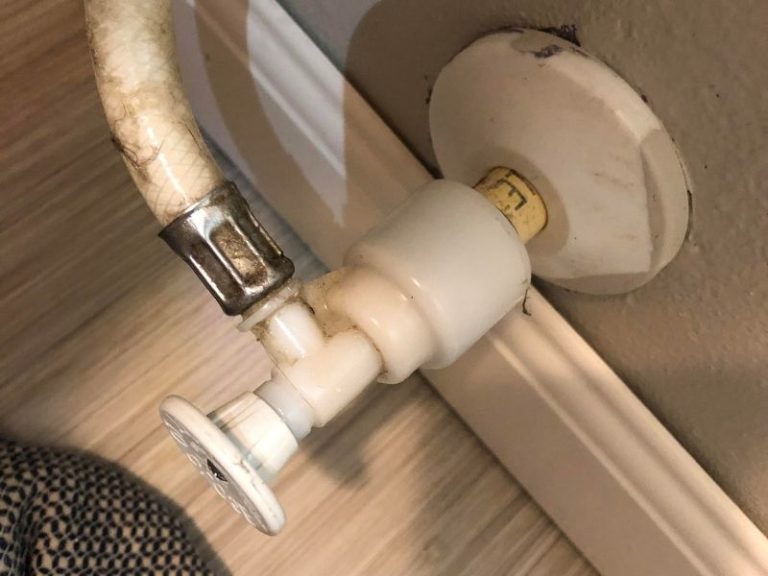
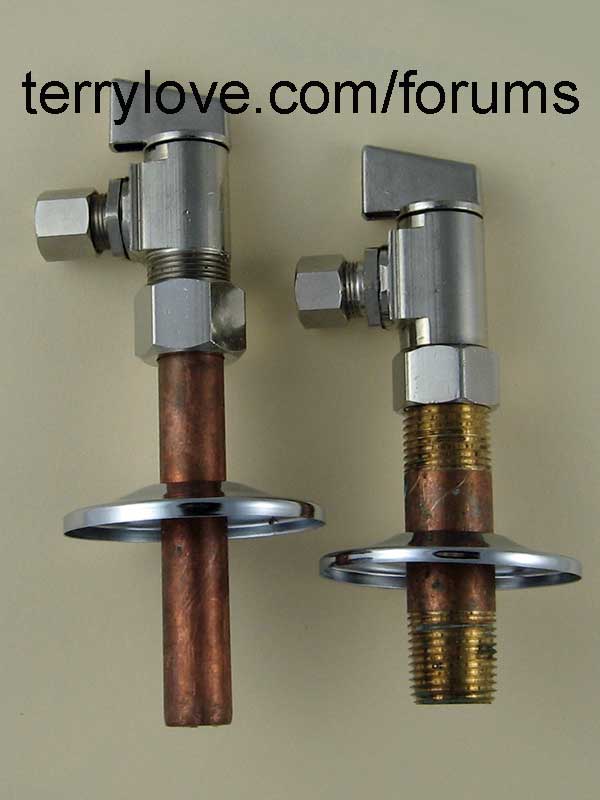
Before you begin, make sure to turn off the water supply to your kitchen sink. This can usually be done by turning the shut-off valve located under the sink clockwise until it is fully closed. Once the water is turned off, follow these steps to replace the water valves: 1. Remove the old valves: Using a pipe wrench, carefully loosen and remove the old water valves from the pipes under the sink. Make sure to have a bucket or towel handy to catch any remaining water in the pipes. 2. Clean the area: With the old valves removed, use a rag to clean any debris or residue from the pipes. This will ensure a proper seal when installing the new valves. 3. Measure and cut the pipes: Using a pipe cutter or hacksaw, measure and cut the pipes to the appropriate length for the new valves. Be sure to measure twice to avoid any mistakes. 4. Install the new valves: Apply plumber's tape to the threads of the new valves to create a tight seal. Then, use a wrench to tighten the new valves onto the pipes.Replacing Water Valves Under Kitchen Sink: A Step-by-Step Guide


Replacing Water Valves Under Kitchen Sink: A Step-by-Step Guide

Replacing water valves under a kitchen sink is a task that you can easily do on your own, without the need for a professional plumber. By following the steps above and having the right tools, you can save both time and money by doing it yourself.DIY: Replacing Water Valves Under Kitchen Sink


DIY: Replacing Water Valves Under Kitchen Sink


When replacing water valves under your kitchen sink, here are some helpful tips to keep in mind: Use the right tools: Having the right tools, such as a pipe wrench, pipe cutter, and plumber's tape, can make the process much easier. Turn off the water supply: Always remember to turn off the water supply before starting any work. This will prevent any accidents or water damage. Measure twice, cut once: Double-check your measurements before cutting the pipes to avoid any mistakes. Use plumber's tape: Applying plumber's tape to the threads of the new valves will create a tight seal and prevent any leaks.Replacing Water Valves Under Kitchen Sink: Tips and Tricks


Replacing Water Valves Under Kitchen Sink: Tips and Tricks


Replacing water valves under your kitchen sink is an important maintenance task that should not be overlooked. Old or faulty valves can lead to leaks, which can cause water damage and potentially costly repairs. By replacing them, you can ensure the proper functioning of your kitchen sink and prevent any potential disasters.The Importance of Replacing Water Valves Under Kitchen Sink

The Importance of Replacing Water Valves Under Kitchen Sink

Here are the tools you will need to replace water valves under your kitchen sink: Pipe wrench: This tool will help you remove the old valves and tighten the new ones. Pipe cutter or hacksaw: You will need this to cut the pipes to the appropriate length. Plumber's tape: This tape will create a tight seal between the pipes and the new valves. Rags: Have some rags handy to clean any debris or residue from the pipes.Tools You Need for Replacing Water Valves Under Kitchen Sink

Tools You Need for Replacing Water Valves Under Kitchen Sink


Here are some common mistakes to avoid when replacing water valves under your kitchen sink: Not turning off the water supply: This is an important step that should not be skipped to prevent any potential accidents or water damage. Incorrect measurements: Always measure twice to avoid any mistakes when cutting the pipes. Not using plumber's tape: This tape will create a tight seal and prevent any leaks.Replacing Water Valves Under Kitchen Sink: Common Mistakes to Avoid
Replacing Water Valves Under Kitchen Sink: Common Mistakes to Avoid

There is no set timeline for when you should replace water valves under your kitchen sink. However, if you notice any leaks or if your valves are old and rusty, it may be time for a replacement. It's always better to be proactive and replace them before any major issues occur.How Often Should You Replace Water Valves Under Kitchen Sink?


How Often Should You Replace Water Valves Under Kitchen Sink?

While replacing water valves under your kitchen sink can be a DIY project, some people may prefer to hire a professional plumber. If you are not confident in your plumbing skills or do not have the necessary tools, it may be best to leave it to the professionals. However, if you have the right tools and follow the steps outlined in this guide, you can successfully replace the valves on your own.Replacing Water Valves Under Kitchen Sink: Professional vs. DIY

Replacing Water Valves Under Kitchen Sink: Professional vs. DIY
If you prefer visual instructions, there are many helpful video tutorials available online that can guide you through the process of replacing water valves under your kitchen sink. You can also follow along with this step-by-step guide while watching the video to ensure you don't miss any important steps. In conclusion, replacing water valves under your kitchen sink is an important maintenance task that can easily be done as a DIY project. By following our guide and keeping these tips and tricks in mind, you can ensure that your kitchen sink functions properly and avoid any potential water damage or costly repairs.Step-by-Step Video Tutorial: Replacing Water Valves Under Kitchen Sink

Step-by-Step Video Tutorial: Replacing Water Valves Under Kitchen Sink
Why Replacing Water Valves Under Kitchen Sink is Important for Your Home
:max_bytes(150000):strip_icc()/sink-pipe-under-wash-basin-119001607-6f28aec4c66944efb7a9a38cb622ab8b.jpg)
Maintaining the Functionality of Your Kitchen Sink
 Your kitchen sink is one of the most frequently used fixtures in your home. It is where you wash your hands, dishes, and prepare food. However, it is also one of the most neglected areas when it comes to maintenance. The water valves under your kitchen sink are responsible for controlling the flow of water and shutting it off completely when needed. Over time, these valves can become worn out and corroded, causing leaks and reducing the functionality of your sink. That's why replacing them is crucial for maintaining the functionality of your kitchen sink.
Corrosion and Wear and Tear
Due to constant exposure to water and other substances, the water valves under your kitchen sink are susceptible to corrosion and wear and tear. This can cause them to become stiff and difficult to turn, making it harder to control the water flow. It can also lead to leaks, which not only wastes water but can also cause damage to your cabinets and flooring. By replacing these valves, you can prevent these issues and ensure that your sink continues to function properly.
Your kitchen sink is one of the most frequently used fixtures in your home. It is where you wash your hands, dishes, and prepare food. However, it is also one of the most neglected areas when it comes to maintenance. The water valves under your kitchen sink are responsible for controlling the flow of water and shutting it off completely when needed. Over time, these valves can become worn out and corroded, causing leaks and reducing the functionality of your sink. That's why replacing them is crucial for maintaining the functionality of your kitchen sink.
Corrosion and Wear and Tear
Due to constant exposure to water and other substances, the water valves under your kitchen sink are susceptible to corrosion and wear and tear. This can cause them to become stiff and difficult to turn, making it harder to control the water flow. It can also lead to leaks, which not only wastes water but can also cause damage to your cabinets and flooring. By replacing these valves, you can prevent these issues and ensure that your sink continues to function properly.
Preventing Costly Repairs
 Replacing water valves under your kitchen sink may seem like a small and insignificant task, but it can save you from costly repairs in the long run. A leaky valve can lead to water damage, which can be expensive to fix. It can also cause mold and mildew growth, which can be hazardous to your health. By regularly replacing your water valves, you can avoid these potential issues and save yourself from the headache and expense of major repairs.
Improving Water Efficiency
Old and worn-out valves can also affect the efficiency of your water usage. They may not shut off completely, causing water to continuously drip and waste water. By replacing these valves, you can ensure that your water is being used efficiently and reduce your water bill in the process.
Replacing water valves under your kitchen sink may seem like a small and insignificant task, but it can save you from costly repairs in the long run. A leaky valve can lead to water damage, which can be expensive to fix. It can also cause mold and mildew growth, which can be hazardous to your health. By regularly replacing your water valves, you can avoid these potential issues and save yourself from the headache and expense of major repairs.
Improving Water Efficiency
Old and worn-out valves can also affect the efficiency of your water usage. They may not shut off completely, causing water to continuously drip and waste water. By replacing these valves, you can ensure that your water is being used efficiently and reduce your water bill in the process.
Professional Help for Replacing Water Valves
 Replacing water valves under your kitchen sink may seem like a simple task, but it is best left to the professionals. They have the knowledge and experience to properly install new valves and ensure that they are functioning correctly. They can also provide you with guidance on choosing the right valves for your specific sink and plumbing system.
Invest in Your Home
In conclusion, replacing water valves under your kitchen sink is an important aspect of maintaining your home. It not only ensures the proper functionality of your sink but also prevents potential damage and costly repairs. So, don't neglect this task and invest in your home by regularly replacing your water valves. Your kitchen sink (and your wallet) will thank you.
Replacing water valves under your kitchen sink may seem like a simple task, but it is best left to the professionals. They have the knowledge and experience to properly install new valves and ensure that they are functioning correctly. They can also provide you with guidance on choosing the right valves for your specific sink and plumbing system.
Invest in Your Home
In conclusion, replacing water valves under your kitchen sink is an important aspect of maintaining your home. It not only ensures the proper functionality of your sink but also prevents potential damage and costly repairs. So, don't neglect this task and invest in your home by regularly replacing your water valves. Your kitchen sink (and your wallet) will thank you.

/media/img/prizes/prizegrab-sleep-number-bed-sweepstakes.jpg)