Replacing a water valve under a kitchen sink may seem like a daunting task, but with the right tools and knowledge, it can be a simple and straightforward process. Whether you are experiencing a leaky valve or just looking to upgrade, replacing a water valve is an important maintenance task that every homeowner should know how to do. In this guide, we will walk you through the steps to successfully replace a water valve under your kitchen sink.How to Replace a Water Valve Under a Kitchen Sink


How to Replace a Water Valve Under a Kitchen Sink


Before you begin the process of replacing a water valve under a kitchen sink, it is important to gather all the necessary tools and materials. This includes a pipe wrench, adjustable pliers, Teflon tape, and a new water valve. Make sure to turn off the water supply to your kitchen sink before starting the process.How to Replace a Kitchen Sink Water Valve


How to Replace a Kitchen Sink Water Valve
:max_bytes(150000):strip_icc()/sink-pipe-under-wash-basin-119001607-6f28aec4c66944efb7a9a38cb622ab8b.jpg)
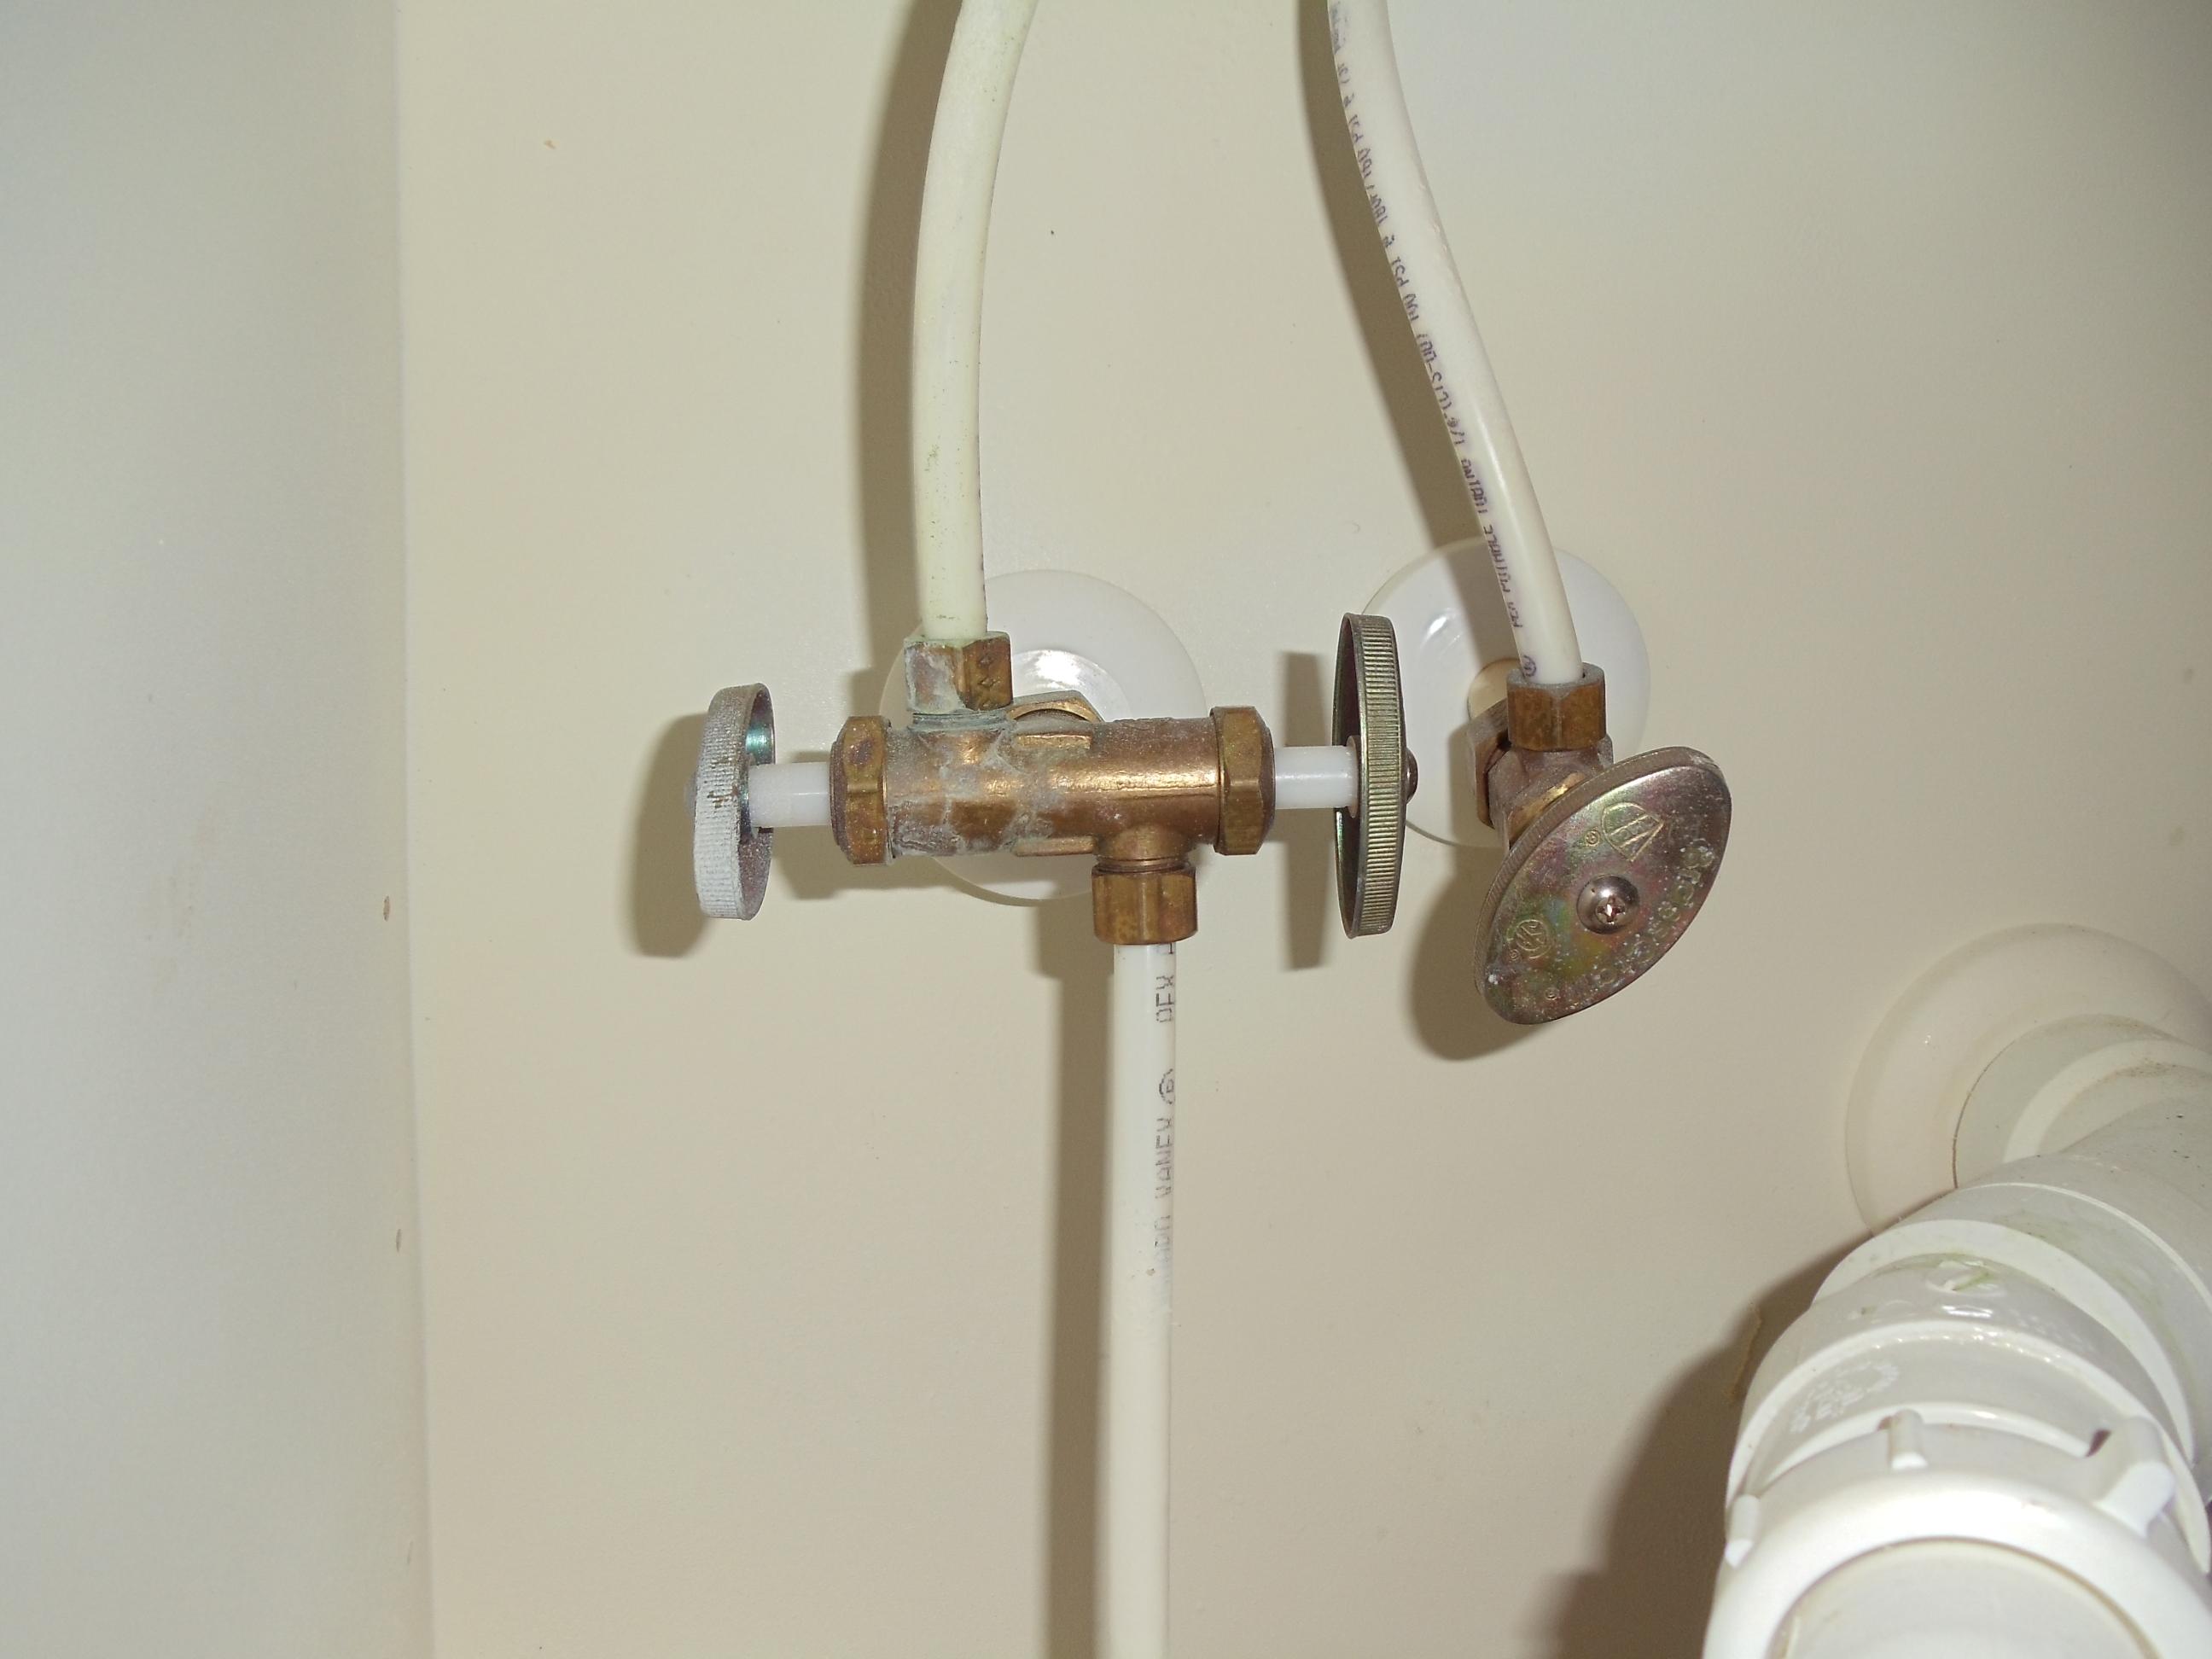
Step 1: Start by locating the water valve under your kitchen sink. It is usually located on the wall or cabinet behind the sink. Use a pipe wrench to loosen the nuts on both ends of the valve. Step 2: Once the nuts are loose, remove the old valve from the pipe. You may need to use adjustable pliers to hold the valve in place while you remove the nuts. Step 3: Clean the threads of the pipe with a wire brush to ensure a tight seal with the new valve. Step 4: Wrap Teflon tape around the threads of the pipe in a clockwise direction. This will help prevent leaks once the new valve is installed. Step 5: Install the new valve onto the pipe, making sure it is secure and tight. You can use adjustable pliers to tighten the nuts if needed. Step 6: Turn the water supply back on and check for any leaks. If there are no leaks, you have successfully replaced the water valve under your kitchen sink.Step-by-Step Guide for Replacing a Water Valve Under a Kitchen Sink


Replacing a Water Valve Under a Kitchen Sink
Replacing a water valve under a kitchen sink is a task that can easily be done by yourself. Not only does it save you money from hiring a professional, but it also gives you the satisfaction of completing a home maintenance task on your own. Just make sure to follow the steps carefully and take all necessary safety precautions.DIY: Replacing a Water Valve Under a Kitchen Sink


Replacing a Kitchen Sink Water Valve

Before starting the process of replacing a water valve under your kitchen sink, make sure you have all the necessary tools and materials. This includes a pipe wrench, adjustable pliers, Teflon tape, and a new water valve. It is also recommended to have a wire brush on hand to clean the threads of the pipe.Tools and Materials Needed for Replacing a Water Valve Under a Kitchen Sink


Step-by-Step Guide for Replacing a Water Valve Under a Kitchen Sink


While replacing a water valve under a kitchen sink is a relatively simple task, there are some common problems that may arise. One of the most common issues is difficulty loosening the nuts on the old valve. In this case, using a lubricant such as WD-40 can help make the process easier. Another common problem is leaks, which can be prevented by properly wrapping Teflon tape around the threads of the pipe.Common Problems When Replacing a Water Valve Under a Kitchen Sink


DIY: Replacing a Water Valve Under a Kitchen Sink


Replacing a water valve under a kitchen sink may seem intimidating, but with these tips, the process can be smooth and easy. Always remember to turn off the water supply before starting, use the right tools for the job, and make sure to check for leaks after installing the new valve. And if you encounter any difficulties, don't hesitate to seek help from a professional plumber.Tips for Replacing a Water Valve Under a Kitchen Sink


Tools and Materials Needed for Replacing a Water Valve Under a Kitchen Sink
If you are not confident in your ability to replace a water valve under a kitchen sink, or if you encounter any major problems during the process, it is best to call a professional plumber. They have the knowledge and experience to handle the job efficiently and effectively, saving you time and hassle. Replacing a water valve under a kitchen sink may seem like a daunting task, but with the right tools and knowledge, it can be a simple and straightforward process. Make sure to follow the steps carefully and take all necessary precautions to successfully replace your kitchen sink water valve. When to Call a Professional for Replacing a Water Valve Under a Kitchen Sink
Common Problems When Replacing a Water Valve Under a Kitchen Sink
How to Replace a Water Valve Under Your Kitchen Sink

Step 1: Gather Your Tools
 Before you begin replacing the water valve under your kitchen sink, it's important to gather all the necessary tools. This will make the process smoother and more efficient. You will need an adjustable wrench, pliers, Teflon tape, a towel, and a new water valve. Make sure to turn off the water supply to your sink before you begin.
Step 2: Remove the Old Valve
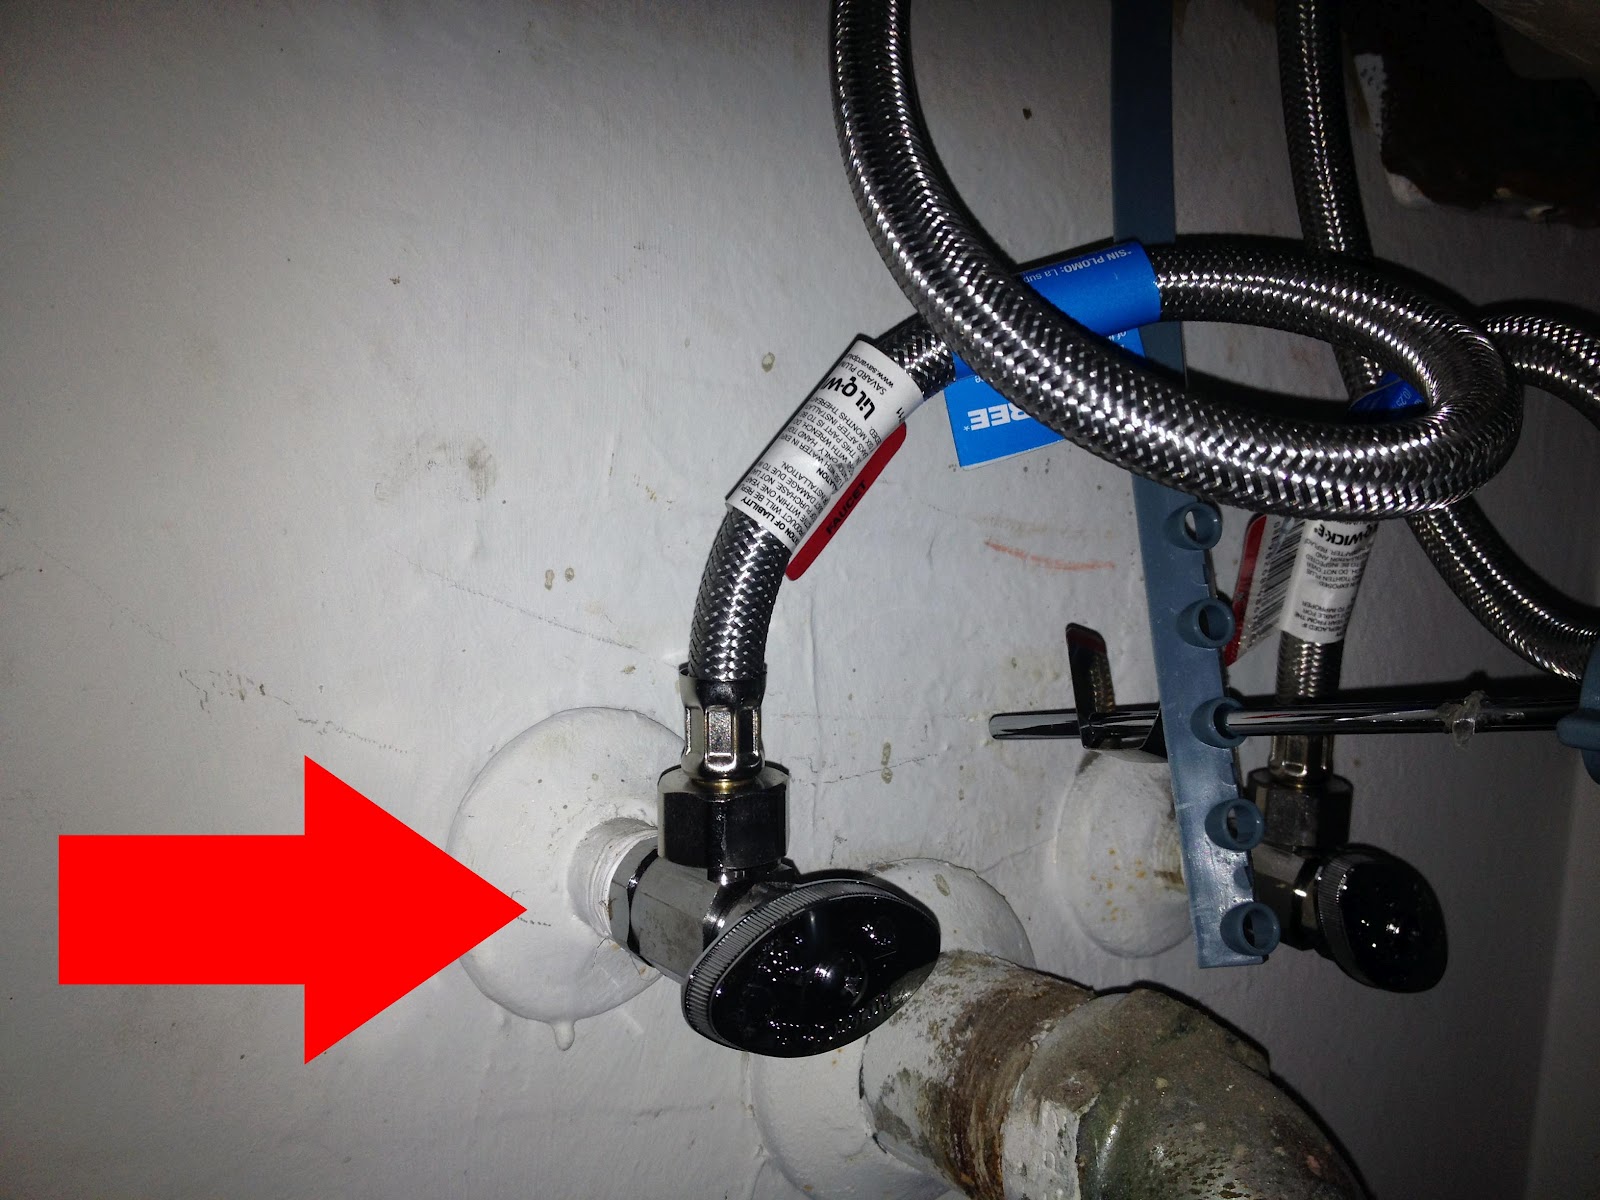
 The first step is to locate the old water valve under your kitchen sink. It is usually located on the wall or behind the sink cabinet. Once you have located it, use your pliers to loosen the compression nut that connects the valve to the water supply line. Then, use your adjustable wrench to unscrew the valve from the pipe.
Step 3: Clean and Prepare the Pipe
:max_bytes(150000):strip_icc()/sink-pipe-under-wash-basin-119001607-75542e154b364e7bb52032249f293908.jpg) After you have removed the old valve, use a towel to clean any debris or residue from the pipe. Next, wrap the threads of the pipe with Teflon tape to create a tight seal. This will prevent any leaks when you install the new valve.
After you have removed the old valve, use a towel to clean any debris or residue from the pipe. Next, wrap the threads of the pipe with Teflon tape to create a tight seal. This will prevent any leaks when you install the new valve.
Step 4: Install the New Valve
 Now it's time to install the new water valve. Place the new valve onto the pipe and hand-tighten it. Then, use your adjustable wrench to tighten the valve until it is securely in place. Make sure not to over-tighten, as this can cause damage to the valve.
Step 5: Connect the Water Supply Line
 Once the new valve is installed, it's time to reconnect the water supply line. Use your pliers to tighten the compression nut onto the valve. Make sure it is snug, but not too tight. Turn on the water supply and check for any leaks. If there are no leaks, you have successfully replaced the water valve under your kitchen sink.
Step 6: Test Your New Valve
 To make sure your new valve is working properly, turn on the water and test it. If there are any leaks or issues, go back and double-check the installation. If everything is working correctly, you can now enjoy your new water valve and a leak-free kitchen sink.
Replacing a water valve under your kitchen sink may seem like a daunting task, but with the right tools and steps, it can be a simple DIY project. Remember to turn off the water supply and take your time during the installation process. With a new, functioning valve, you can prevent future leaks and keep your kitchen sink running smoothly.
To make sure your new valve is working properly, turn on the water and test it. If there are any leaks or issues, go back and double-check the installation. If everything is working correctly, you can now enjoy your new water valve and a leak-free kitchen sink.
Replacing a water valve under your kitchen sink may seem like a daunting task, but with the right tools and steps, it can be a simple DIY project. Remember to turn off the water supply and take your time during the installation process. With a new, functioning valve, you can prevent future leaks and keep your kitchen sink running smoothly.