How to Replace PVC Pipes Under Your Kitchen Sink
Having a functioning kitchen sink is essential for any household. However, over time, the PVC pipes under your kitchen sink may start to wear out and cause leaks or clogs. In such cases, it is necessary to replace the PVC pipes to ensure the smooth functioning of your sink. Here's a step-by-step guide on how to replace PVC pipes under your kitchen sink.


How to Replace PVC Pipes Under Your Kitchen Sink


/how-to-install-a-sink-drain-2718789-hero-24e898006ed94c9593a2a268b57989a3.jpg)

Replacing PVC Pipes Under Your Kitchen Sink: A Step-by-Step Guide
Step 1: Gather the necessary tools and materials.
Before you start replacing the PVC pipes, make sure you have all the required tools and materials. These include a hacksaw, PVC pipe cutter, plumber's tape, PVC primer and cement, new PVC pipes, and fittings.
Step 2: Turn off the water supply.
Before you start working on the pipes, turn off the water supply to your kitchen sink. This will prevent any water from leaking out while you're working on the pipes.
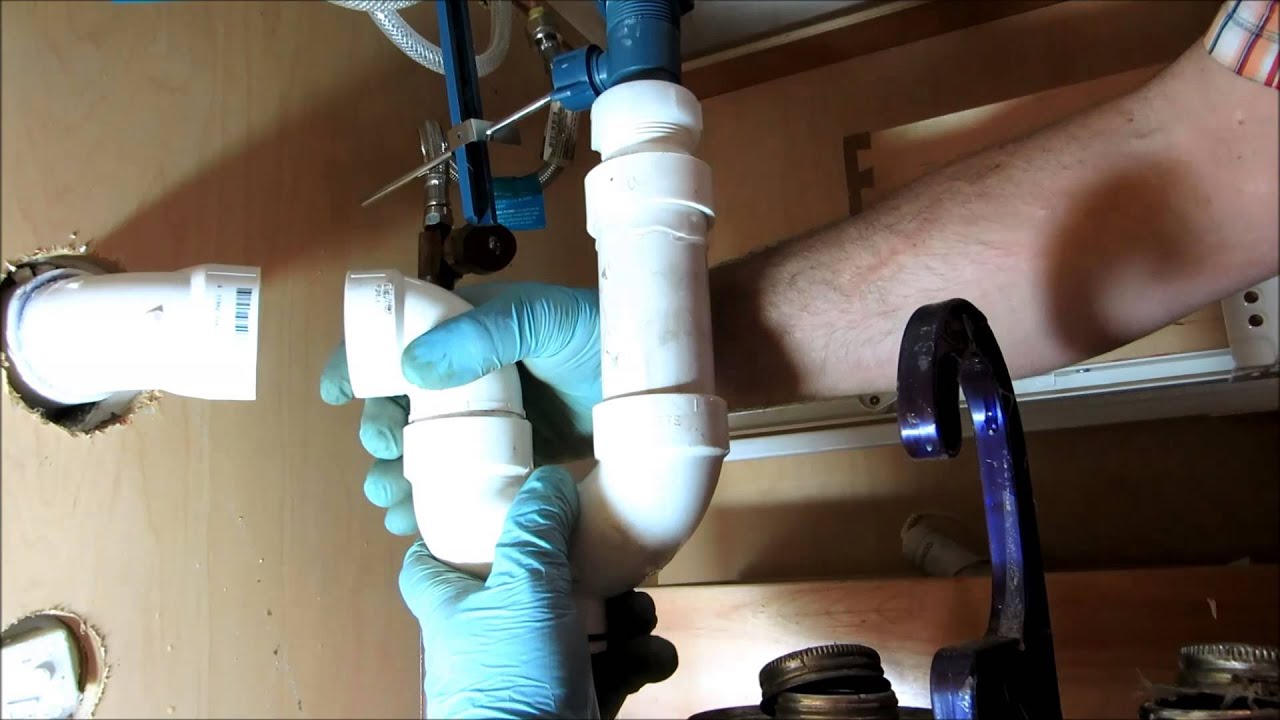
Step 3: Remove the old PVC pipes.
Using a hacksaw or PVC pipe cutter, carefully cut the old PVC pipes that need to be replaced. Make sure to cut the pipes close to the fittings to avoid damaging the surrounding pipes.
Step 4: Clean the fittings.
Once the old pipes are removed, clean the fittings by removing any remaining pieces of PVC pipe or cement. Use a wire brush to clean the inside of the fittings thoroughly.
Step 5: Measure and cut the new PVC pipes.
Using a measuring tape, measure the length of the new pipes required to connect the fittings. Use a hacksaw or PVC pipe cutter to cut the PVC pipes to the correct length.
Step 6: Prime and cement the fittings.
Before connecting the new pipes, make sure to prime and cement the inside of the fittings. This will ensure a strong and leak-proof connection.
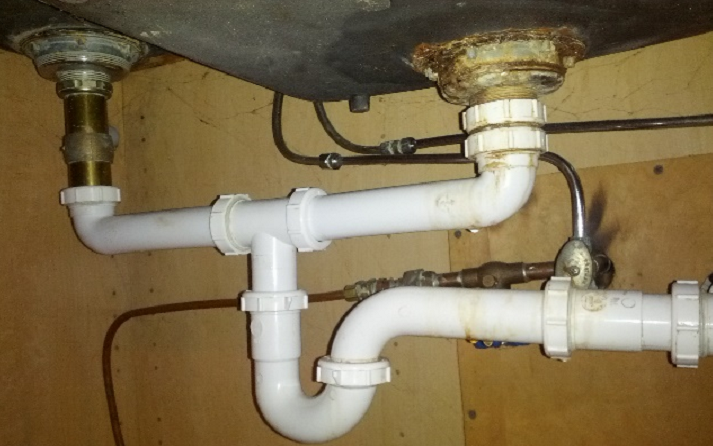
Step 7: Connect the new pipes.
Carefully connect the new pipes to the fittings, making sure they are securely in place. Use plumber's tape to wrap around the connections for added protection against leaks.
Step 8: Turn on the water supply.
Once all the new pipes are connected, turn on the water supply to your kitchen sink and check for any leaks. If there are any, tighten the connections or redo the priming and cementing process.


Replacing PVC Pipes Under Your Kitchen Sink: A Step-by-Step Guide


DIY: Replacing PVC Pipes Under Your Kitchen Sink
Replacing PVC pipes under your kitchen sink can be a DIY project if you have the right tools and materials. However, if you are not confident in your plumbing skills, it is always best to hire a professional plumber to ensure the job is done correctly.


DIY: Replacing PVC Pipes Under Your Kitchen Sink


Replacing PVC Pipes Under Your Kitchen Sink: Tips and Tricks
Here are some tips and tricks to keep in mind while replacing PVC pipes under your kitchen sink:

Replacing PVC Pipes Under Your Kitchen Sink: Tips and Tricks
What You Need to Know Before Replacing PVC Pipes Under Your Kitchen Sink
Before starting the process of replacing PVC pipes under your kitchen sink, here are a few things you should keep in mind:


What You Need to Know Before Replacing PVC Pipes Under Your Kitchen Sink


Replacing PVC Pipes Under Your Kitchen Sink: Common Mistakes to Avoid
While replacing PVC pipes may seem like a simple task, there are a few common mistakes that people make. Here are some of the mistakes you should avoid while replacing PVC pipes under your kitchen sink:

Replacing PVC Pipes Under Your Kitchen Sink: Common Mistakes to Avoid
Tools and Materials Needed for Replacing PVC Pipes Under Your Kitchen Sink
Here's a list of the tools and materials you will need to replace PVC pipes under your kitchen sink:

Tools and Materials Needed for Replacing PVC Pipes Under Your Kitchen Sink


Replacing PVC Pipes Under Your Kitchen Sink: Troubleshooting Common Issues
If you encounter any issues while replacing PVC pipes under your kitchen sink, here are some common problems and how to troubleshoot them:

Replacing PVC Pipes Under Your Kitchen Sink: Troubleshooting Common Issues

Step-by-Step Video Tutorial: Replacing PVC Pipes Under Your Kitchen Sink
If you prefer visual instructions, there are plenty of step-by-step video tutorials available online that can guide you through the process of replacing PVC pipes under your kitchen sink.


Step-by-Step Video Tutorial: Replacing PVC Pipes Under Your Kitchen Sink

Replacing PVC Pipes Under Your Kitchen Sink: Professional vs. DIY
While it is possible to replace PVC pipes under your kitchen sink as a DIY project, it is always best to hire a professional plumber. A professional will have the necessary skills and experience to ensure the job is done correctly and efficiently.
Replacing PVC pipes under your kitchen sink may seem like a daunting task, but with the right tools and knowledge, it can be a straightforward process. By following this step-by-step guide, you can successfully replace PVC pipes under your kitchen sink and ensure a smoothly functioning sink for years to come.

Replacing PVC Pipes Under Your Kitchen Sink: Professional vs. DIY
Why it is Important to Replace PVC Pipes Under Your Kitchen Sink
The Dangers of Old and Damaged PVC Pipes
 When it comes to the plumbing in your home, it is important to regularly check and maintain the pipes to prevent any potential issues. The same goes for the PVC pipes under your kitchen sink. These pipes are responsible for carrying water and waste away from your sink and can become damaged over time due to wear and tear, leading to potential leaks and water damage. In addition, old and damaged PVC pipes can also pose health risks as they can become breeding grounds for bacteria and mold. This is why it is crucial to replace old and damaged PVC pipes under your kitchen sink.
Benefits of Replacing PVC Pipes
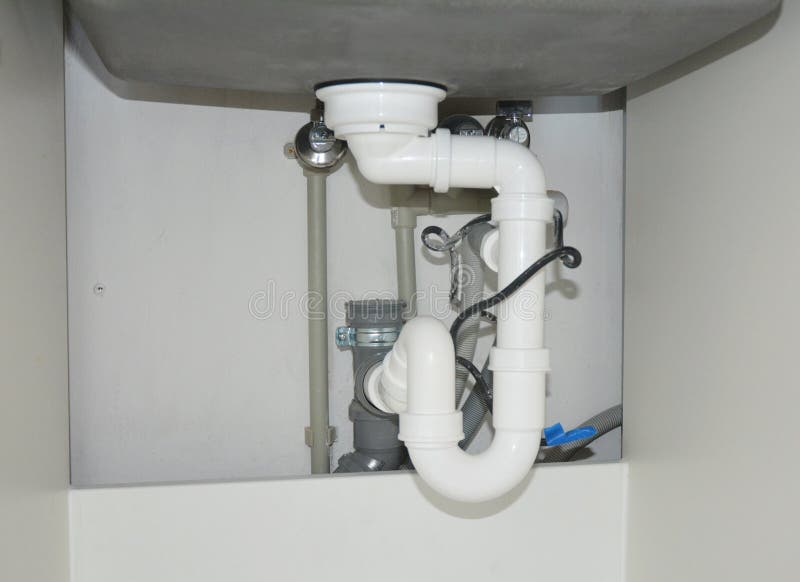
 Replacing PVC pipes under your kitchen sink not only ensures the safety and health of your household, but it also has other benefits. New PVC pipes are more durable and have a longer lifespan, reducing the need for frequent replacements. They also have smoother interiors, which allows for better water flow and reduces the risk of clogs and blockages. In addition, replacing old PVC pipes can also improve the overall aesthetics of your kitchen, giving it a more modern and updated look.
Professional Replacement Process
 Replacing PVC pipes under your kitchen sink may seem like a daunting task, but it is best left to the professionals. A licensed plumber has the necessary skills and experience to properly replace the pipes and ensure they are installed correctly. They will also be able to identify any potential issues and address them before they become major problems. Professional replacement also guarantees that the new pipes are up to code and comply with all safety regulations, giving you peace of mind.
Conclusion
 In conclusion, it is crucial to regularly check and replace PVC pipes under your kitchen sink to ensure the safety and health of your household. Hiring a professional plumber for this task is the best way to ensure it is done correctly and to prevent any potential issues in the future. So if you notice any signs of damage or wear and tear on your PVC pipes, do not hesitate to schedule a replacement. It is a small investment that can save you from costly repairs and potential health hazards in the long run.