If you've noticed a leaky bathroom sink or your sink is not draining properly, it may be time to replace the flange. The flange is the part of the sink that connects the sink to the drain pipe and helps to keep it securely in place. Over time, the flange can become worn or damaged, causing issues with your sink's functionality. In this guide, we will walk you through the steps of replacing a bathroom sink flange to help you fix the problem quickly and easily.How to Replace a Bathroom Sink Flange

How to Replace a Bathroom Sink Flange


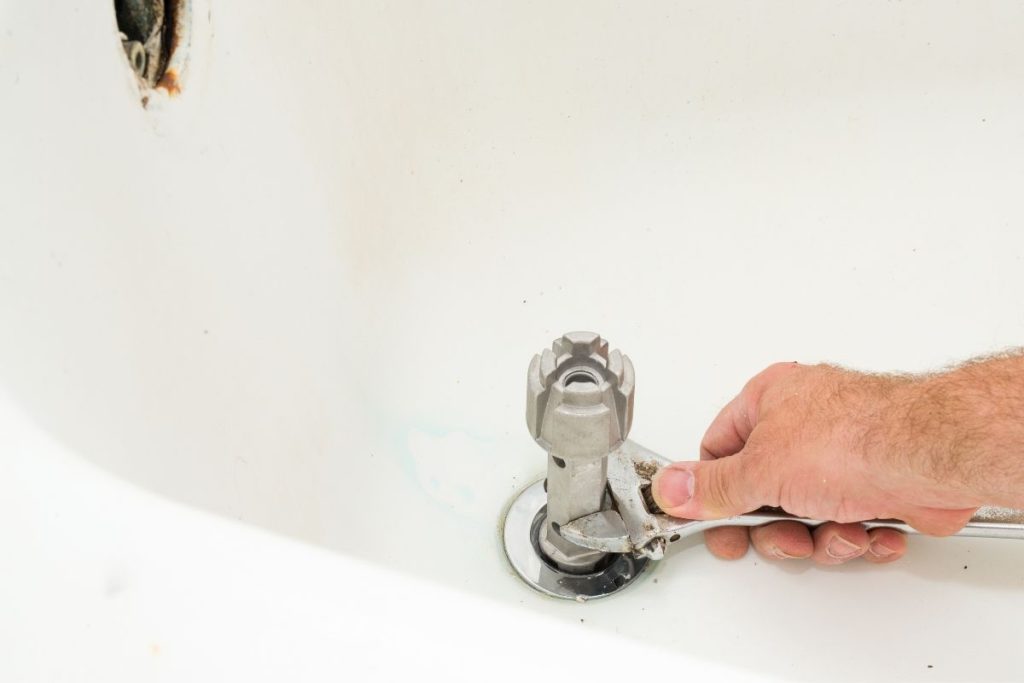


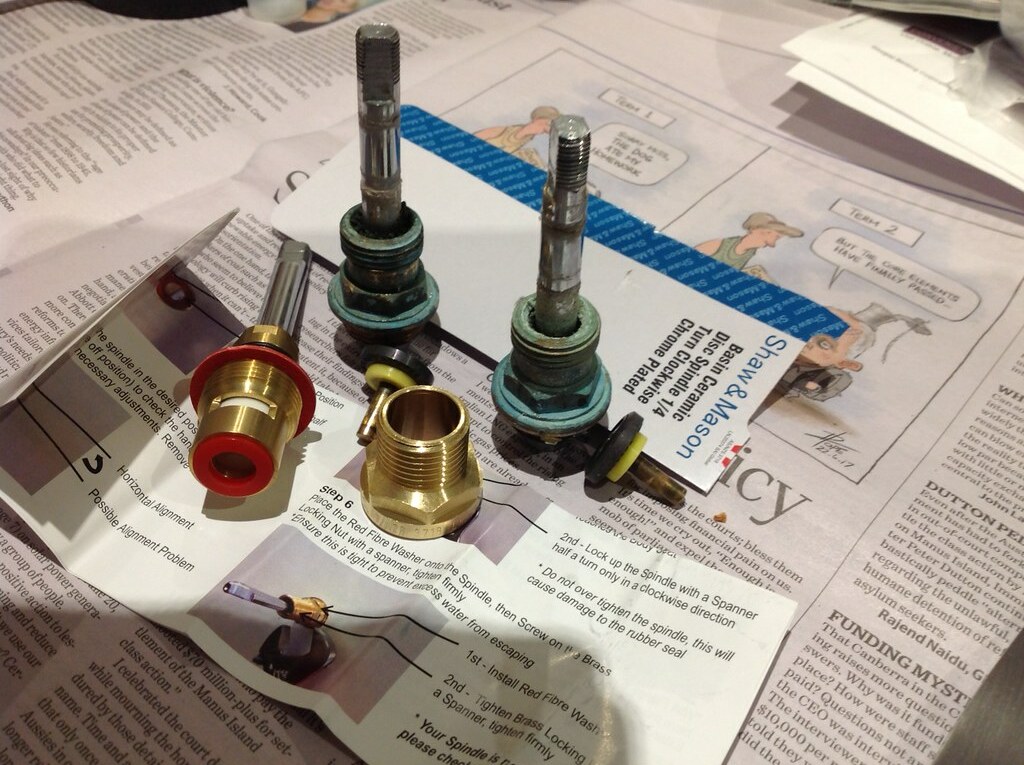
Before you begin the replacement process, it's important to gather all the necessary tools and materials. You will need a sink flange wrench, a putty knife, plumber's putty, a new sink flange, and a new drain assembly. Once you have these items, follow these steps: Step 1: Start by turning off the water supply to your sink. This can usually be done by turning off the shut-off valves under the sink. Step 2: Next, use the sink flange wrench to loosen and remove the old flange. You may need to use some force to loosen it, but be careful not to damage the sink or the pipes. Step 3: Once the old flange is removed, use a putty knife to scrape off any remaining plumber's putty or debris from the sink's surface. This will help ensure a clean and secure fit for the new flange. Step 4: Apply a thin layer of plumber's putty to the underside of the new flange. This will help create a watertight seal between the flange and the sink. Step 5: Carefully place the new flange into the sink's drain hole and press down to ensure a tight seal. Note: Make sure the flange is properly aligned with the drain pipe before pressing down. Step 6: Once the flange is in place, use the sink flange wrench to tighten it securely. Step 7: Install the new drain assembly by following the manufacturer's instructions. This may involve attaching a rubber gasket and tightening the drain nut. Step 8: Turn the water supply back on and test the sink to ensure it is draining properly. If there are no leaks or issues, you have successfully replaced your bathroom sink flange!Replacing a Bathroom Sink Flange: Step-by-Step Guide


Replacing a Bathroom Sink Flange: Step-by-Step Guide


If you're a handy person who loves taking on DIY projects, replacing a bathroom sink flange is a task you can easily tackle. With the right tools and materials, you can save yourself the cost of hiring a professional plumber and have the satisfaction of fixing the problem yourself.DIY: Replacing a Bathroom Sink Flange


DIY: Replacing a Bathroom Sink Flange


To successfully replace a bathroom sink flange, you will need the following tools and materials: - Sink flange wrench - Putty knife - Plumber's putty - New sink flange - New drain assemblyReplacing a Bathroom Sink Flange: Tools and Materials Needed


Replacing a Bathroom Sink Flange: Tools and Materials Needed


If you're short on time or just want a simplified guide to replacing a bathroom sink flange, here are the basic steps: Step 1: Turn off the water supply to the sink. Step 2: Remove the old flange using a sink flange wrench. Step 3: Clean the sink's surface and apply plumber's putty to the new flange. Step 4: Install the new flange, aligning it with the drain pipe. Step 5: Tighten the flange using the sink flange wrench. Step 6: Install the new drain assembly. Step 7: Turn the water supply back on and test the sink.Quick and Easy Guide to Replacing a Bathroom Sink Flange


Quick and Easy Guide to Replacing a Bathroom Sink Flange


While replacing a bathroom sink flange may seem like a straightforward task, there are some common mistakes that can lead to issues down the road. Here are a few things to avoid: Not turning off the water supply: Before beginning any plumbing work, always make sure to turn off the water supply to avoid any accidents or flooding. Not using plumber's putty: Plumber's putty helps create a watertight seal between the flange and the sink, so make sure to use it to prevent leaks. Not properly aligning the flange: If the flange is not properly aligned with the drain pipe, it can lead to leaks and other issues.Replacing a Bathroom Sink Flange: Common Mistakes to Avoid

Replacing a Bathroom Sink Flange: Common Mistakes to Avoid


If you prefer a more detailed guide with visuals, you can find many step-by-step tutorials online that will walk you through the process of replacing a bathroom sink flange. Just make sure to follow the instructions carefully and use the right tools and materials.Step-by-Step Tutorial for Replacing a Bathroom Sink Flange


Step-by-Step Tutorial for Replacing a Bathroom Sink Flange
Here are a few tips and tricks to keep in mind when replacing a bathroom sink flange: - Before removing the old flange, take a picture of it to use as a reference when installing the new one. - If you're having trouble loosening the old flange, try using a hairdryer to warm it up and make it easier to remove. - If your sink has a garbage disposal, make sure to disconnect it before beginning the replacement process.Replacing a Bathroom Sink Flange: Tips and Tricks


Replacing a Bathroom Sink Flange: Tips and Tricks
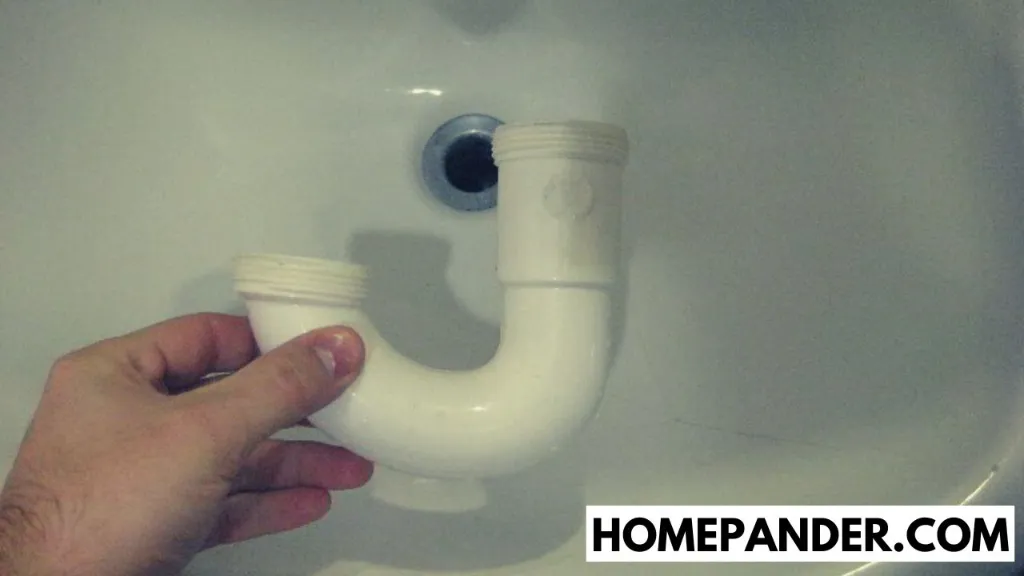
Even with careful installation, you may encounter some issues after replacing a bathroom sink flange. Here are some common problems and how to troubleshoot them: Leaking: If your sink is still leaking after replacing the flange, check to make sure the flange is aligned properly and tightened securely. You may also need to replace the rubber gasket or add more plumber's putty. Sink not draining: If your sink is not draining properly, there may be a blockage in the drain pipes. Try using a plunger or a drain snake to clear the blockage.Replacing a Bathroom Sink Flange: Troubleshooting Common Issues


Replacing a Bathroom Sink Flange: Troubleshooting Common Issues


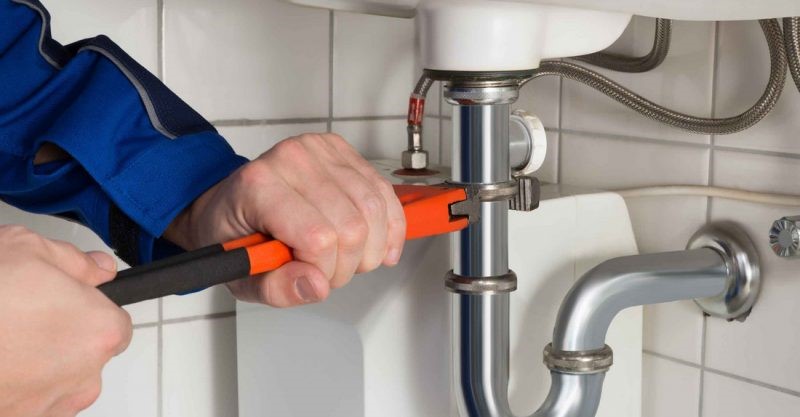
If you're still unsure about replacing a bathroom sink flange or encounter any difficulties during the process, it's always best to consult a professional plumber. They can provide expert advice and ensure the job is done correctly. With these tips and tricks, you can confidently tackle the task of replacing a bathroom sink flange and have your sink functioning properly again in no time. Remember to take your time and follow the steps carefully to avoid any mistakes. Happy DIY-ing!Expert Advice on Replacing a Bathroom Sink Flange

Expert Advice on Replacing a Bathroom Sink Flange
Why Replacing Your Bathroom Sink Flange is Essential for a Well-Designed Home

The Importance of a Flawless Bathroom Design
 The bathroom is one of the most used and necessary rooms in any home. It is a place where we start and end our day, where we relax and unwind, and where we take care of our personal hygiene. Therefore, it is essential to have a well-designed and functional bathroom to ensure a comfortable and enjoyable experience. From the tiles and fixtures to the sink and toilet, every element plays a crucial role in creating a well-designed bathroom. And one of the often overlooked but essential components of a bathroom is the sink flange.
Sink Flange:
The Unsung Hero of Your Bathroom
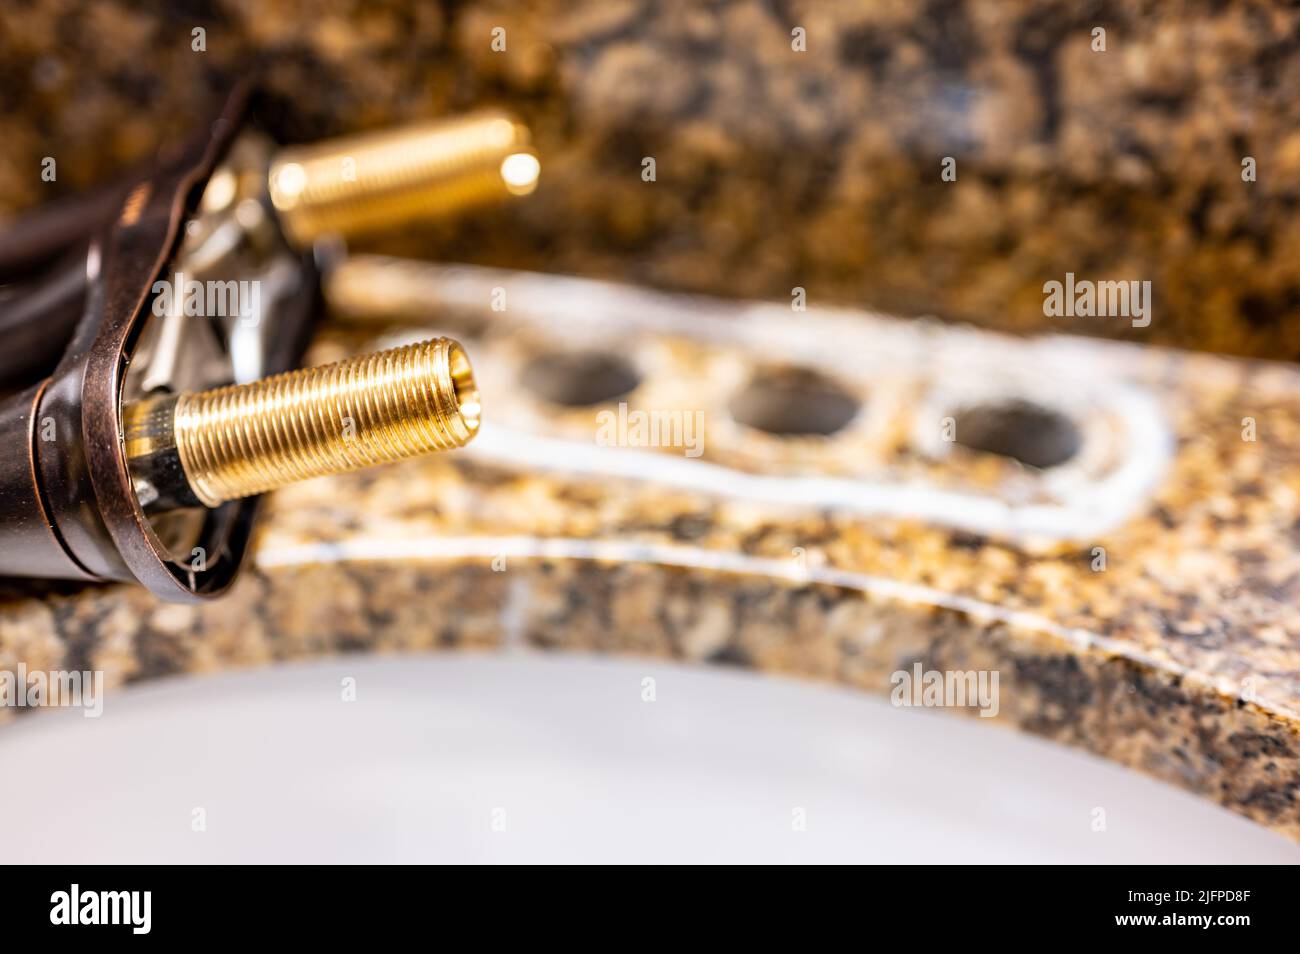
The sink flange is a small but essential part of your bathroom sink. It is the round, flat piece of metal or plastic that sits between the sink basin and the drain. Its main purpose is to create a seal and prevent water from leaking into the cabinet below.
But it also plays a significant role in the overall design and functionality of your bathroom sink.
A damaged or outdated sink flange can not only cause leaks but also affect the aesthetic appeal and ease of use of your sink.
The bathroom is one of the most used and necessary rooms in any home. It is a place where we start and end our day, where we relax and unwind, and where we take care of our personal hygiene. Therefore, it is essential to have a well-designed and functional bathroom to ensure a comfortable and enjoyable experience. From the tiles and fixtures to the sink and toilet, every element plays a crucial role in creating a well-designed bathroom. And one of the often overlooked but essential components of a bathroom is the sink flange.
Sink Flange:
The Unsung Hero of Your Bathroom
The sink flange is a small but essential part of your bathroom sink. It is the round, flat piece of metal or plastic that sits between the sink basin and the drain. Its main purpose is to create a seal and prevent water from leaking into the cabinet below.
But it also plays a significant role in the overall design and functionality of your bathroom sink.
A damaged or outdated sink flange can not only cause leaks but also affect the aesthetic appeal and ease of use of your sink.
Signs You Need to Replace Your Sink Flange
 Leaking:
One of the most common signs that your sink flange needs to be replaced is water leakage. If you notice water pooling around the base of your sink or dripping from the cabinet below, it is a clear indication that your sink flange is damaged and needs to be replaced.
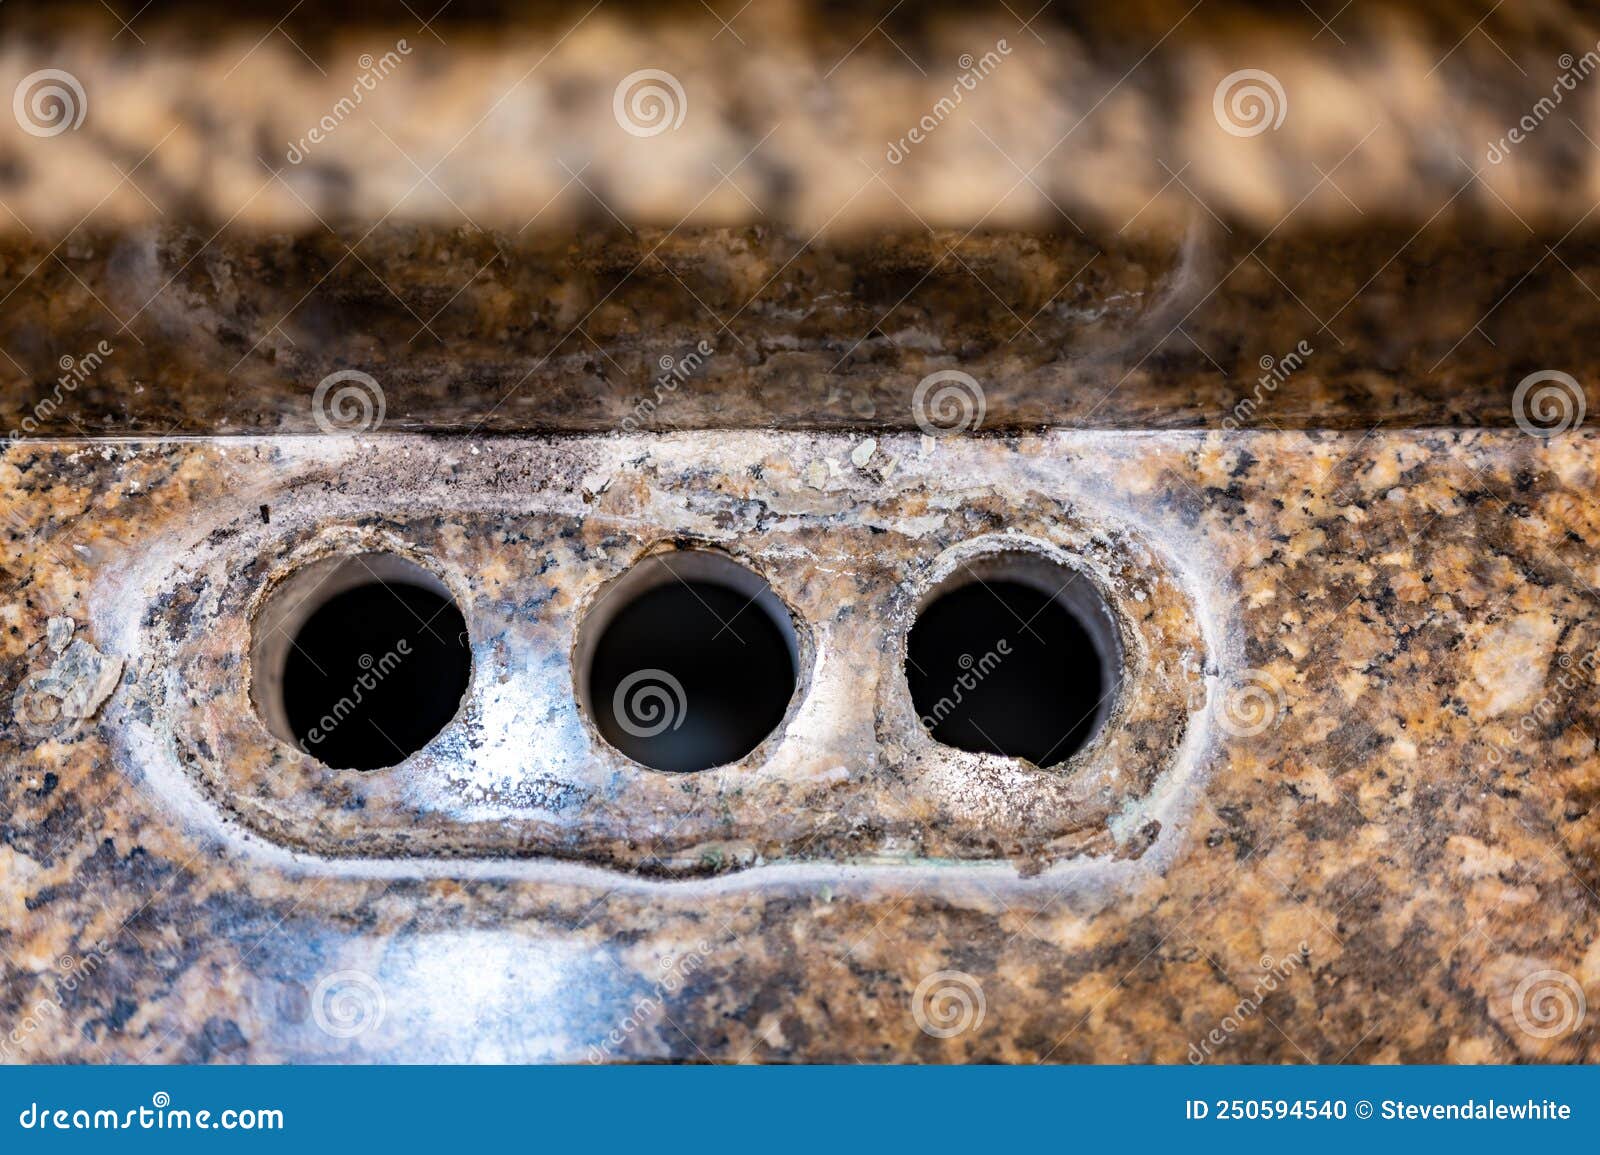
Rust or Corrosion:
If your sink flange is made of metal, it is susceptible to rust and corrosion over time. This not only affects the appearance of your sink but also weakens the seal and can lead to leaks.
Difficulty Draining:
A damaged or clogged sink flange can cause water to drain slowly or not at all. This can be frustrating and can also lead to other plumbing issues if not addressed promptly.
Leaking:
One of the most common signs that your sink flange needs to be replaced is water leakage. If you notice water pooling around the base of your sink or dripping from the cabinet below, it is a clear indication that your sink flange is damaged and needs to be replaced.
Rust or Corrosion:
If your sink flange is made of metal, it is susceptible to rust and corrosion over time. This not only affects the appearance of your sink but also weakens the seal and can lead to leaks.
Difficulty Draining:
A damaged or clogged sink flange can cause water to drain slowly or not at all. This can be frustrating and can also lead to other plumbing issues if not addressed promptly.
The Benefits of Replacing Your Sink Flange
 Prevents Leaks:
The primary function of a sink flange is to create a seal and prevent water from leaking into the cabinet below. By replacing your damaged or outdated flange, you can ensure a leak-free sink for years to come.
Improves Aesthetic Appeal:
Replacing your sink flange can also give your bathroom sink a fresh, updated look. With a variety of materials and styles available, you can choose a flange that complements your overall bathroom design.
Ensures Proper Drainage:
A new sink flange can help improve the drainage of your sink, making it easier and more efficient to use. This can also prevent any potential clogs or backups in your plumbing system.
Prevents Leaks:
The primary function of a sink flange is to create a seal and prevent water from leaking into the cabinet below. By replacing your damaged or outdated flange, you can ensure a leak-free sink for years to come.
Improves Aesthetic Appeal:
Replacing your sink flange can also give your bathroom sink a fresh, updated look. With a variety of materials and styles available, you can choose a flange that complements your overall bathroom design.
Ensures Proper Drainage:
A new sink flange can help improve the drainage of your sink, making it easier and more efficient to use. This can also prevent any potential clogs or backups in your plumbing system.
Conclusion
 Don't overlook the importance of your sink flange when designing or updating your bathroom.
It not only serves a functional purpose but also contributes to the overall aesthetic appeal and functionality of your sink. If you notice any signs of damage or wear, consider replacing your sink flange to ensure a well-designed and fully functional bathroom. Trust us, you'll thank yourself in the long run.
Don't overlook the importance of your sink flange when designing or updating your bathroom.
It not only serves a functional purpose but also contributes to the overall aesthetic appeal and functionality of your sink. If you notice any signs of damage or wear, consider replacing your sink flange to ensure a well-designed and fully functional bathroom. Trust us, you'll thank yourself in the long run.
/https://assets-pergikuliner.com/uploads/image/picture/1623644/picture-1570435591.jpg)