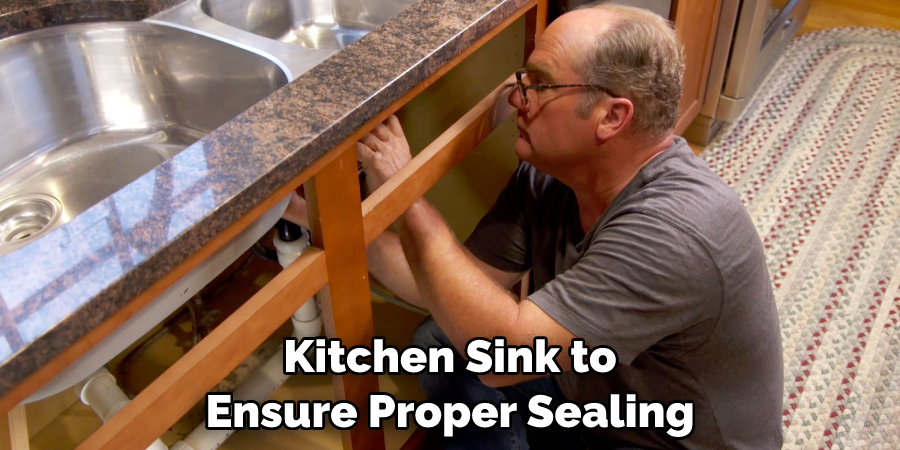
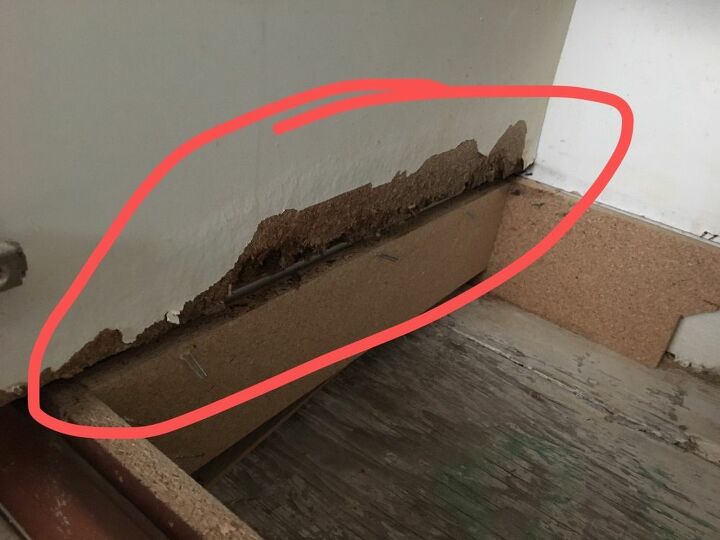
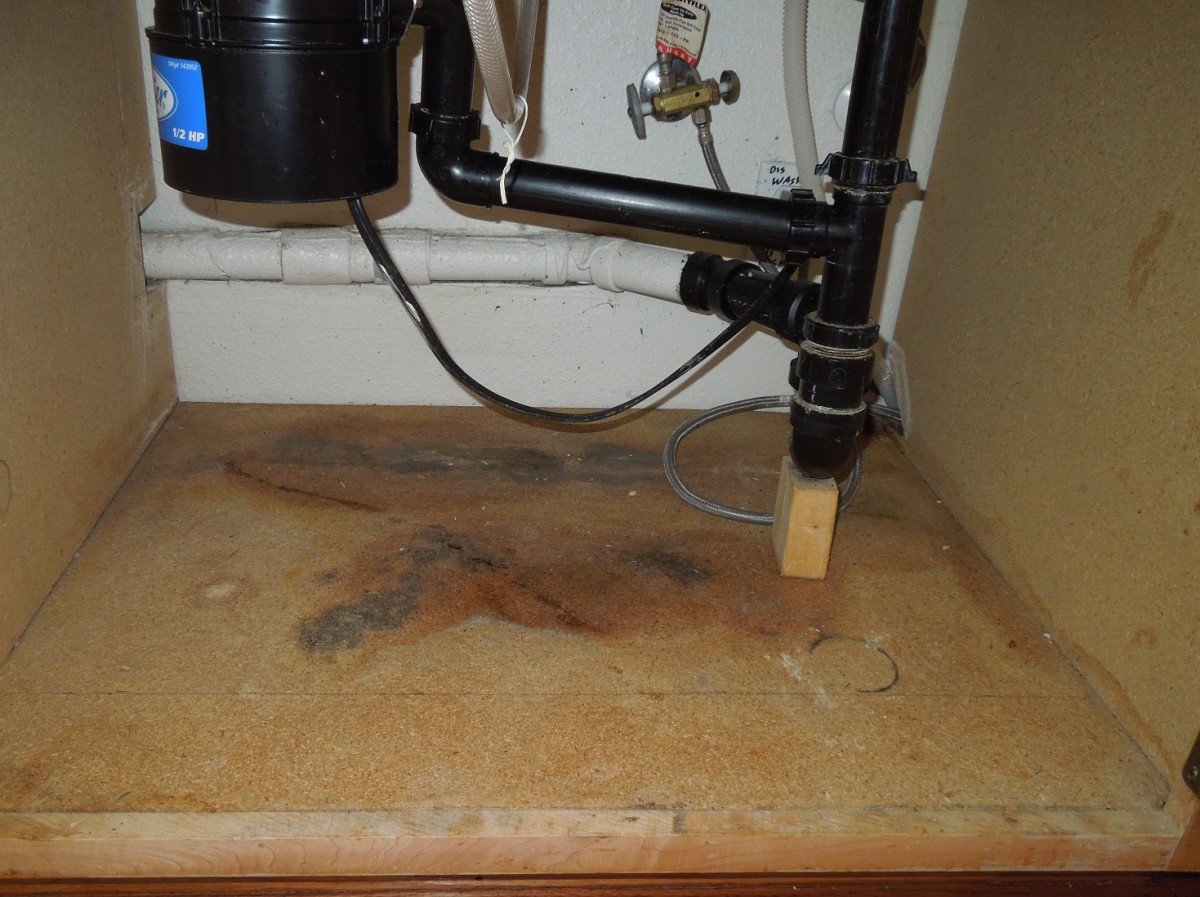
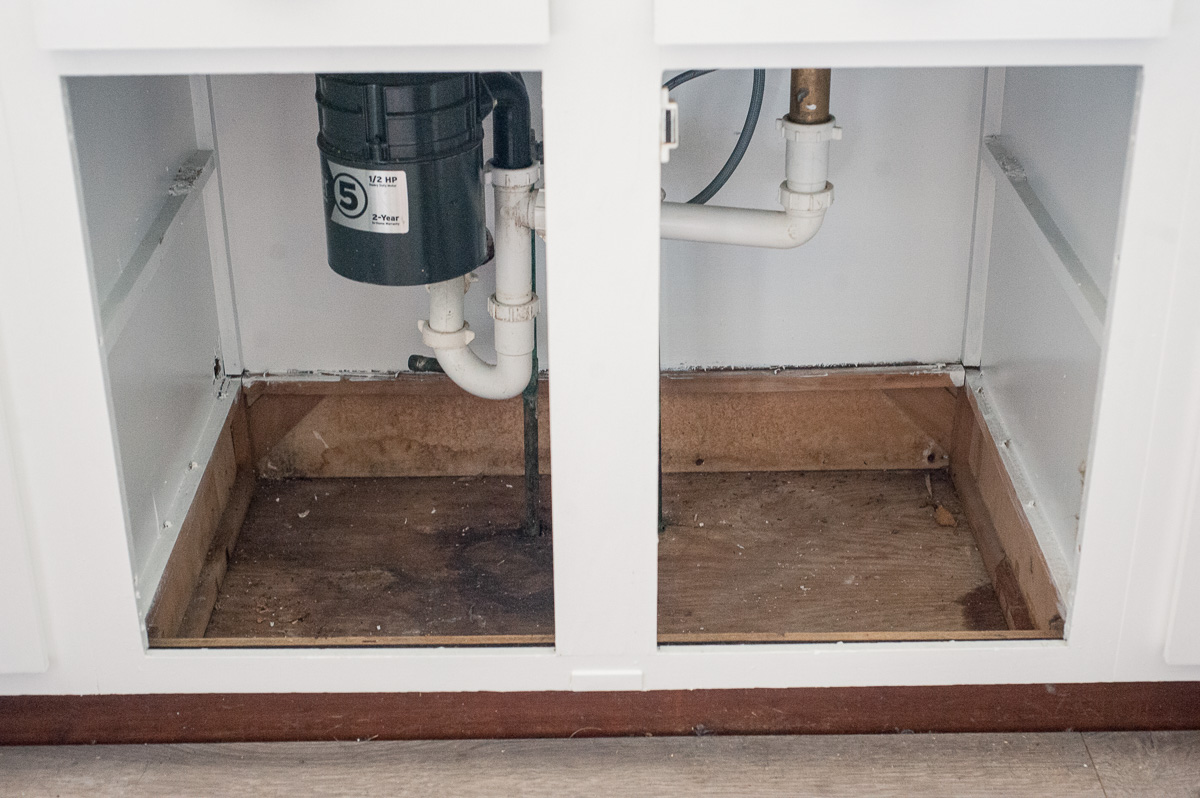
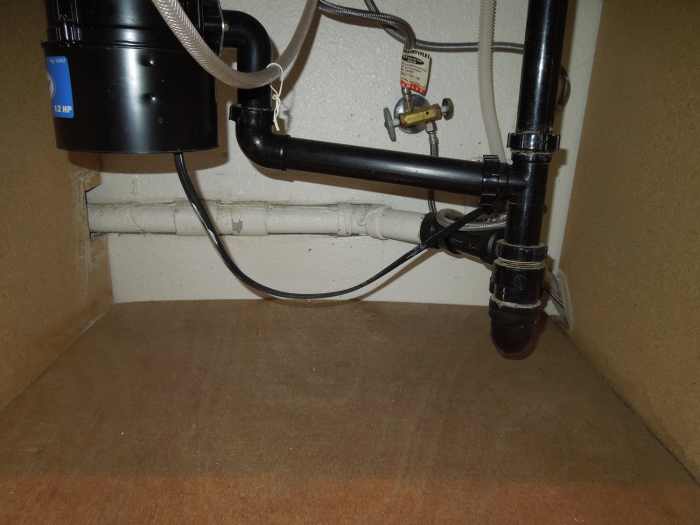
If you've noticed wet wood under your kitchen sink, it's important to take action immediately. Ignoring the issue can lead to further damage and potentially even mold growth. But don't worry, repairing wet wood under a kitchen sink doesn't have to be a daunting task. With the right tools and techniques, you can fix the problem and prevent it from happening again in the future.How to Repair Wet Wood Under a Kitchen Sink


How to Repair Wet Wood Under a Kitchen Sink
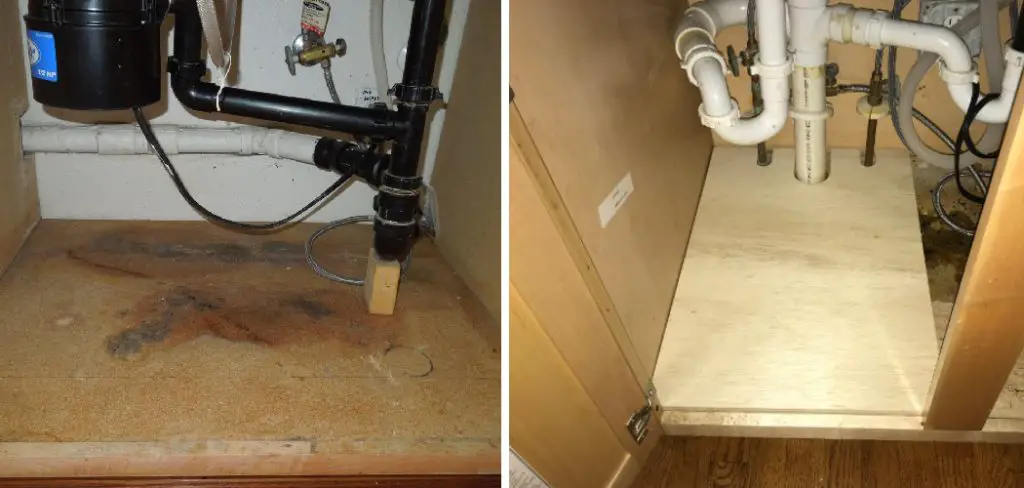
The first step in fixing wet wood under a kitchen sink is to identify the source of the water. This could be a leaky pipe, a malfunctioning garbage disposal, or even a spill that wasn't properly cleaned up. Once you've determined the cause, the repair process can begin.How to Fix Wet Wood Under a Kitchen Sink


How to Fix Wet Wood Under a Kitchen Sink


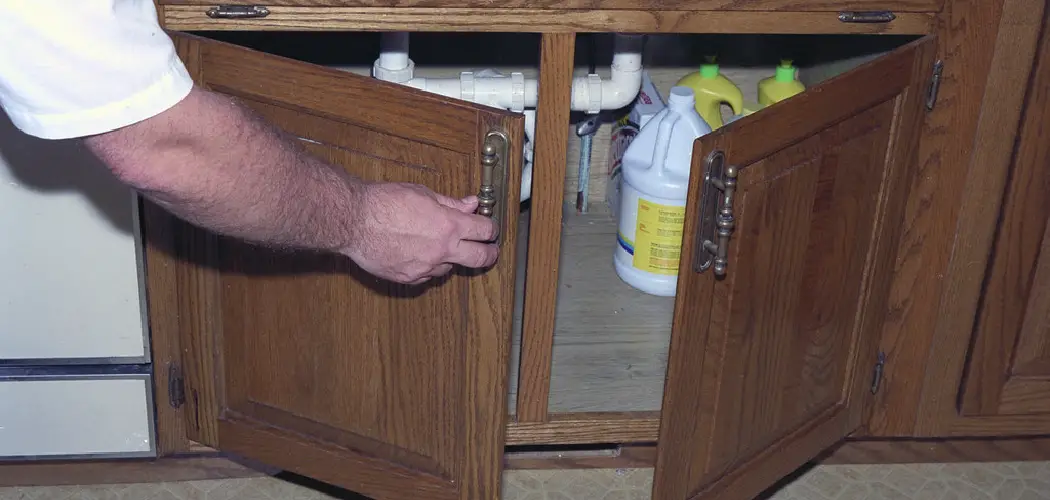
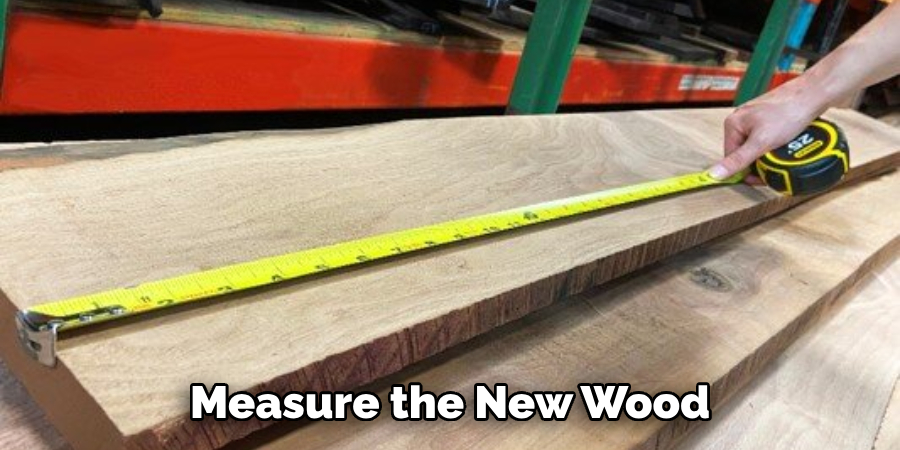
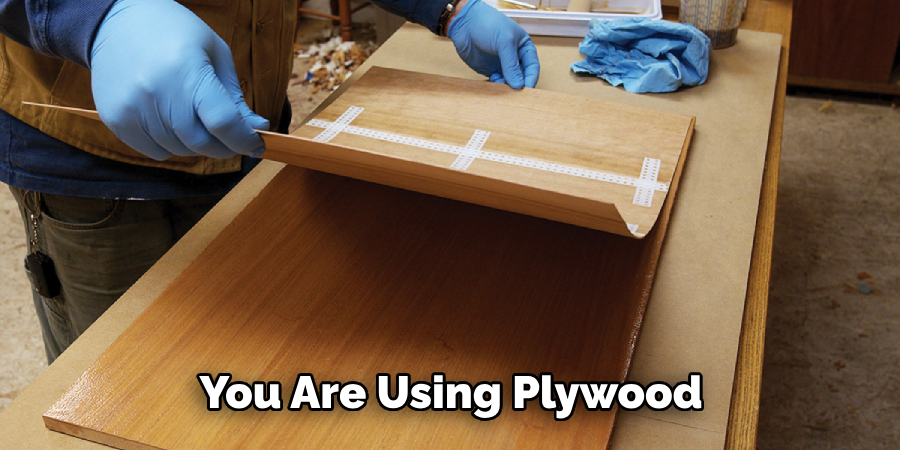
Step 1: Remove any items stored under the sink to give yourself room to work. You may also want to place a towel or tarp on the floor to protect it from any water or debris. Step 2: Use a towel or mop to soak up any standing water under the sink. Step 3: Inspect the wood for signs of damage or rot. If the wood is soft or discolored, it will need to be replaced. Step 4: If the wood is still in good condition, use a fan or dehumidifier to dry it out completely. Step 5: If the wood is damaged, use a saw to cut out the affected area. Be sure to wear protective gear and follow all safety precautions. Step 6: Replace the damaged wood with a new piece, making sure it fits snugly into place. Step 7: Use wood glue and clamps to secure the new piece in place. Let it dry completely before moving on to the next step. Step 8: Sand down any rough edges and apply a coat of primer to the new wood. Step 9: Once the primer is dry, paint or stain the wood to match the rest of the cabinet. Step 10: Finally, check for any remaining leaks and make sure the area is completely dry before replacing any stored items.Steps for Repairing Wet Wood Under a Kitchen Sink


Steps for Repairing Wet Wood Under a Kitchen Sink

If you're a handy person, you may feel comfortable tackling this repair on your own. However, keep in mind that working with wood and plumbing can be tricky, and if you're not confident in your abilities, it's best to hire a professional. But if you do decide to go the DIY route, be sure to follow all safety precautions and take your time to ensure the repair is done correctly.DIY Guide for Repairing Wet Wood Under a Kitchen Sink


DIY Guide for Repairing Wet Wood Under a Kitchen Sink


Here are a few tips to keep in mind when repairing wet wood under a kitchen sink:Tips for Repairing Wet Wood Under a Kitchen Sink


Tips for Repairing Wet Wood Under a Kitchen Sink
There are many potential causes of wet wood under a kitchen sink, including:Common Causes of Wet Wood Under a Kitchen Sink
Common Causes of Wet Wood Under a Kitchen Sink


If you're planning to tackle this repair on your own, here are some of the materials you'll need:Materials Needed to Repair Wet Wood Under a Kitchen Sink


Materials Needed to Repair Wet Wood Under a Kitchen Sink
If you're not comfortable with DIY repairs or don't have the necessary tools and materials, it's best to hire a professional. A plumber or handyman can quickly and safely fix the issue, saving you time and potential frustration. They may also be able to identify and fix any underlying issues that caused the wet wood in the first place.Professional Services for Repairing Wet Wood Under a Kitchen Sink
Professional Services for Repairing Wet Wood Under a Kitchen Sink

The best way to prevent wet wood under a kitchen sink is to address any leaks or spills immediately. Regularly inspecting your pipes and appliances can also help catch any potential issues before they become major problems.Preventing Wet Wood Under a Kitchen Sink
Preventing Wet Wood Under a Kitchen Sink

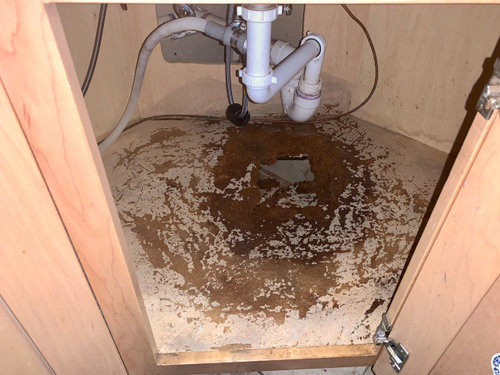
In addition to visibly wet or discolored wood, there are a few other signs that may indicate water damage under a kitchen sink:Signs of Water Damage Under a Kitchen Sink


Signs of Water Damage Under a Kitchen Sink
Why Repairing Wet Wood Under the Kitchen Sink is Important for Your Home
The Dangers of Having Wet Wood Under Your Kitchen Sink
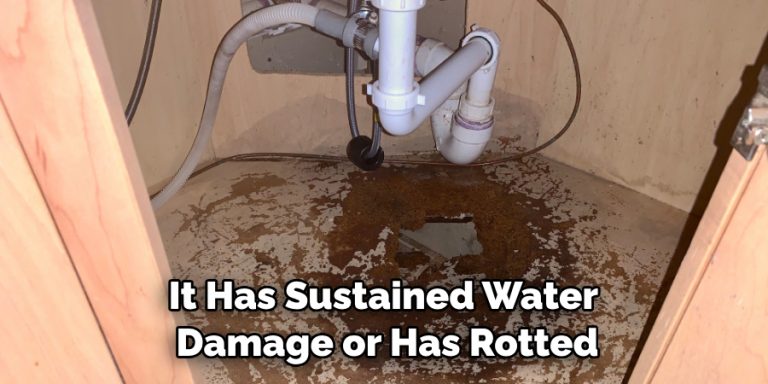
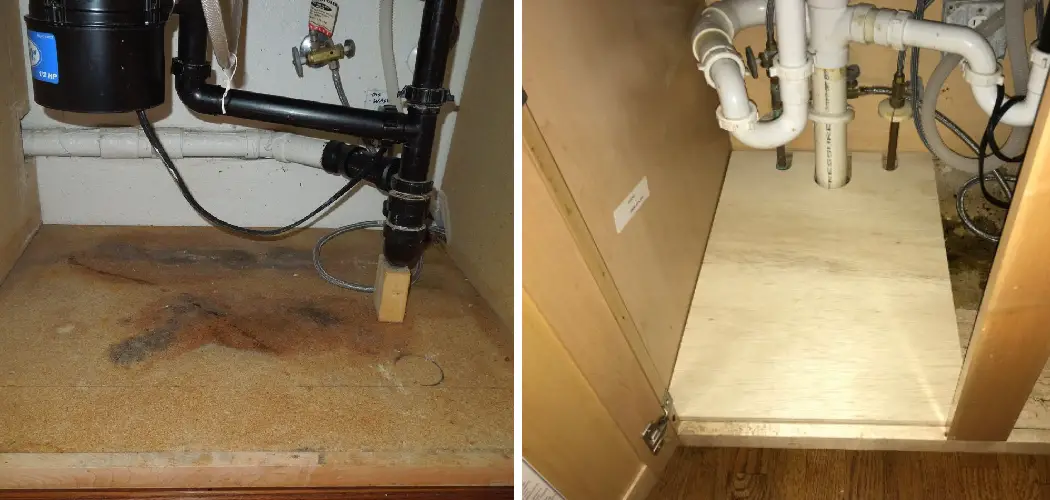
 Having a well-functioning kitchen sink is essential for any household. However, if you notice that there is water leaking and causing damage to the wood under your kitchen sink, it is important to address this issue immediately. Ignoring this problem can lead to more serious and expensive repairs in the future. Wet wood under the kitchen sink can also pose potential health hazards for you and your family.
One of the main dangers of having wet wood under your kitchen sink is the risk of mold growth. When water seeps into the wood, it creates a damp environment that is perfect for mold to thrive. Mold not only causes an unpleasant musty odor, but it can also lead to respiratory issues and allergic reactions. This is especially concerning in a space where you prepare and store food.
Additionally, wet wood can weaken the structural integrity of your kitchen sink area. Over time, the wood may start to rot and become soft. This can cause the sink to become unstable and potentially collapse, leading to more extensive and costly repairs.
Having a well-functioning kitchen sink is essential for any household. However, if you notice that there is water leaking and causing damage to the wood under your kitchen sink, it is important to address this issue immediately. Ignoring this problem can lead to more serious and expensive repairs in the future. Wet wood under the kitchen sink can also pose potential health hazards for you and your family.
One of the main dangers of having wet wood under your kitchen sink is the risk of mold growth. When water seeps into the wood, it creates a damp environment that is perfect for mold to thrive. Mold not only causes an unpleasant musty odor, but it can also lead to respiratory issues and allergic reactions. This is especially concerning in a space where you prepare and store food.
Additionally, wet wood can weaken the structural integrity of your kitchen sink area. Over time, the wood may start to rot and become soft. This can cause the sink to become unstable and potentially collapse, leading to more extensive and costly repairs.
The Importance of Repairing Wet Wood Under the Kitchen Sink
 Now that we understand the potential dangers of having wet wood under the kitchen sink, it is crucial to address the issue as soon as possible. Repairing wet wood not only prevents further damage to your sink area, but it also ensures the safety and well-being of your household.
Featured Keywords:
repair wet wood, kitchen sink, important, home, dangers, mold growth, structural integrity, repairs, safety, well-being.
Now that we understand the potential dangers of having wet wood under the kitchen sink, it is crucial to address the issue as soon as possible. Repairing wet wood not only prevents further damage to your sink area, but it also ensures the safety and well-being of your household.
Featured Keywords:
repair wet wood, kitchen sink, important, home, dangers, mold growth, structural integrity, repairs, safety, well-being.
How to Repair Wet Wood Under the Kitchen Sink
 First, start by identifying the source of the water leak. This could be a faulty pipe or a loose connection. Once the leak has been fixed, you can begin the process of drying out the wet wood. Use a dehumidifier or fans to help speed up the drying process. If the wood is severely damaged, it may need to be replaced.
Once the wood is completely dry, you can reinforce it by using wood hardeners or epoxies. These products will strengthen the wood and prevent future water damage. It is also important to seal the wood with a waterproof sealant to protect it from any potential leaks in the future.
In some cases, it may be necessary to seek professional help for repairing wet wood under the kitchen sink. A professional can assess the extent of the damage and provide the best solution for your specific situation.
First, start by identifying the source of the water leak. This could be a faulty pipe or a loose connection. Once the leak has been fixed, you can begin the process of drying out the wet wood. Use a dehumidifier or fans to help speed up the drying process. If the wood is severely damaged, it may need to be replaced.
Once the wood is completely dry, you can reinforce it by using wood hardeners or epoxies. These products will strengthen the wood and prevent future water damage. It is also important to seal the wood with a waterproof sealant to protect it from any potential leaks in the future.
In some cases, it may be necessary to seek professional help for repairing wet wood under the kitchen sink. A professional can assess the extent of the damage and provide the best solution for your specific situation.
In Conclusion
 In conclusion, repairing wet wood under the kitchen sink is crucial for the safety and well-being of your home. It not only prevents potential health hazards, but it also ensures the structural integrity of your sink area. By identifying the source of the water leak, drying out the wood, and reinforcing it, you can successfully repair and prevent future damage. Remember, it is always best to address this issue as soon as possible to avoid more extensive and costly repairs in the future.